Viewing entries in
Education

Blog Post Ideas for Senior Photographers

2 Comments

Blog Post Ideas for Senior Photographers

Is blogging dead in 2024?

While I consider myself a fairly consistent blogger (I blog about 60-70 times per year), I’ve wondered this myself as we enter the golden age of apps like TikTok, Threads, and YouTube. Does blogging have any value for a small business owner, and maybe more specifically for photographers, in 2024?

I might be biased, but I say a resounding YES! And I say this emphatic “yes” because of some simple (yet compelling) reasons:

  • Content from my blog STILL drives TONS of traffic to my website (especially when I’m consistently sharing and keywording images from my sessions), which is great for my SEO rankings on Google. Google likes activity, and they reward websites with “good” activity with higher rankings (meaning that when someone searches for you, your website/blog post will pop up on or closer to that coveted first page of Google!)

  • Blogging is an easy way for me to answer frequent questions that clients have for me, and in turn, allows me to serve my clients better. When they email me, I simply send them the blog post I’ve already written instead of typing out that answer again and again and again. Plus - answering your clients questions positions you as an expert in your field. Imagine someone Googling “where should I have my senior photos taken in (insert your town)?” and YOUR blog post pops up with some beautiful images from your favorite locations. Do you think that person is going to trust that you are an expert and that you know what you’re doing? Of course! And that puts them in a great position to want to invest in your services and experience. Score!

For me, those are two awesome reasons to continue blogging, even into 2024 and beyond. And I believe that anyone can “up” their rankings on Google by consistently posting to their blog, even beginning in 2024. It’s not too late to start!

One of the most difficult things about having a blog can be the age old question of “but what do I write?” As someone who has been blogging for 10+ years, trust me, I GET IT. I feel like I’ve written so so many blog posts throughout the years that I barely have any content left to write about. But then I get a question from a client or photograph a senior at a new location, and suddenly, I have an idea for content!

In this particular blog post, I’d love to share some ideas with you for blog posts that will actually help you rank on Google and that will help you serve your clients well. Because you need those inquiries… and you need to take care of those clients who have already trusted you with their memories and money!

Today, I’m going to share some blog post ideas specifically for Senior Photographers.

UNIQUE BLOG POST IDEAS FOR SENIOR PHOTOGRAPHERS:

  1. Highlight the best images (could be 5, could be 25!) from every senior session you photograph in a separate blog post for each client. Yes, every single one. Chances are, you’re most likely editing some sneak peeks for your client, so go the extra mile and throw those sneak peeks in a blog post - but don’t forget to keyword those images (that’s the secret sauce!). This one is such good low hanging fruit, too, because these blog posts basically write themselves. Share the images, share some info about the senior (maybe where they go to school, what they plan on doing after college, what hobbies they are interested in) and wah-la! You have an easy, repeatable way to blog consistently throughout the year. (Click here to see a sample blog post!)

  2. Highlight your favorite locations to take photos of seniors

    • This could be one blog posts with a long list of locations and sample images

    • This could also be individual blog posts highlighting your favorite images from each location

    • This could even be your favorite locations within different categories such as urban, nature, architectural, etc.

    • Click here to see a sample blog post from this category!

  3. Share your favorite hair and/or makeup artists. Do you encourage your seniors to book hair and makeup artists for their session? Instead of typing up a list every time someone asked for a recommendation, what if you were able to simply send a link with some of your favorites? (Linking to each artists’ website, of course). This will make it SO easy for your clients to find the info they need!

  4. Have a hair or makeup artists write a “guest blog post” for you with simple tips for how seniors can do their hair and makeup for their session (how to make their hair/makeup last longer in humidity, etc.)

  5. Write about what seniors should wear for their photos. You could make one post for the ladies, and one for the guys. You could even break this into different seasons (i.e., what to wear for summer senior photos, what to wear for fall senior photos, etc.) (Click here to see a sample blog post from this category!)

  6. Write about what seniors should NOT wear for their photos (again, one post for the ladies, one post for the guys).

  7. Write about the best time of year to have senior photos taken. Wherever you live, there is probably a “peek” season for photos. Tell them why and write about it! Or, you can talk about when makes the most sense in terms of senior year/yearbook submission timing. (Sample post here!)

  8. If there is a specific season you want to take photos in MORE, do a blog post featuring photos during that specific season, talking about why it’s so great (I live in Pittsburgh and have a blog post about why I love winter senior sessions!).

  9. Write a letter to parents of seniors about what you want them to know going into their child’s senior session. This could be a great way to set parents up for success. One season, I had a few moms that were very unencouraging during their child’s senior session, which visibly deflated the senior and led to a difficult time getting happy emotions out of them. Talk about how parents can support their senior when it comes to their senior session!

  10. Write about what props seniors can include during their photo session. If you’re a senior photographer, I have no doubt that someone has asked you to incorporate some sort of sport prop or instrument into their senior photos. Create a blog post with your best images and give some alternative ideas for props, too! (I love to encourage my clients to bring fresh flowers to their sessions!)

  11. Write a blog post and feature some images from your own senior session (if you had one!). This can just be a fun way to let your senior into your life! People need to know you before they can trust you and buy from you… showcase your personality here! And if the photos were a super long time ago and aren’t your style anymore, talk about how senior photos have evolved into something so much better in modern times.

  12. Do one big FAQ! Do parents and seniors ask you a lot of the same questions before, during, or after their senior photo session? Tackle all of those questions (or each one individually) on your blog! This will give you TONS of great content to refer your clients to when they have questions.

  13. Write about your favorite senior photo trends. Do you have any current trends you love? Talk about why you love them on your blog!

  14. Write about what senior photo trends you think are outdated. Is there a pose that is so 2015? What makes senior photos look outdated, to you? Talk about those things on your blog!

  15. Write about the ways you go the extra mile for your senior clients. Do you have a changing tent you bring with you so your clients can change on location? Do you buy every senior their favorite Starbucks drink before their session? Do you have a gift you give them before or after their session? These small things will set you apart from the competition, and they should be celebrated! This could easily veer into bragging territory, so just be careful about how you frame it.

  16. Make a video walking through how you edit your senior photos. Everybody loves a good behind the scenes! This will show your clients how you take the time to edit their images to perfection (Click here for a sample post!)

  17. Write about the tools you use for your craft. What is a must-have for you when you photograph a senior session? For me, it’s my reflector… and I love talking about how big a difference it makes in my images!

  18. Talk about the best time of day for a senior session. What is your favorite time of day to shoot, and why? Share it with your clients so they know when they can expect their session to be!

When you blog, don’t forget to think about what your perspective client might be Googling… in fact, that’s where you should start! What do they want to know? What is important to them? How can you serve them before you sell to them?

I hope this post was helpful, and happy blogging!

Interested in senior photography education?

Check out the resources below!

2 Comments

Unique Blog Post Ideas for Wedding Photographers

7 Comments

Unique Blog Post Ideas for Wedding Photographers

Is blogging dead in 2023?

While I consider myself a fairly consistent blogger (I blog about 70 times per year), I’ve wondered this myself as we enter the golden age of apps like TikTok, Twitch, and YouTube. Does blogging have any value for a small business owner, and maybe more specifically for photographers, in 2023?

I might be biased, but I say a resounding YES! And I say this emphatic “yes” because of some simple (yet compelling) reasons:

  • Content from my blog STILL drives TONS of traffic to my website (especially when I’m consistently sharing and keywording images from my sessions), which is great for my SEO rankings on Google. Google likes activity, and they reward websites with “good” activity with higher rankings (meaning that when someone searches for you, your website/blog post will pop up on or closer to that coveted first page of Google!)

  • Blogging is an easy way for me to answer frequent questions that clients have for me, and in turn, allows me to serve my clients better. When they email me, I simply send them the blog post I’ve already written instead of typing out that answer again and again and again. Plus - answering your clients questions positions you as an expert in your field. Imagine someone Googling “where should I have my senior photos taken in (insert your town)?” and YOUR blog post pops up with some beautiful images from your favorite locations. Do you think that person is going to trust that you are an expert and that you know what you’re doing? Of course! And that puts them in a great position to want to invest in your services and experience. Score!

For me, those are two awesome reasons to continue blogging, even into 2023 and beyond. And I believe that anyone can “up” their rankings on Google by consistently posting to their blog, even beginning in 2023. It’s not too late to start!

One of the most difficult things about having a blog can be the age old question of “but what do I write?” As someone who has been blogging for 10 years, trust me, I GET IT. I feel like I’ve written so so many blog posts throughout the years that I barely have any content left to write about. But then I get a question from a client or photograph a wedding at a new venue, and suddenly, I have an idea for content!

In this particular blog post, I’d love to share some ideas with you for blog posts that will actually help you rank on Google and that will help you serve your clients well. Because you need those inquiries… and you need to take care of those clients who have already trusted you with their memories and money!

First up, I’m going to share some blog post ideas specifically for Wedding Photographers.

UNIQUE BLOG POST IDEAS FOR WEDDING PHOTOGRAPHERS:

  • Highlight the best images from every wedding you photograph. Yes, every single one. Chances are, you’re most likely editing some sneak peeks for your client, so go the extra mile and throw those sneak peeks in a blog post - but don’t forget to keyword those images (that’s the secret sauce!). This one is such good low hanging fruit, too, because these blog posts basically write themselves. Share the images, share a list of what vendors were involved in the wedding day, and even a little bit about the flow of the day itself (people love reading about the behind the scenes of a wedding day!). If you really want to go crazy - share a little bit about the couple’s story, too!

  • Highlight your favorite venues in their own blog posts. Are there any places you LOVE shooting weddings at? Consider featuring those venues in their own blog post! Couples tend to book their venue before their wedding photographer anyways, so being able to offer professional insight about a wedding venue positions you as an expert, and could give you an upper-hand on other photographers who haven’t photographed events there before.

  • Why should your client do/not do a first look? List out the pros and cons of a first look between a bride and groom. How will it help their wedding day flow better or worse?

  • How you handle rain on a client’s wedding day. Do you bring umbrellas with you? Are you an off camera lighting aficionado who could make any indoor space look amazing? What types of locations do you look for to use during a wedding while it’s raining?

  • Share a sample wedding day timeline - you could even do this for different “types” of wedding days (i.e., with a first look, without a first look, 8 hours of wedding coverage, 10 hours of wedding coverage, with a reception exit, without a reception exit, etc.)

  • Share your favorite vendors. You could do multiple blog posts with different vendor categories: florists, makeup artists, DJ’s, etc.). Don’t forget to link to their websites, too!

  • Think about the most difficult parts of the day from the client perspective, and offer a solution from your expertise. For example, ways to not keep your guests waiting too long during cocktail hour photos, how to work through family formals quickly, etc.

  • Why should your client consider having engagement photos done? Are there any benefits of them getting to work with you beforehand?

  • How can they prepare for their engagement photos? Is there anything they should do beforehand that will help them show up more prepared?

  • Share your favorite locations for taking engagement photos.

  • Are there any details you want your client to have ready for you when you arrive on their wedding day? Most of the time bridal detail photos are the first thing a photographer photographs - what should they have ready for you? (Tip: you can also make a blog post listing groom detail photo ideas!)

  • How can your client maximize their portrait time on their wedding day? This would be a good place to talk about sneaking out of the reception for those beautiful golden hour photos!

  • If you offer albums, create a blog post featuring some of your sample albums. Show them what options you have available! Cover materials, page designs, sizes, etc.

  • Write about a challenge you experienced on a wedding day, and how you overcame it. This, again, will position you as an expert in your field! Wedding days are FULL of problems that need to be solved quickly by professionals.

  • Share your favorite locations for taking wedding photos. If you photograph weddings in a city, you might have some locations you prefer over others. Share why you love those spots so you can begin to steer your clients towards those favorable locations!

  • Share a compilation of your favorite ___________ photos. What I mean by this is: if you LOVE photographing epic night photos, share a compilation blog post featuring your favorite epic night shots. If you love taking wedding couples out for golden hour photos, share a blog post featuring your favorite golden hour photos. You could basically do this for every part of a wedding day!

  • At the end of the year, share your favorite wedding images from that particular year. It’s fun to do a little round up of the year prior! I try to choose at least one image from each wedding I photograph to share in my yearly round up blog post. I find that my clients enjoy seeing everything else I photographed that year, and I enjoy seeing and remembering all the hard work that went into that year!

I hope this list is helpful for giving you at least one idea for how you can get started writing your wedding photography blog! And remember - even if a blog post has been written before, it hasn’t been written from your unique perspective. YOUR clients want to hear from YOU! Happy writing!

7 Comments

How to Edit Senior Photos in Lightroom and Photoshop

Comment

How to Edit Senior Photos in Lightroom and Photoshop

As a senior, family, and wedding photographer, I showcase many photos on my website and blog - all of which are completely edited, color corrected, and retouched. I love sharing the final product of the work that I produce for my clients! However, today I wanted to share a behind the scenes peek at just how those photos go from their unedited state to what you see in all of my blog posts.

Showing an unedited image sort of feels like one of those dreams where you get up to give a speech and realize that you’re in your underwear 😂 But alas, I do think it’s helpful for clients to see how much time and energy goes into making sure their images are beautiful!

Ultimately, this blog post might be of interest to you if you are a photographer (I love seeing how others edit their images) - but even if you’re not, it might surprise you how much time and effort goes into the details of each image you may see on my website or blog posts - or on any photographer’s website! Some may edit more, some less, but all photographers do retouch their images to some degree. I hope this give an understanding for the love and effort that goes into each image!

Also, if you’re interested in seeing a highlight blog post from this stunning senior’s photo session, feel free to click here!

And for anyone who may be interested, in this editing tutorial, I use two editing programs: Adobe Lightroom and Adobe Photoshop, both on my desktop computer. Enjoy!

Before & After

And for anyone who might be interested in seeing the before and after without watching the entire tutorial… I’ve included the images below just for you! 😉

Before Editing (Raw image format, straight out of camera)

After Editing (JPEG image format - after color correction, spot removal, skin softening, eye enhance, fly away removal, and glowy corner addition)

Interested in seeing more content like this? Feel free to let me know below! Or, if you’re interested in seeing some additional editing tutorials, feel free to check out my Youtube channel by clicking the link below.

For more resources for photographers, seniors, and engaged couples, click any of the photos below!

Comment

24 of the Best Locations for Photo Sessions in and around Pittsburgh

Comment

24 of the Best Locations for Photo Sessions in and around Pittsburgh

One of the most frequent questions I get from my clients is: what location would you recommend for my photos? While I always encourage my clients to choose a location they resonate with, I always love to give suggestions based on some of my favorite locations to shoot!

In this list, you’ll find 24 of my favorite locations for photo sessions in and around the Pittsburgh area! All of these locations are either in, around, or North of the city. While I’m sure there are many beautiful locations in the South Hills, the North Hills are my stomping grounds and the areas I frequent most!

If you have questions about any of these locations, please feel free to email me directly at jhidingerphotography@gmail.com

  1. MORAINE STATE PARK

Moraine State Park has so many beautiful features - forest, pathways, a lake, docks, and fields all make it a great spot with lots of variety for photo sessions!

Location: Butler County, in Portersville


2. MCCONNELL’S MILL STATE PARK

McConnell’s Mill features forest, large boulders, the mill itself, a covered bridge, pathways through the woods, and lovely areas down by the river that runs through it.

Location: Butler County


3. MELLON PARK

Mellon Park is a favorite location among photographers and pedestrians alike! It features beautiful historic architecture, archways, black iron gates, an ornate fountain, and brick walls. In the Spring & Summer, there are beautiful flowers that decorate the walkways! Specifically, the walled-garden area is very popular.

Be advised: this location is very busy with photographers in the evenings, and if there is a wedding happening in the walled-garden area, pedestrians and photographers will be asked to leave.

Location: Allegheny County, in Shadyside


4. HARTWOOD ACRES MANSION

Another favorite among photographers, Hartwood Acres Mansion is one of the most unique (and popular!) locations for photoshoots in the Pittsburgh area. The Hartwood Mansion is large and features historic stone architecture, stairways, archways, doors, pathways, and interesting nooks and crannies. There is also a large garden located on the property, which is beautiful in the Spring & Summer. In addition, there are also lots of foresty areas. You really do get so many backdrops to work with here!

On any given night at Hartwood, you’ll find a plethora of photo sessions taking place. On the weekends, they also host weddings. They do ask pedestrians and photographers to vacate the property during private events. I would recommend calling their office in advance to check for upcoming events while planning a photo session! (If you are a client of mine, note that I will call for you in advance! :) )

*Note that Hartwood Acres Mansion is closed through May of 2022 for construction & renovations.

Location: Allegheny County


5. NORTH PARK

A lovely spot for those looking for a photo session featuring nature! North Park has a beautiful lake, foresty areas, and an area with a large wood bridge that crosses to a small island.

Location: Allegheny County, in Allison Park


6. POINT STATE PARK

Located within walking distance of downtown Pittsburgh, Point State Park is the perfect mix of a little bit of nature and a little bit of city! You can see some of the yellow bridges from the park. But the best part might be the large Point State Park fountain, located at “the point.”

In the summer time, this spot is SUPER busy with tourists and pedestrians.

Location: Allegheny County


7. NORTH SHORE RIVERWALK

One of the most picturesque Pittsburgh locations for photos! The North Shore Riverwalk is right along the river near PNC Park. The Roberto Clemente Bridge (closed for two years beginning in February of 2022) and the Andy Warhol Bridge are both right on the Riverwalk. You can also use the streets around the Riverwalk for some cool shots. I recently found a brightly painted wall a few streets back from the Riverwalk, too!

This location is VERY busy on PNC Park game days. Generally, it gets a lot of traffic in the summer as well.

Location: Allegheny County


8. THE STRIP DISTRICT

This has become a new favorite of mine! If you want that grungy Pittsburgh look, this might be a good spot for you. There are LOTS of brick walls and brightly colored scenery in and around the Strip District. I usually like to begin at the Terminal, and go from there! There is also a parking garage nearby that has a beautiful view of the city right at sunset.

I would recommend planning a shoot here on a non-Saturday. The Strip gets tons of traffic on Saturdays!

Location: Allegheny County


9. HISTORIC HARMONY

Arguably one of the best spots for photos (in my opinion!). Historic Harmony is a small German town that’s gotten a facelift in recent years. There are beautifully painted brick walls, colorful doorways, a nearby bridge, and lots more located here!

But please note: you DO need a permit to be able to shoot at this location, and you can purchase one from the Harmony Museum. Even then, there are some buildings that you will be able to use, and others that you will not be able to use. Ask the Harmony Museum for information regarding what locations they allow photos to be taken at. And if there is another building that you’d like to take photos in front of, make sure you check with the owner before doing so.

If you are a client of mine, note that I will cover the permit fee to shoot at this location. I love shooting there so much, that it’s worth it for me to eat the cost!

Location: Butler County, north of Cranberry Township


10. ZELIENOPLE

If you’ve never heard of this town, you’re going to be pleasantly surprised at what you find here! Zelienople is a bustling small town with many restaurants and shops along its main street. It has lots of adorable spots for photos, and has a nice urban feel (without having to go all the way into downtown Pittsburgh! ;) ). It’s also very close to Historic Harmony (they are neighbor towns!). There is a nearby park (Zelienople Community Park) if you want to also get some nature-esque photos!

Location: Butler County, north of Cranberry Township


11. MELLON INSTITUTE

You might have seen this grand building with its beautiful columns in some Pittsburgh wedding photos. It’s a popular spot for couples to have wedding portraits taken, but it makes a great backdrop for any type of portrait session! It’s also a great location to use in case of rain. It gets great natural light, but is covered from inclement weather under the columns!

Location: Allegheny County, in Oakland


12. CATHEDRAL OF LEARNING & PITT CAMPUS

A lovely spot with a nice pop of color! The Cathedral of Learning is a large building on the University of Pittsburgh’s property that houses lots of classrooms. Post-covid, only University of Pitt students are allowed to enter the building, but the outside makes for an incredible backdrop with its historic architecture! The pop of color I mentioned earlier comes from the large red door on one side of the building. It’s iconic!

Location: Allegheny County, in Oakland


13. PHIPP’S CONSERVATORY

Note: there are differences here between the indoor and outdoor areas at Phipp’s. You cannot walk into Phipp’s, buy a ticket, and have a professional photo session. You do need to reserve one of their available rooms in advance (available in 45 minute increments). Anyone can, however, shoot outside of Phipp’s. They have an area off to one side with a cute little garden, small fountain, benches, and a beautiful building that can be used freely, and free of charge. Indoors, they have beautifully curated rooms that make perfect backdrops for photos, if you’re willing to spend a little extra money!

Location: Allegheny County, in Oakland

INSIDE:


OUTSIDE:

14. SCHENLEY LOCK BRIDGE

This bridge is located right next to Phipp’s Conservatory in Oakland! It features a variety of beautiful locks, left by lovers… and makes for an interesting and unique backdrop!

Location: Allegheny County, in Oakland


15. CLELAND ROCK

Technically, Cleland Rock is considered to be a part of McConnell’s Mill, but it’s about a 12 minute drive from the “main” McConnell’s Mill area. It features large fields (which are sometimes cut down, sometimes not… it just depends!), a lovely tree line, and a beautiful overlook. This spot is best later in the day, closer to sunset. And note that it does tend to look very different throughout the different seasons!

Location: Lawrence County, ~10 minutes from McConnell’s Mill


16. HIGHLAND PARK

Highland Park is located near the Pittsburgh Zoo. It has some nature areas, along with a little bit of architecture. They sometimes have flowers in their garden area, too! It’s a fairly busy place in summer months.

Location: Allegheny County


17. ALLEGHENY COMMONS PARK

Located on Pittsburgh’s North Side, this park features bridges, a small lake, a stone war monument, and even a view of the city! This is a great location to pair with the following location, the Mexican War Streets.

Location: Allegheny County, North Side (near the Aviary)


18. MEXICAN WAR STREETS

This is a super fun location to shoot! The Mexican War Streets feature lots of beautiful and colorful buildings. The streets themselves are even pretty for photos… you might just be dodging some traffic! I love to pair this location with Allegheny Commons Park.


Location: Allegheny County, North Side (near the YMCA)

19. LAKE FOREST GARENS

This location is super unique… it is a Christmas tree farm! It features rows of beautiful pine trees. However - you do need advance permission to shoot here, as it is private property, and there is a small fee associated with shooting there.

If you are a client of mine, note that I will cover the permit fee to shoot at this location. I love shooting there so much, that it’s worth it for me to eat the cost!

Location: Butler County in Fombell


20. CRANBERRY TOWNSHIP COMMUNITY PARK

This is a very simple location that gets the job done! Cranberry Township Community Park doesn’t have a ton of different spots for photos, but it does make for a solid simple, natural backdrop. There’s also large log that can be used for posing!

Location: Butler County in Cranberry Township


21. ADAMS TOWNSHIP COMMUNITY PARK

This simple park has a few backdrops to work with, including an old white schoolhouse and small buildings. It can be a nice spot for those located out near the Mars area who may not want to travel far from home for photos!

Location: Butler County in Mars


22. THE FRICK PITTSBURGH

A lovely spot with lots of historic, stone architecture to work with! The Frick Pittsburgh is located right across the Street from Frick Park, which also has some beautiful backdrops for photos!

I would recommend calling the Frick in advance about any photo sessions that take place on their property. They host outdoor events from time to time and like to make sure that nothing will interfere with what they have planned!

Location: Allegheny County


23. SUCCOP NATURE PARK

Succop Nature Park has lots of features, including: a willow tree, pond, red and white barn, old lamp posts, and an old mansion type building! It’s a pretty unique spot.

I would always recommend calling prior to a shoot here. They do sometimes have events where they close down the property for private use!

Location: Butler County


24. SCHENLEY FOUNTAIN

Schenley fountain is in the heart of Oakland! It’s a small fountain right out front of the Frick Fine Arts building on Pitt’s campus.

Location: Oakland, University of Pittsburgh’s campus


Comment

SUMMER PHOTOSHOOT OUTFIT IDEAS: THE DO'S AND DON'TS

Comment

SUMMER PHOTOSHOOT OUTFIT IDEAS: THE DO'S AND DON'TS

When considering an outdoor photo session in the summer months, you may come across a bit of a conundrum - it’s likely to be hot & humid, and you want to make sure you look presentable for the one to two hours that you’ll be standing outside!

Enter the answer: this blog post! I’ve compiled a list of the most pertinent “do’s” and “don’ts” pertaining to outfit choice for photo sessions that take place in summer weather.

SAY YES TO…

  • Light, breathable fabrics - the type of fabric you choose for your photo outfits is so important in the summer time! You want to make sure you choose fabrics that are breathable and light.

  • Light colored clothing - light colors reflect light, so choosing light colored clothing will help you beat the heat and stay a little bit cooler throughout your session!

  • Dresses - ladies, this one is for you! Dresses, short or long, are a great way to stay cool during your summer session. Extra airflow is always a good thing!

  • Open toe shoes - I wouldn’t always recommend an open toe shoe for men for photos, but for ladies, they are certainly permissible!

  • Patterned fabrics - patterned fabrics often hide sweat (and pit stains) better than solid colored fabrics.

  • An outfit change - if your first outfit gets super sweaty mid-photo session, you can always change into a second outfit!

  • An undershirt - especially for guys who plan on wearing a button down to their session, it might seem counter intuitive in the summer, but wear a white undershirt. This will help pit stains stay at bay for longer!

  • Summer themed props & accessories - a cute sunhat? Some ice cream cones? A cold beverage? A picnic basket and blanket? Maybe even just a bouquet of fresh flowers? These can all be cute additions to a summer session!

CONSIDER PASSING ON…

  • Dark colored fabrics - dark fabrics will drawn in the heat and make you warmer faster!

  • Heavy fabrics - heavy fabrics, including denim, corduroy, and suede can feel heavy and are usually a bit too insulated for a comfortable summer photo session (if you want to wear jeans, you could always plan for them to be your second outfit for a sunset-timed photo session, when things are a little bit cooler!)

  • Too many layers - summer is not a time to wear lots of layers. Keep anything you wear light and simple!

  • Sunglasses leading up to your session - when you’re used to wearing sunglasses and then suddenly have to be outside in the bright light for an hour to an hour and a half, you will be very squinty. This is something very common that happens ALL the time. Put those sunglasses away for the week leading up to your session so your eyes are used to the brighter summer light!

A FEW MORE RESOURCES:

If you’re looking for some more help preparing for your summer photo session, check out the posts below!

VIEW SOME OF MY FAVORITE OUTFITS FROM PAST SUMMER SESSIONS BELOW!

Comment

Answering FAQ's: How do you choose locations for photo shoots?

Comment

Answering FAQ's: How do you choose locations for photo shoots?

One question I get fairly frequently from clients as I’m taking their photos is: how do you choose locations for photo shoots?

Most clients who come to me either 1) have a location picked out in advance that they want to use for their session, or 2) tell me the style of backdrop they’re looking for, and I make suggestions for potential locations based on their specifications. Either way, once a client chooses a location (either on their own or with my direction), my job is to find spots at that location that I can use to achieve the style and look of images that clients see on my website.

It’s important to me that a client knows the style of work they are going to get when they choose to work with me. The vast majority of images on my website are vibrant/colorful and bright, so when a client chooses a location for their photo session and chooses me to be the photographer based on the work they’ve seen on my website, my job is to create work for them that is consistent with the work they’ve seen on my website - even at a location I’ve never shot at before.

So, how is this done? How can consistency be maintained across a multitude of different types of locations?

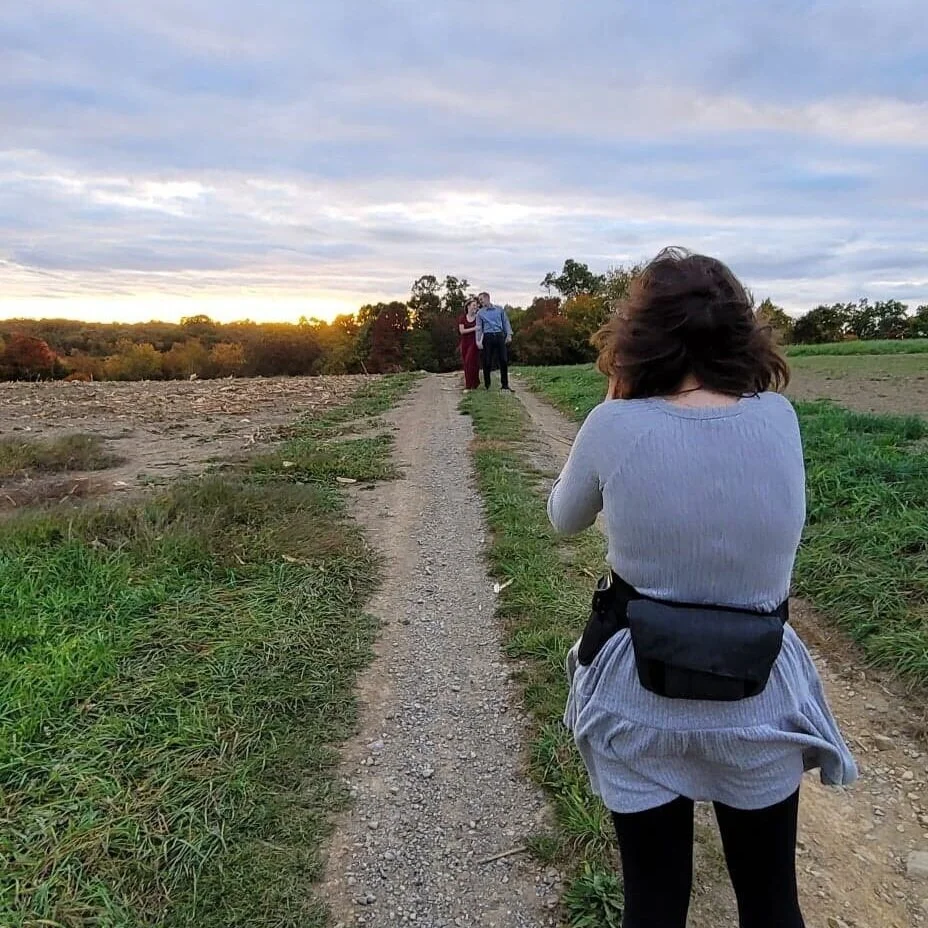
Before every session - either days in advance or an hour in advance - I location scout wherever I will be taking photos. Location scouting is essentially just checking out the light and location of where a session will be taking place to see what spots are suitable for creating bright & vibrant imagery, and what spots are not.

While I’m location scouting, I’m looking for a few specific things. First and foremost, position and quality of light.

1 - Position & Quality of Light

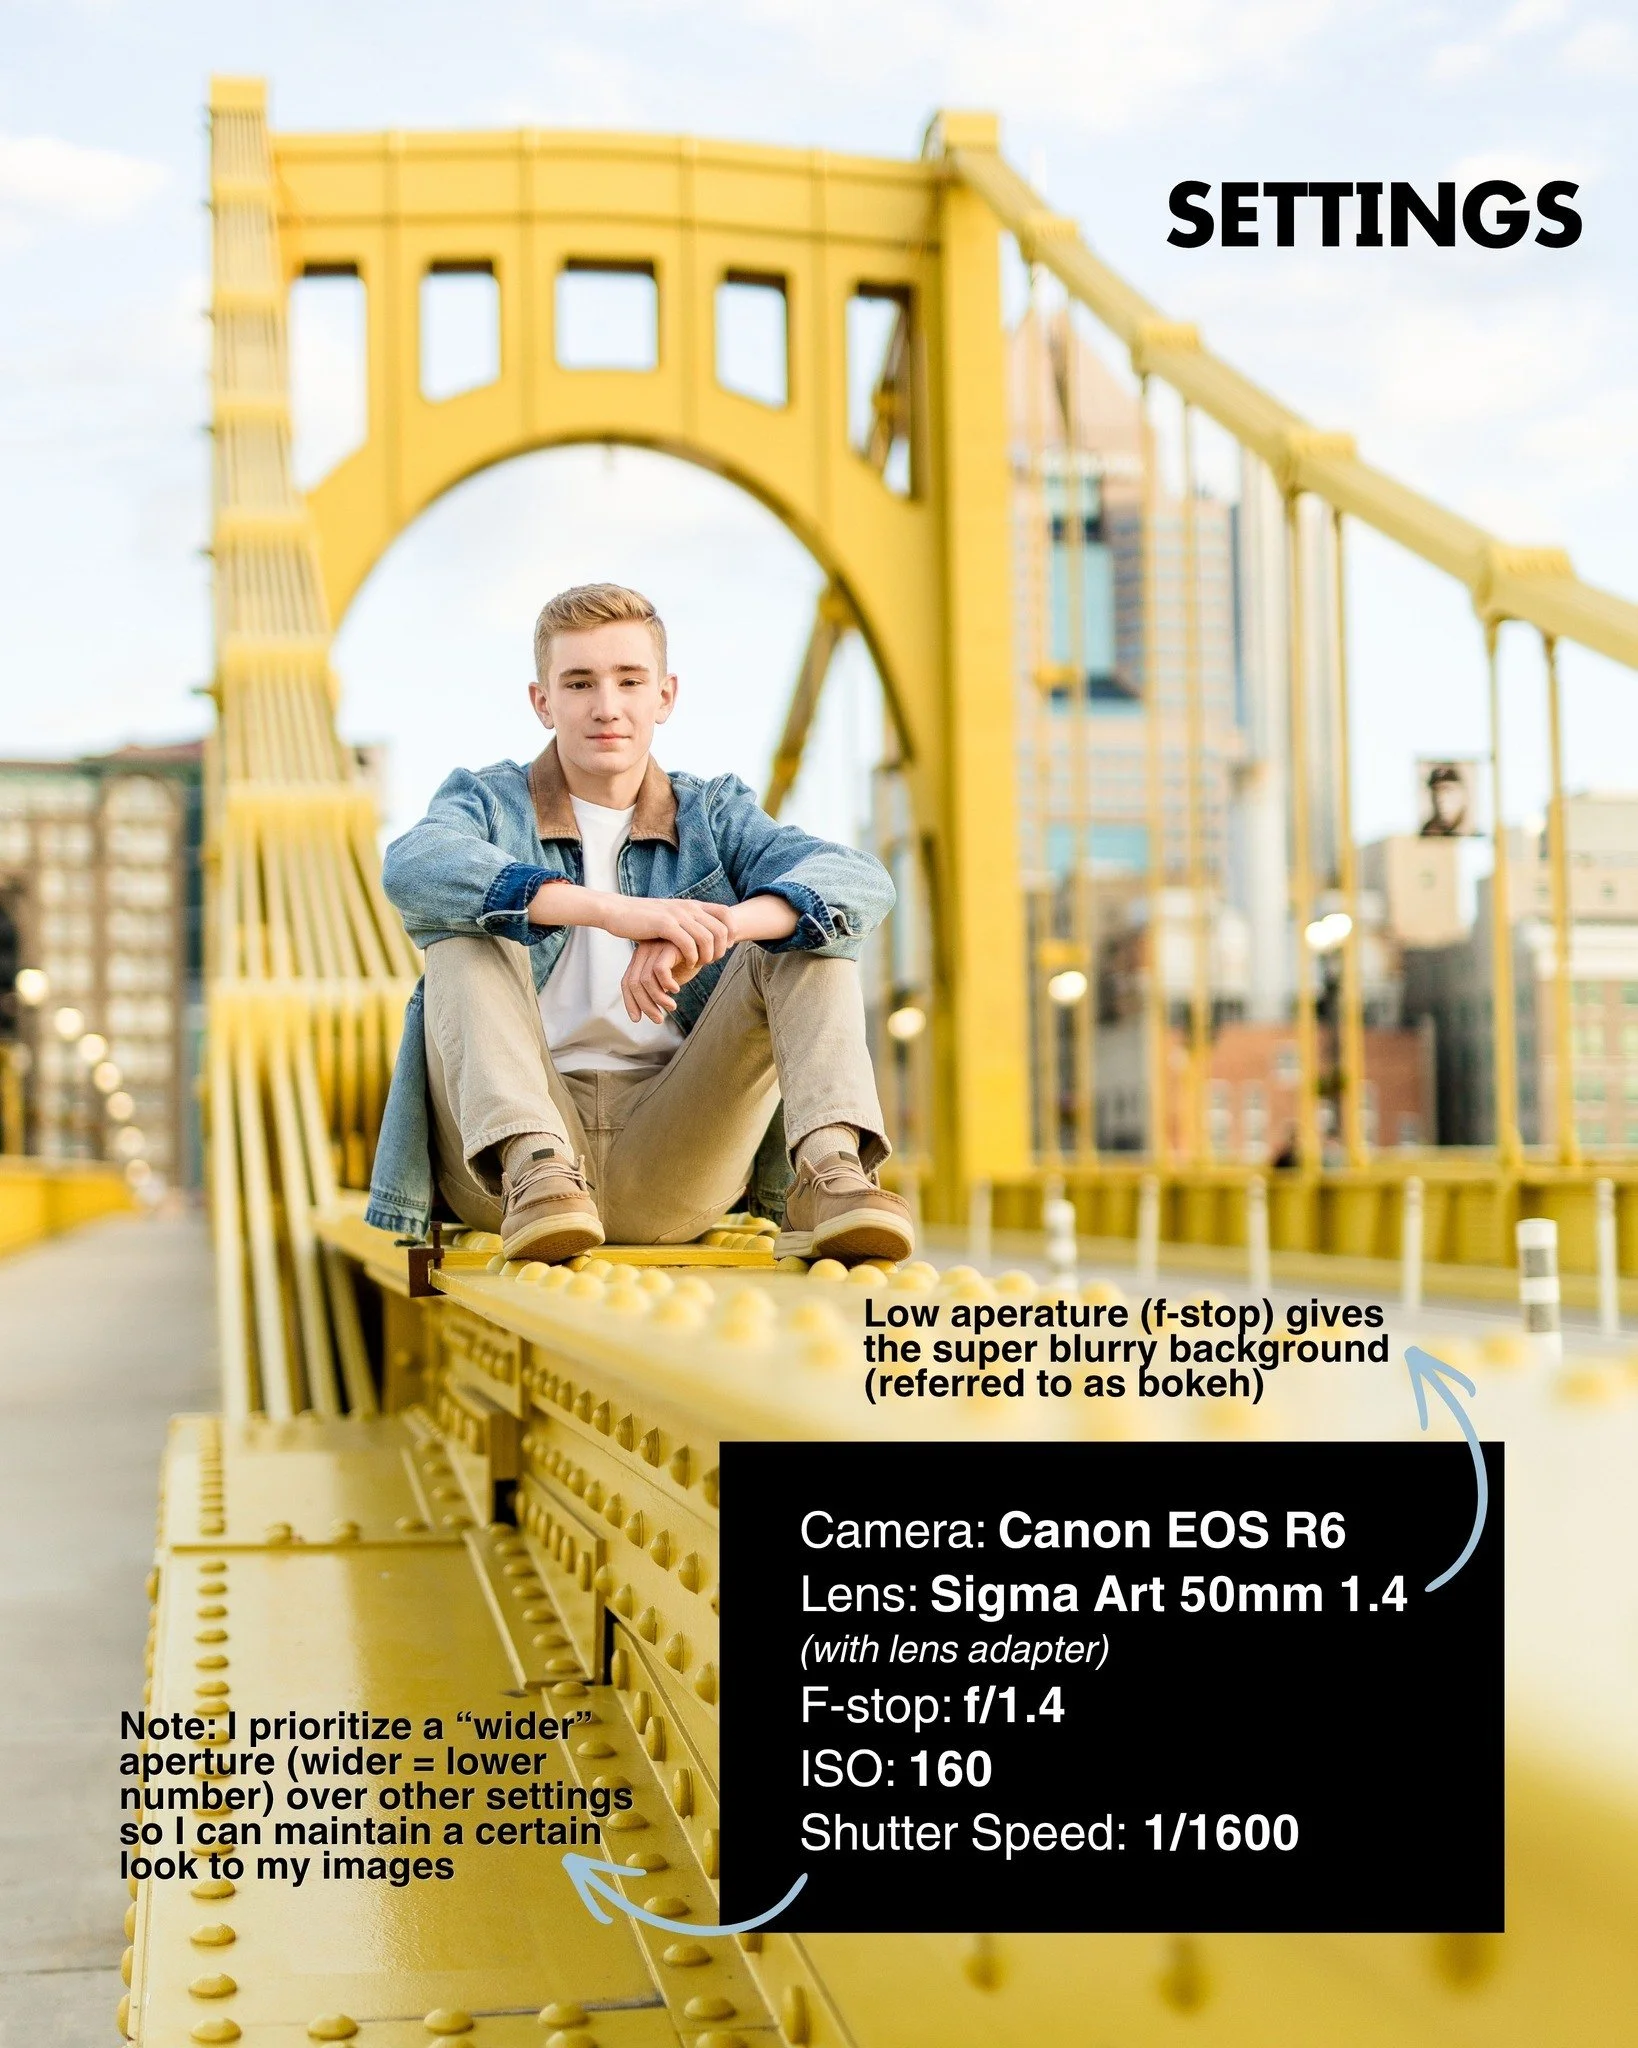
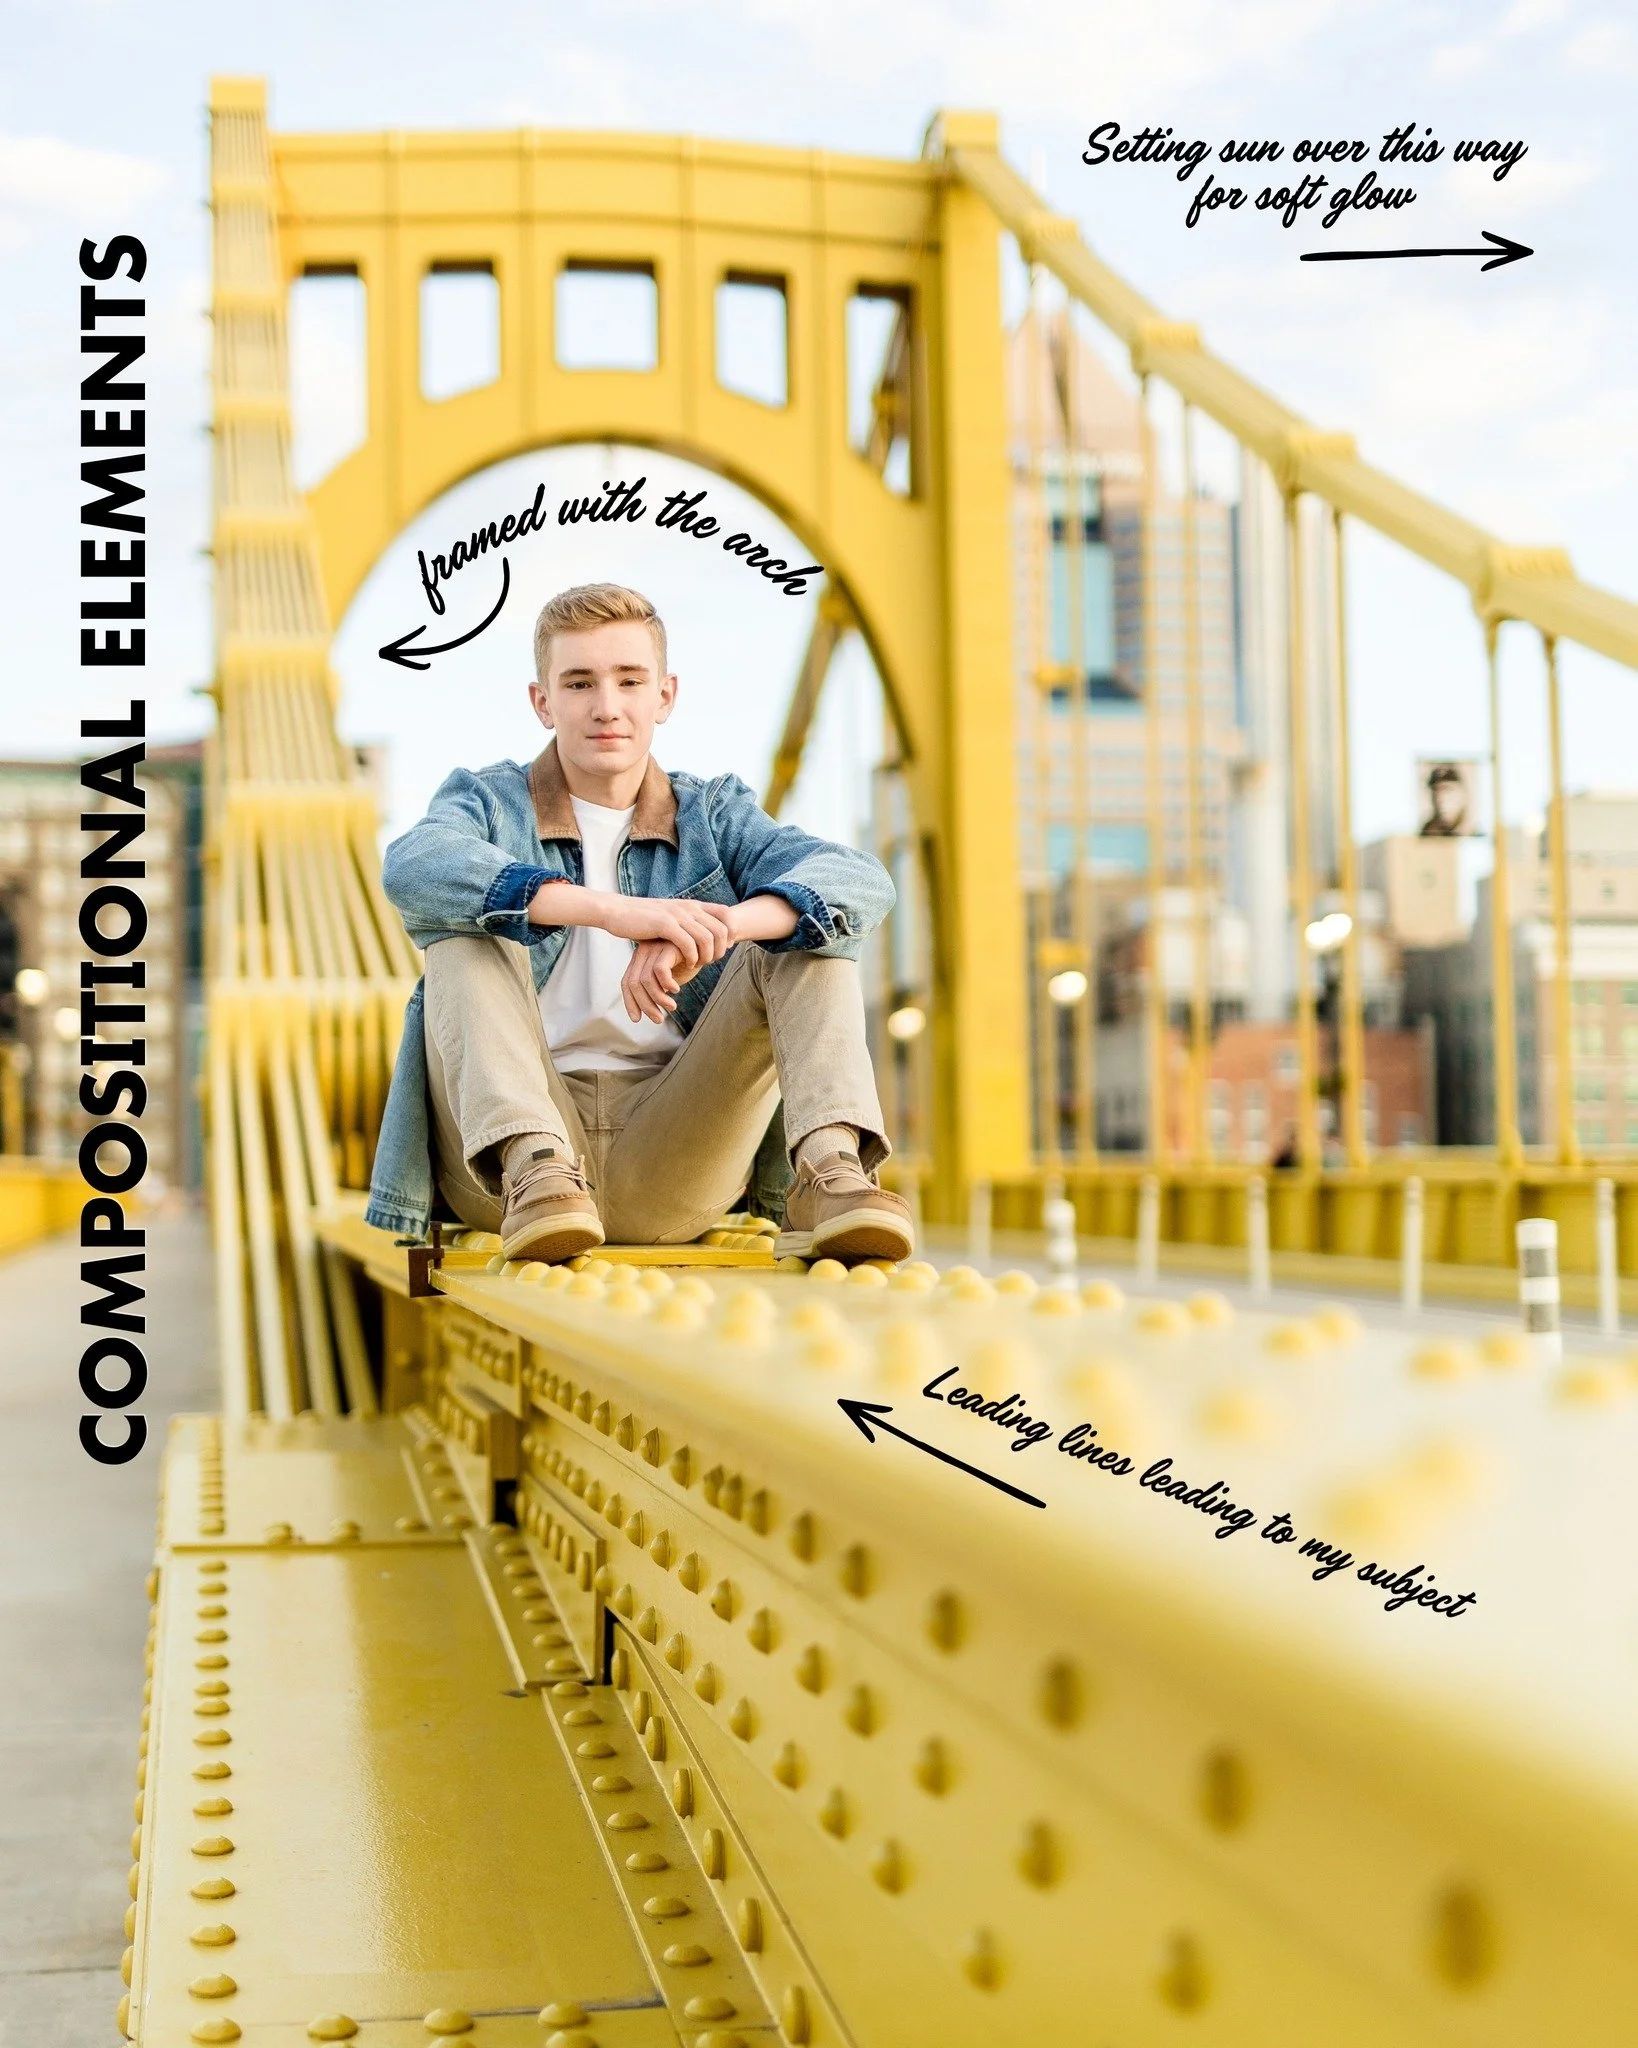
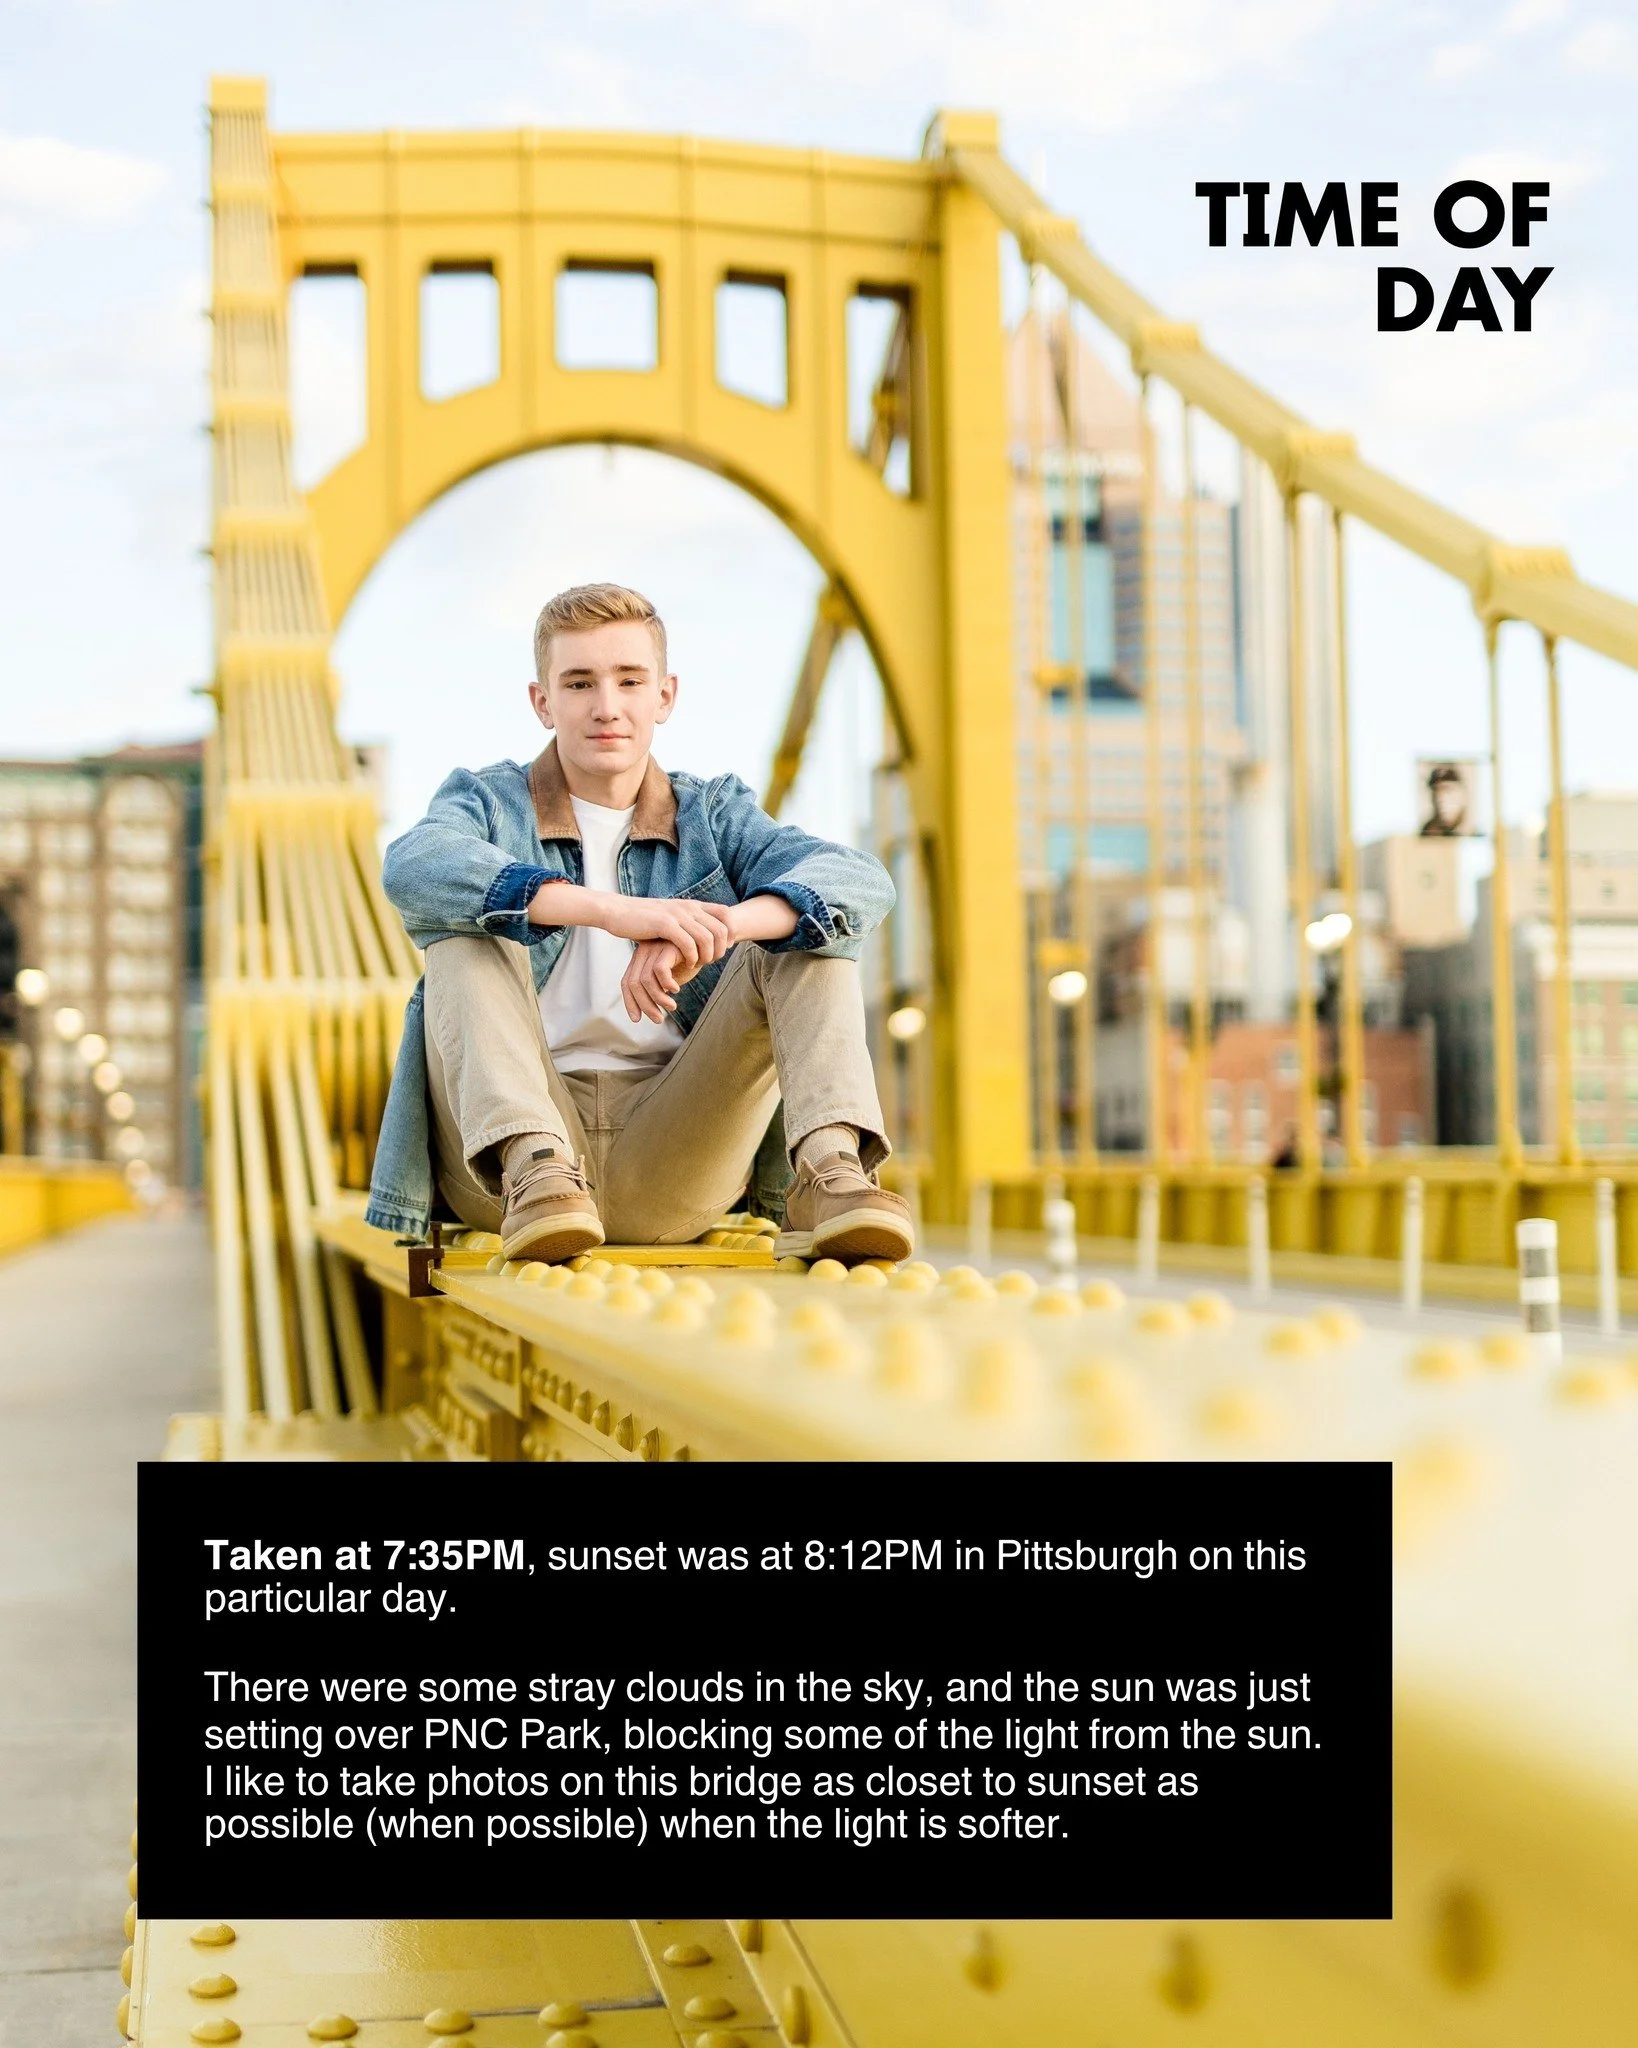
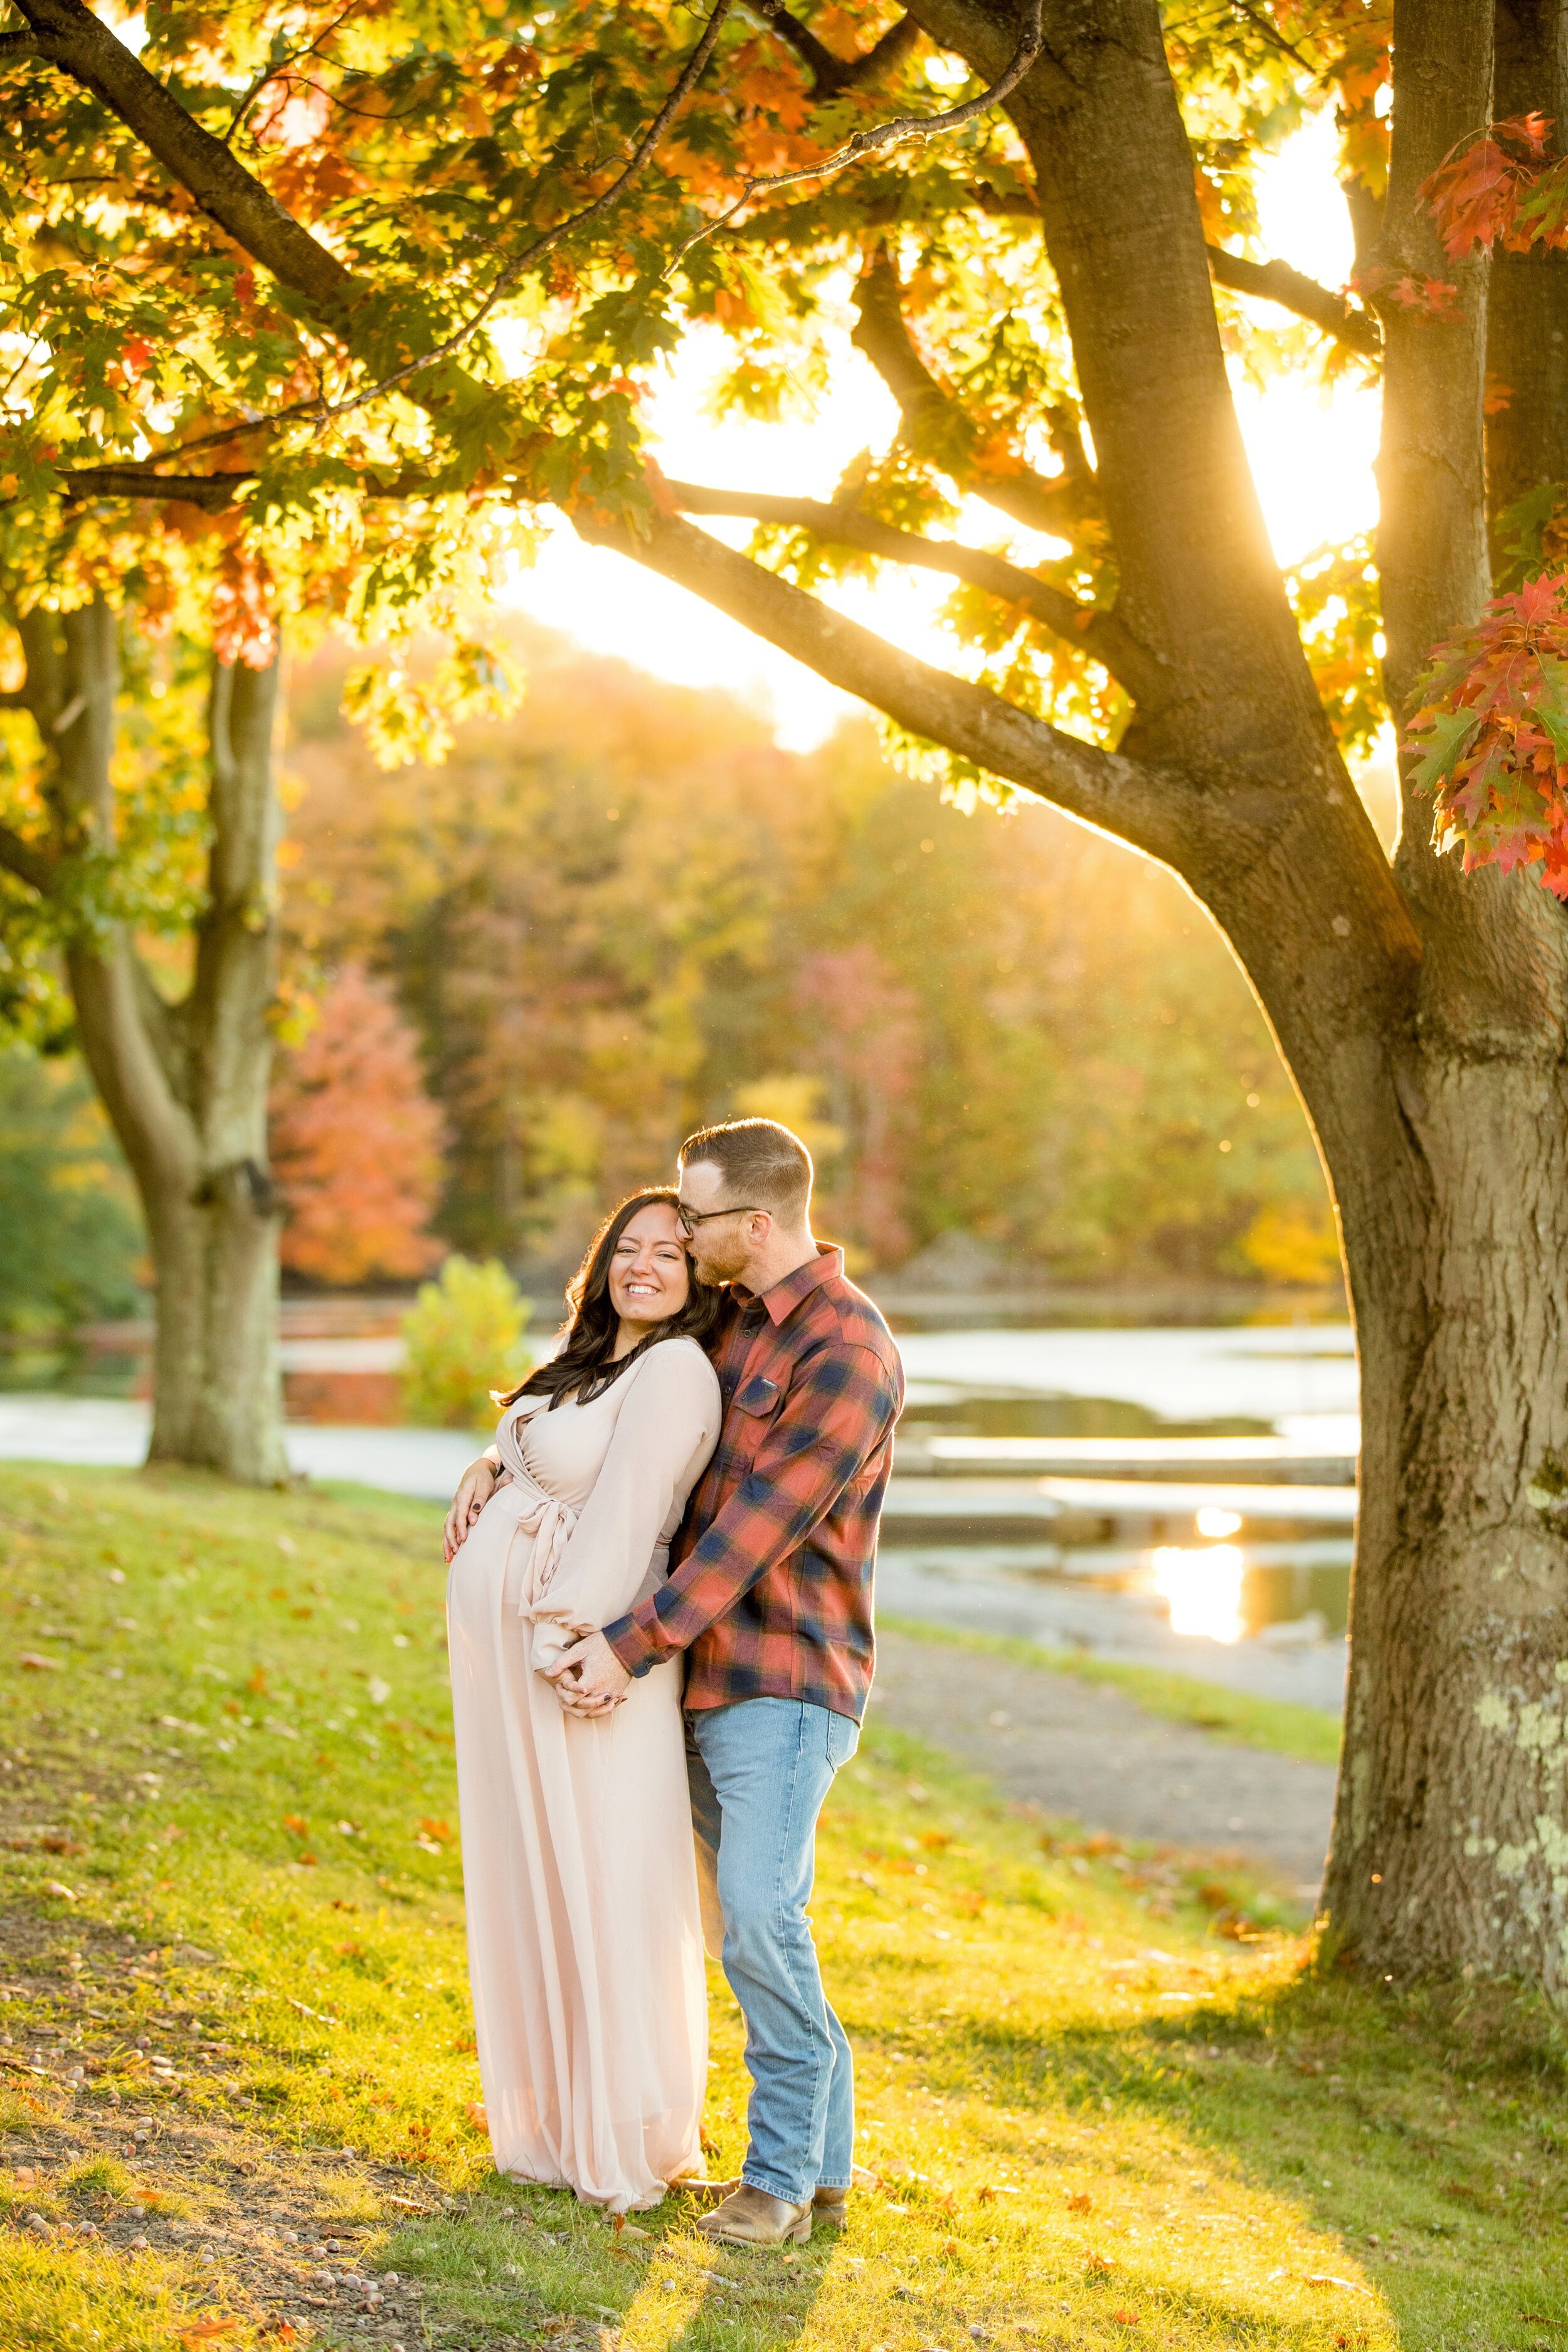
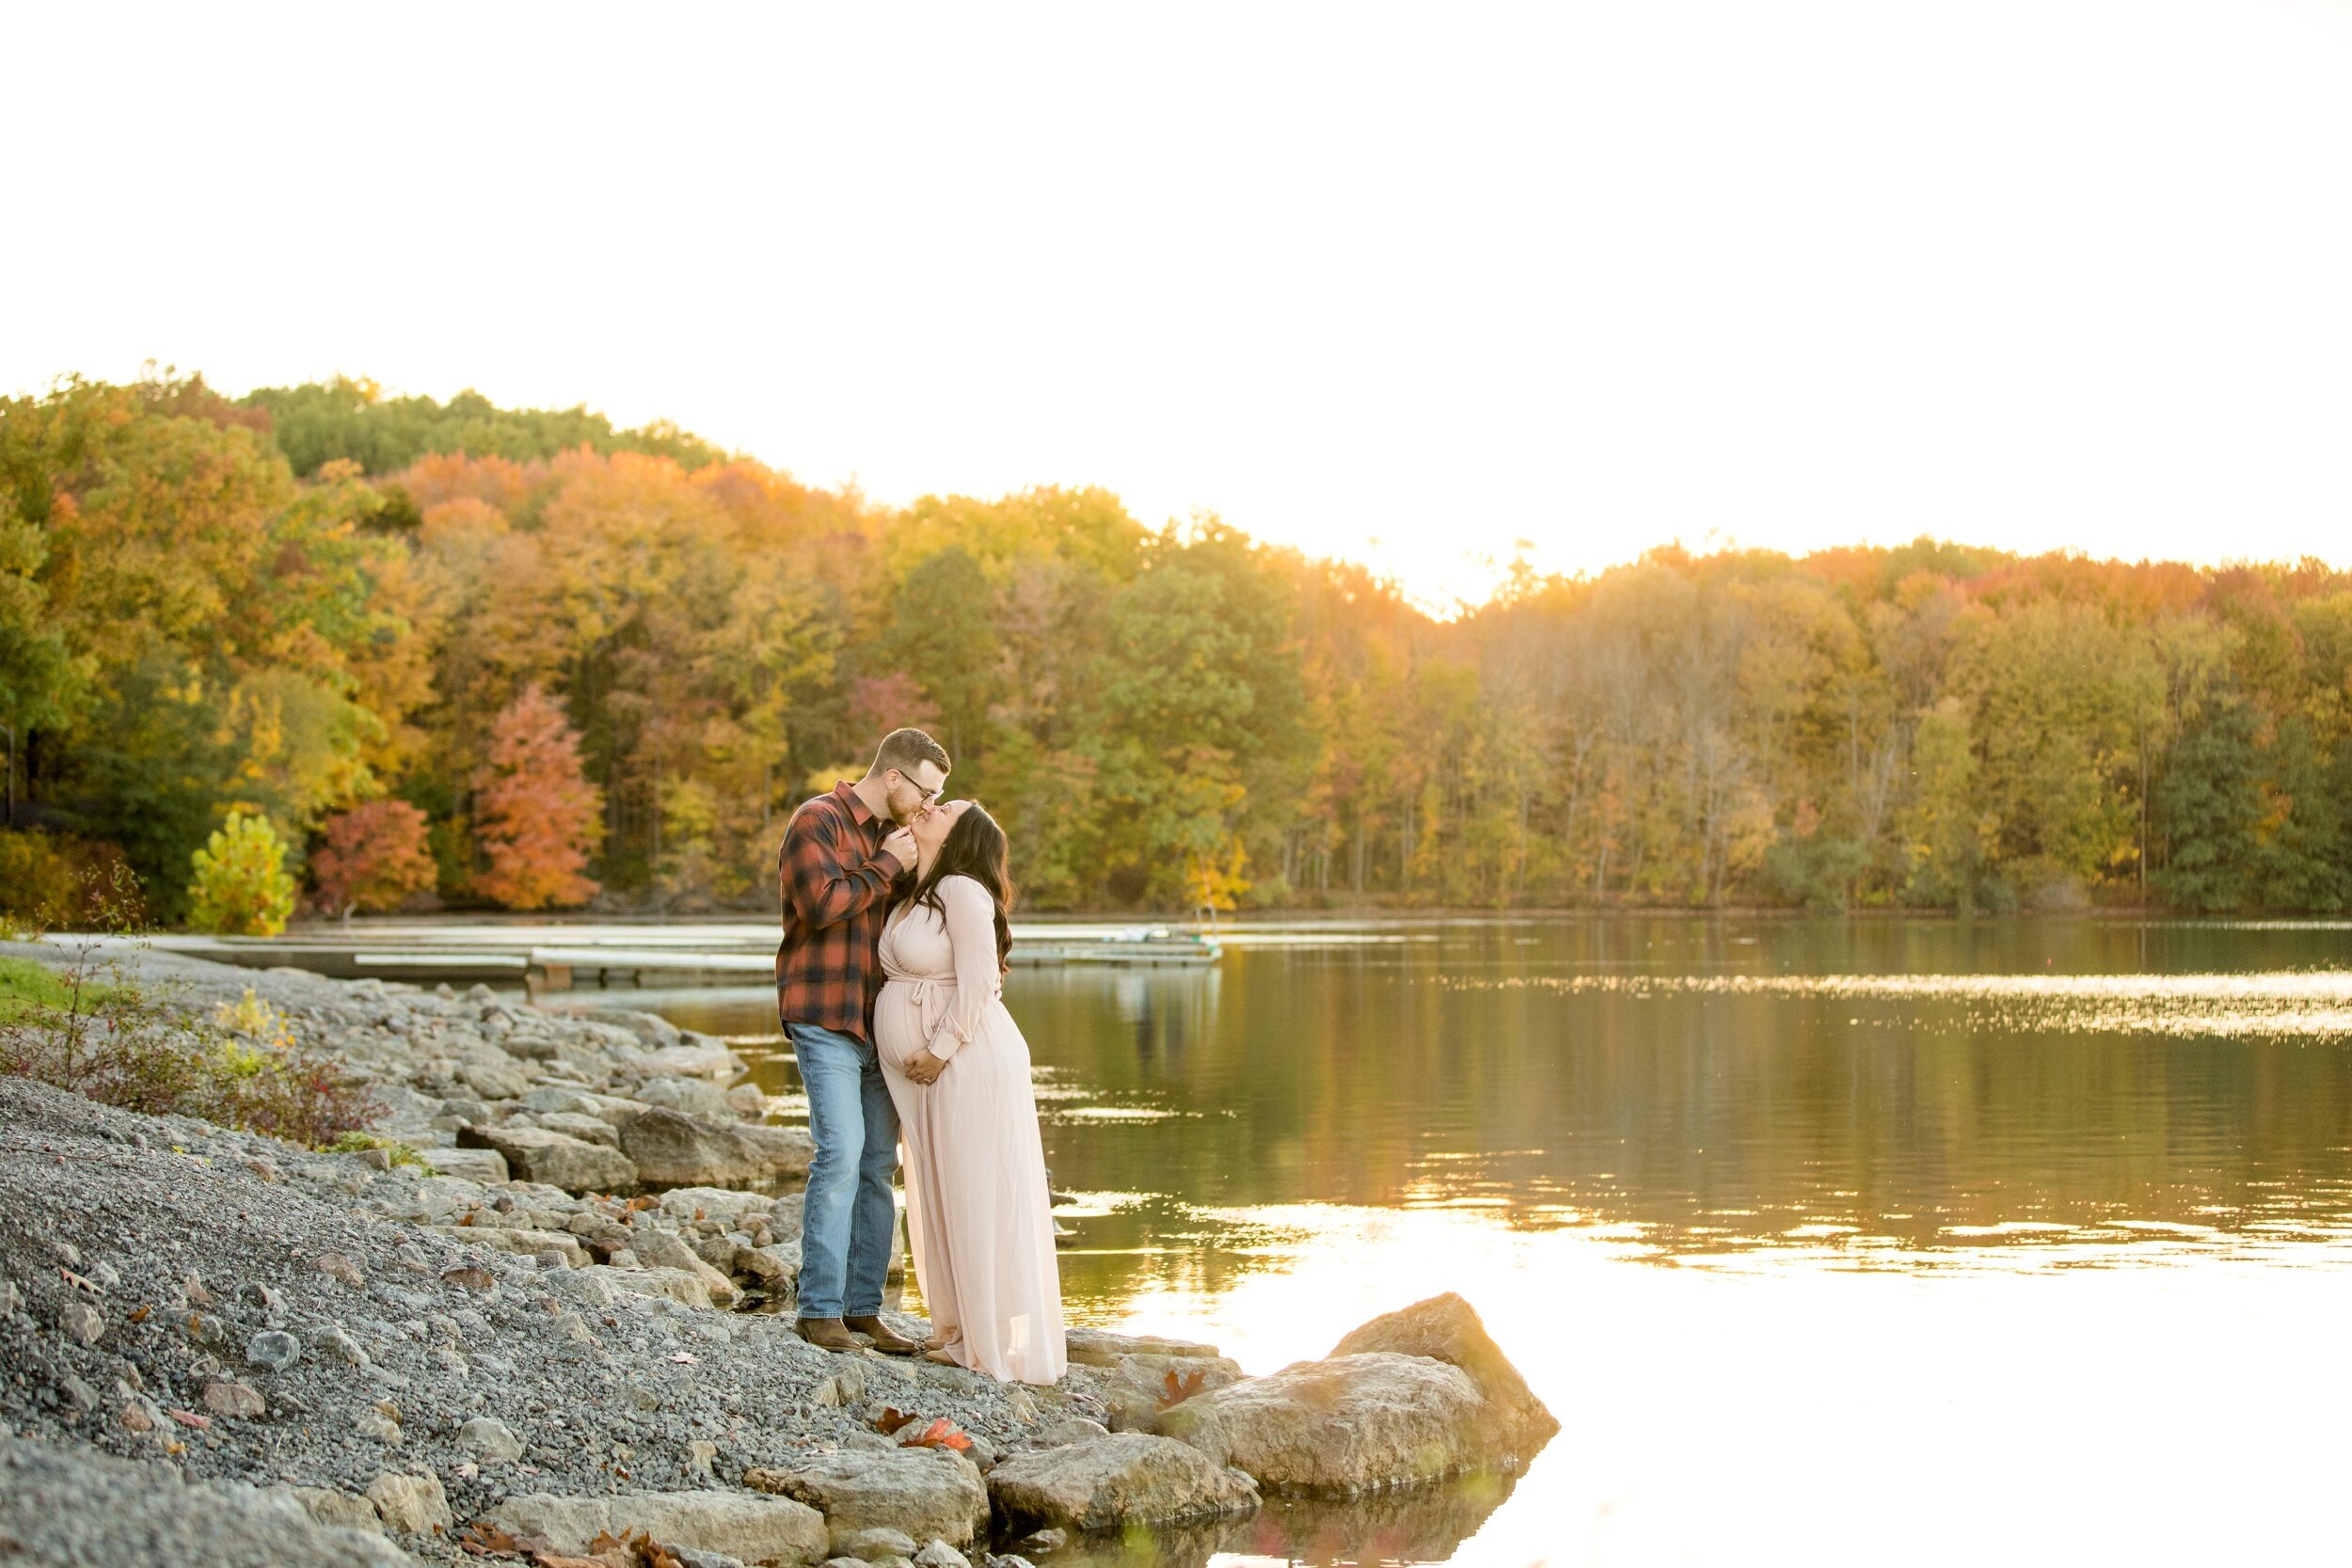
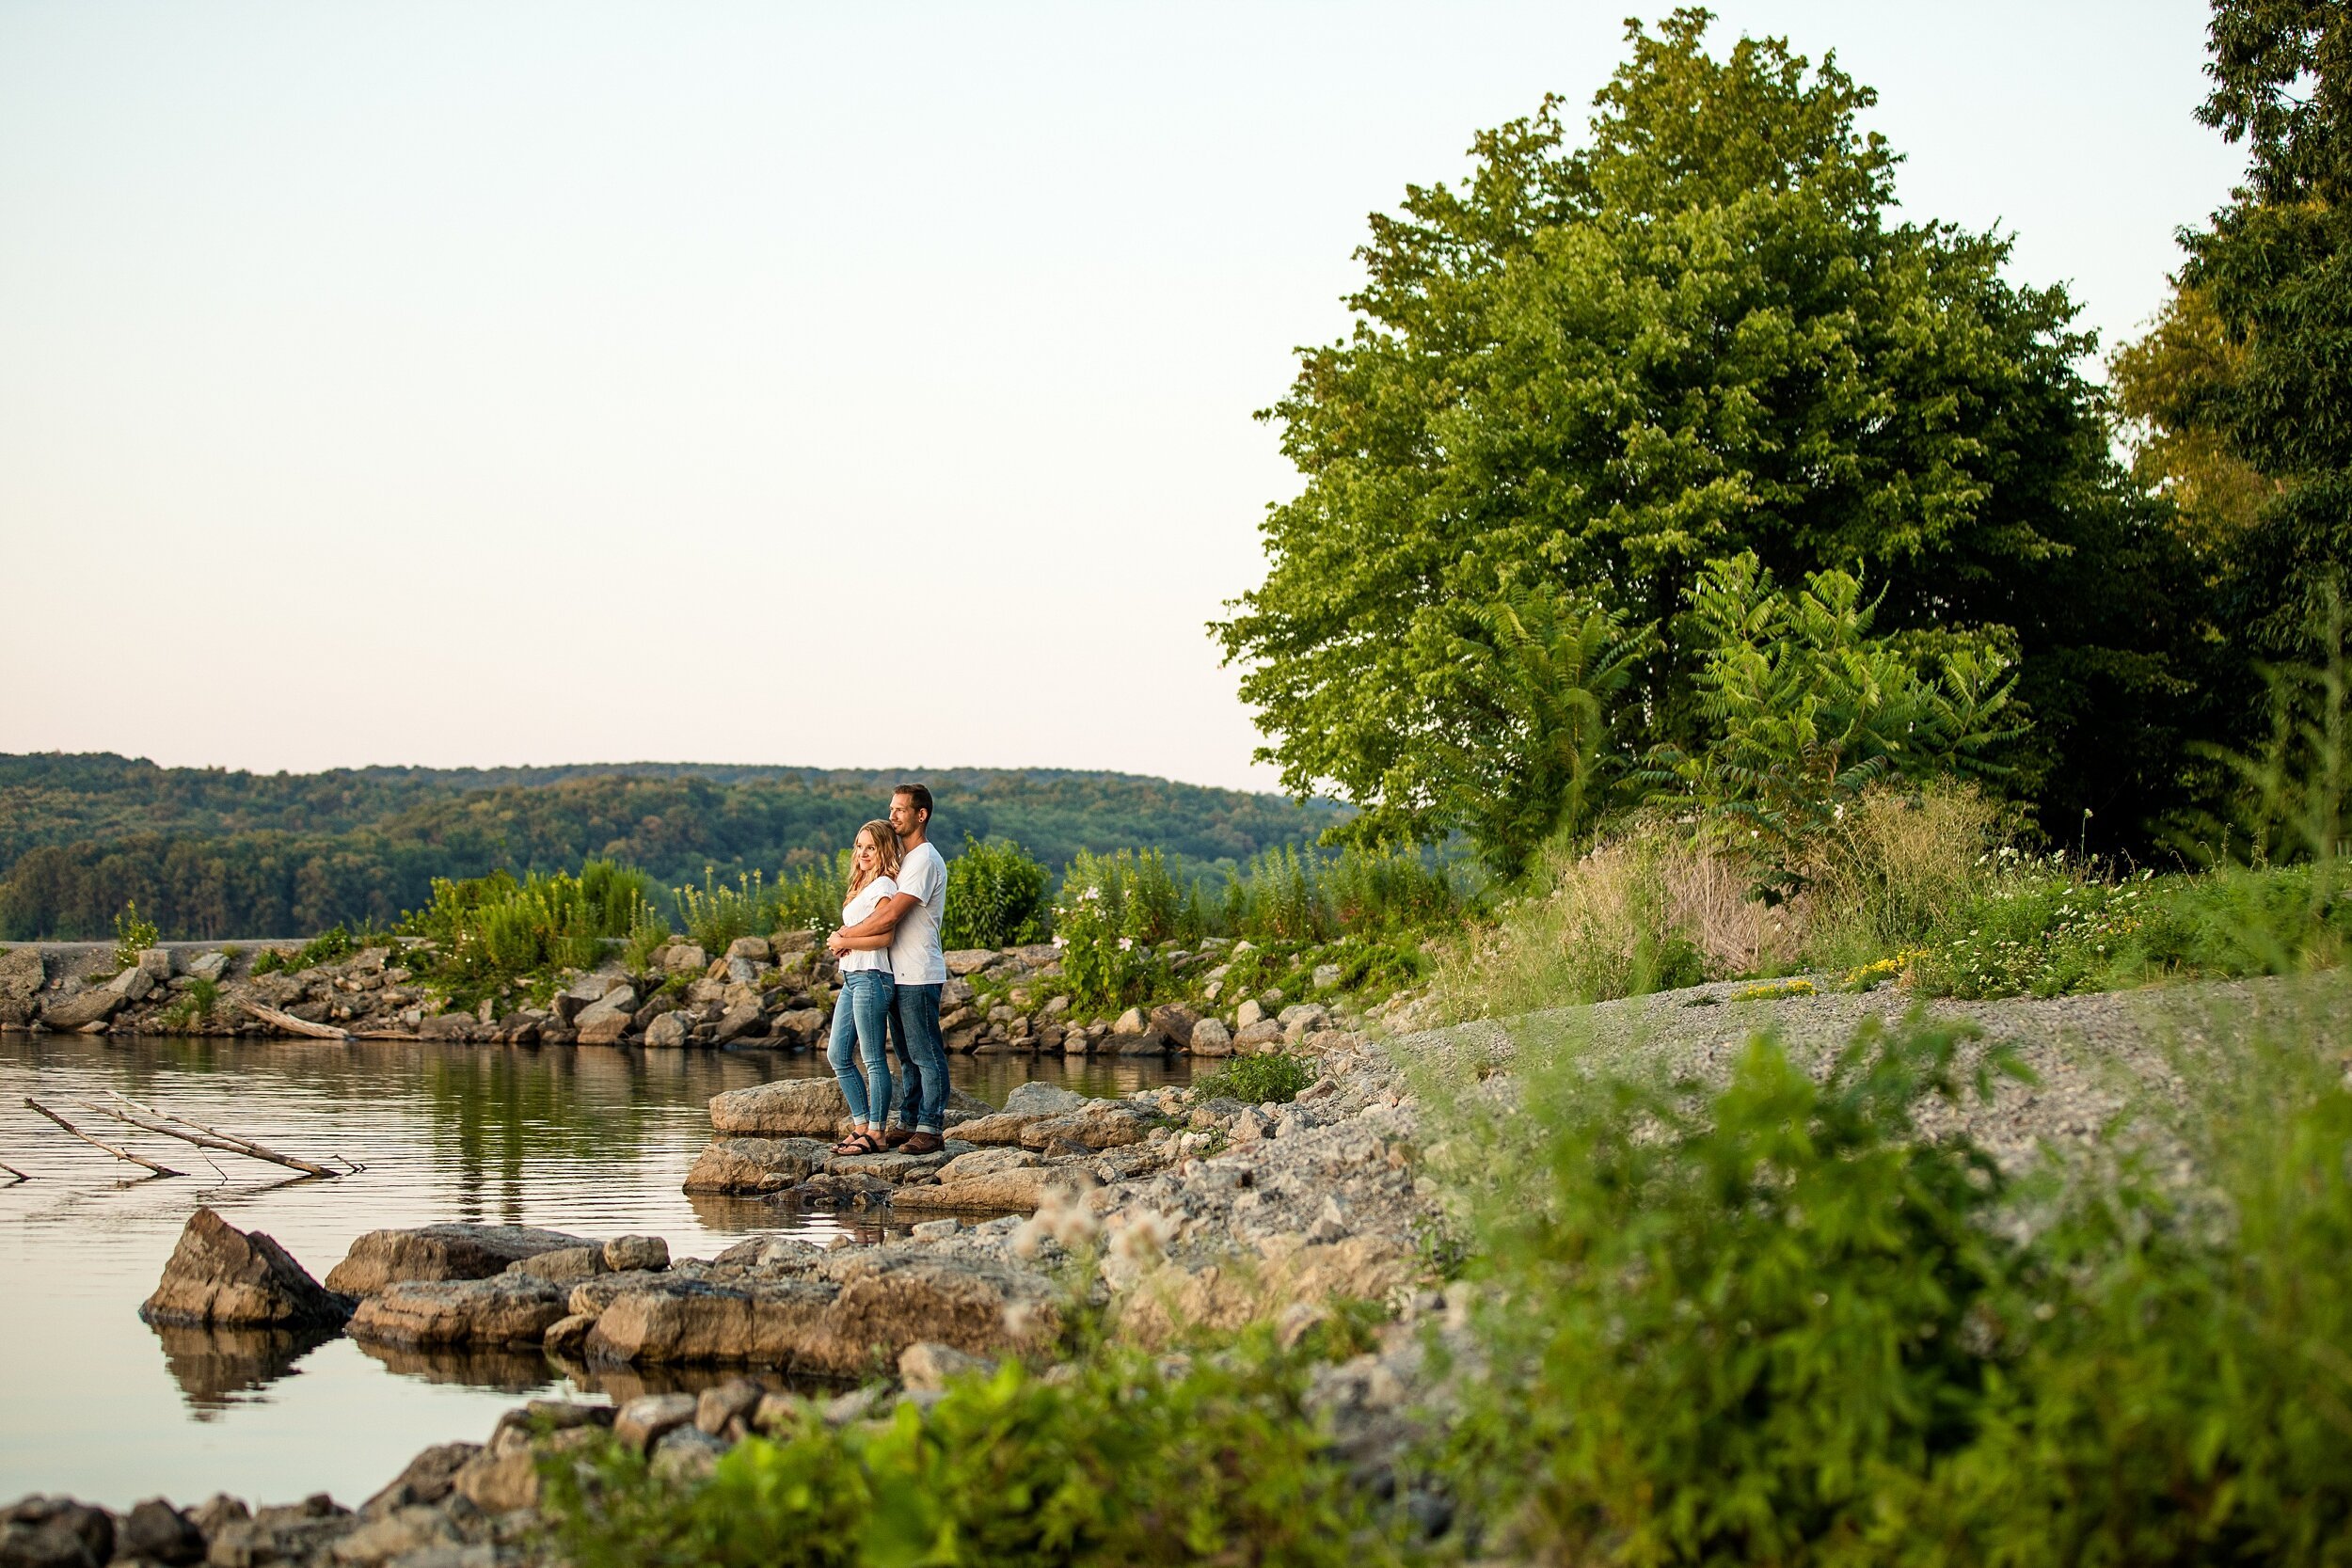
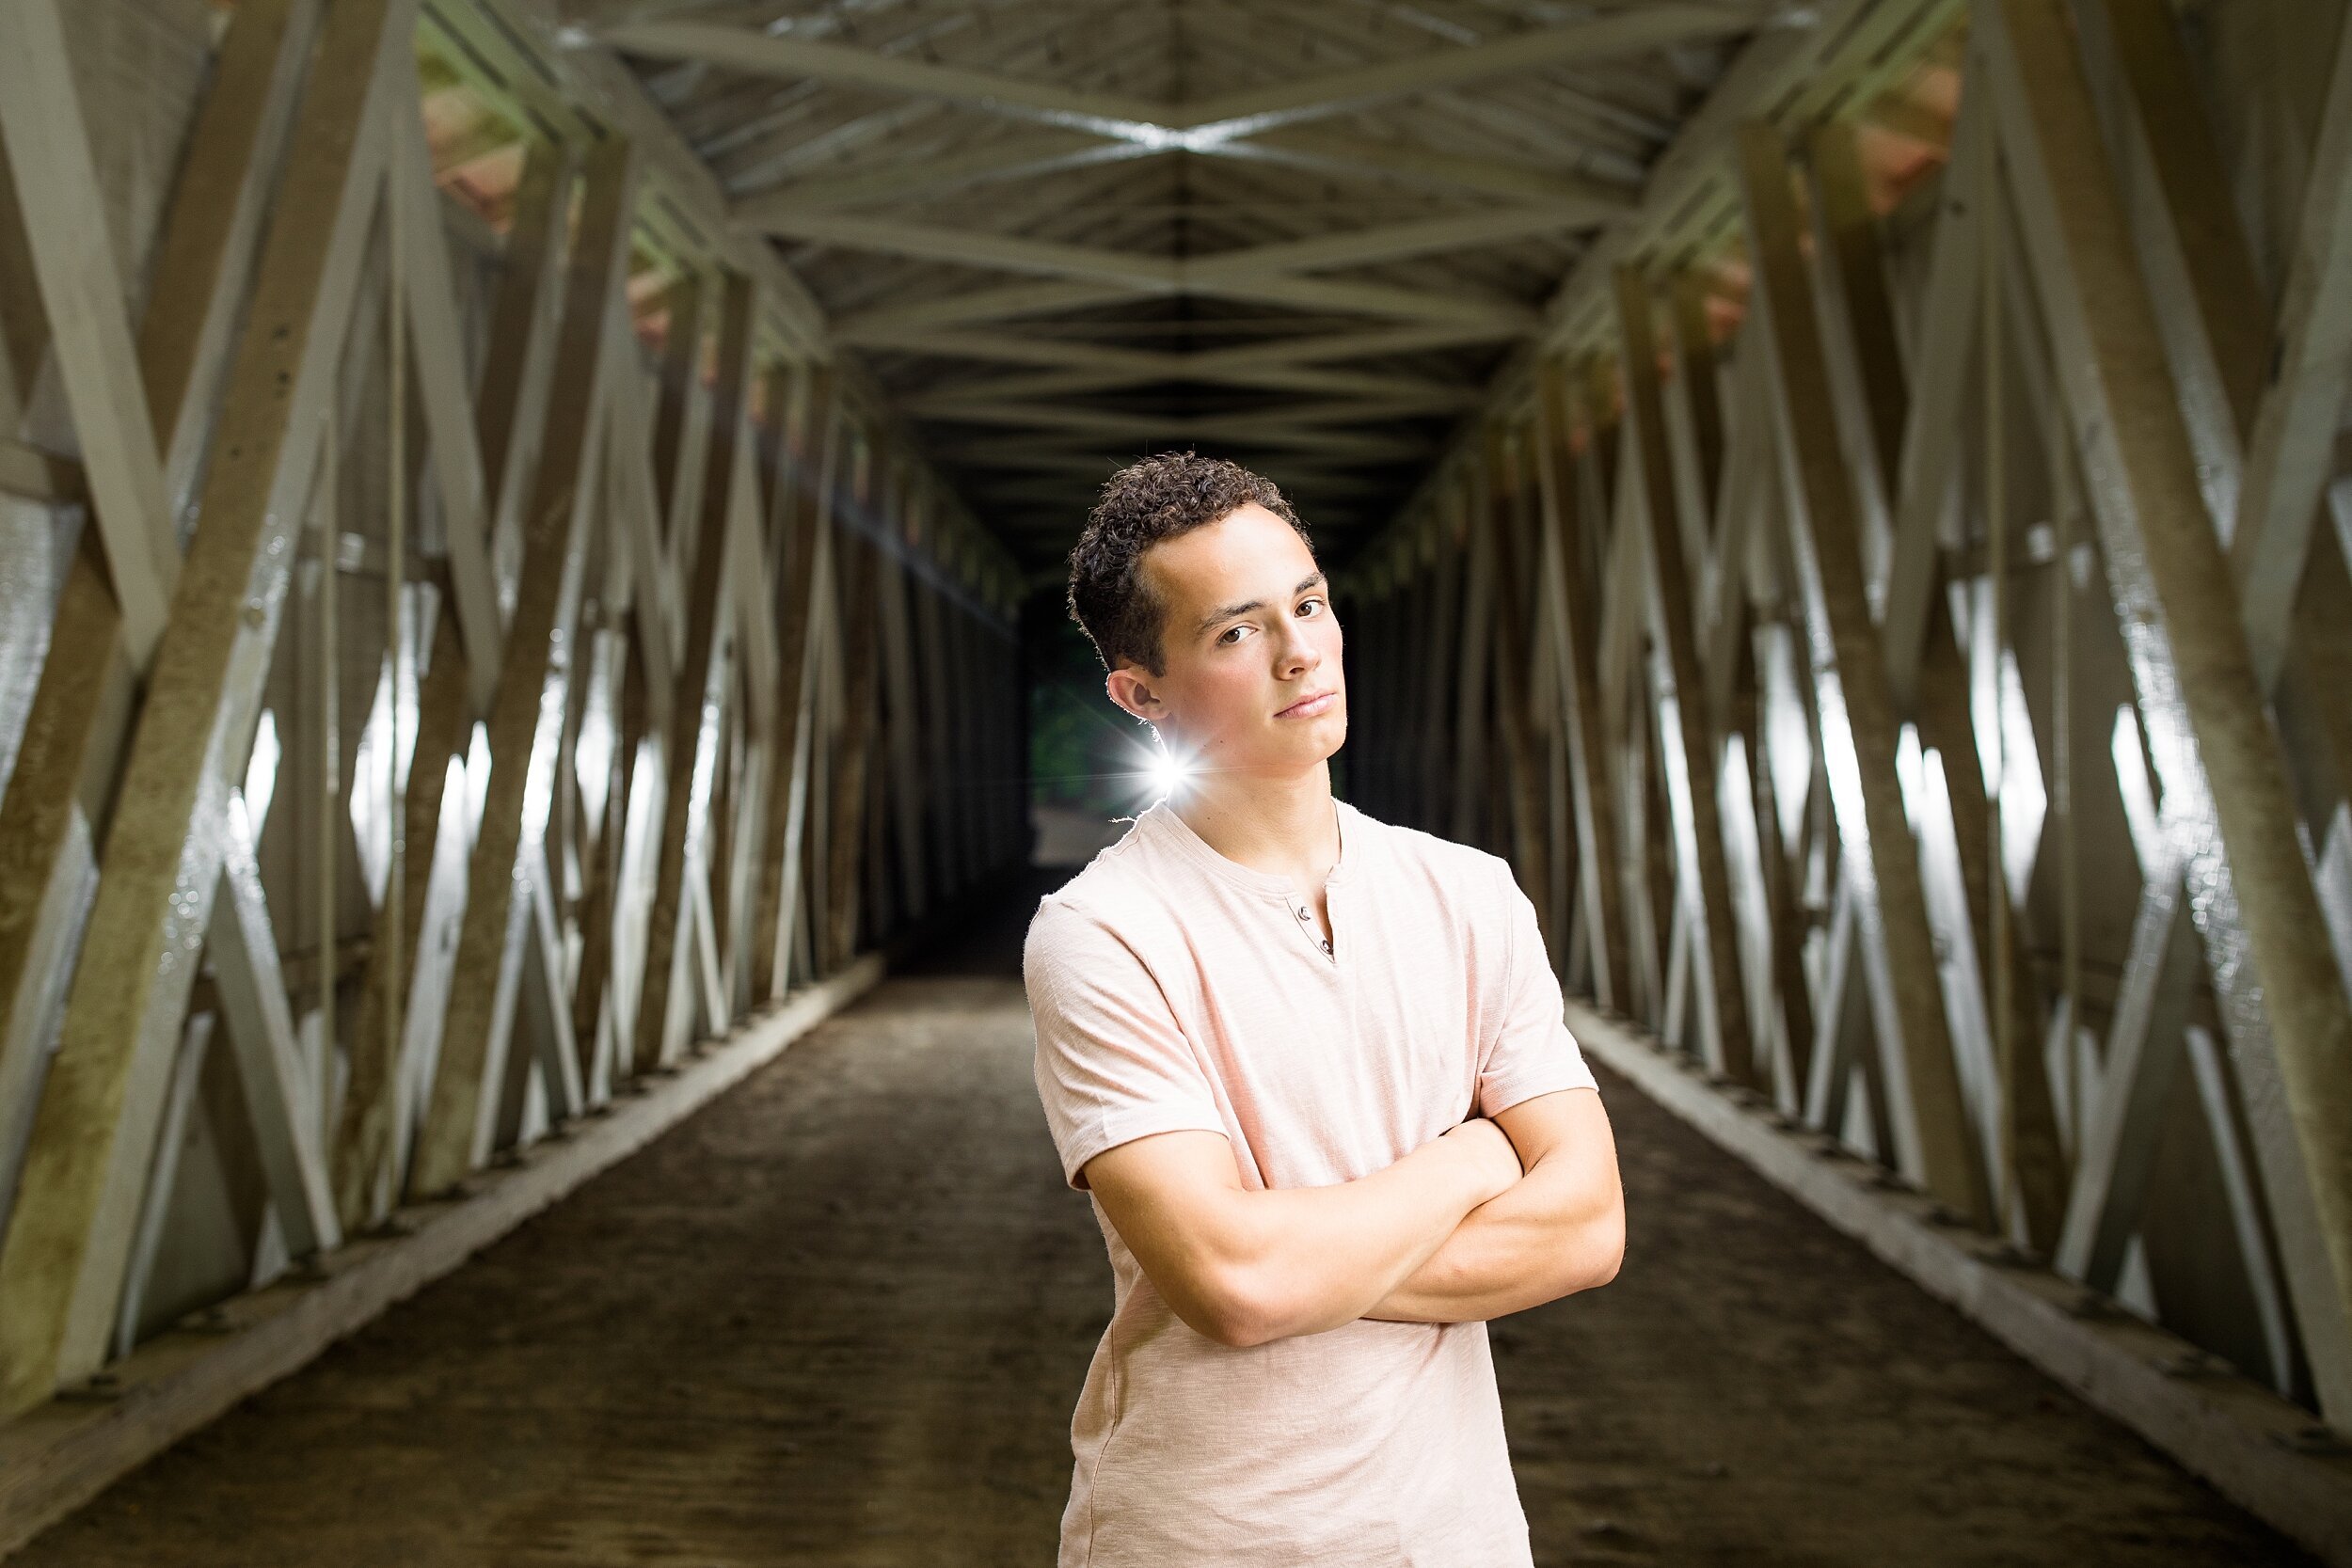
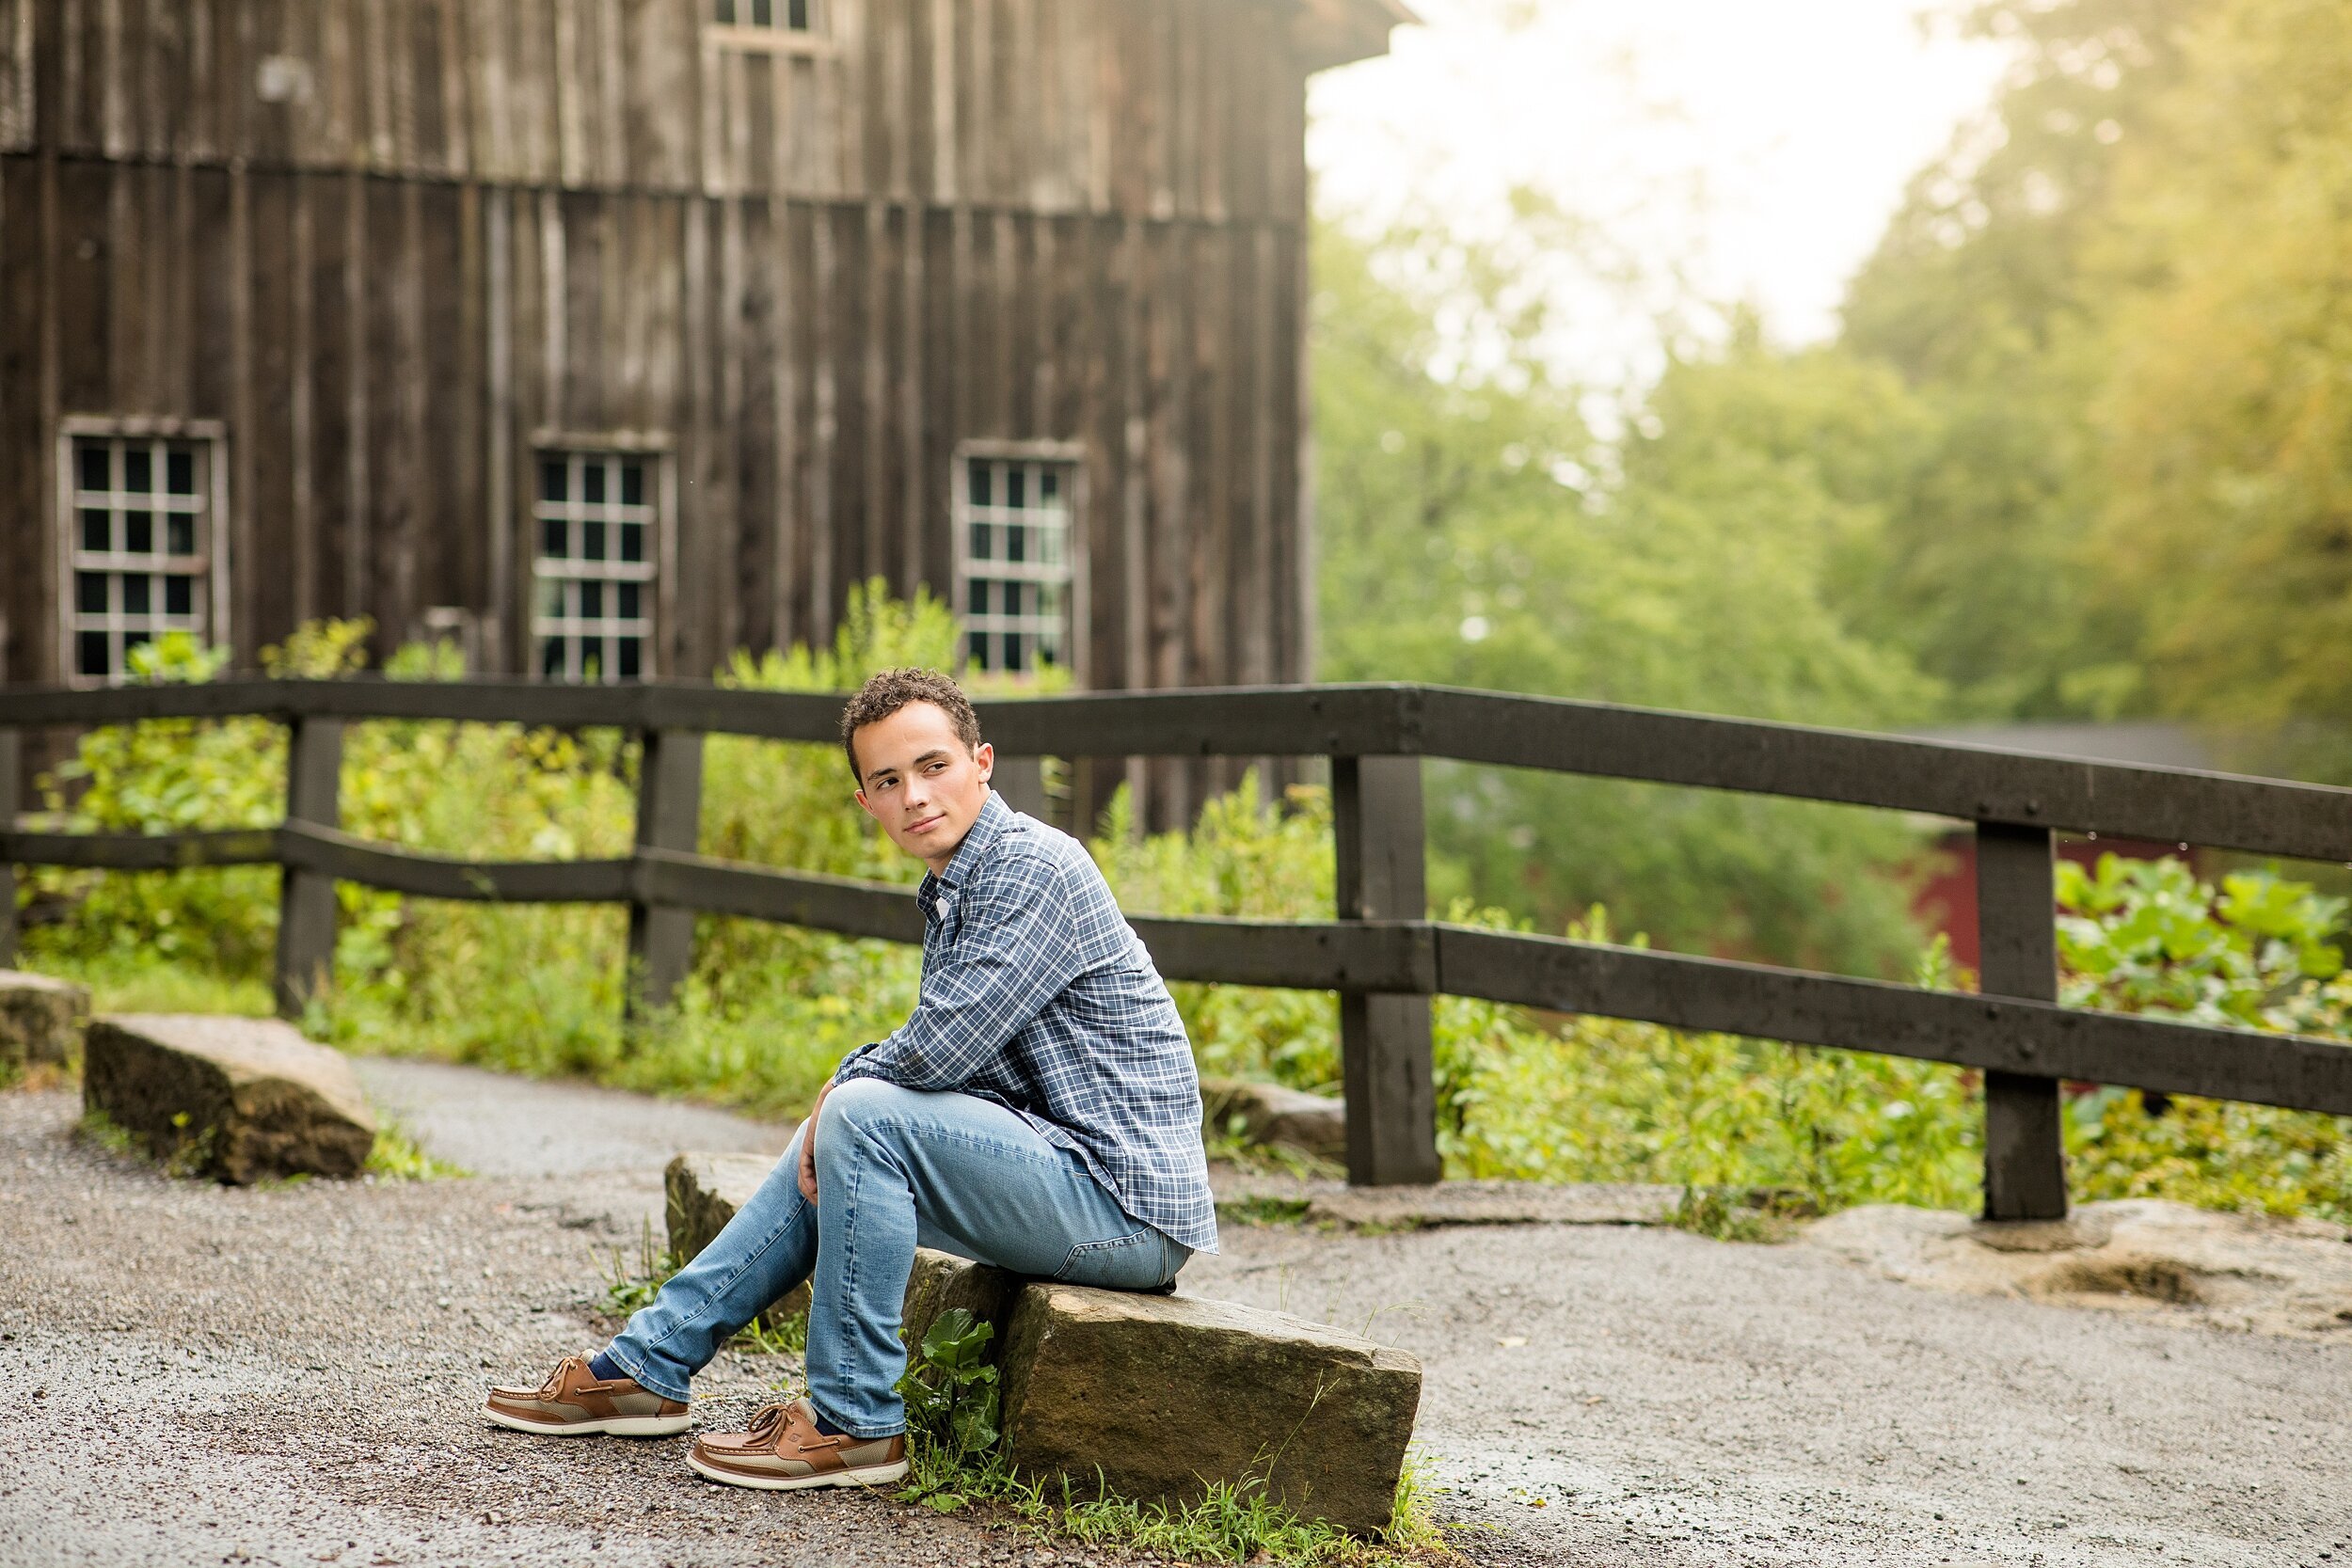
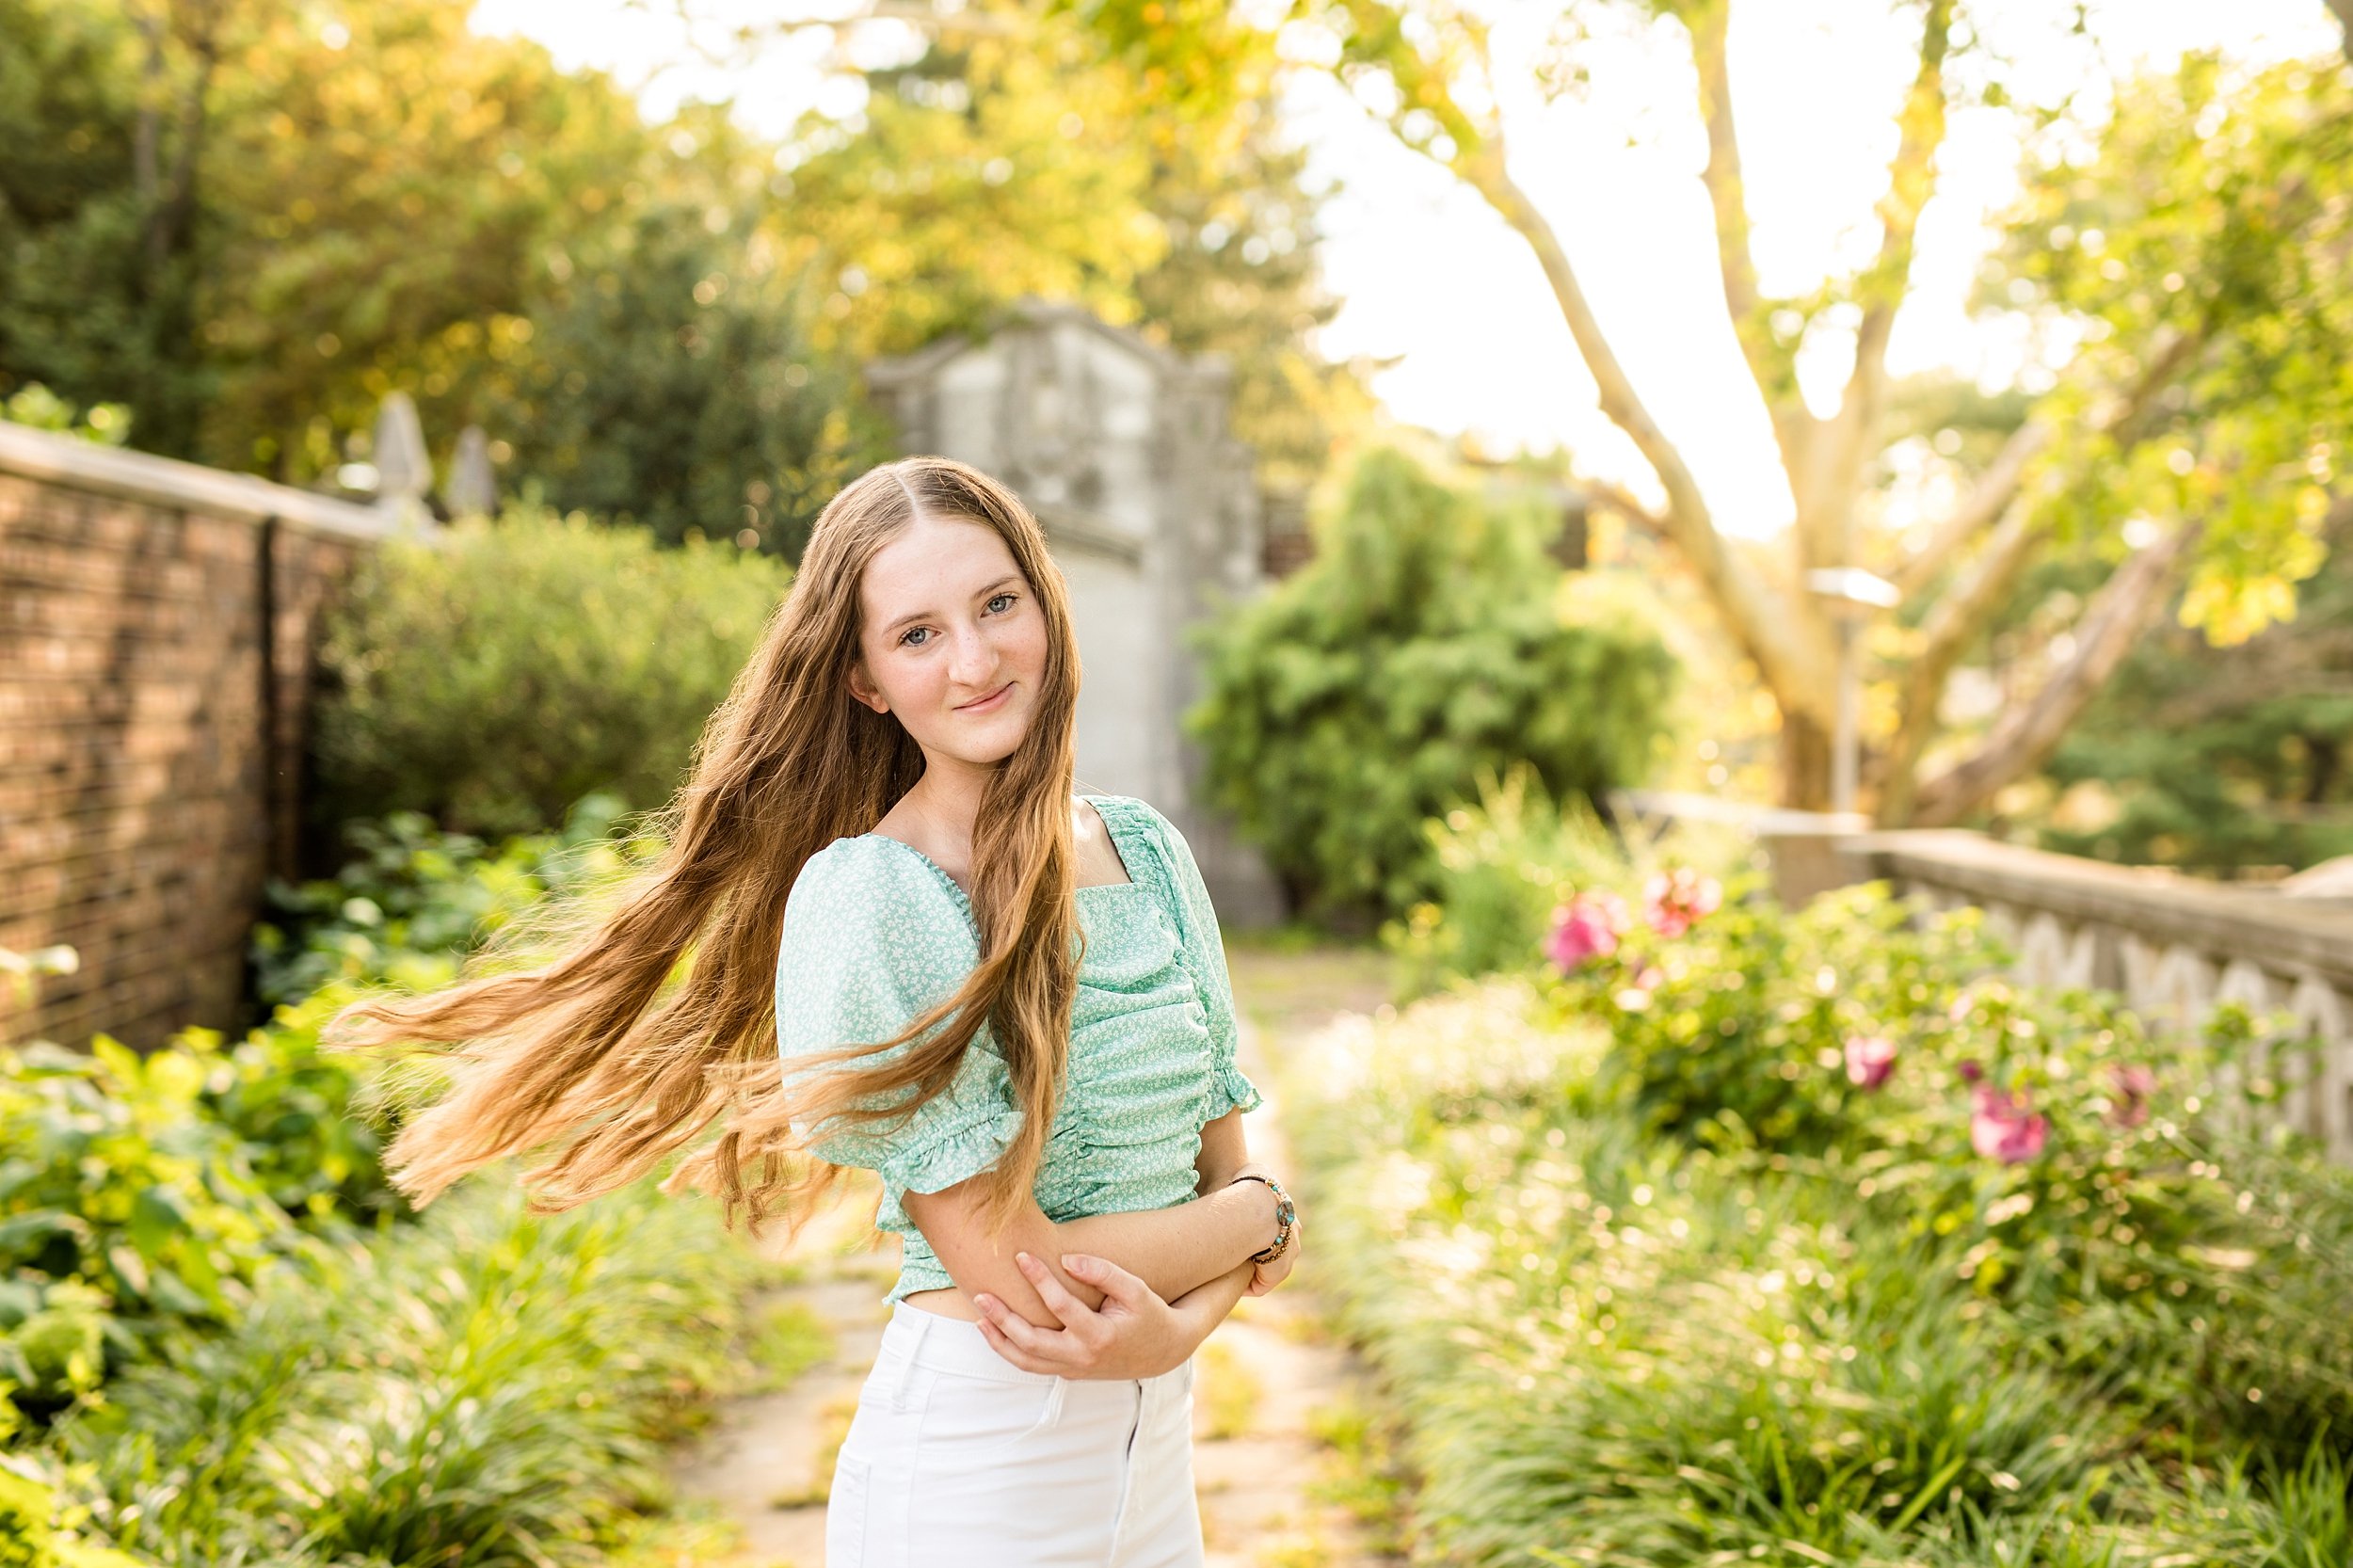
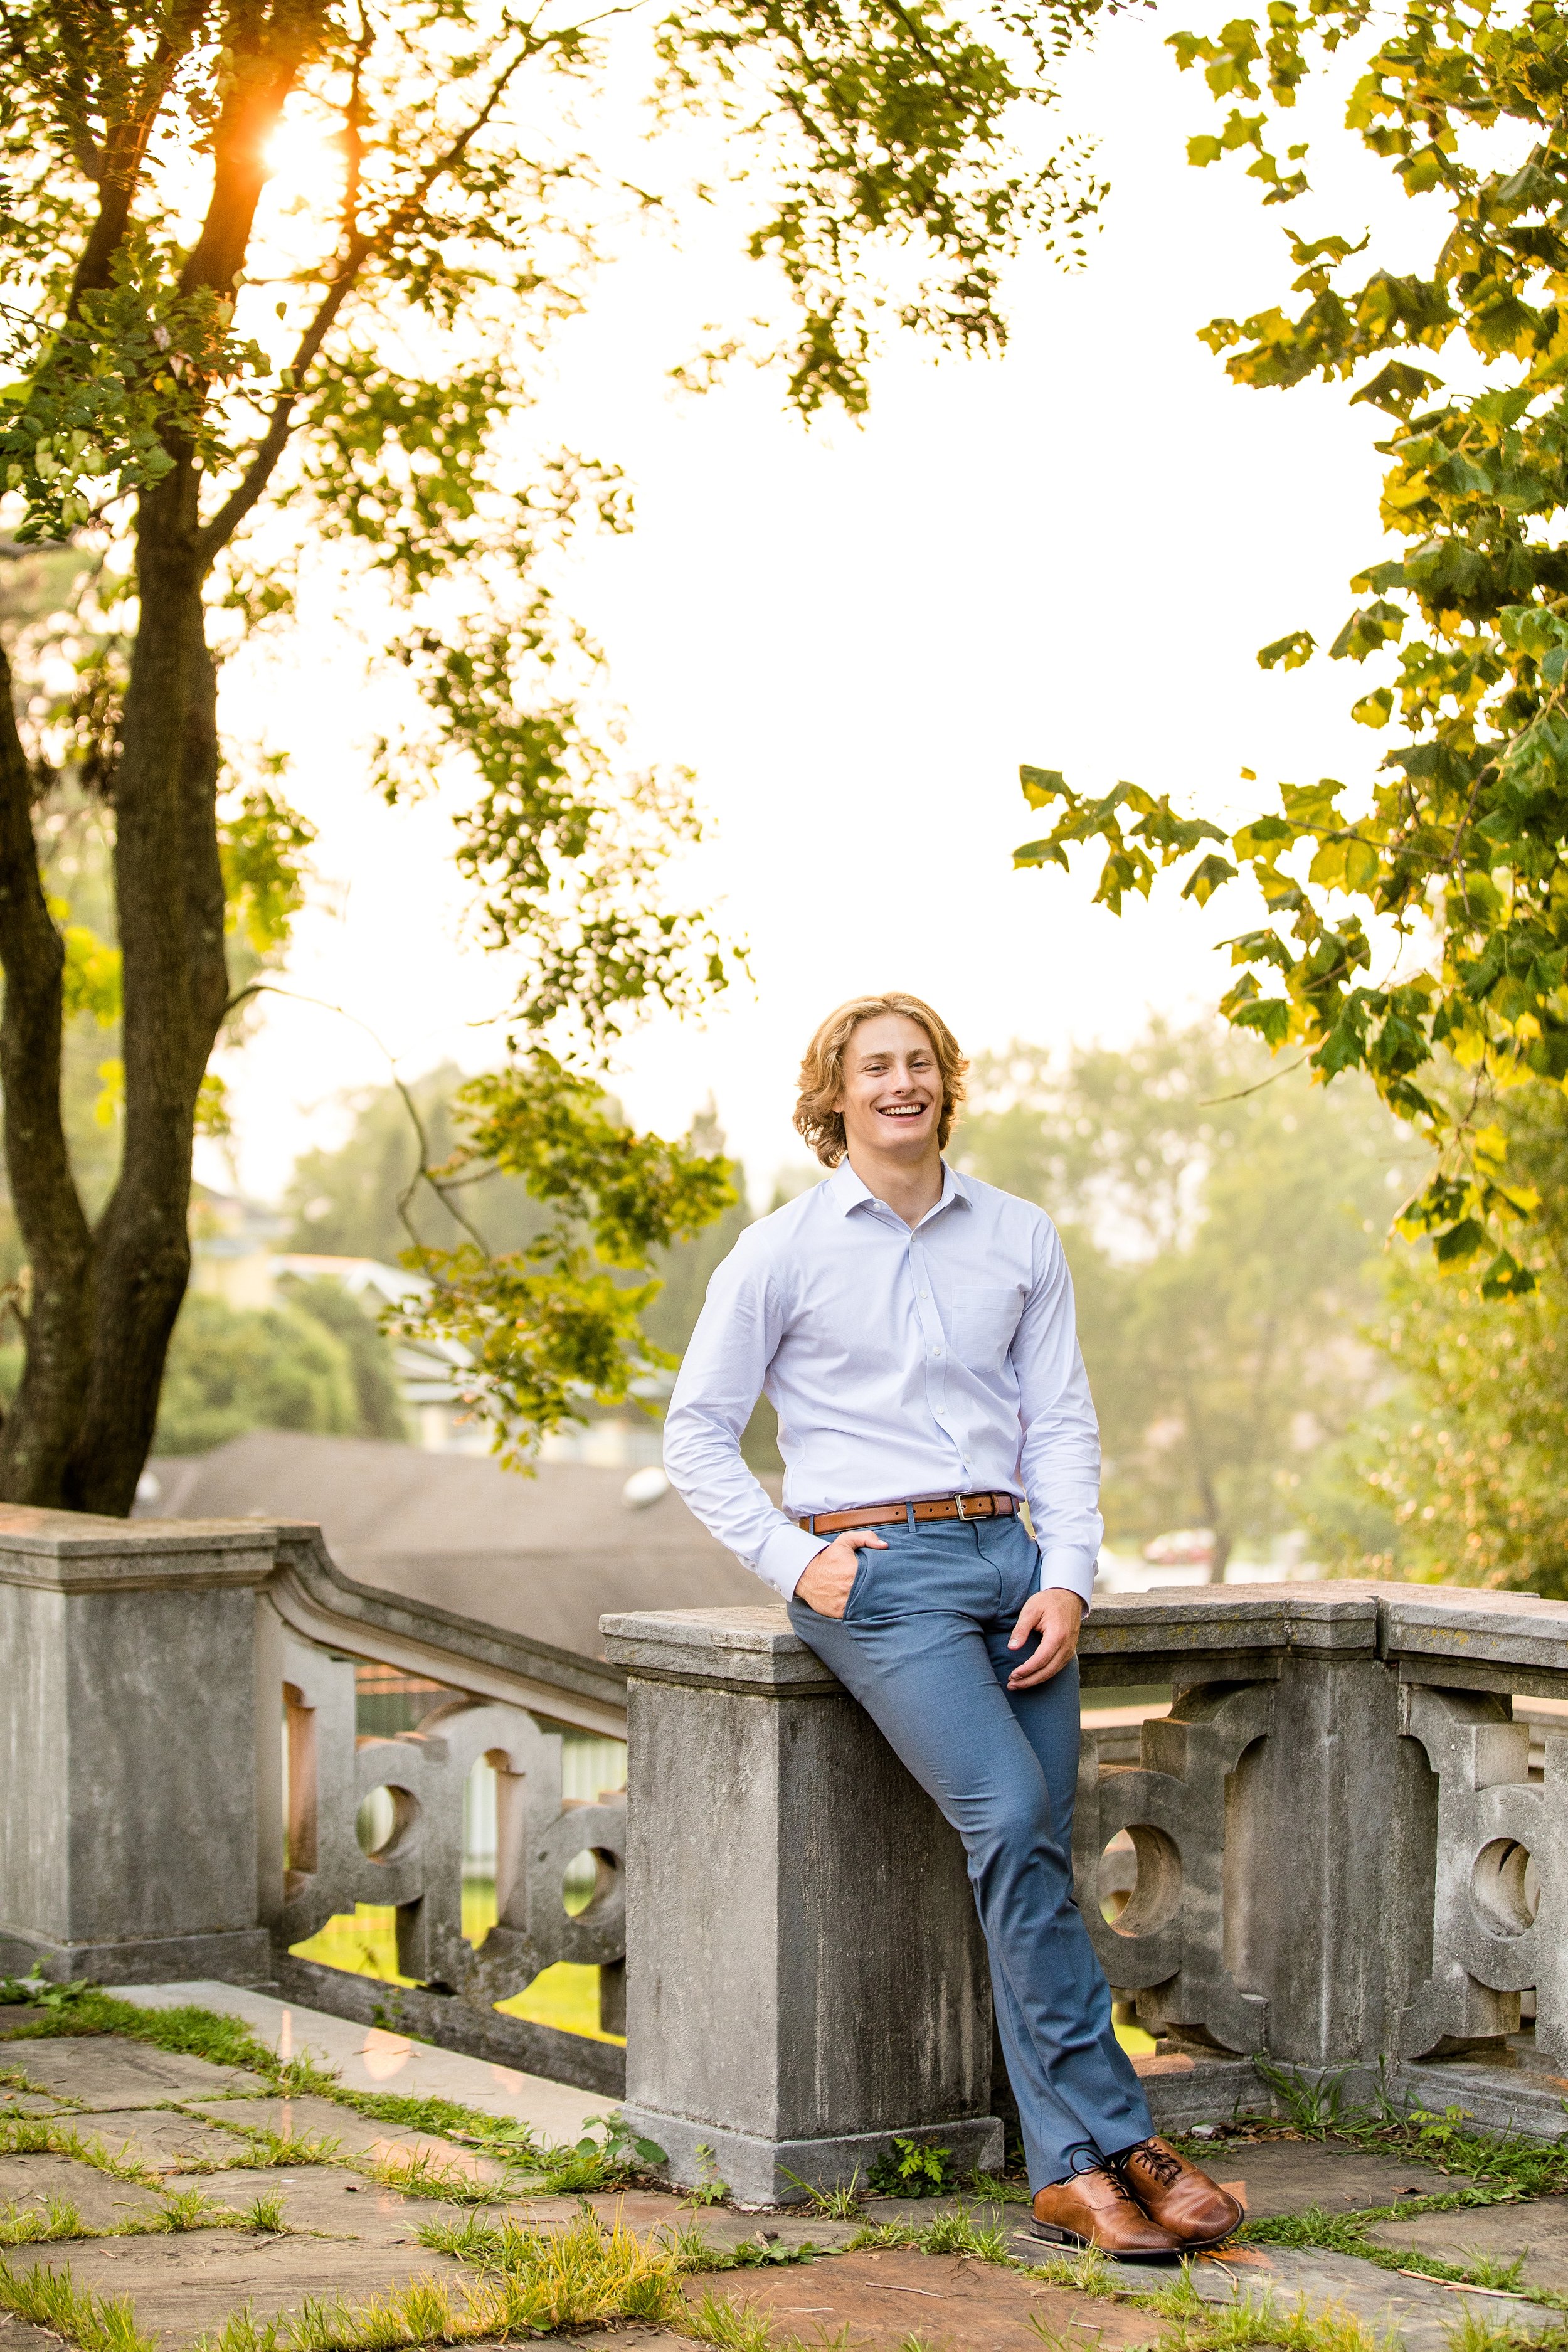
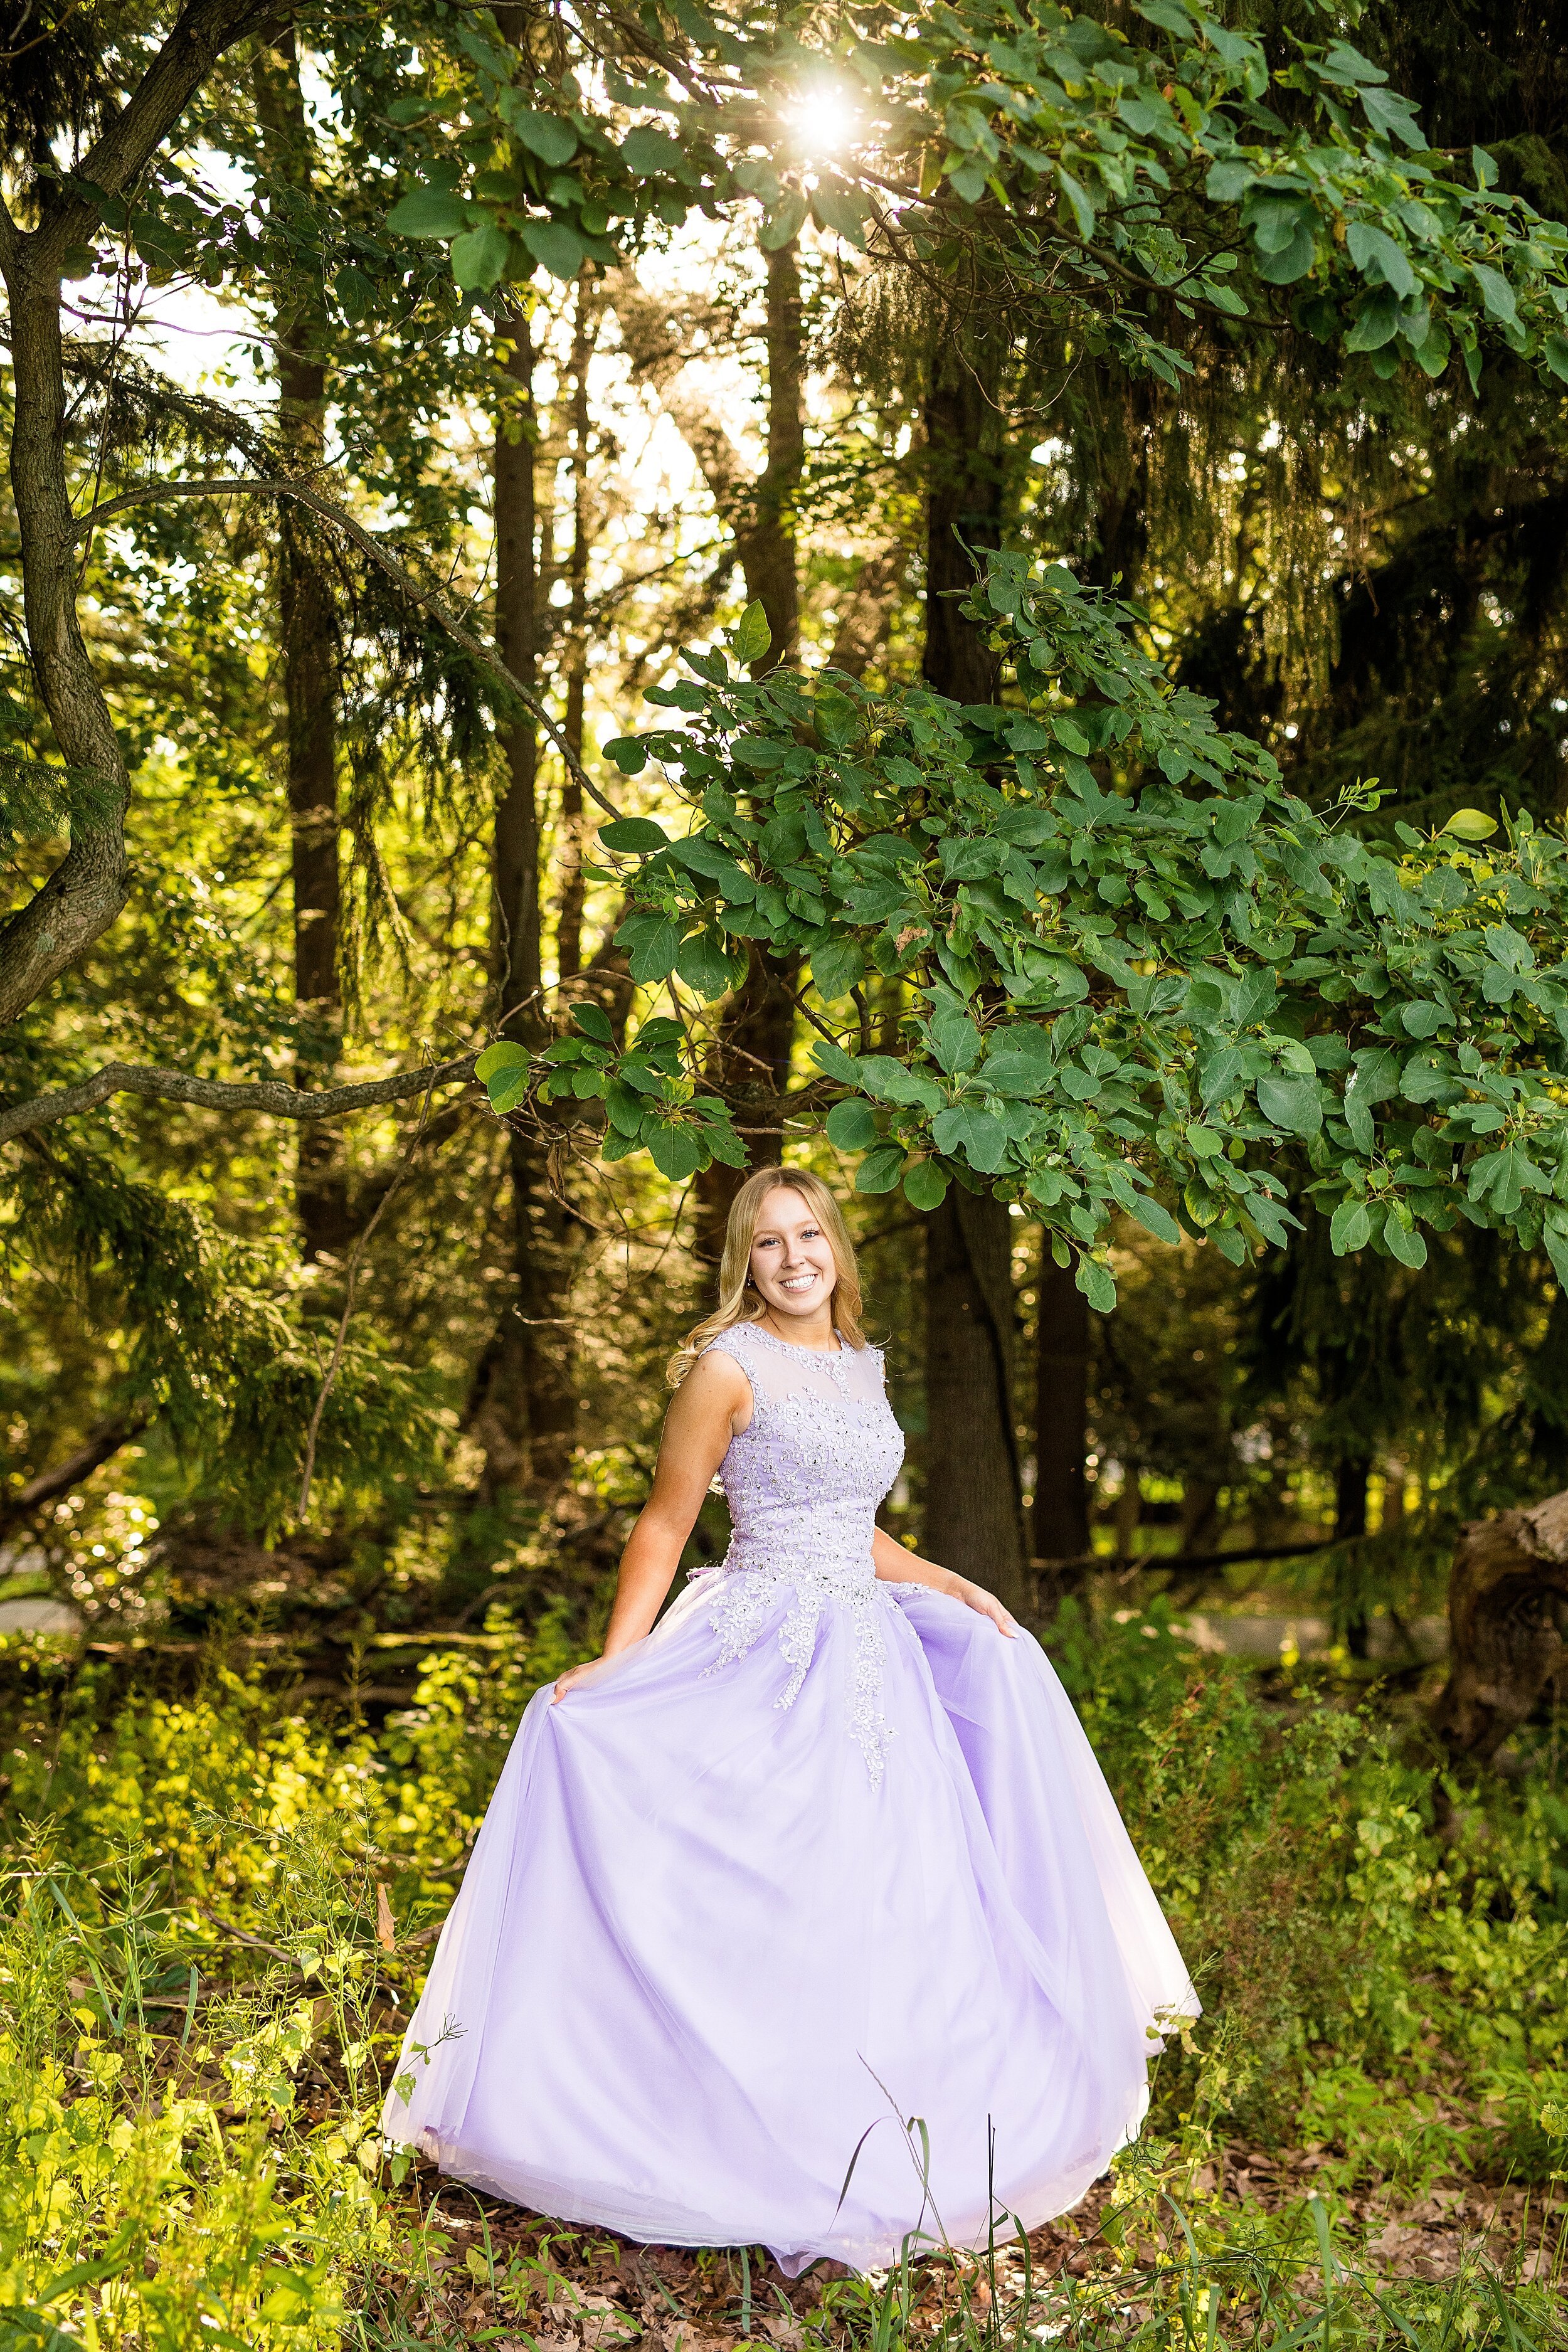
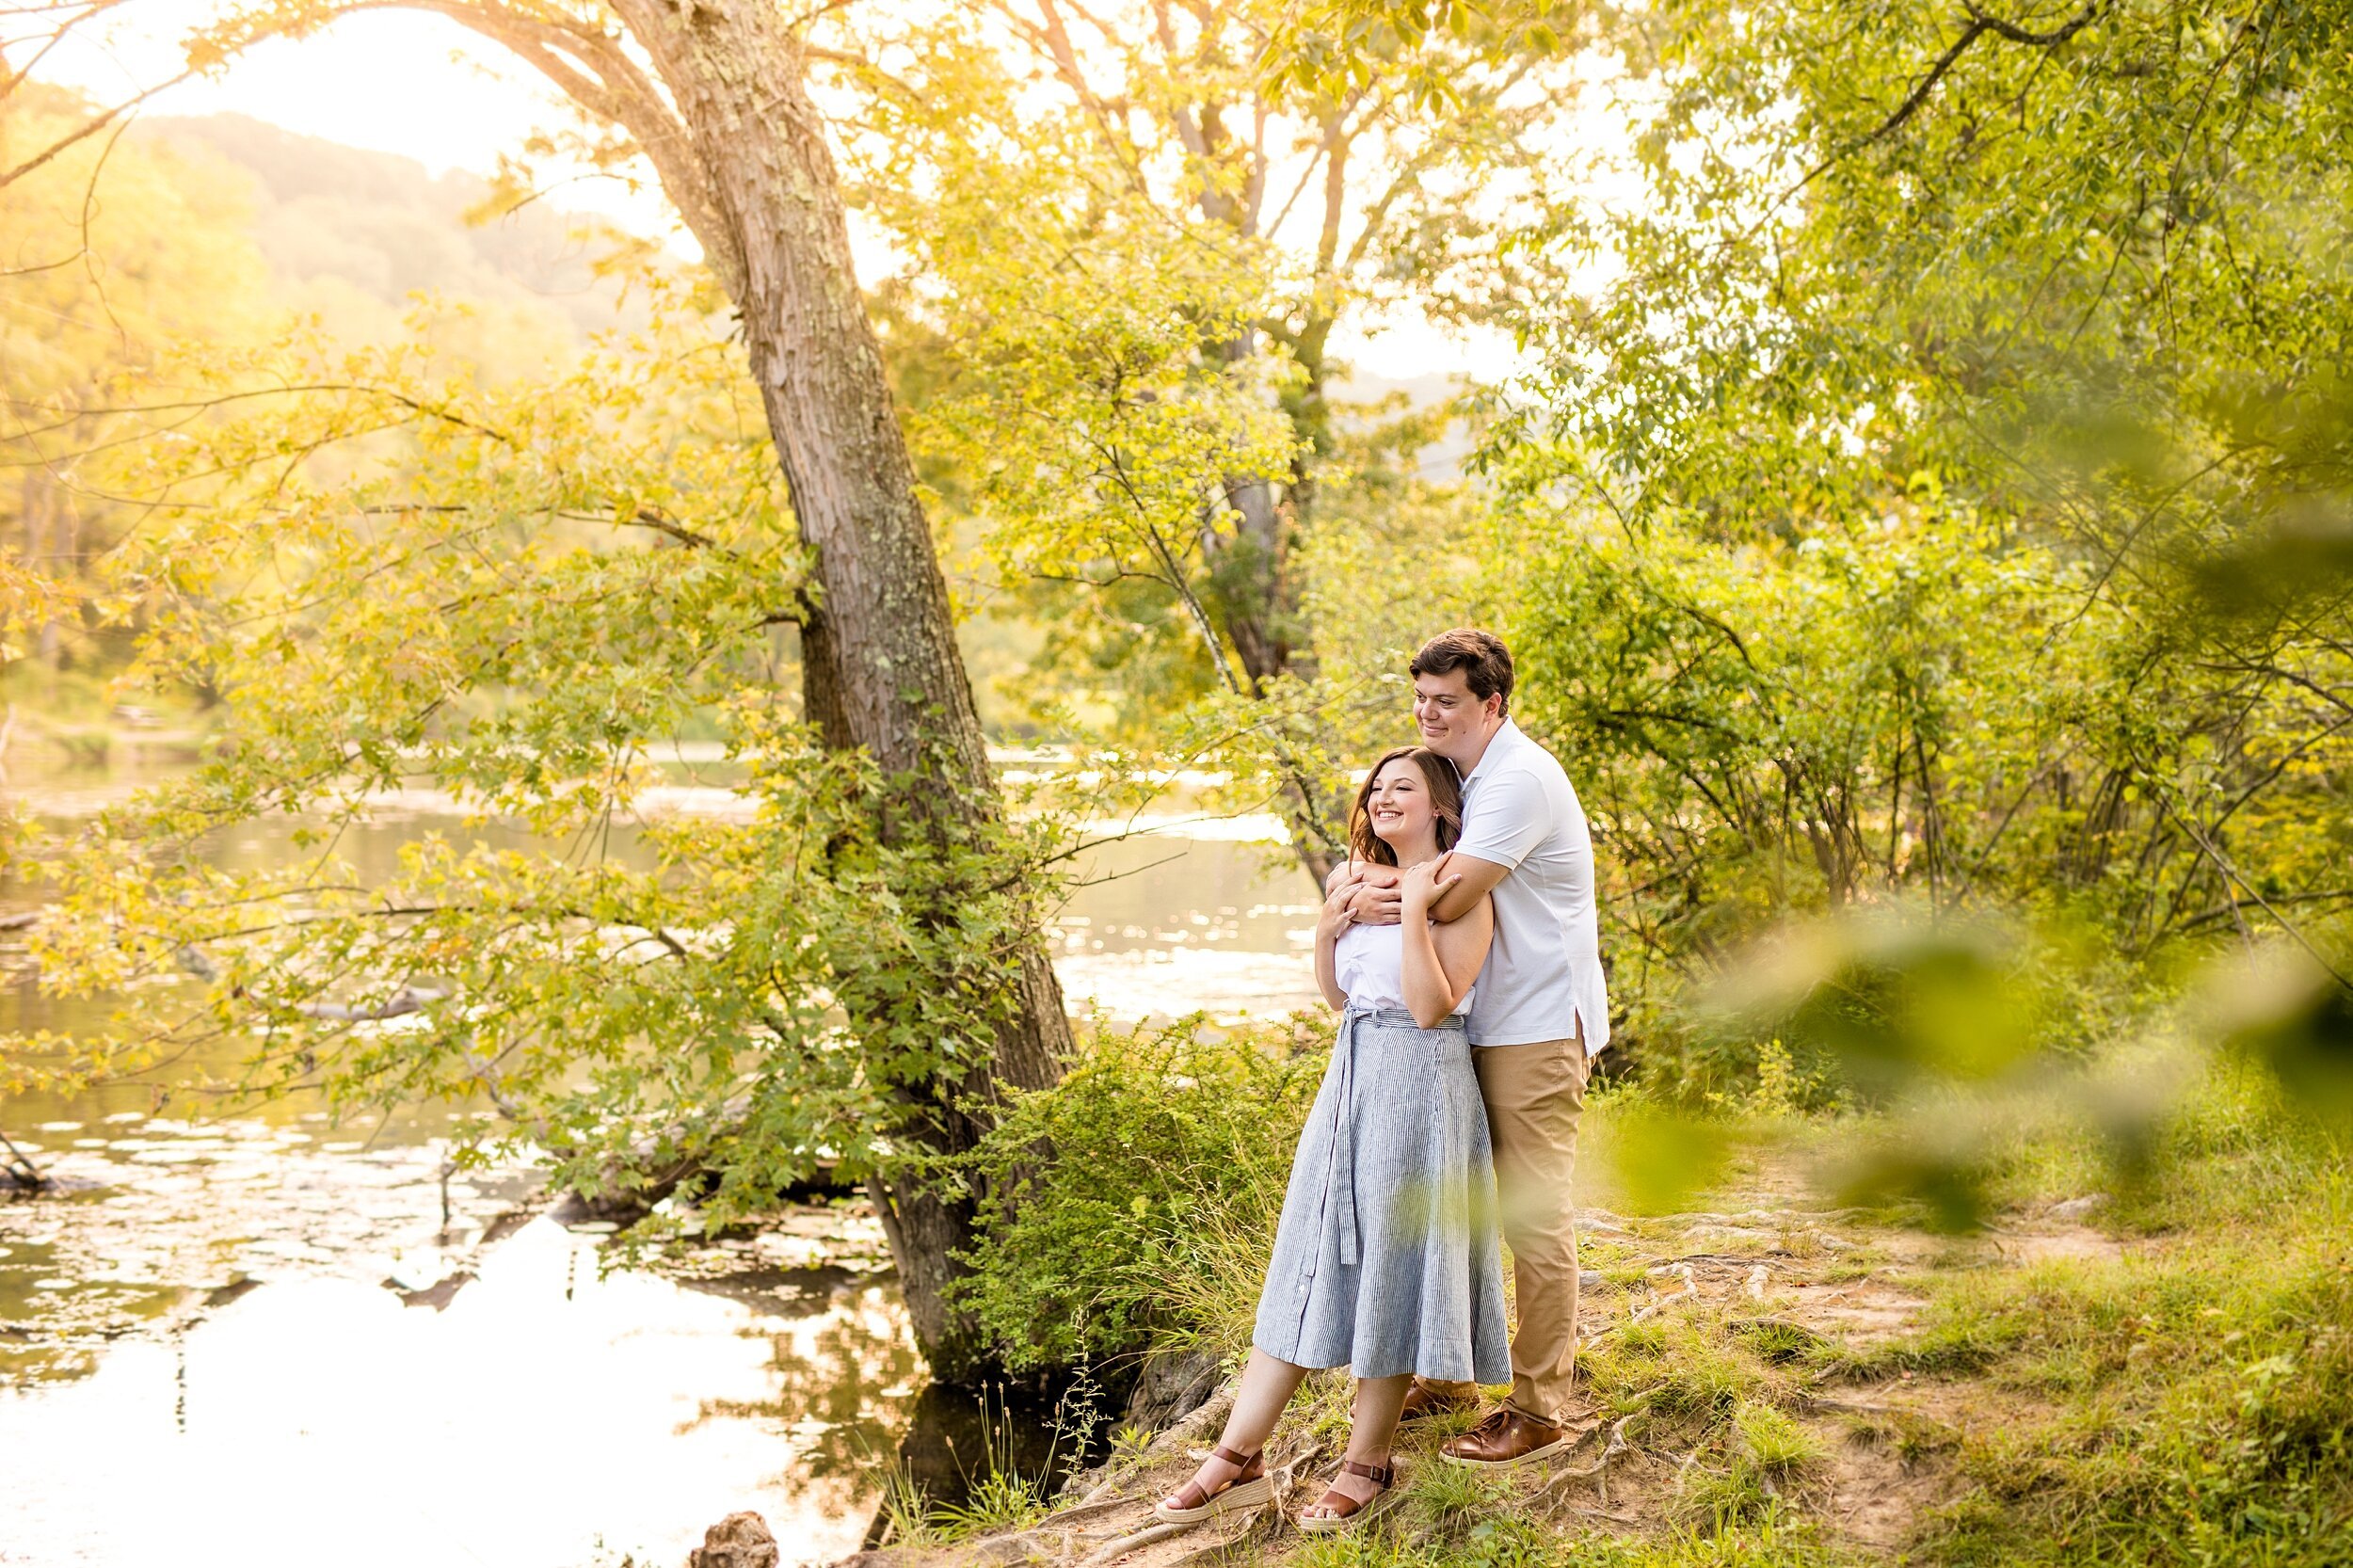
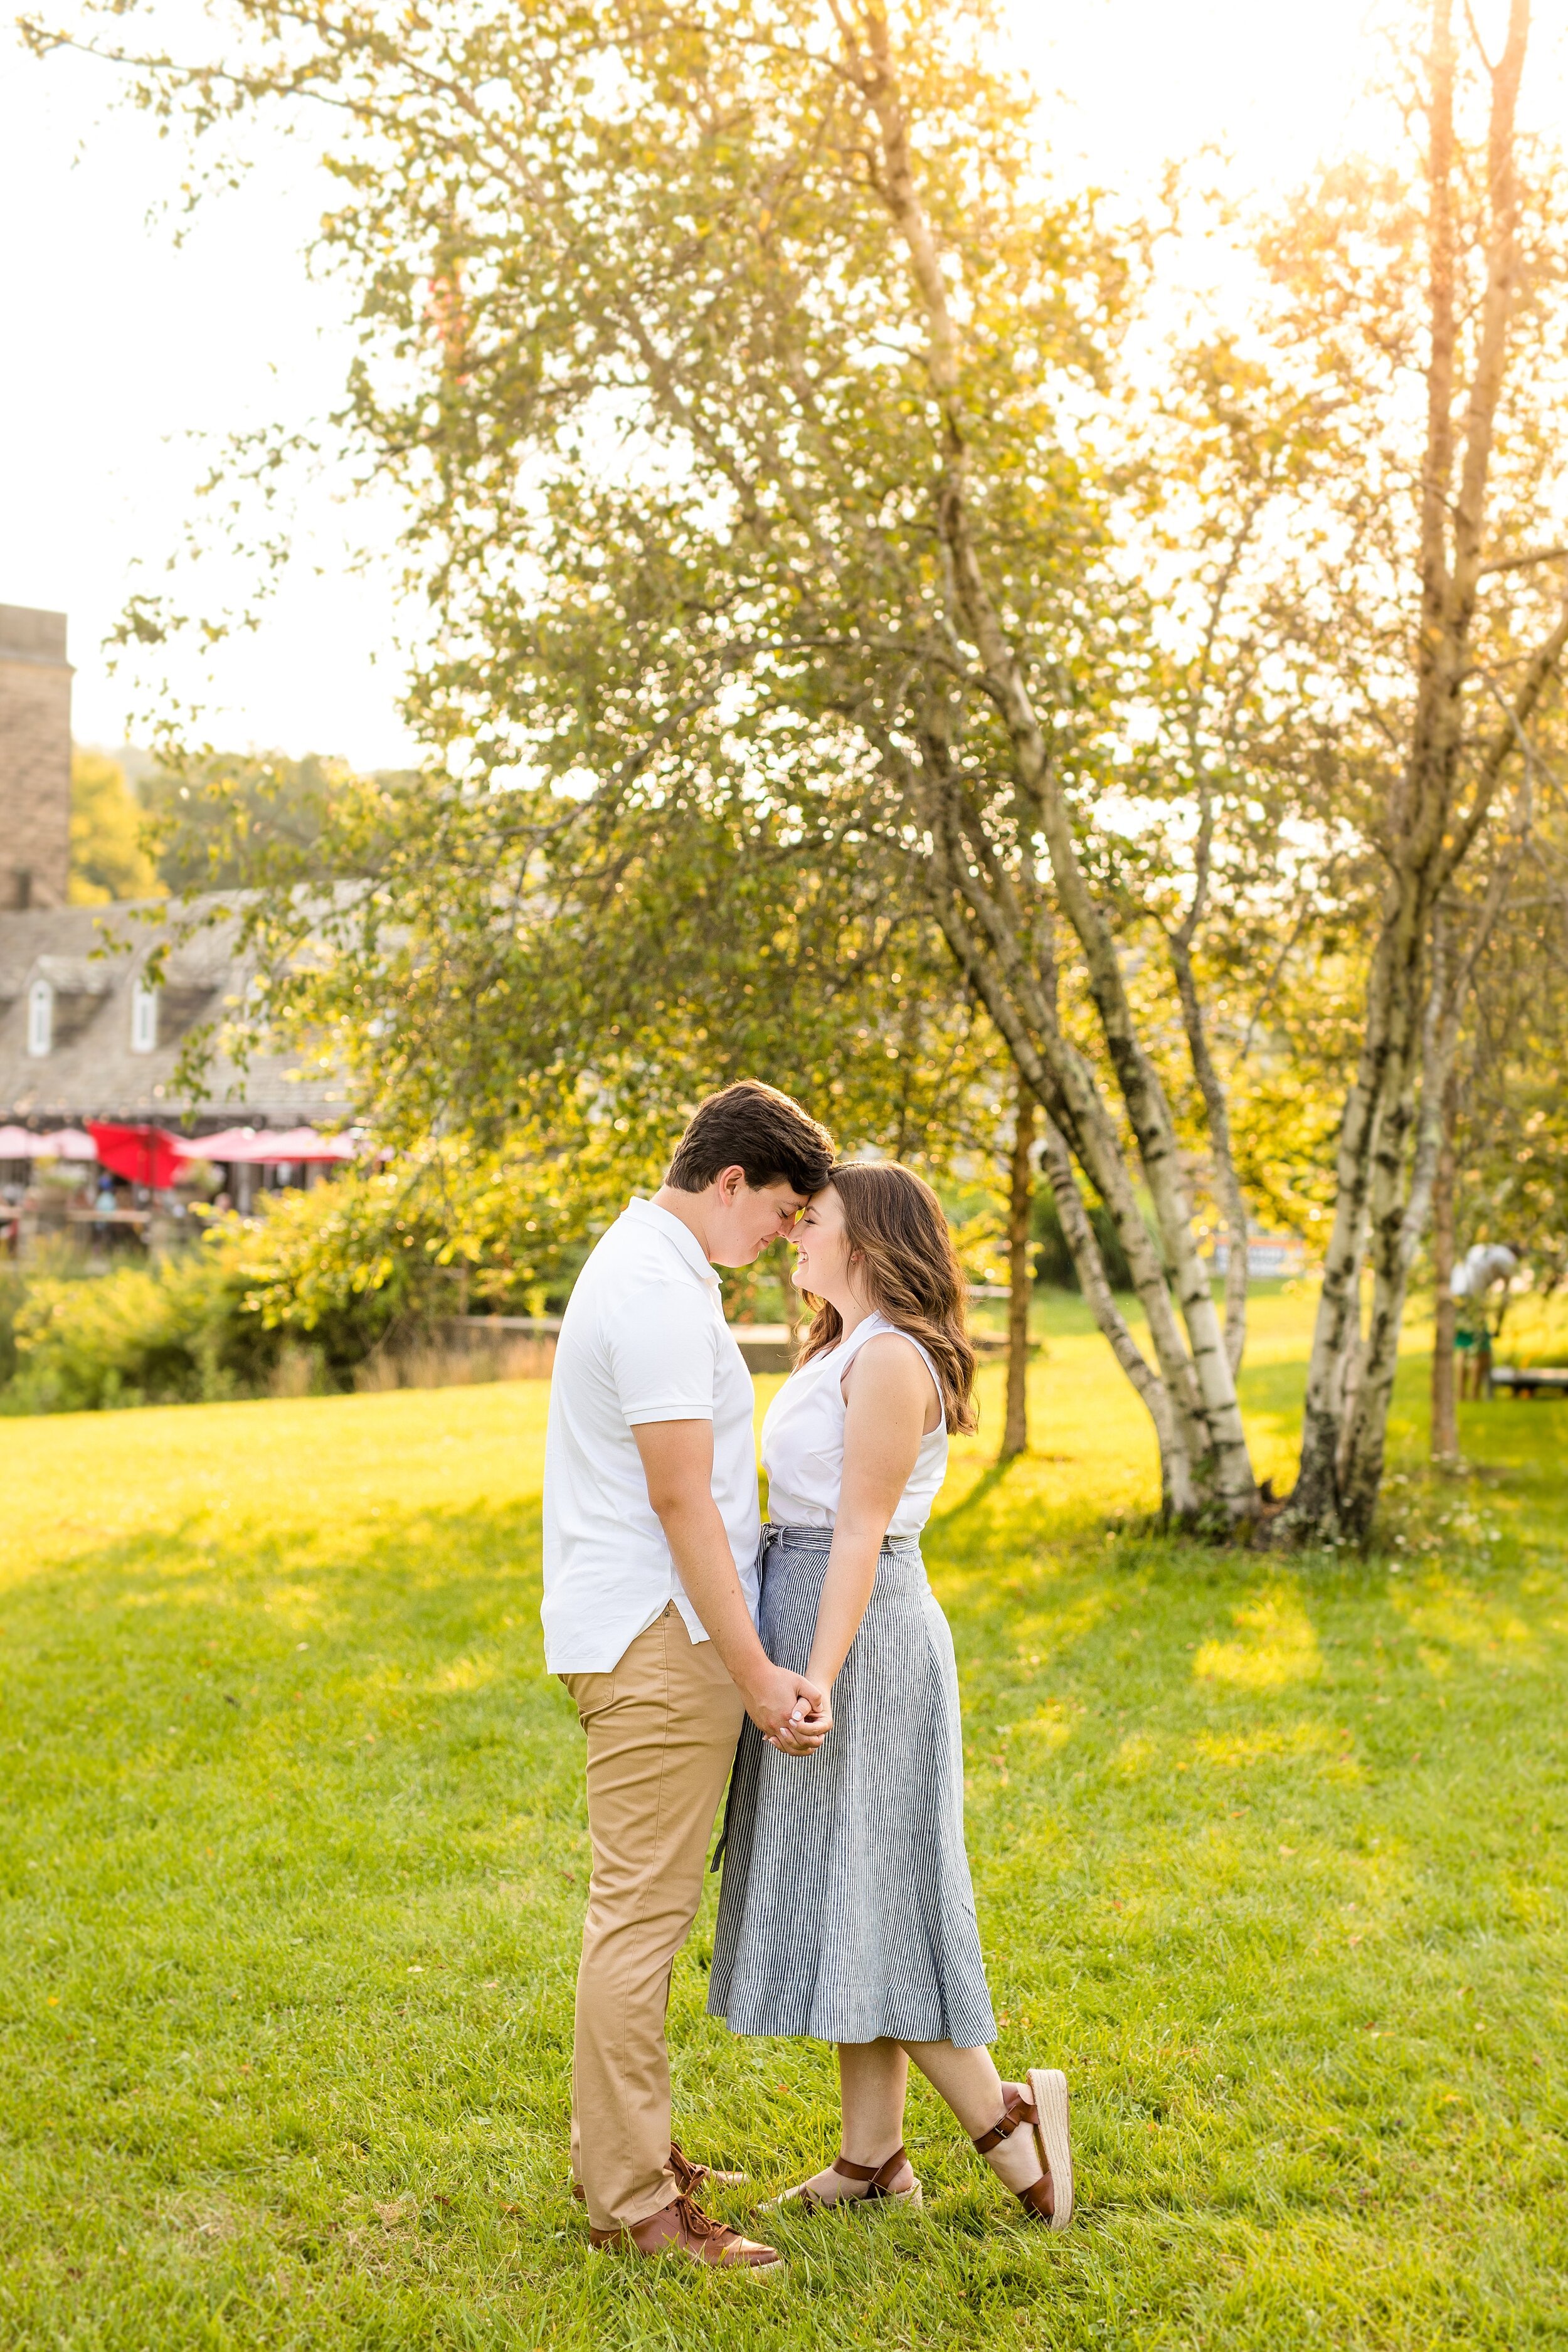
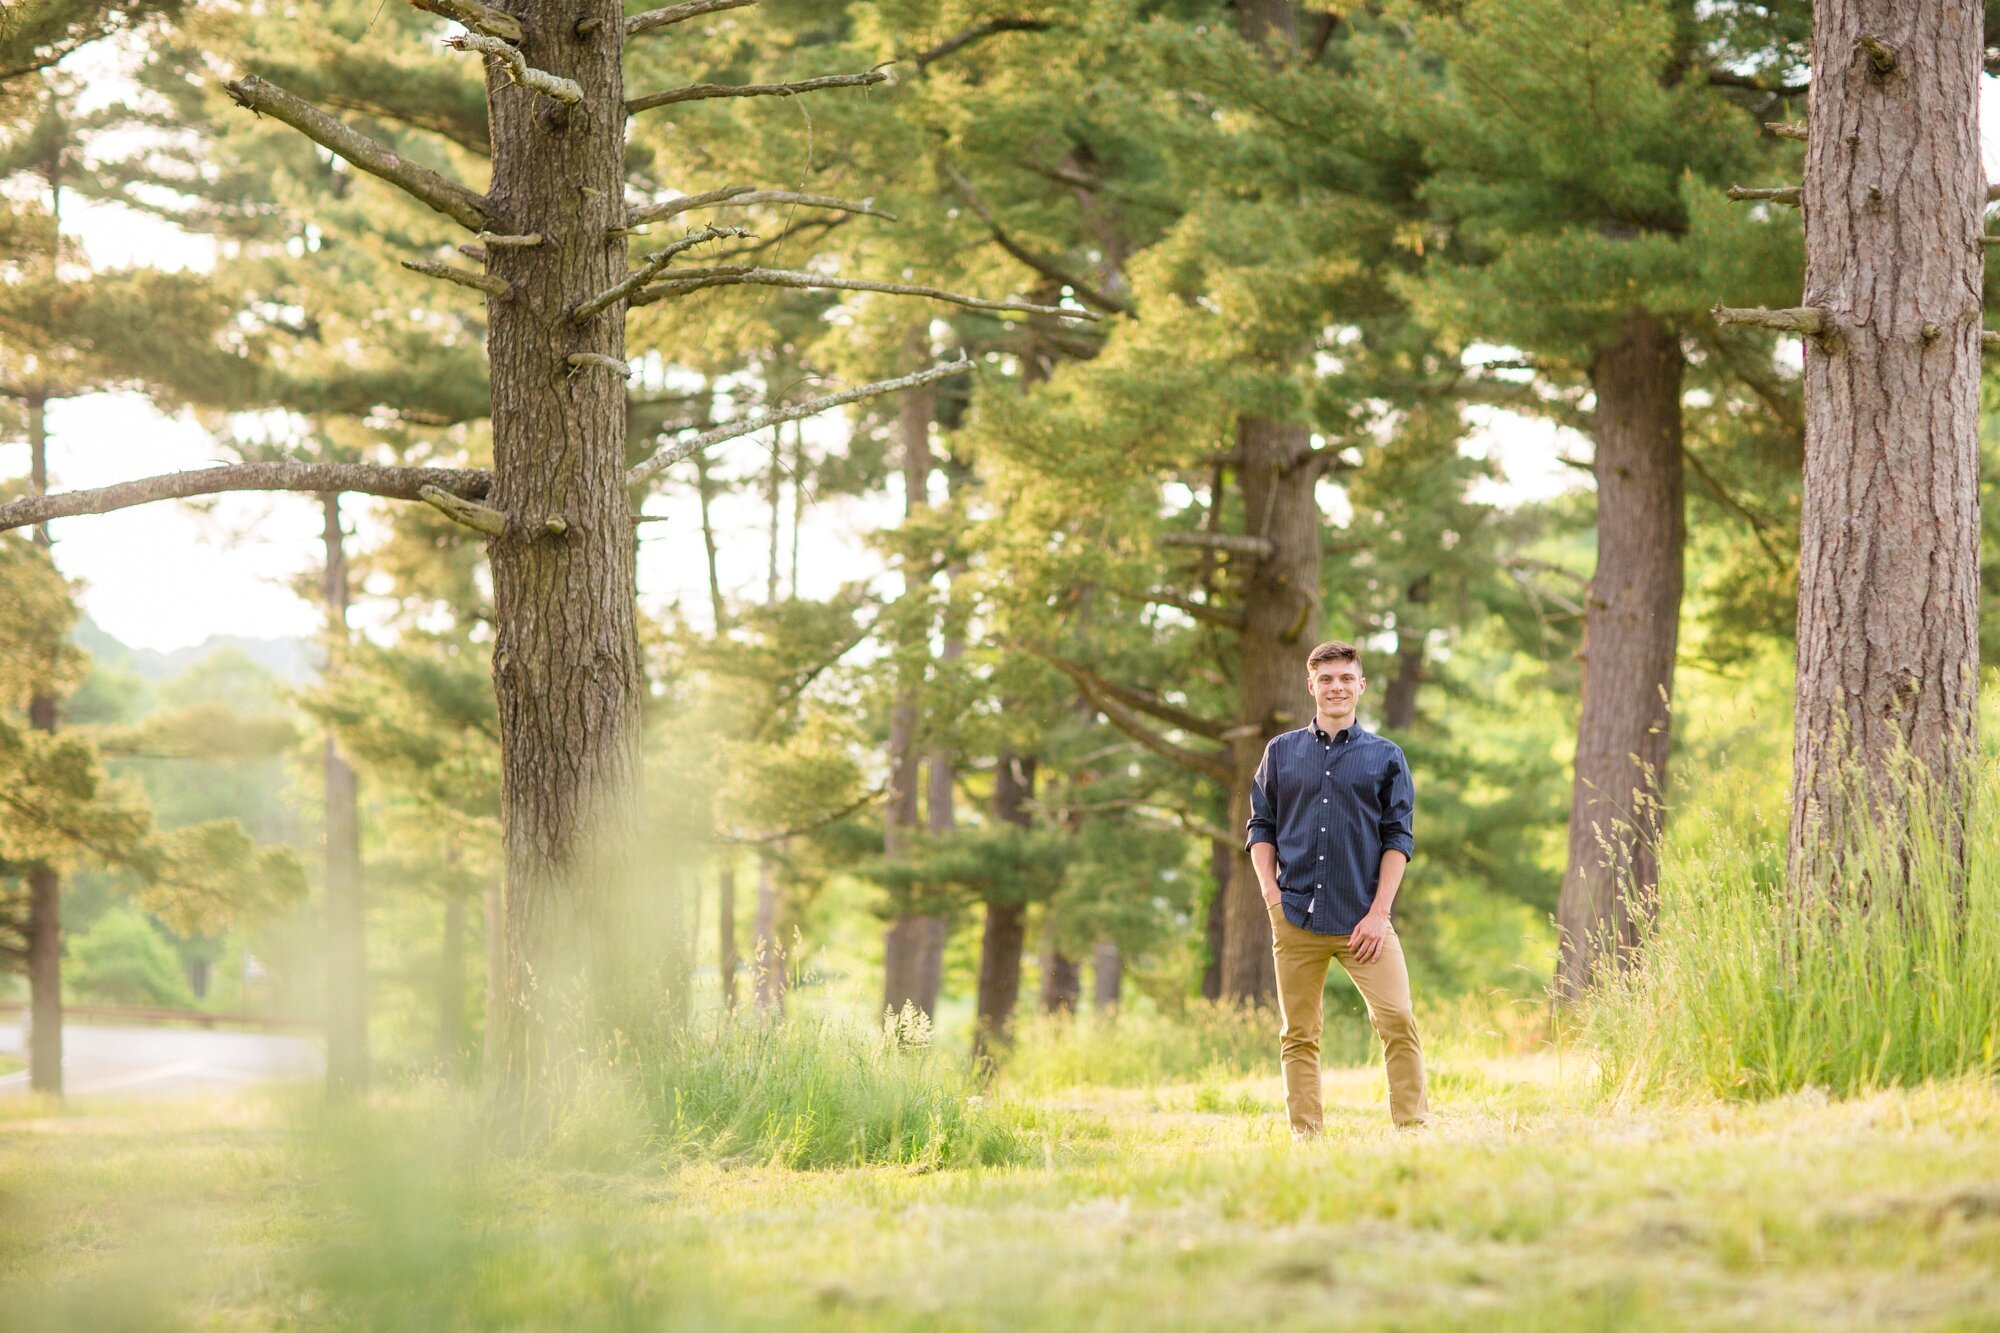
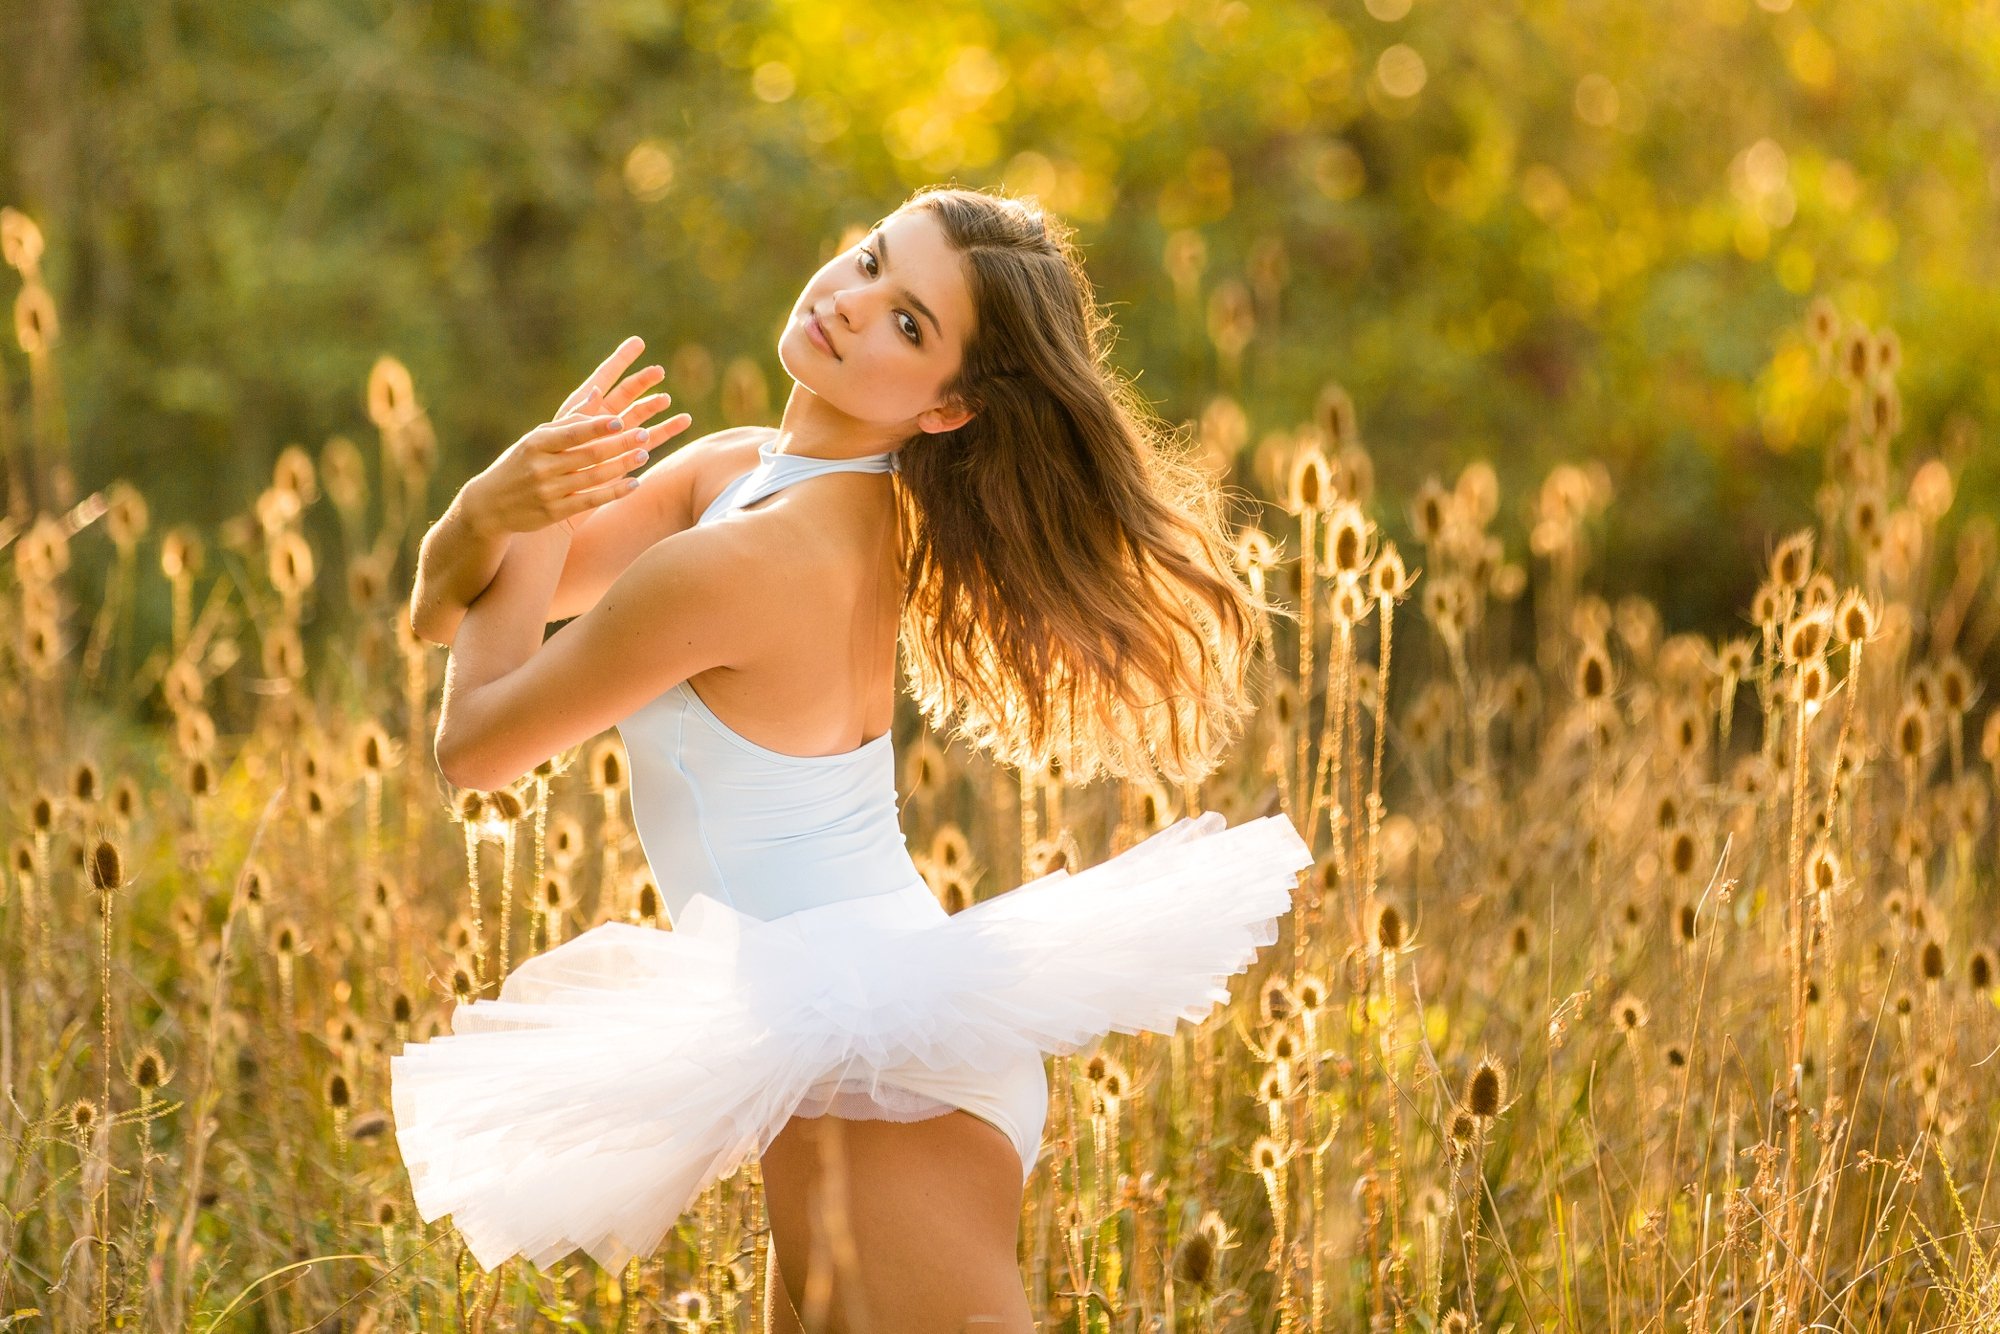
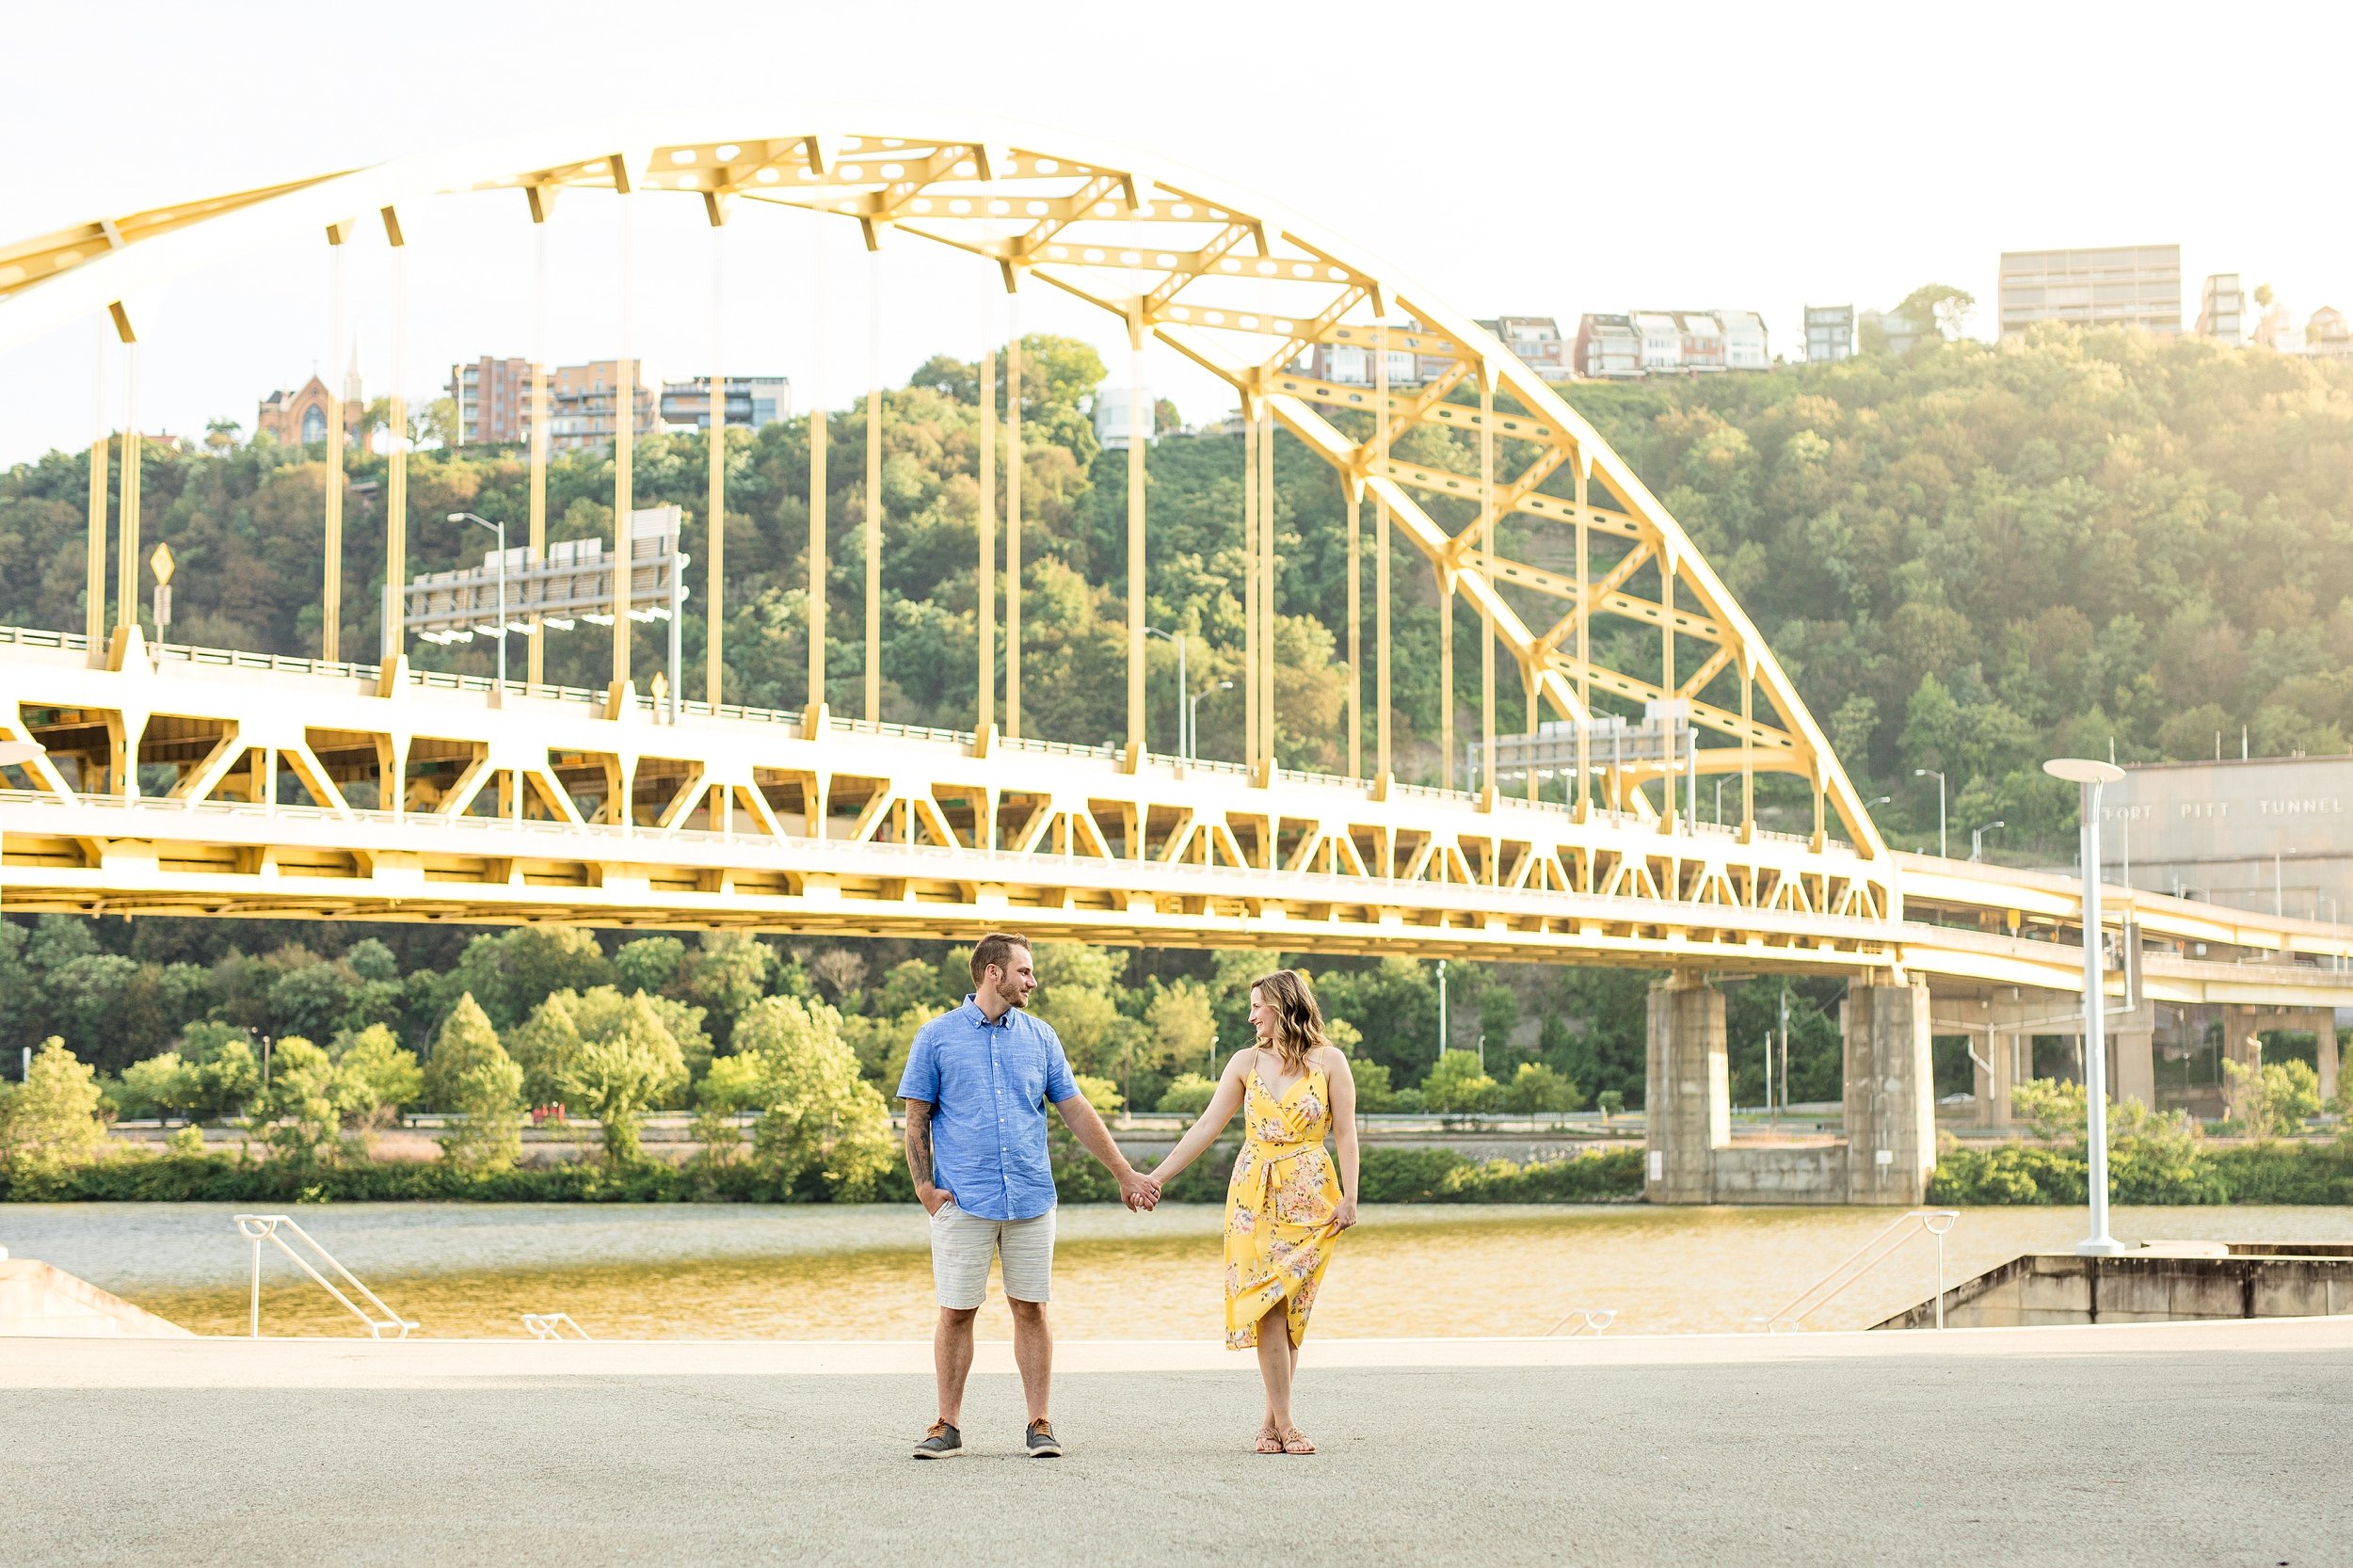
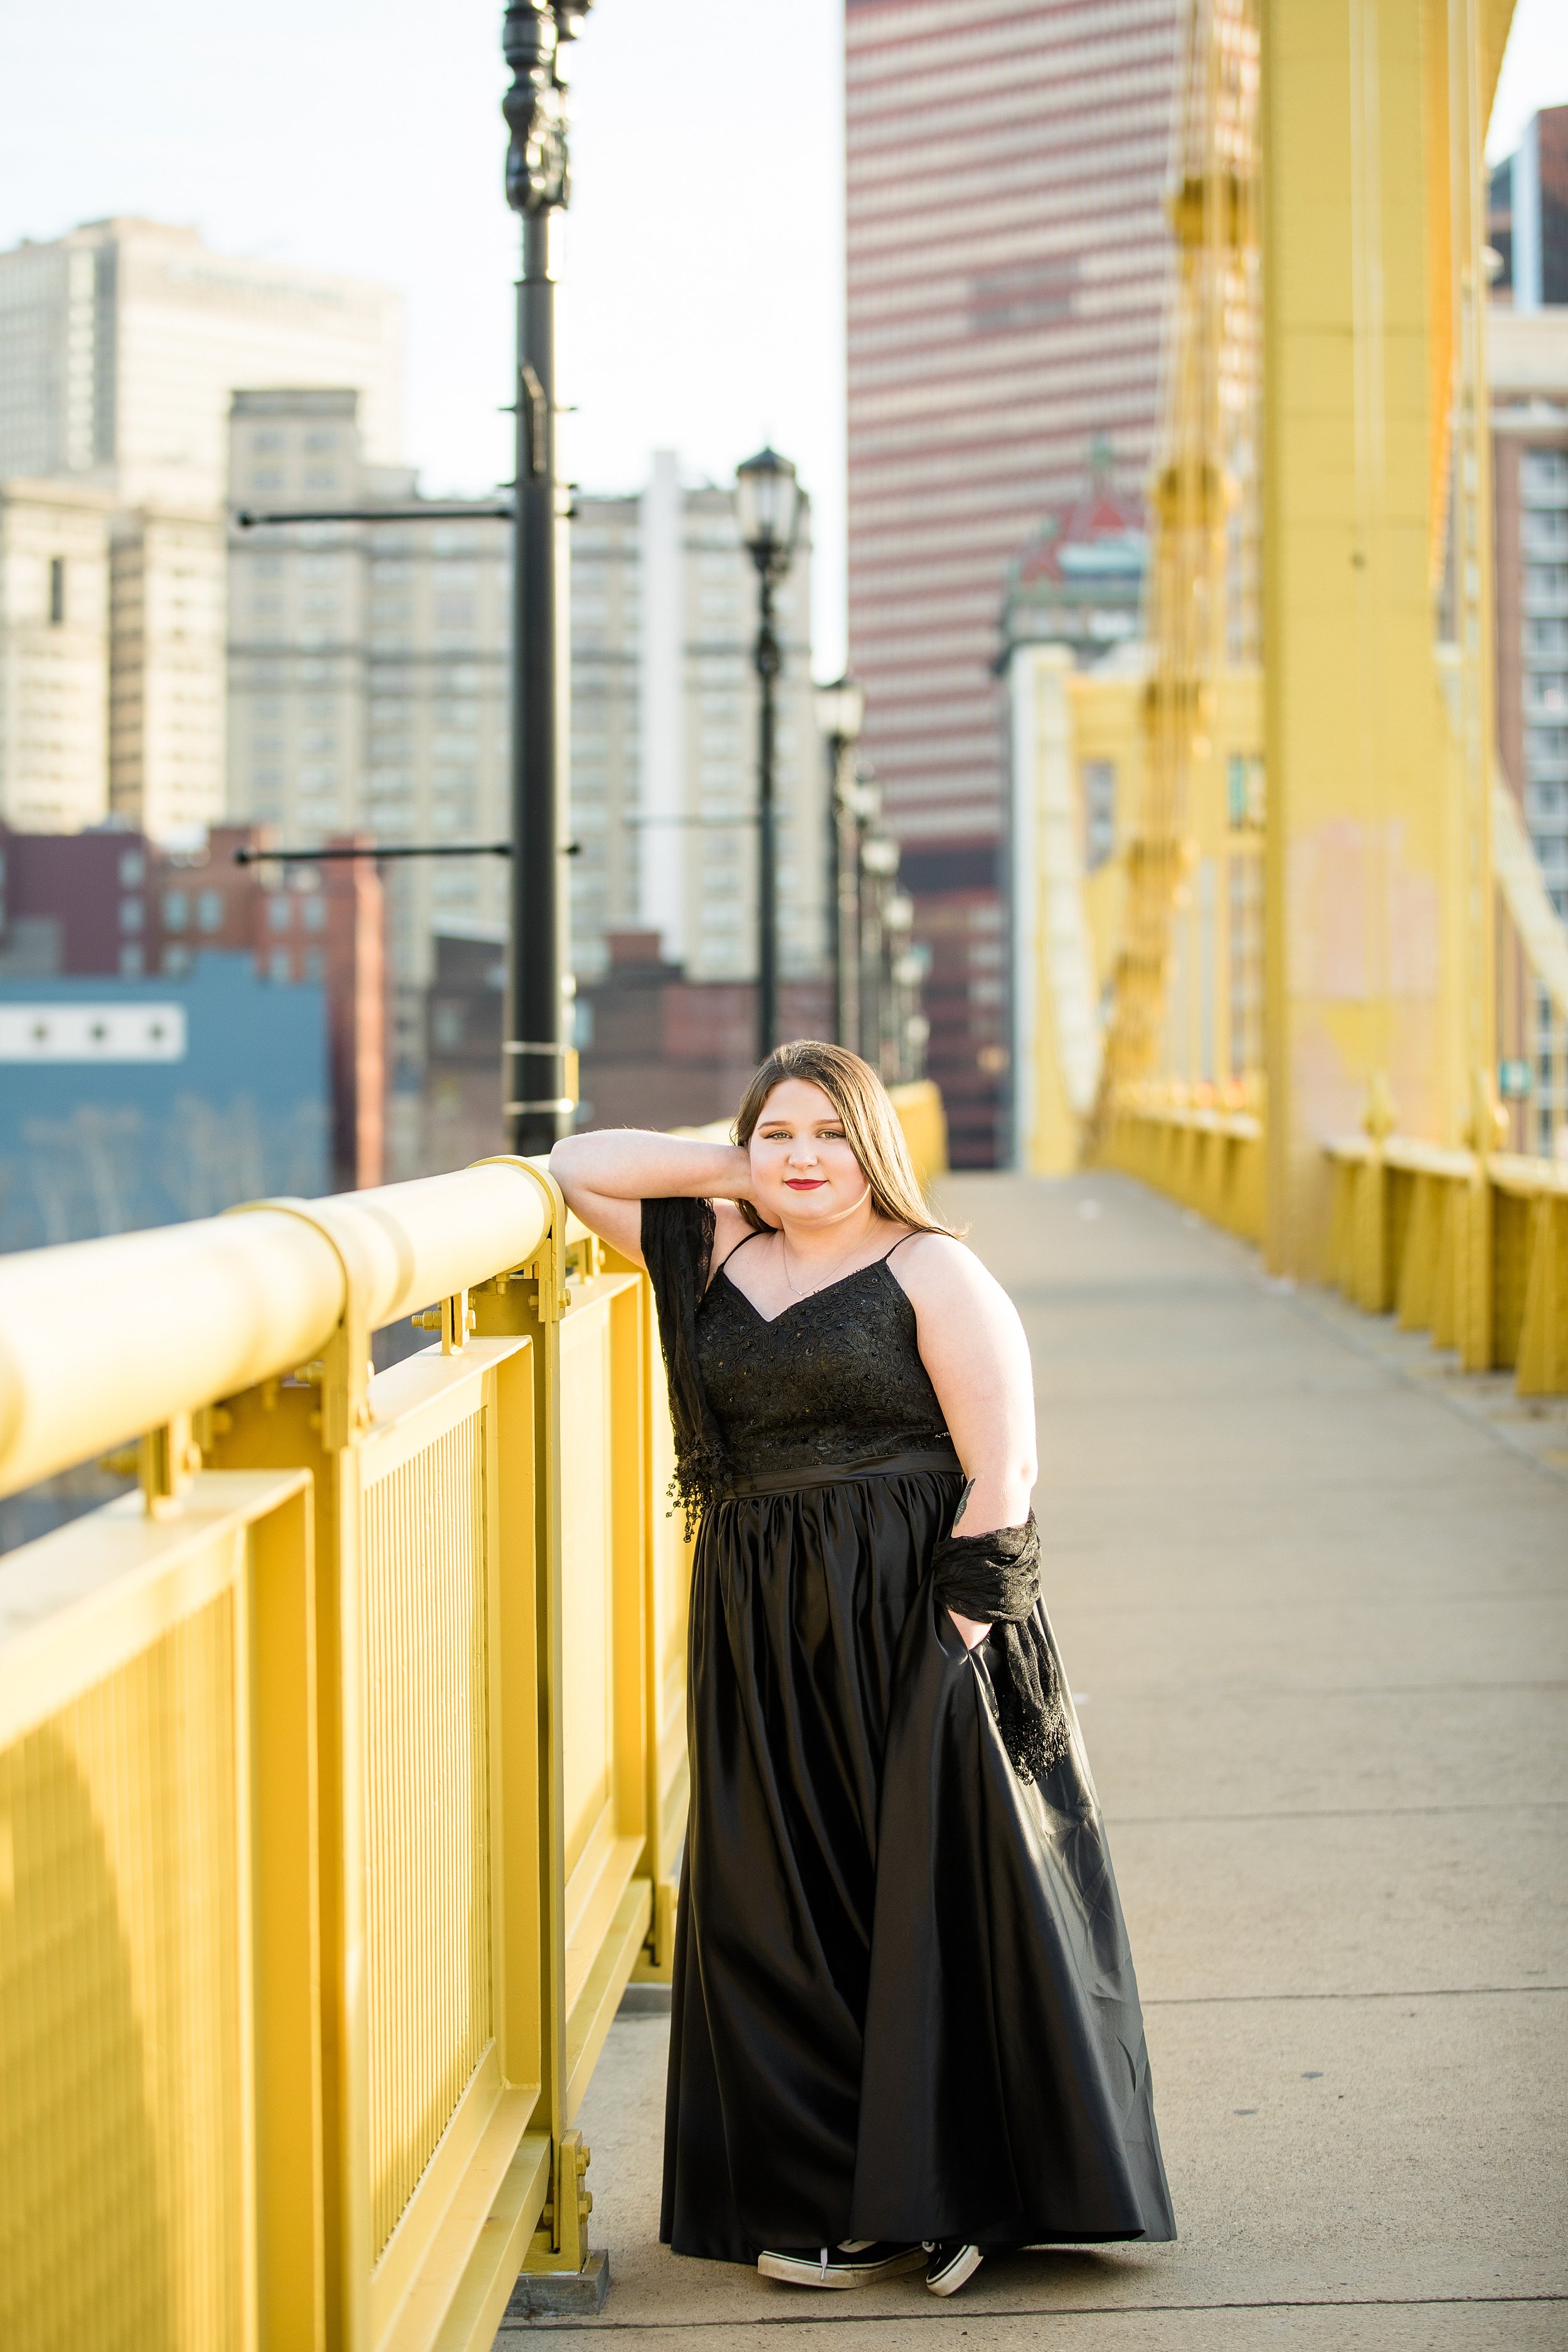
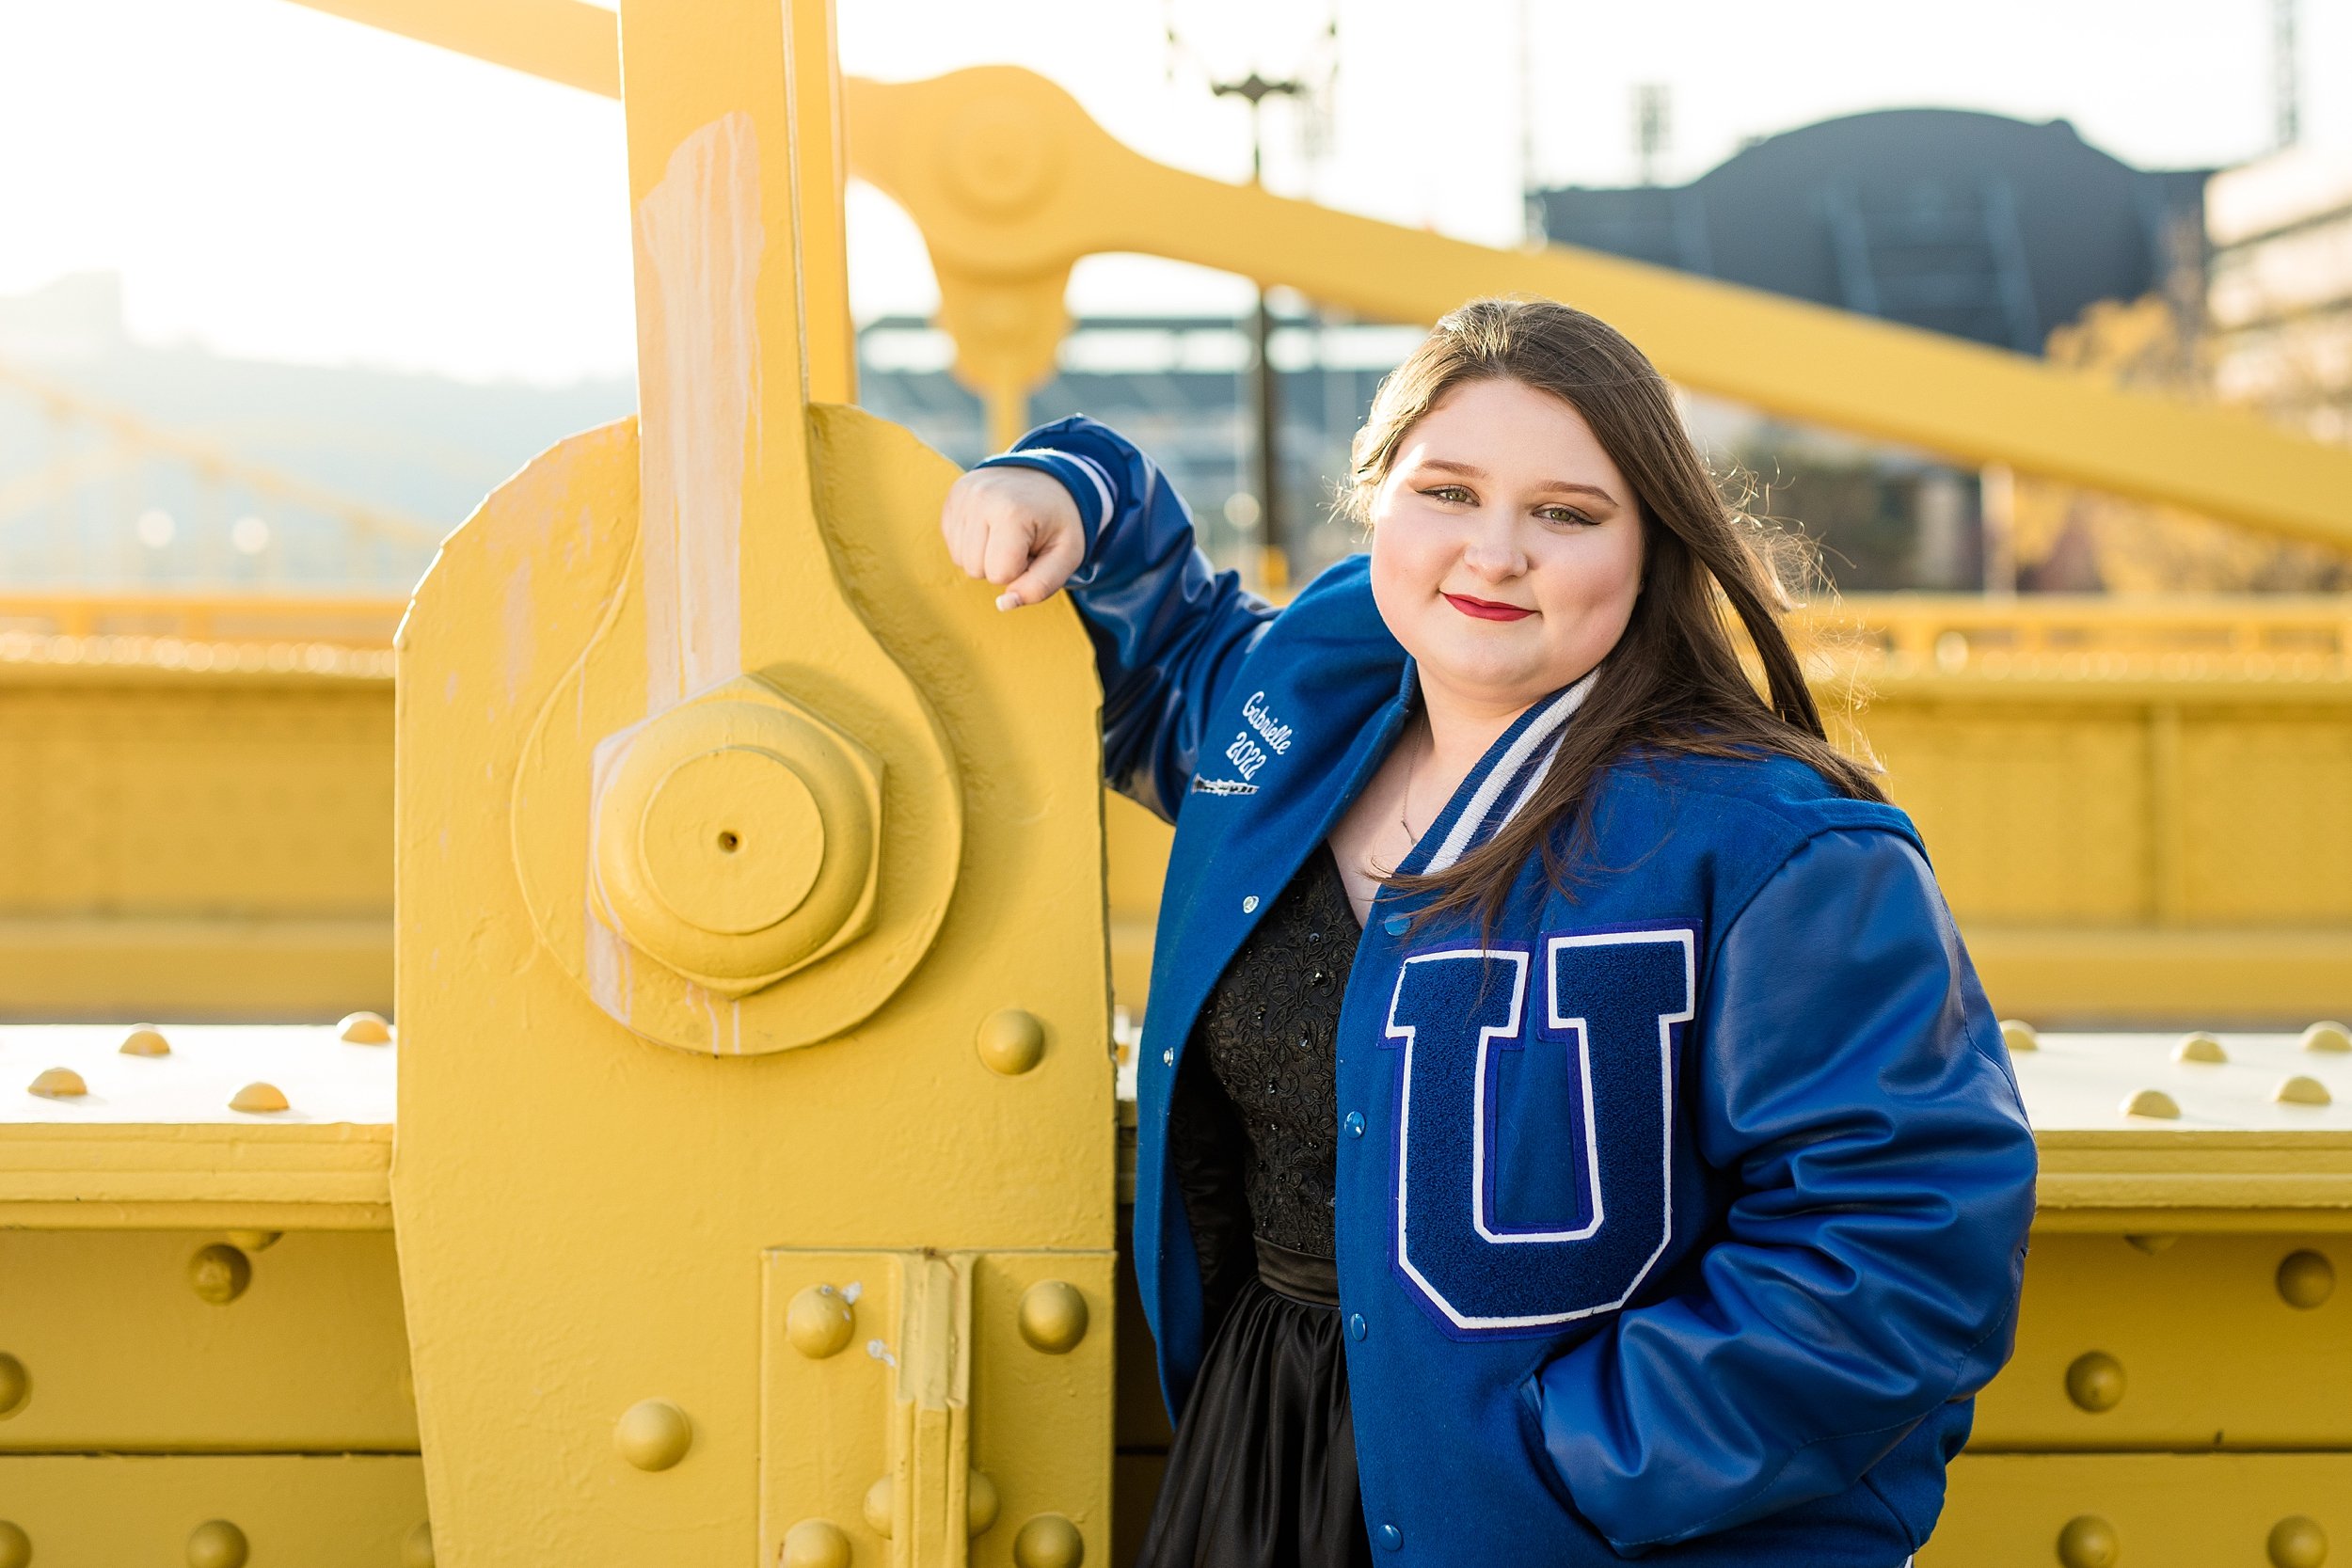
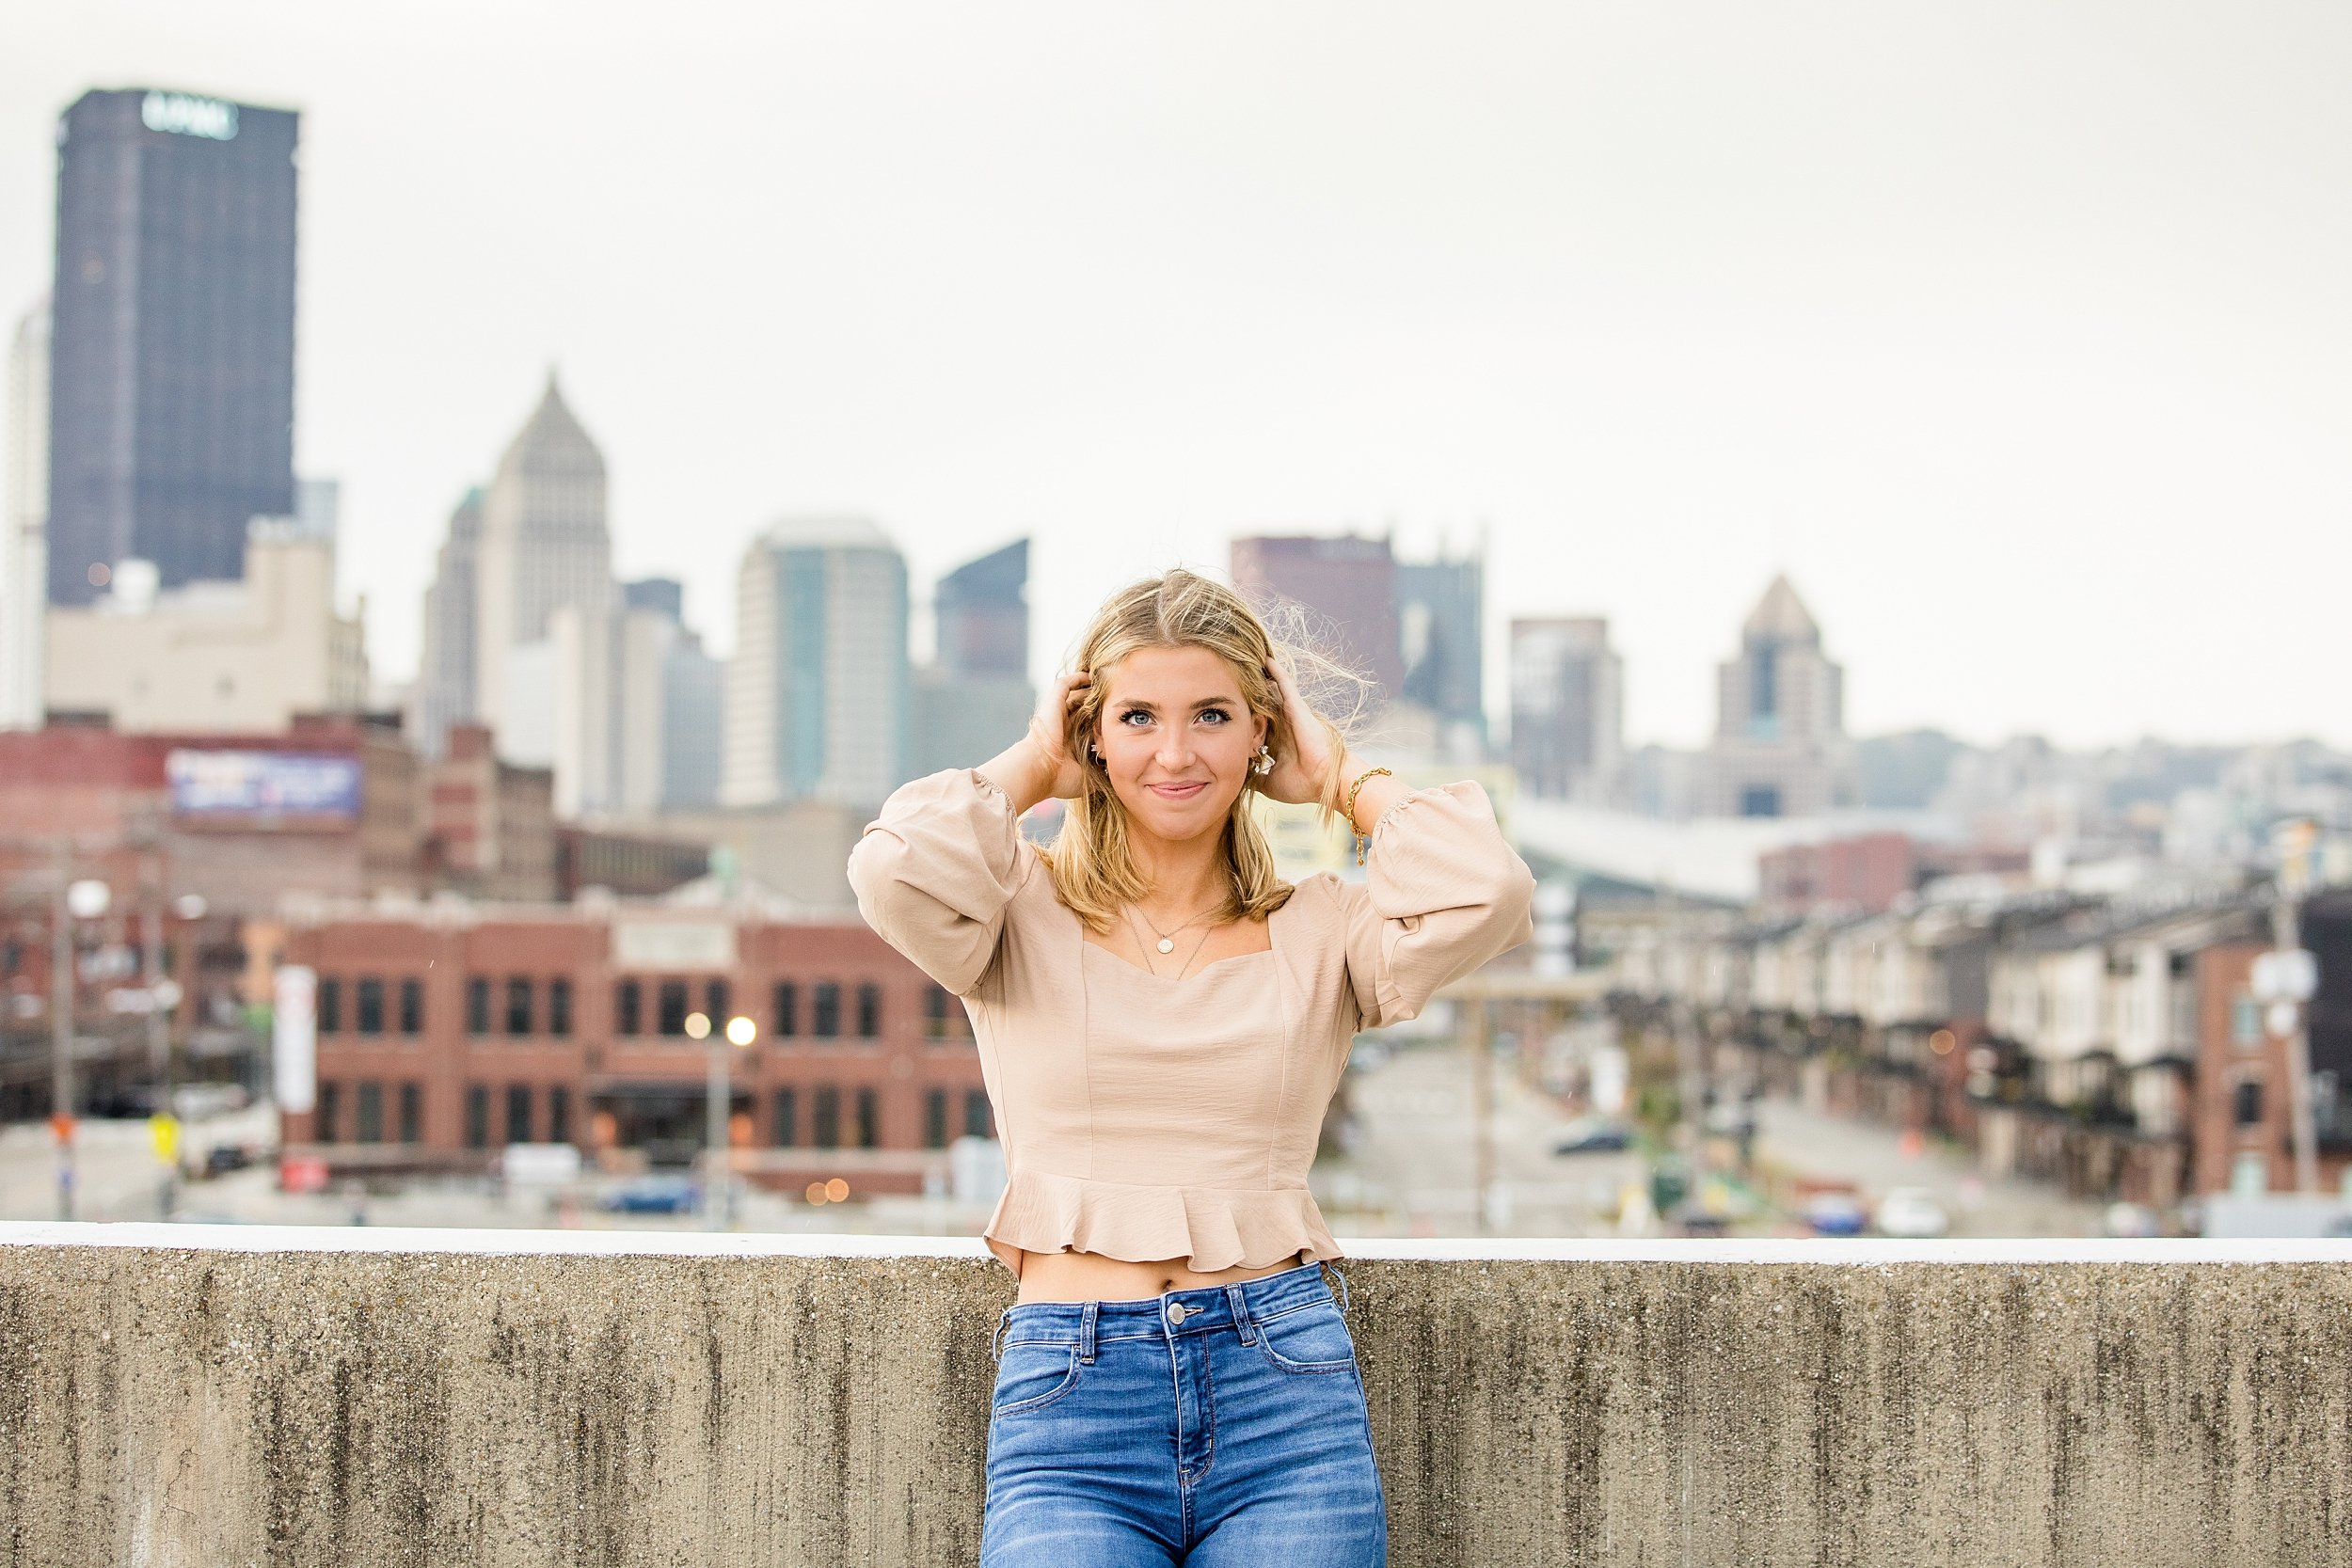
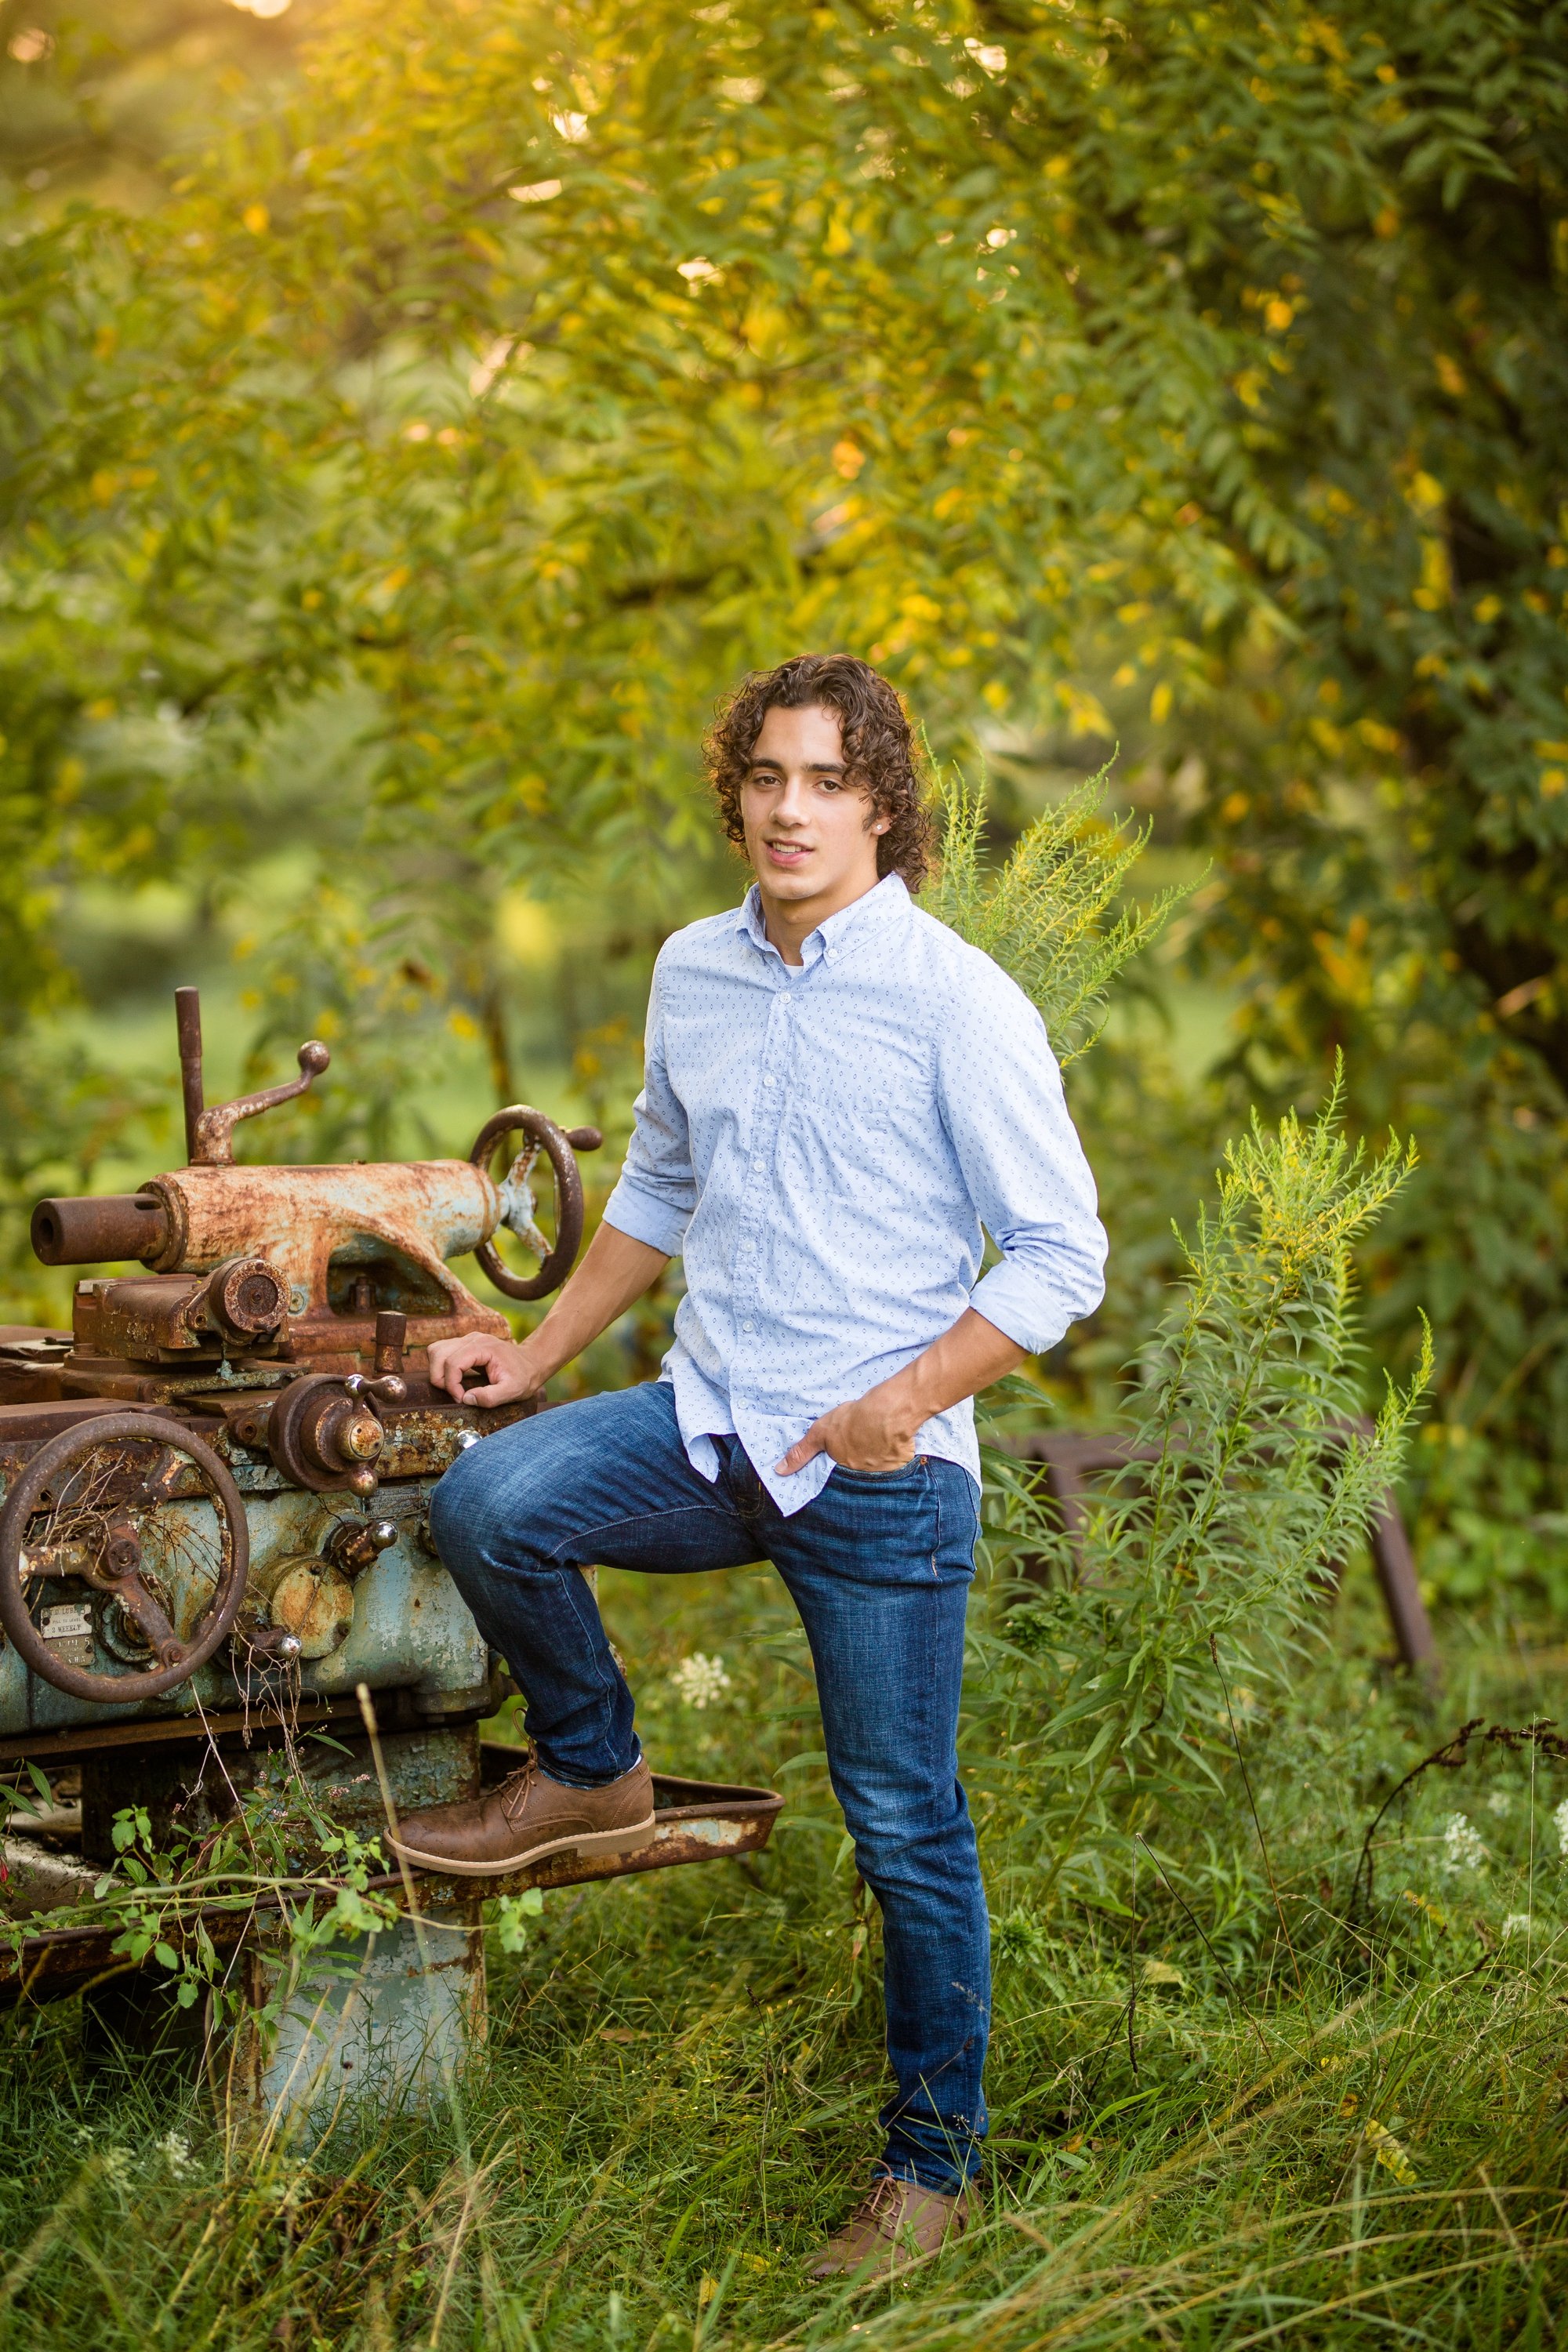
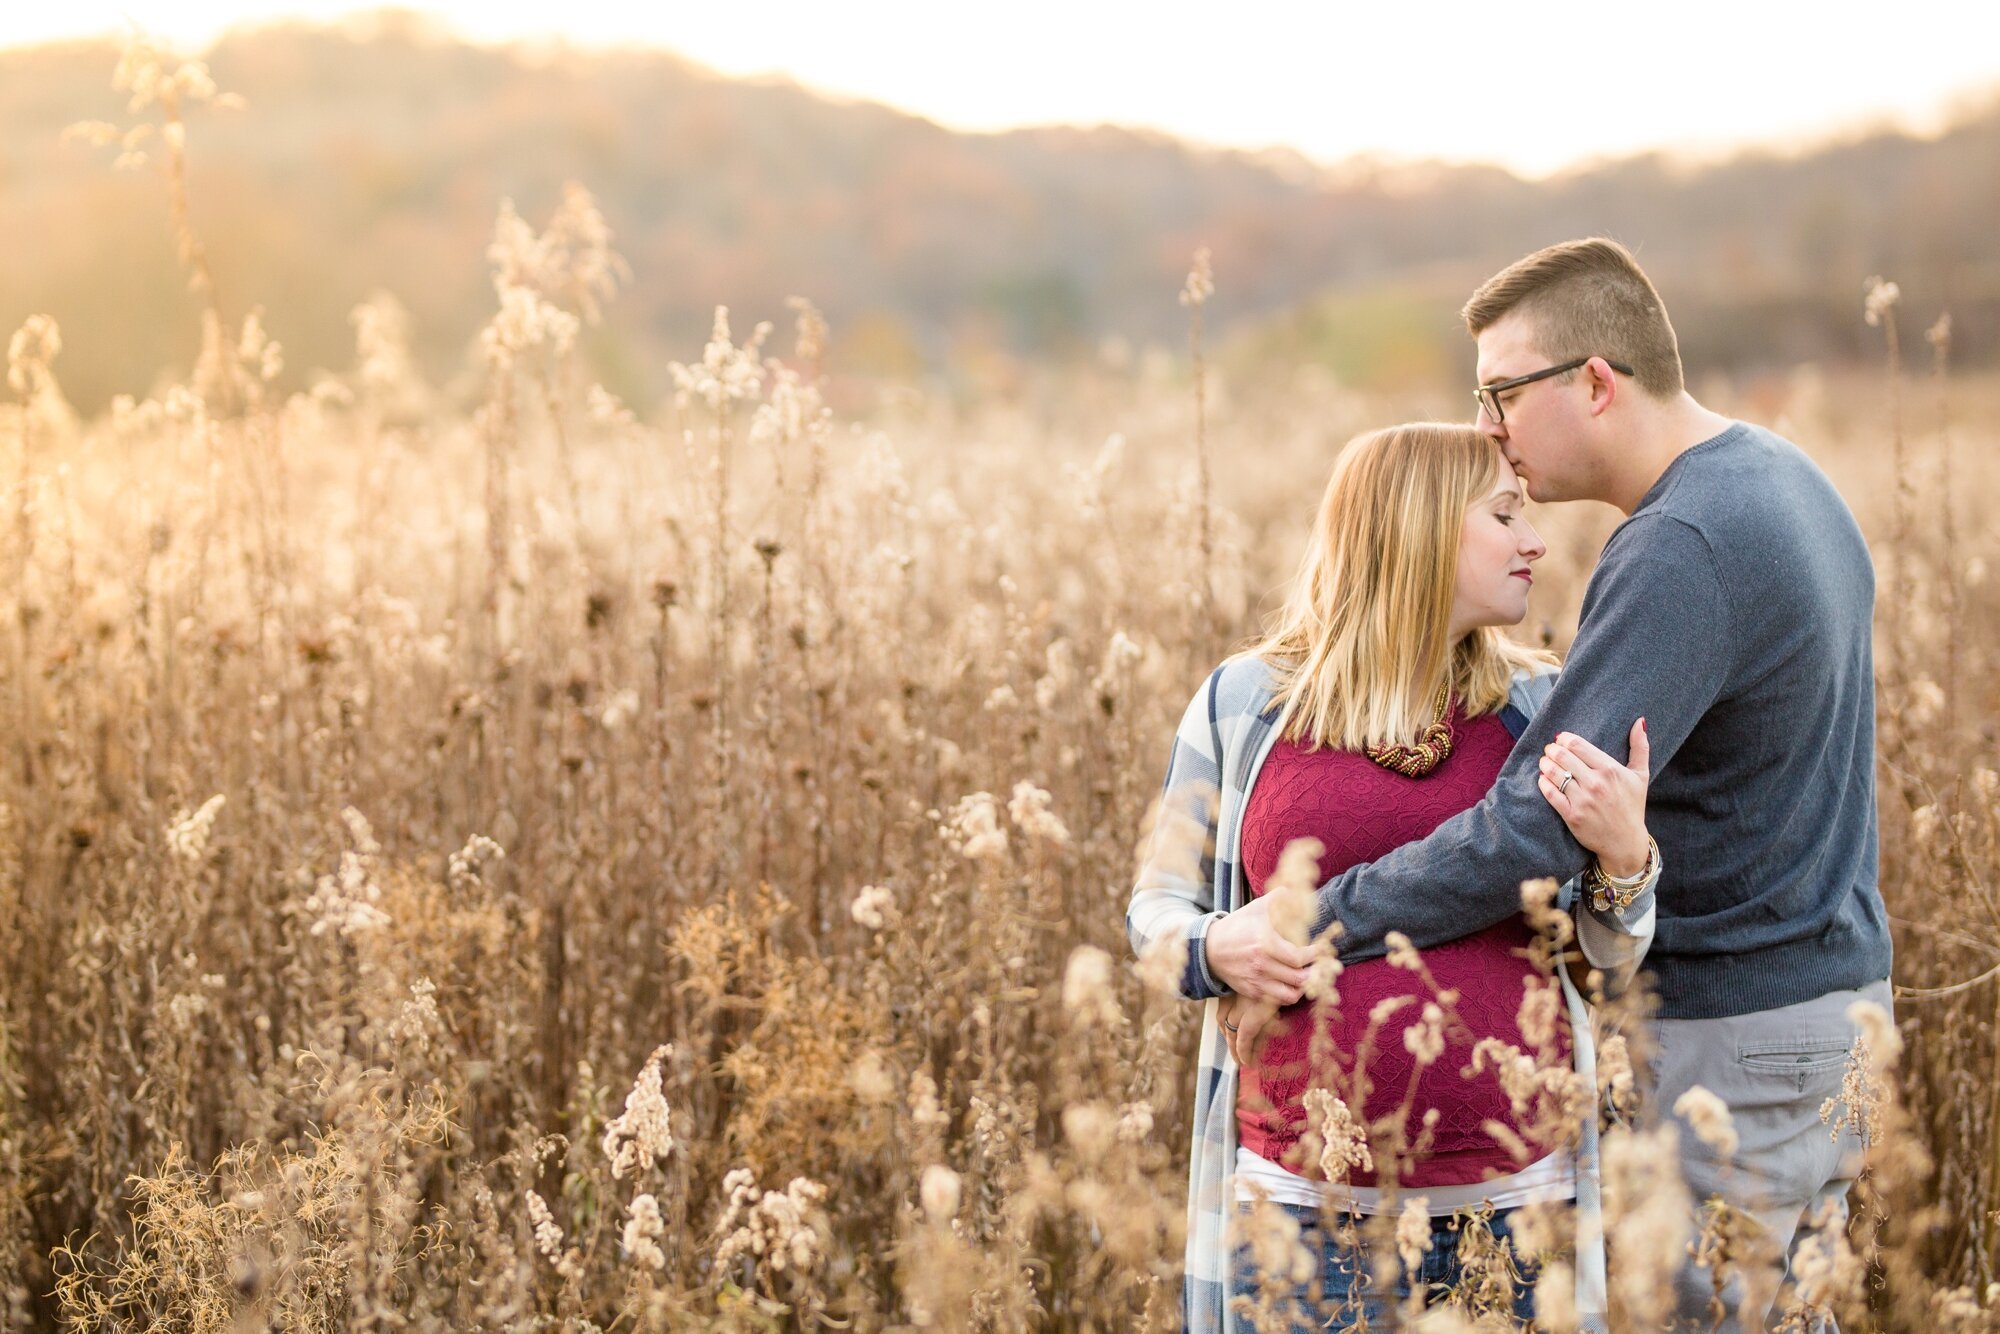
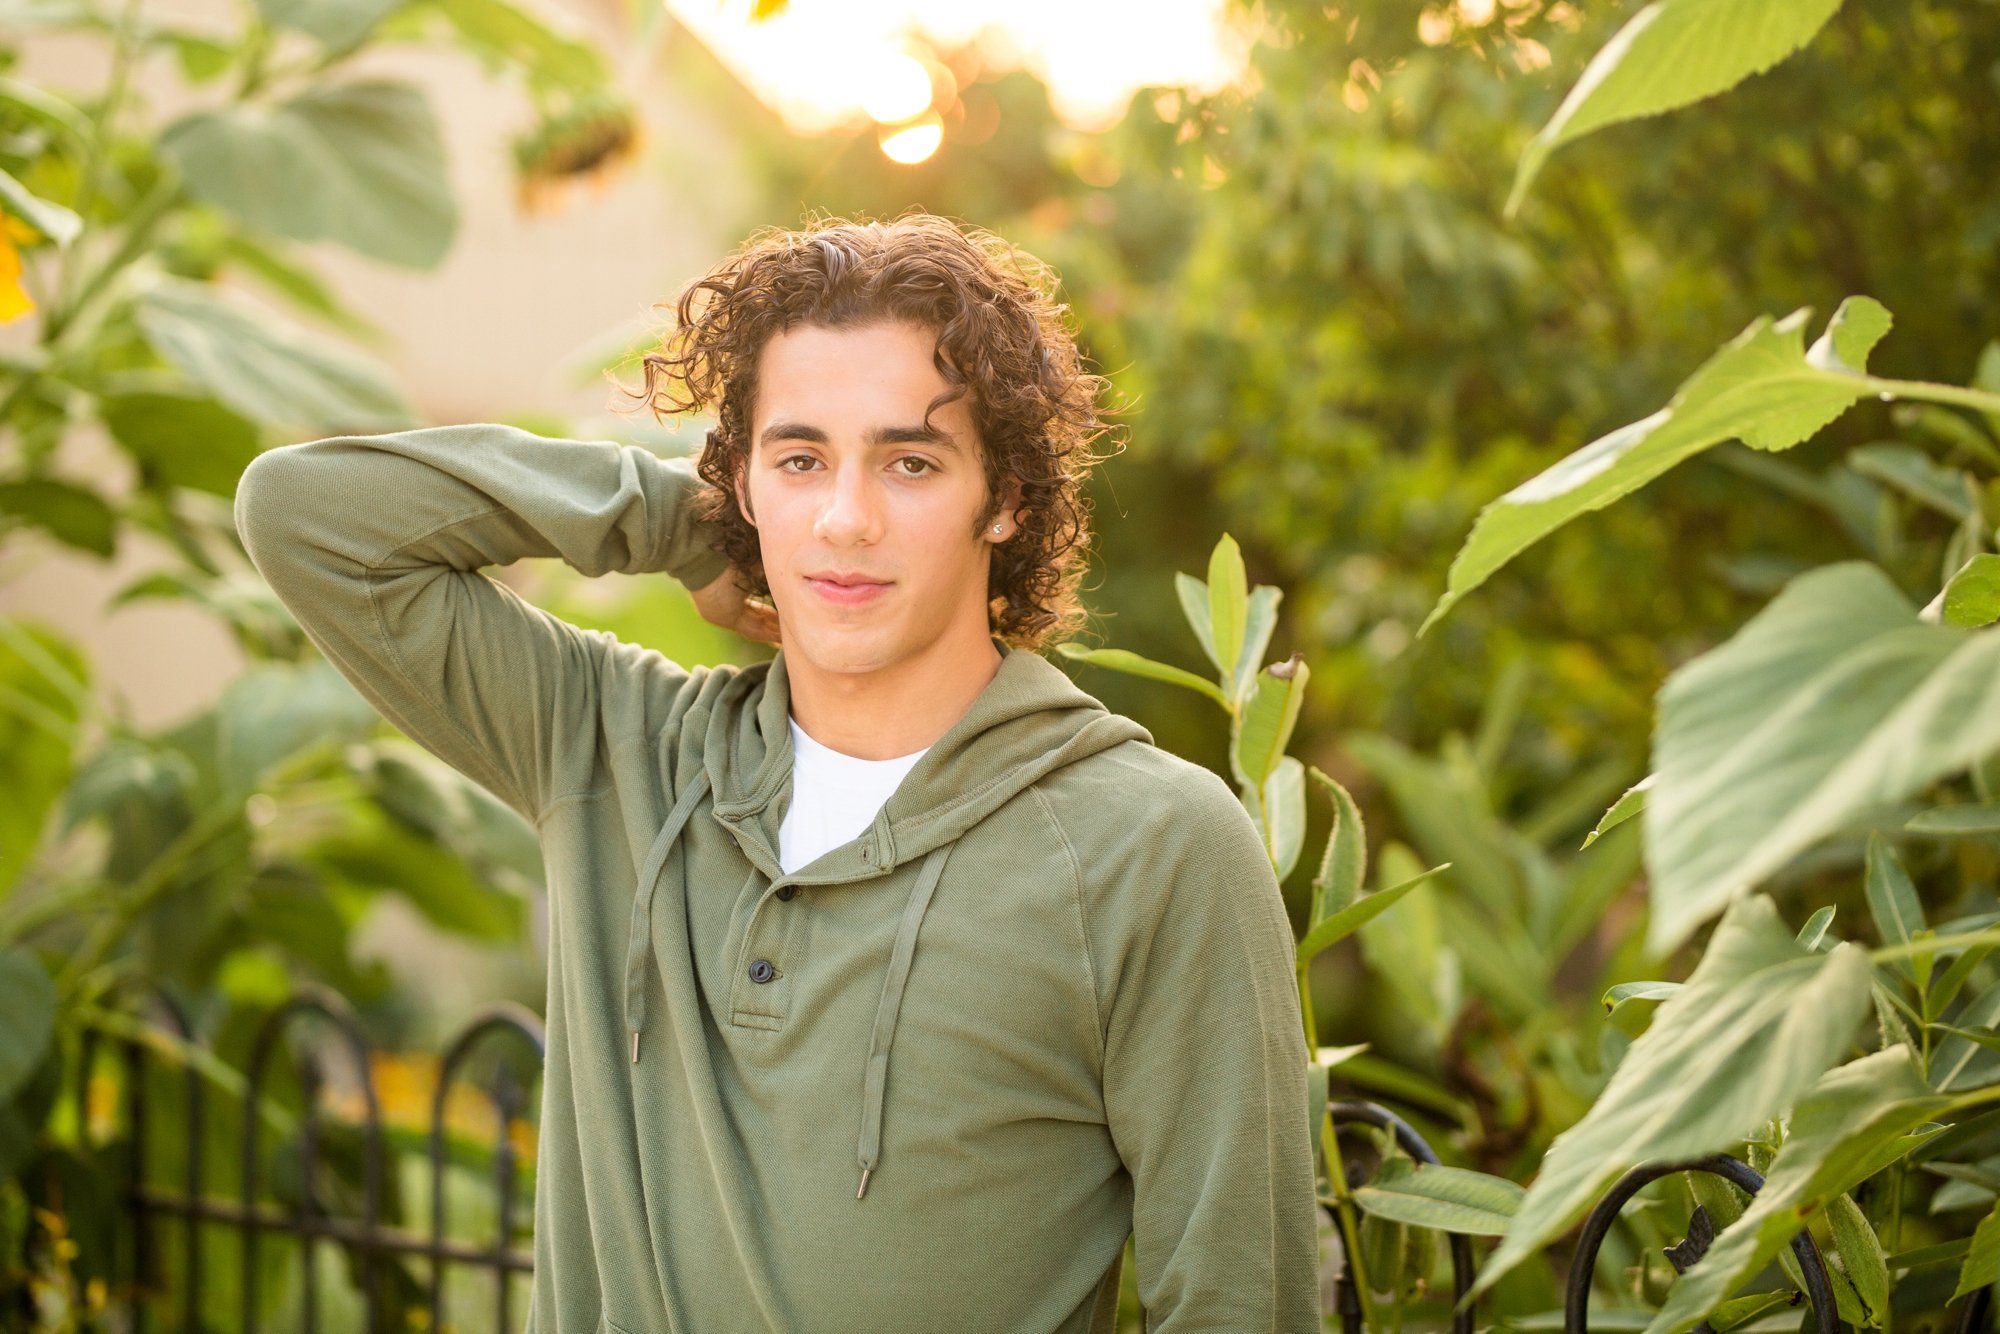
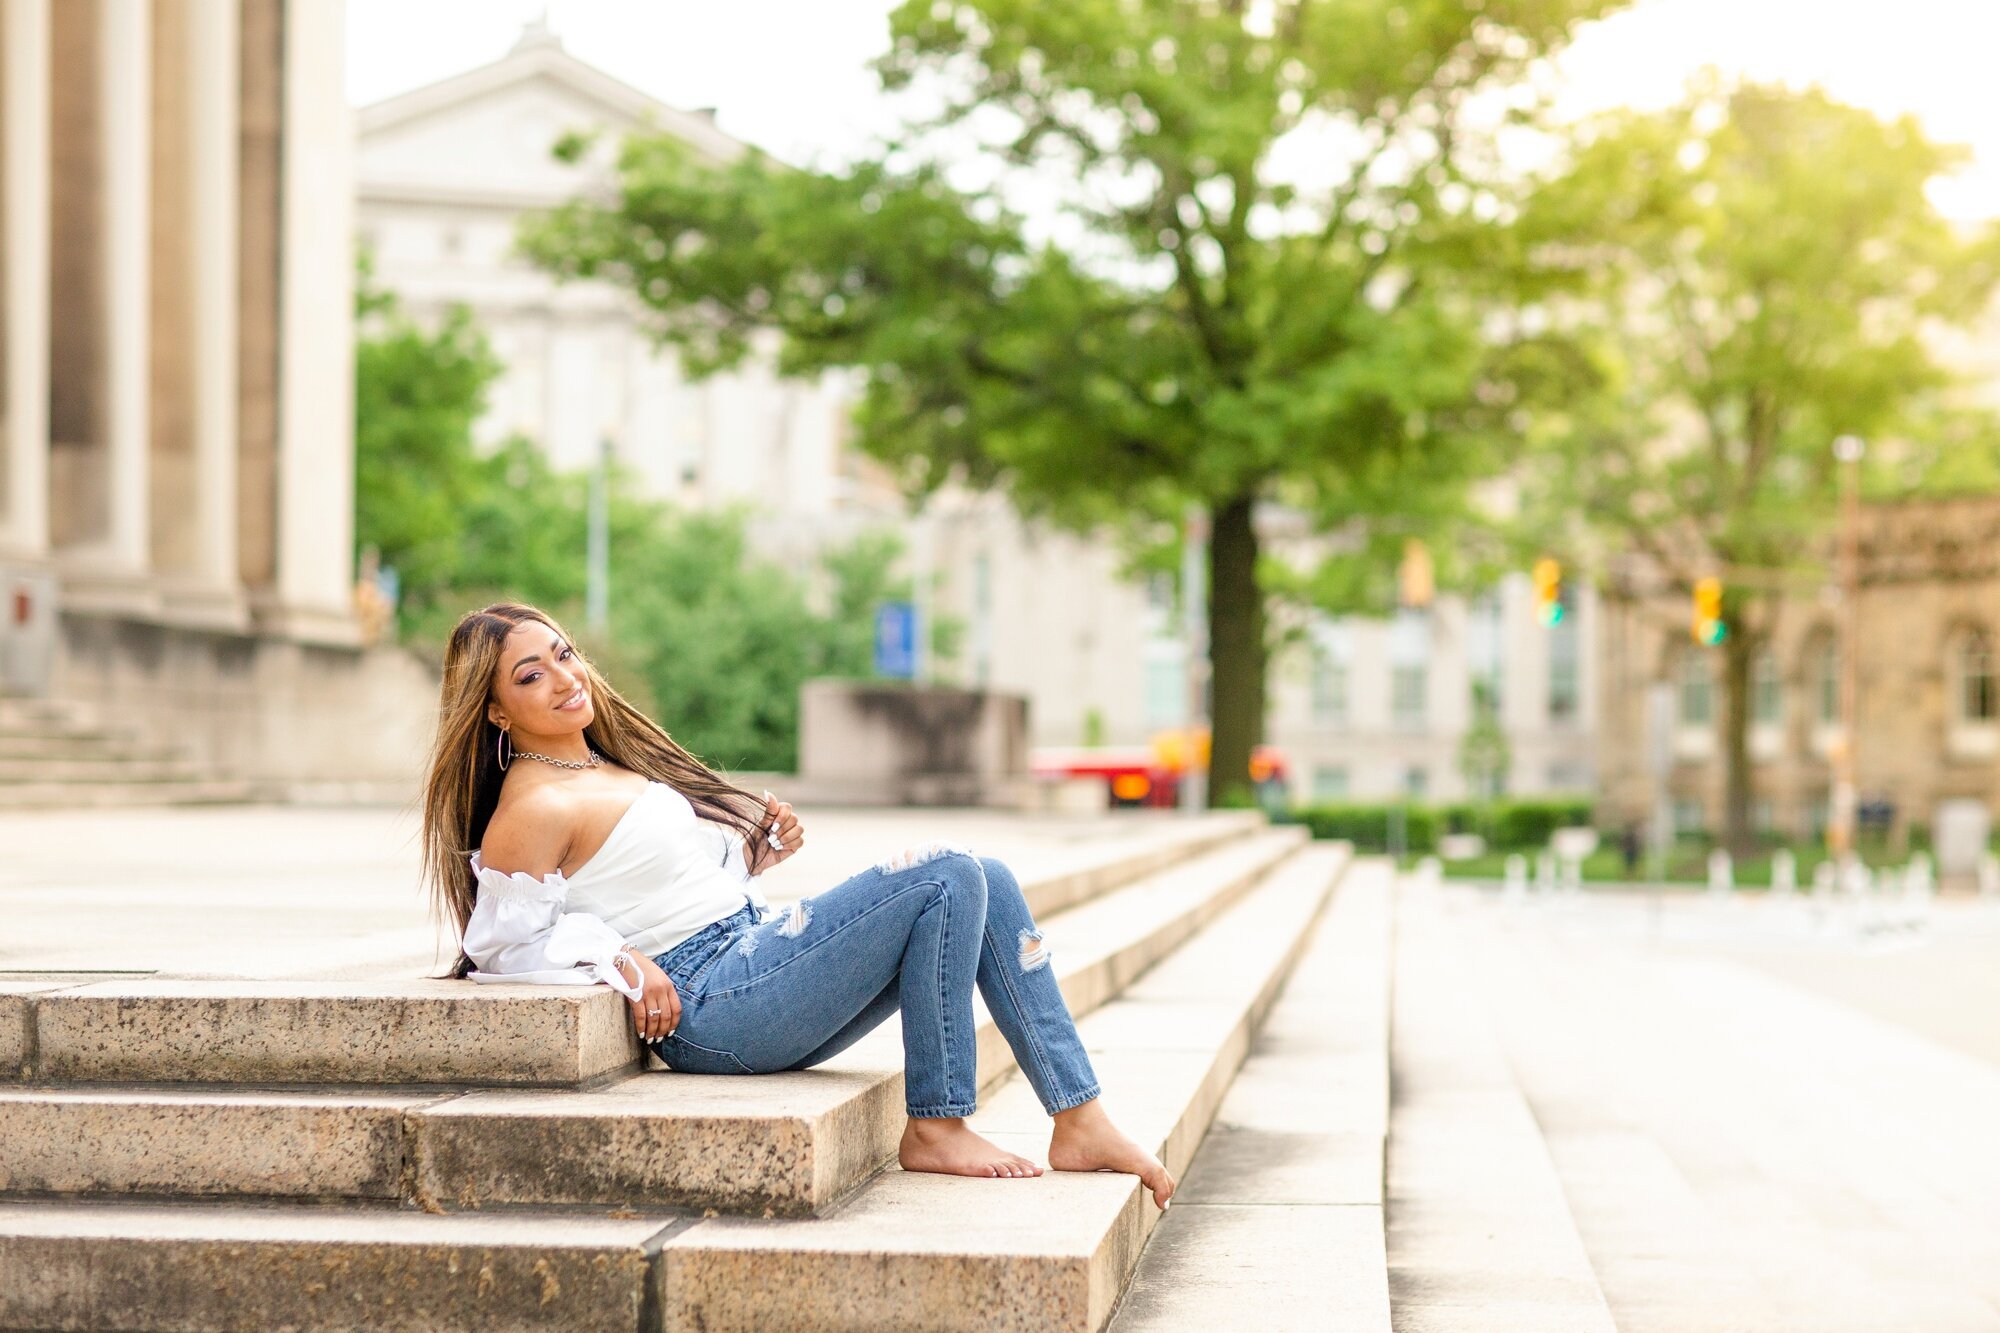
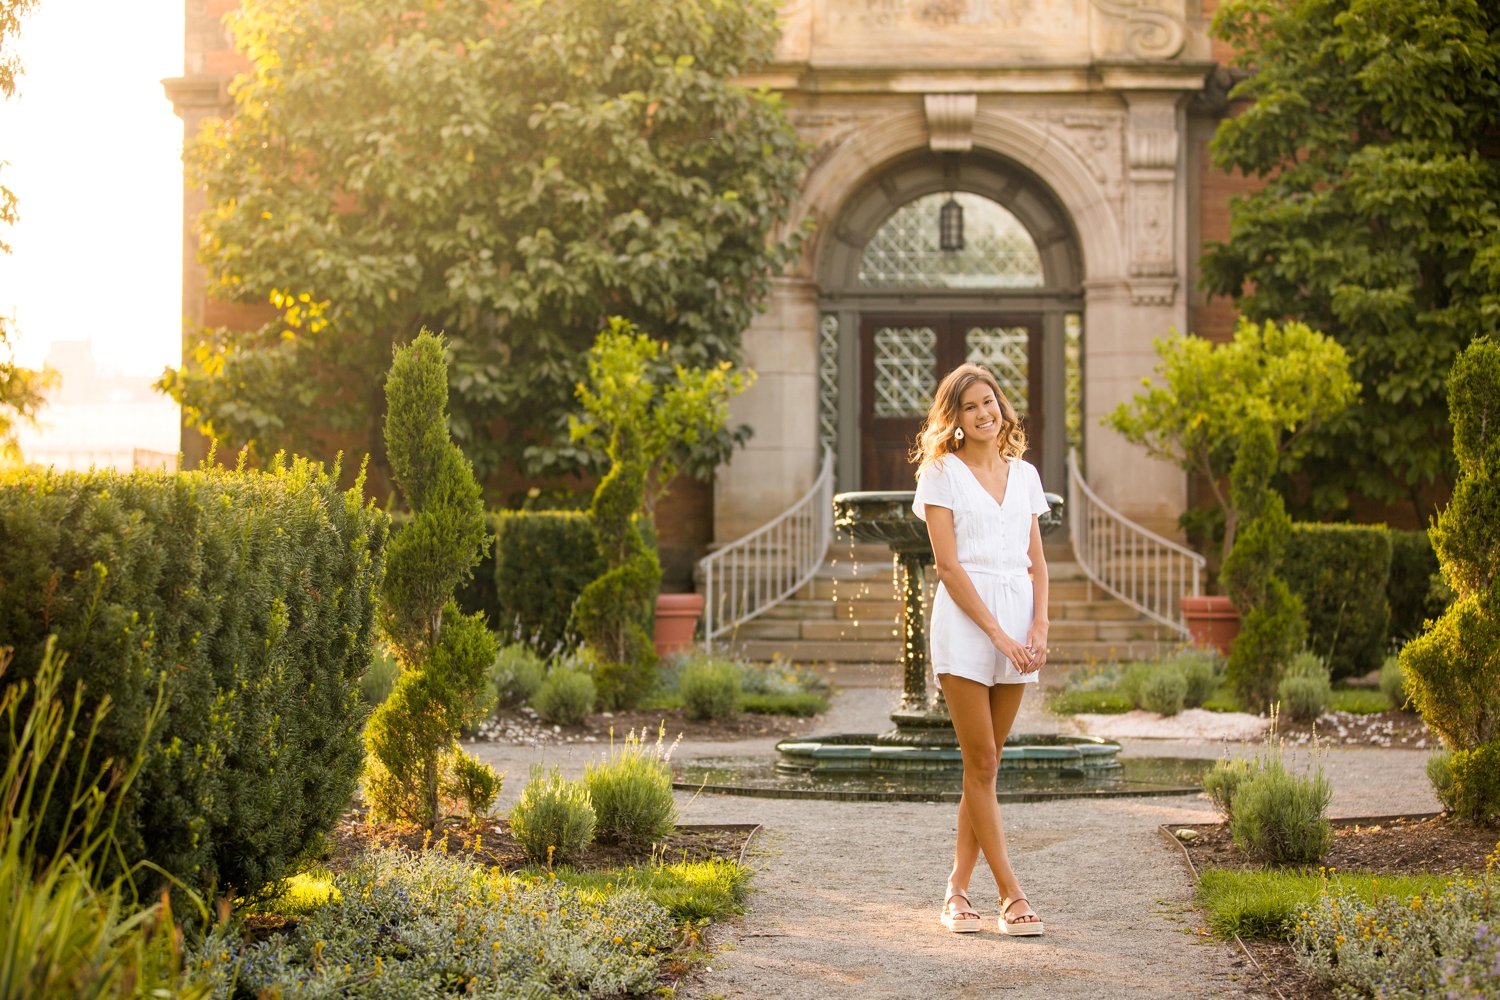
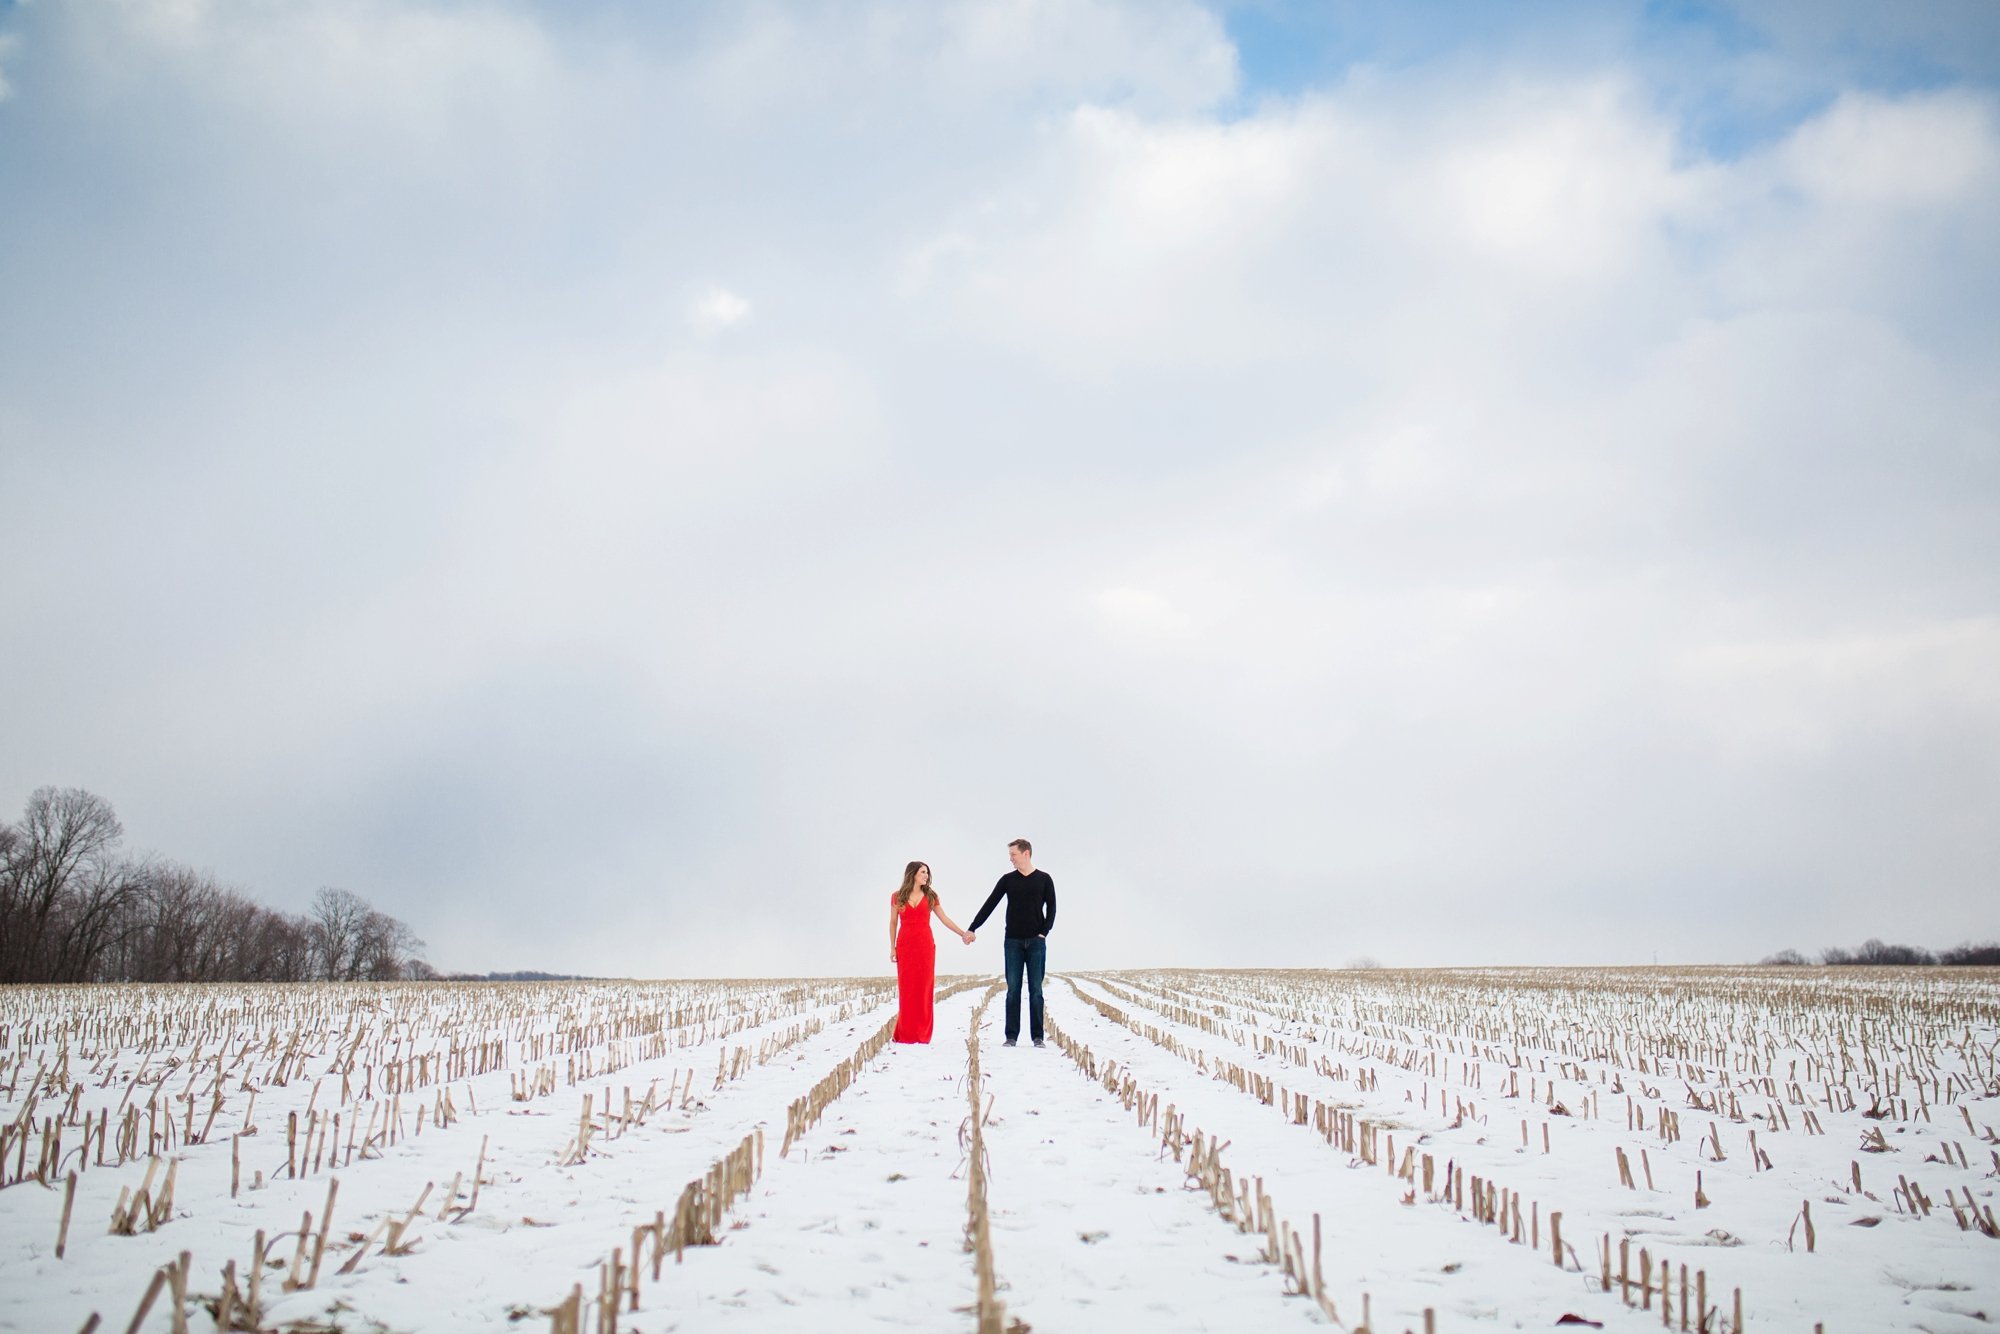
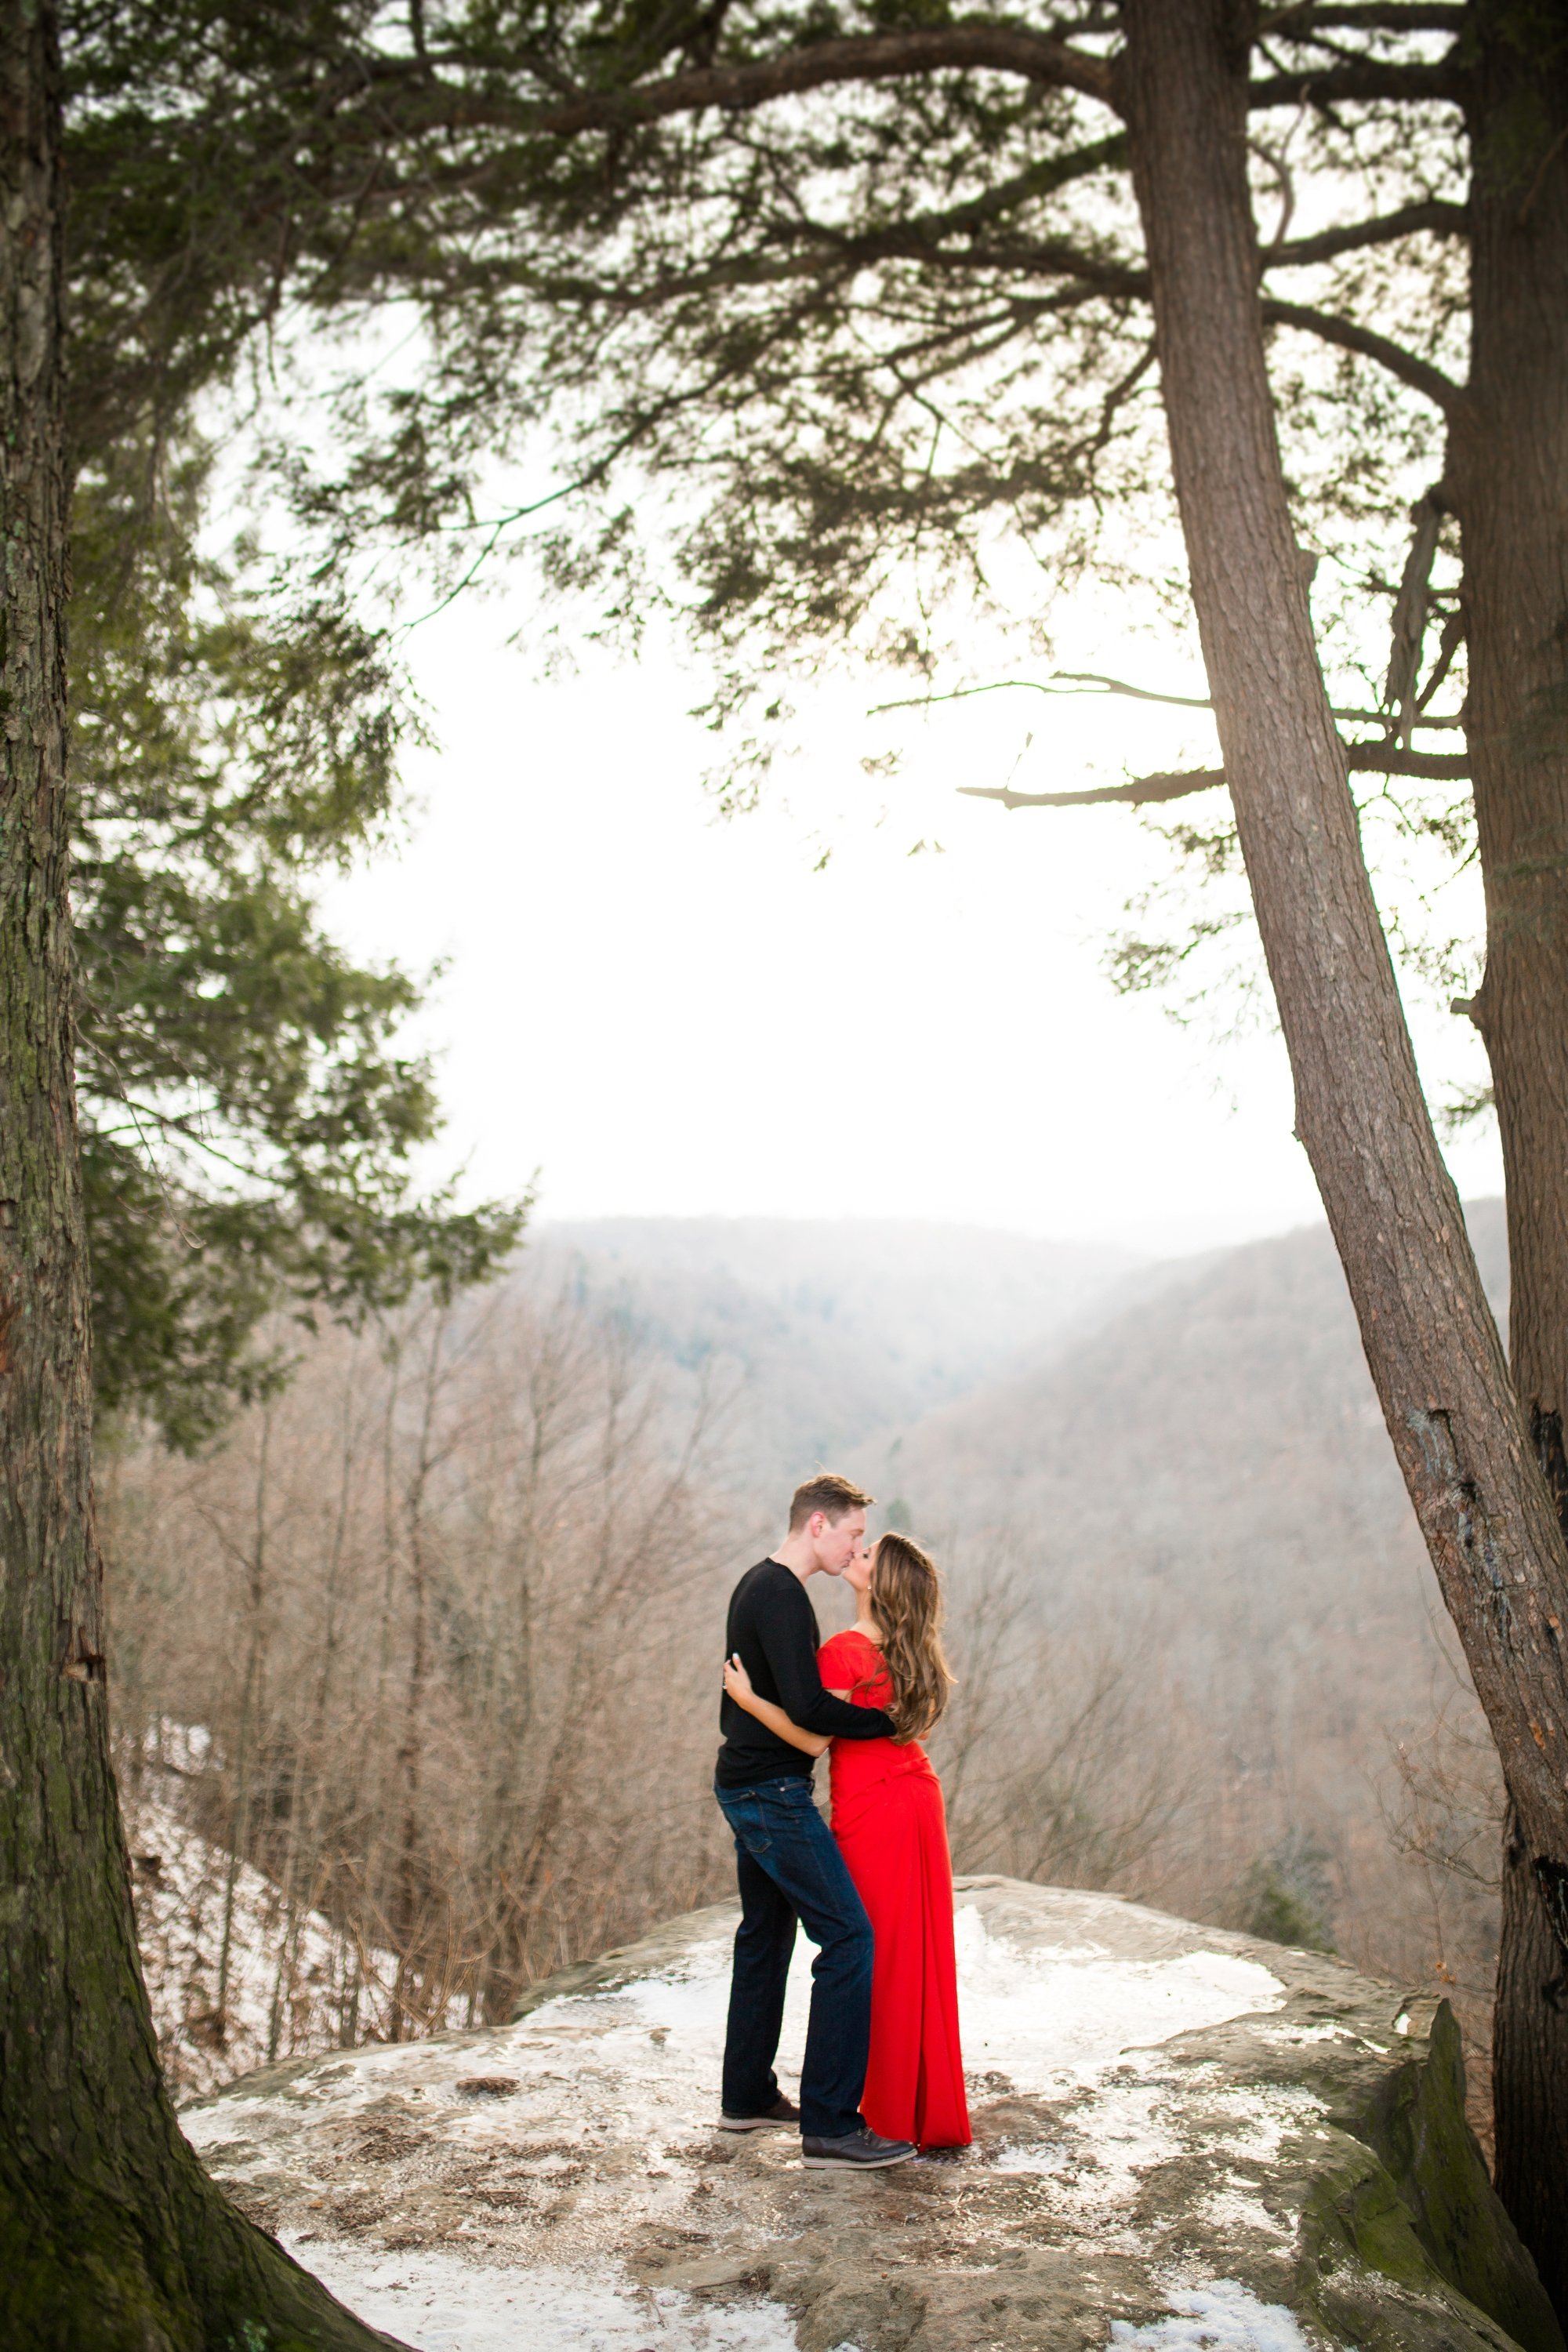
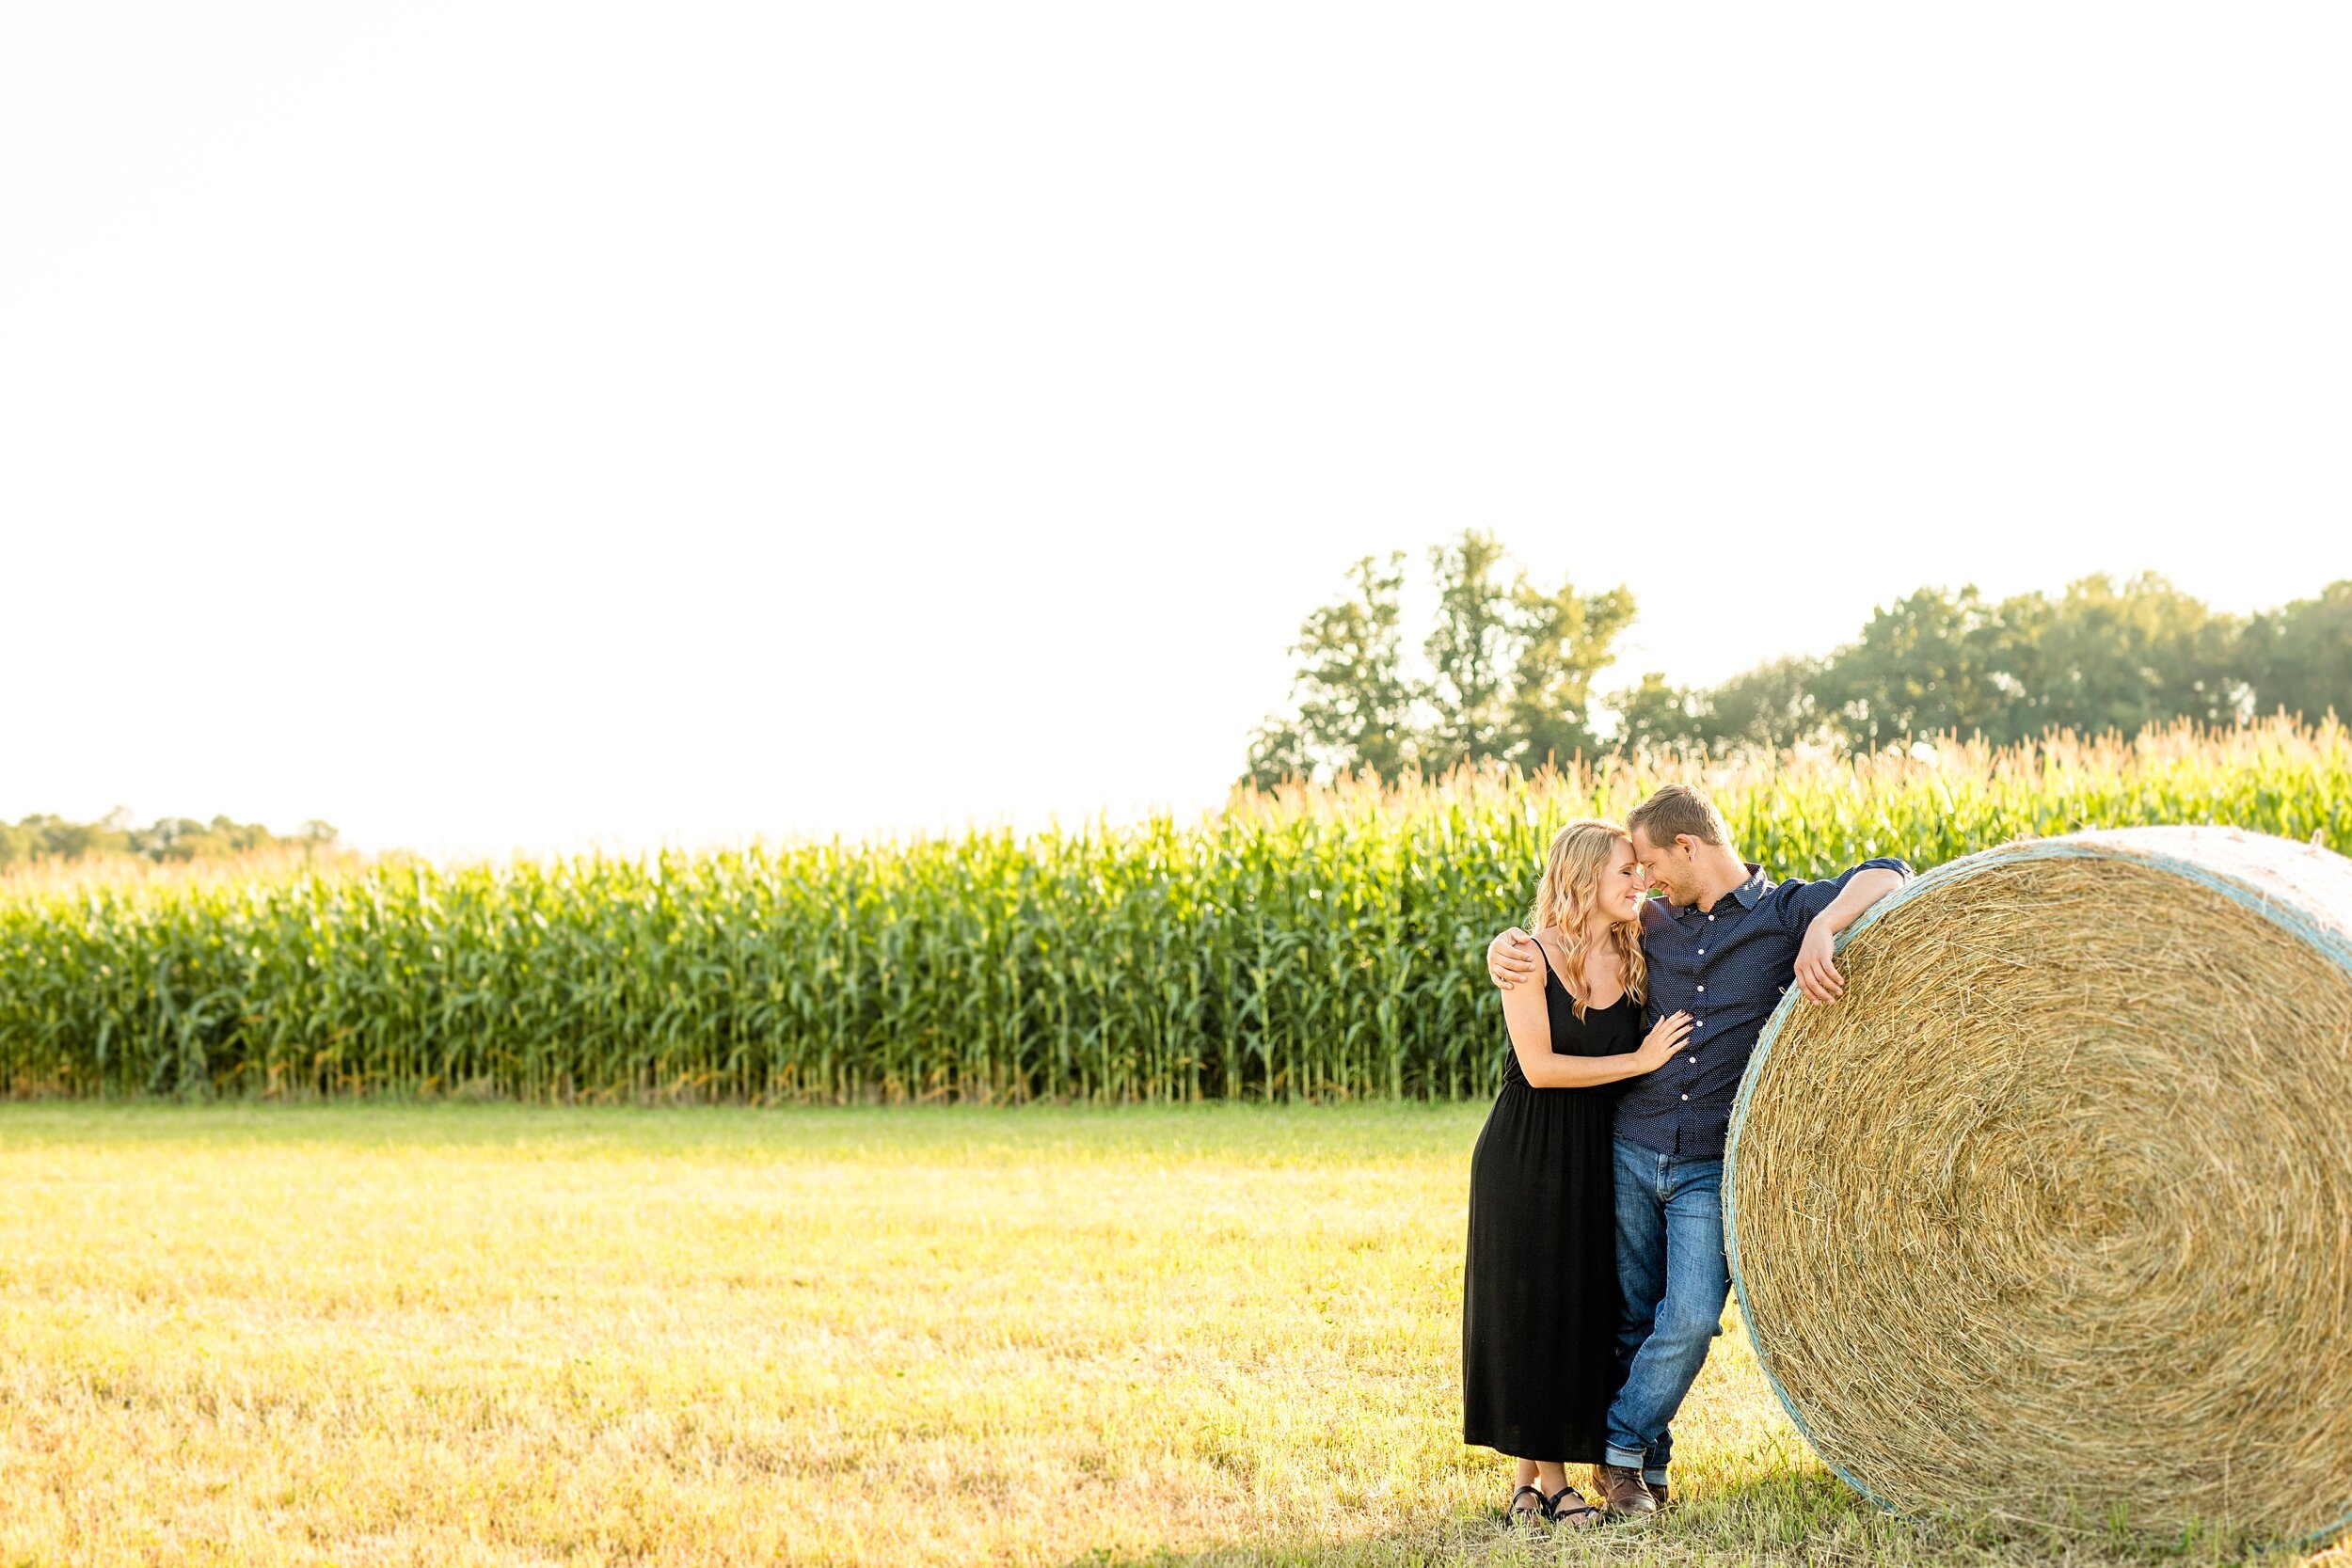
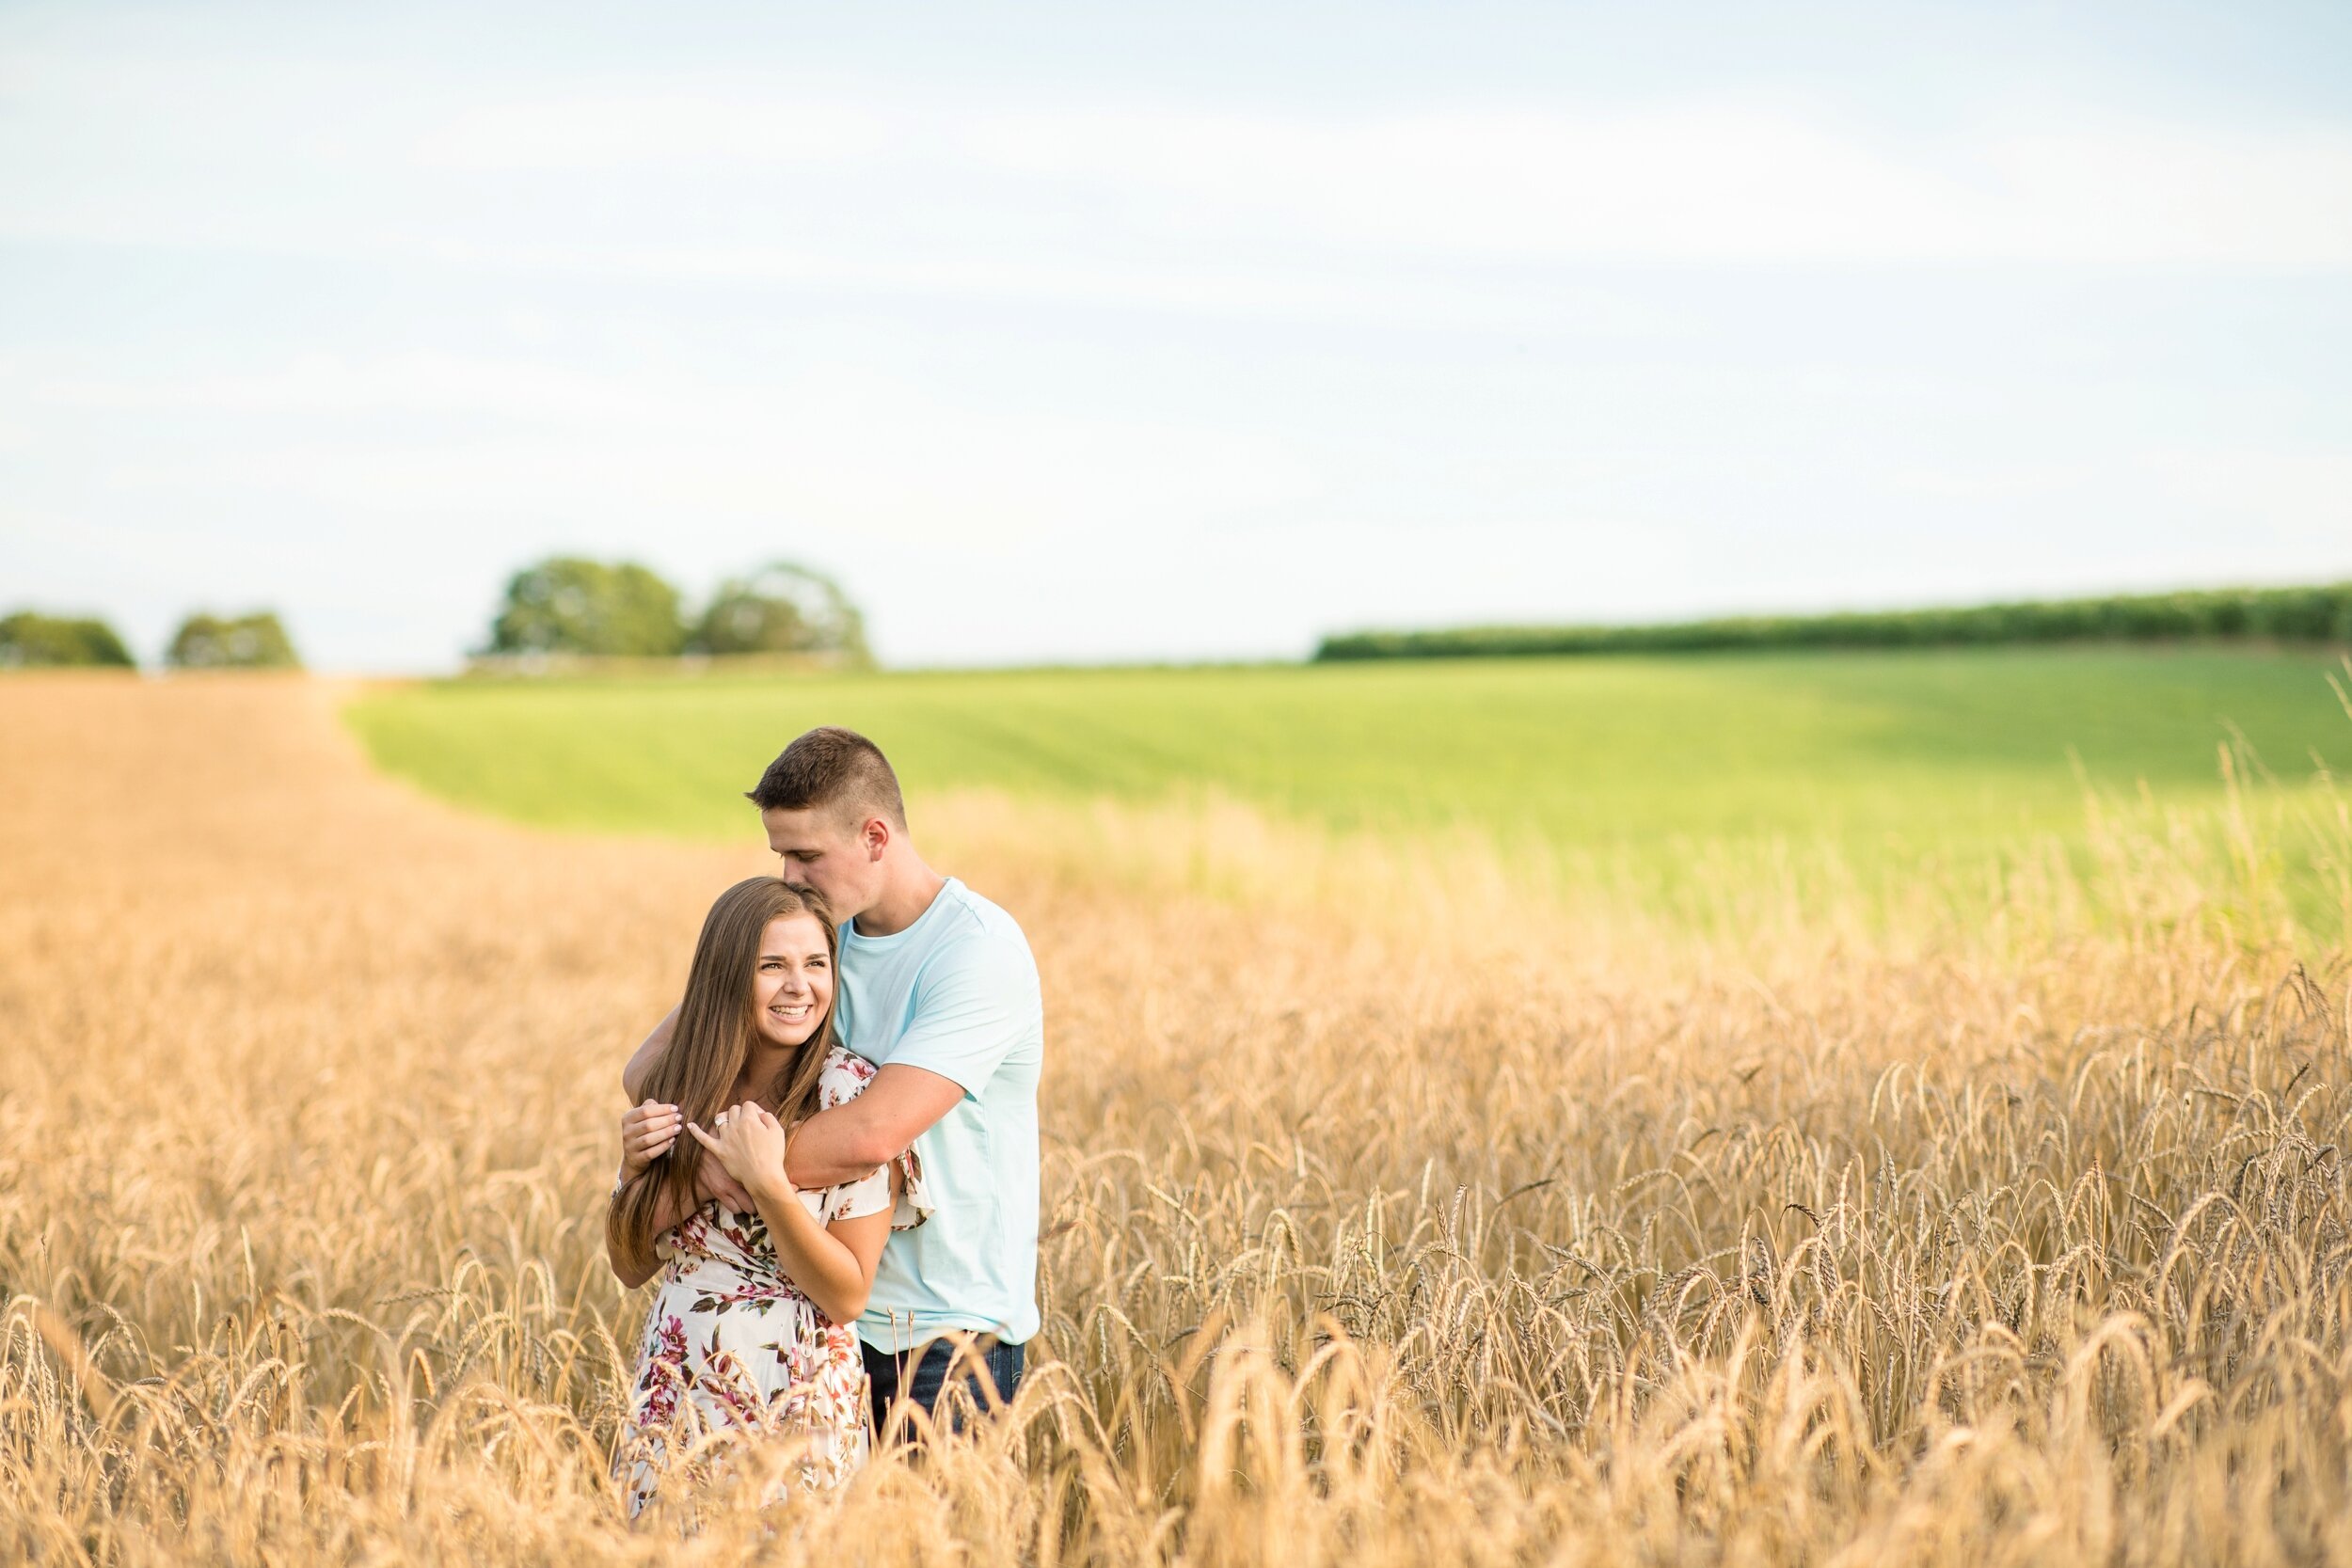
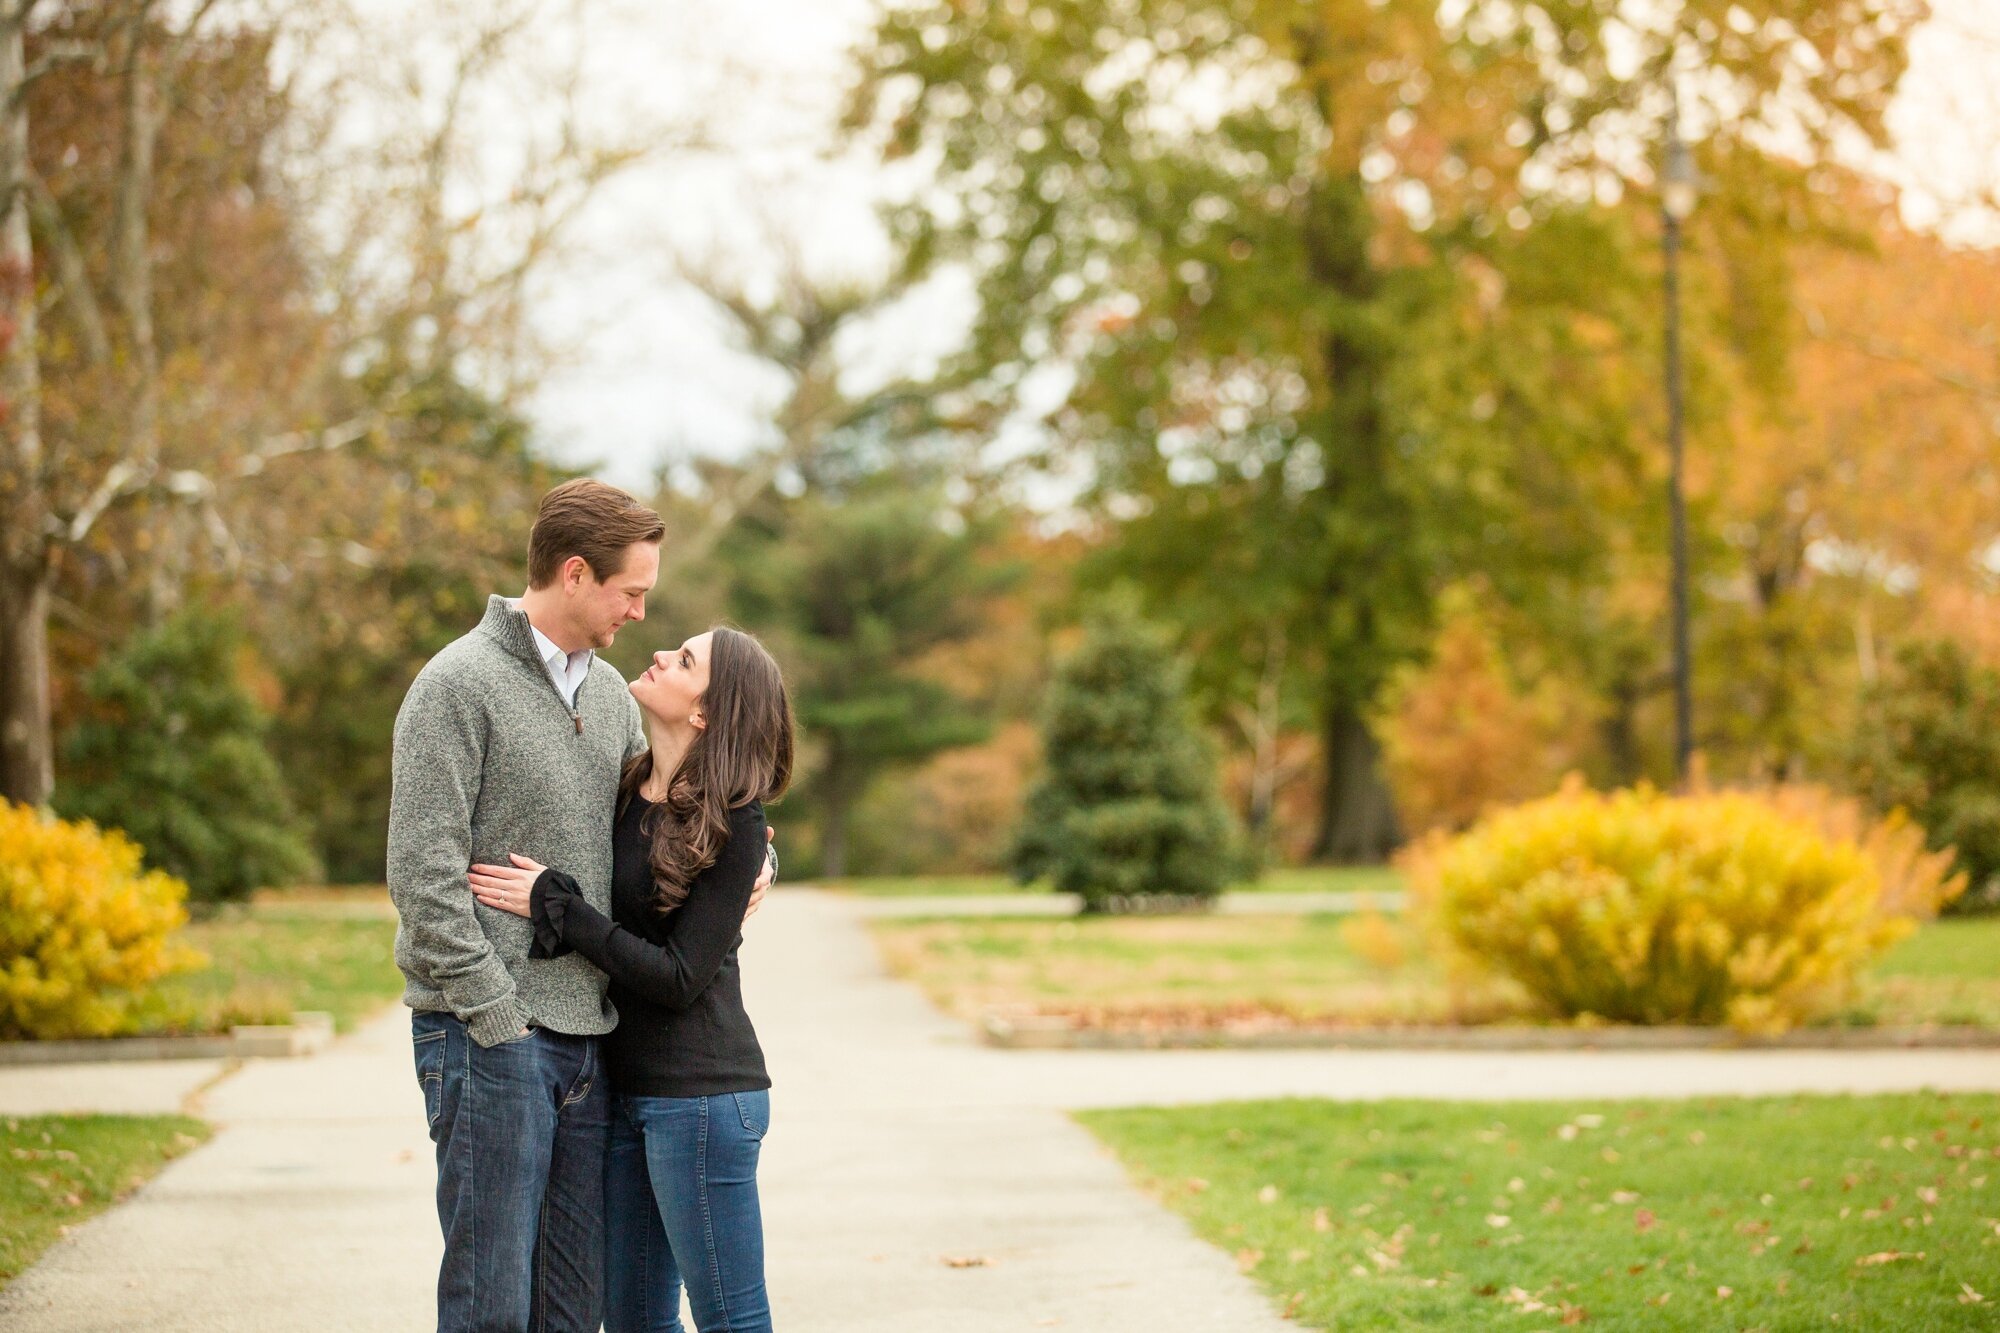
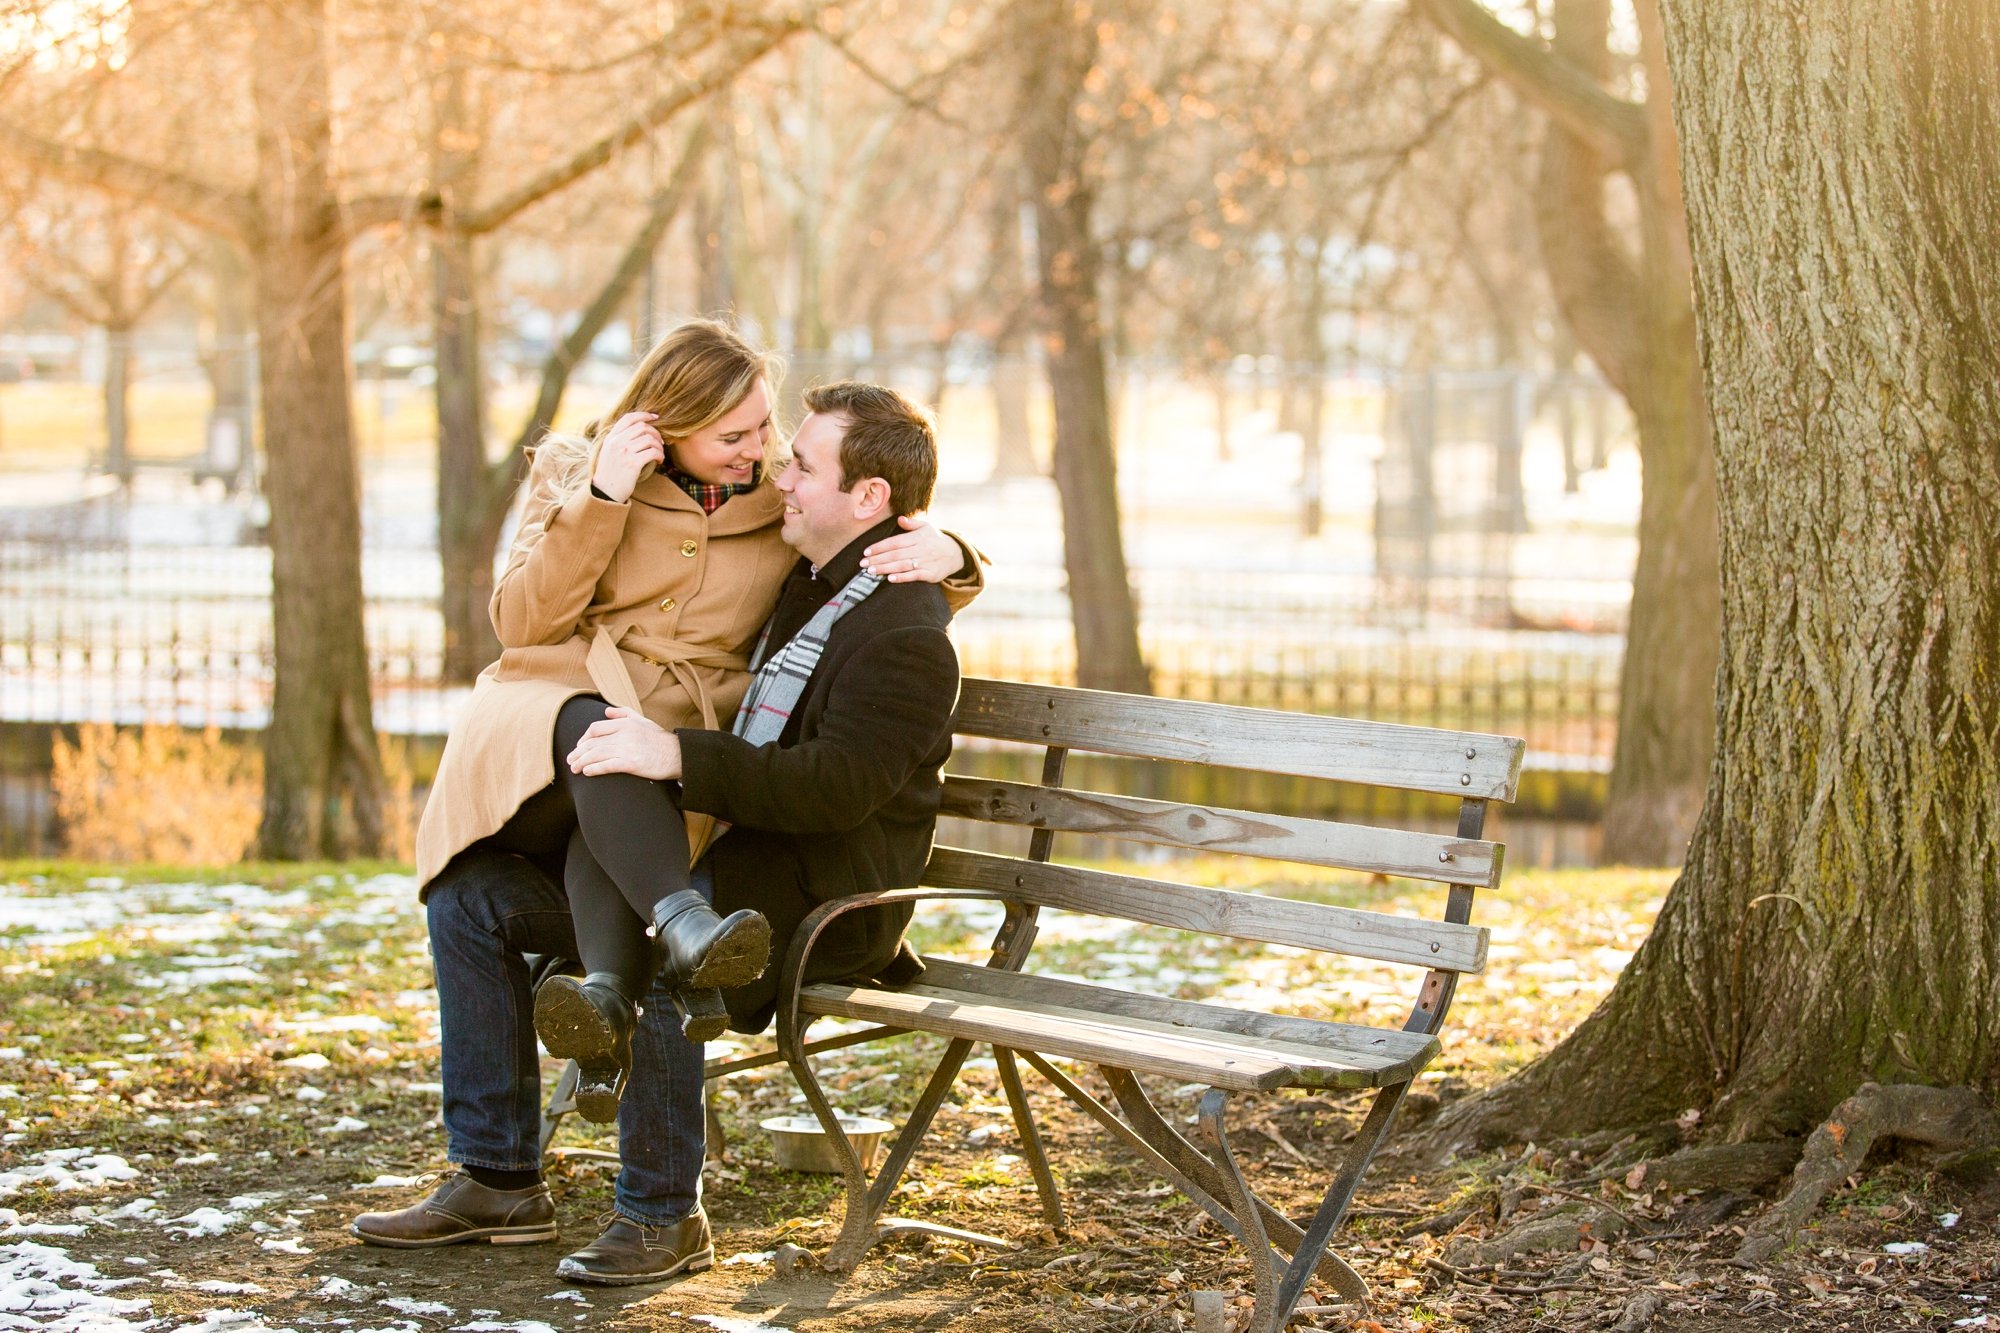
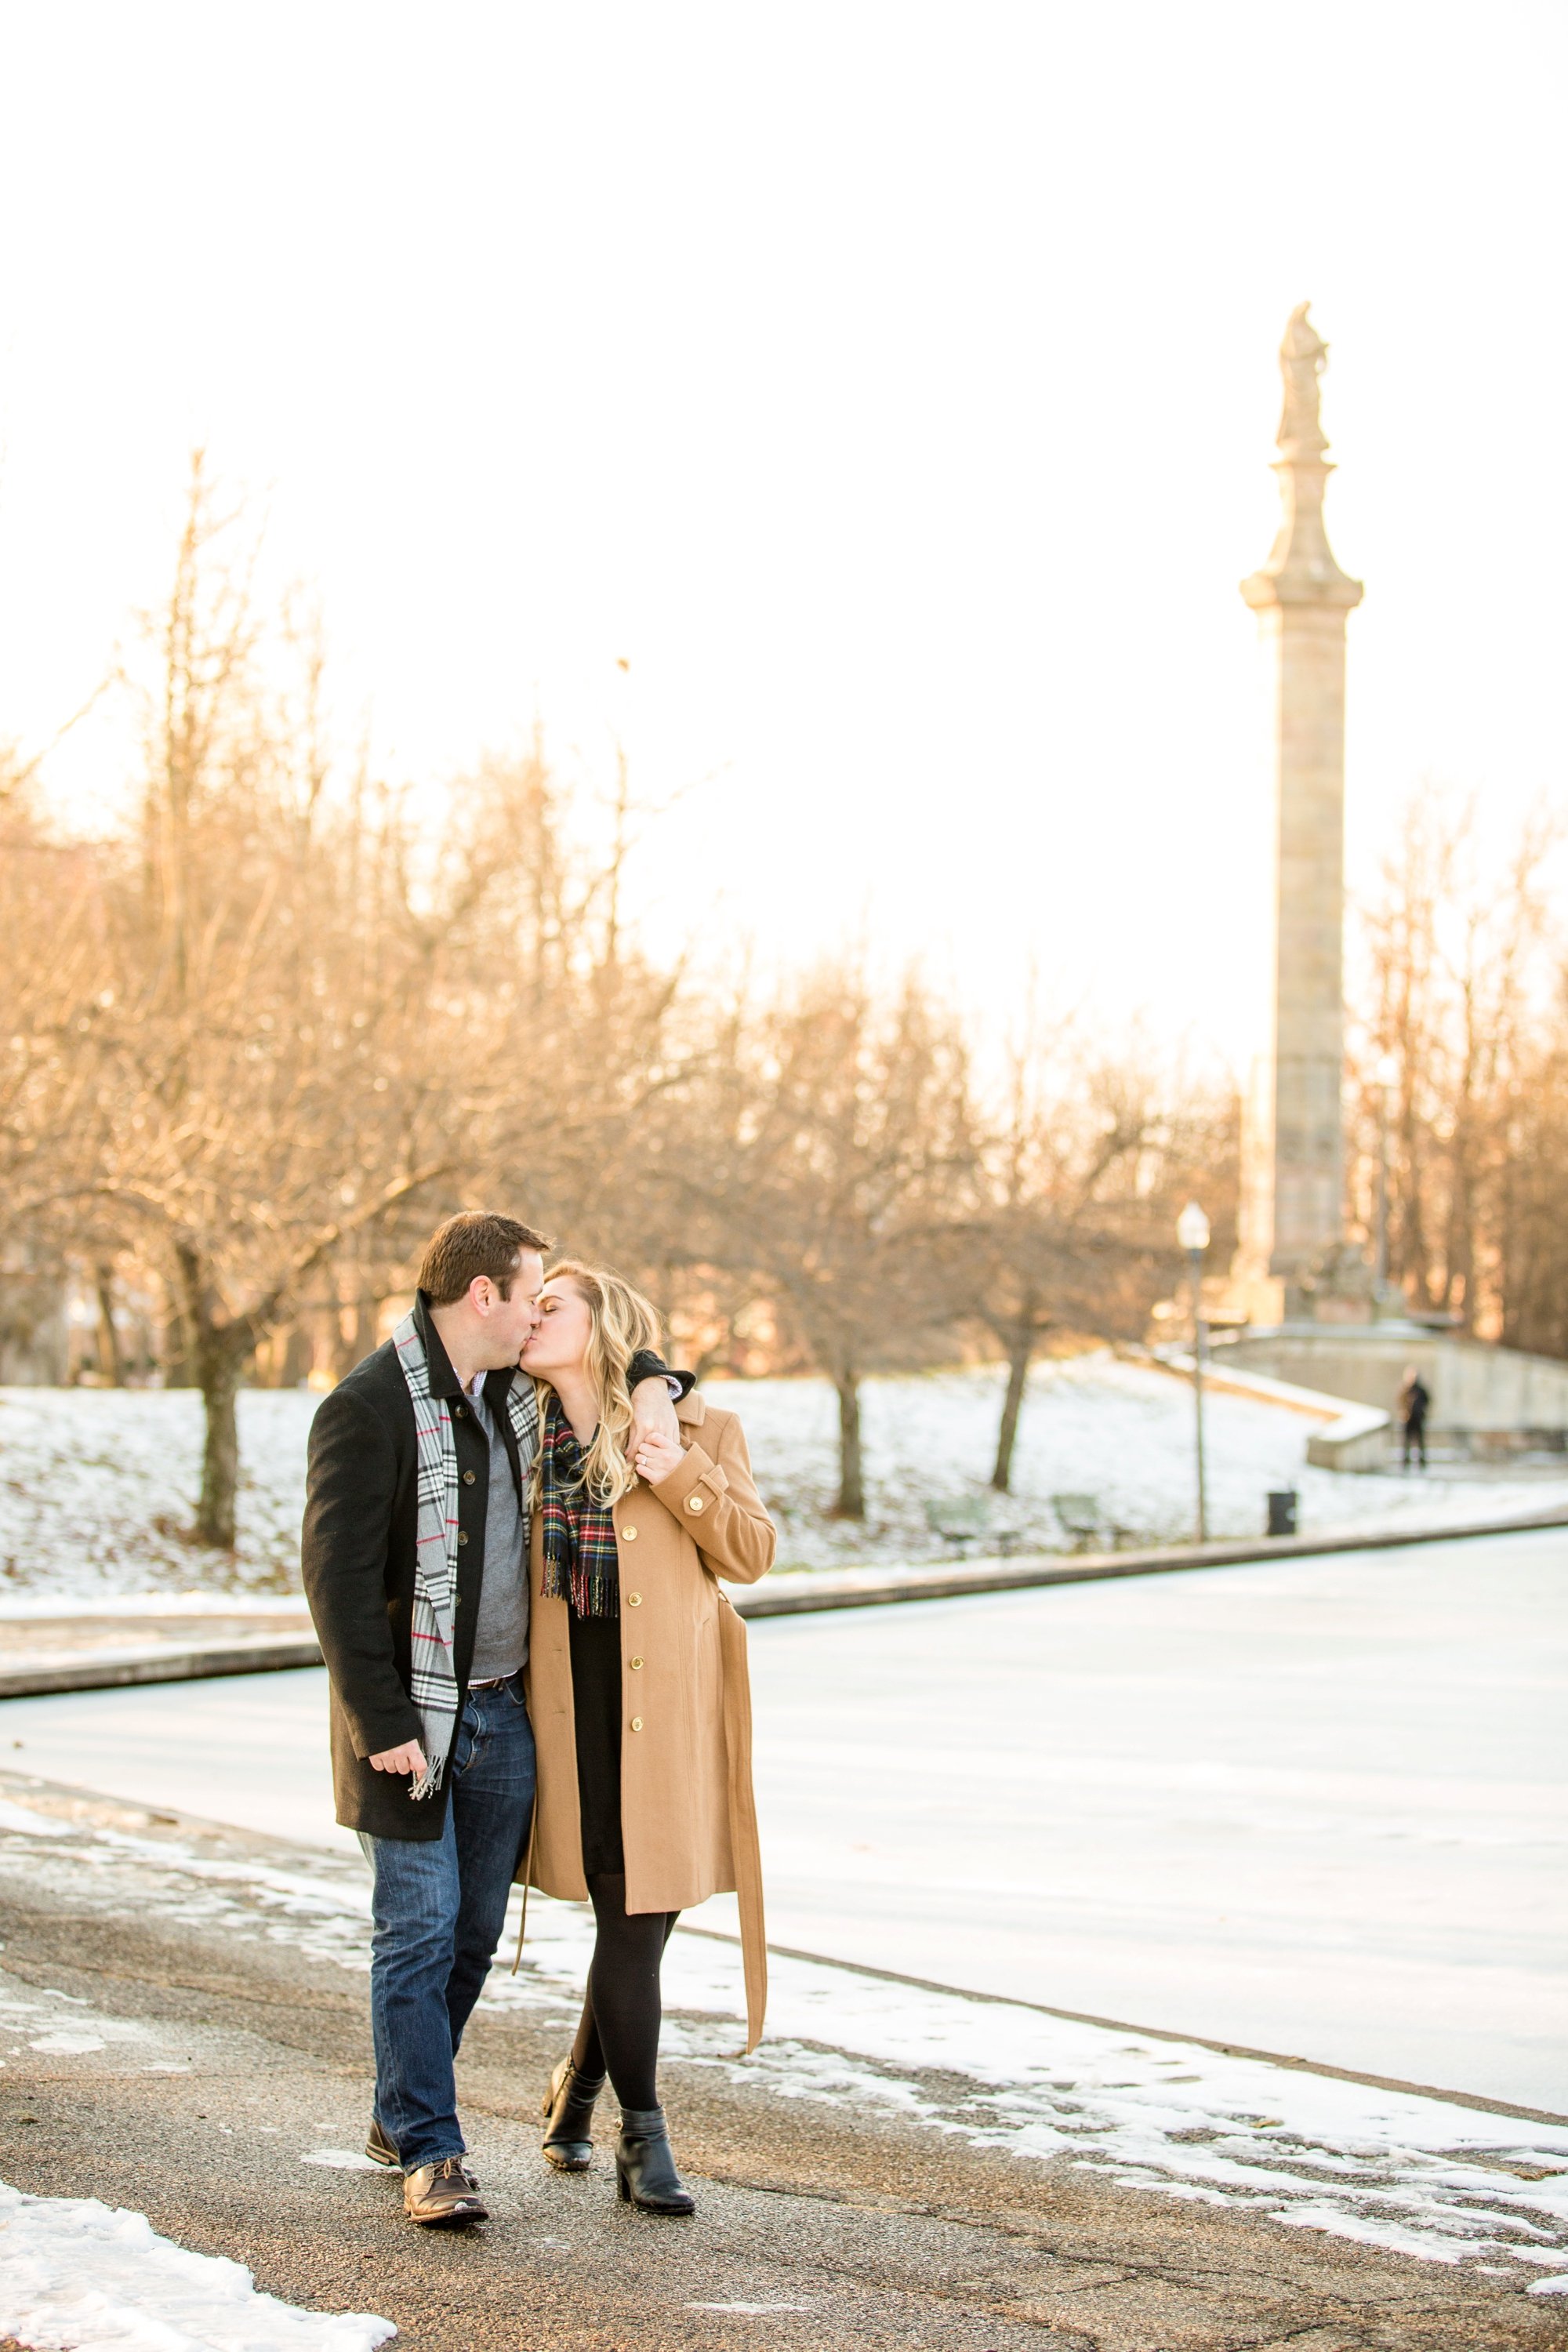
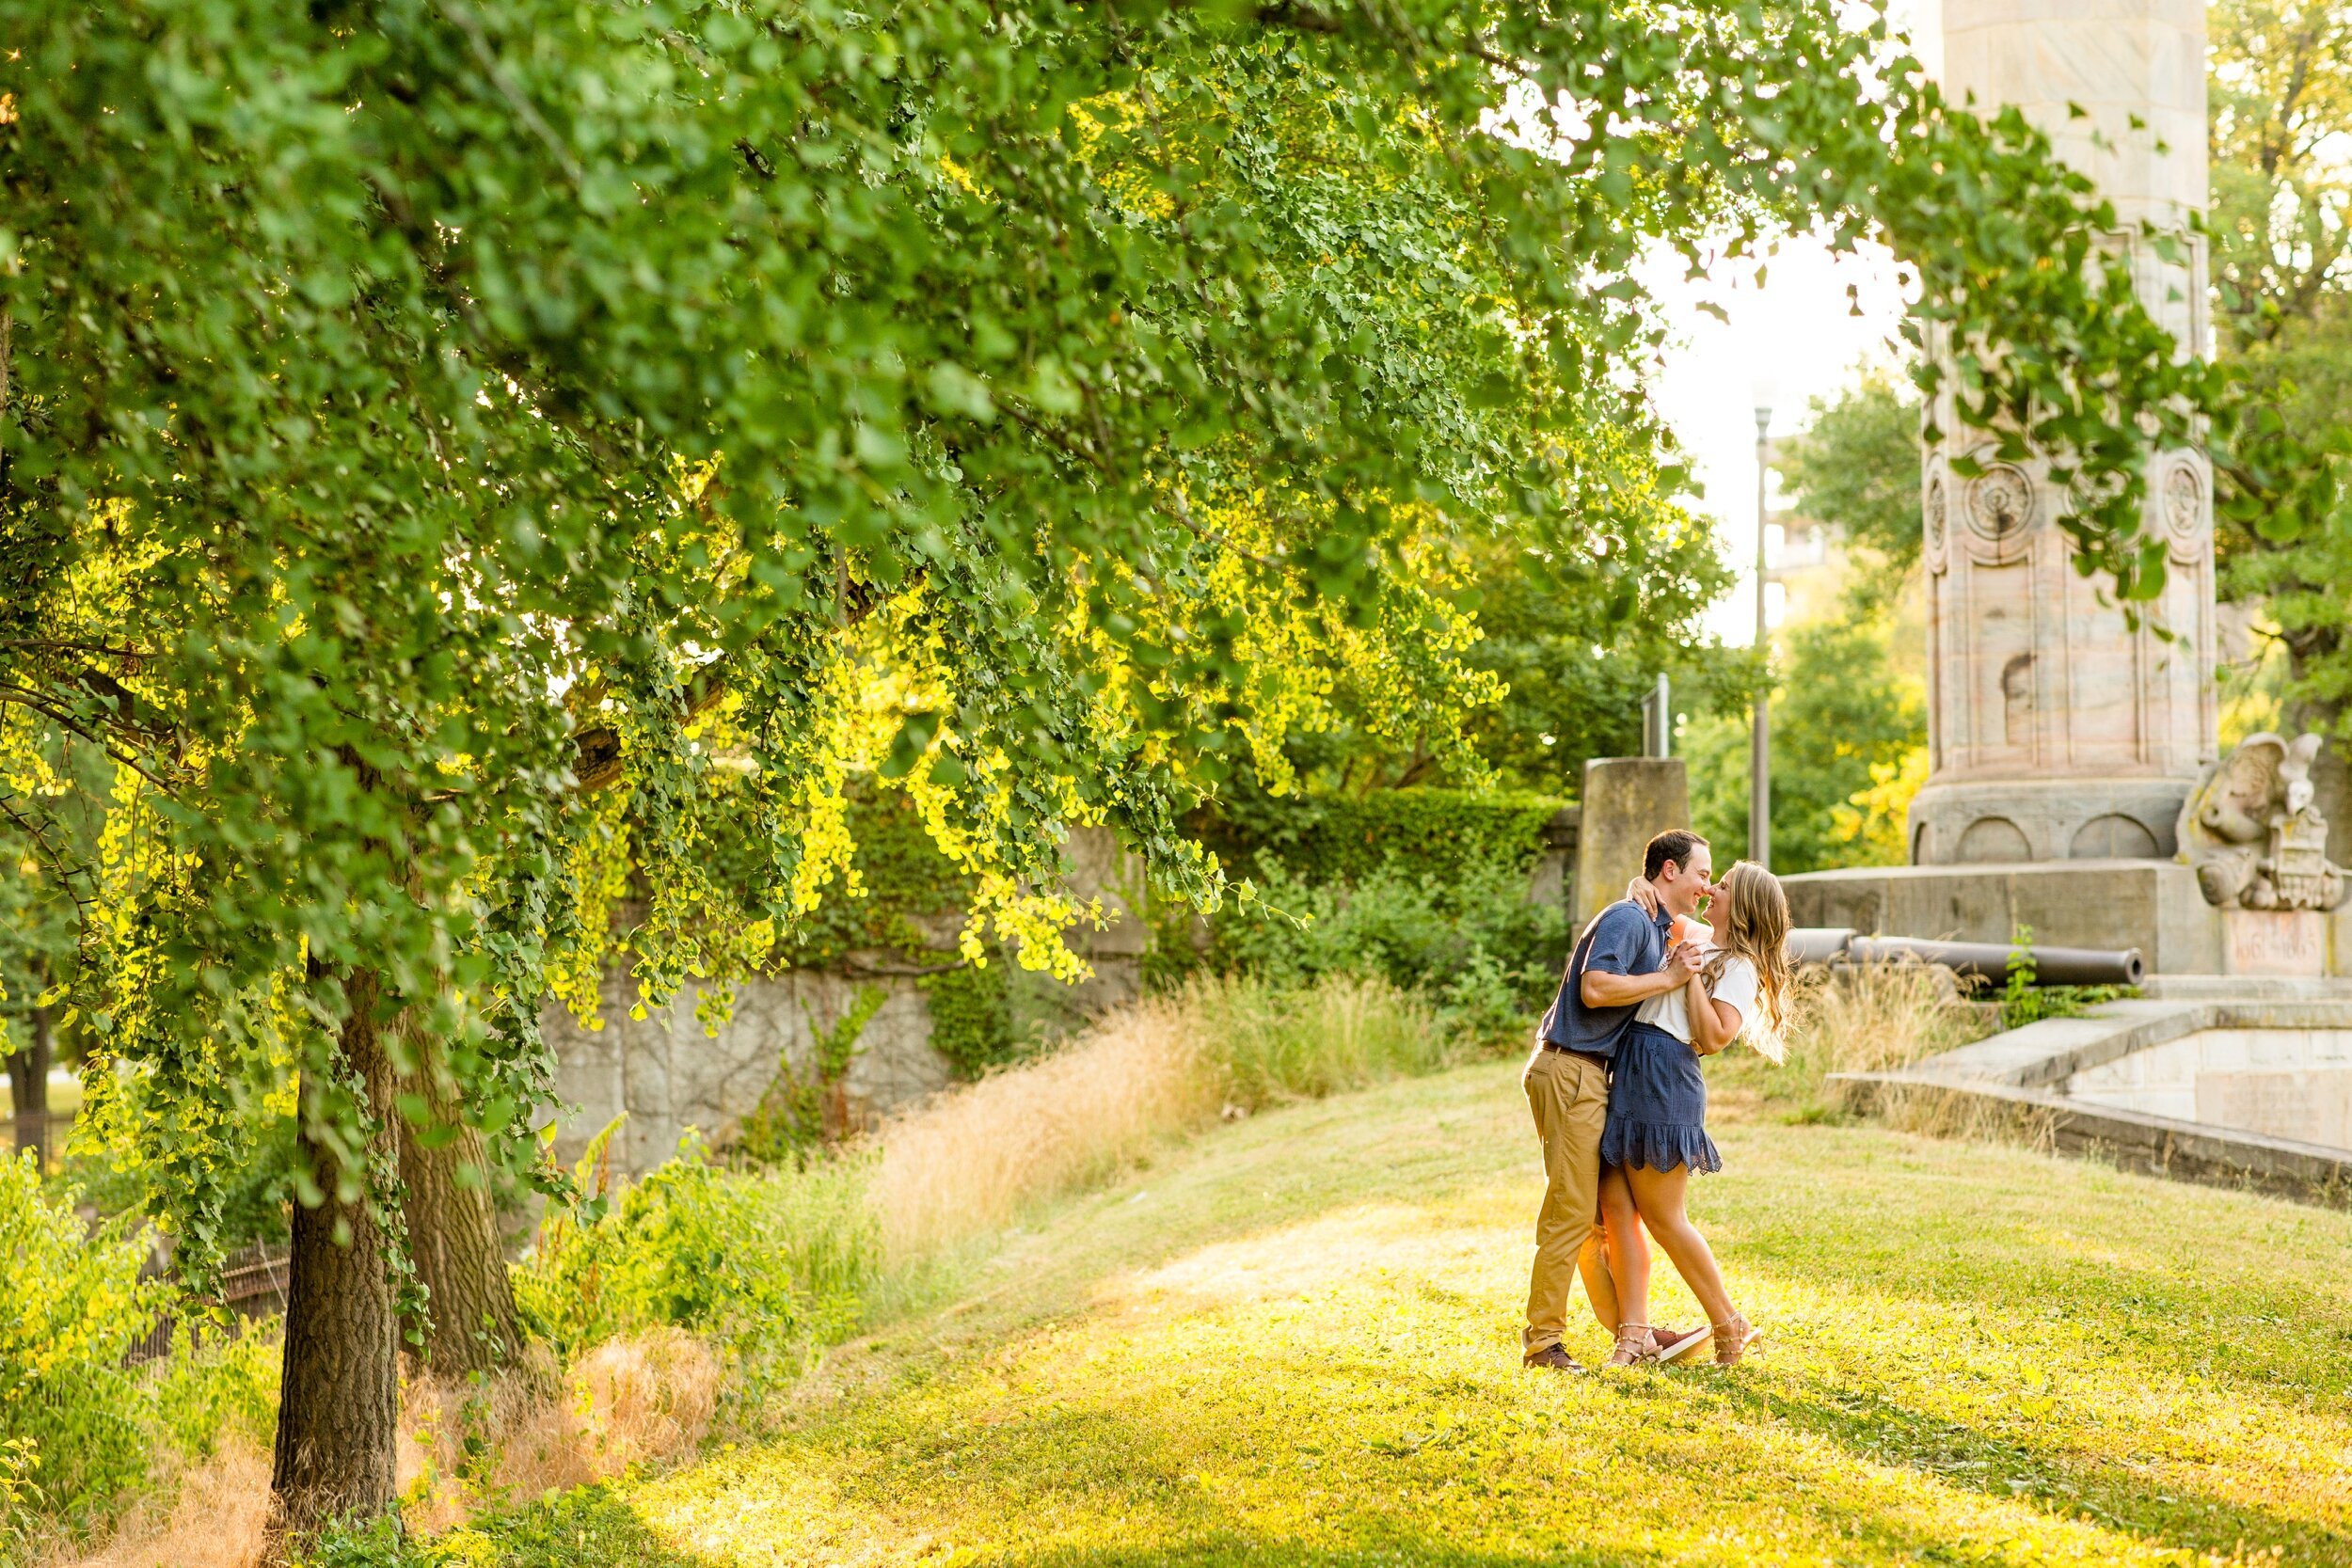
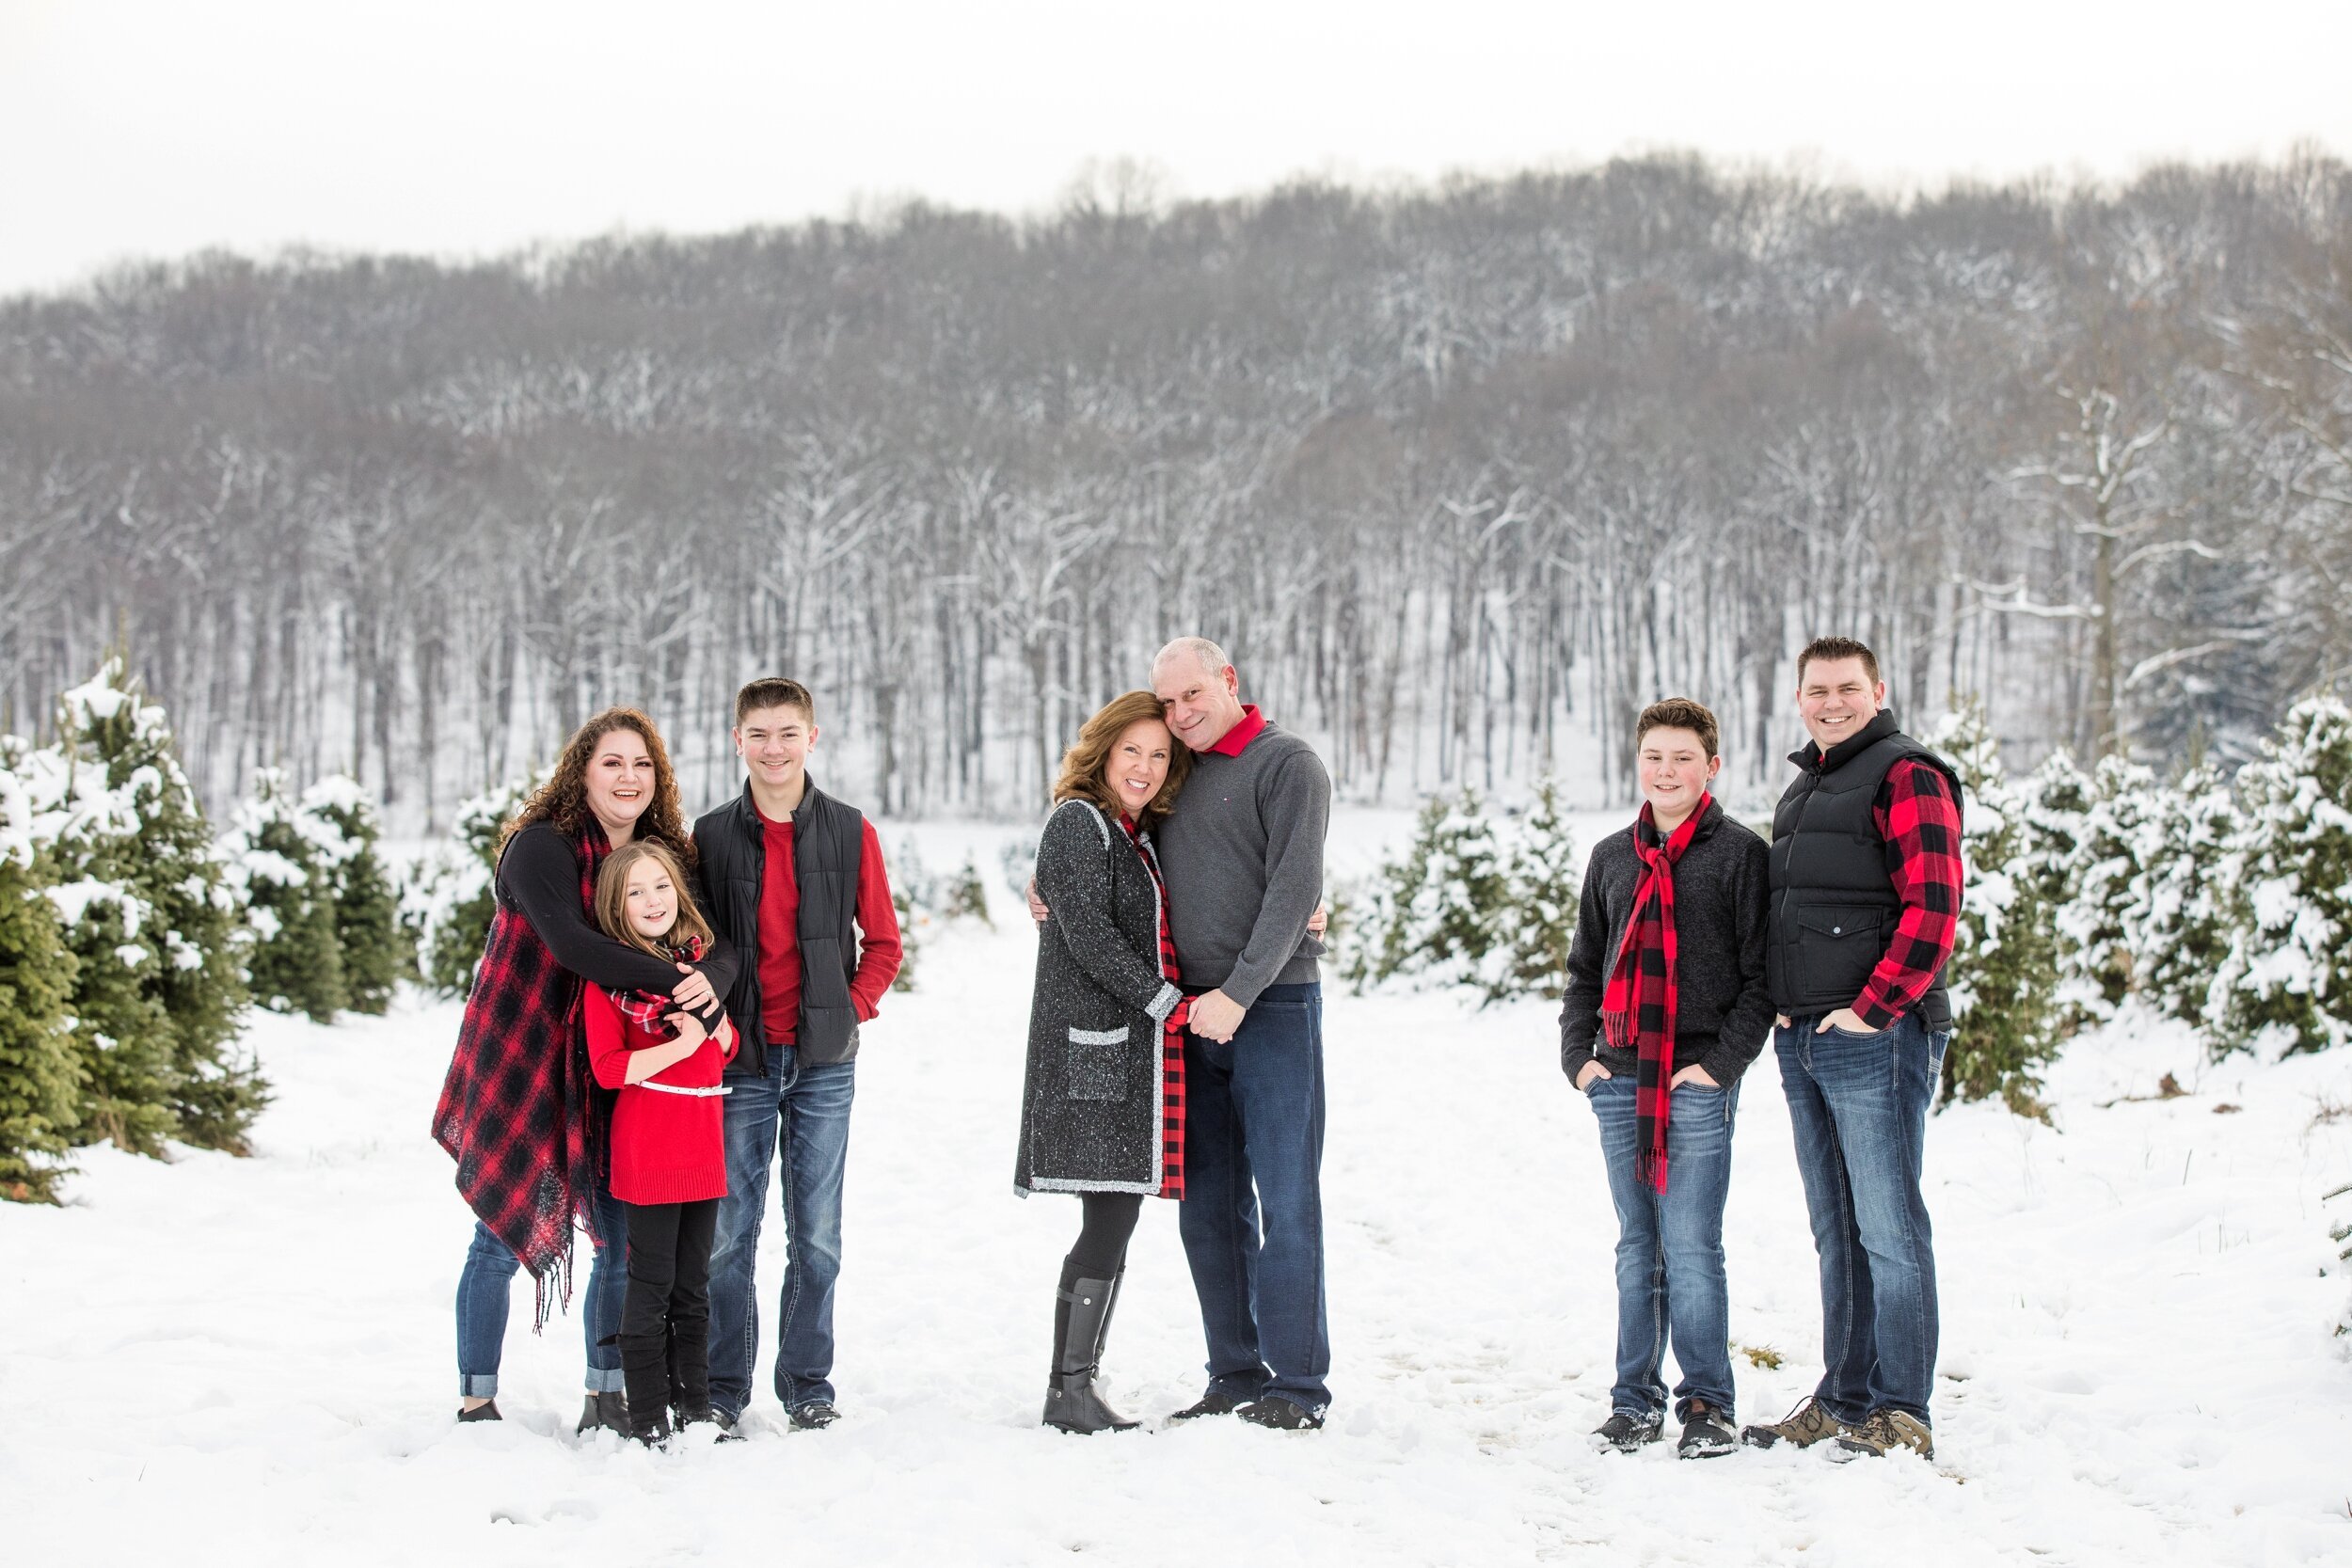
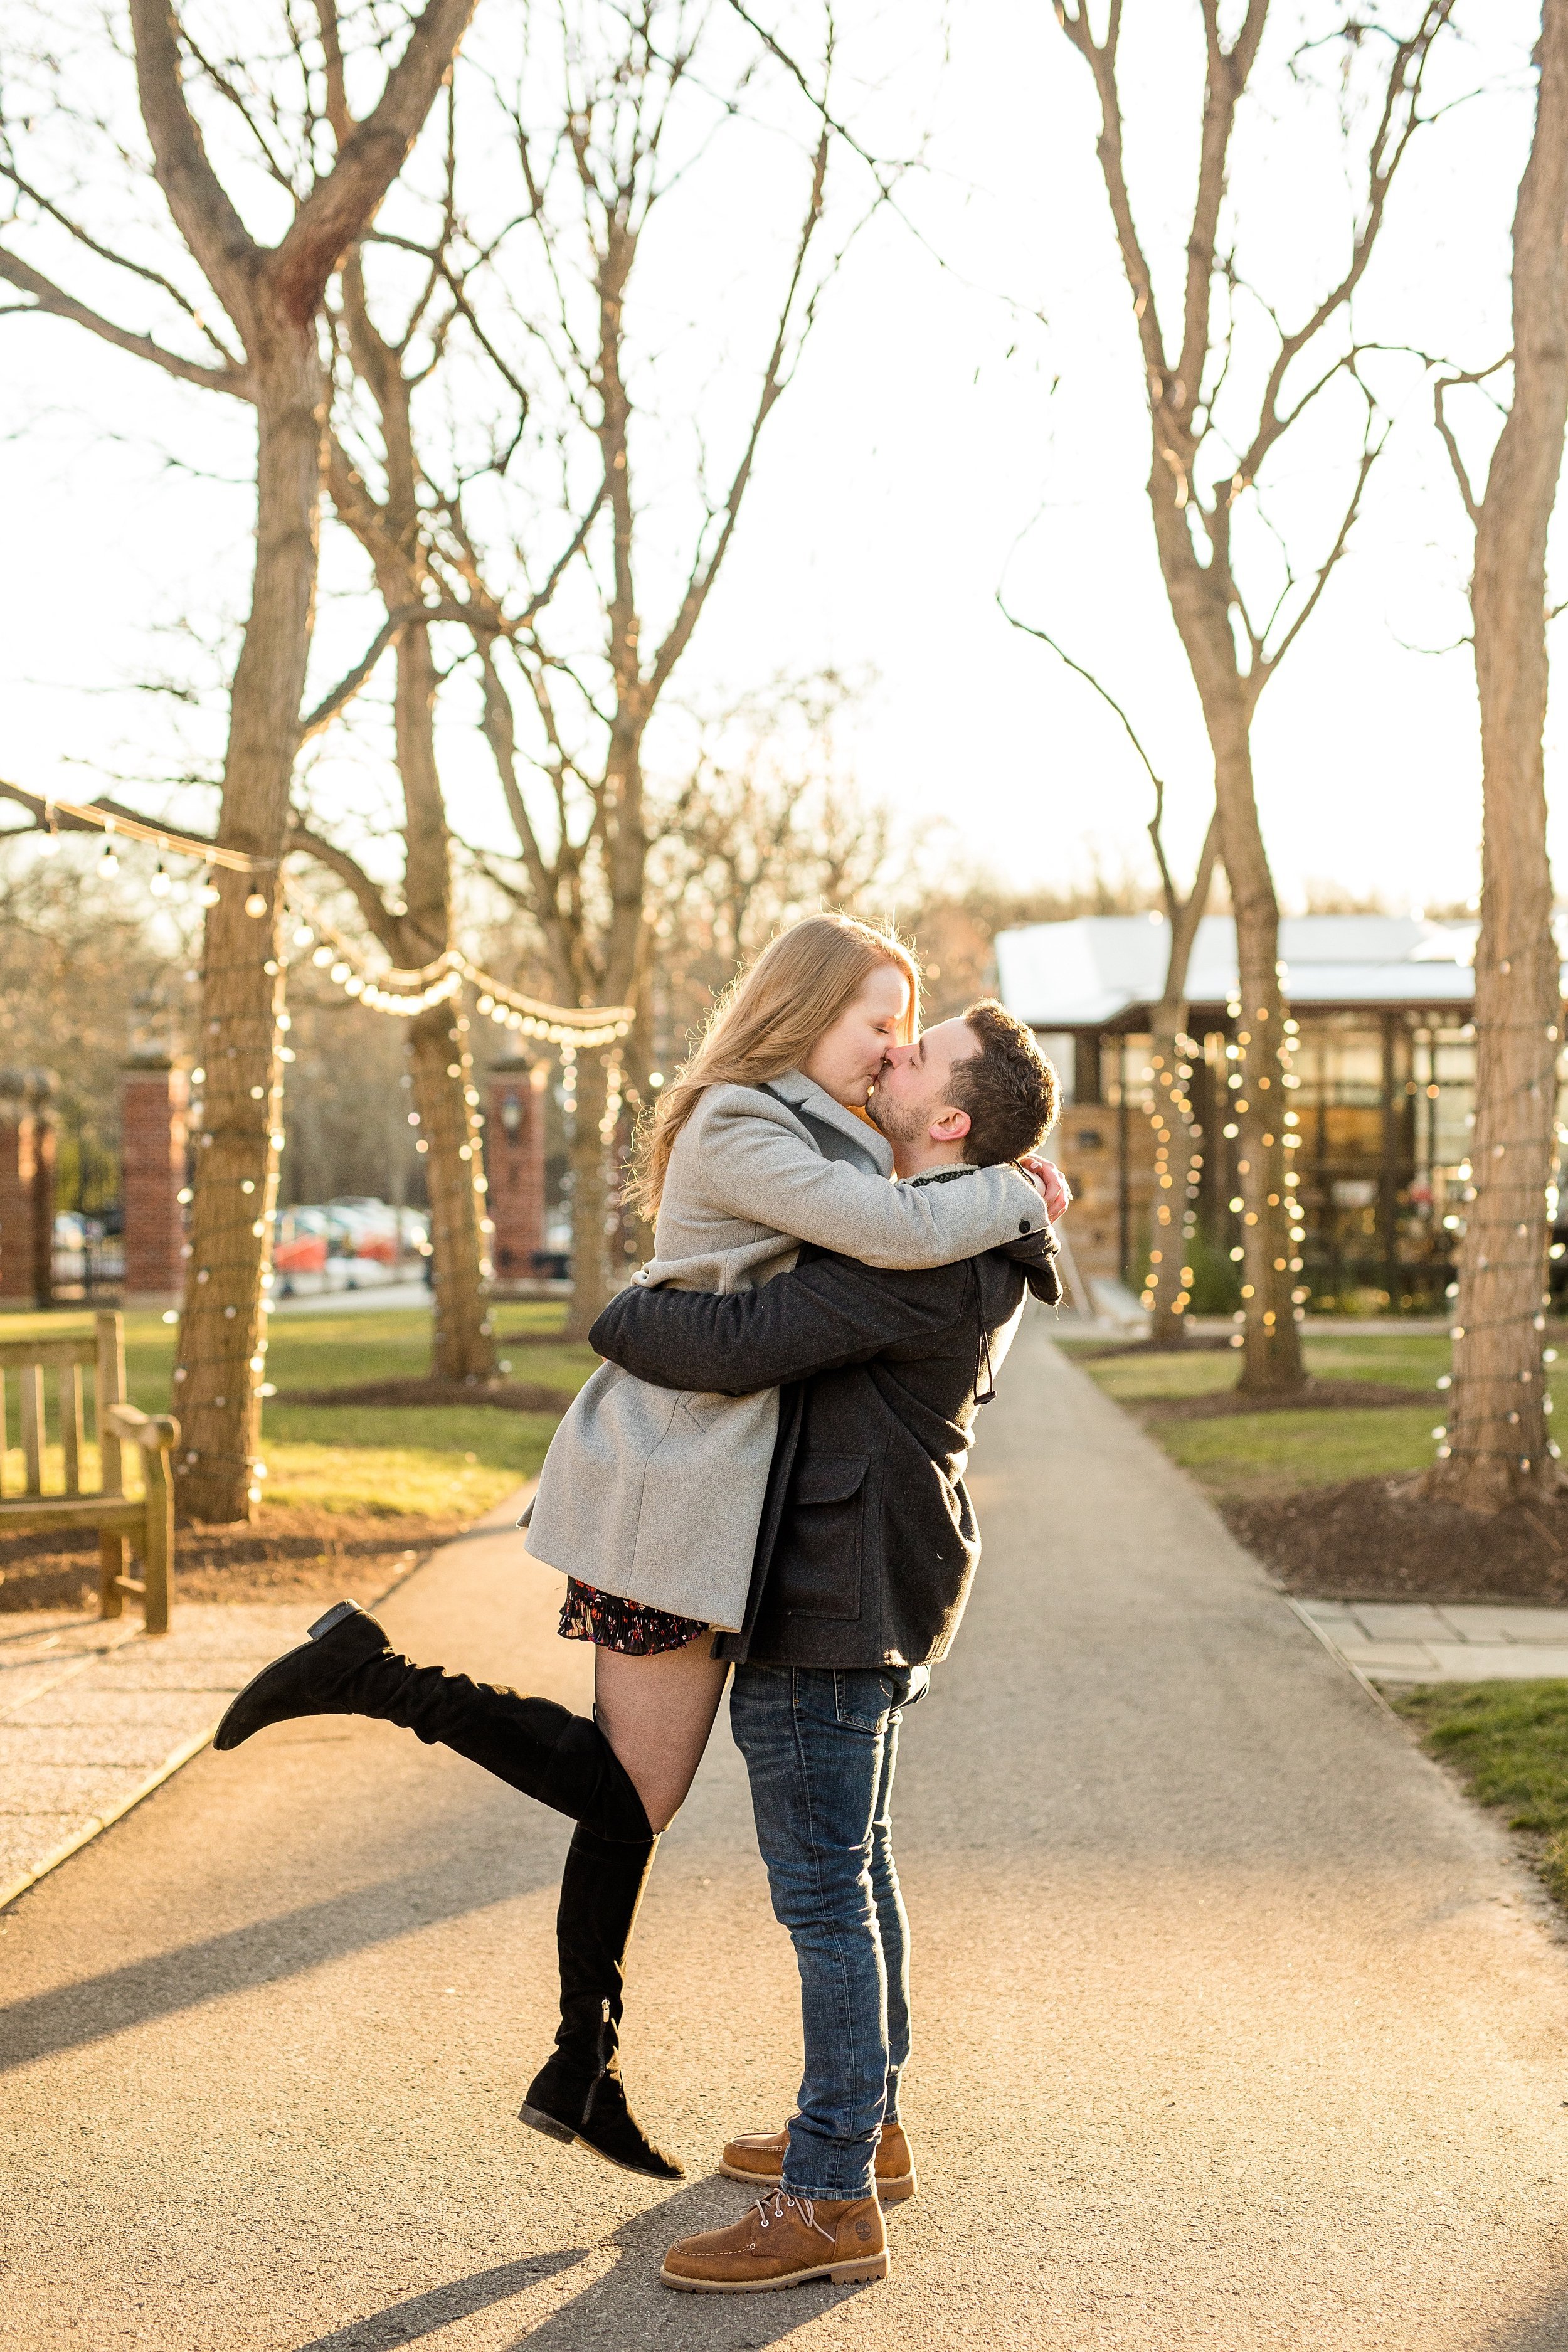
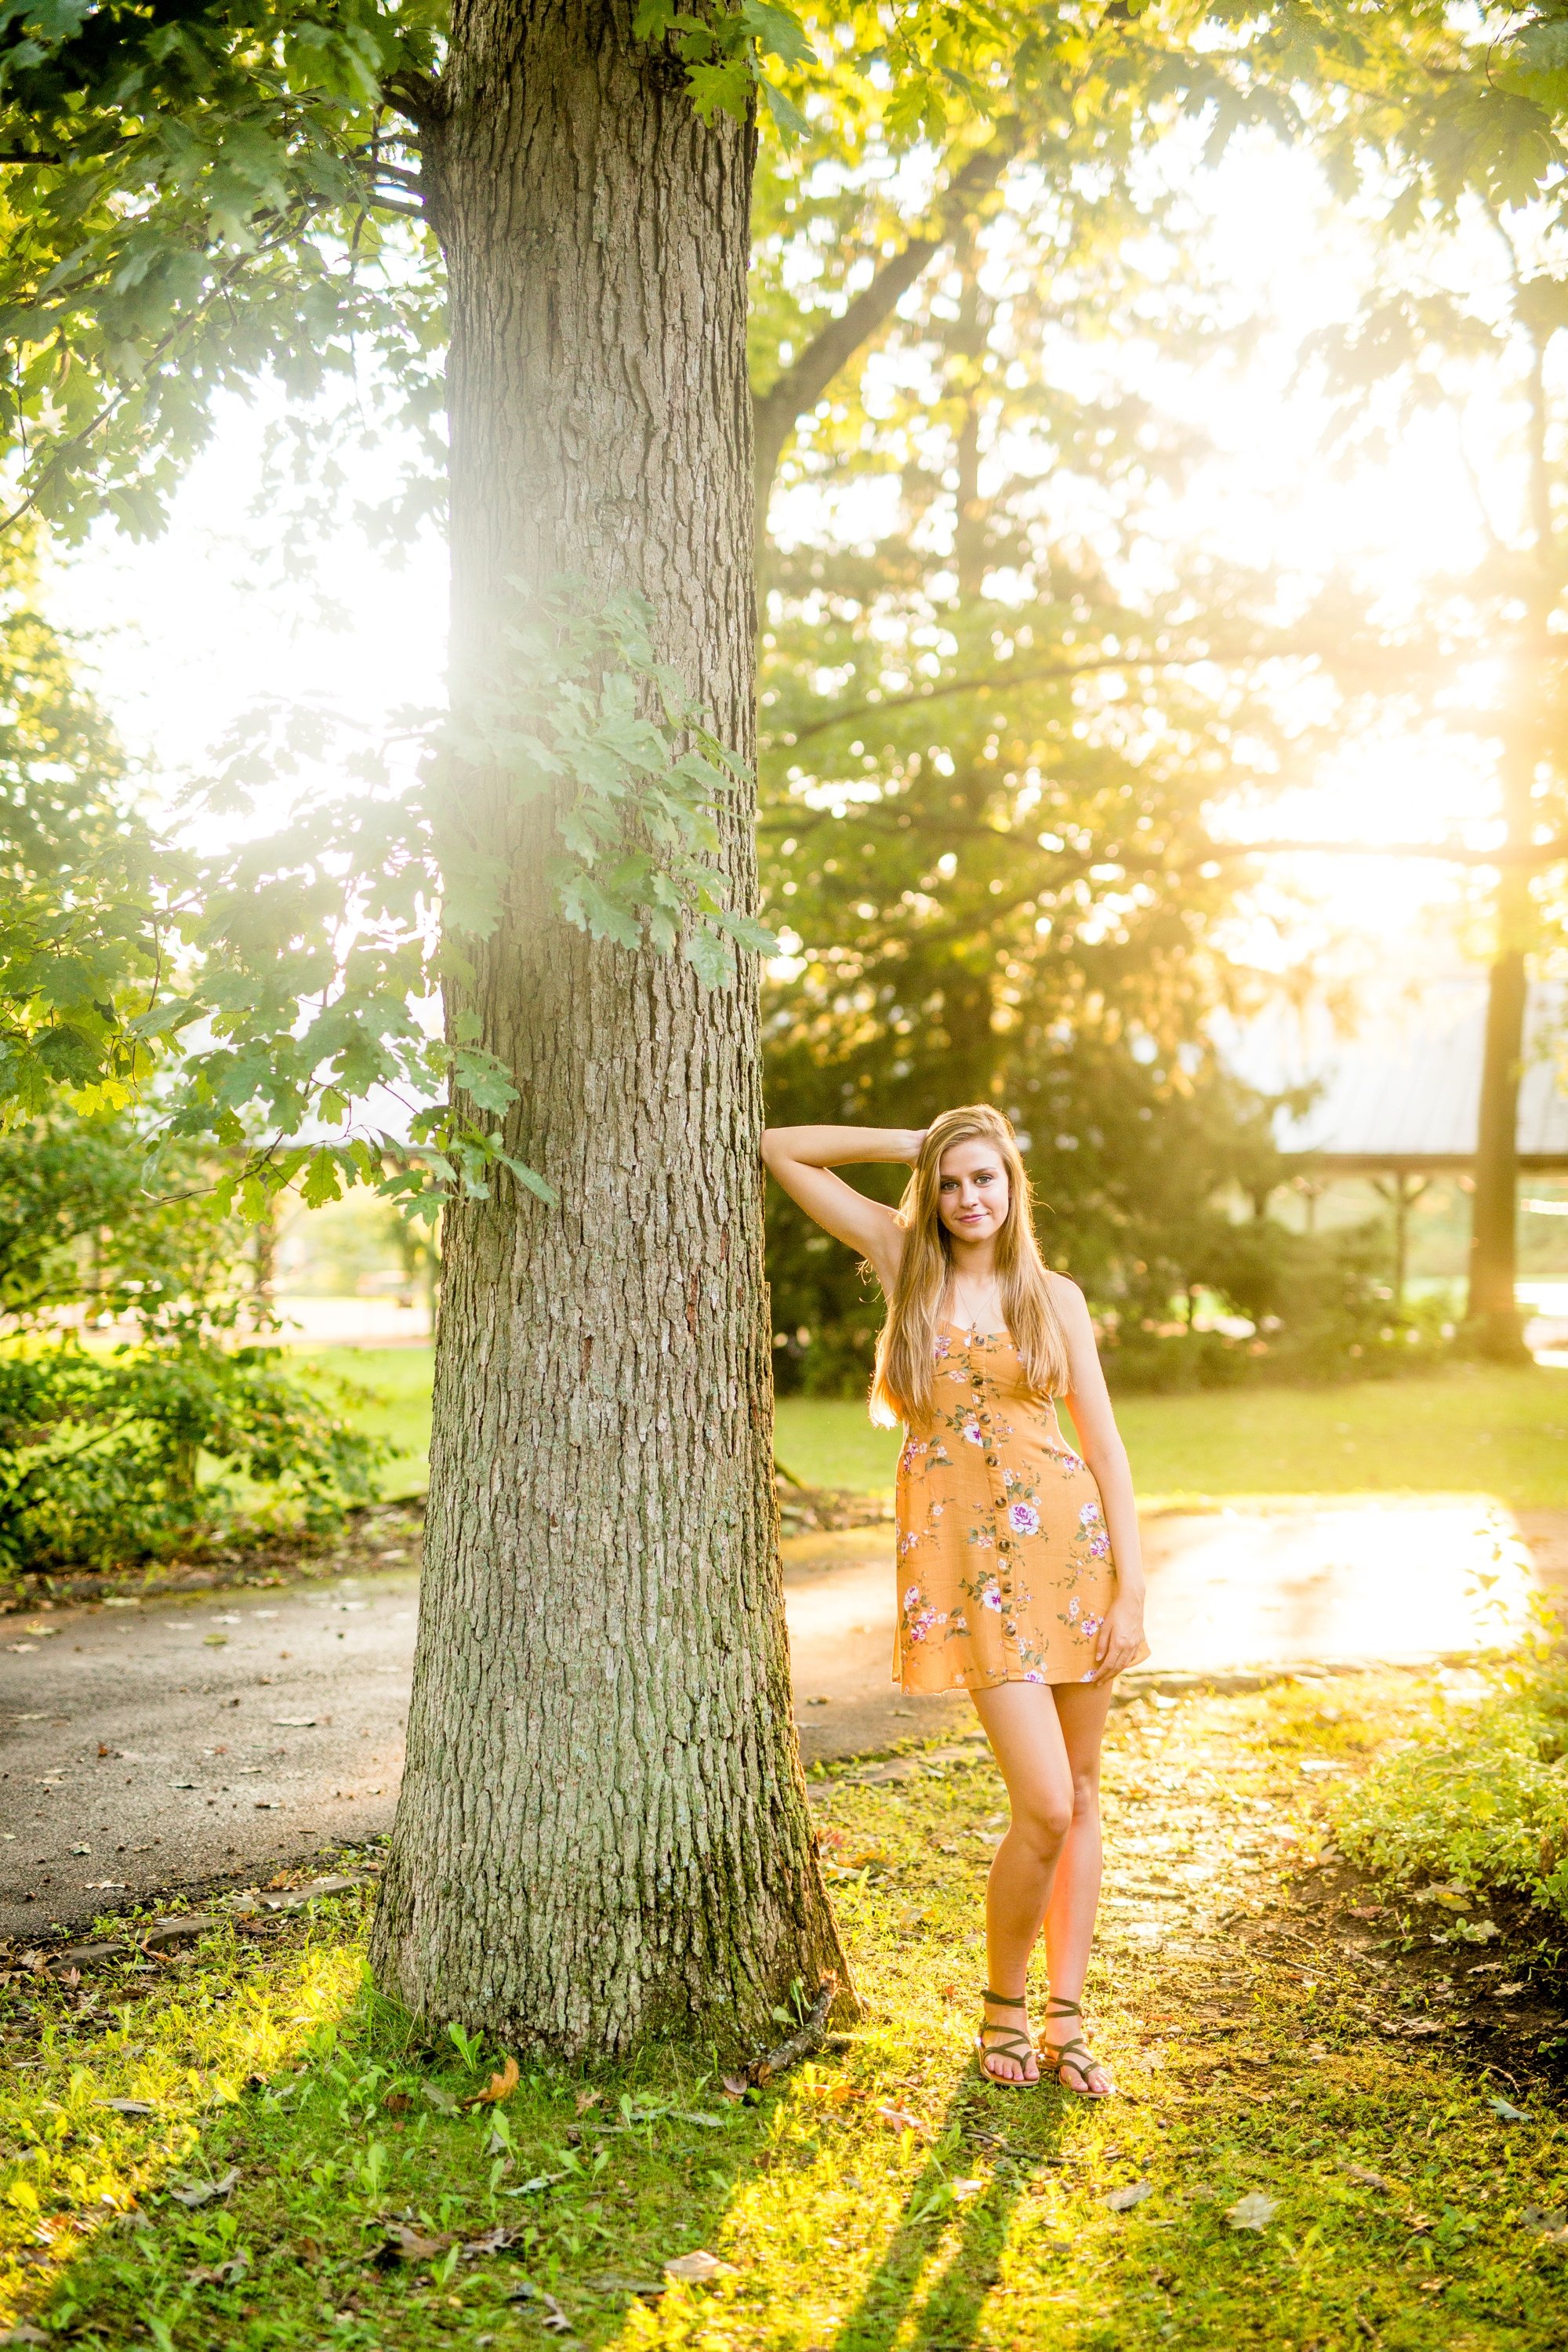
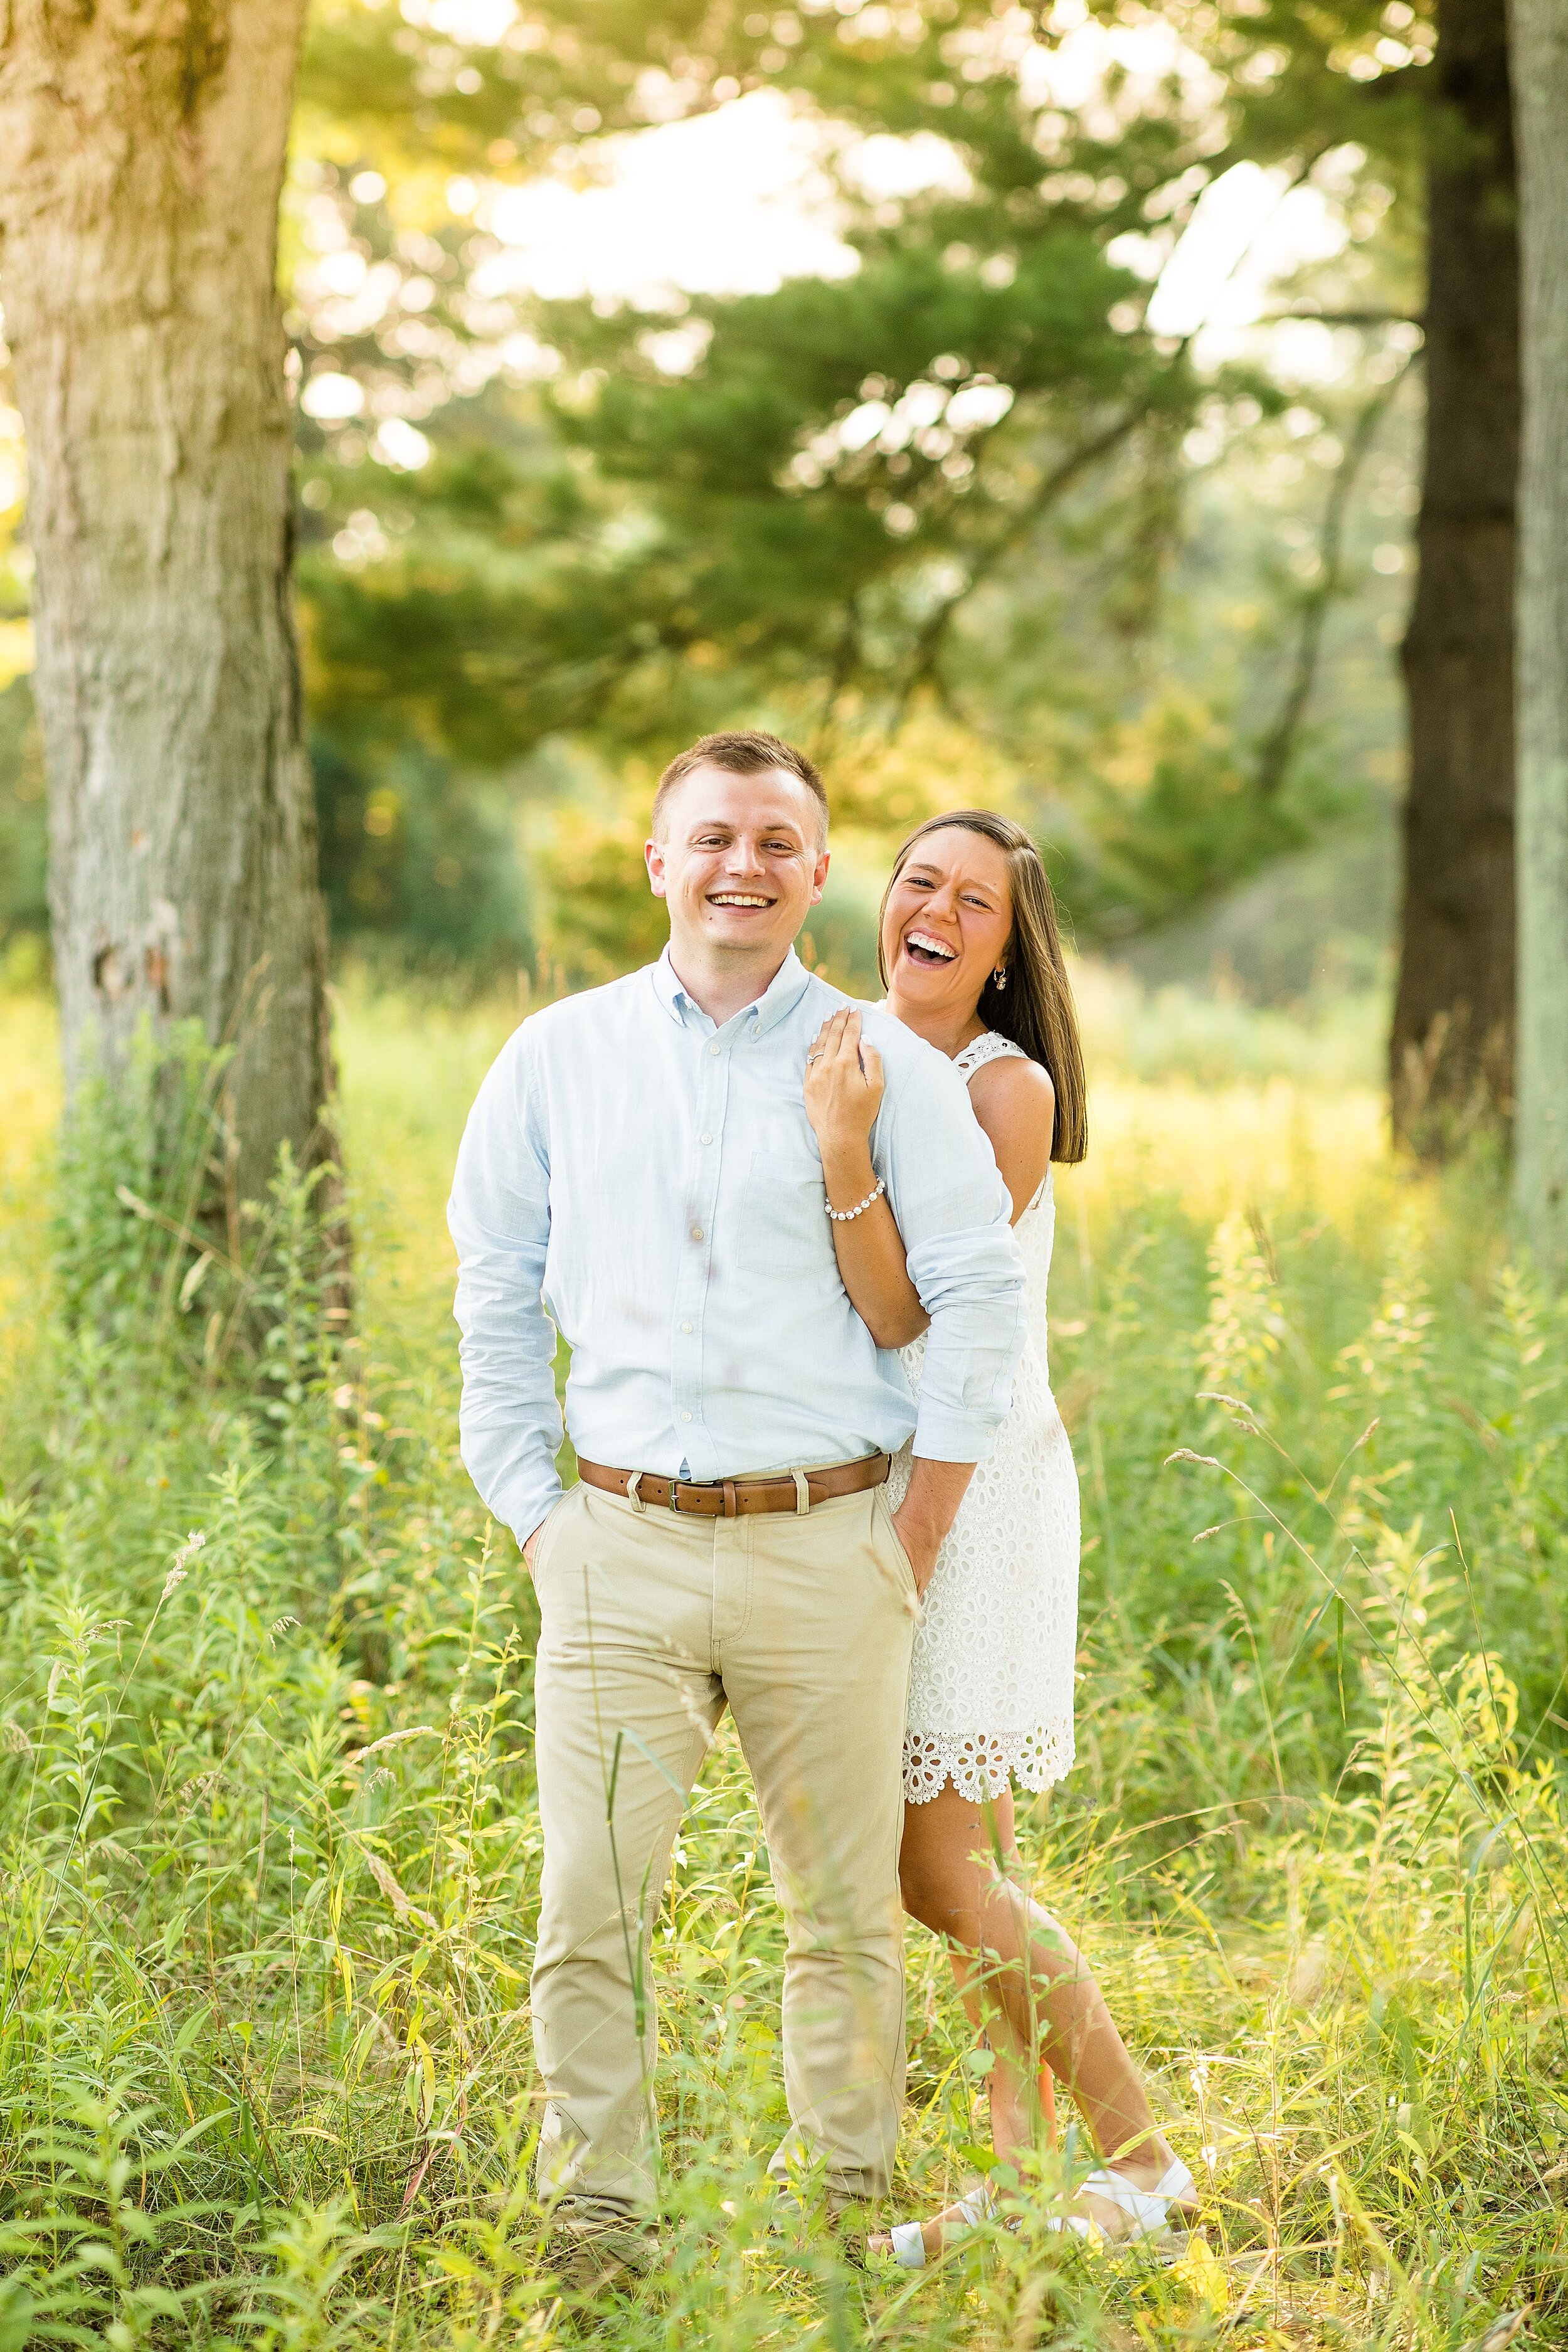
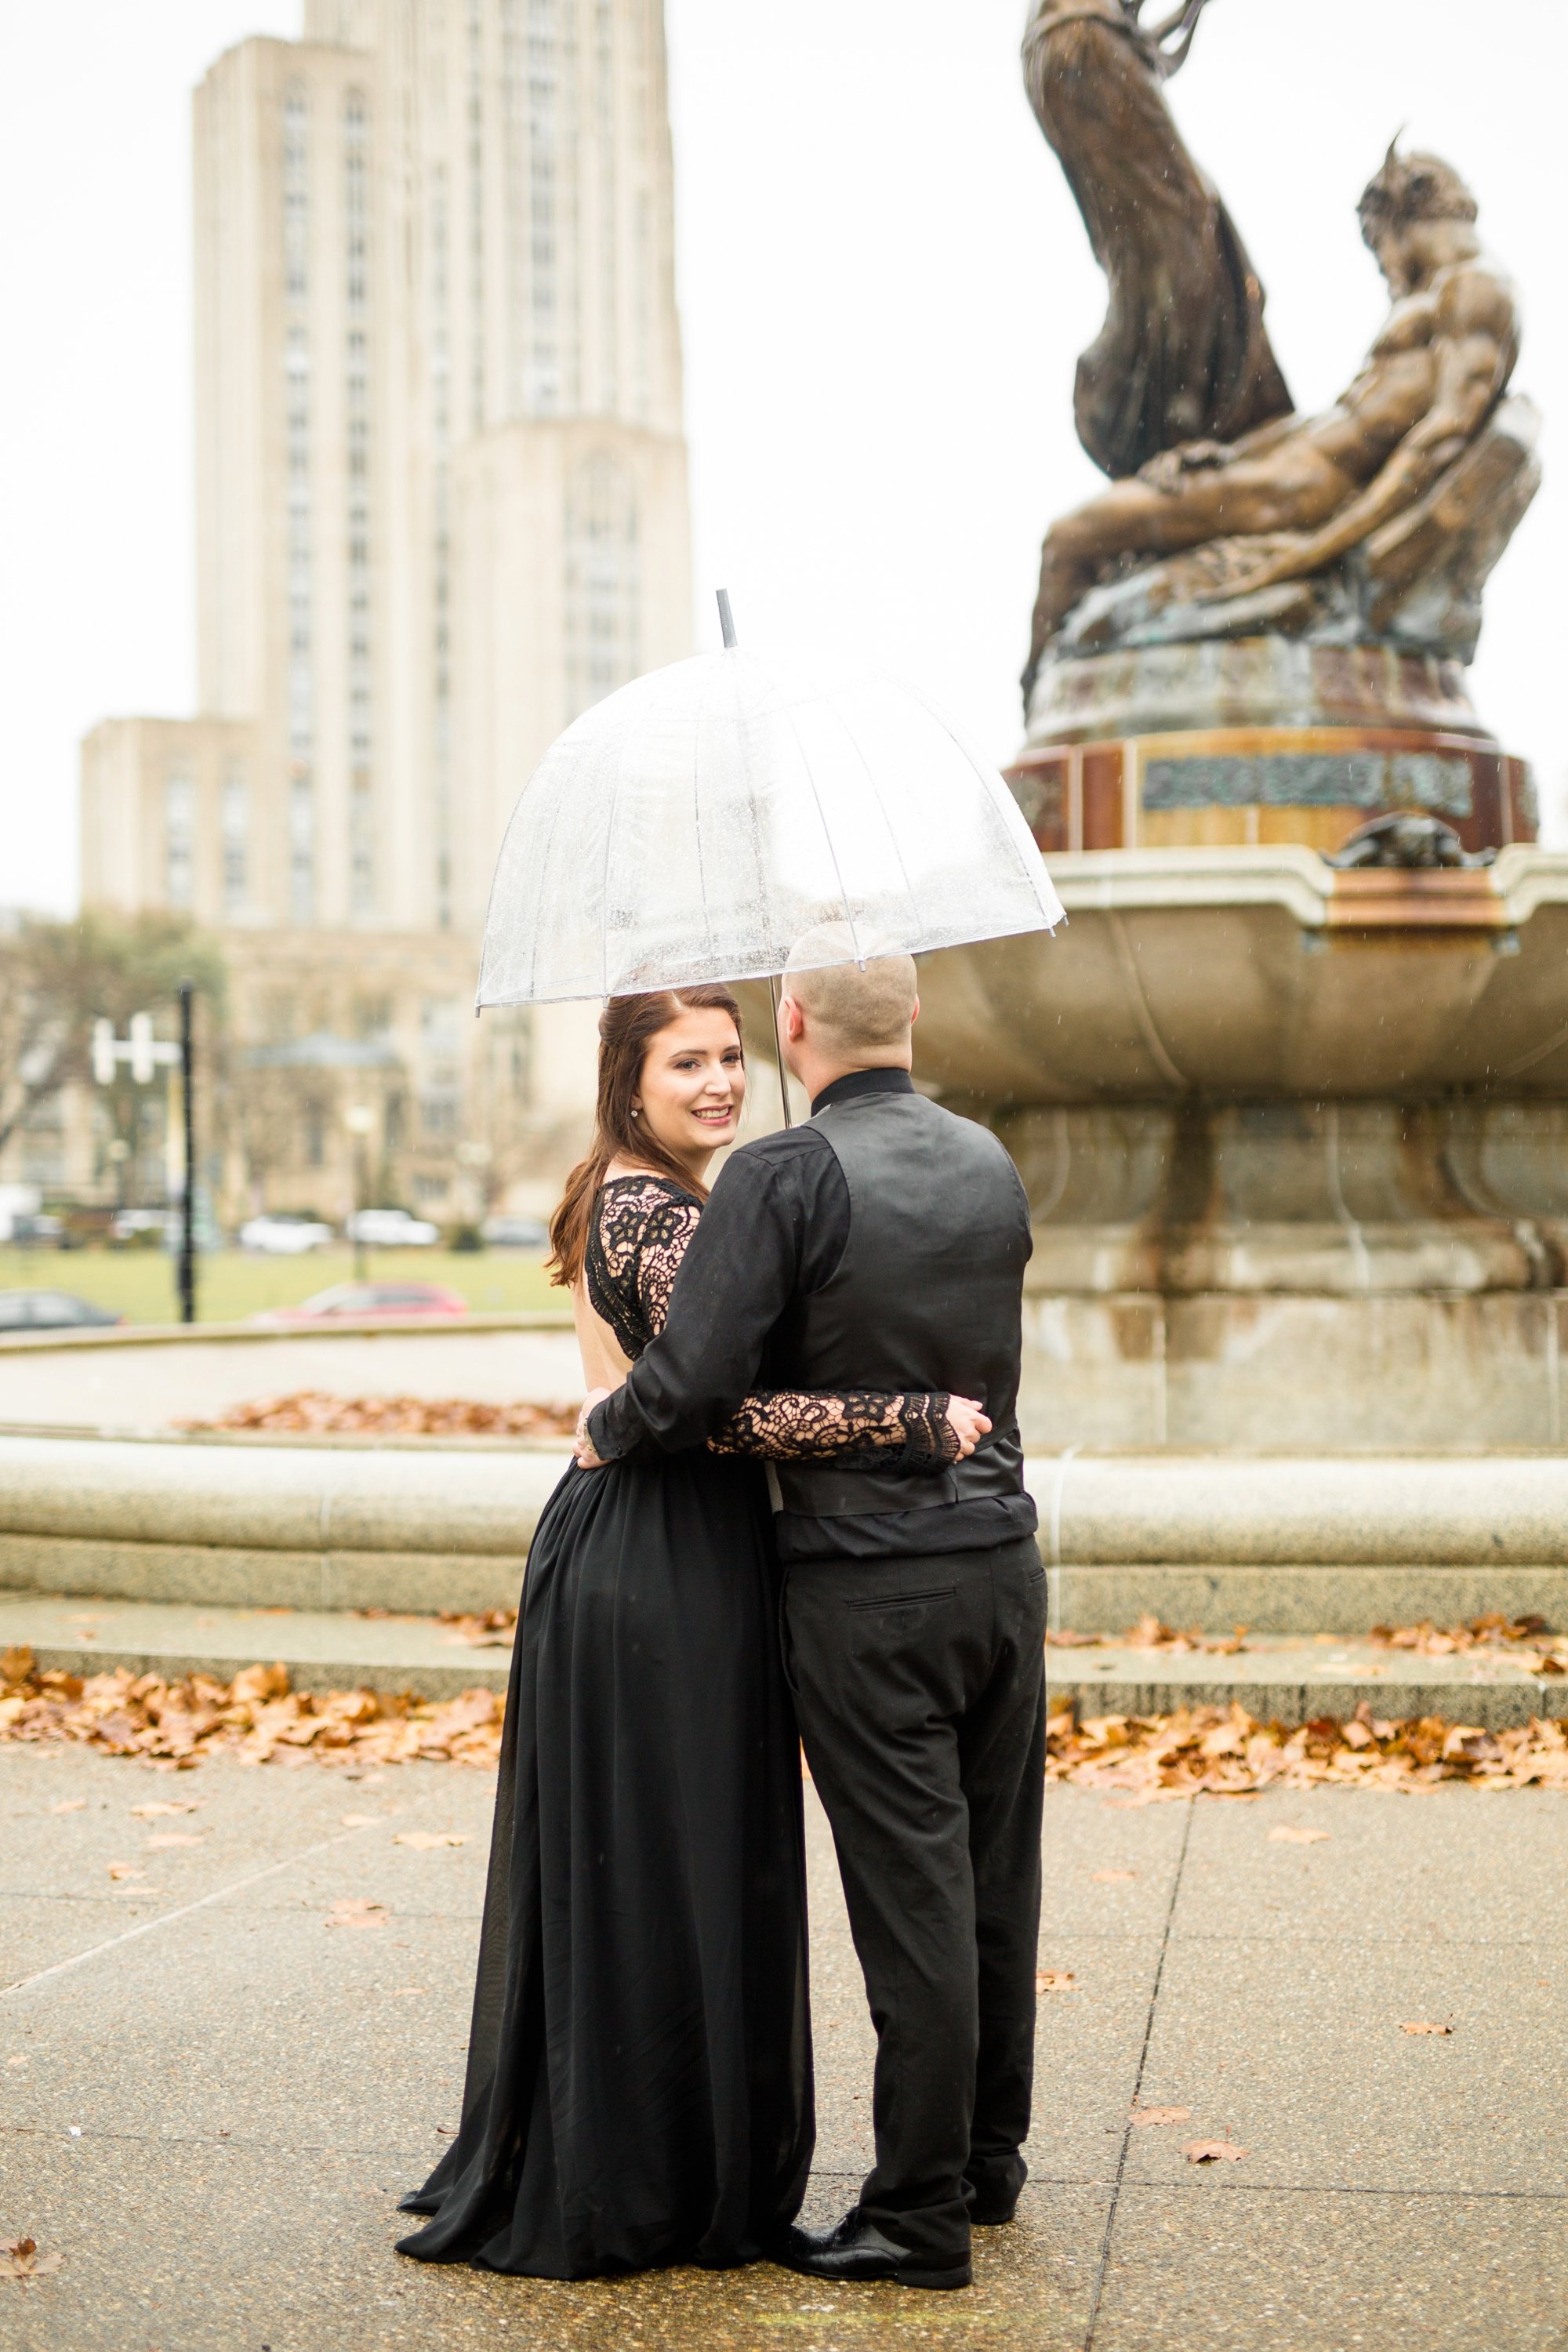
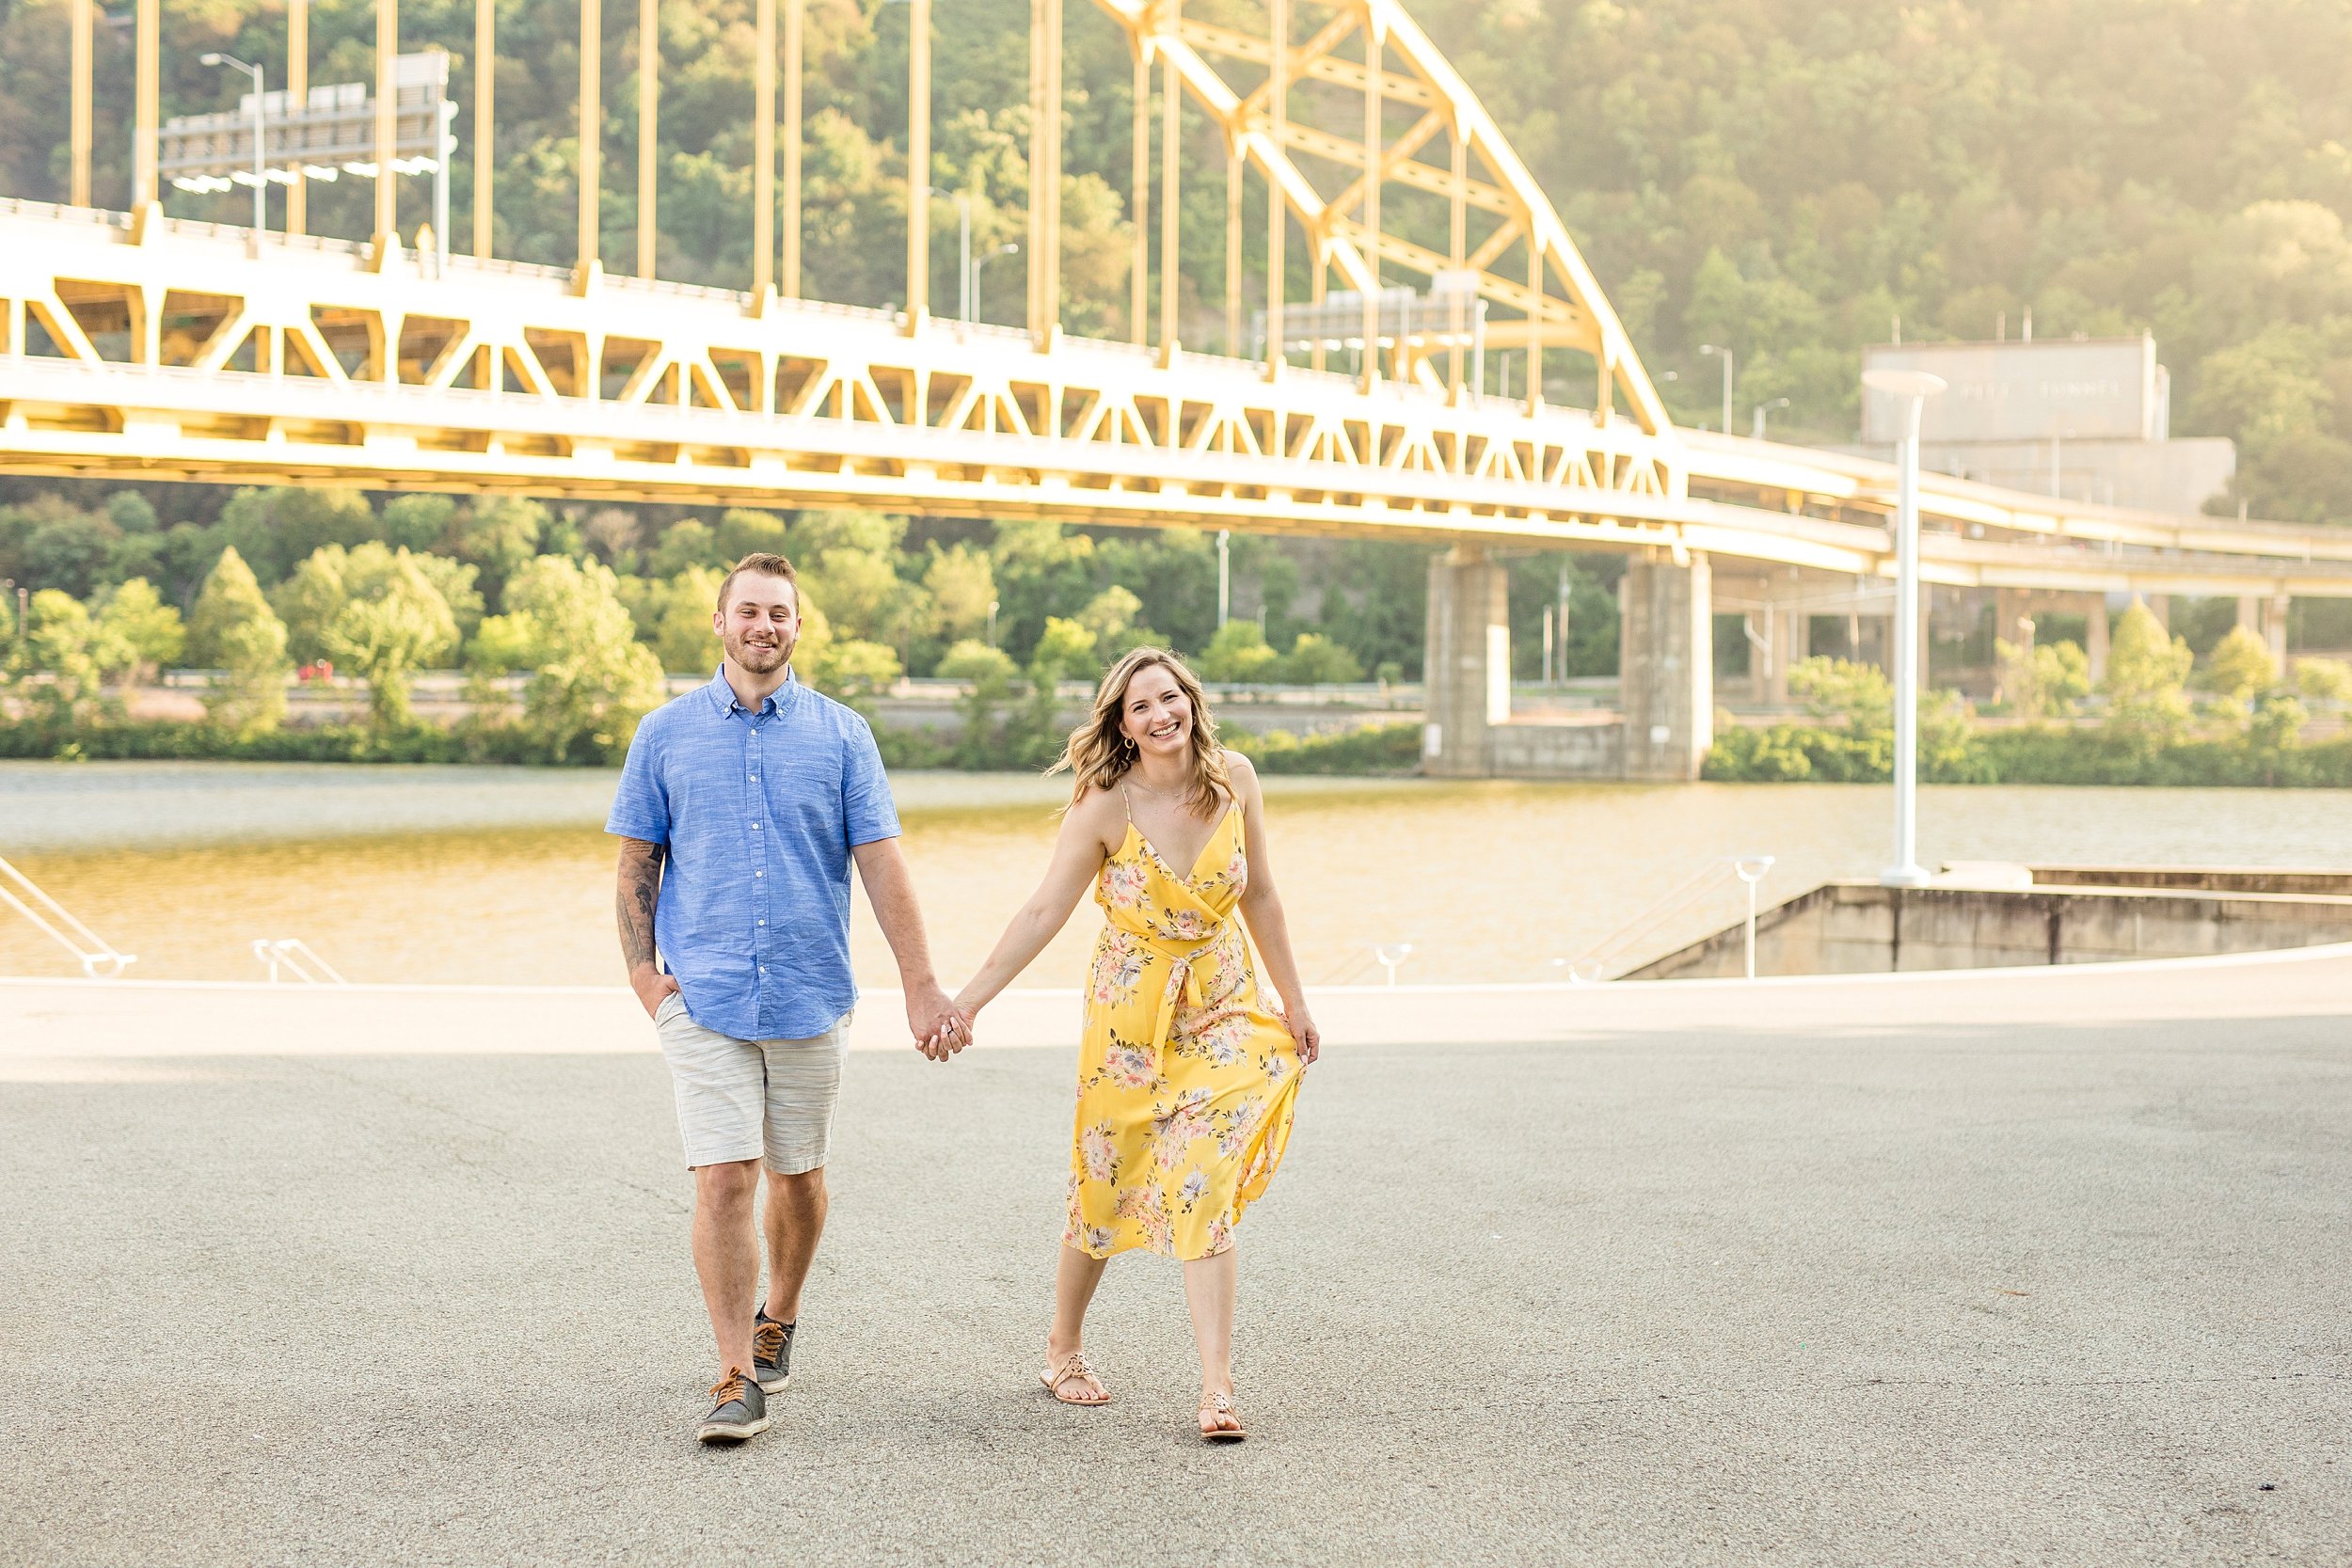
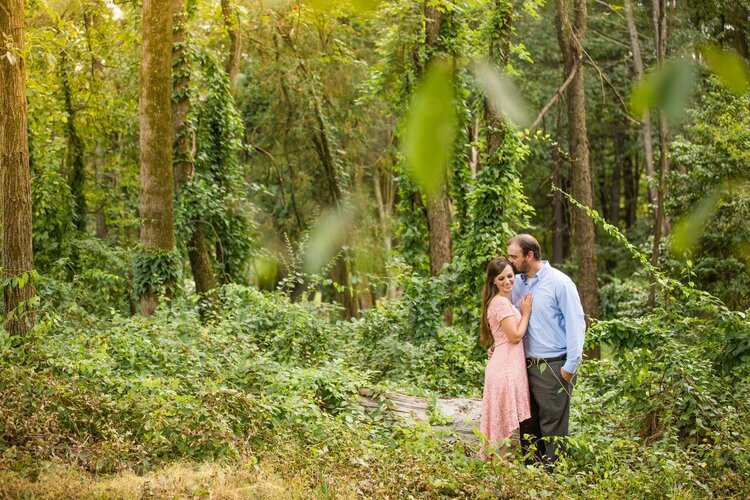
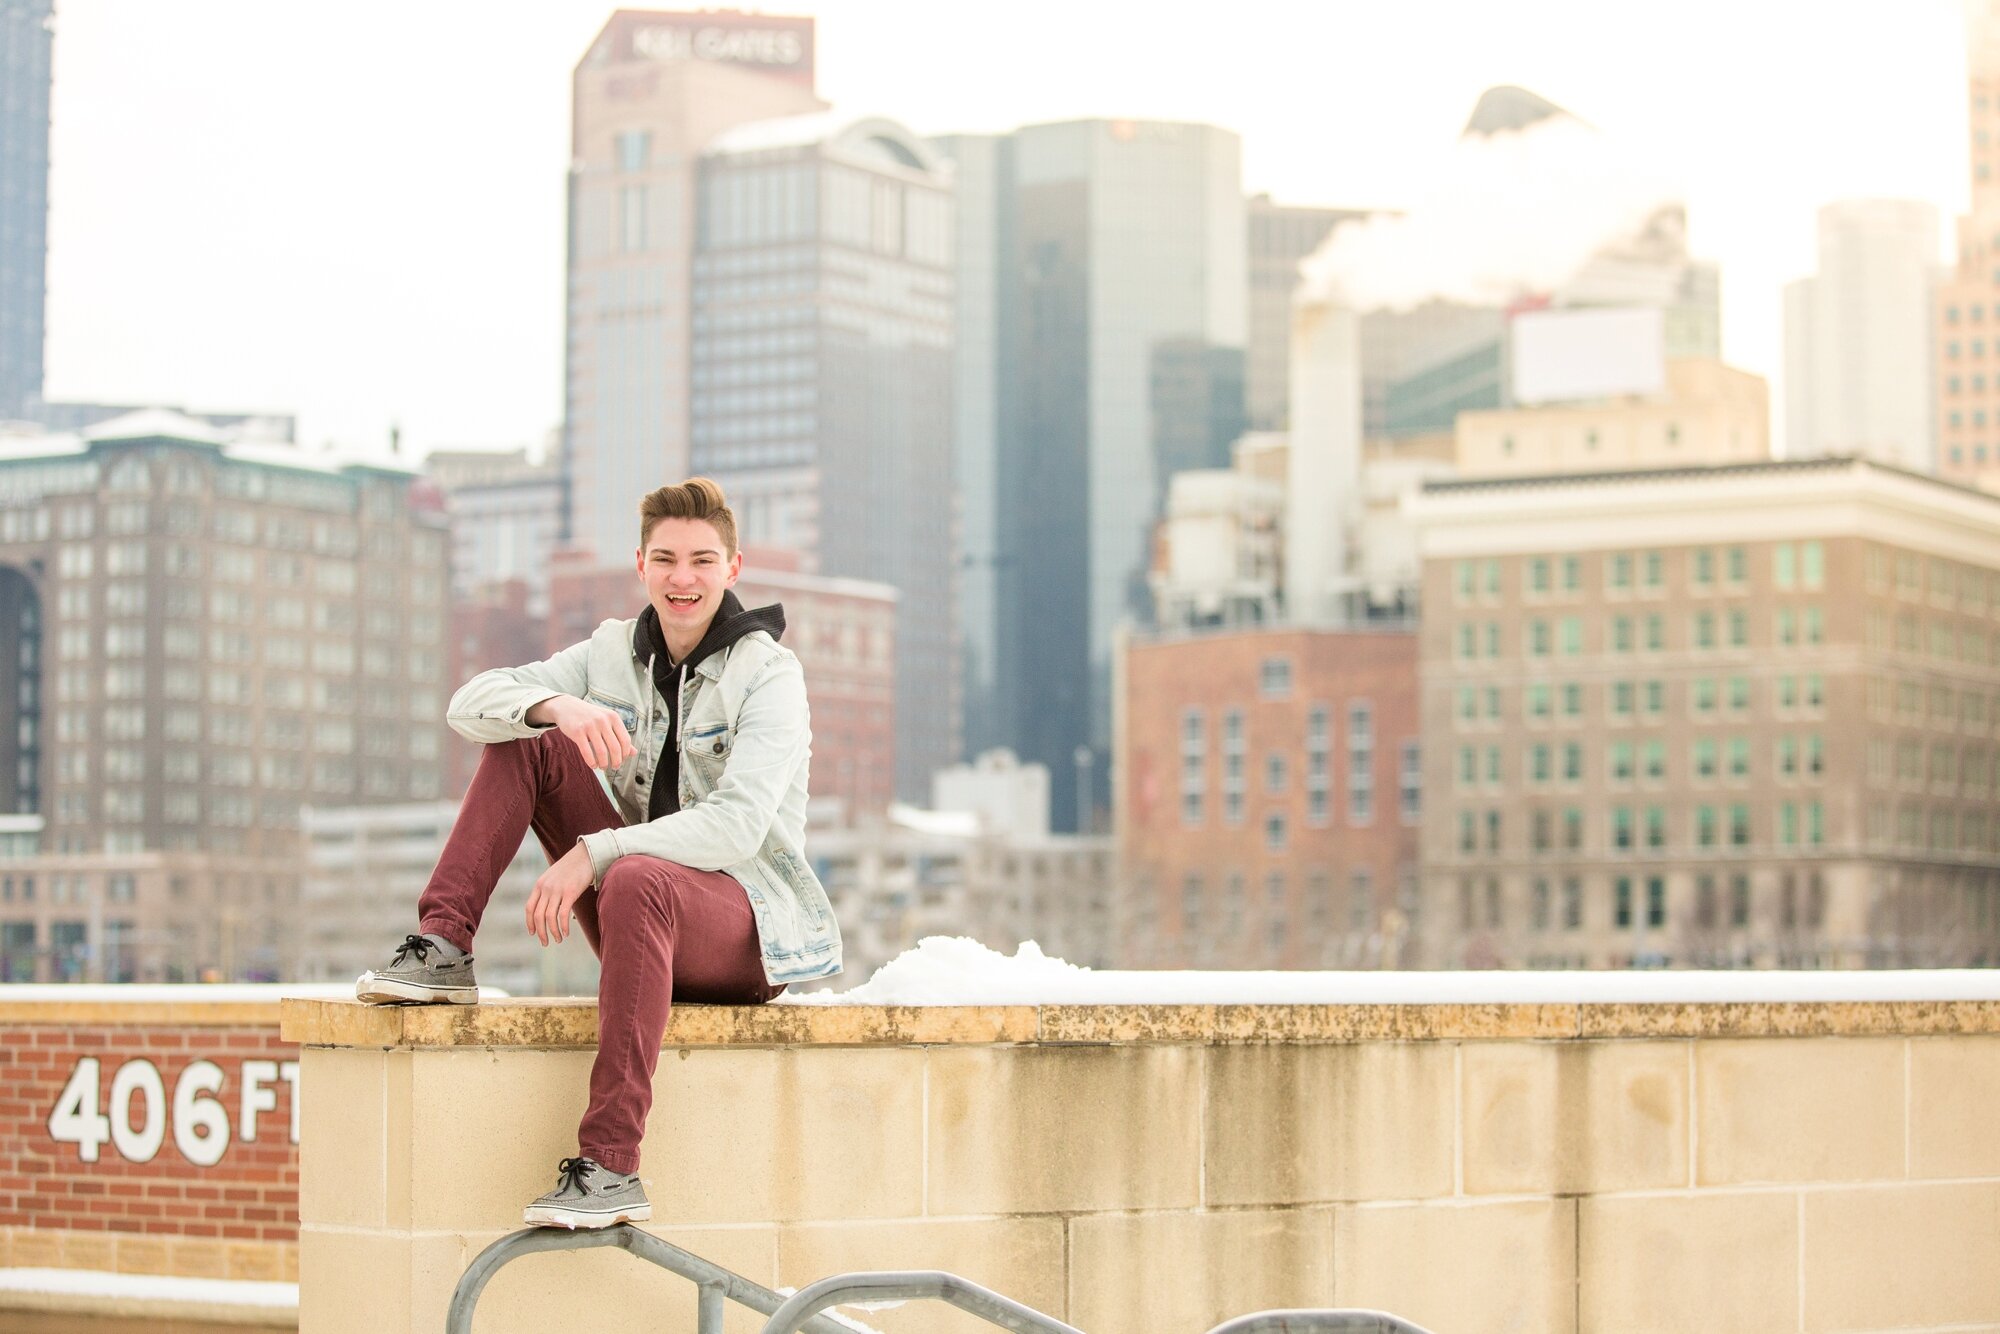
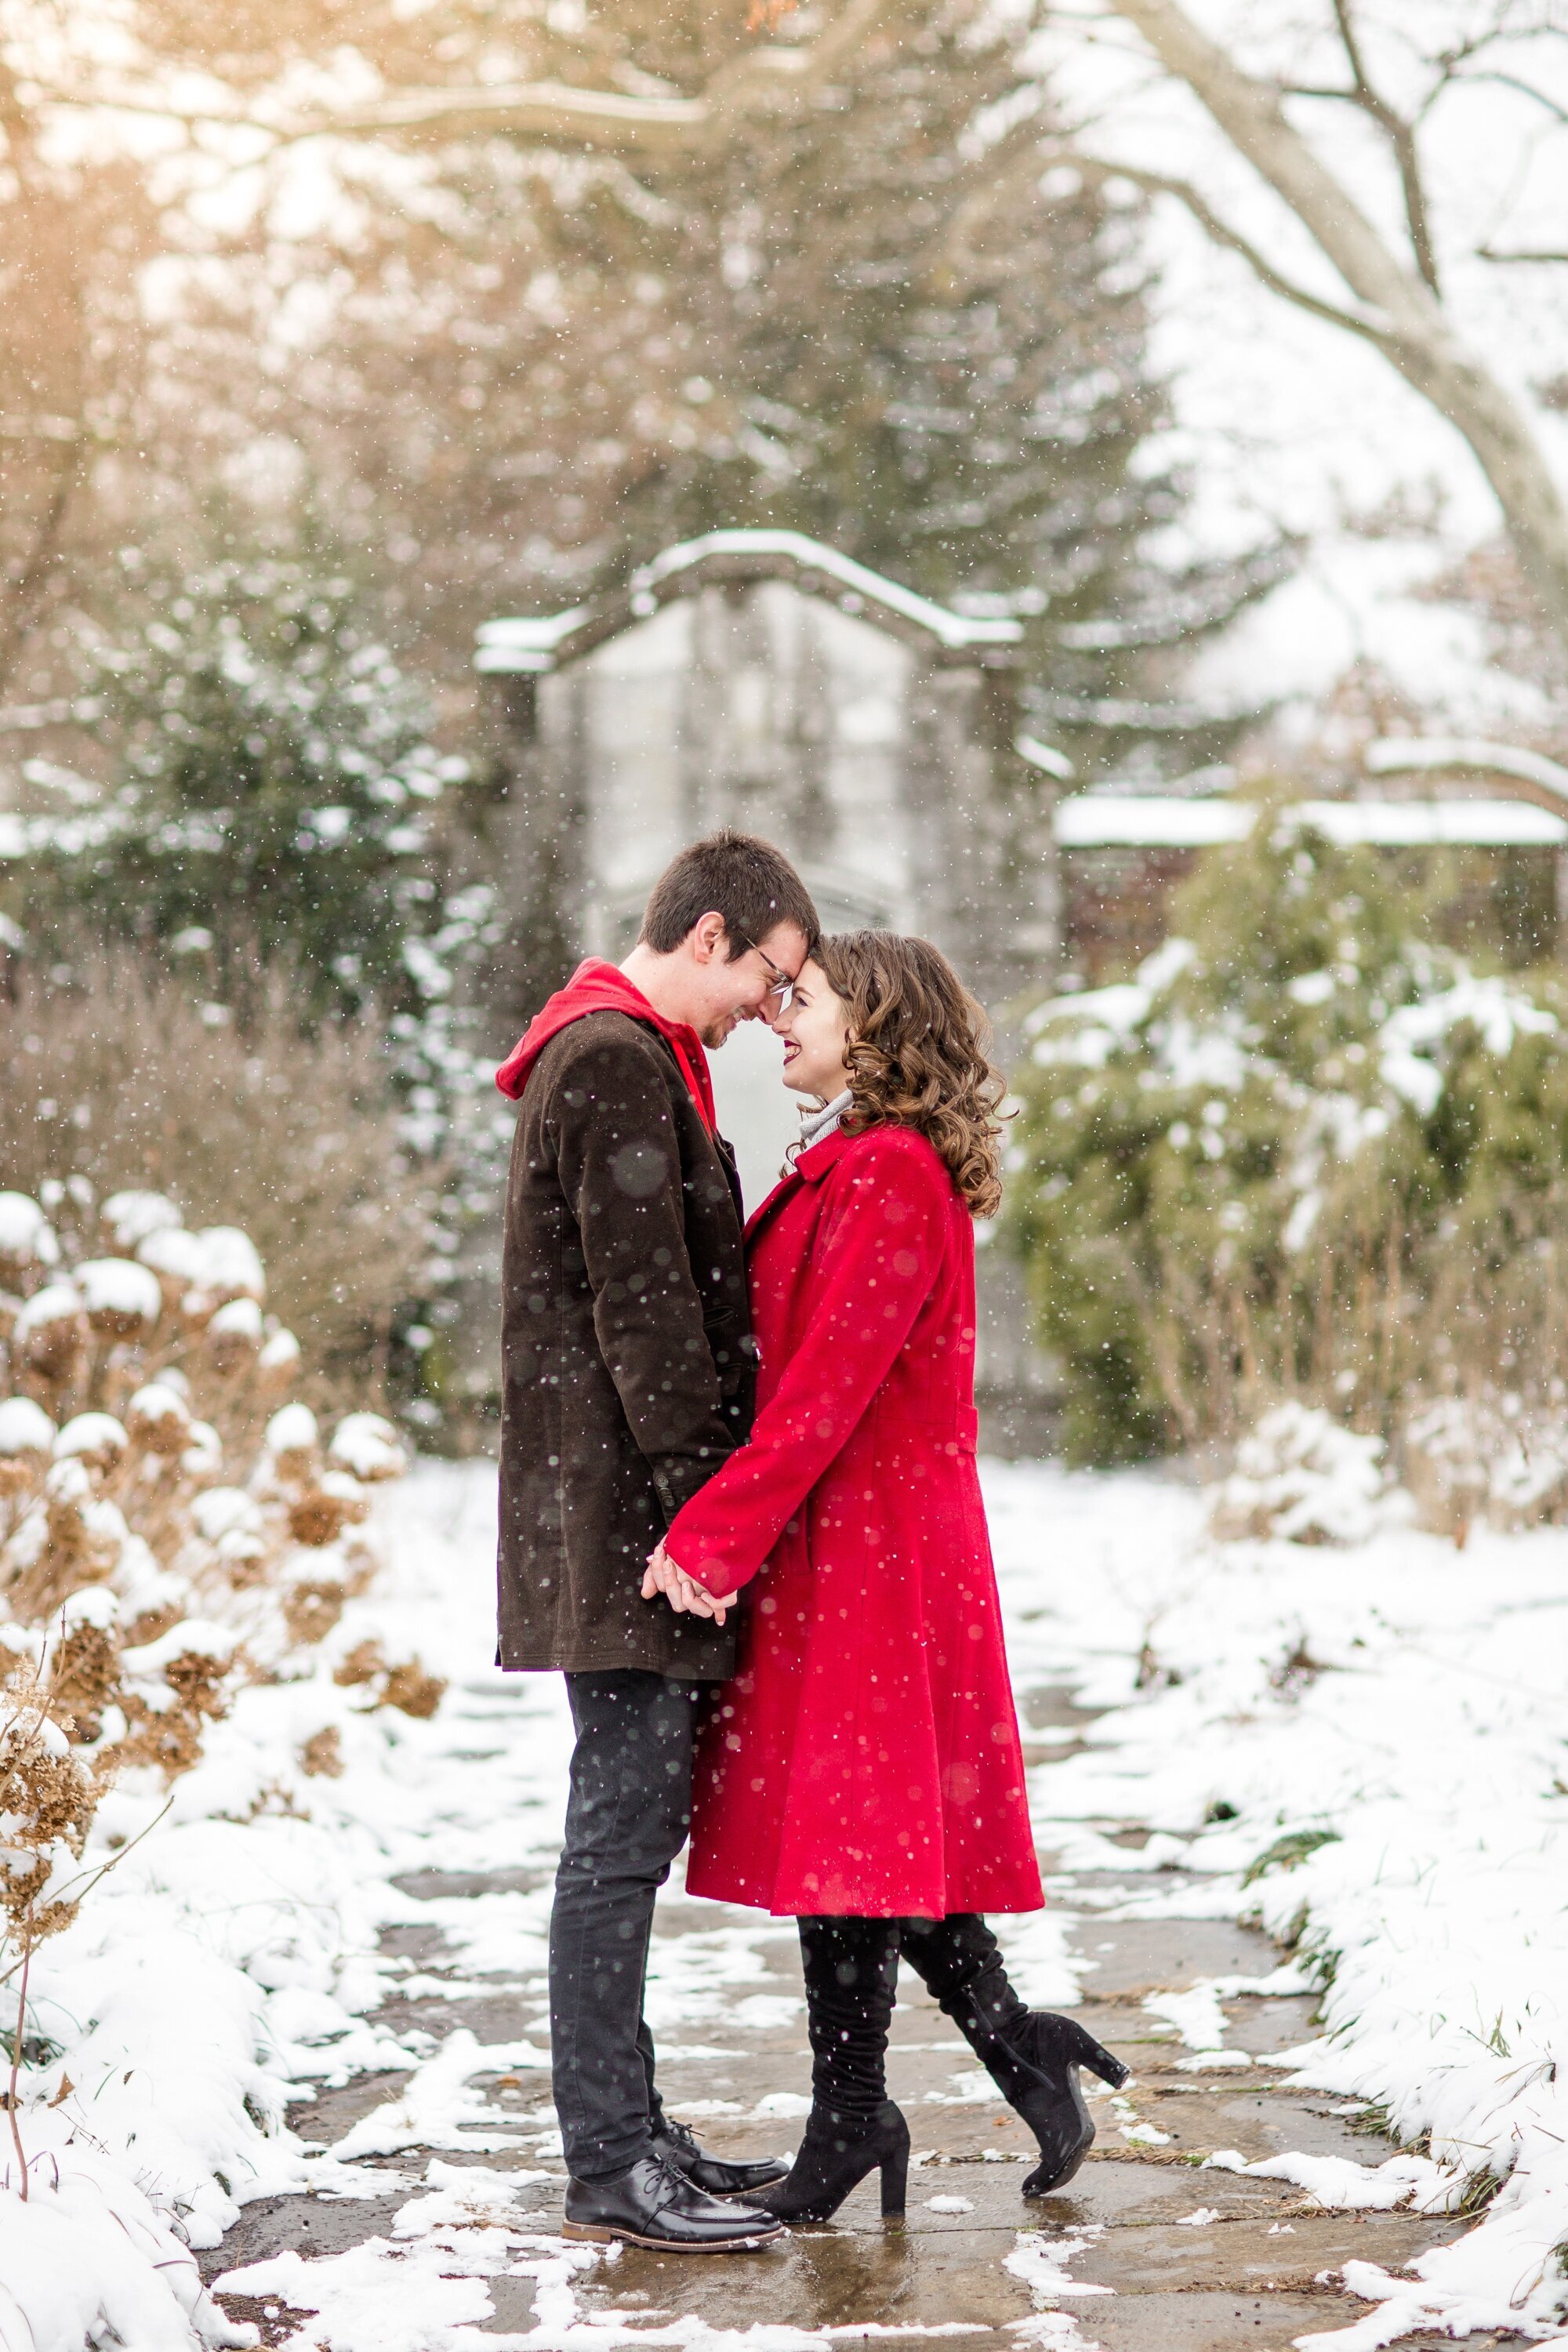
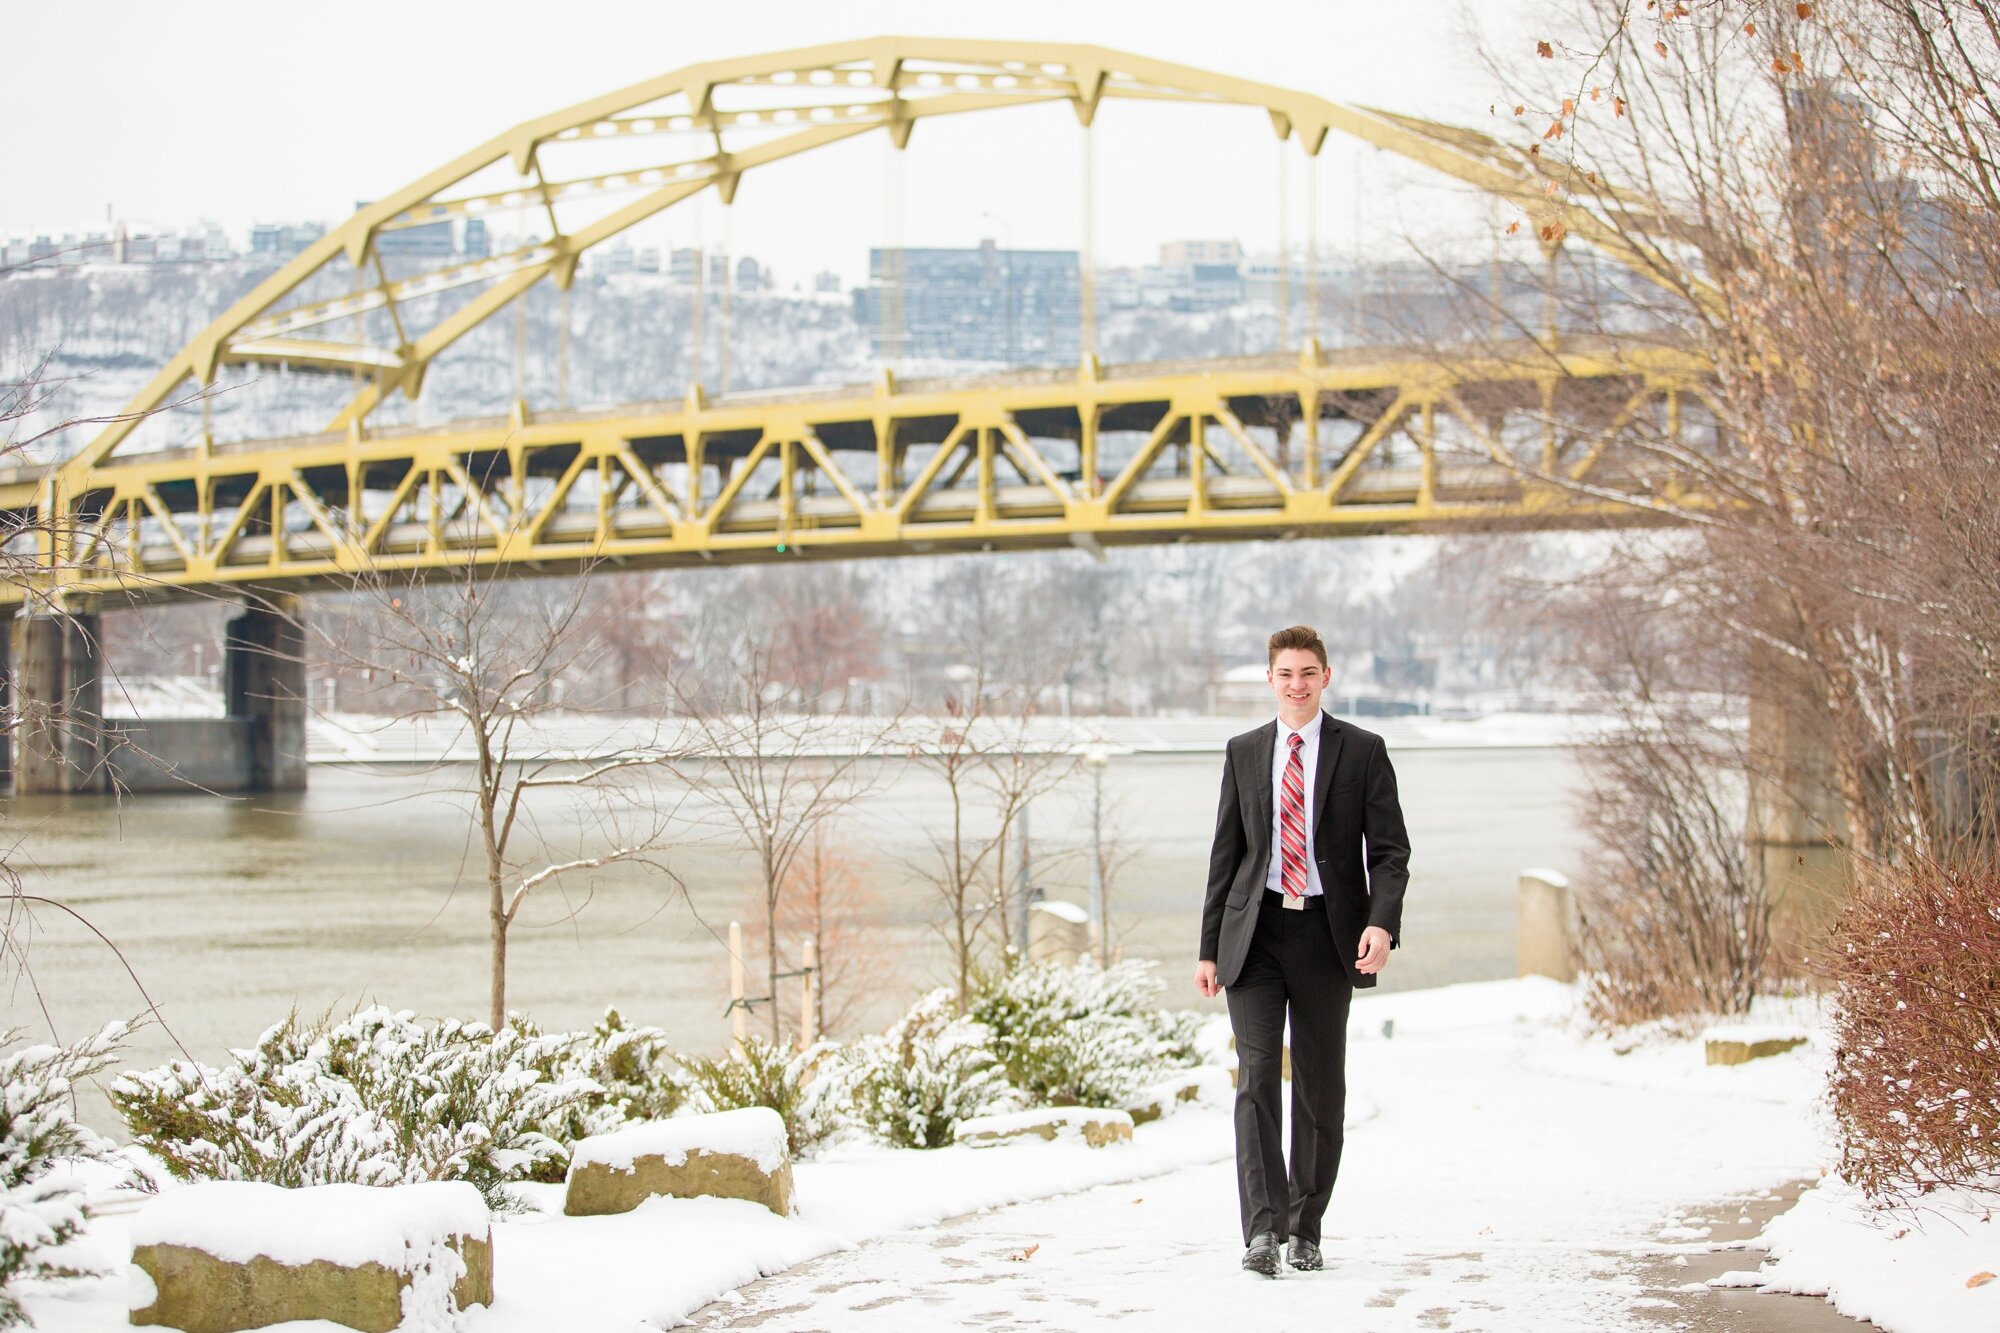
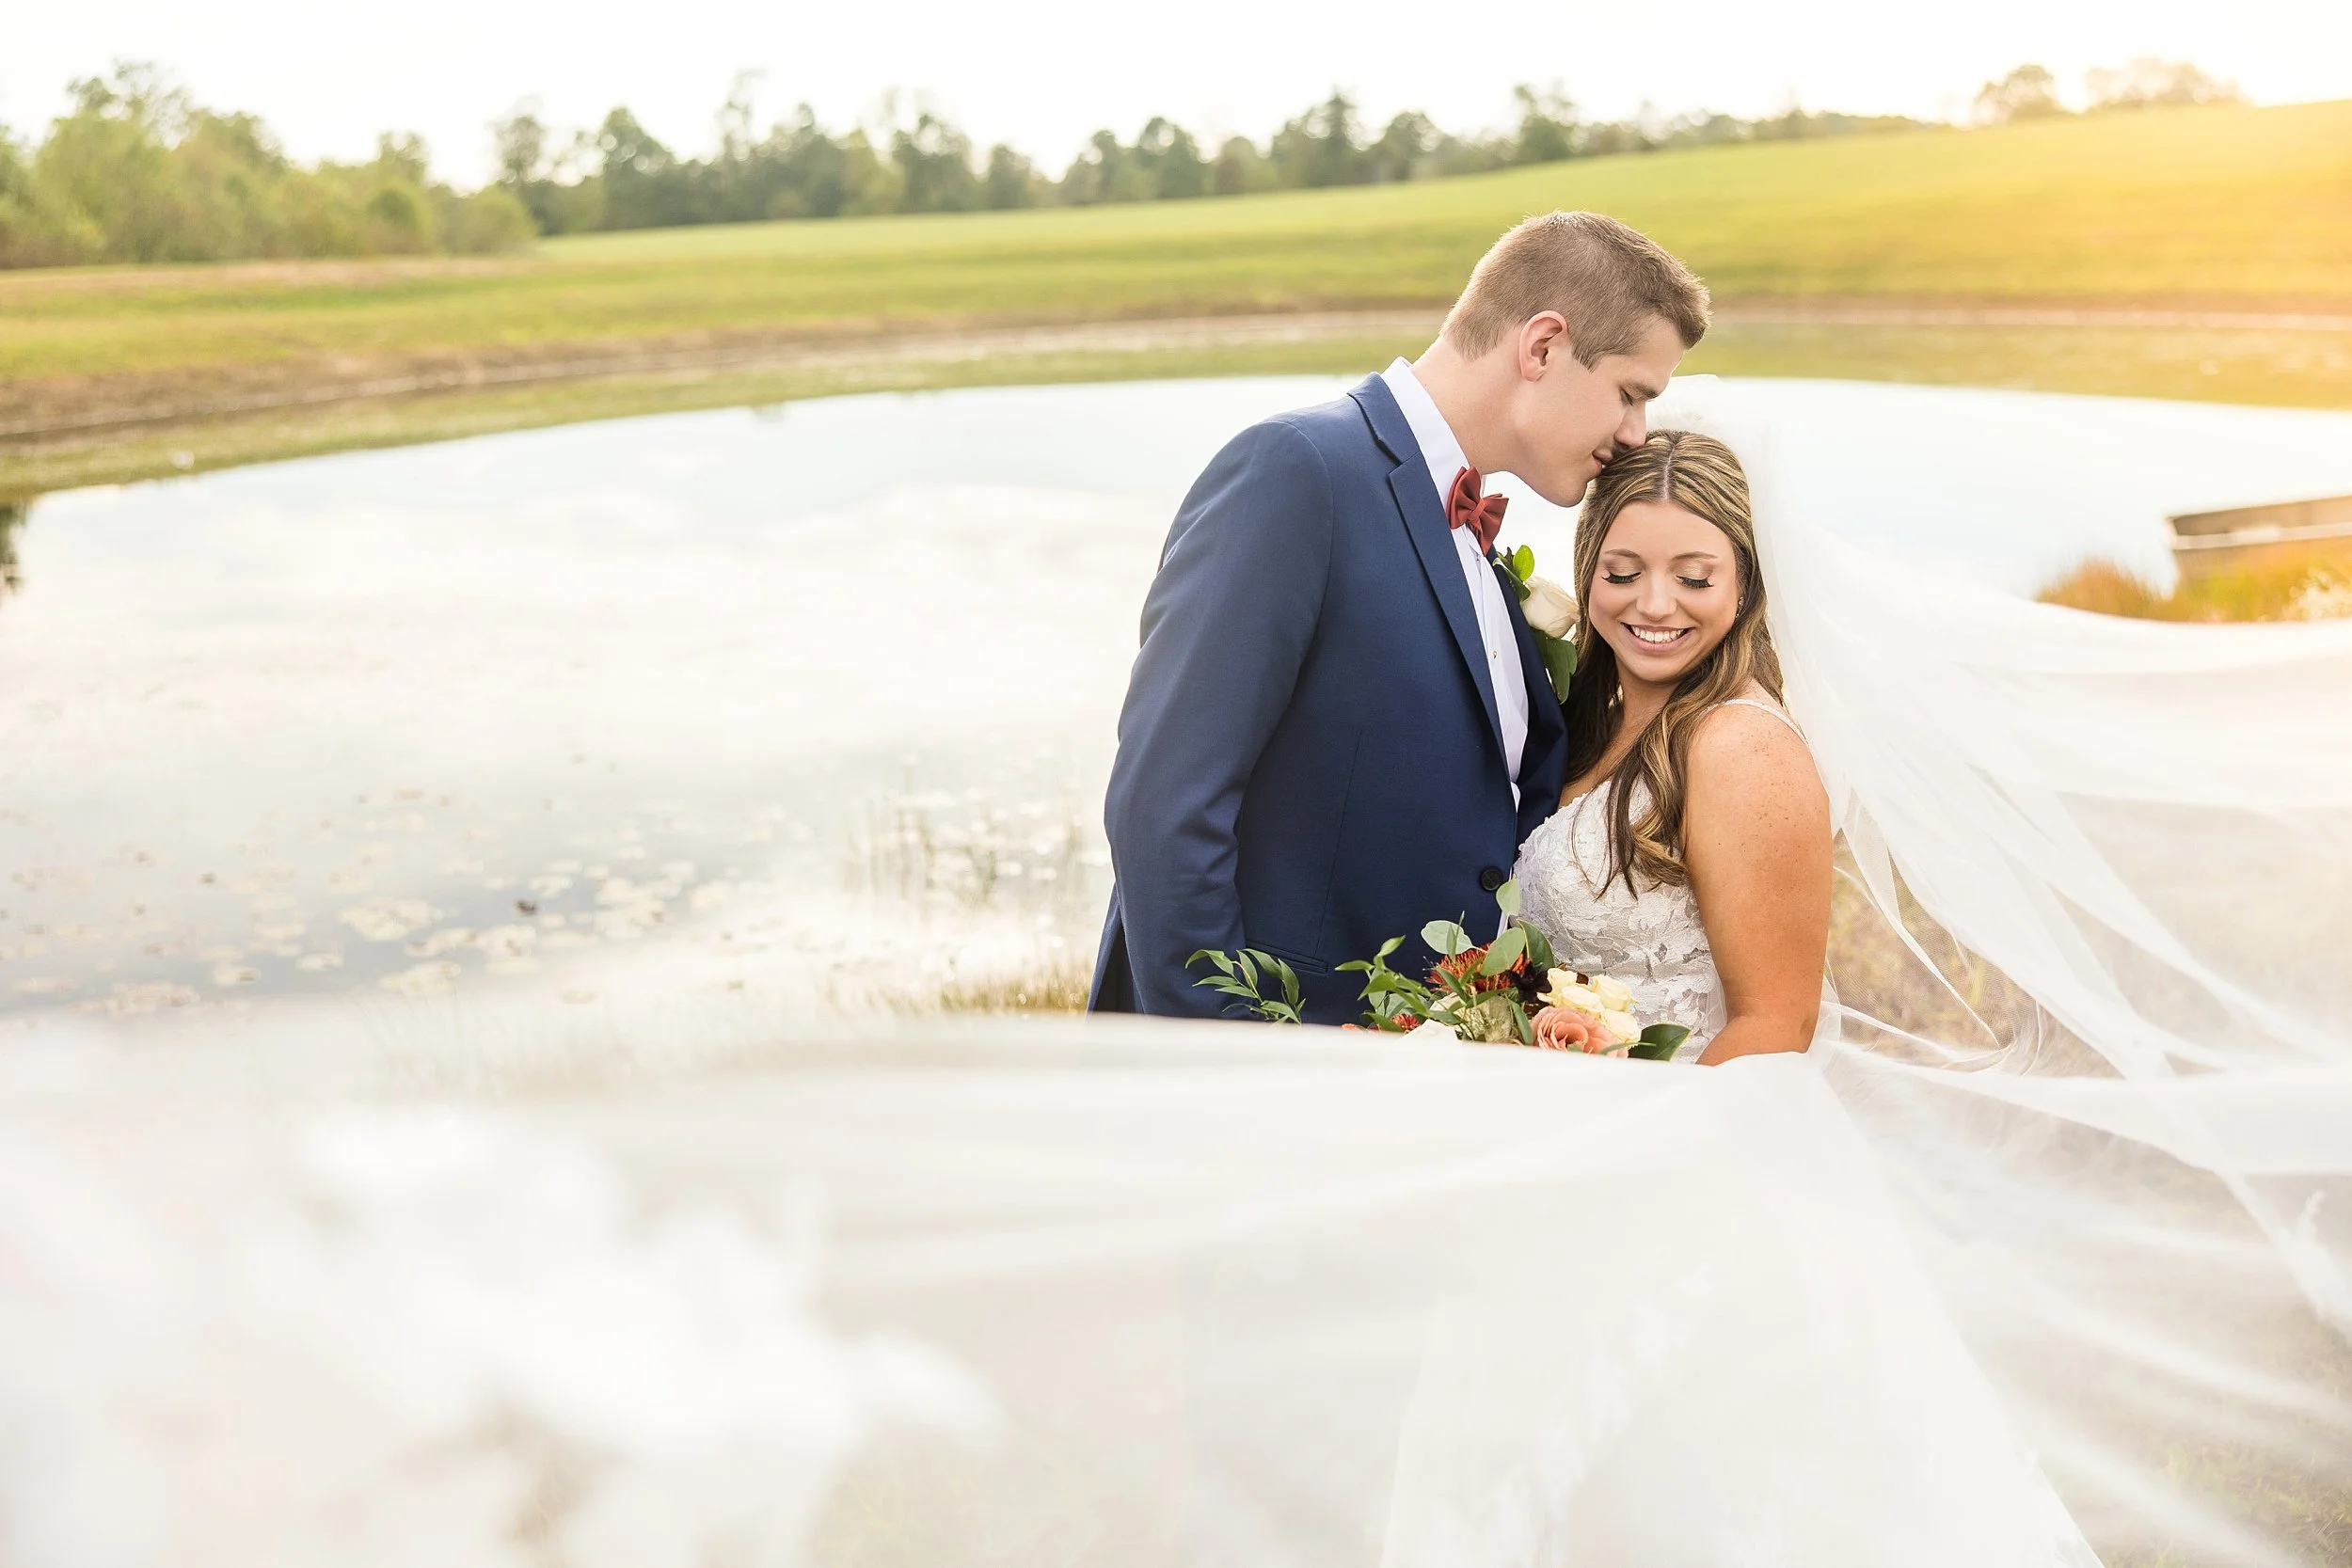
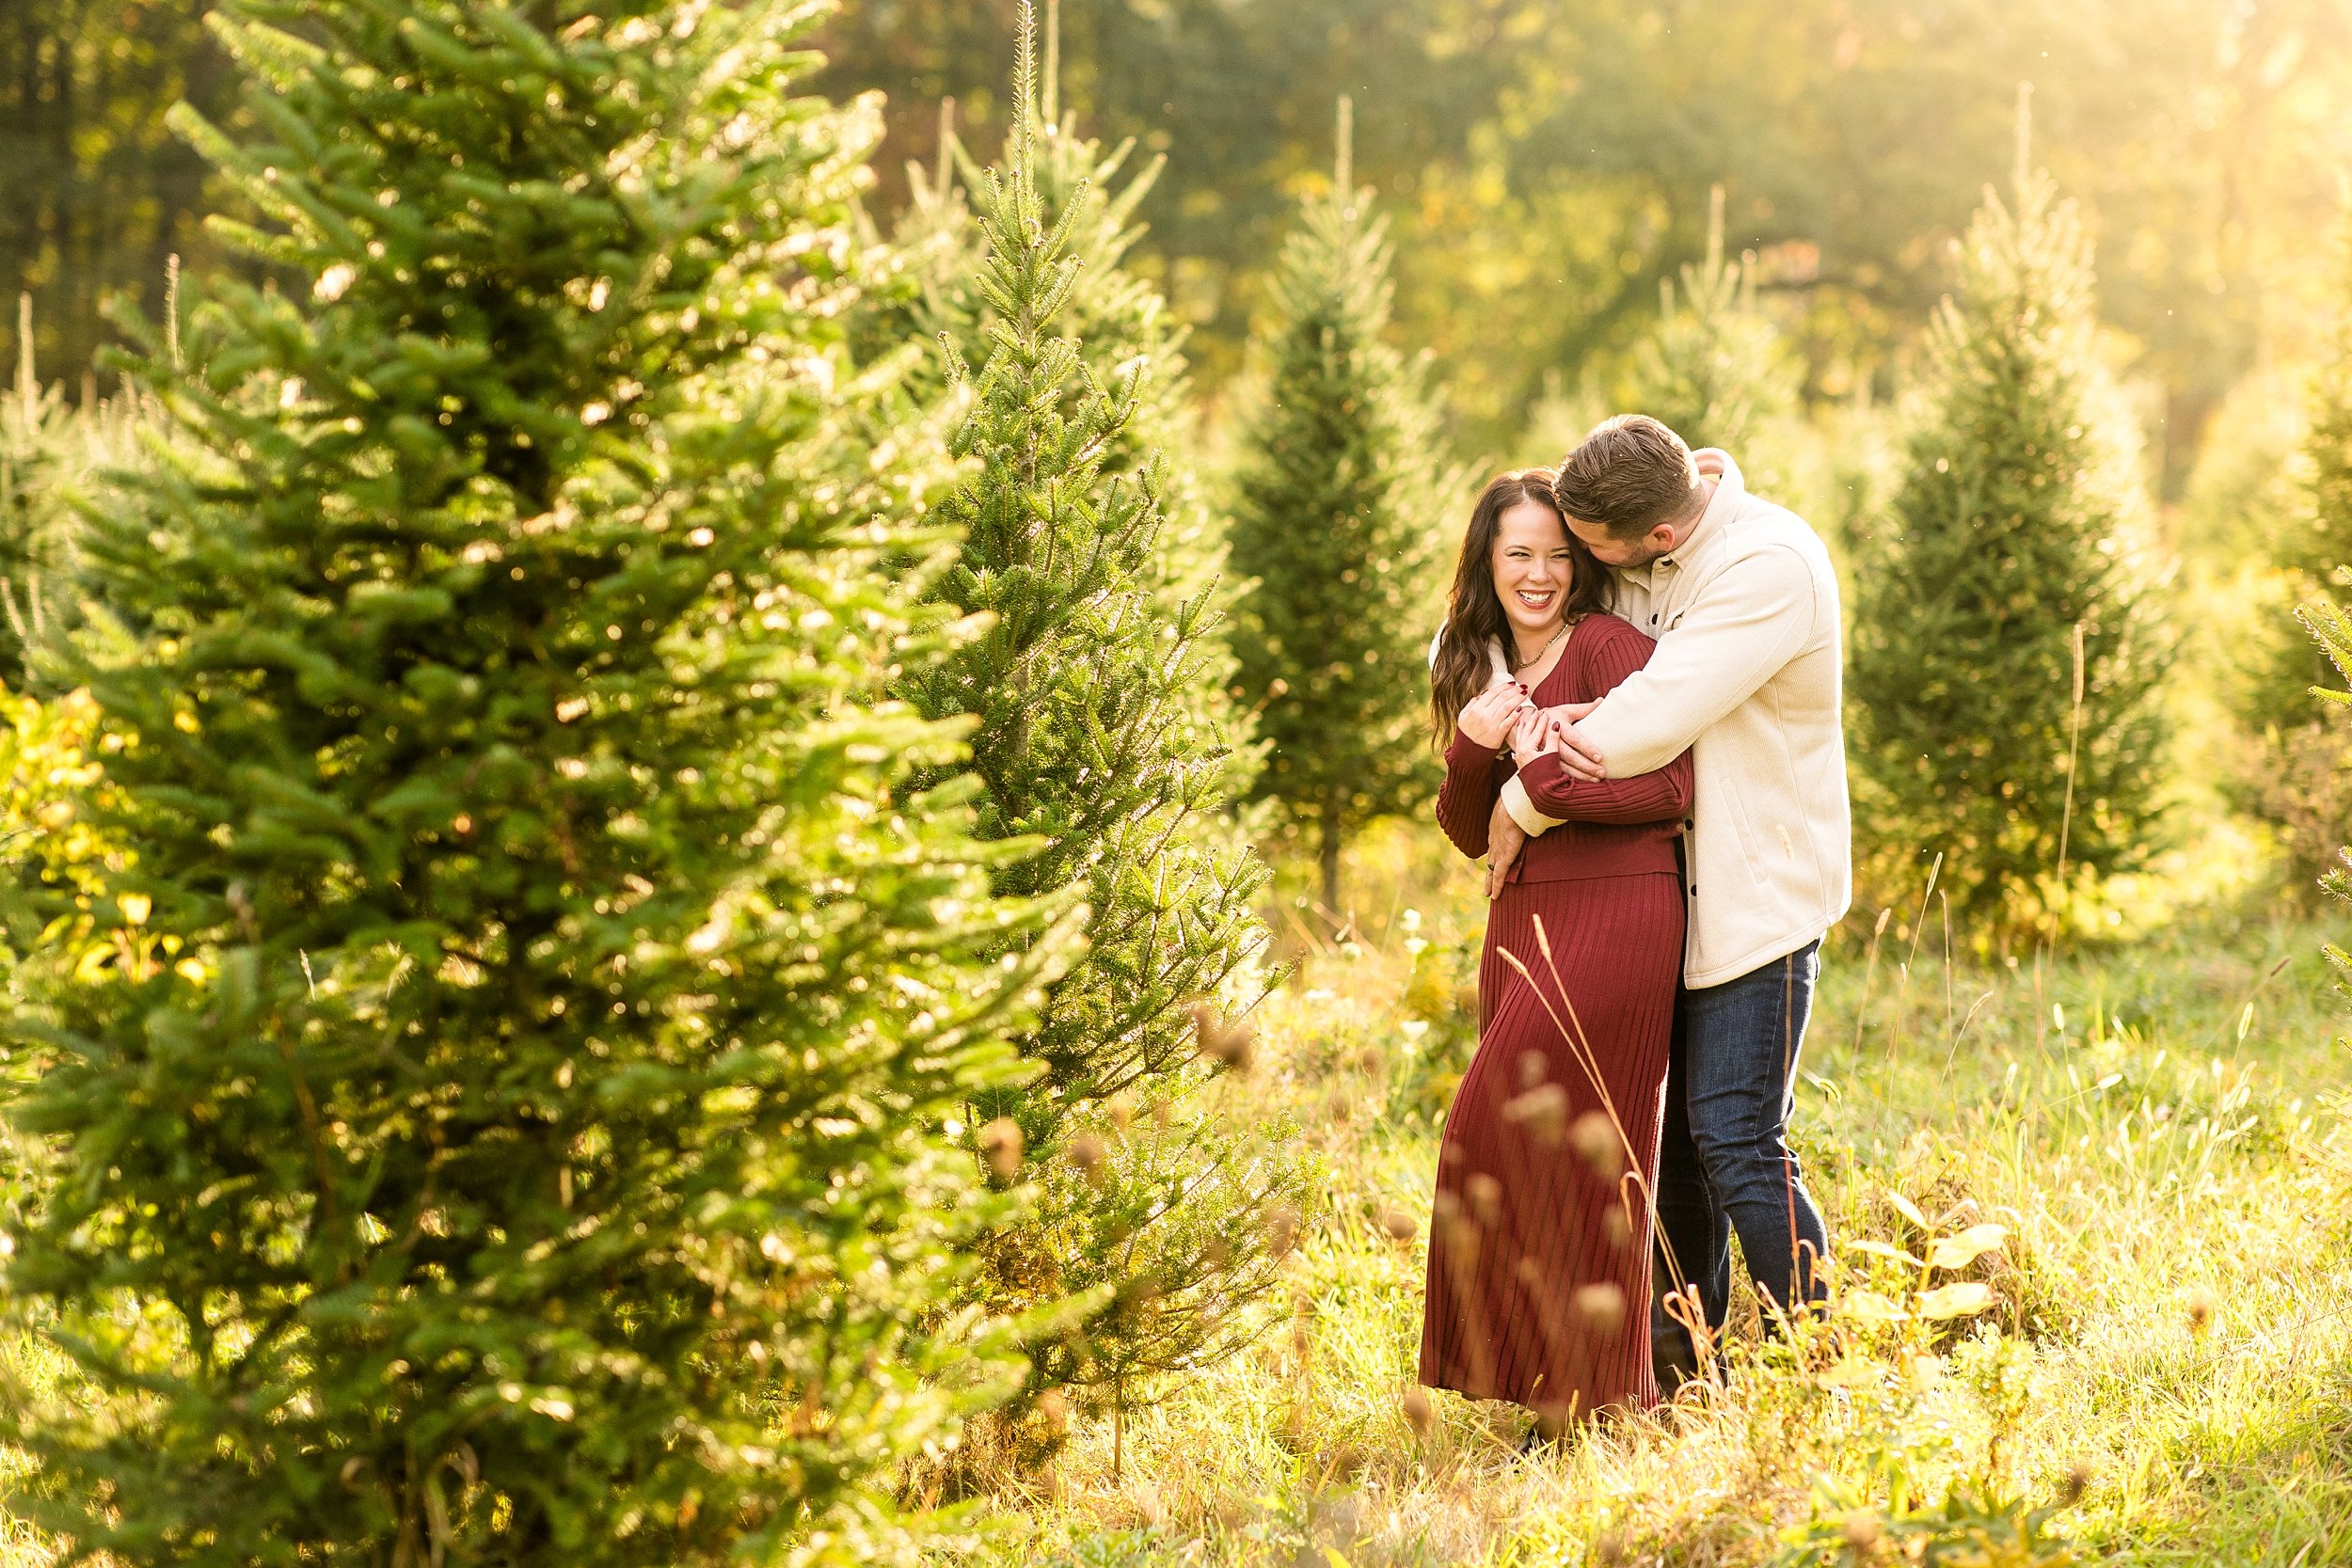
As a photographer who primarily uses natural light for outdoor photography, it’s important for me to know where the sun will be during the timeframe that the photo session will be taking place. My goal is to almost always have my subject facing away from the sun. Because of this, I have to make sure that any specific spots I choose to use during a session are working in cooperation with the available light and with the look I am trying to achieve.

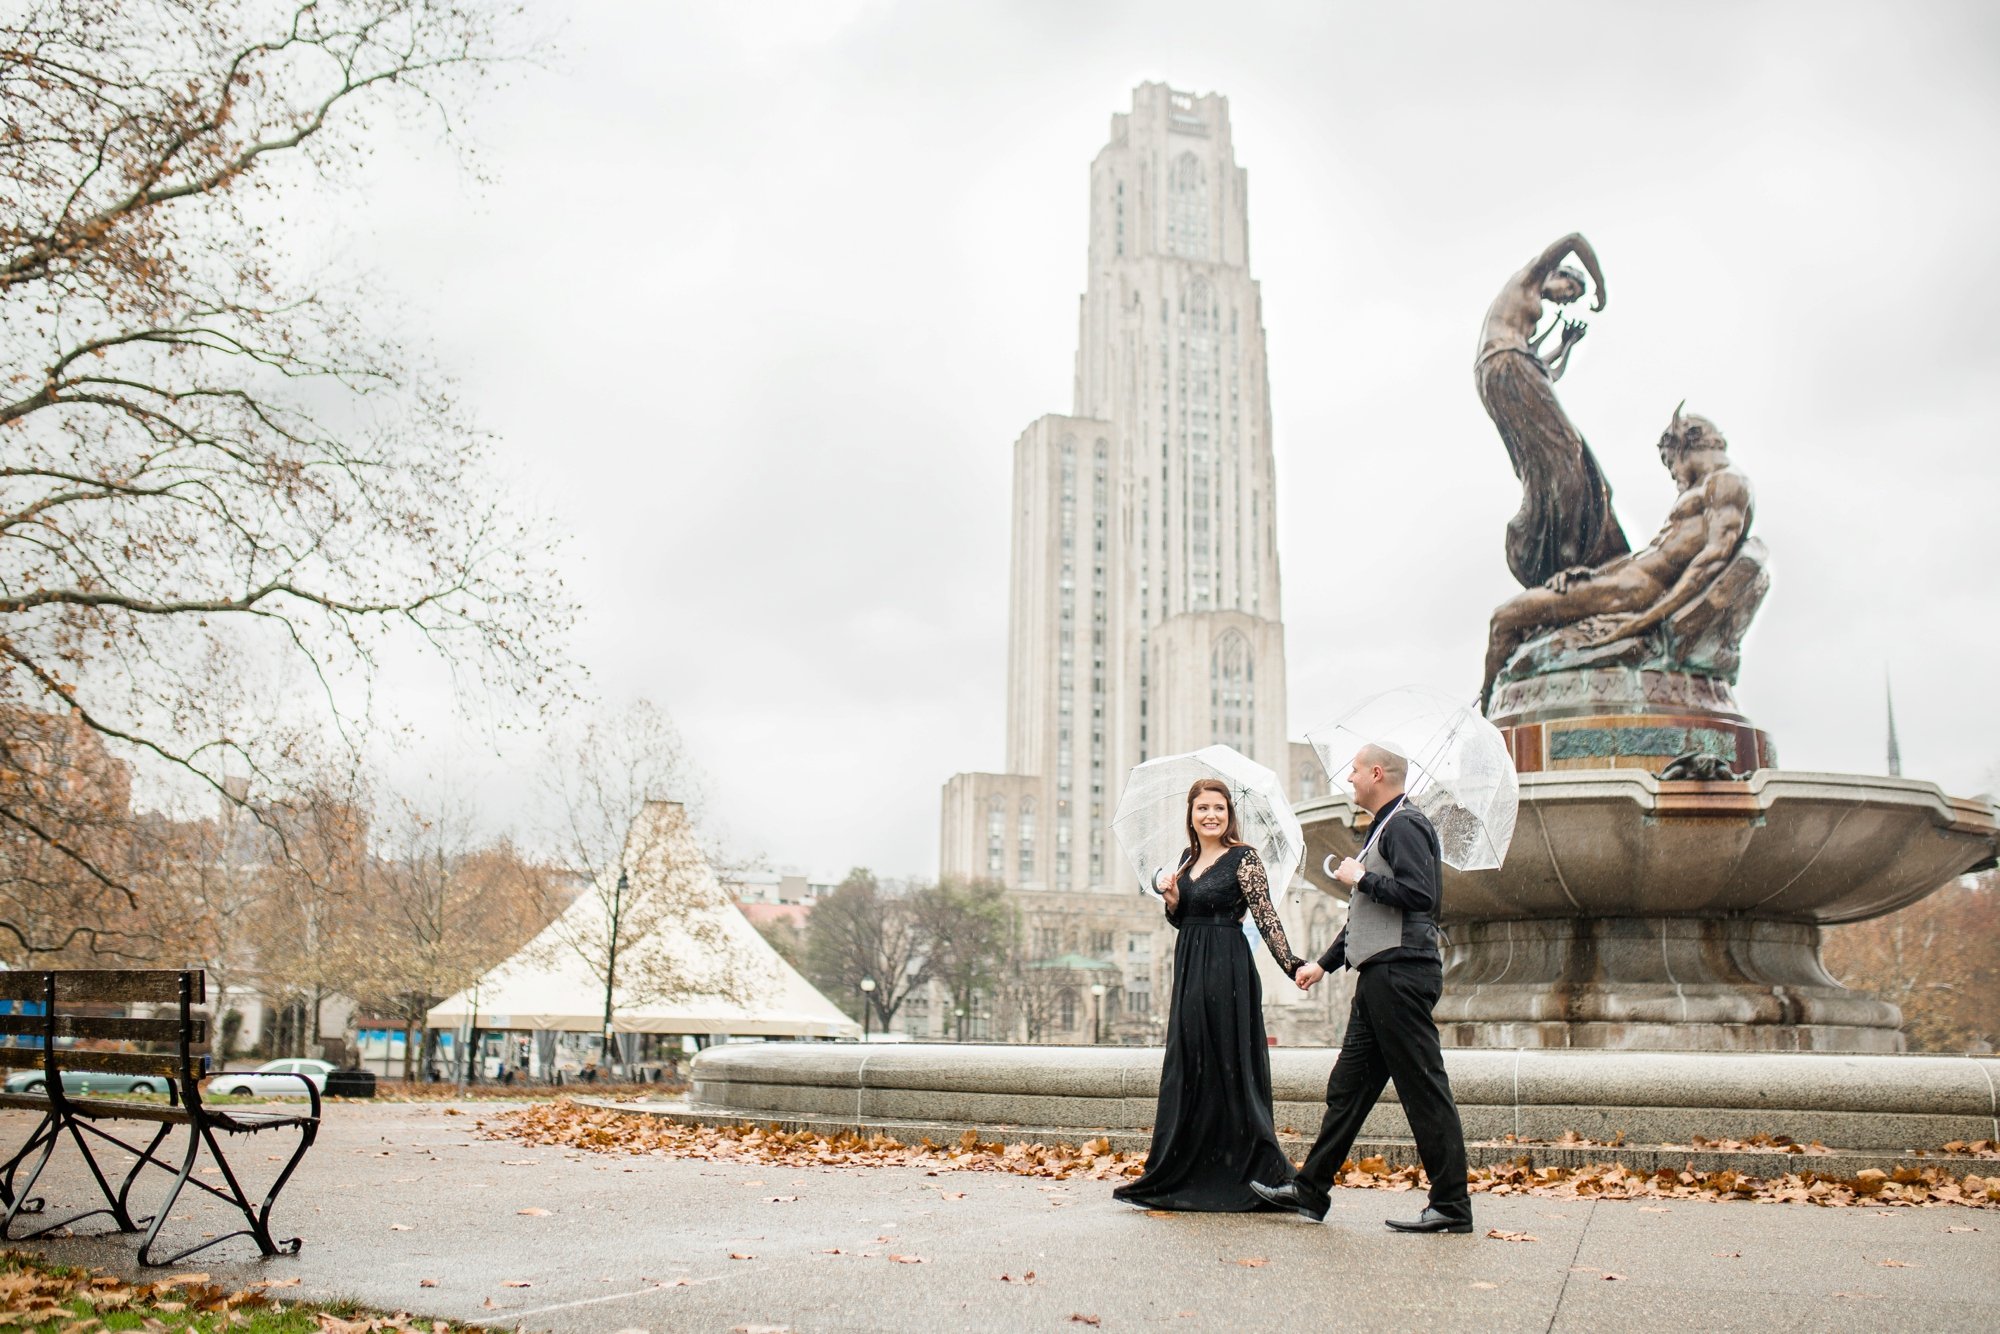
I will choose different locations when photographing an evening photo session versus a morning one, because the sun switches spots in the sky throughout the day. On an overcast day, however, I am able to use MANY more backdrops because the light is much easier to work with - it falls softly across my subject no matter which direction I have them facing, which means we are able to use a wider variety of backdrops.

The light is the first determining factor when figuring out what locations can be used for a photo session.

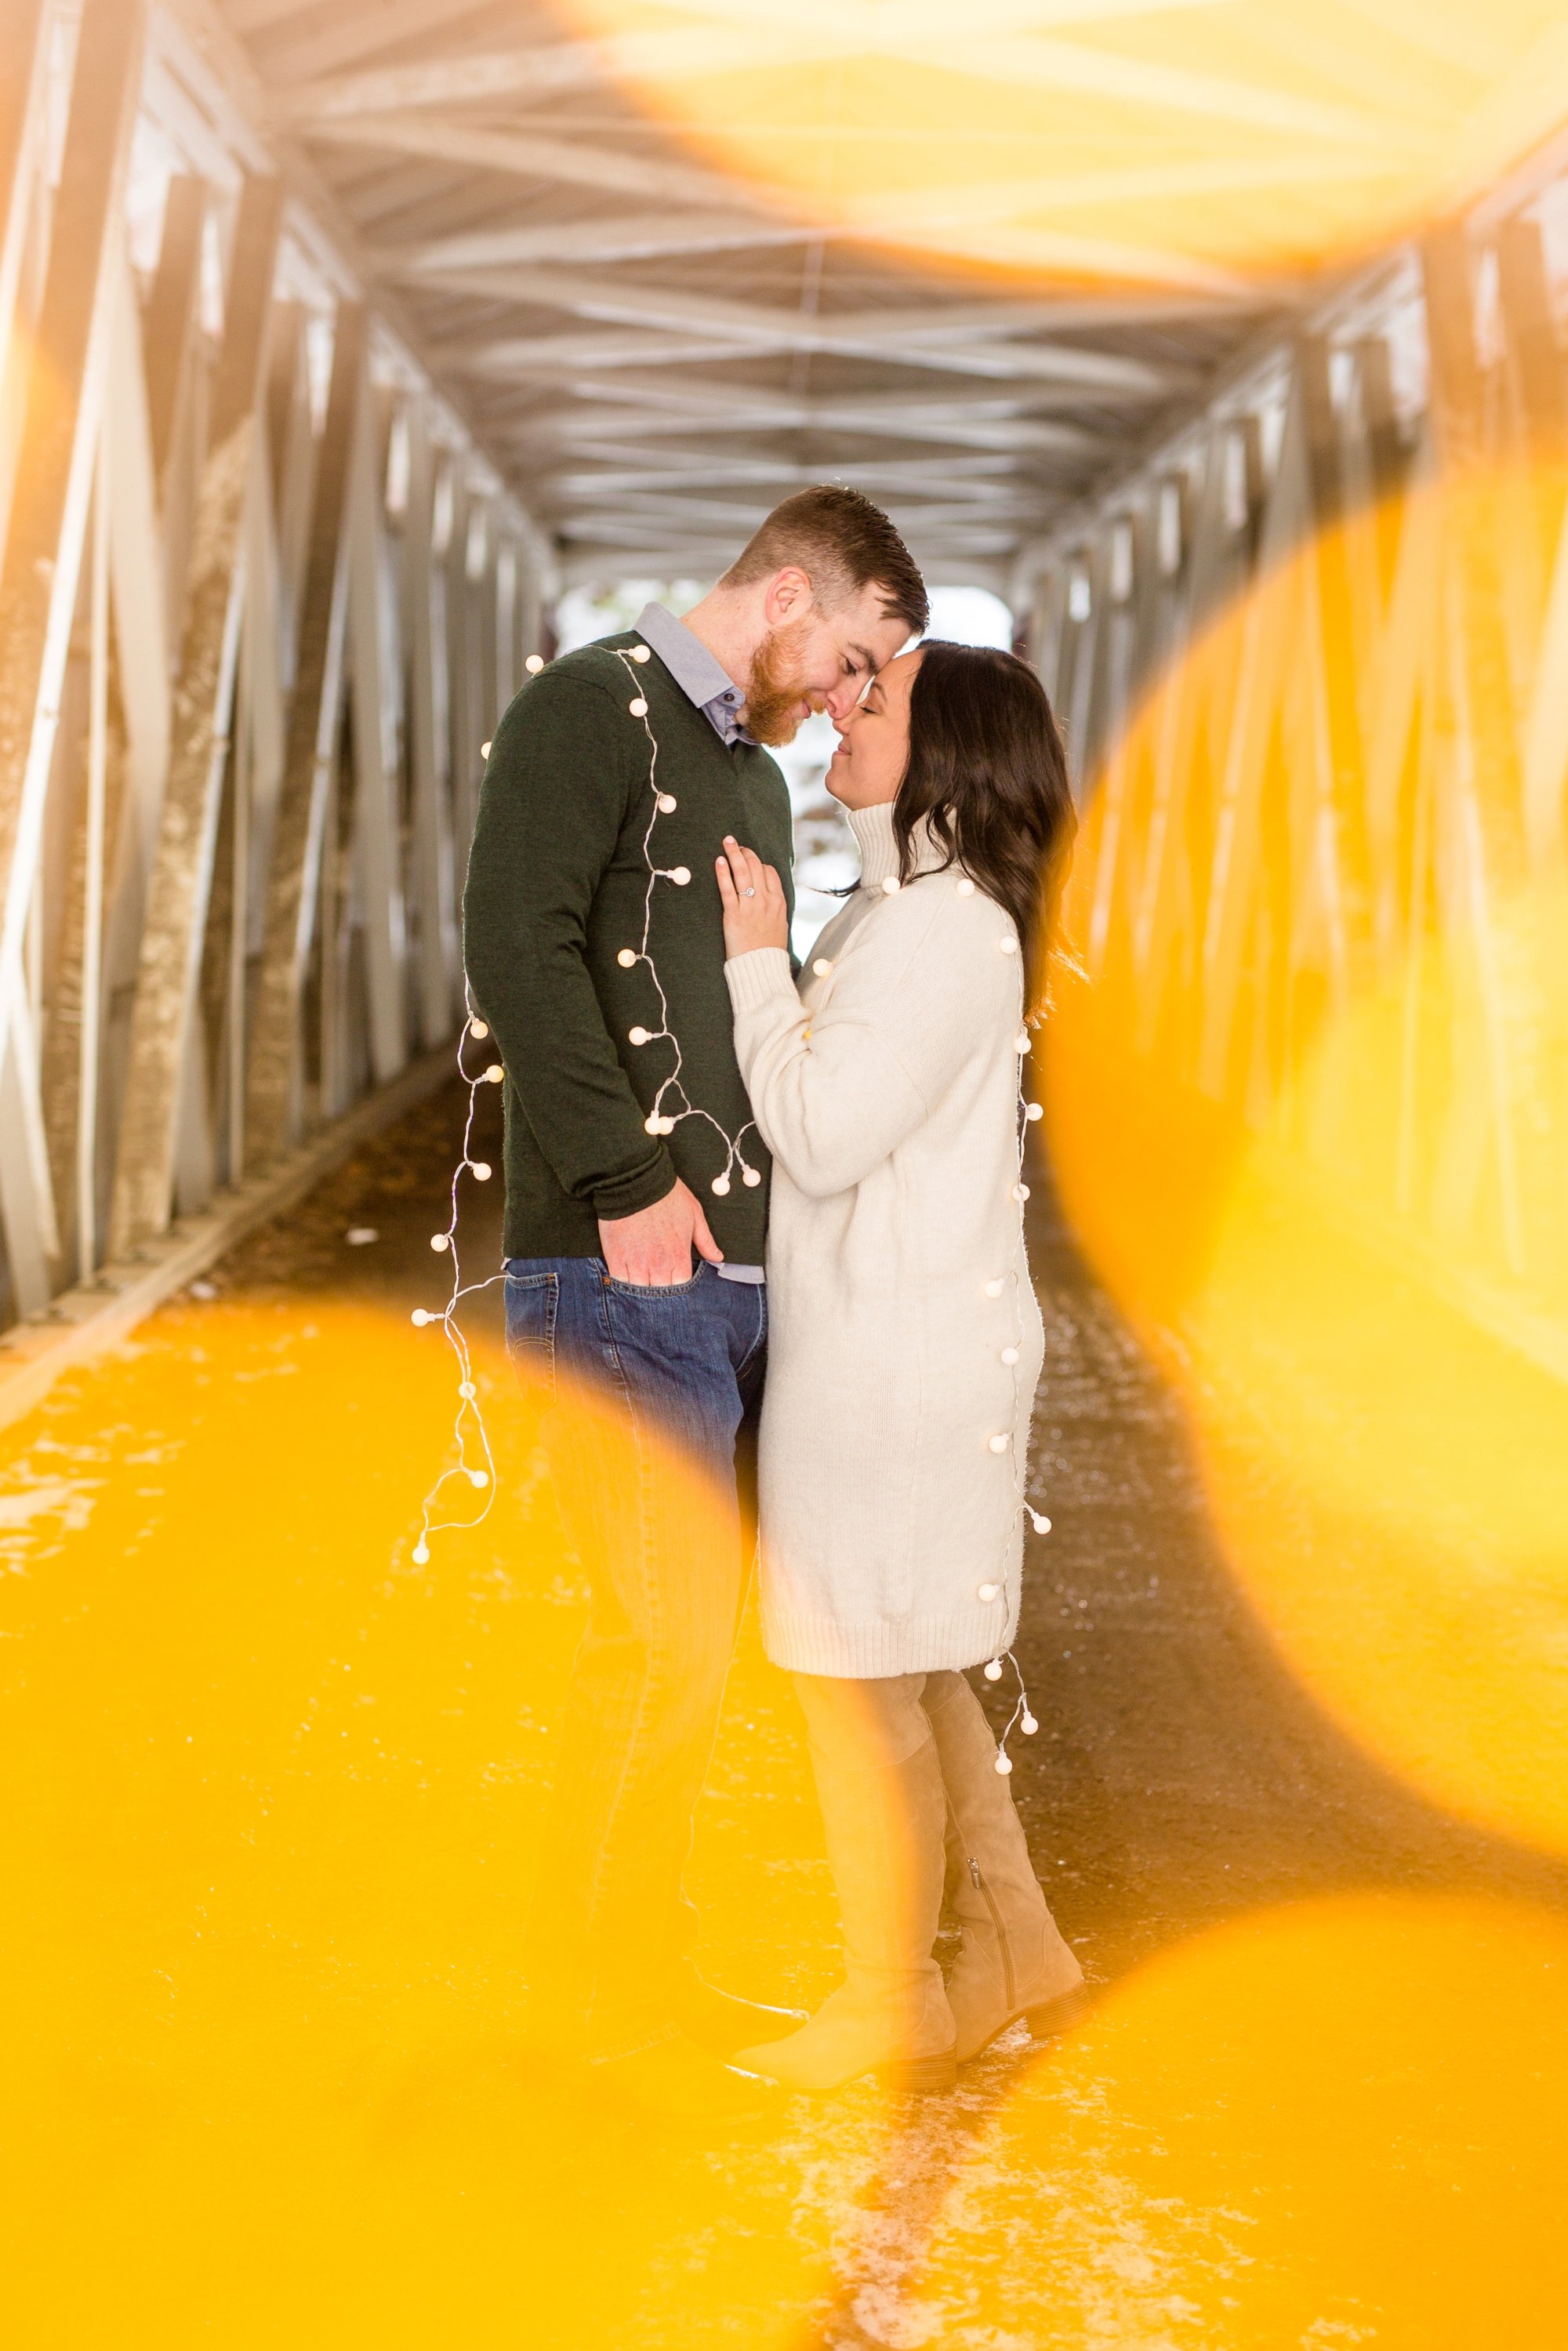
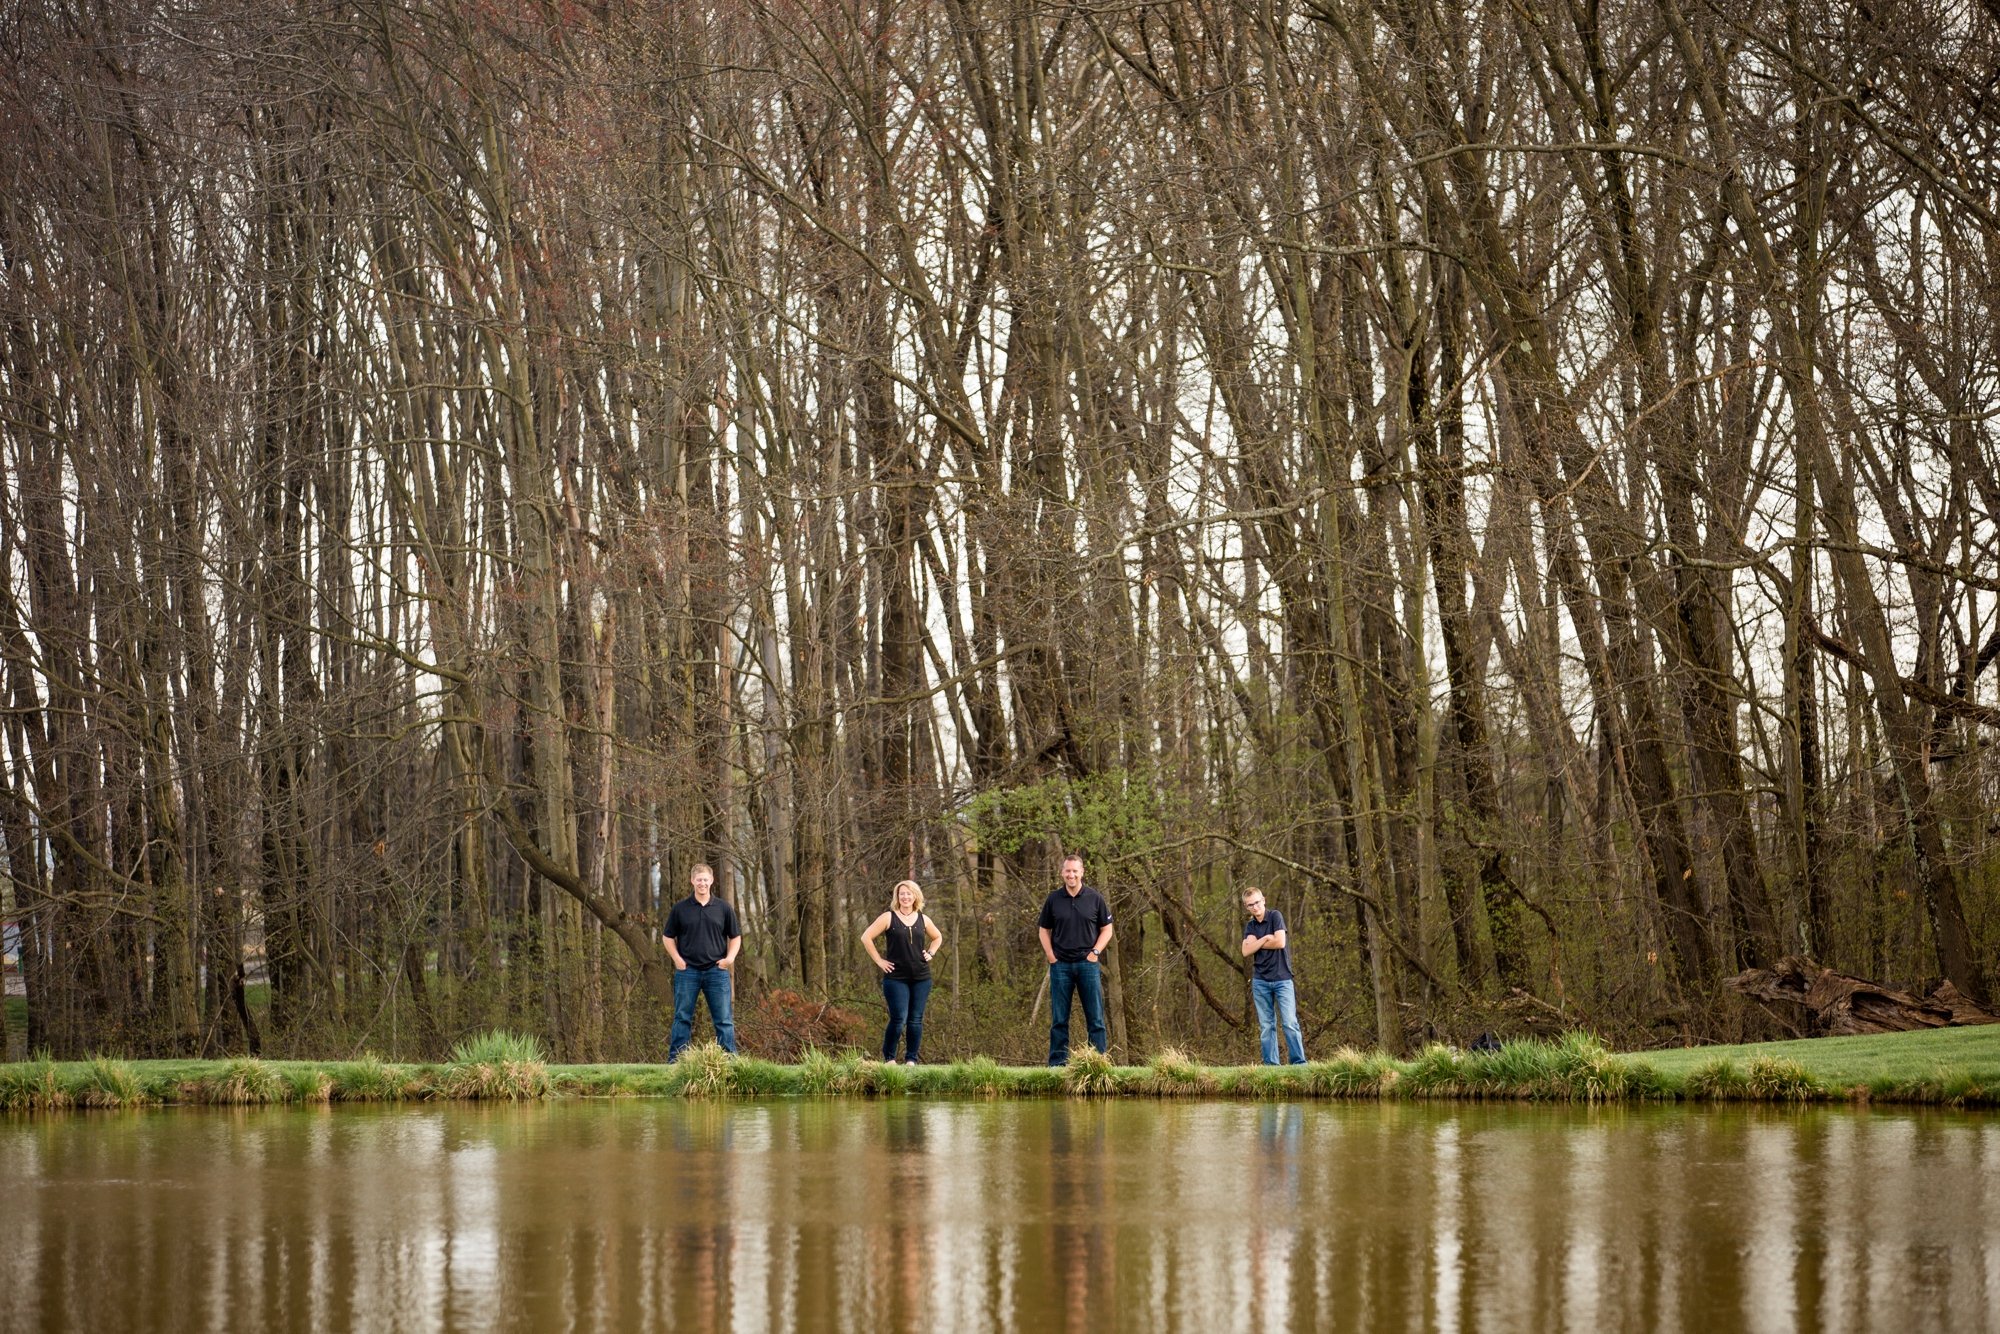
2 - Natural Reflectors

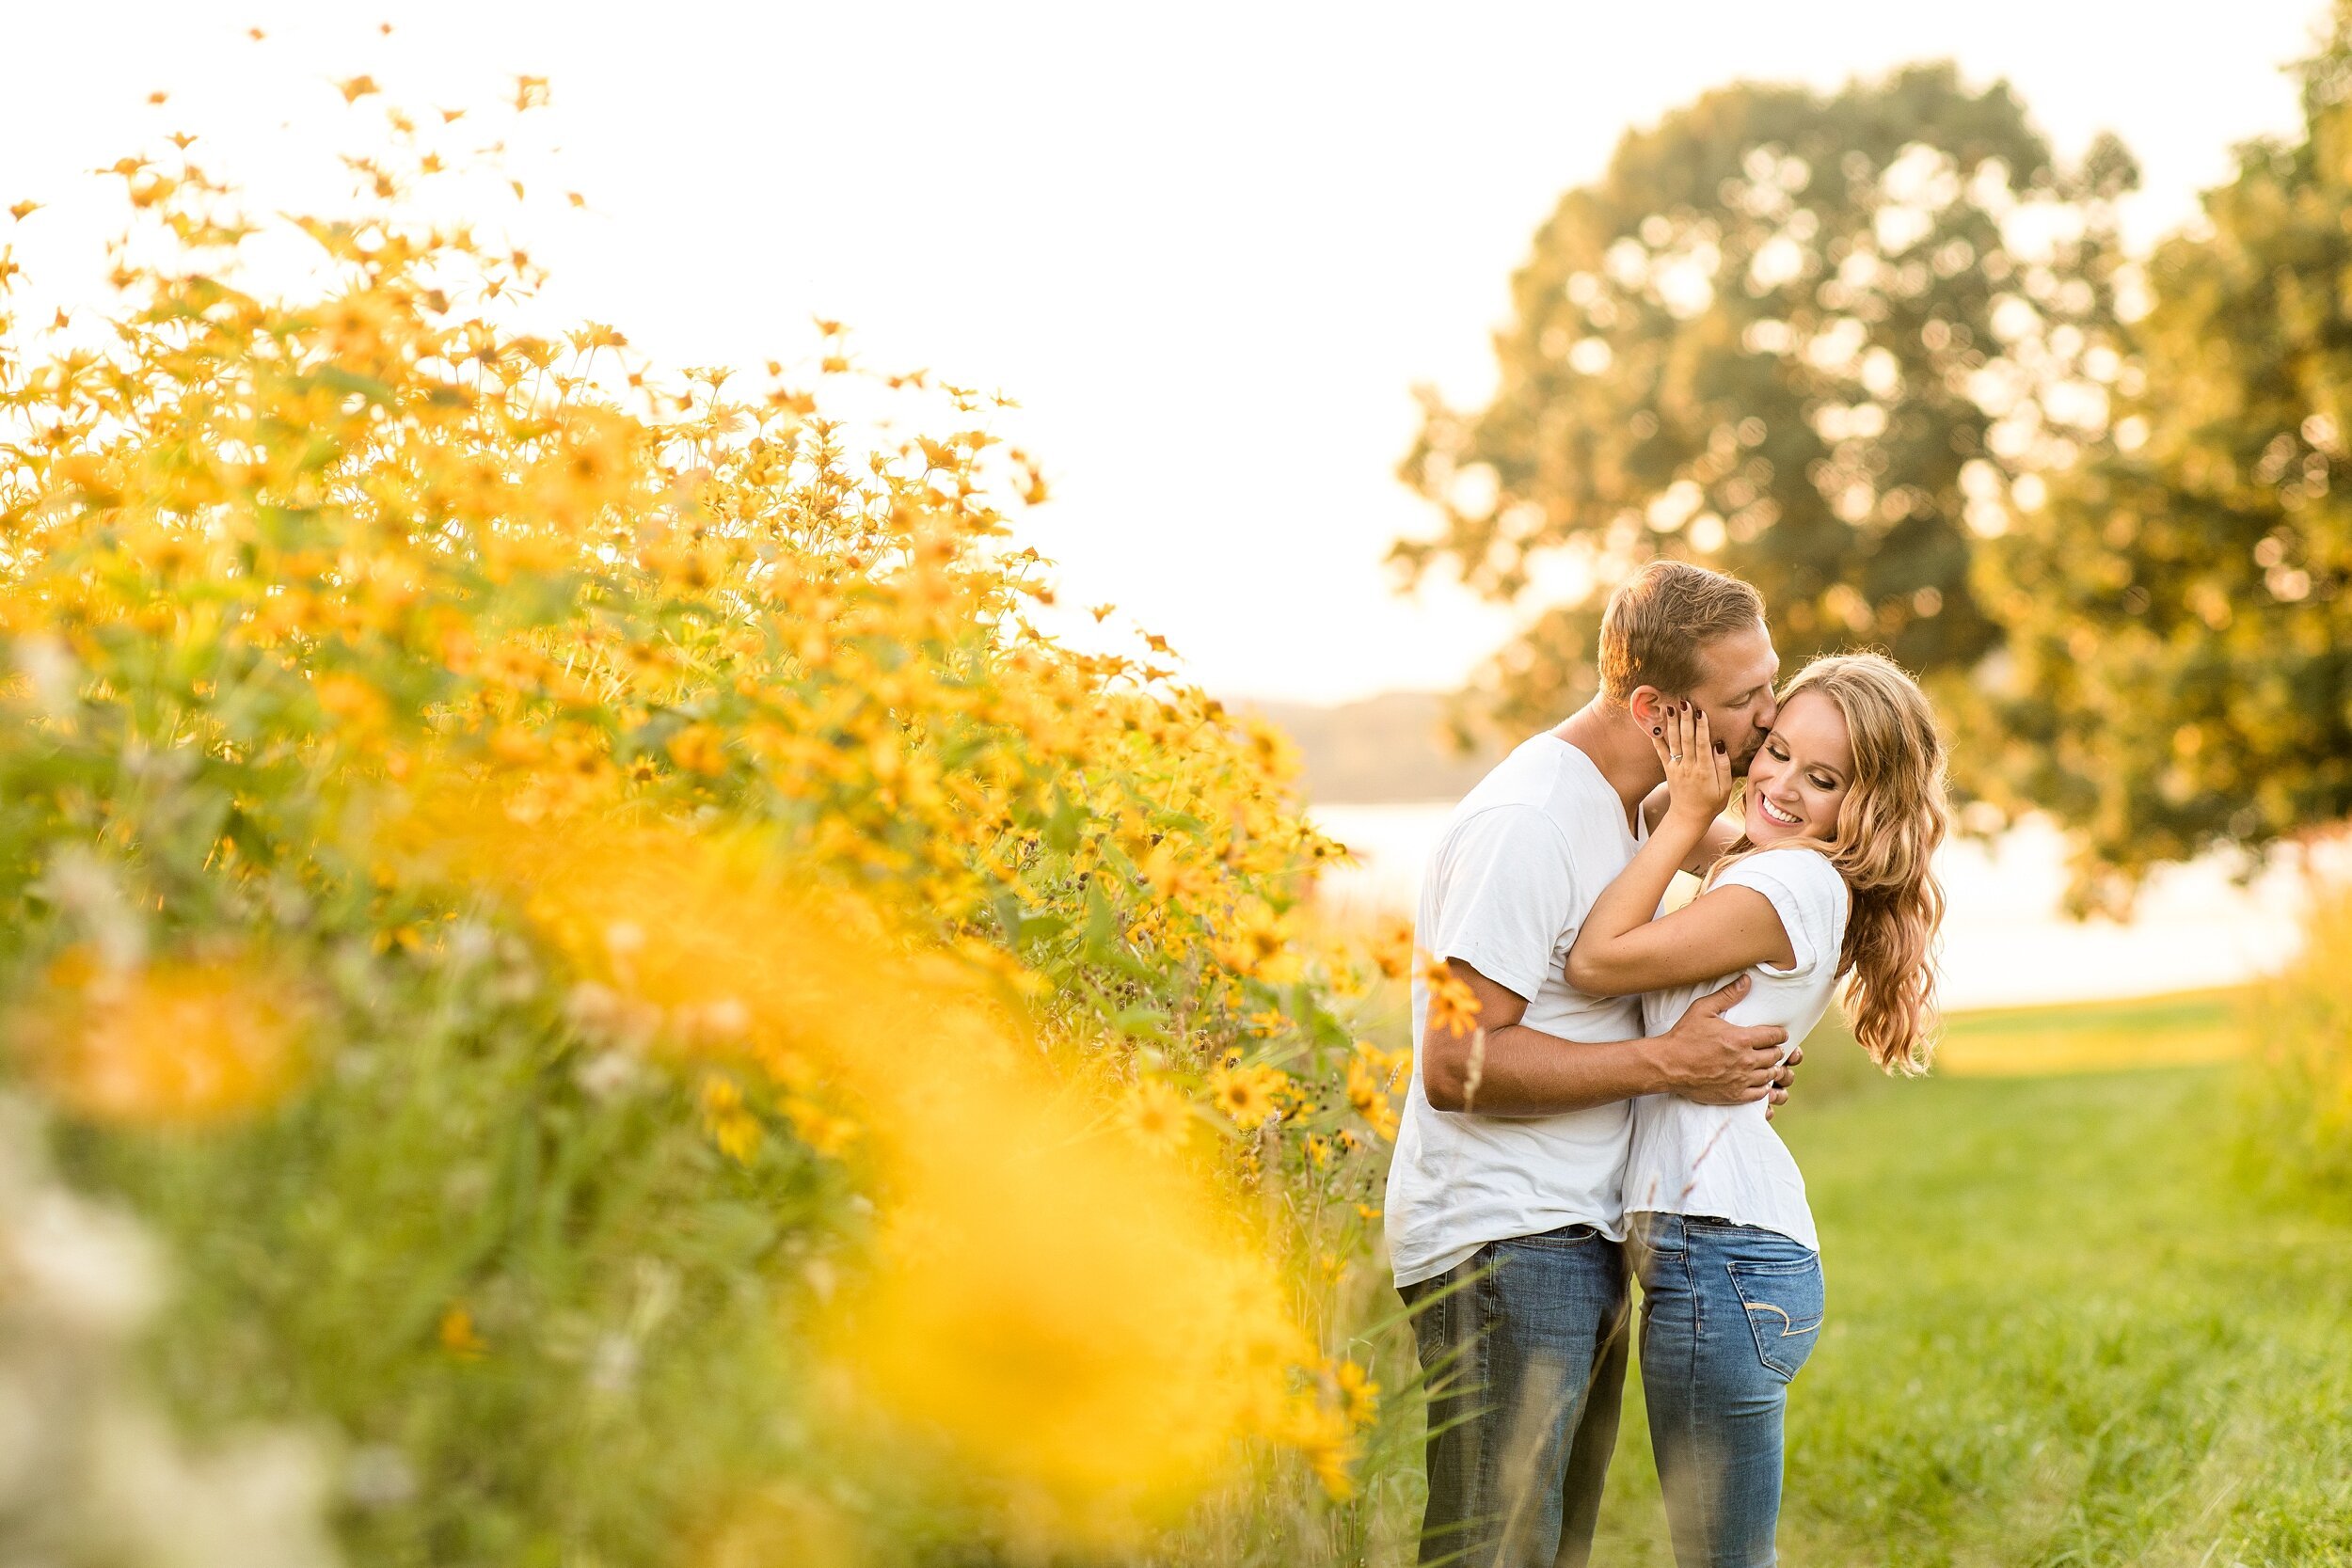
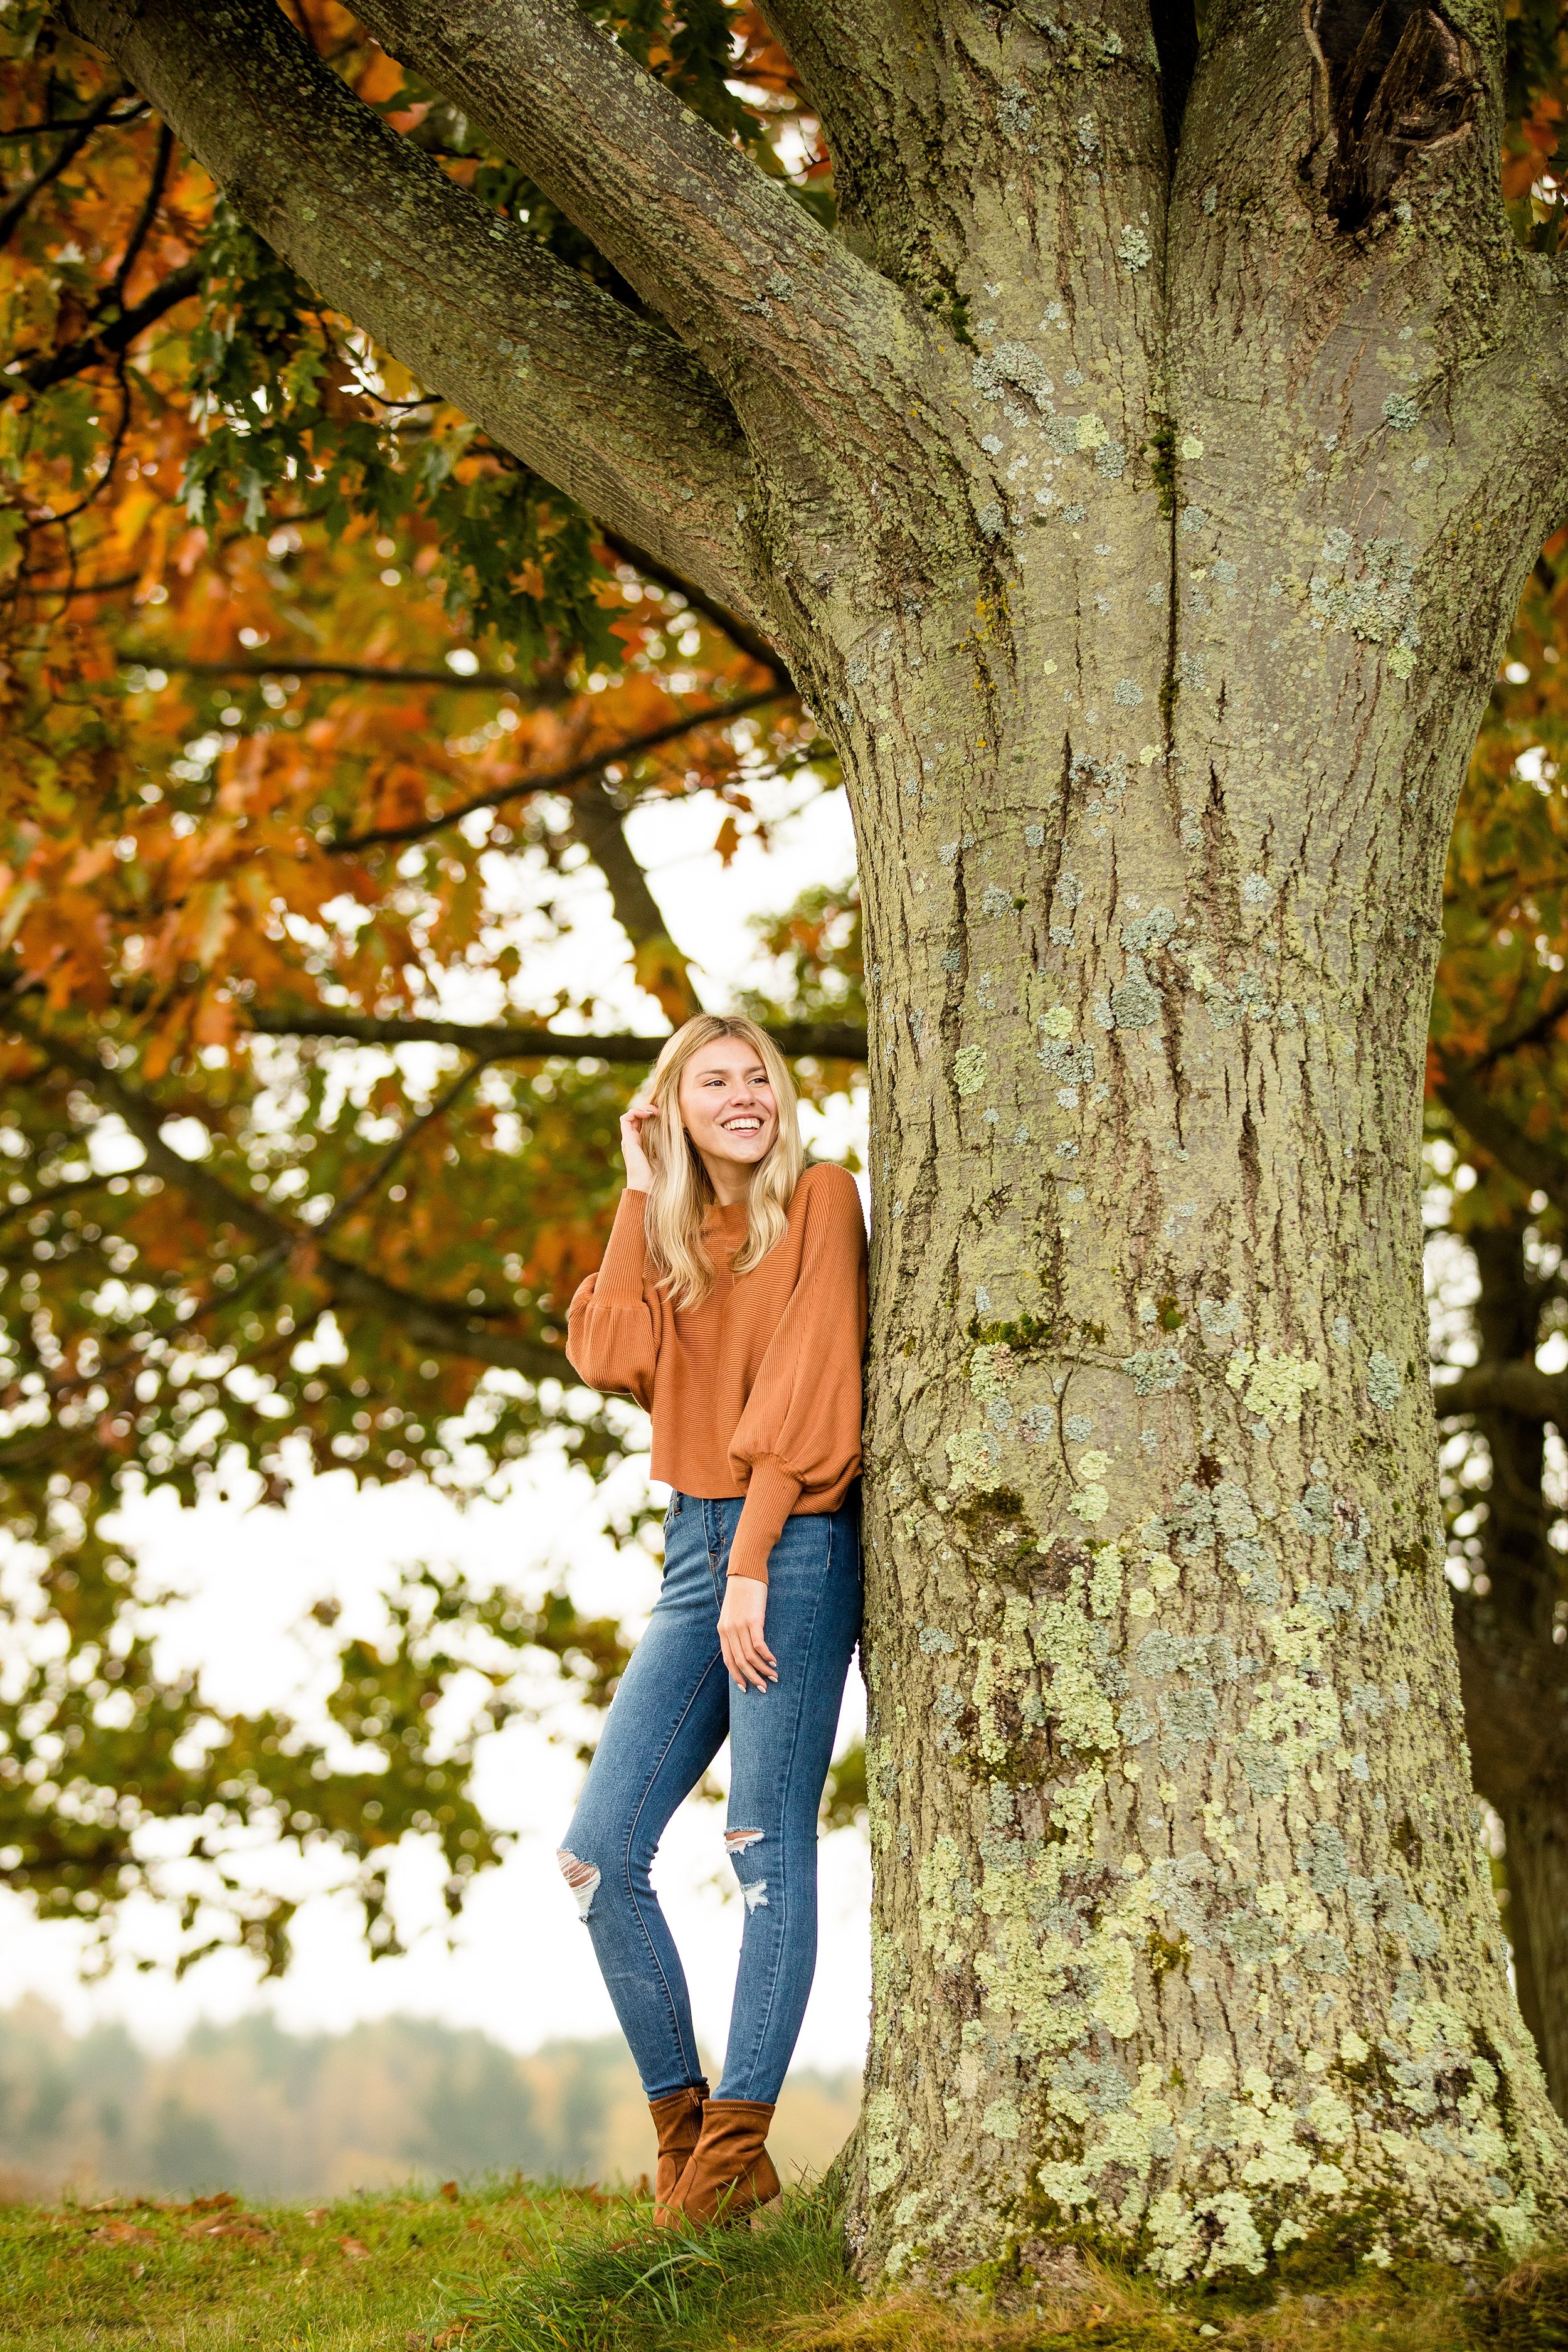
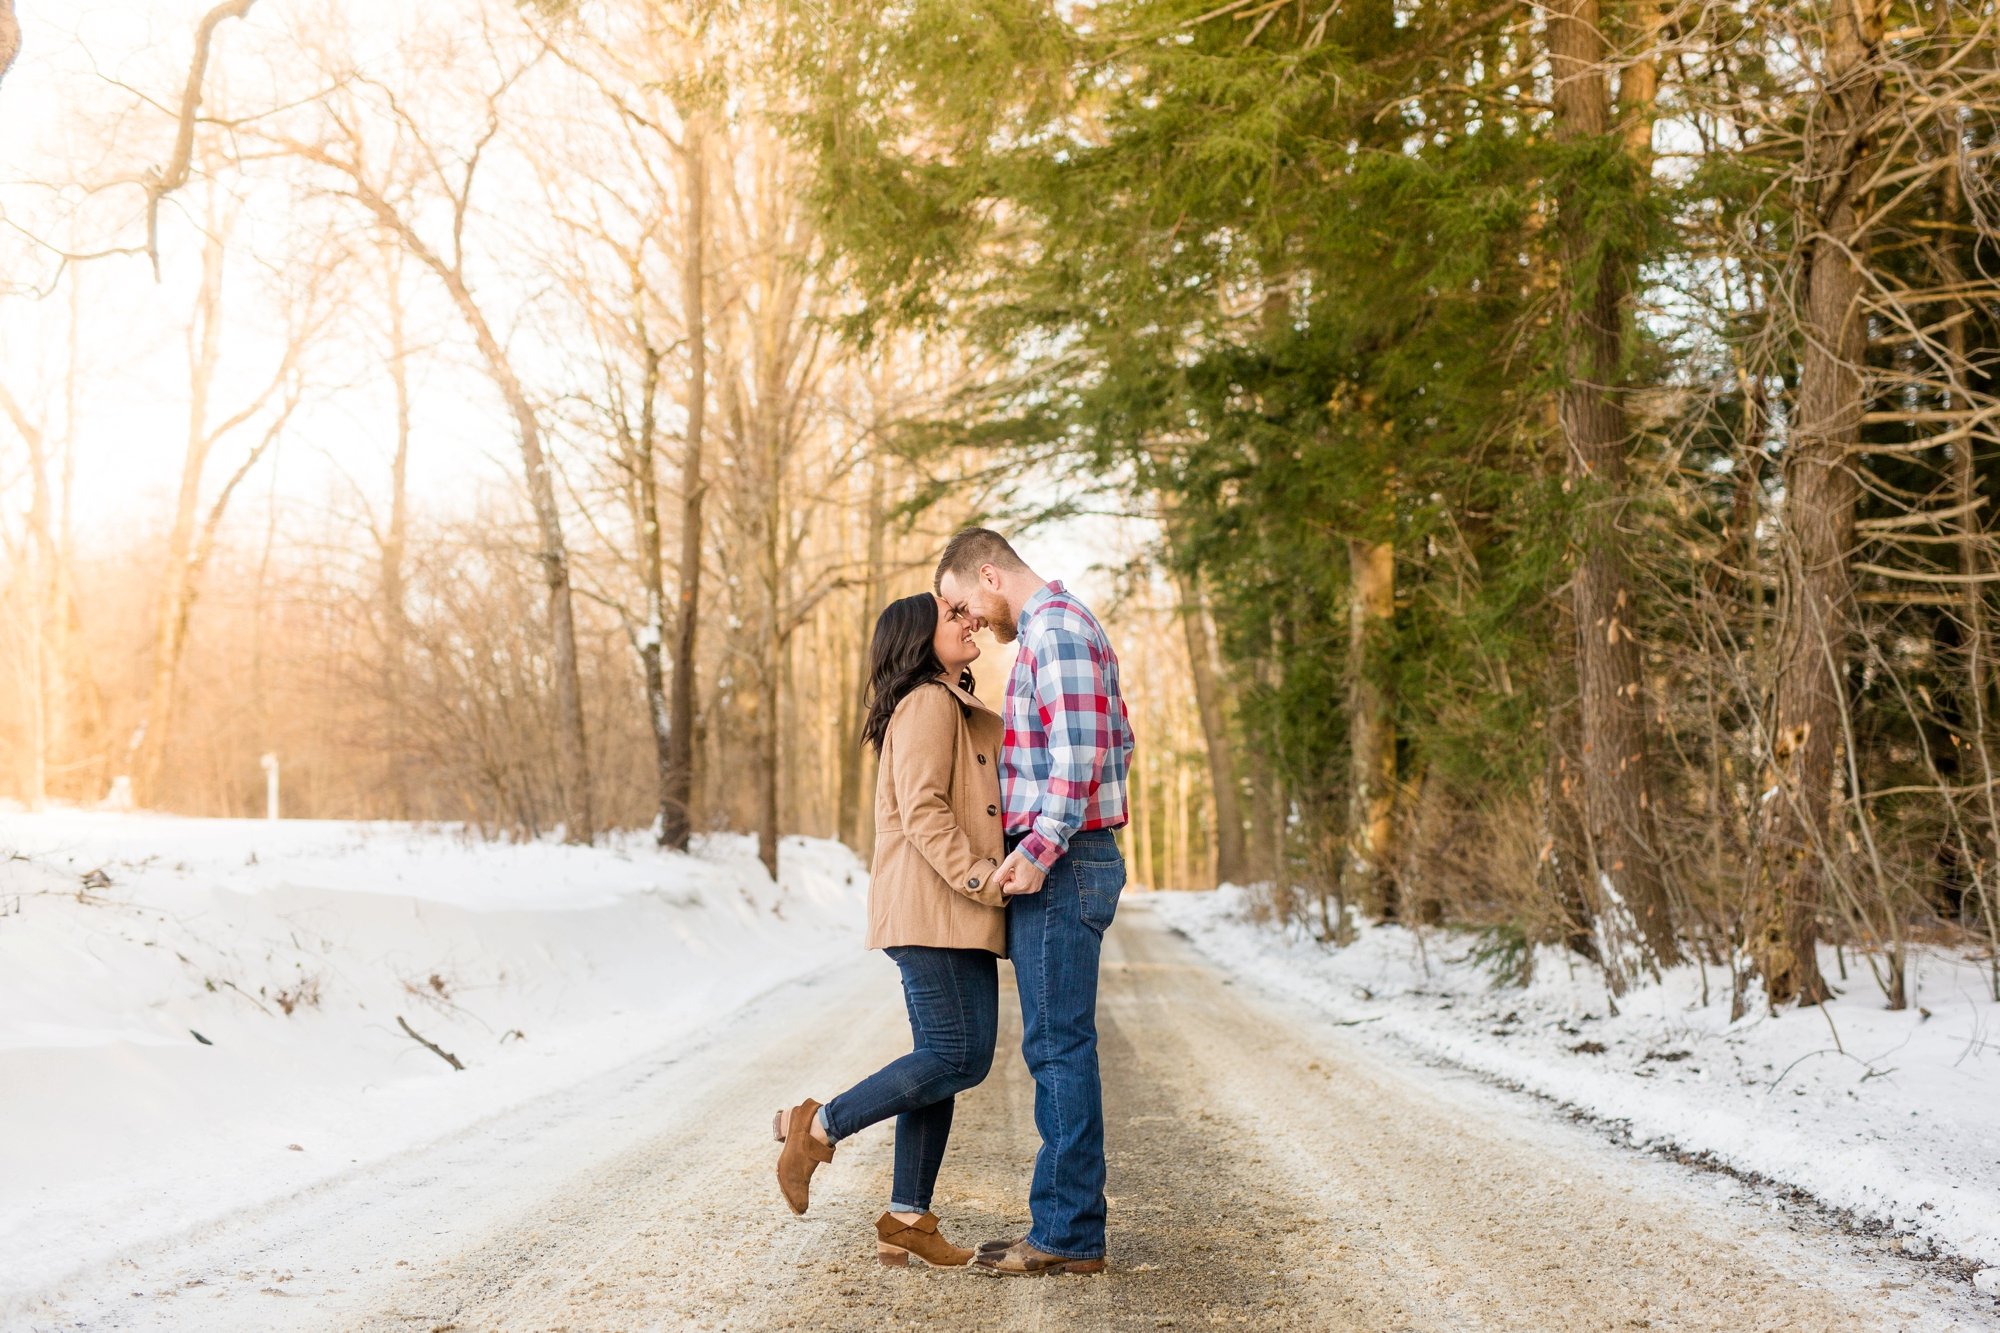
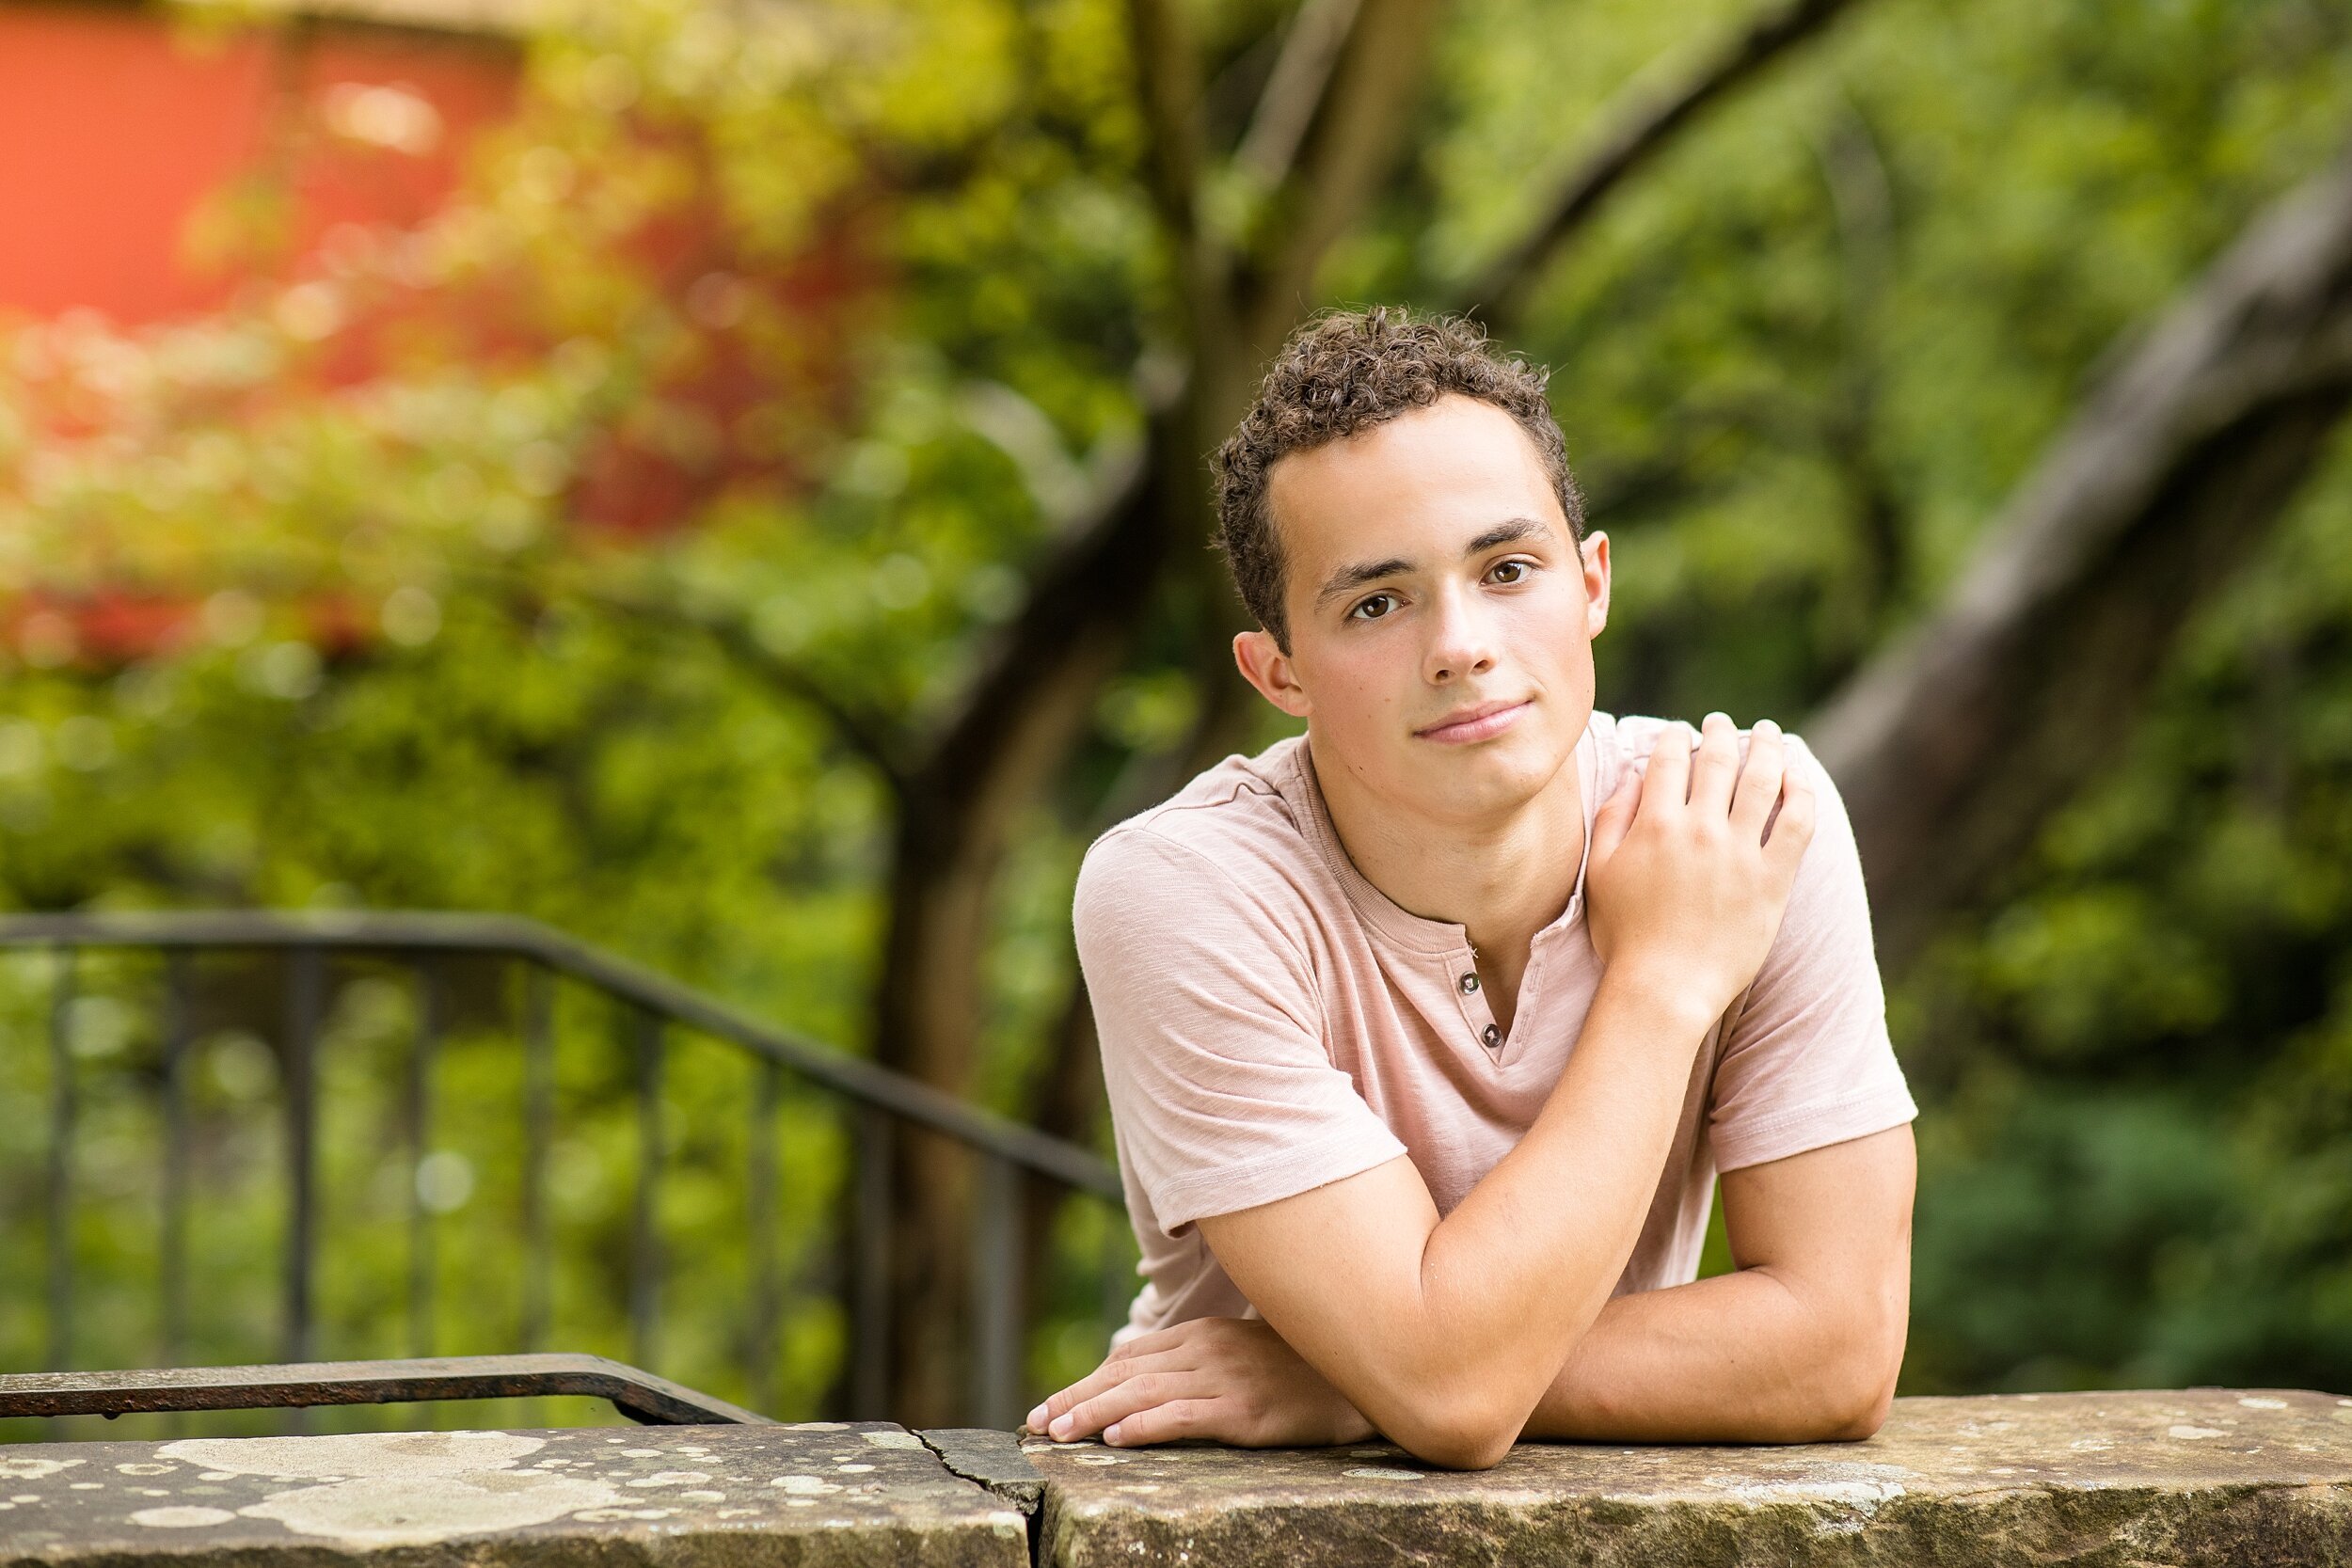
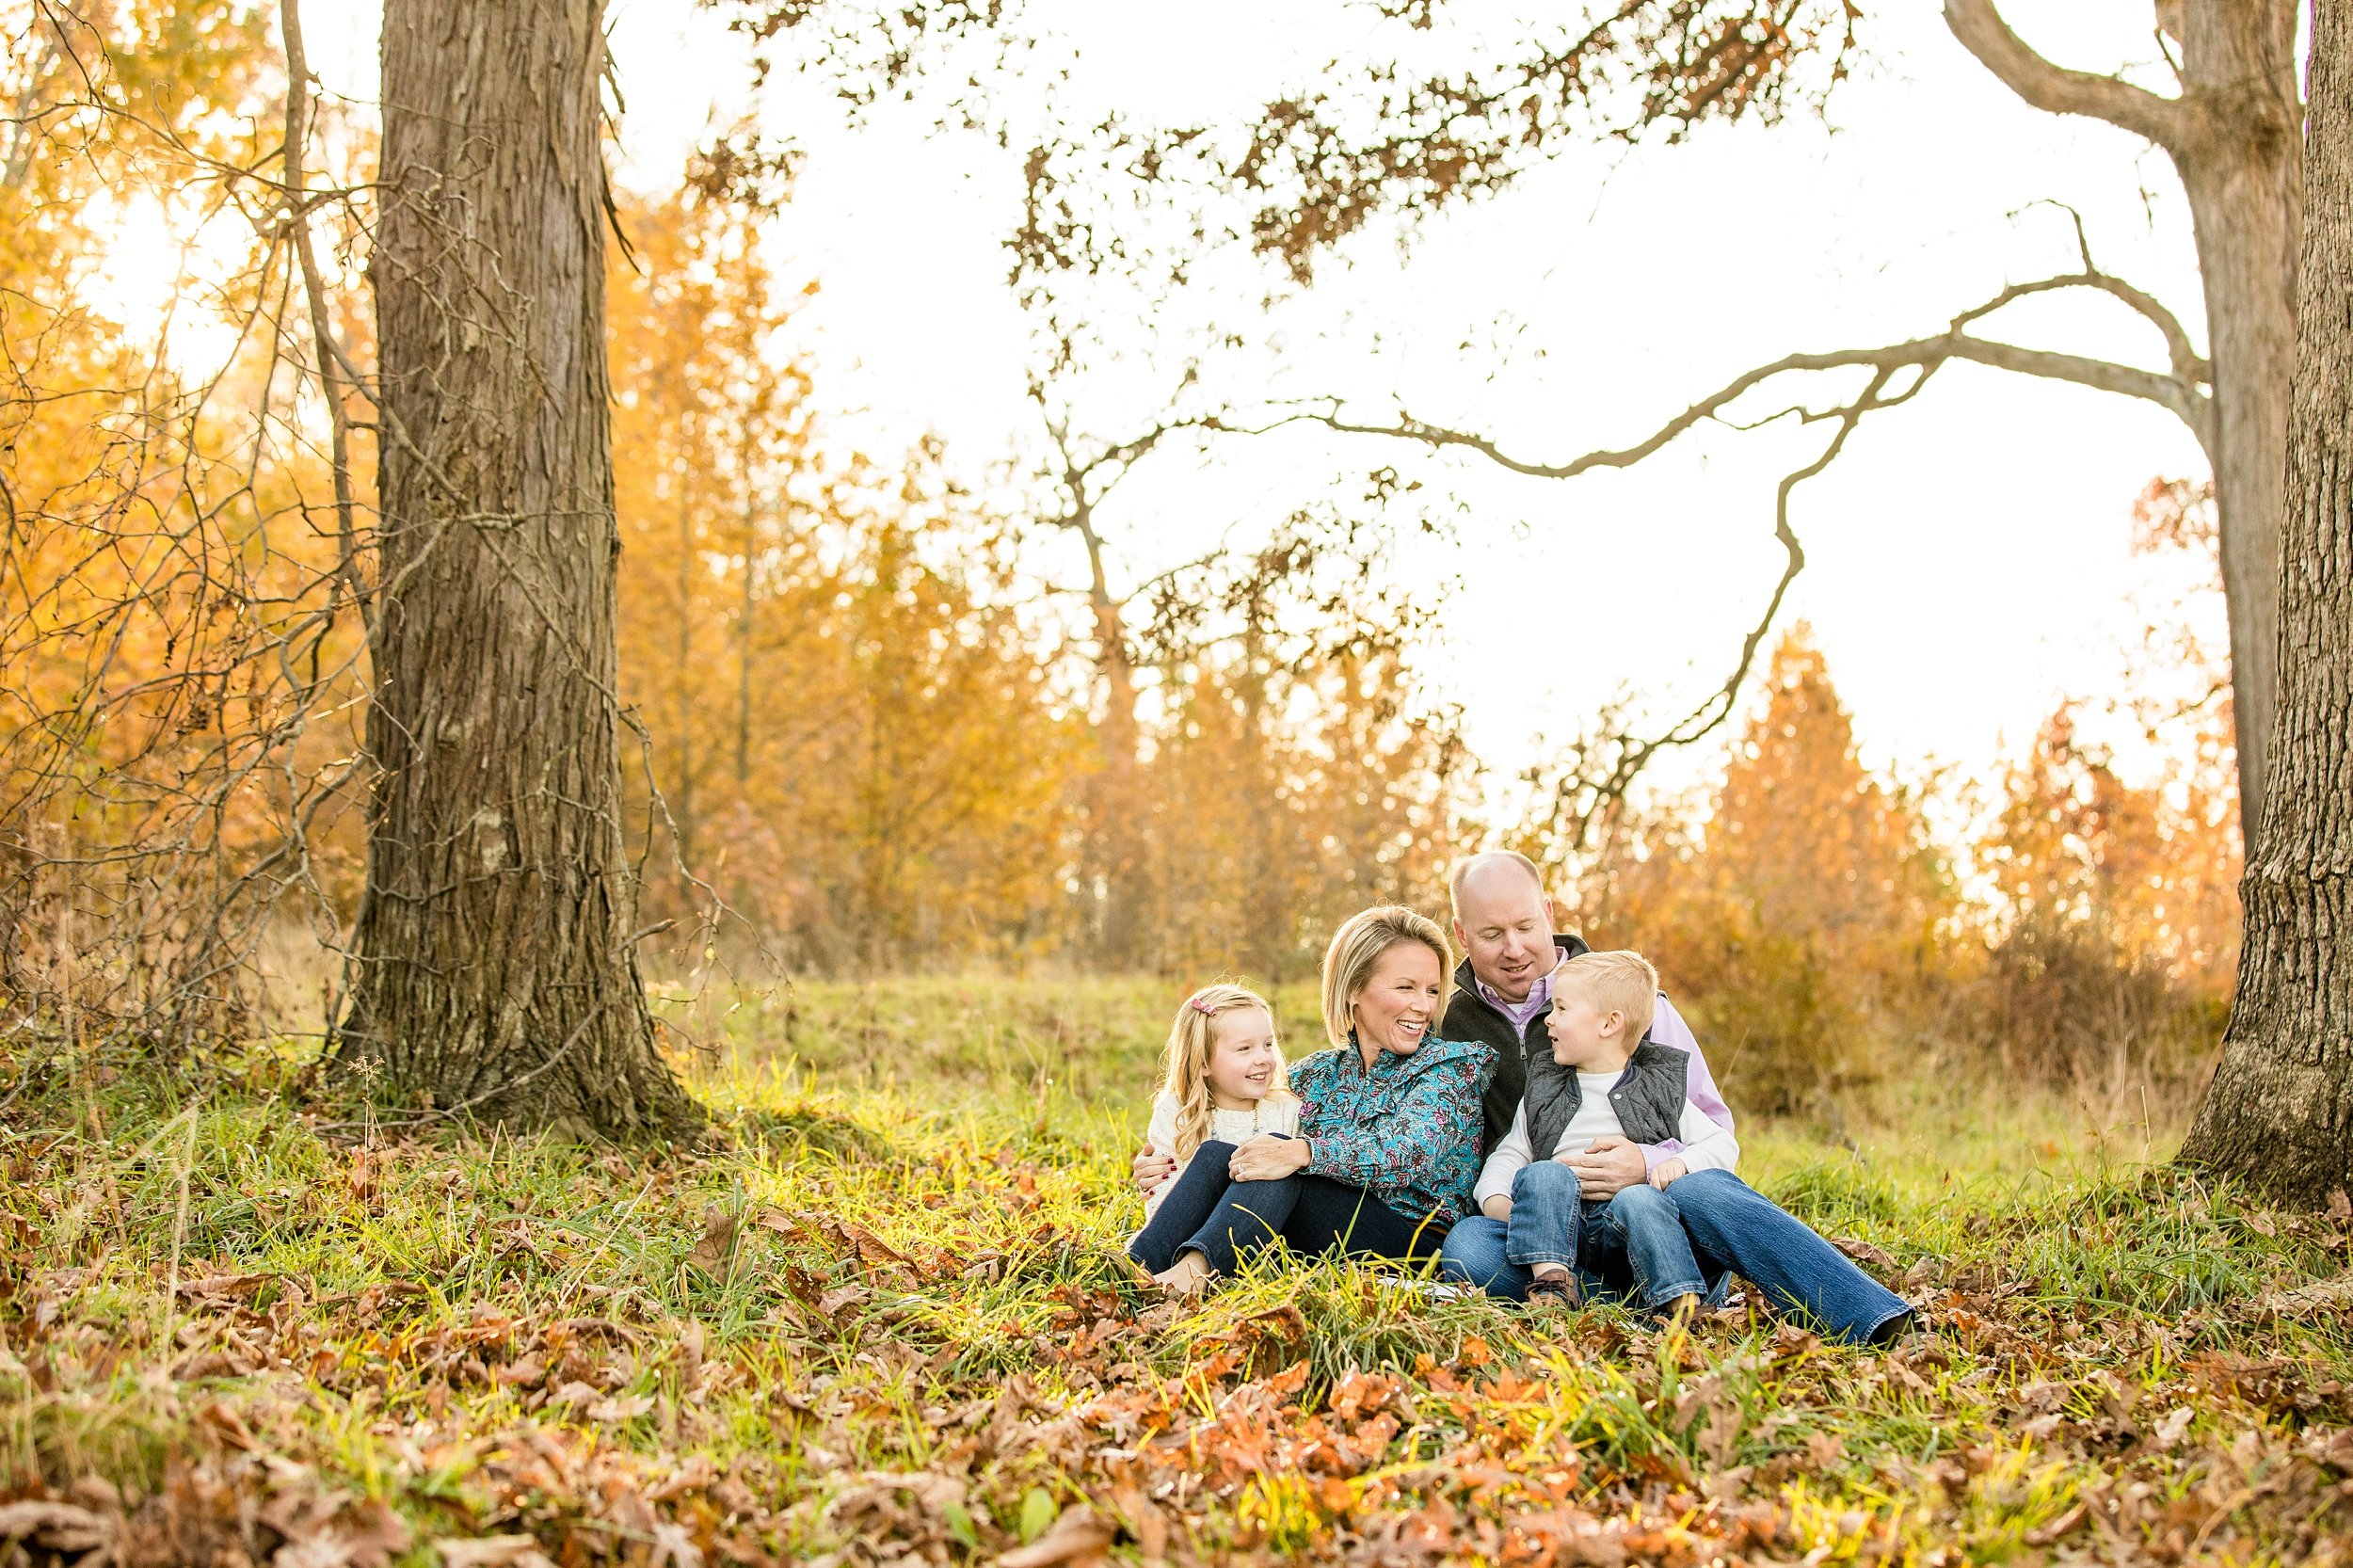
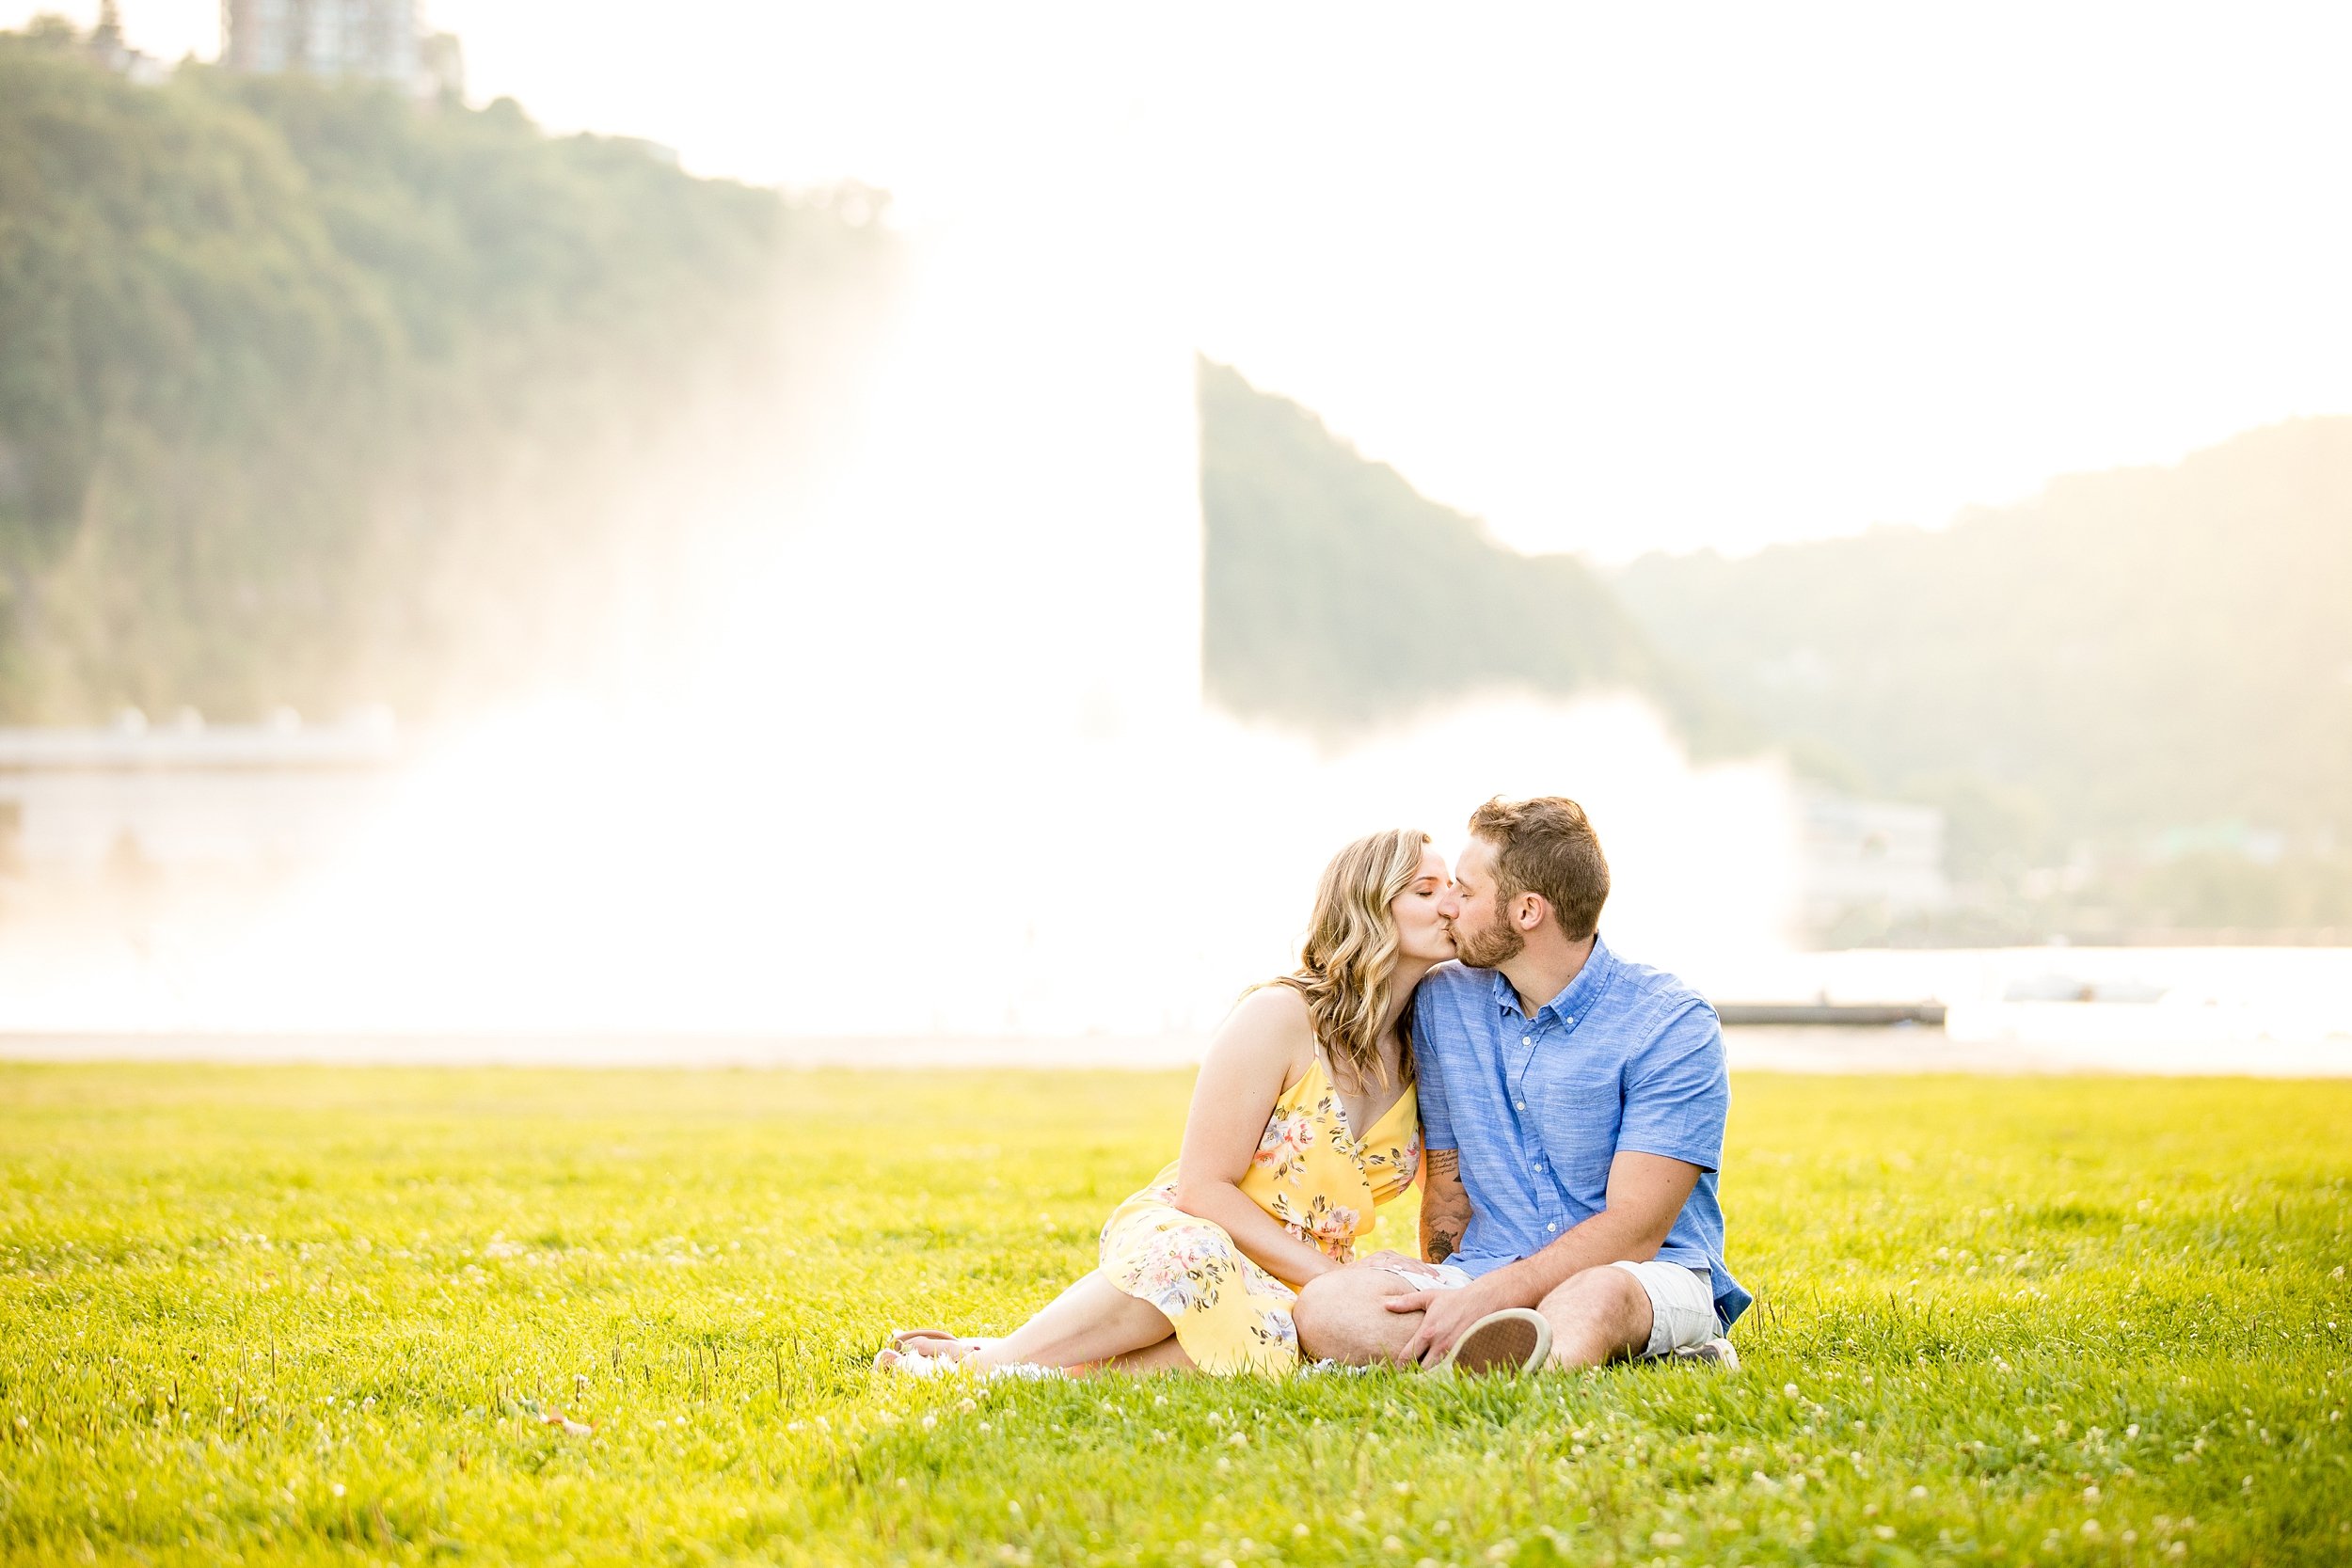
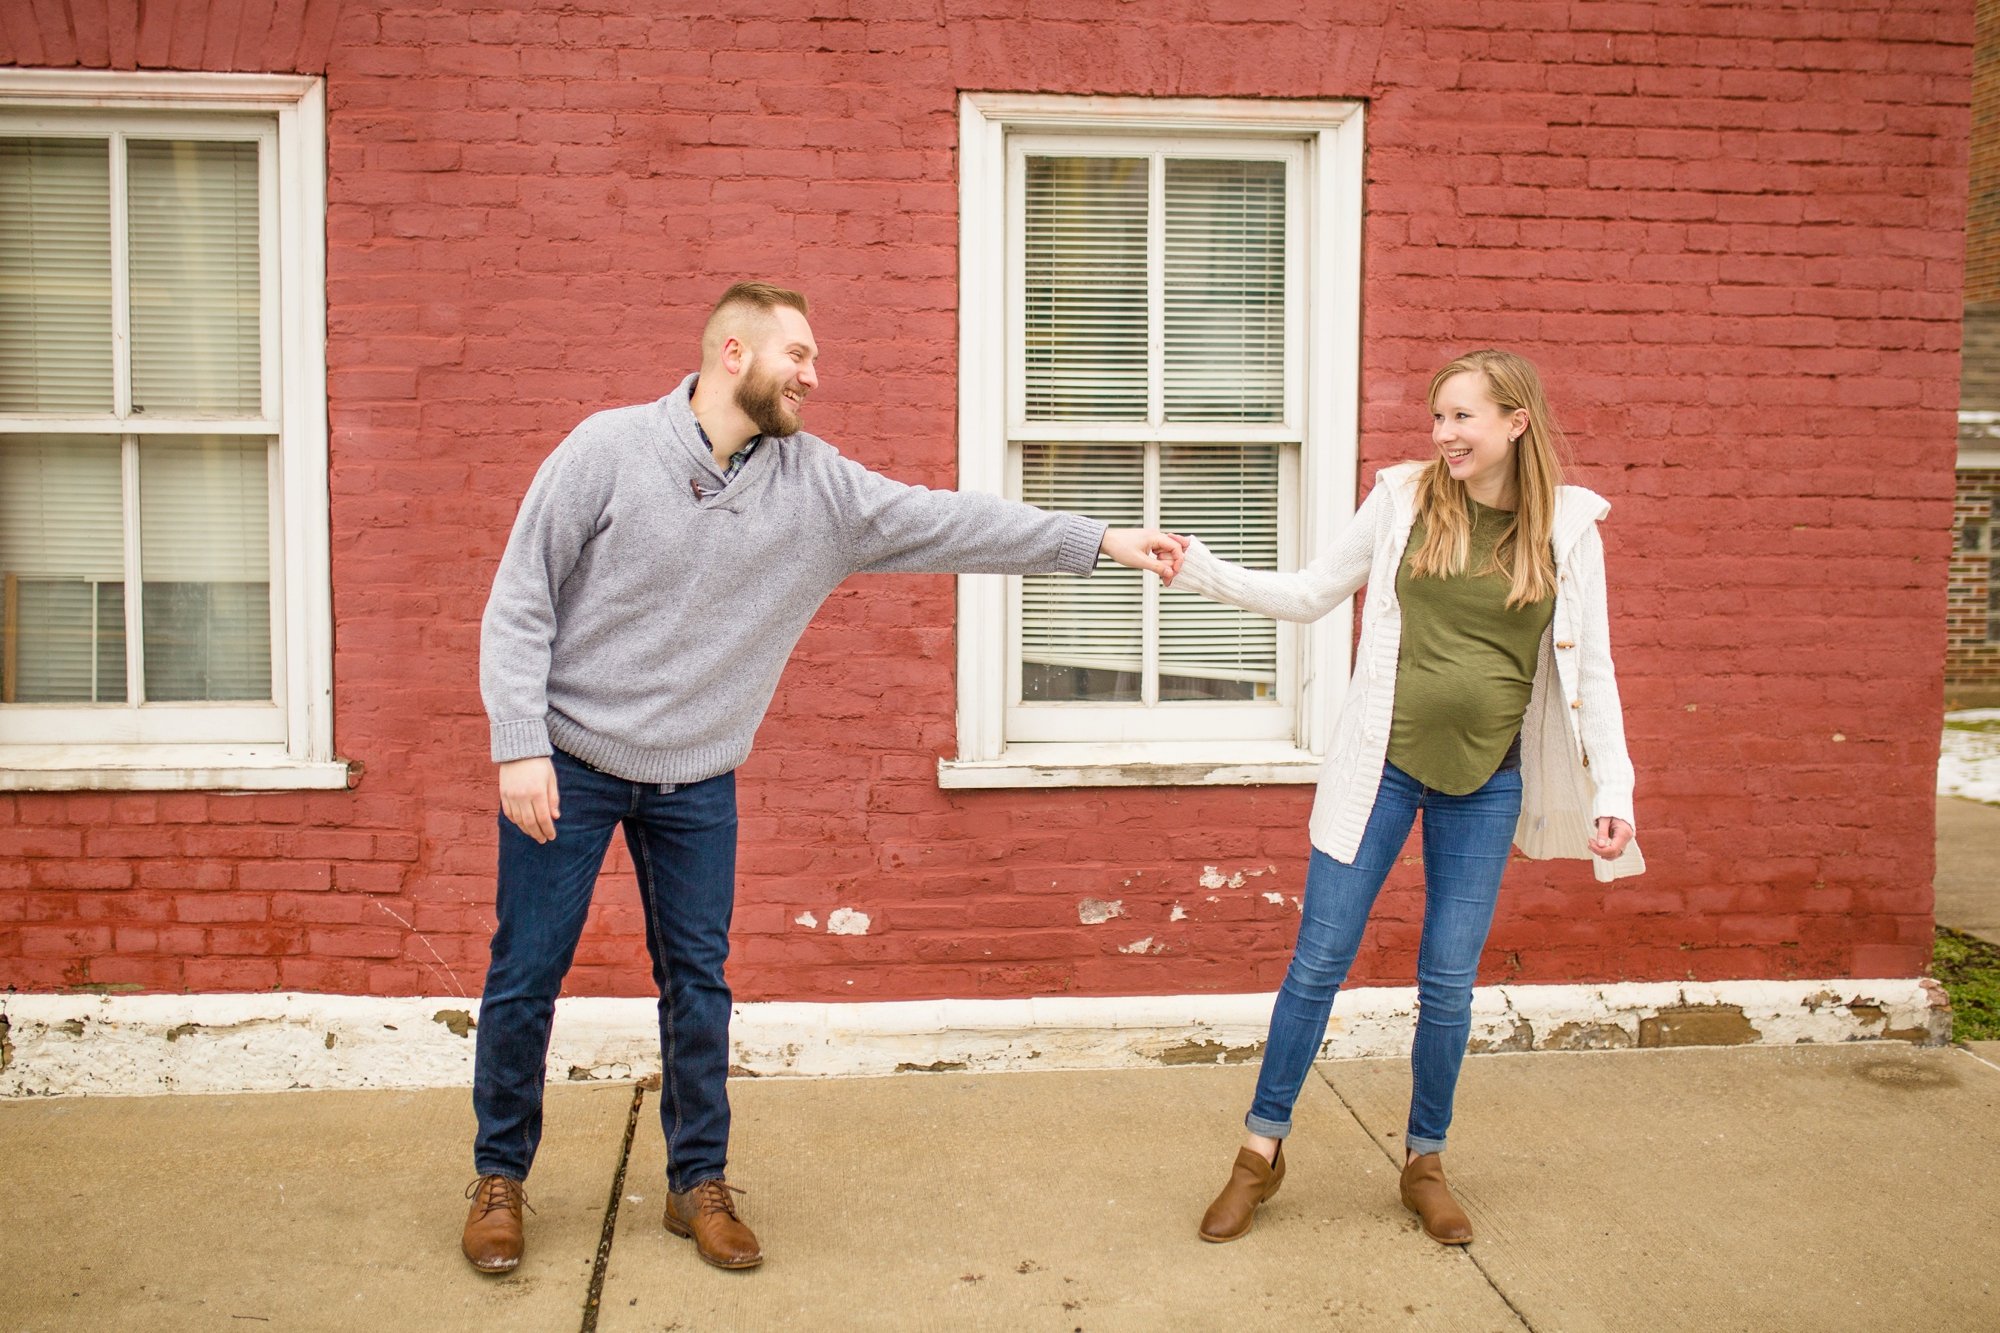
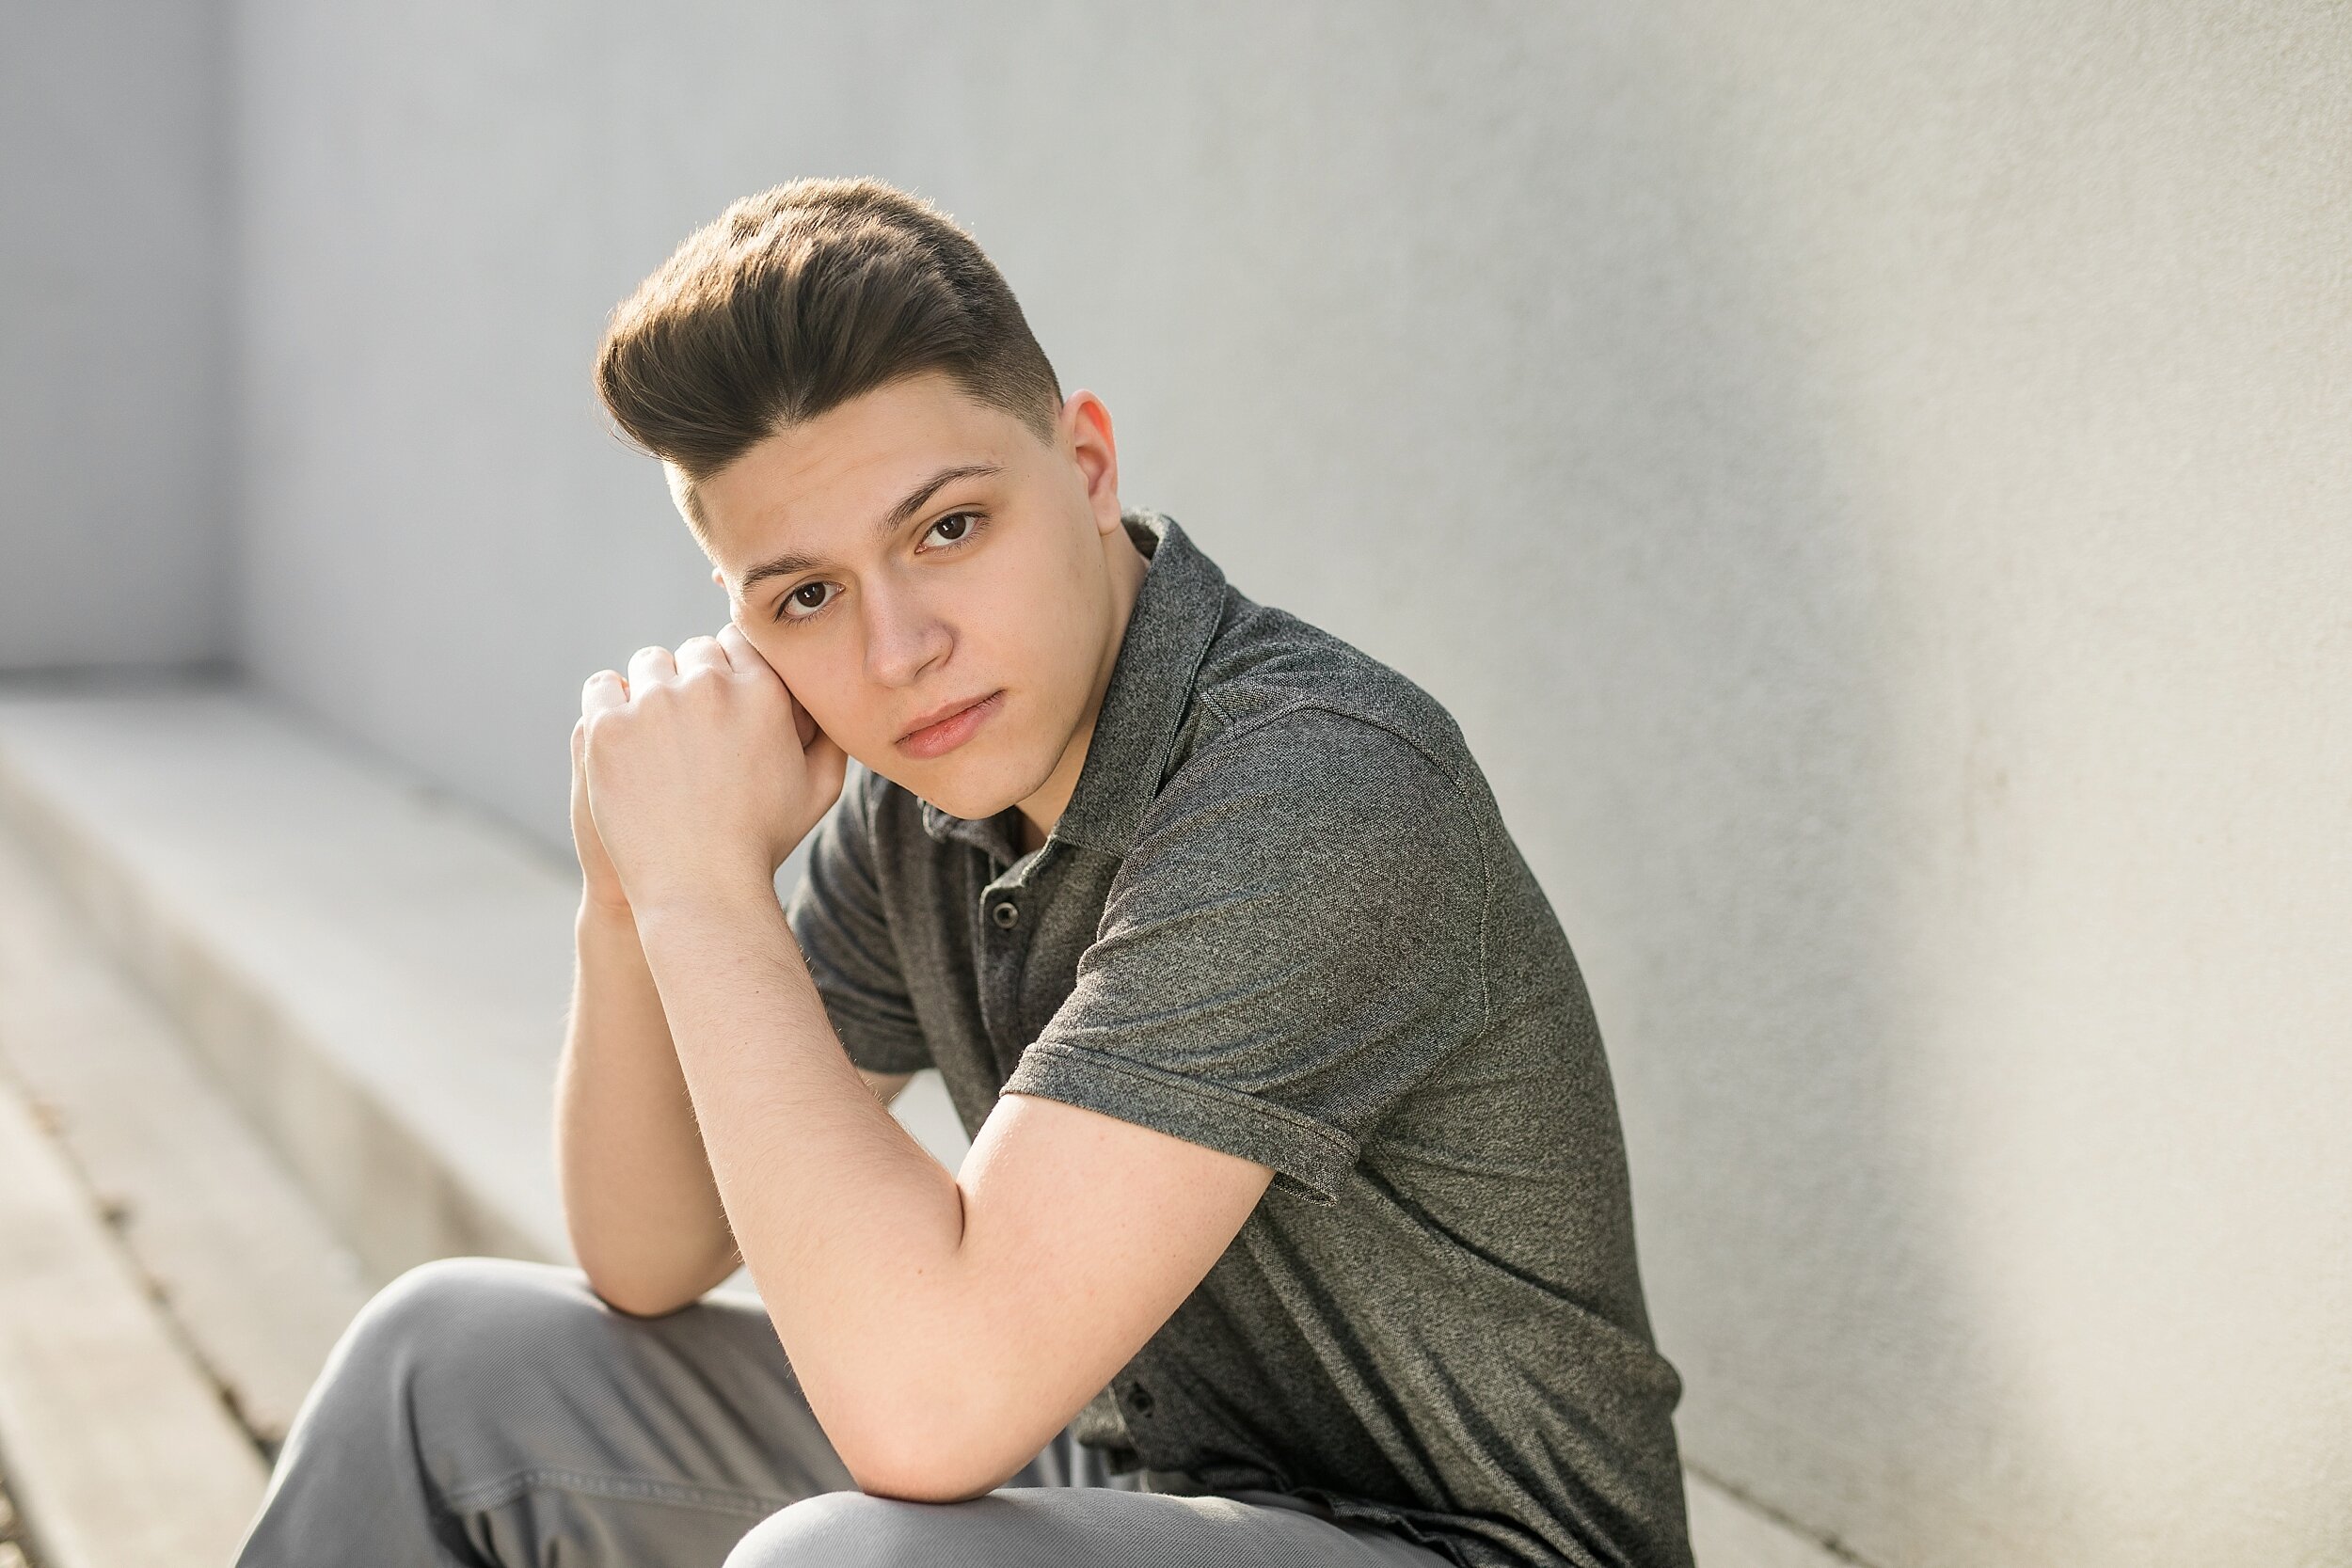
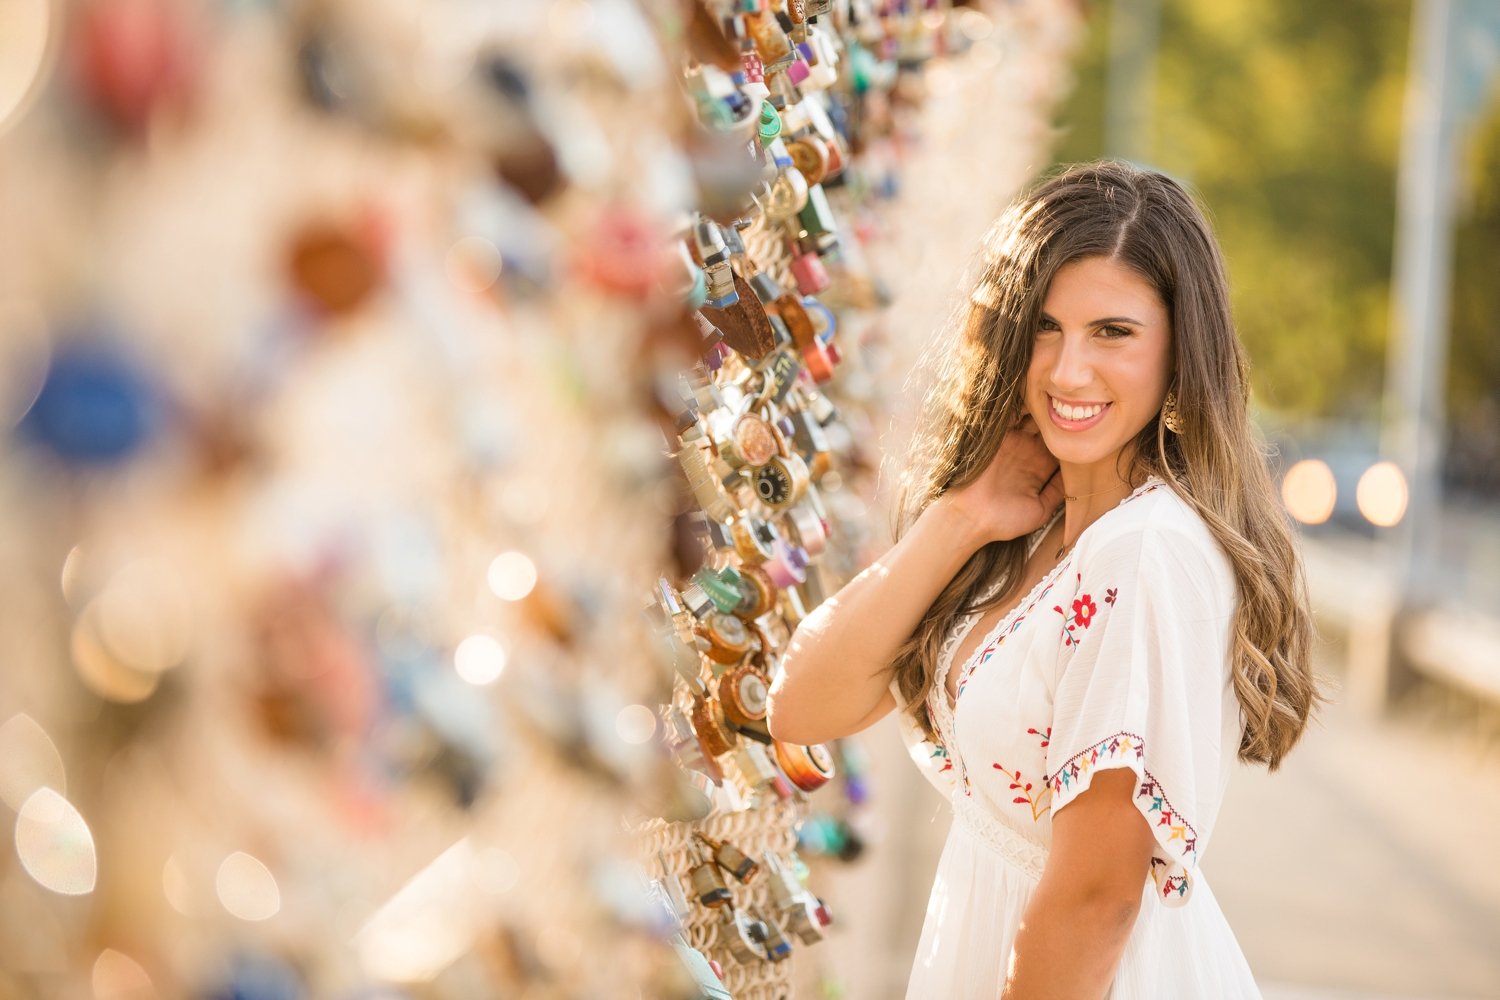
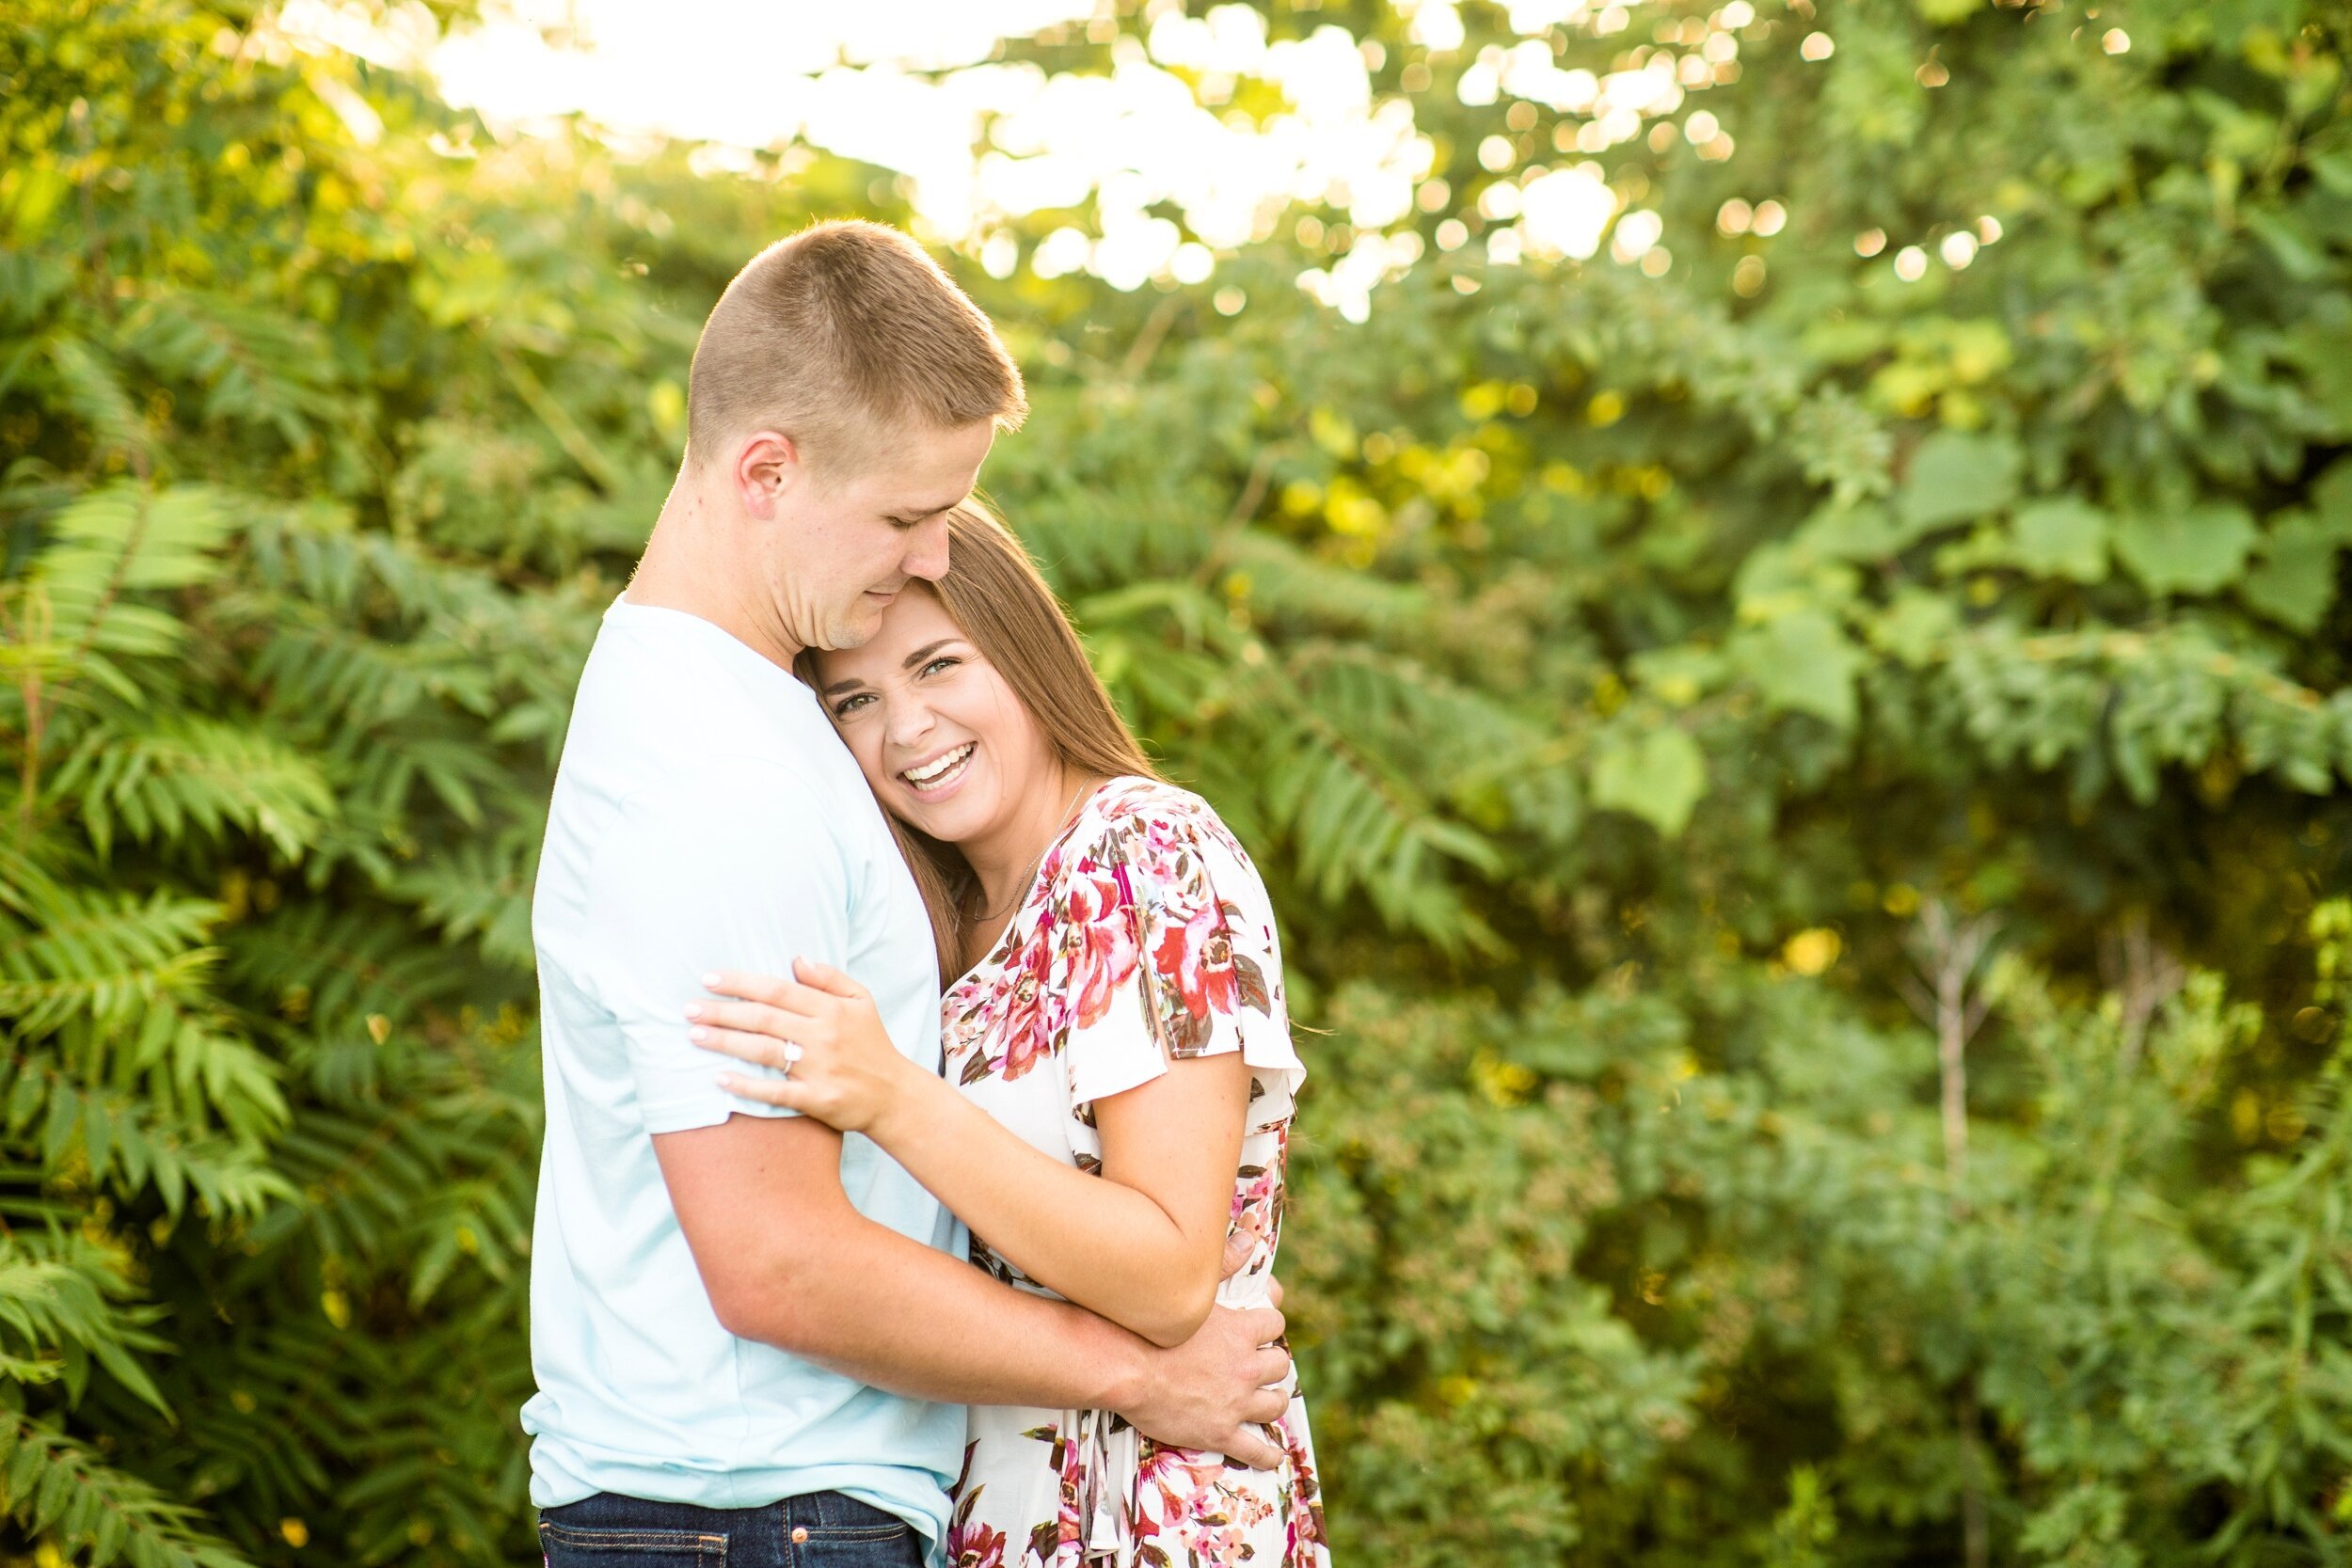
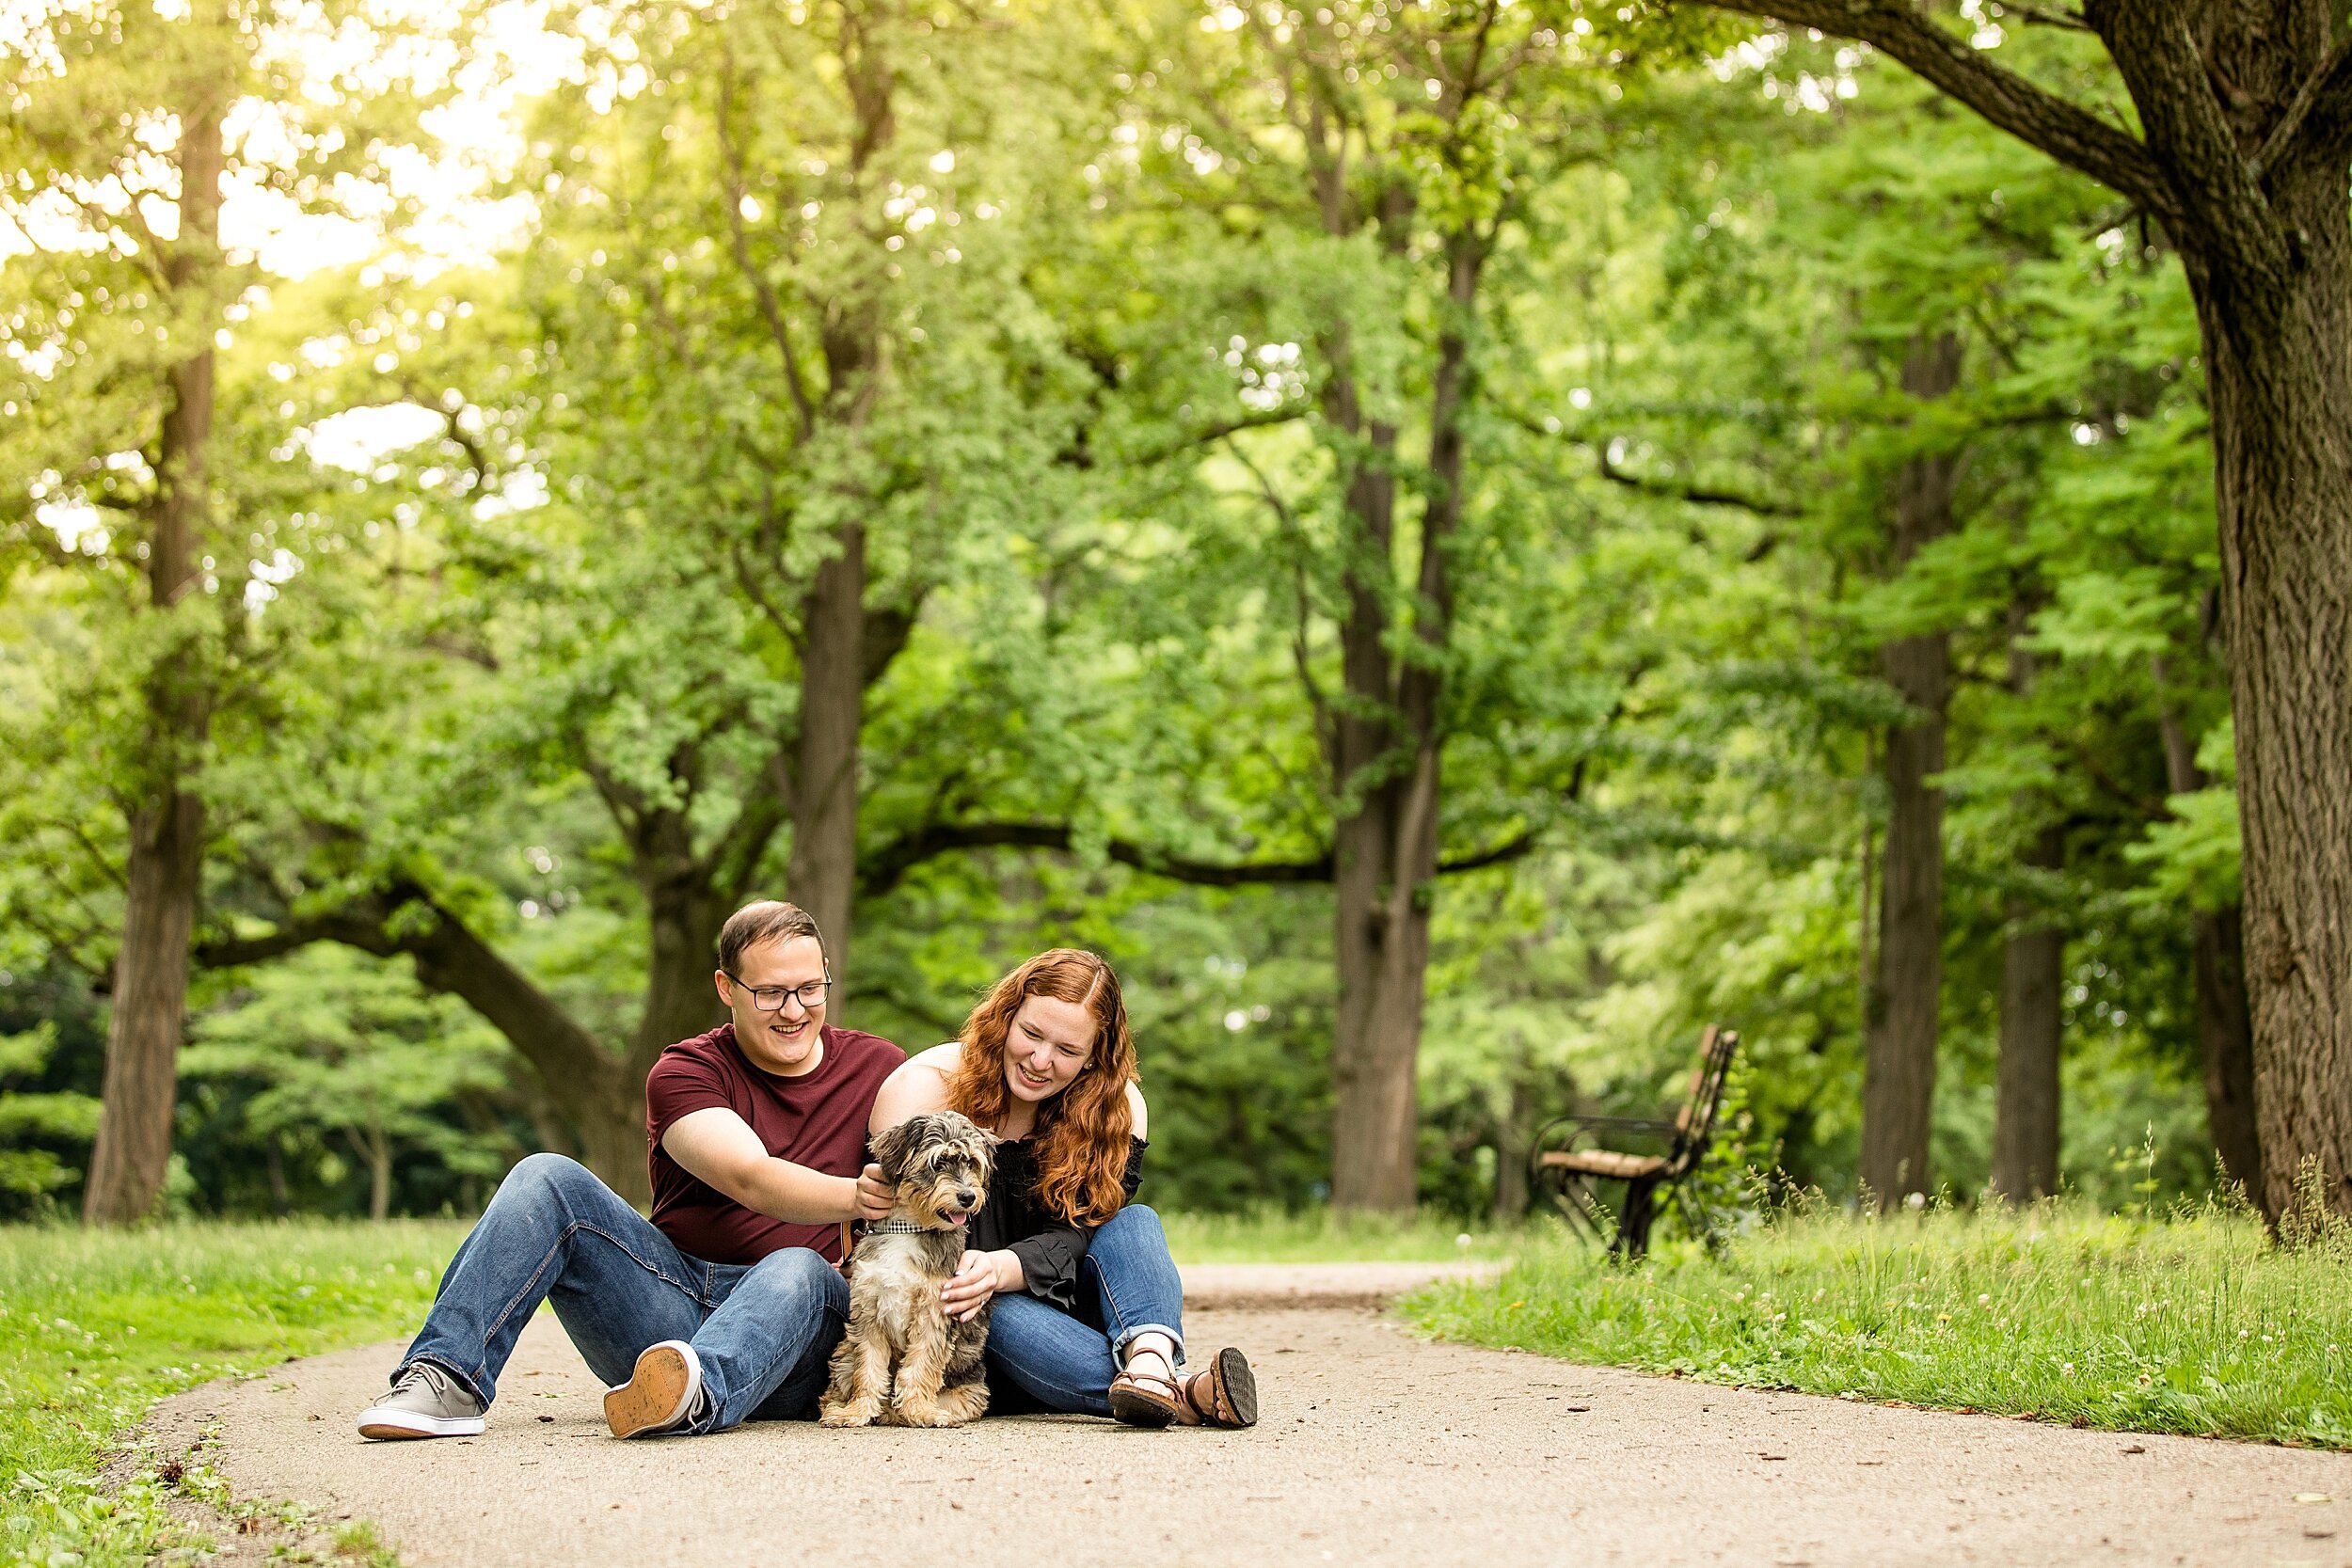
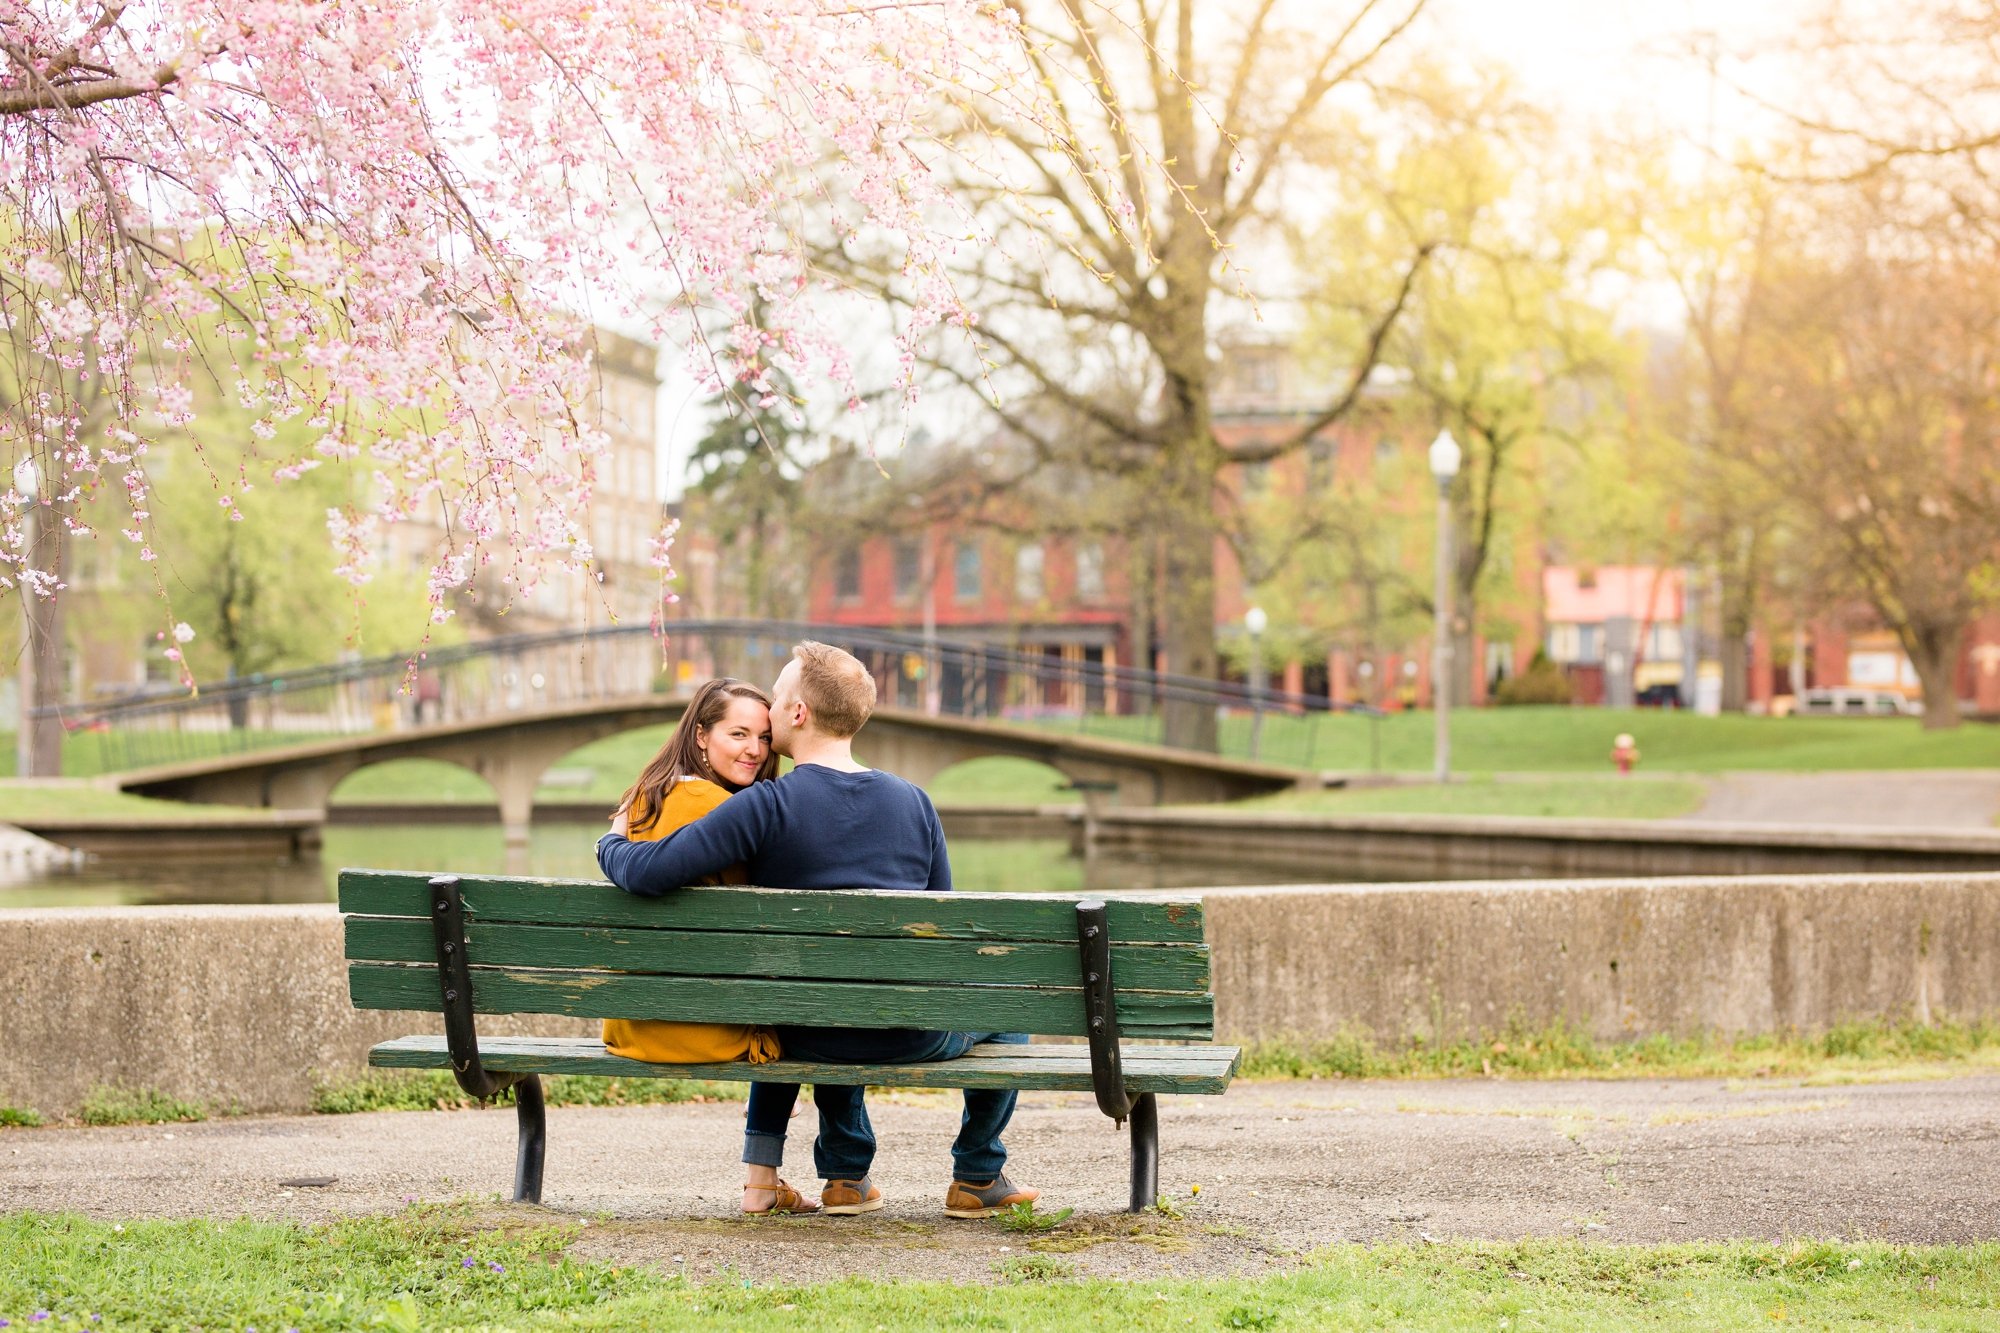
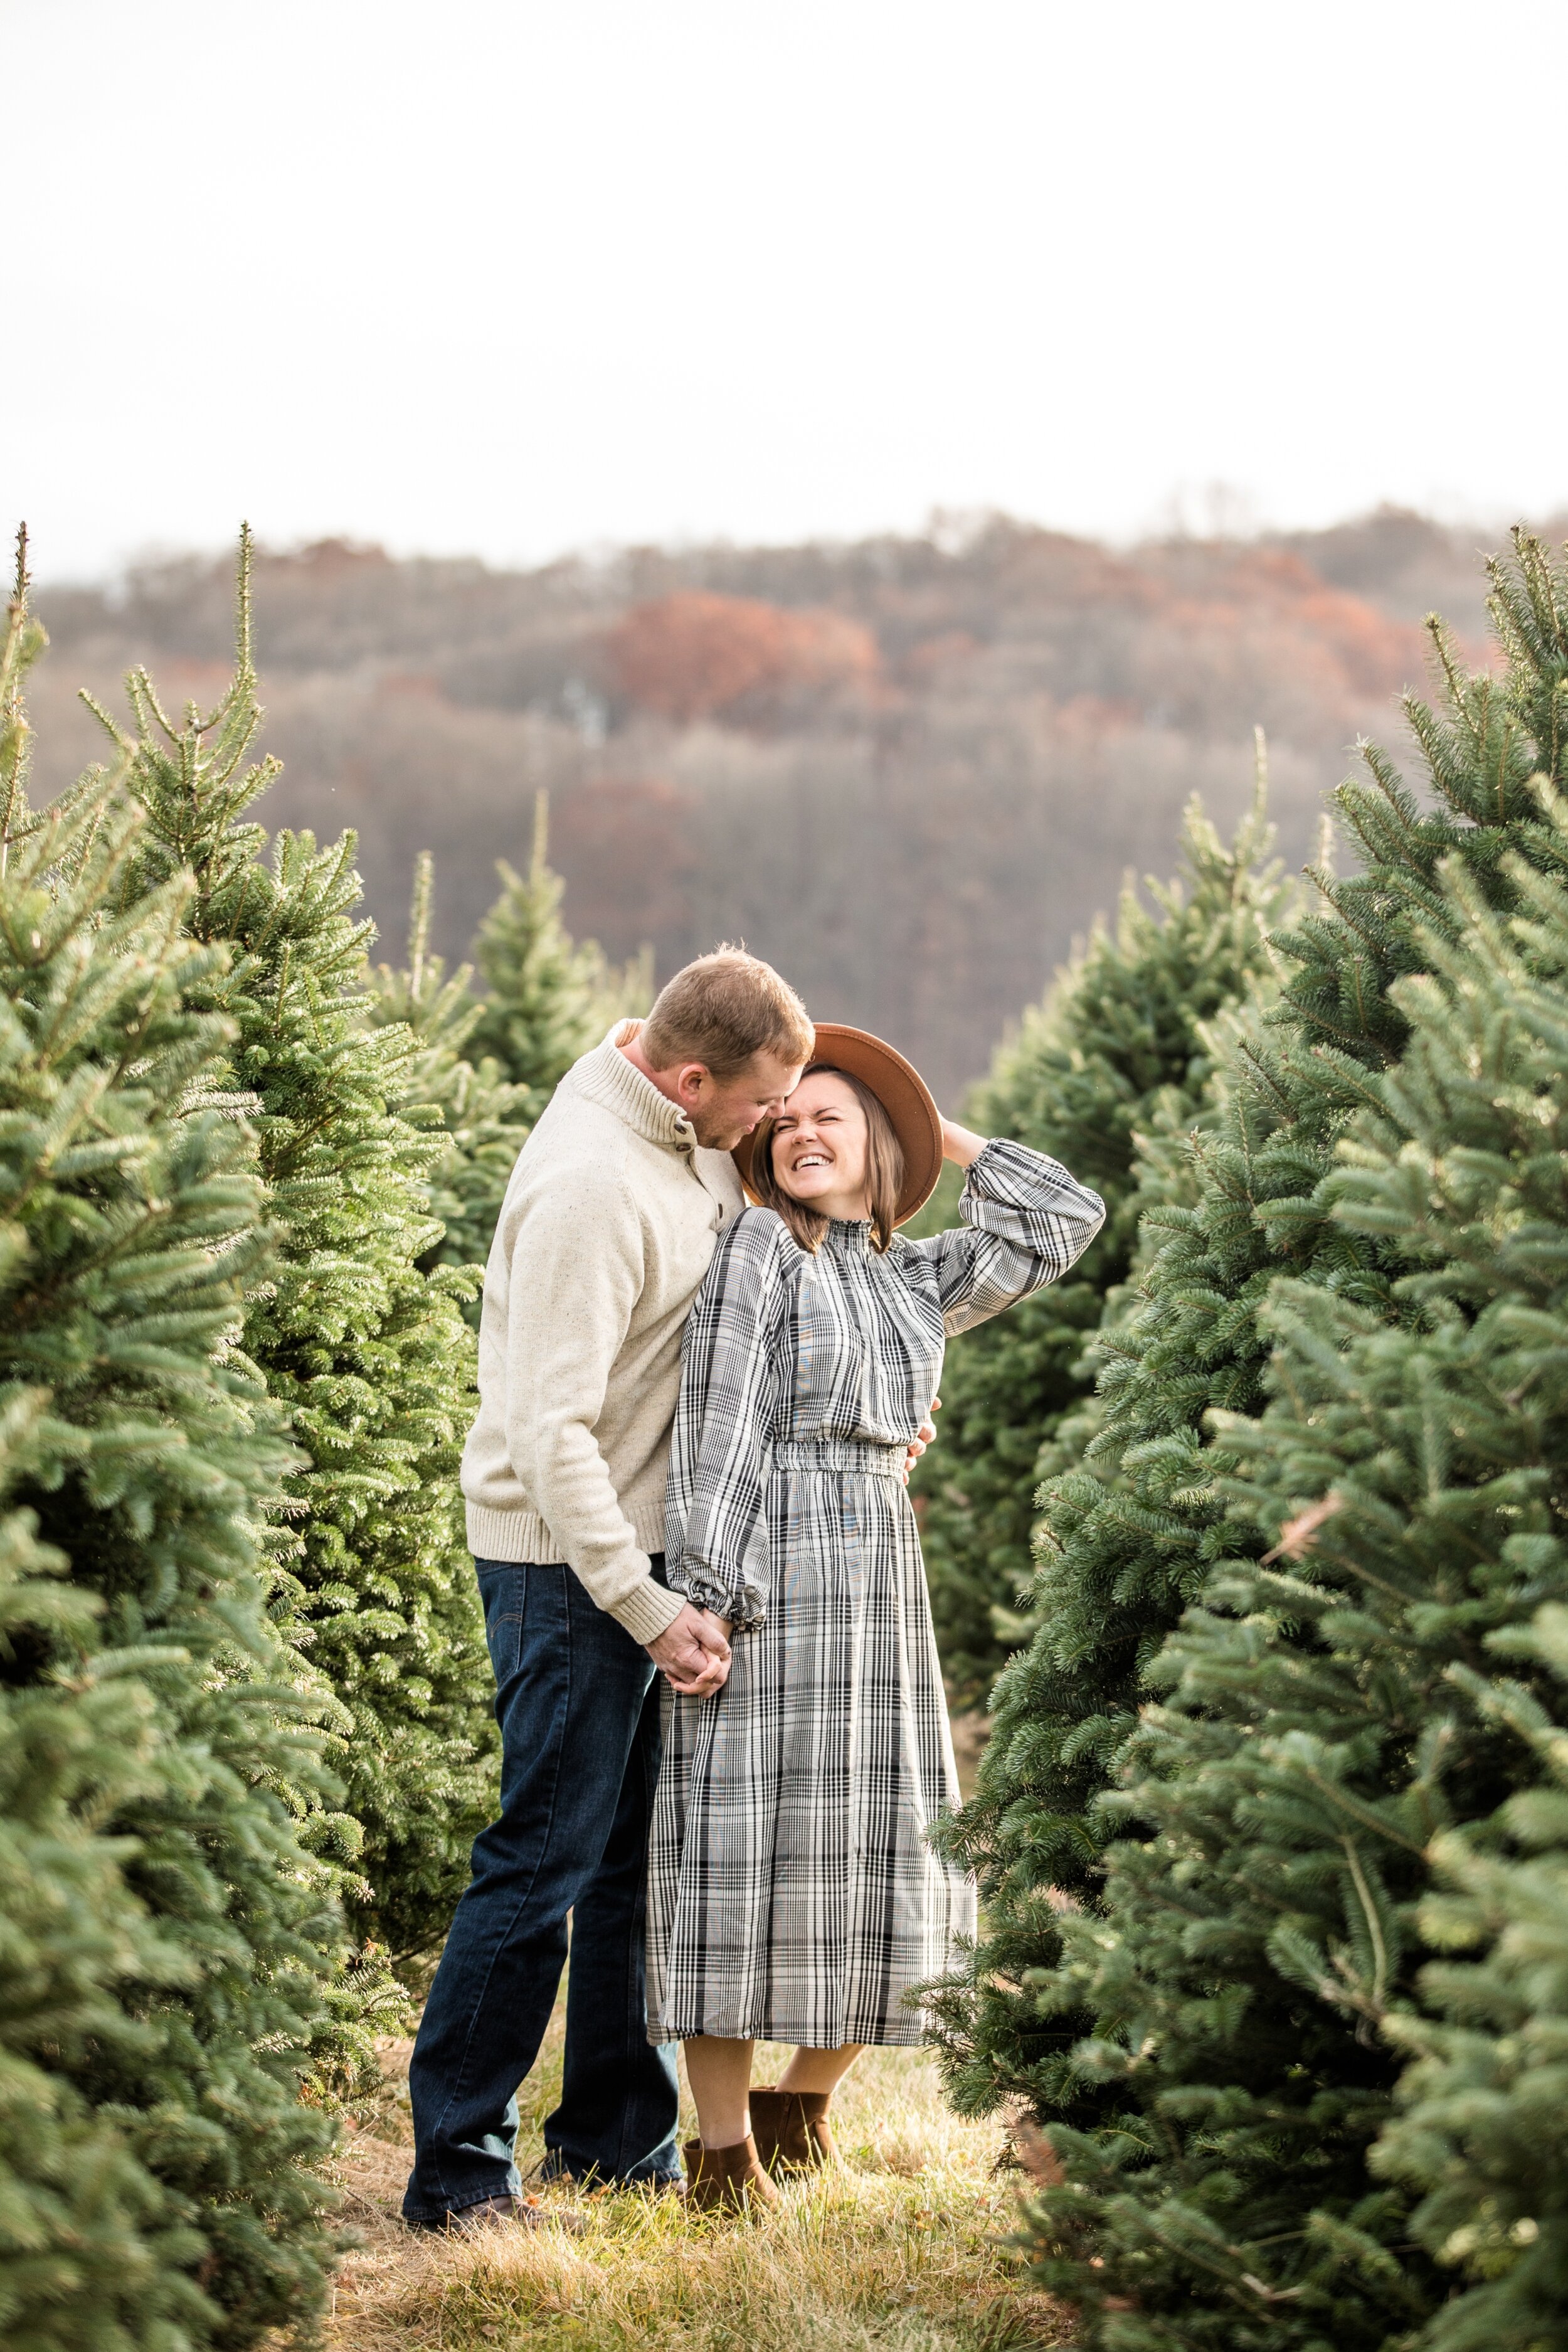
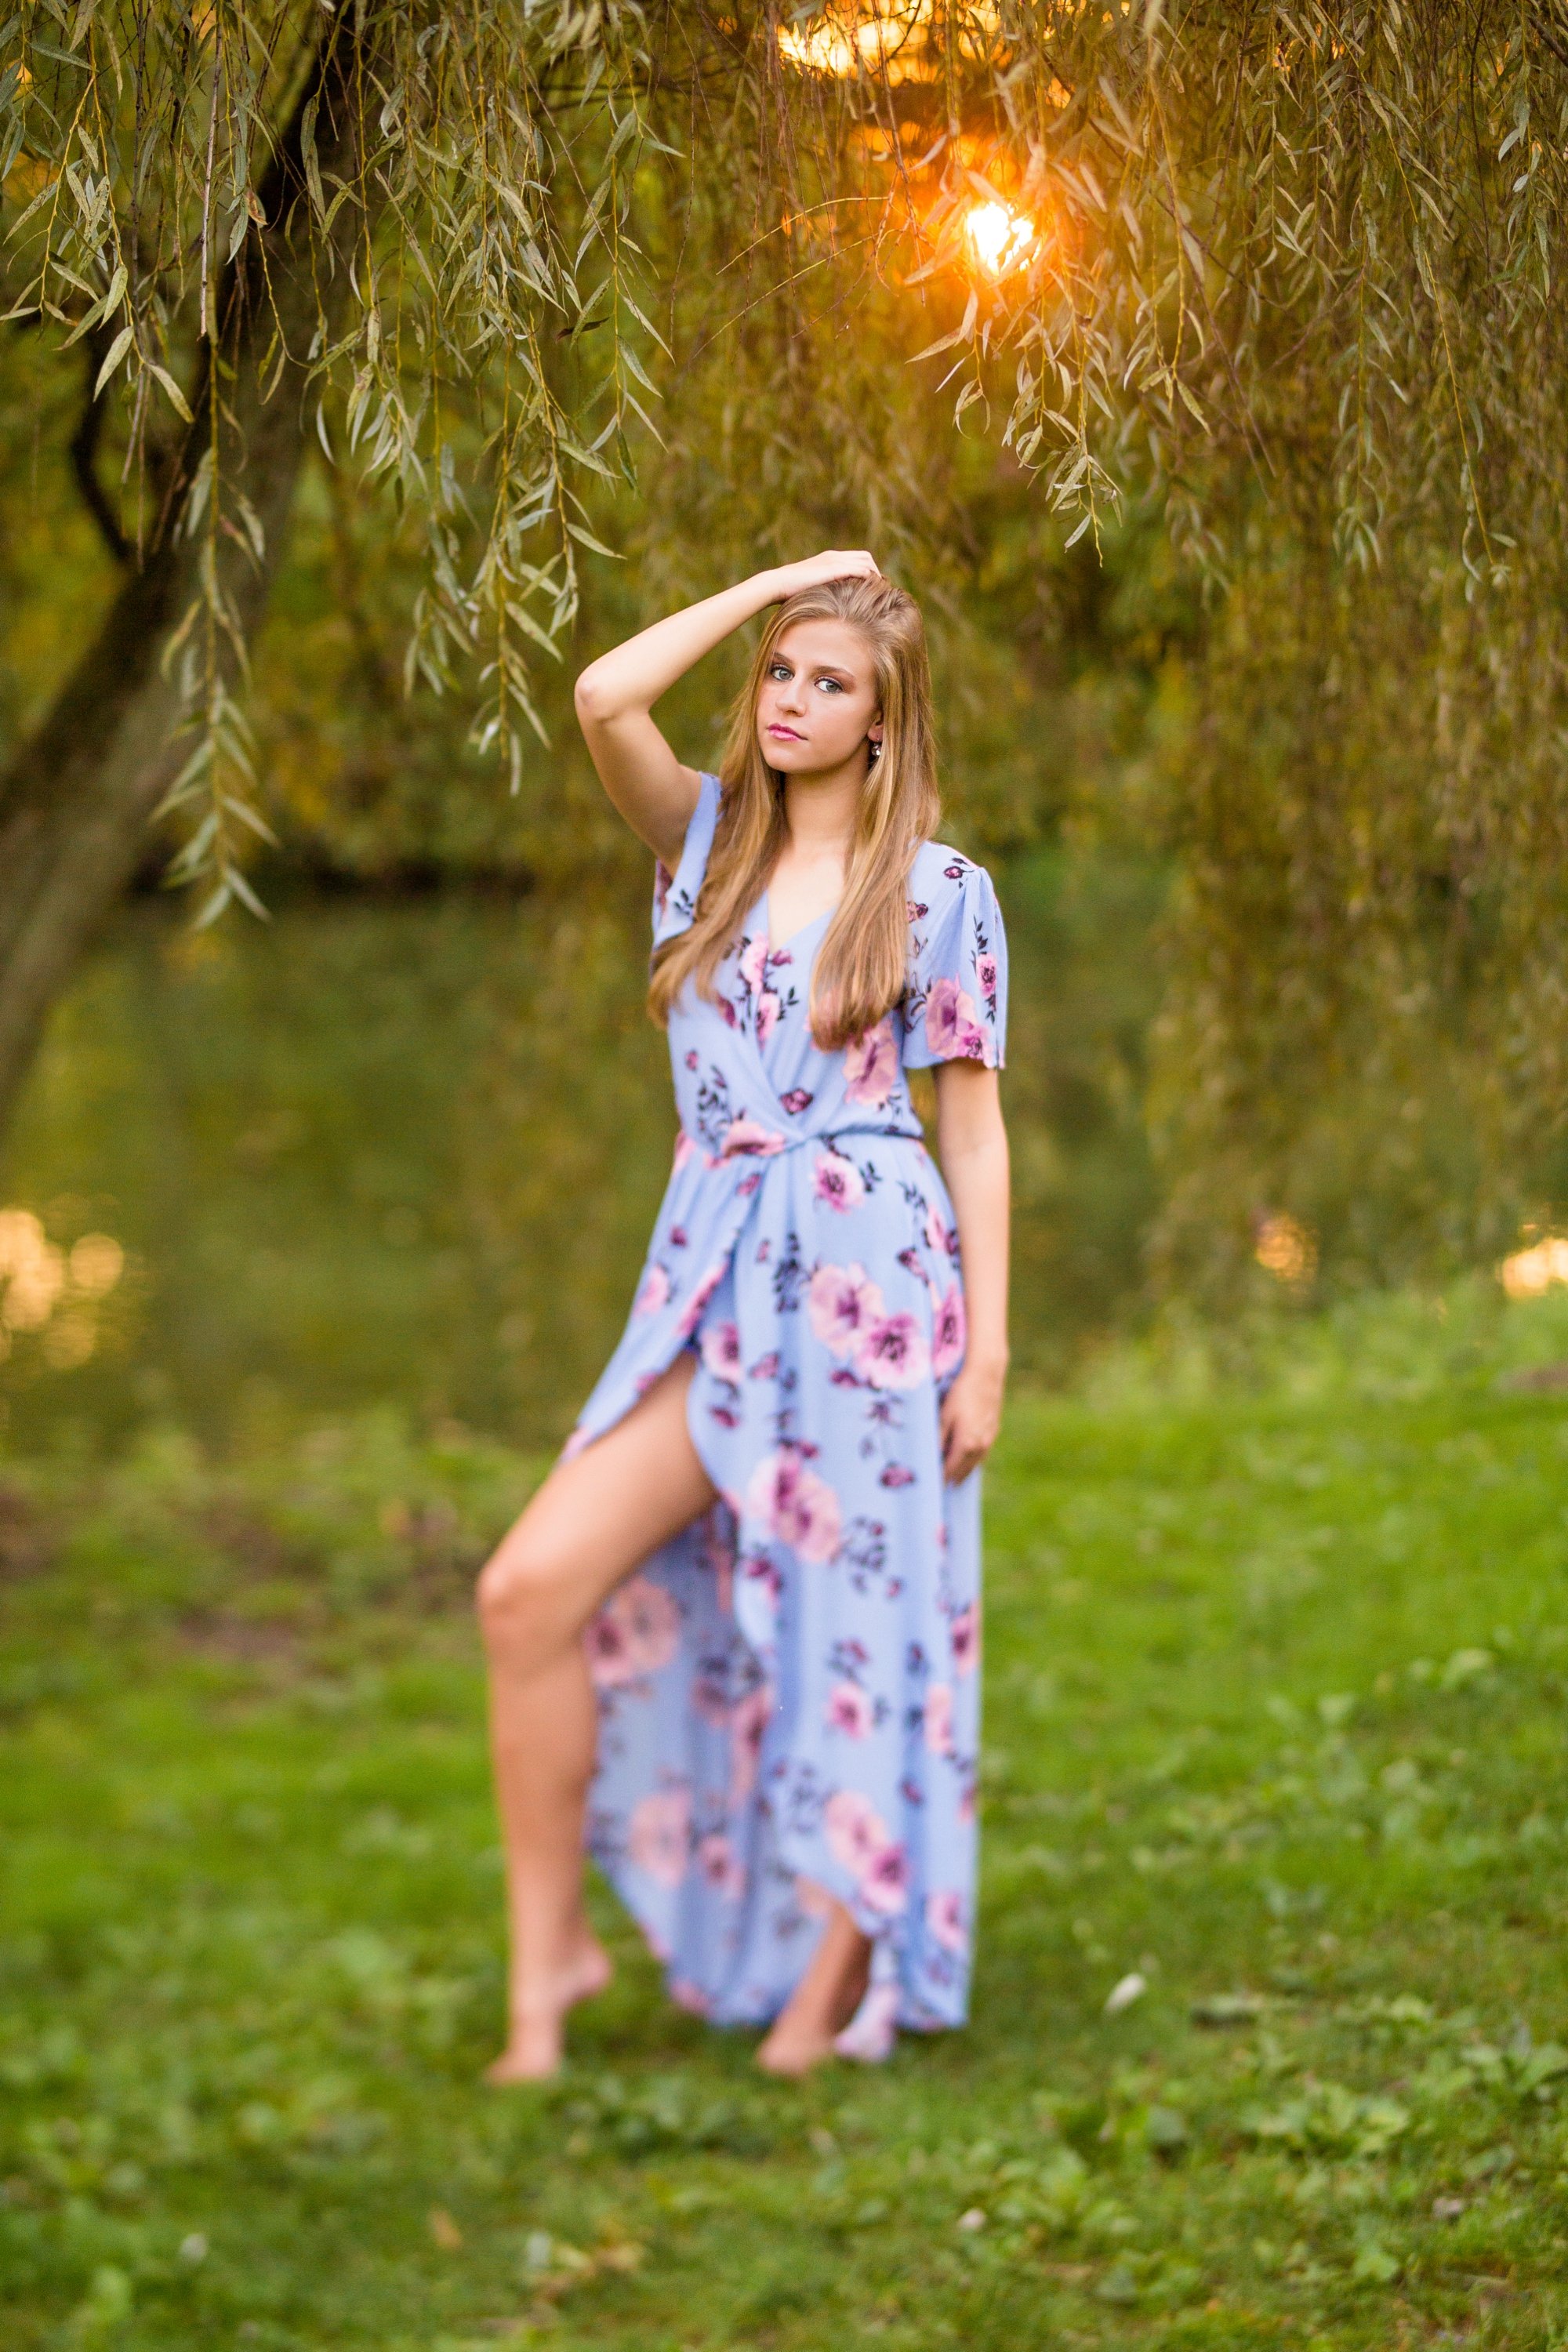
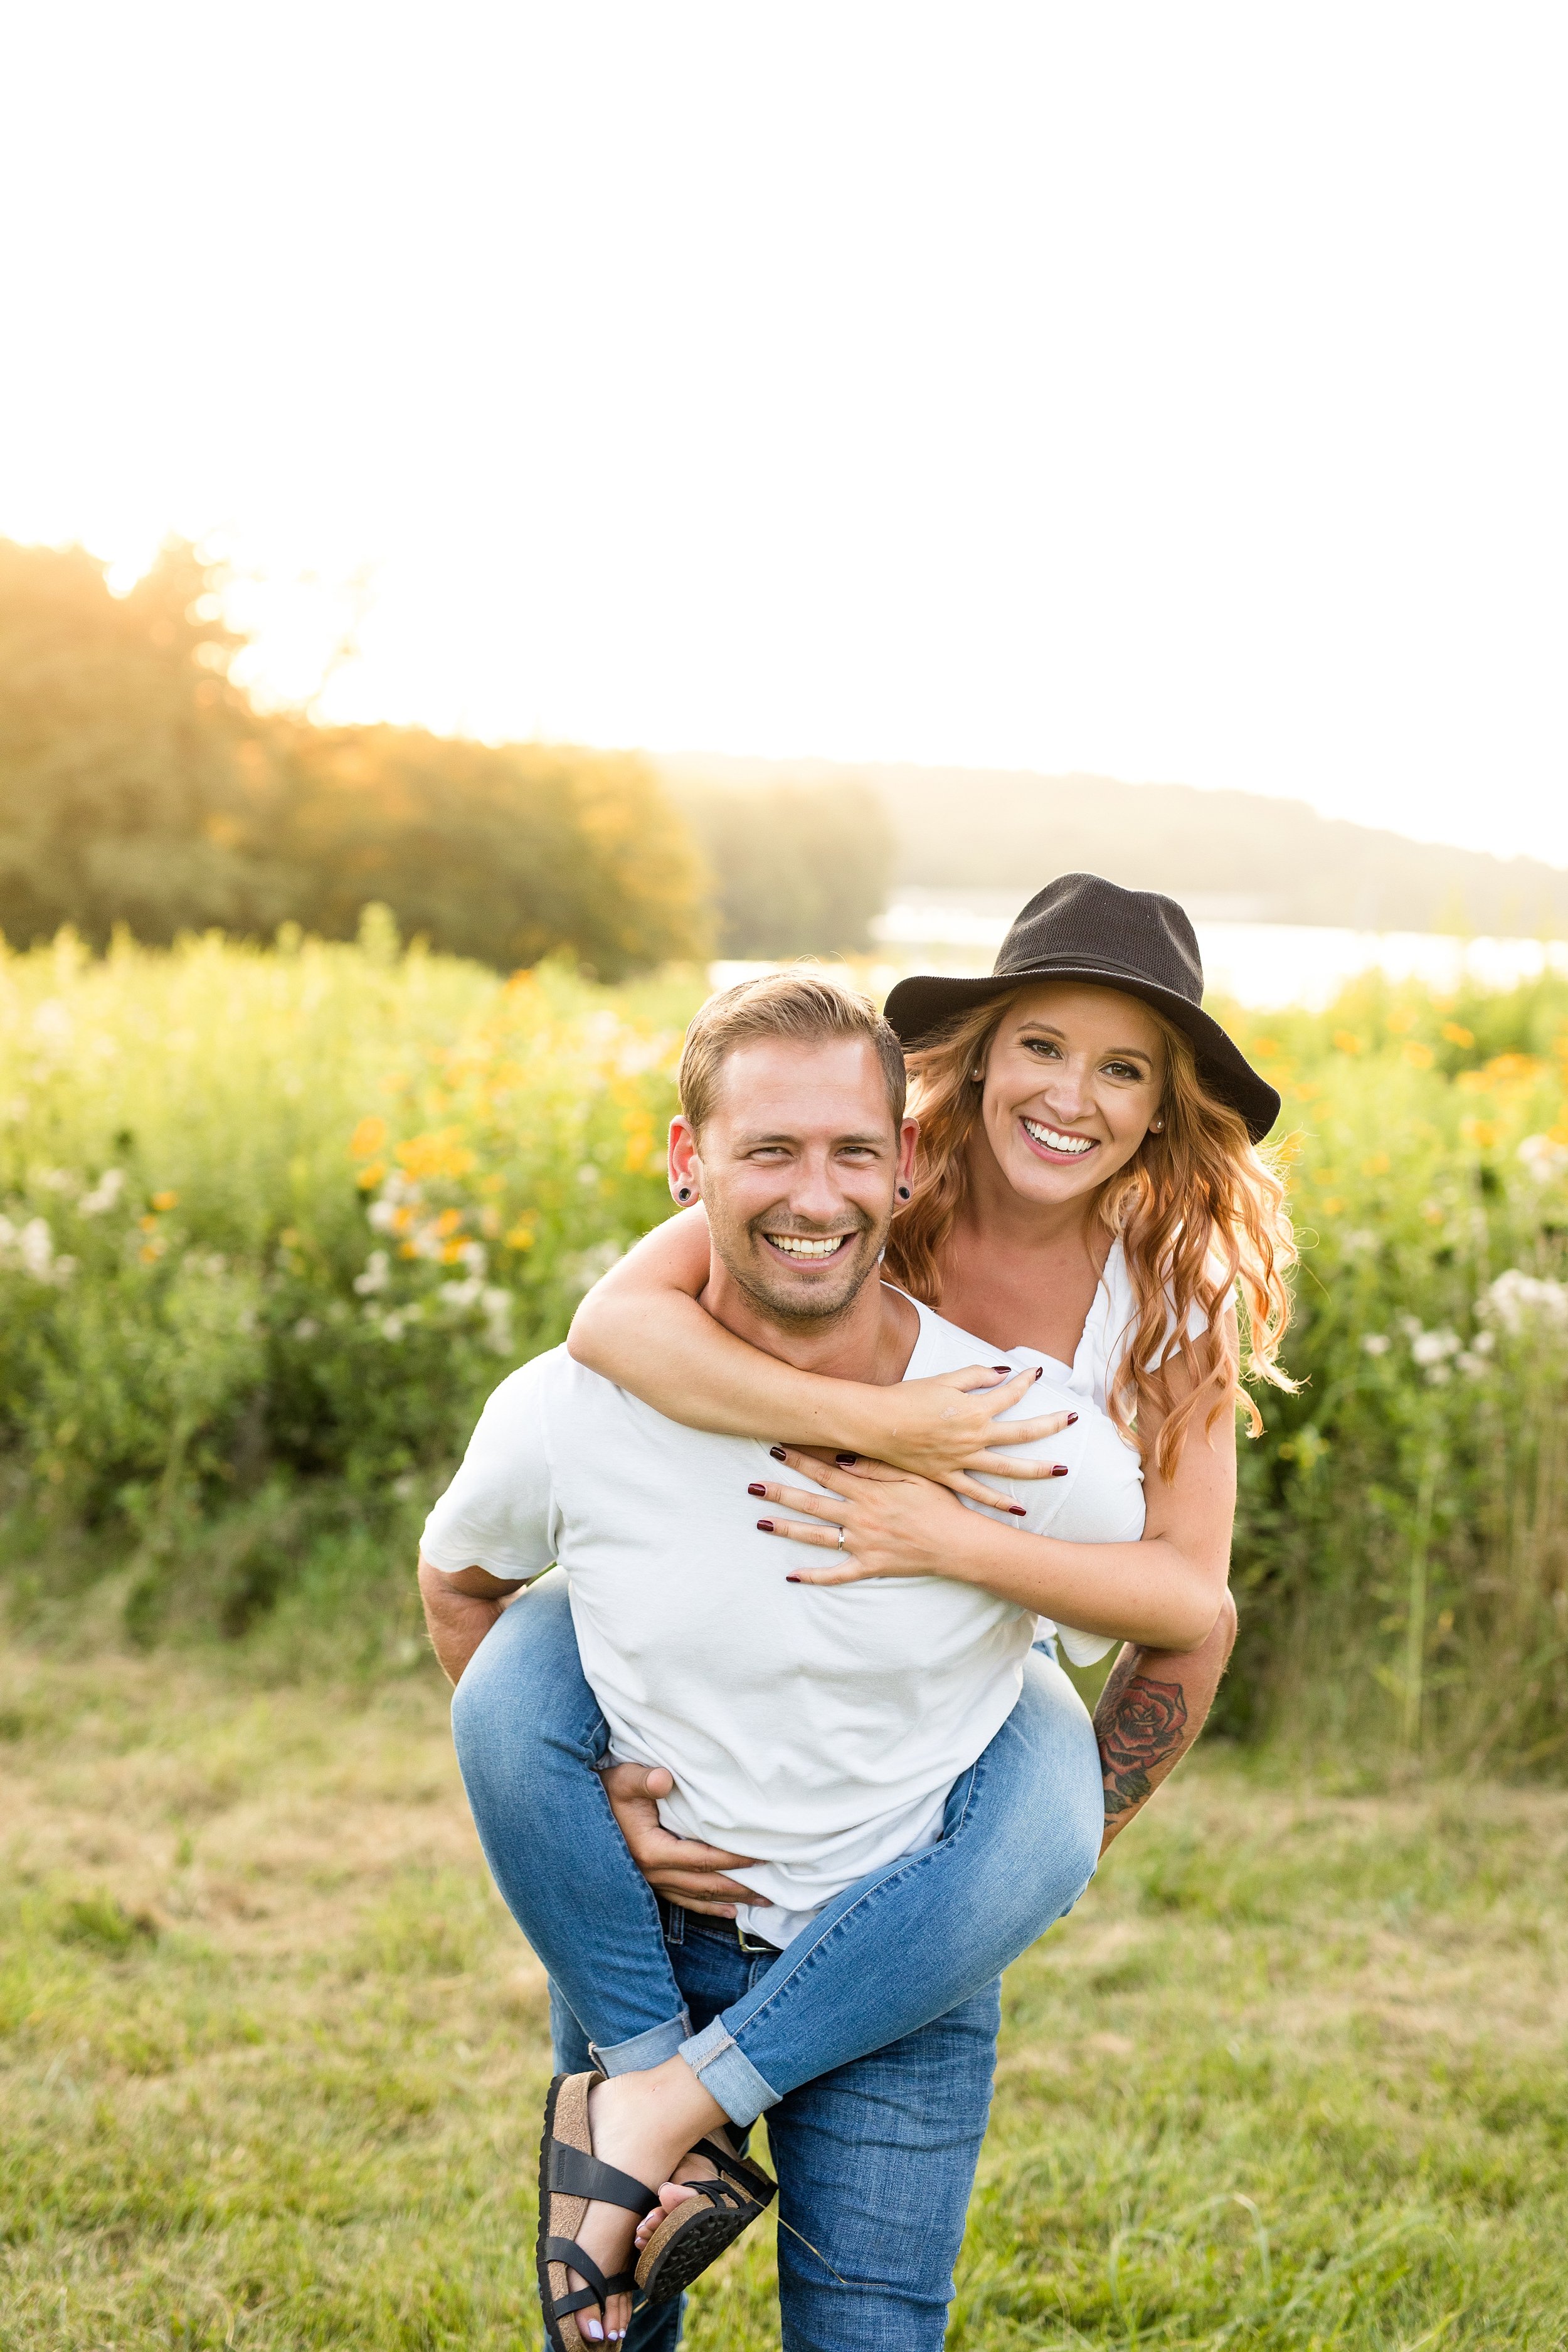
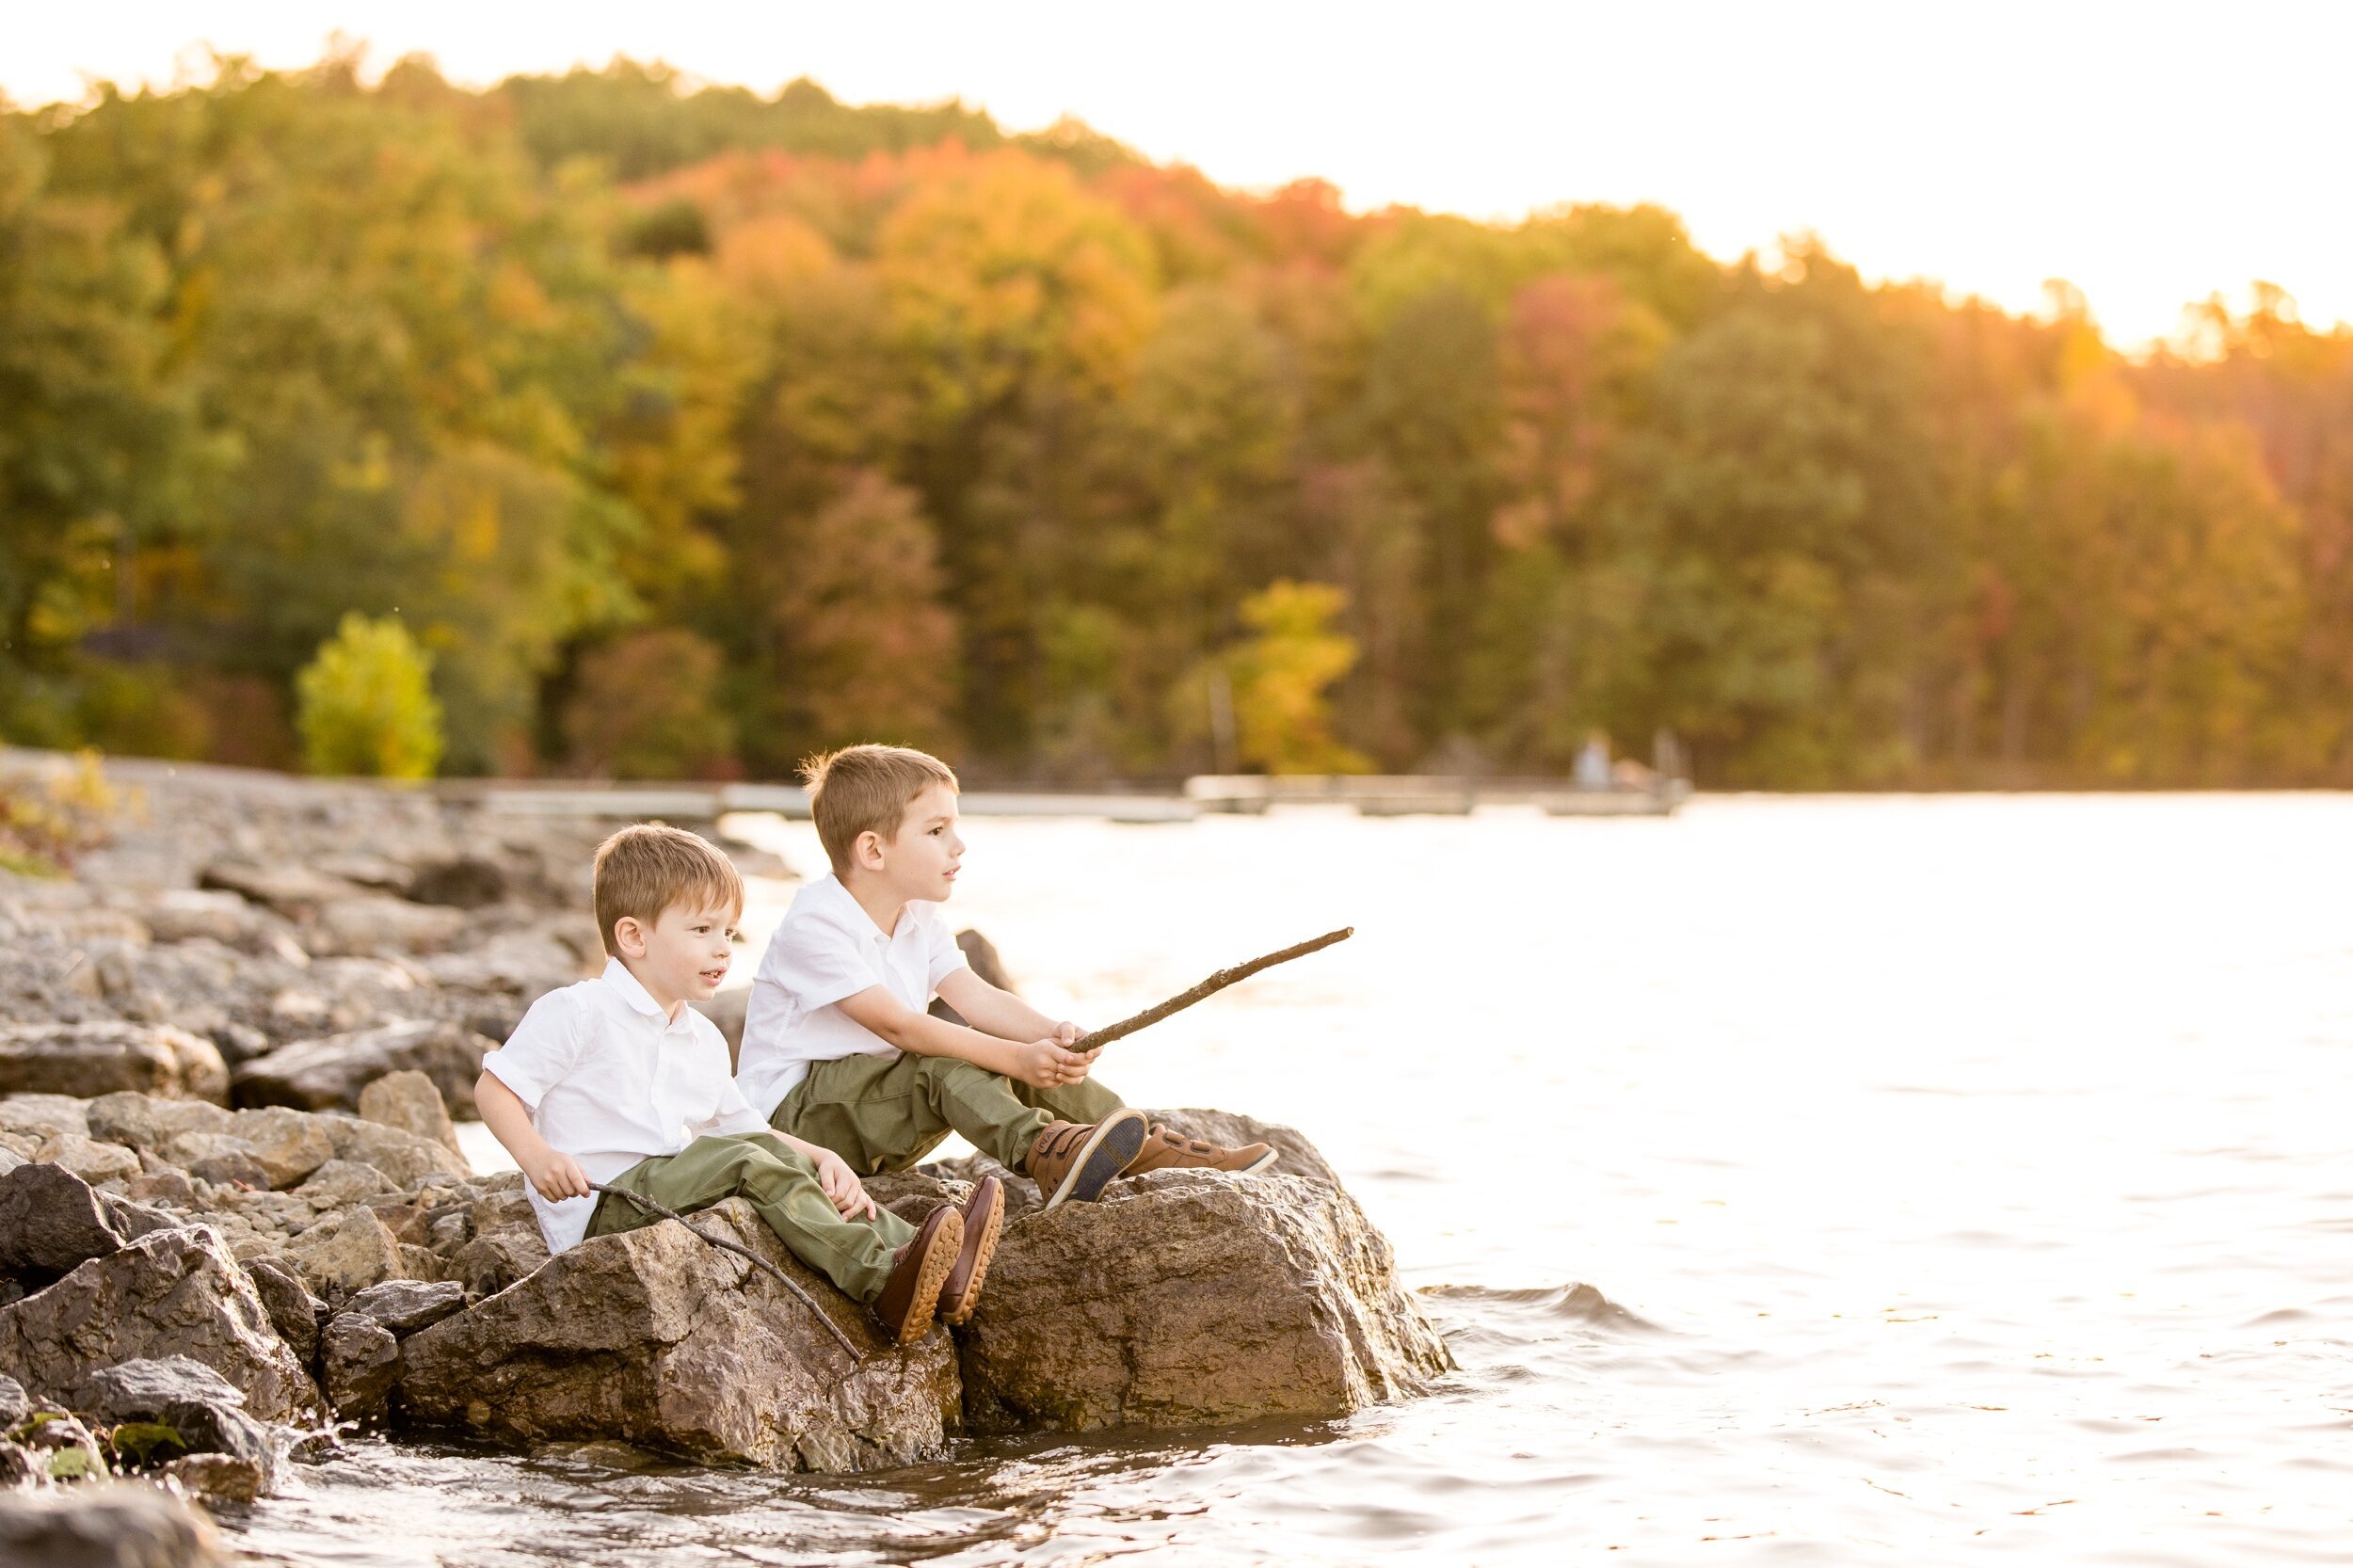
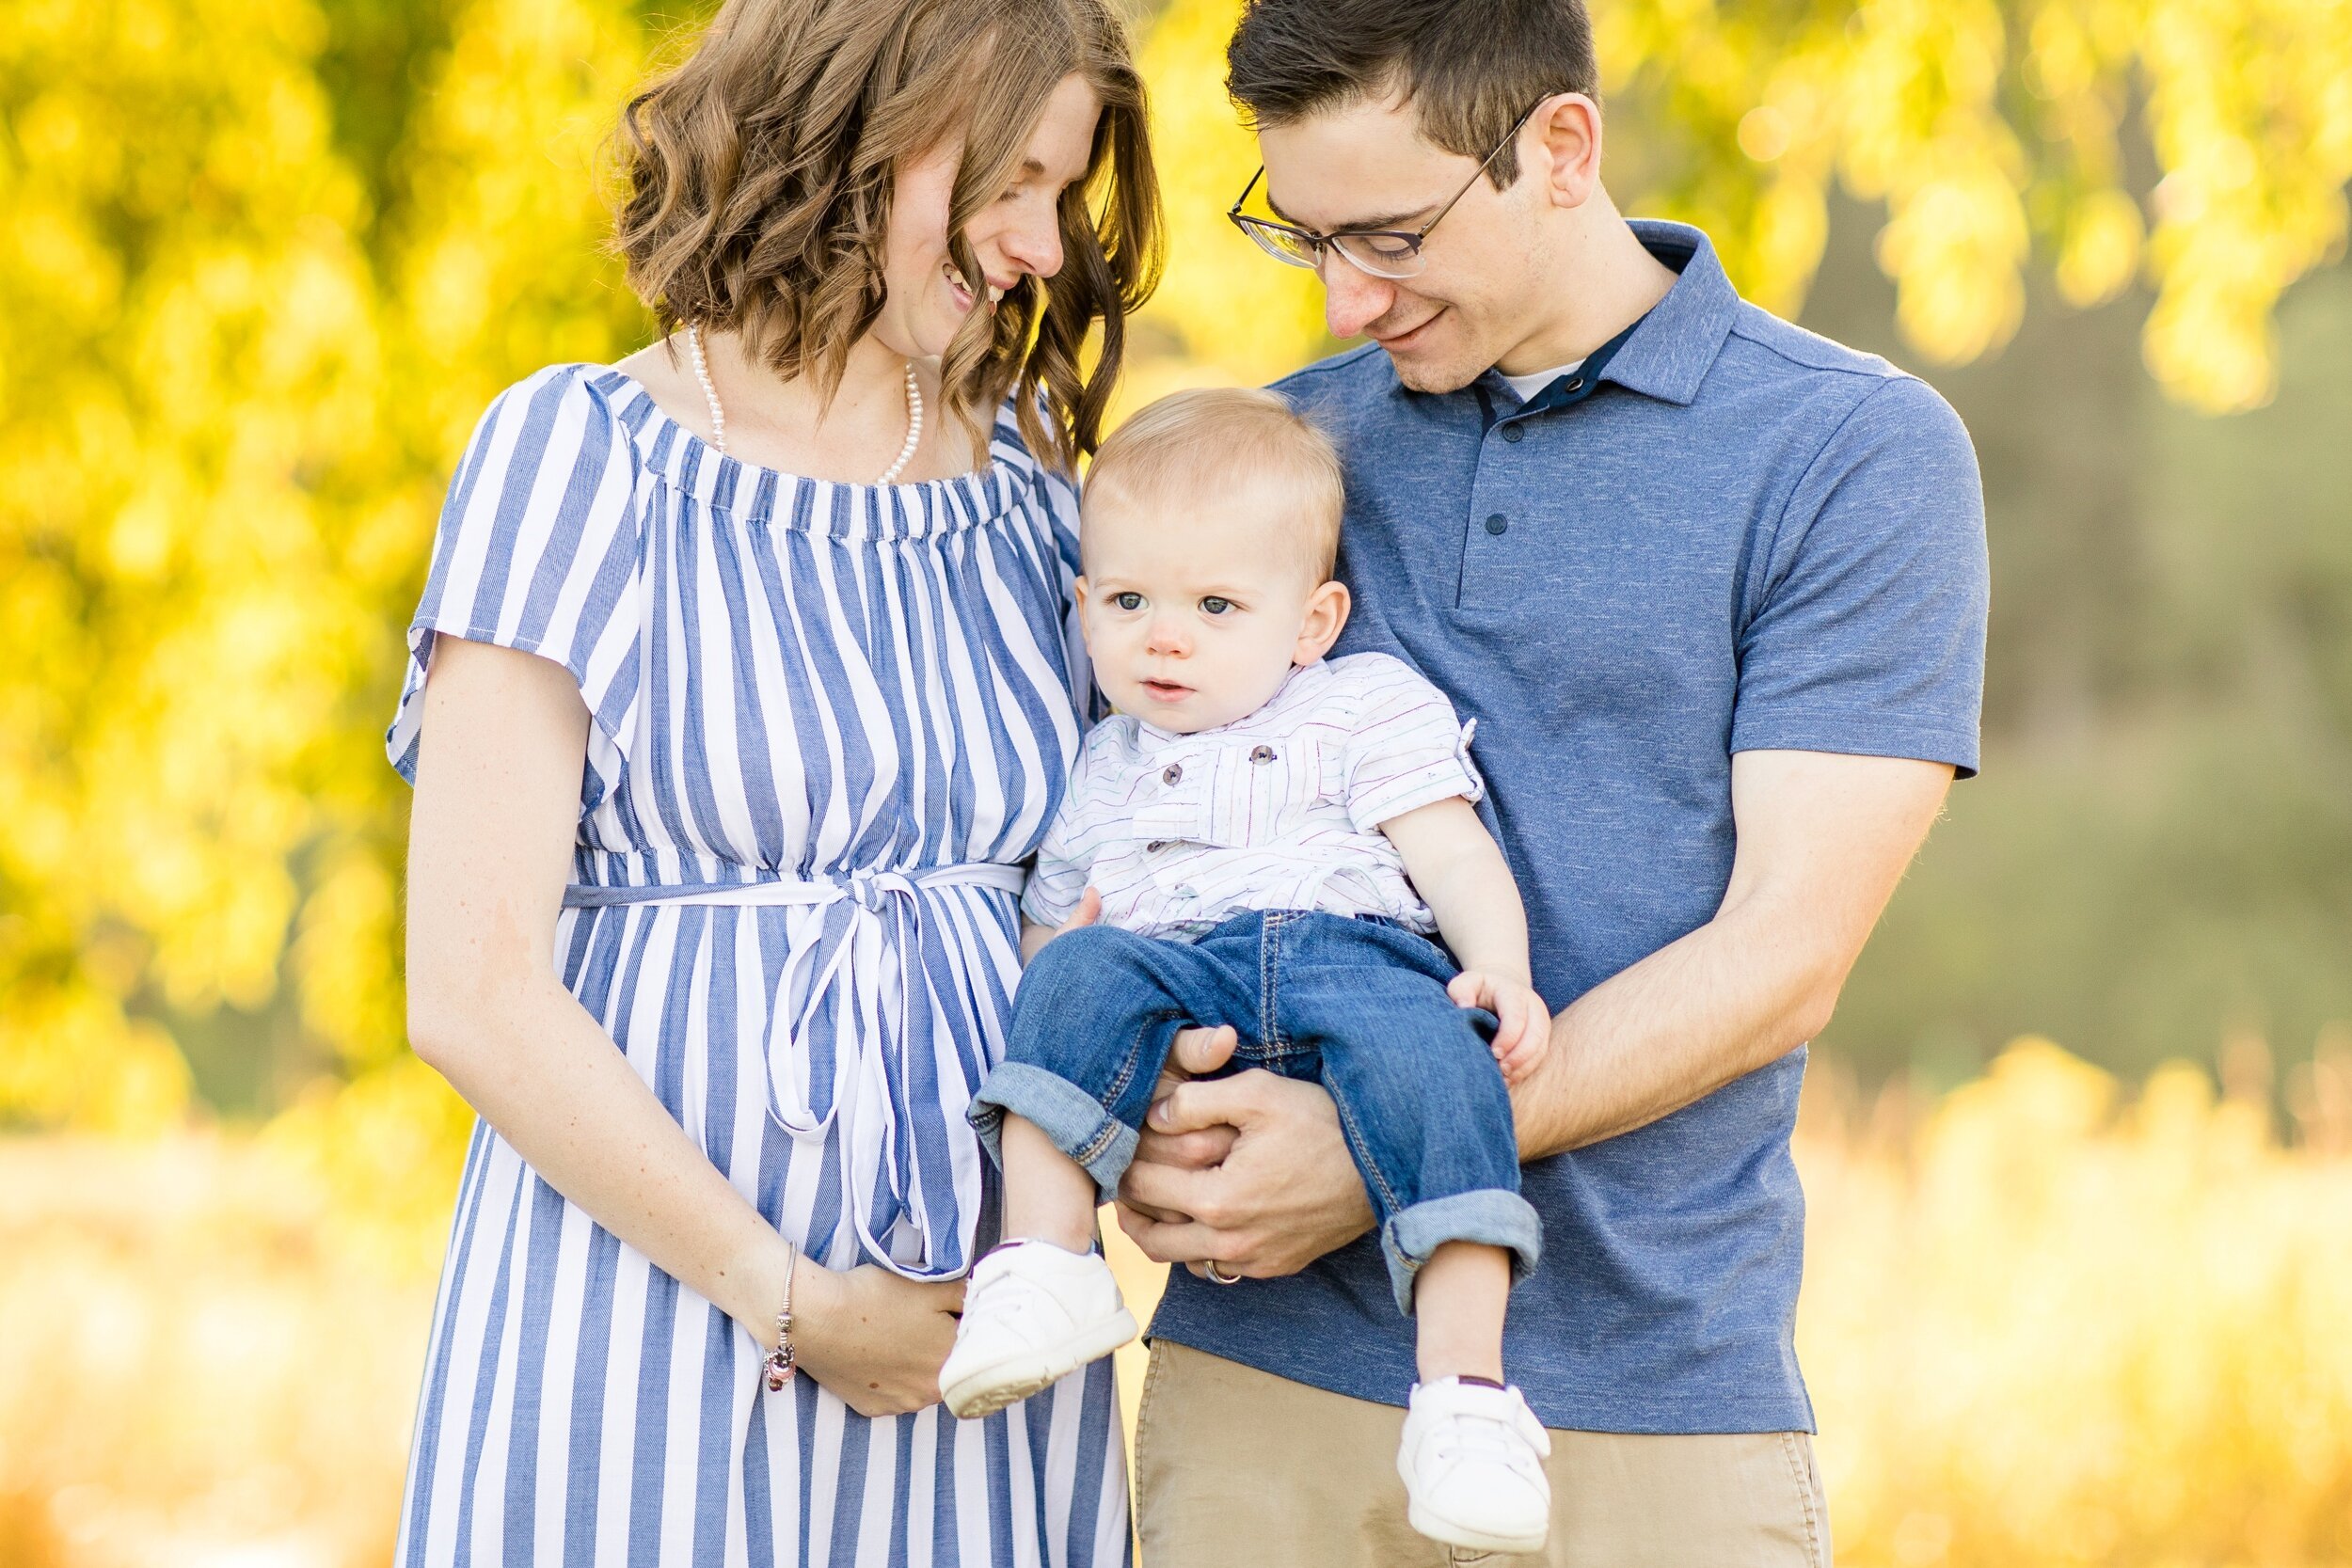
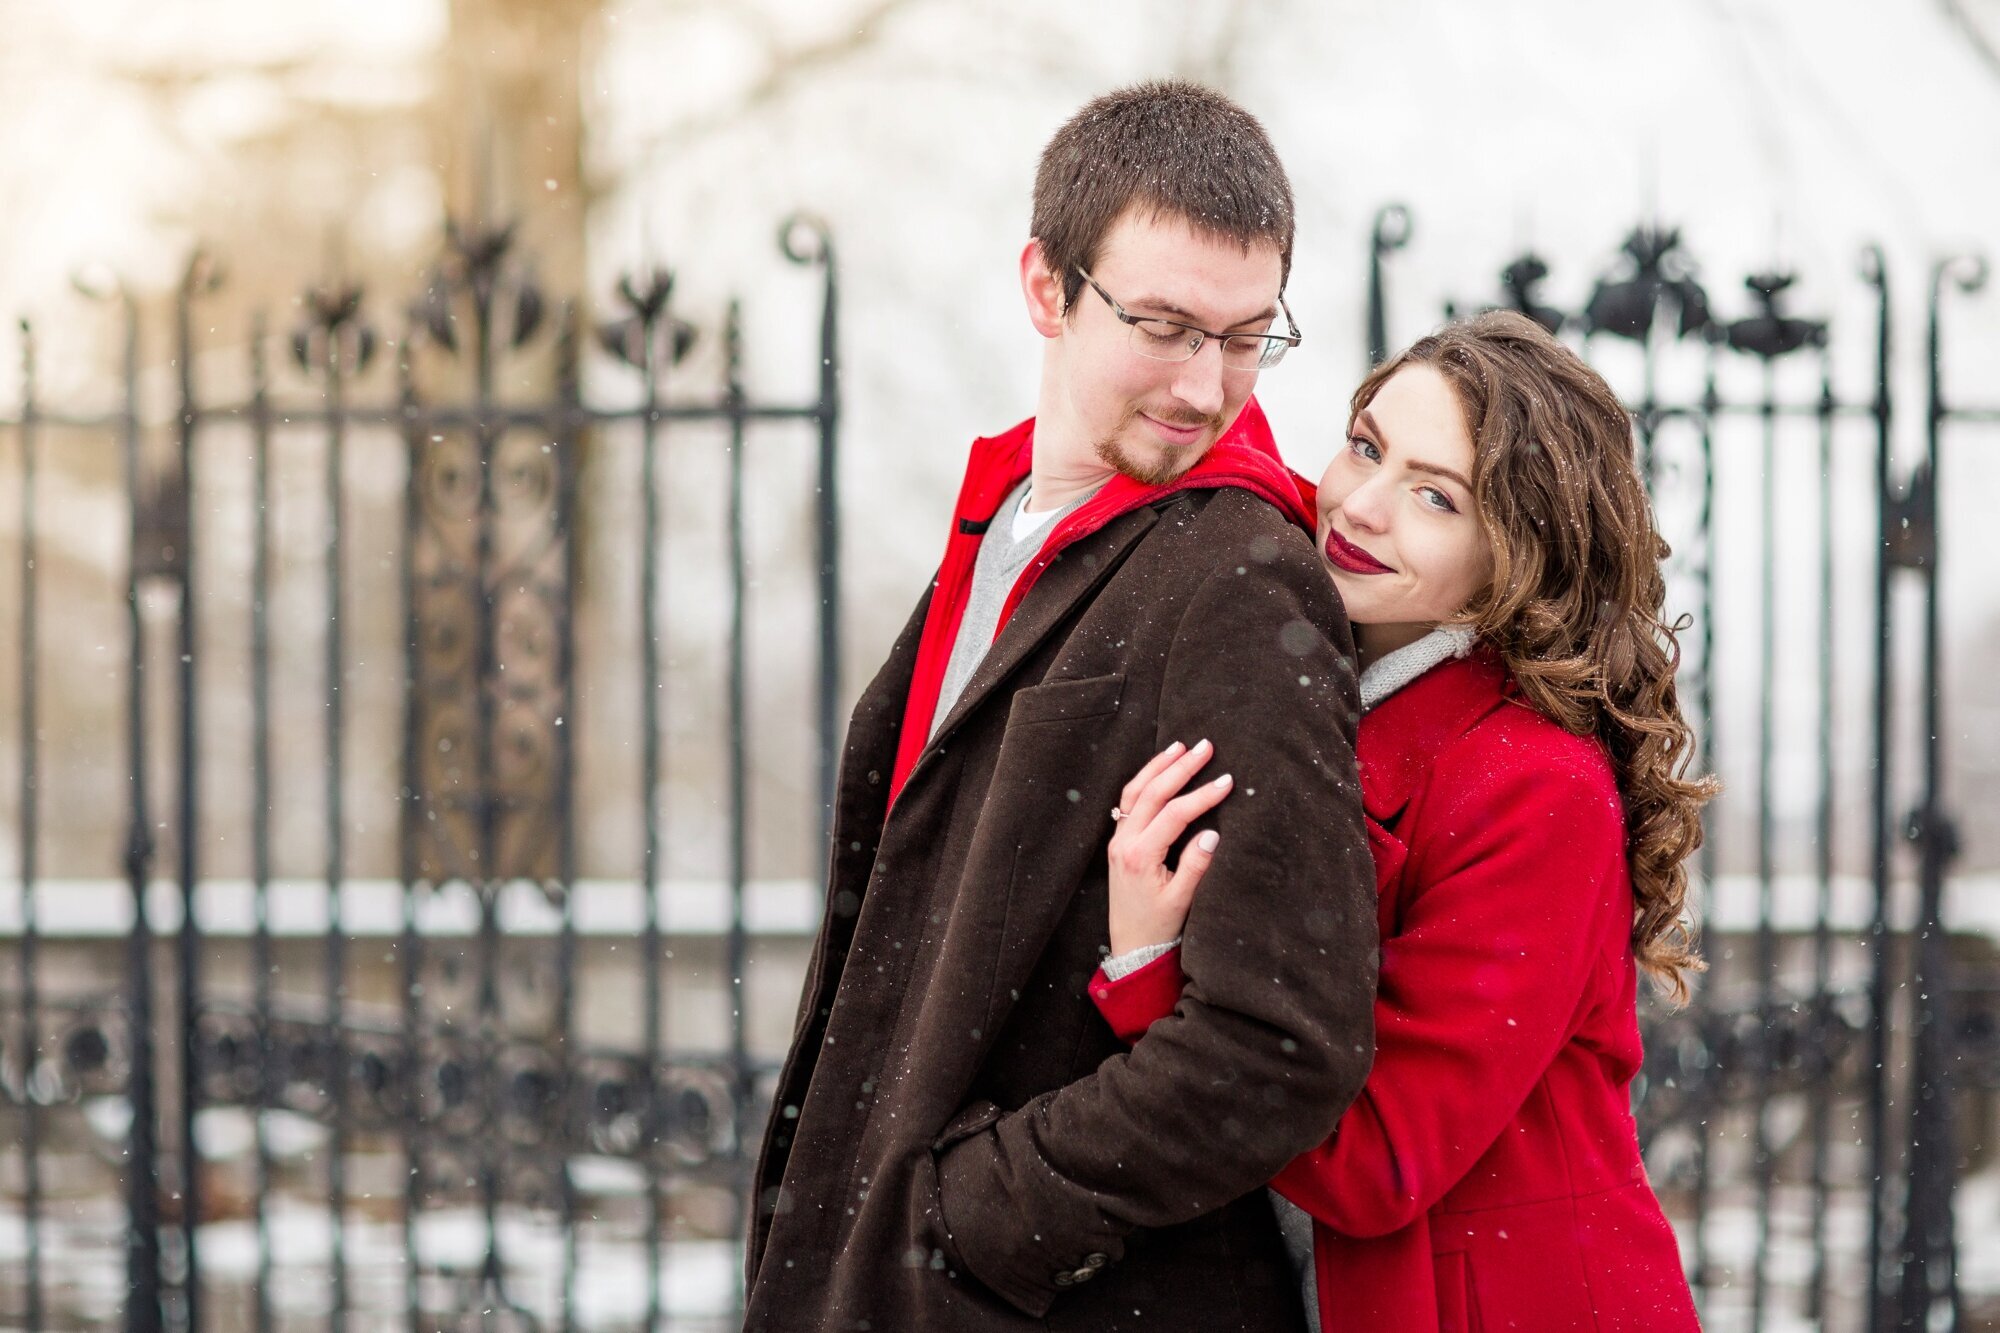
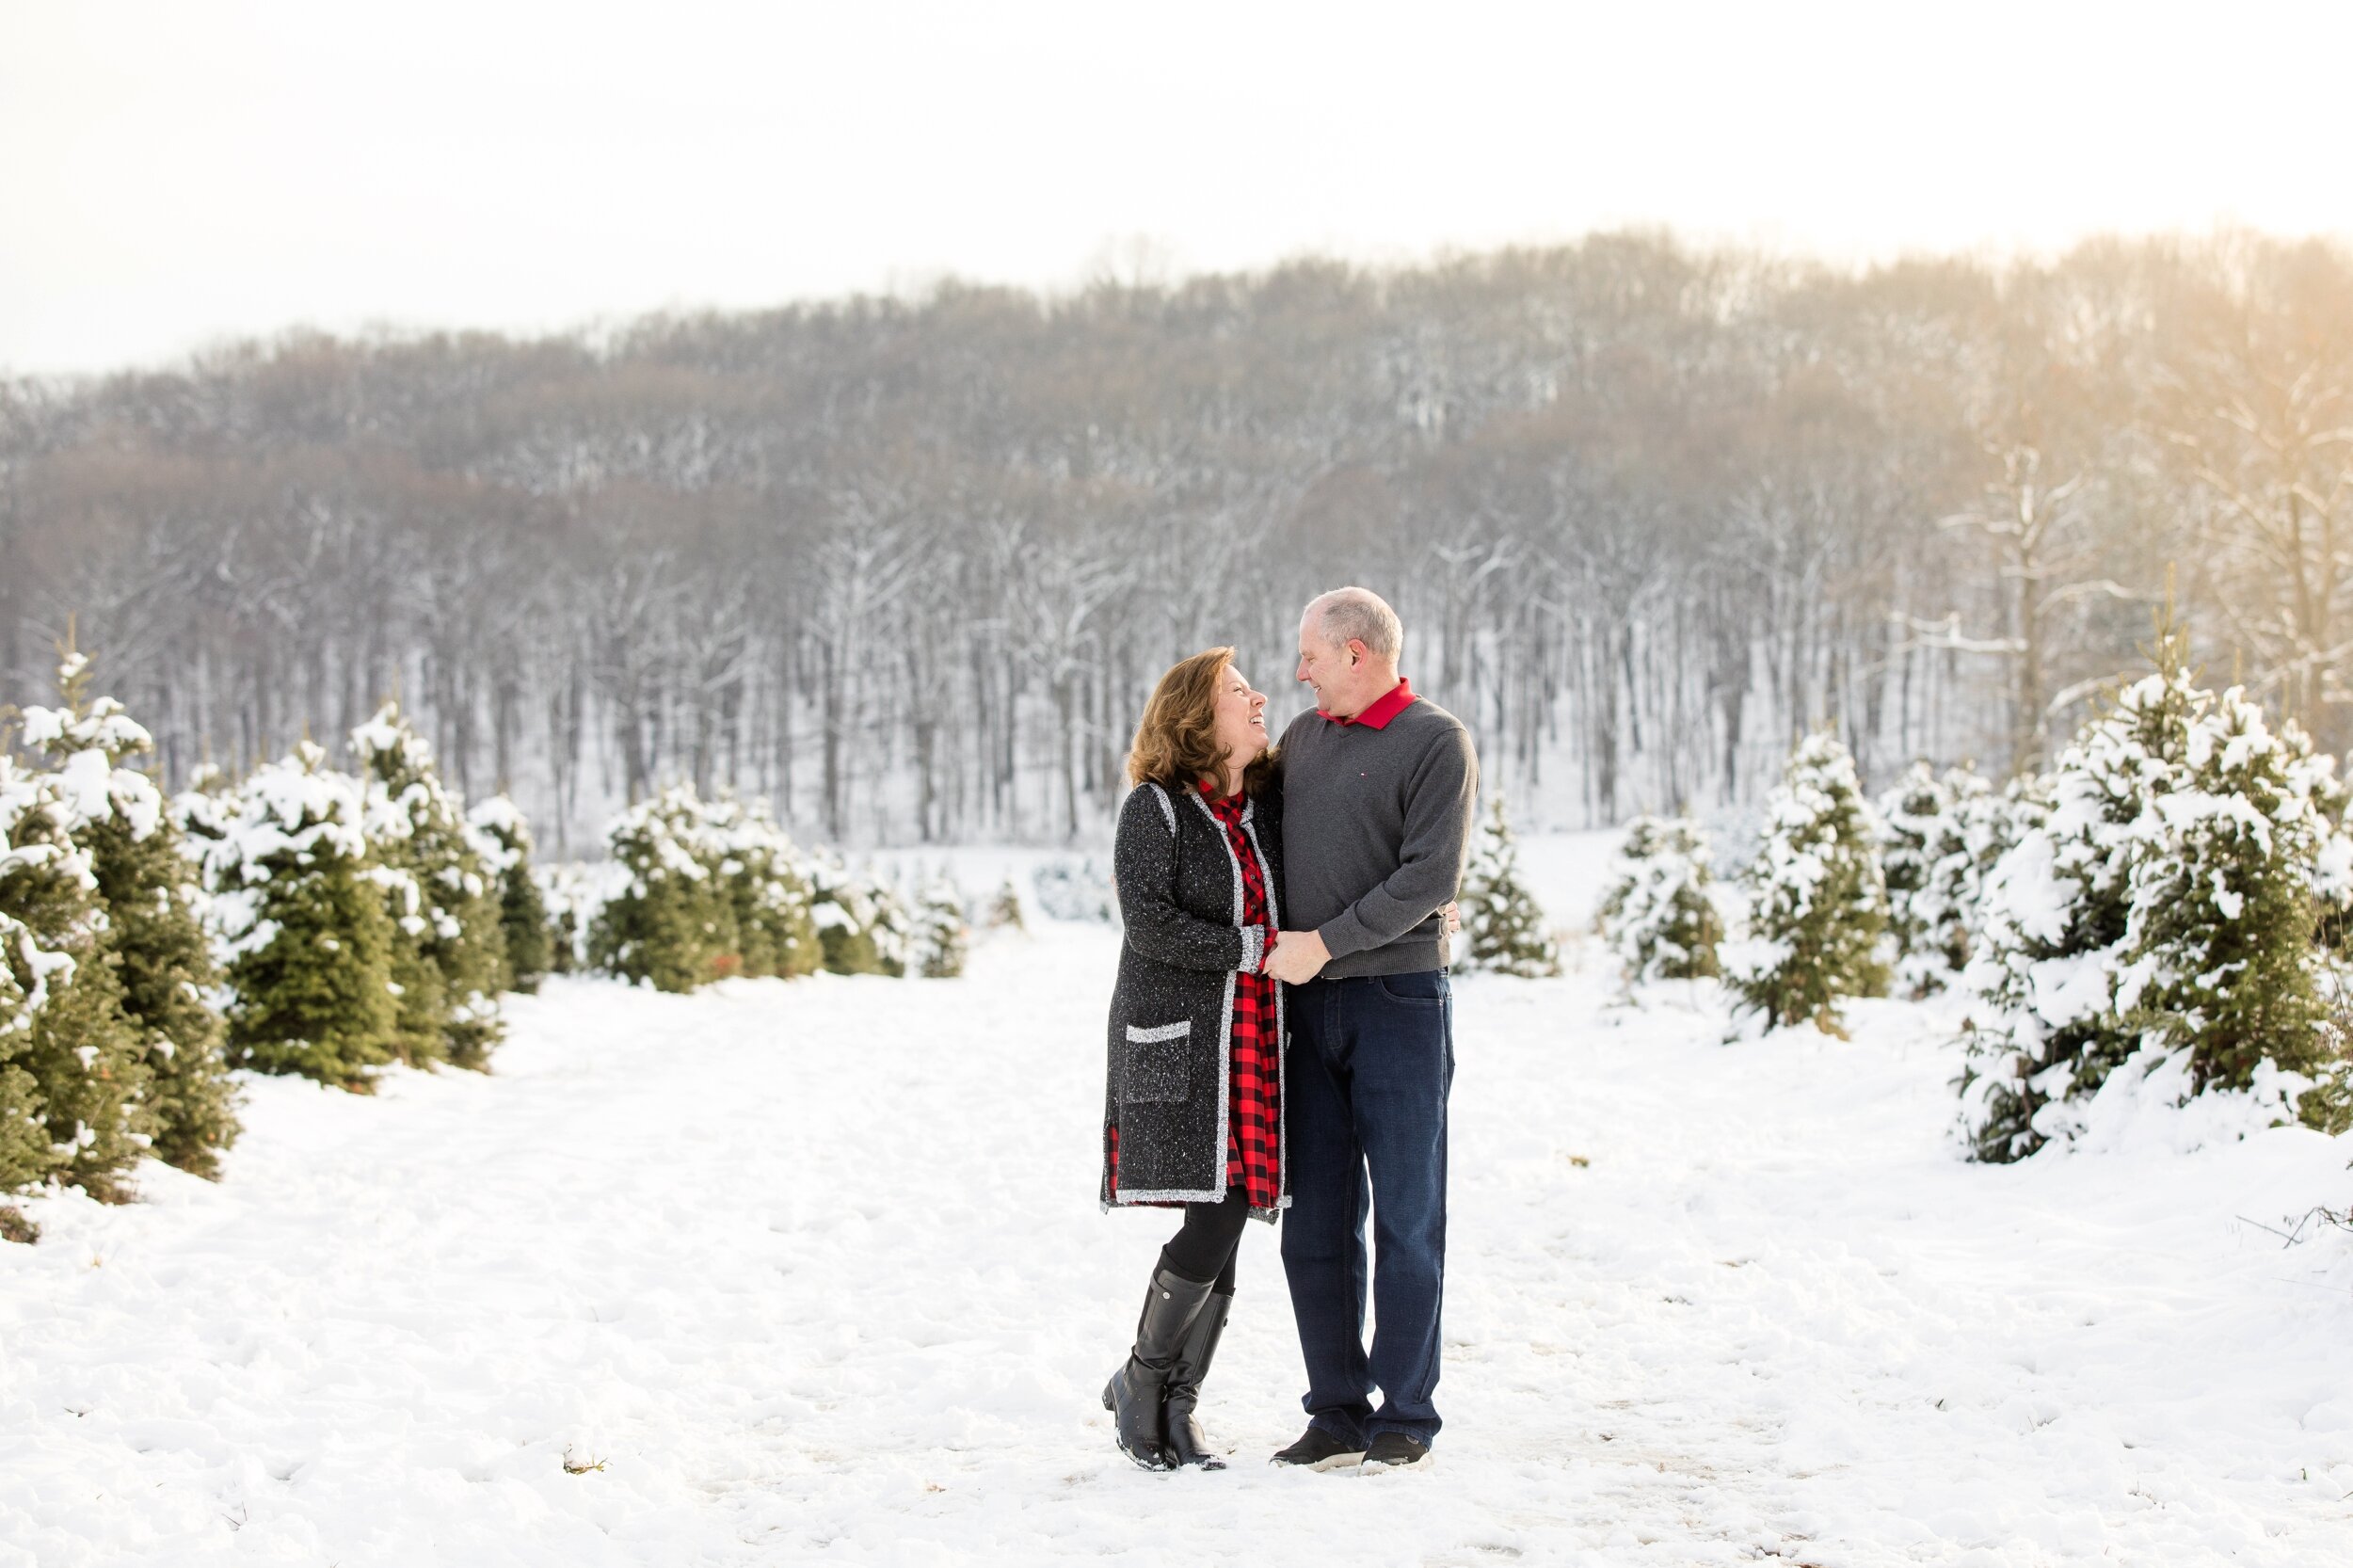
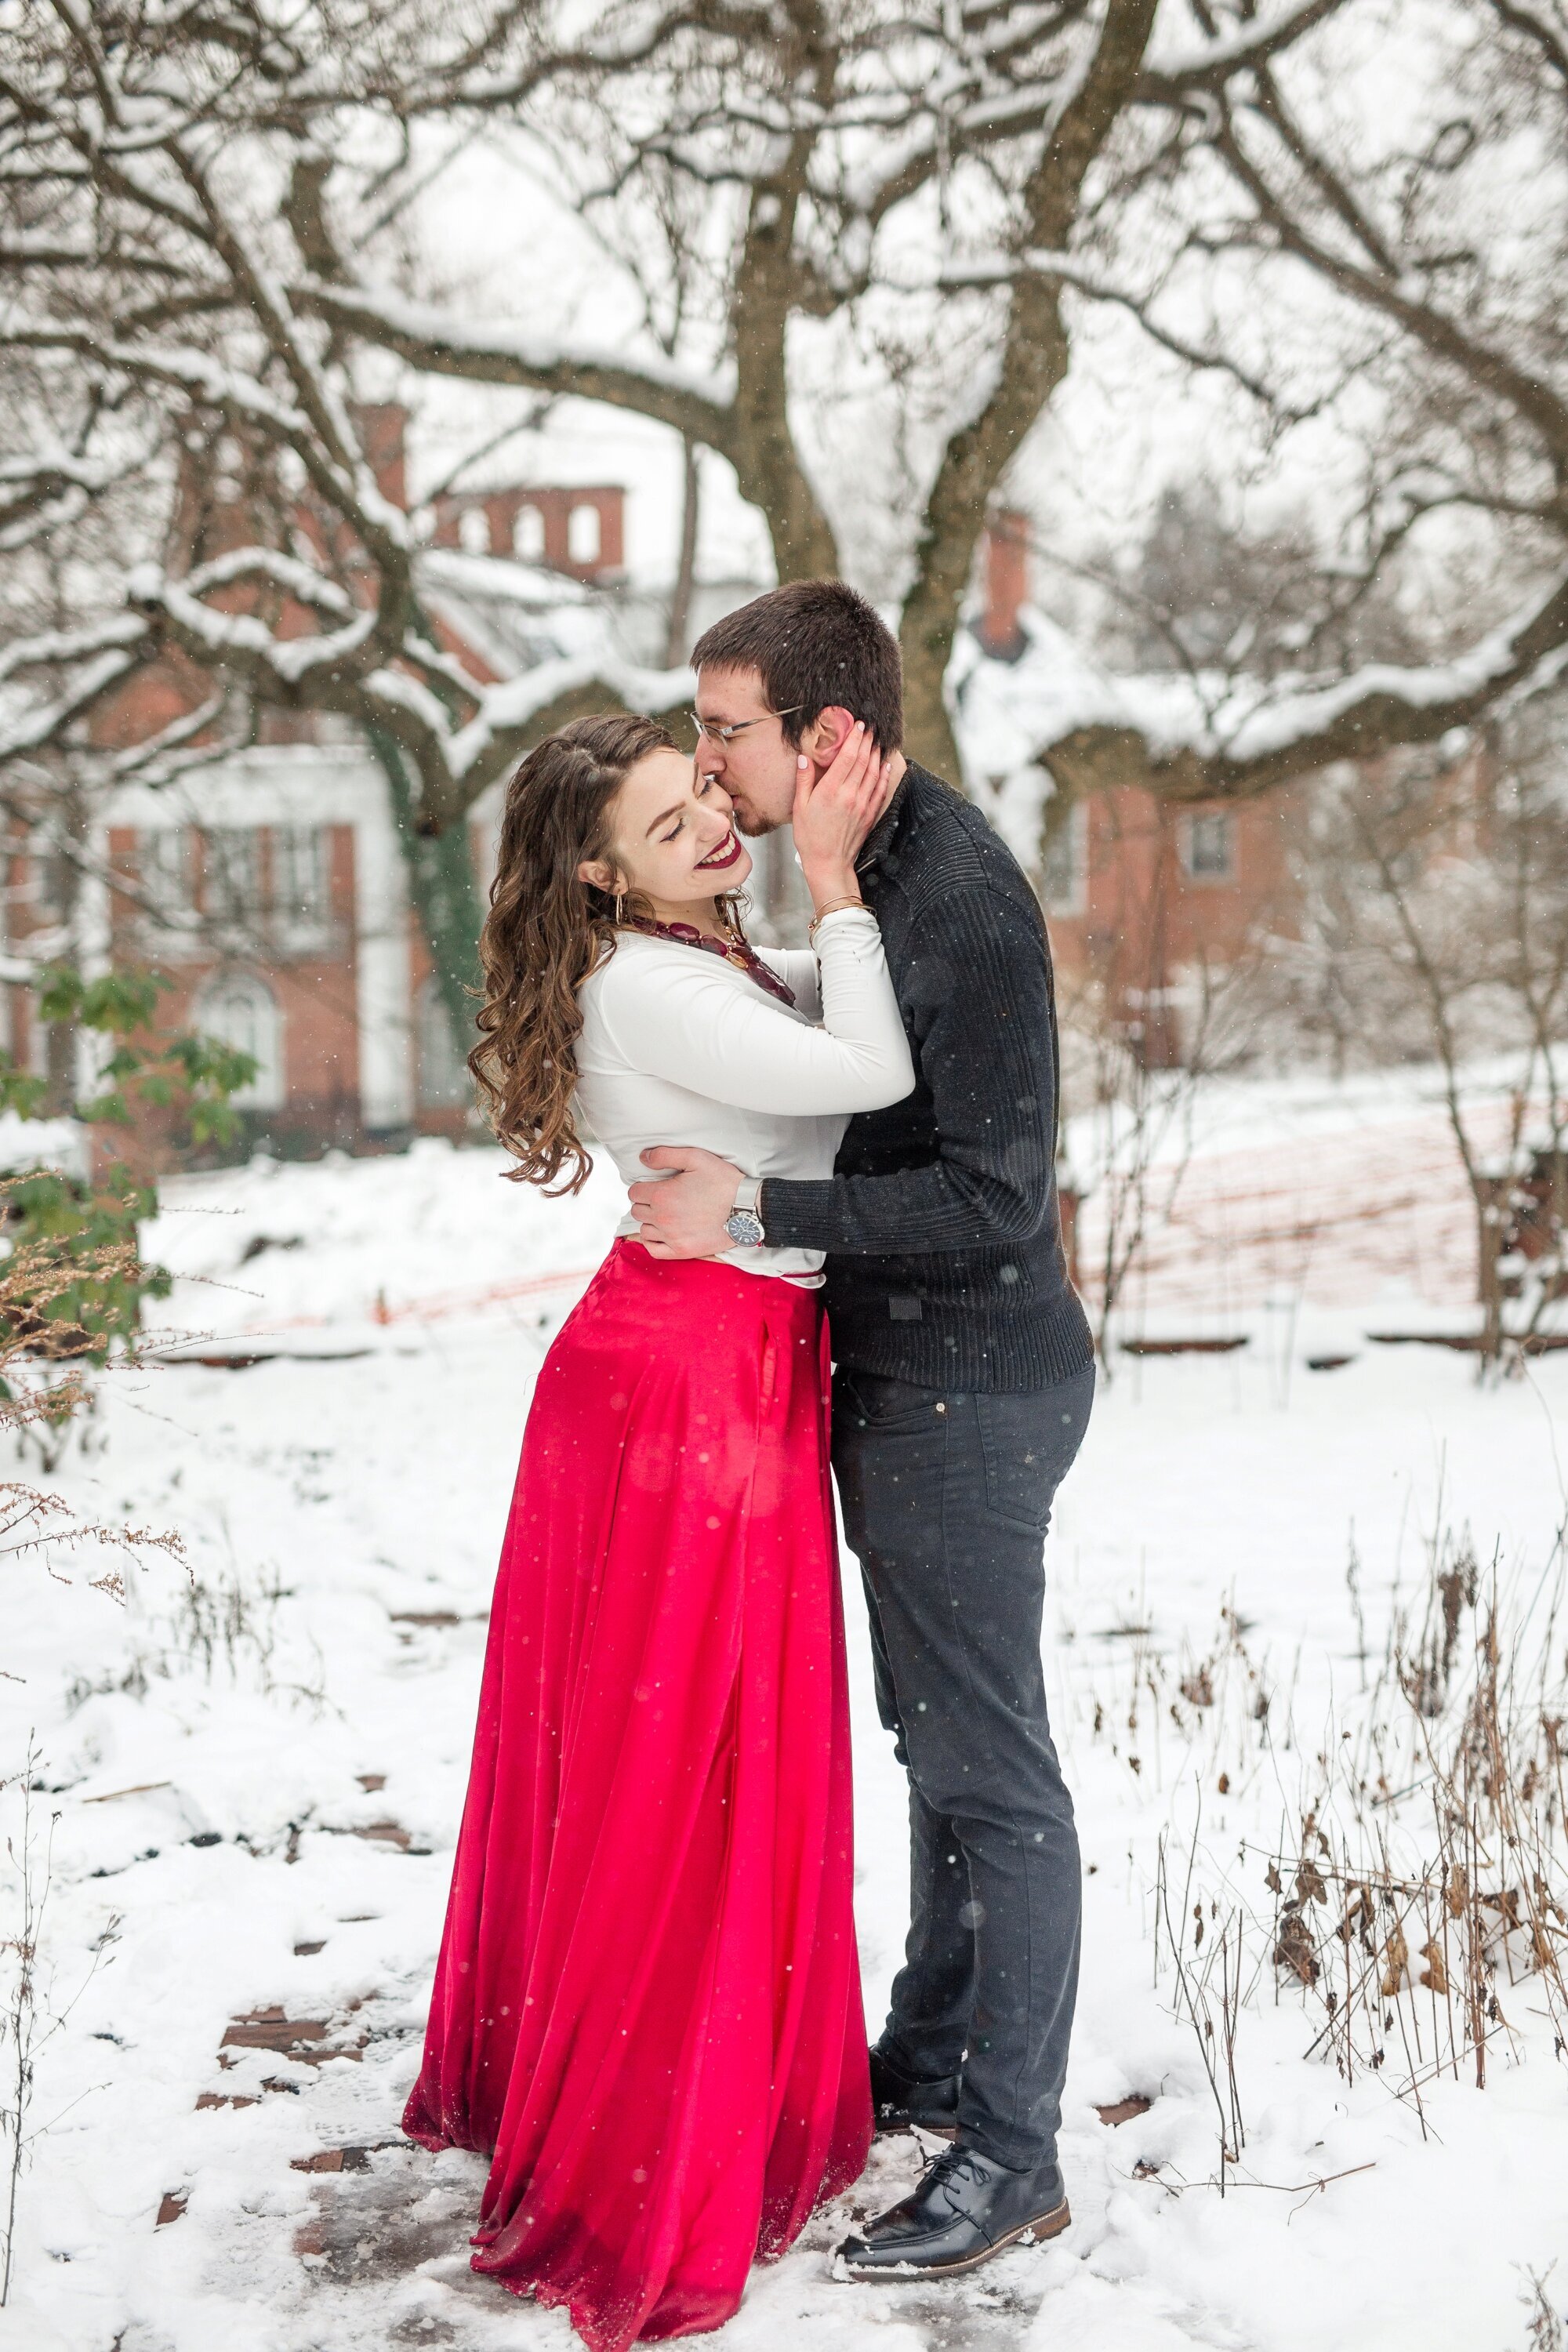
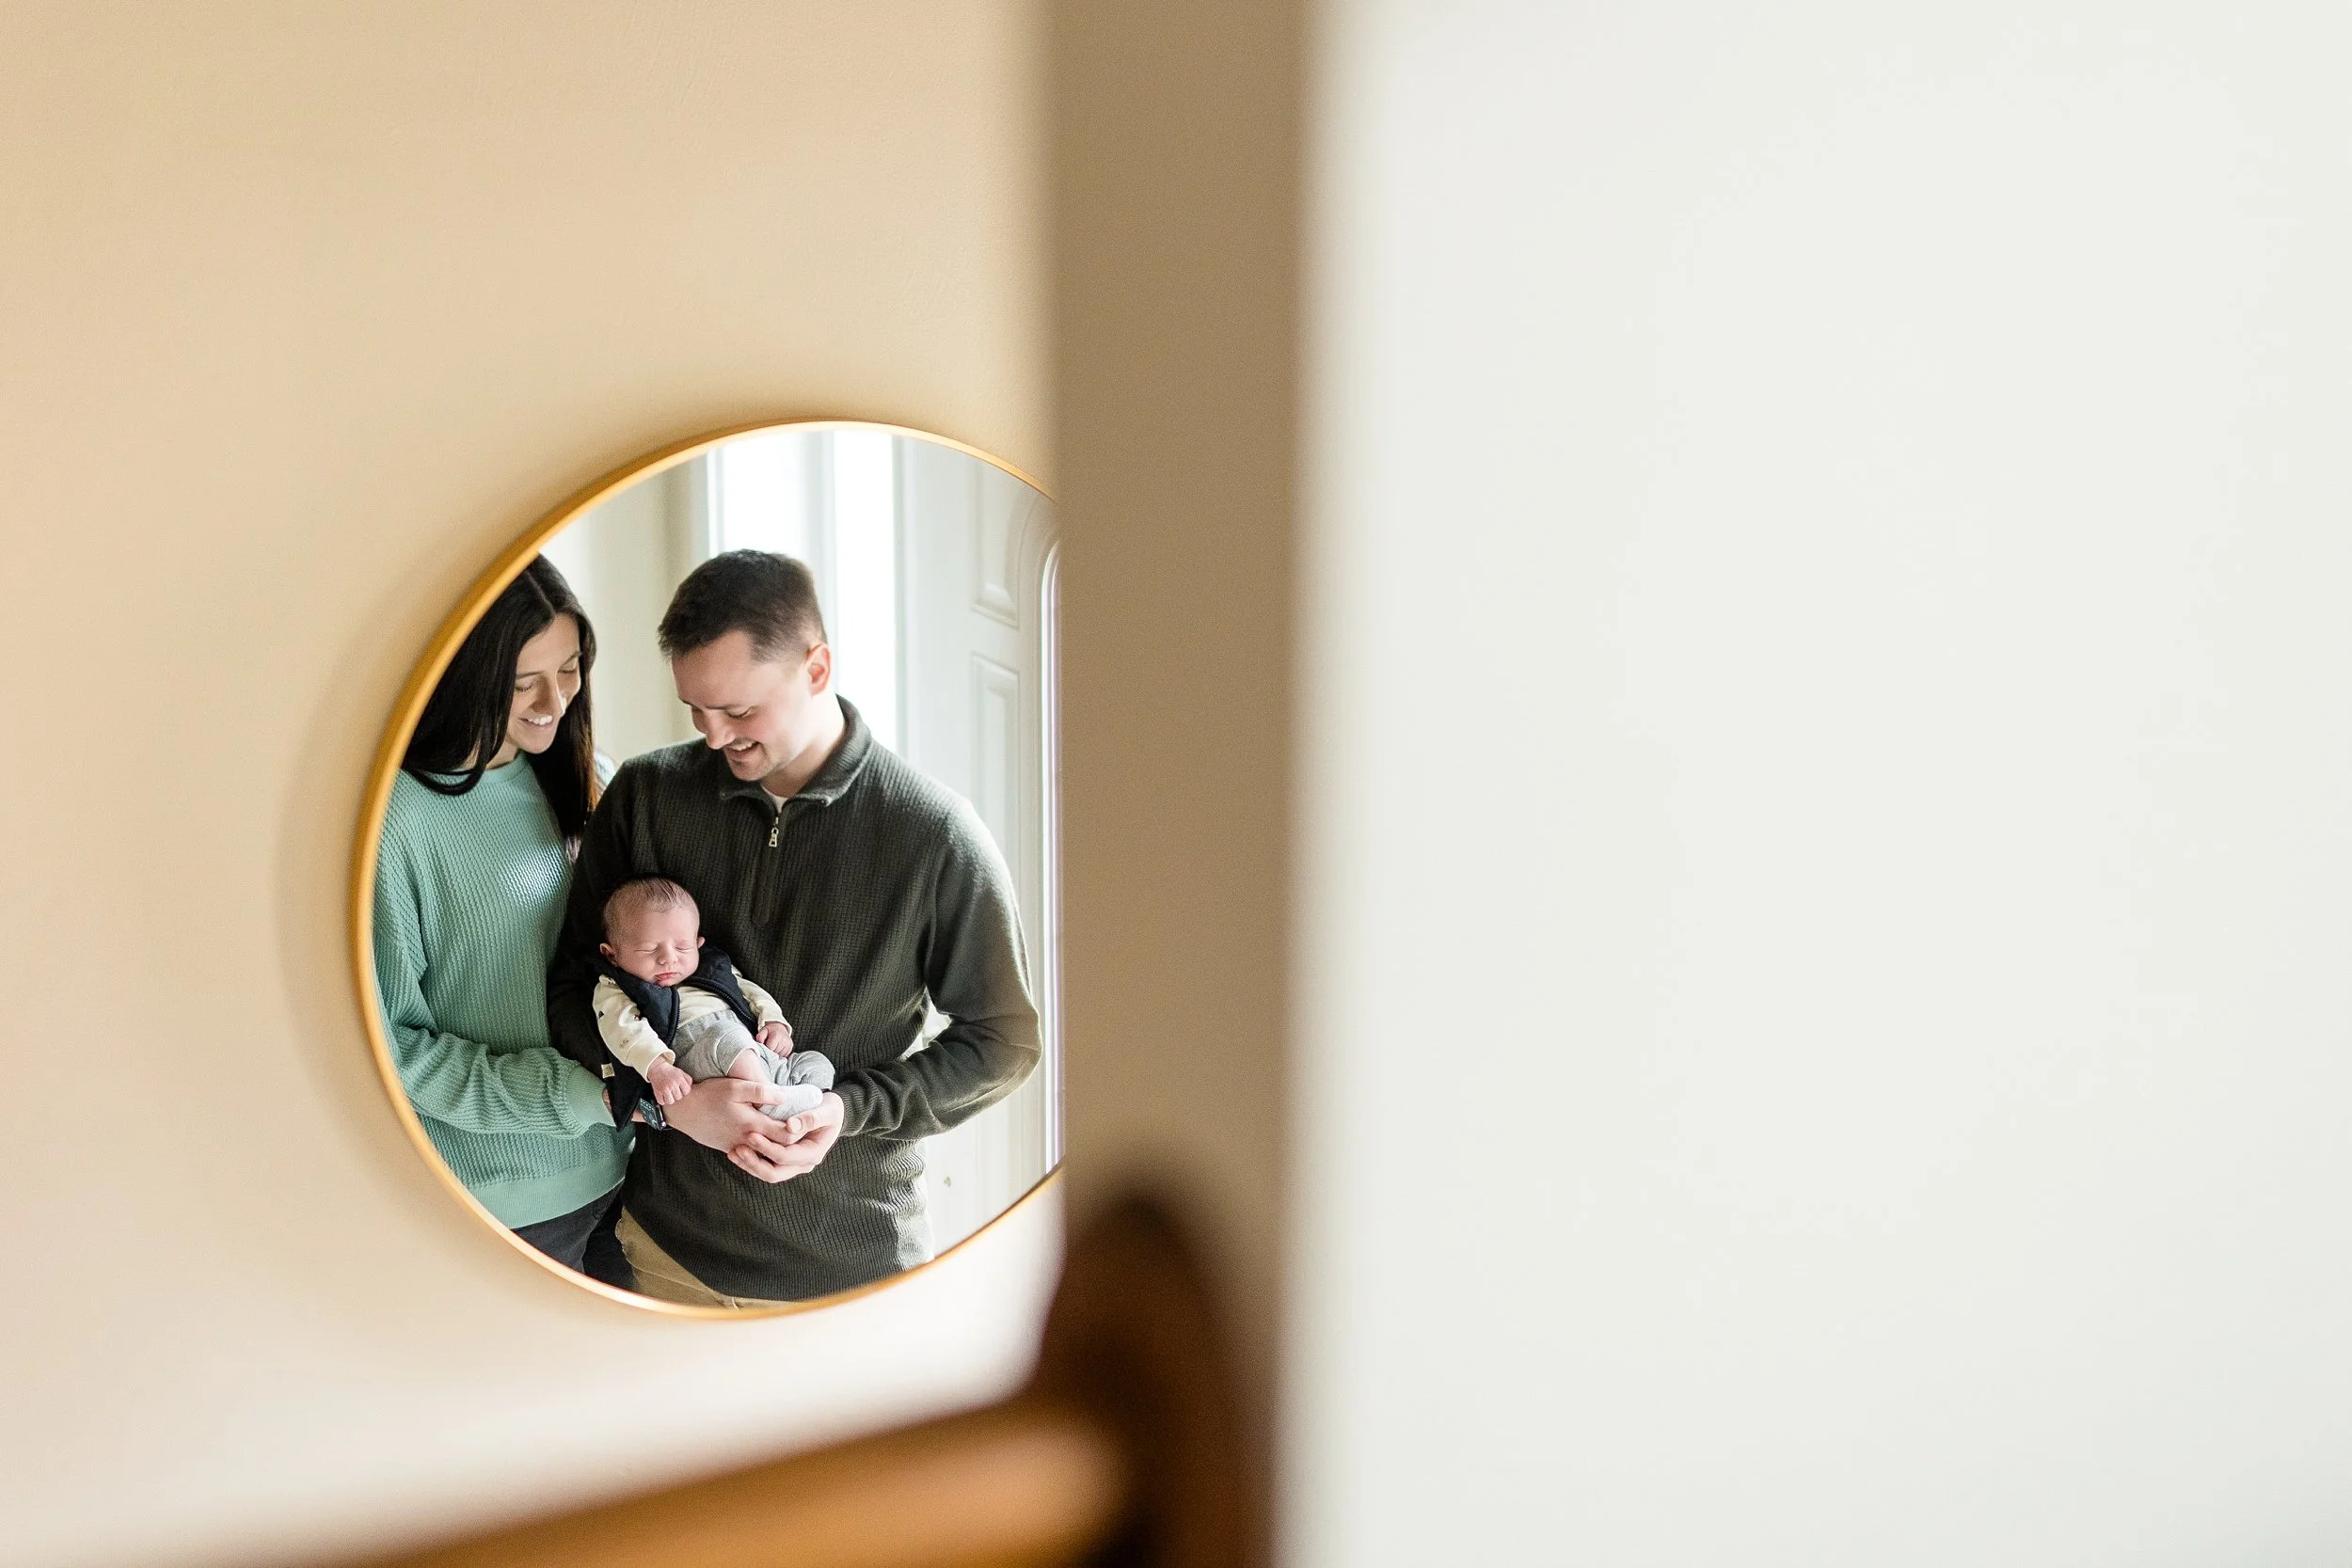
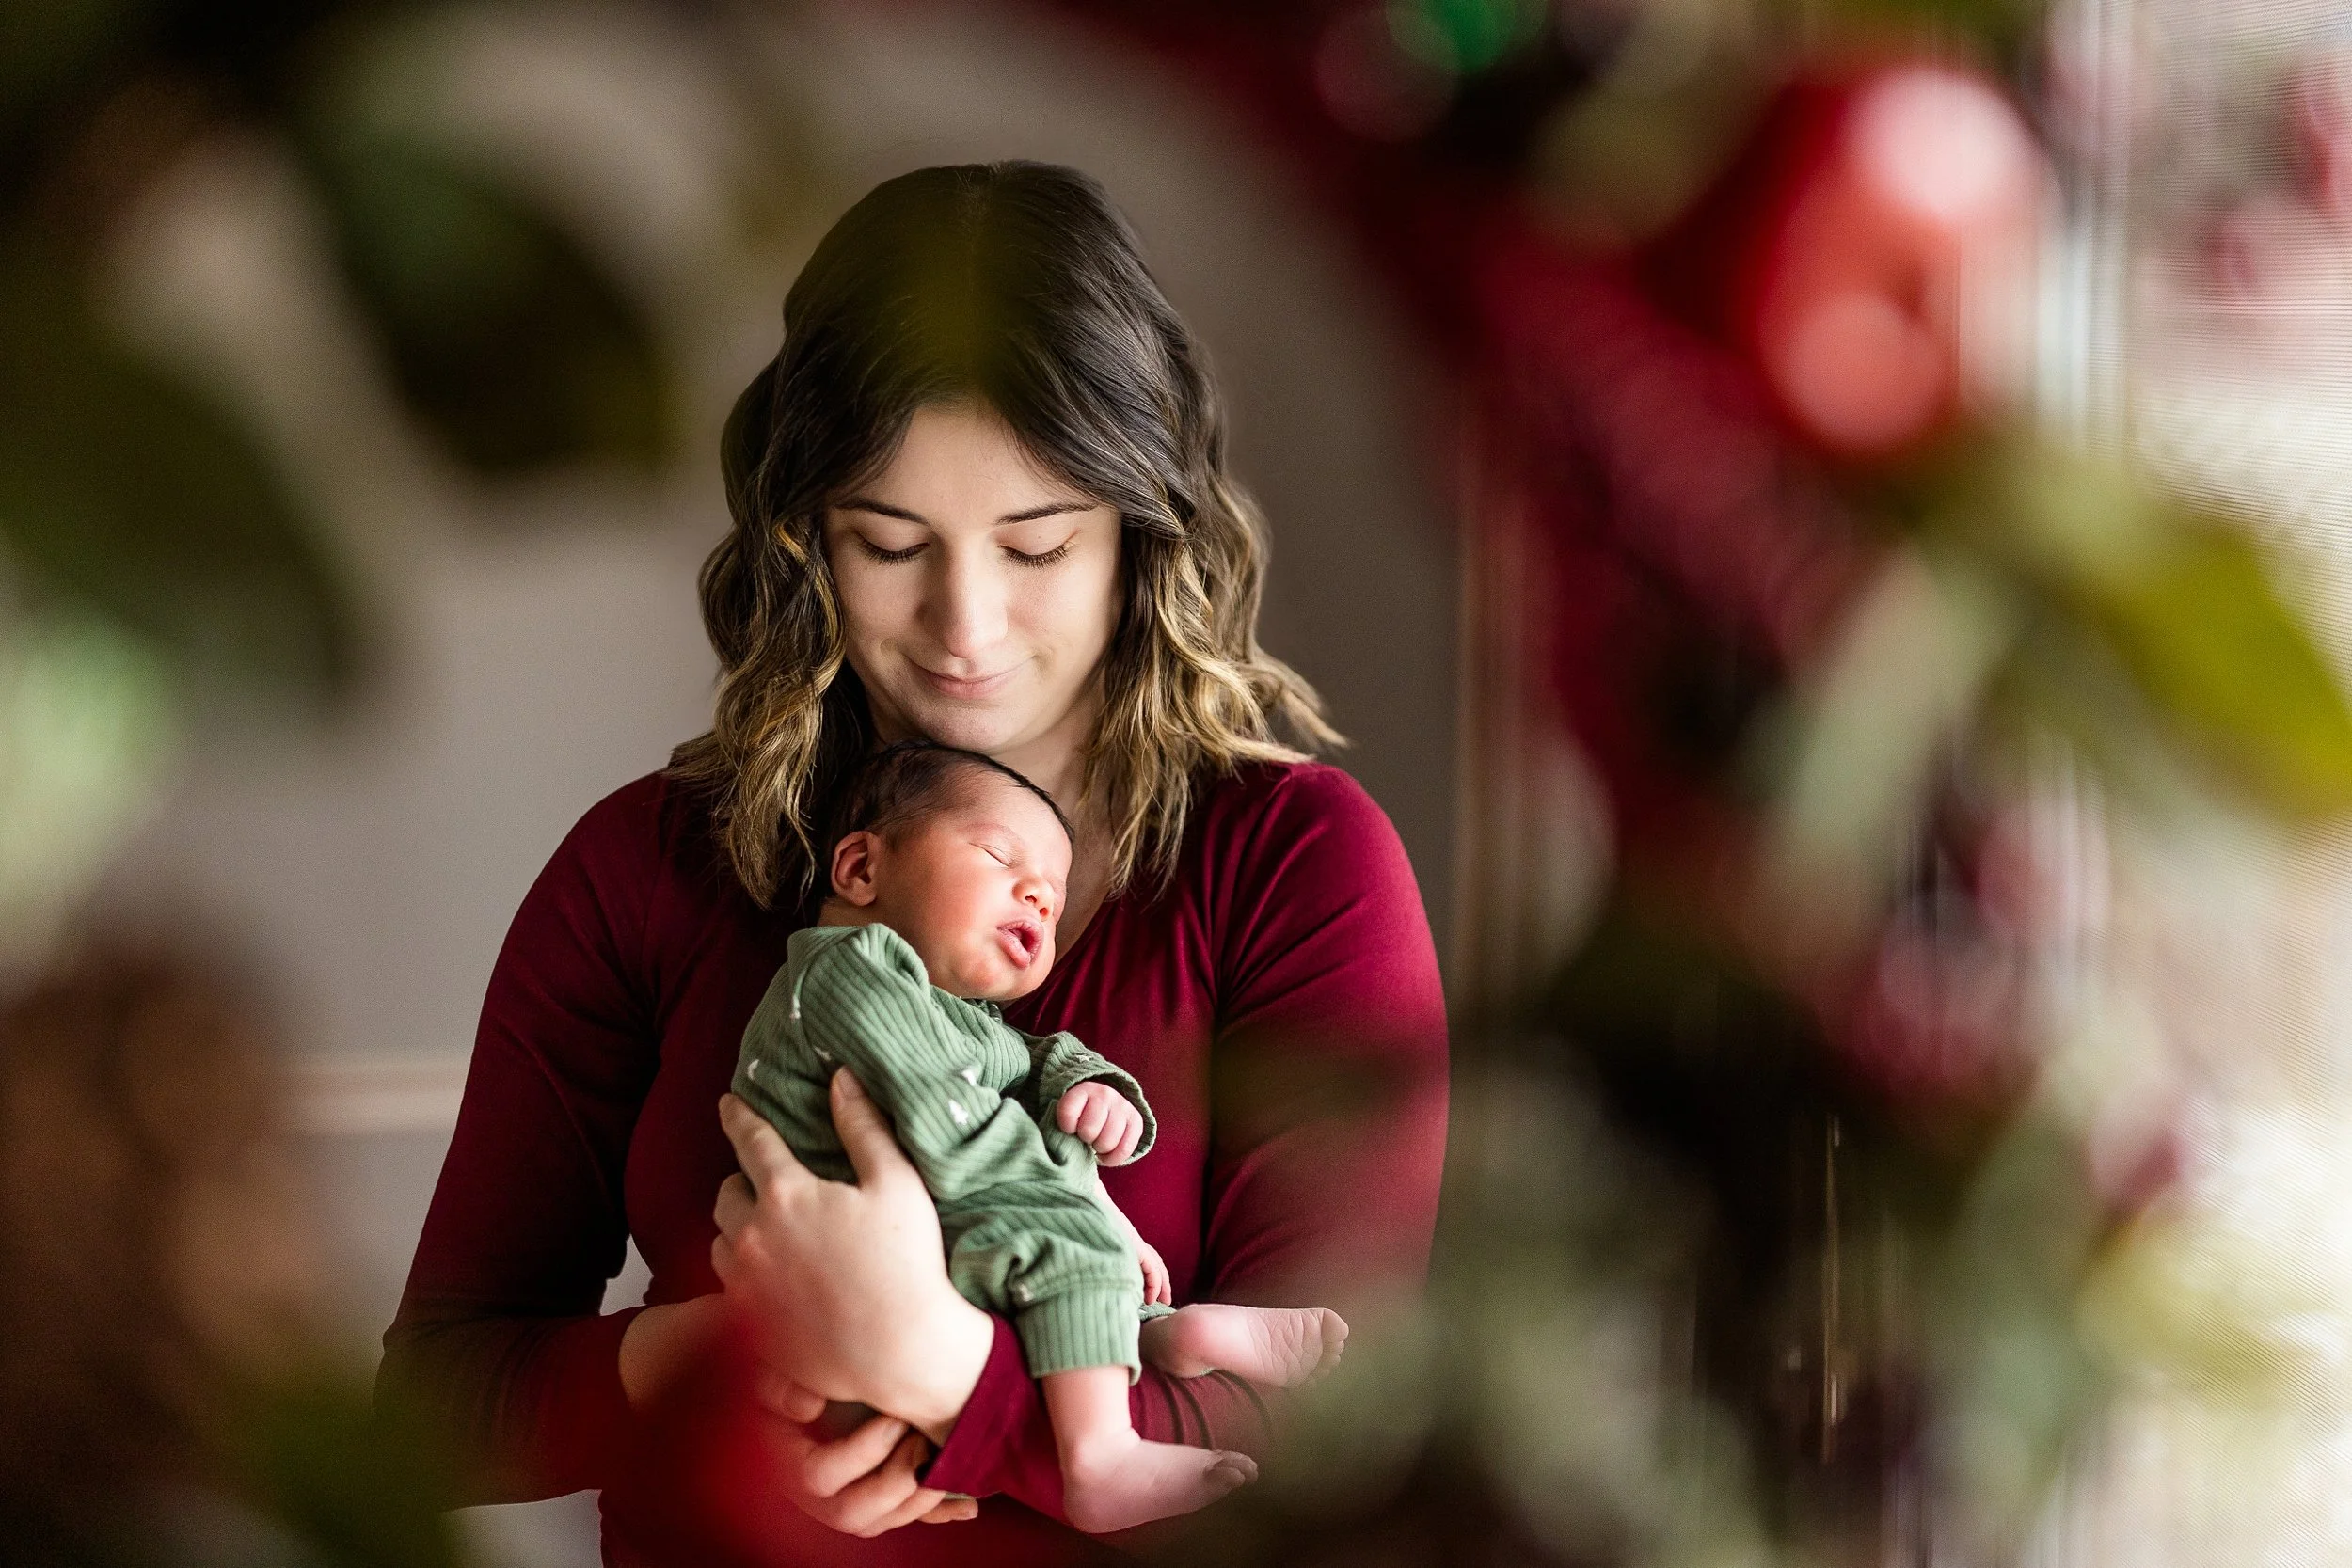
Because my clients are often facing away from the sun, I want to make sure they have enough light bouncing back onto their faces (filling their features, as I like to say!) so that they look illuminated and bright. You might have experience this struggle before if you’ve ever tried to take a backlit photo of someone on a sunny day on your phone - their face might not be very well light, and it probably lacked contrast. One reason is because phones just don’t always have the capacity to expose a subject well when backlit, but another reason is because there might not be any light bouncing back into your subject’s face - it’s all coming from behind.

Here’s how I fix this problem: by utilizing “natural reflectors.” (And sometimes artificial ones, too!)

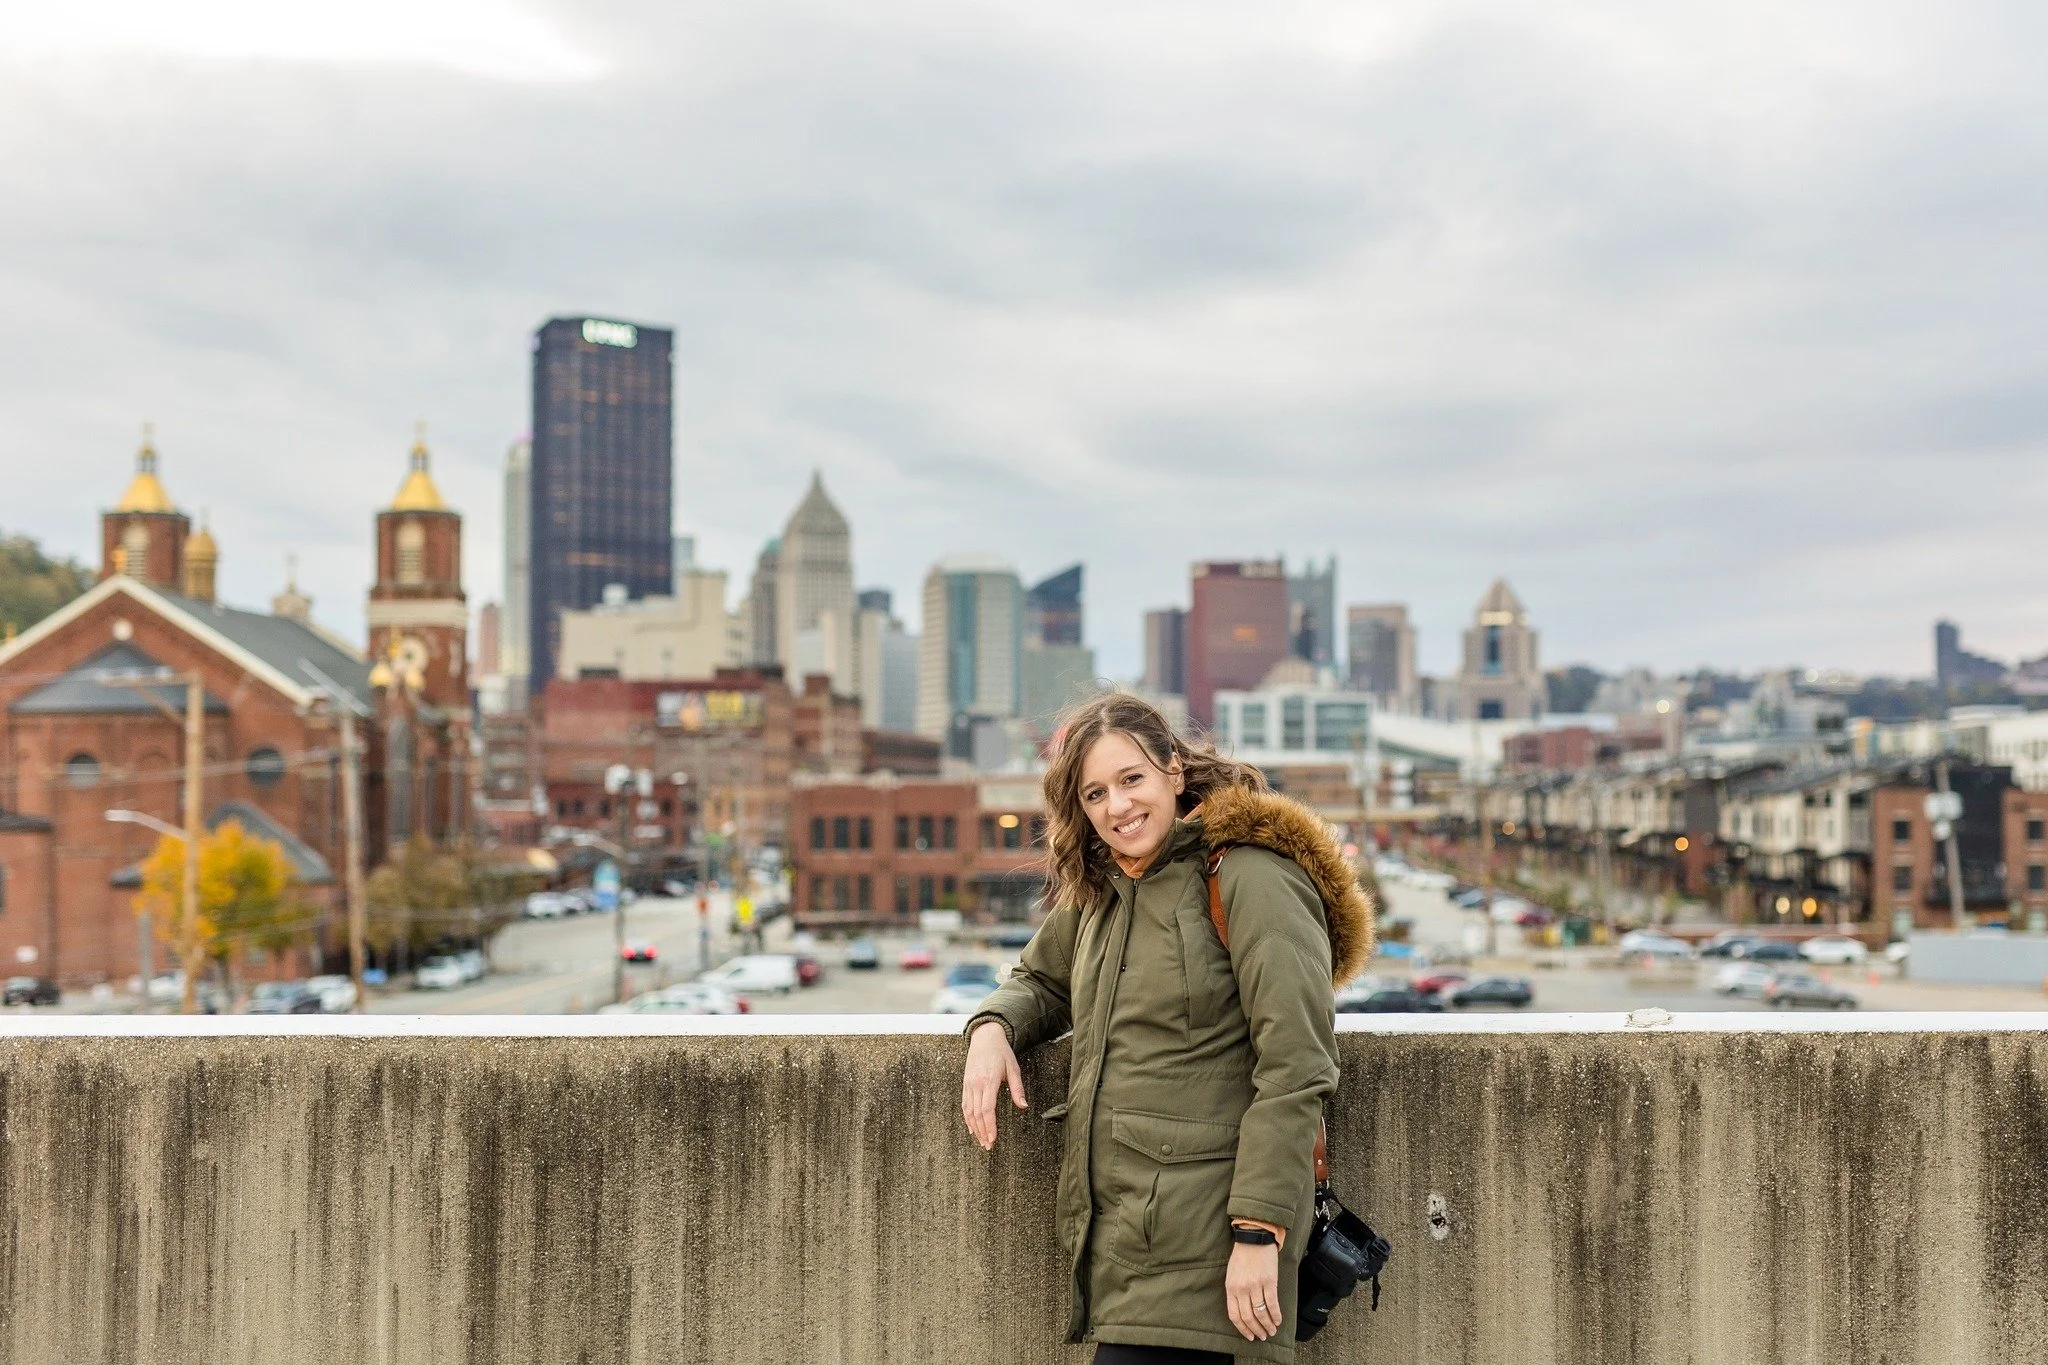
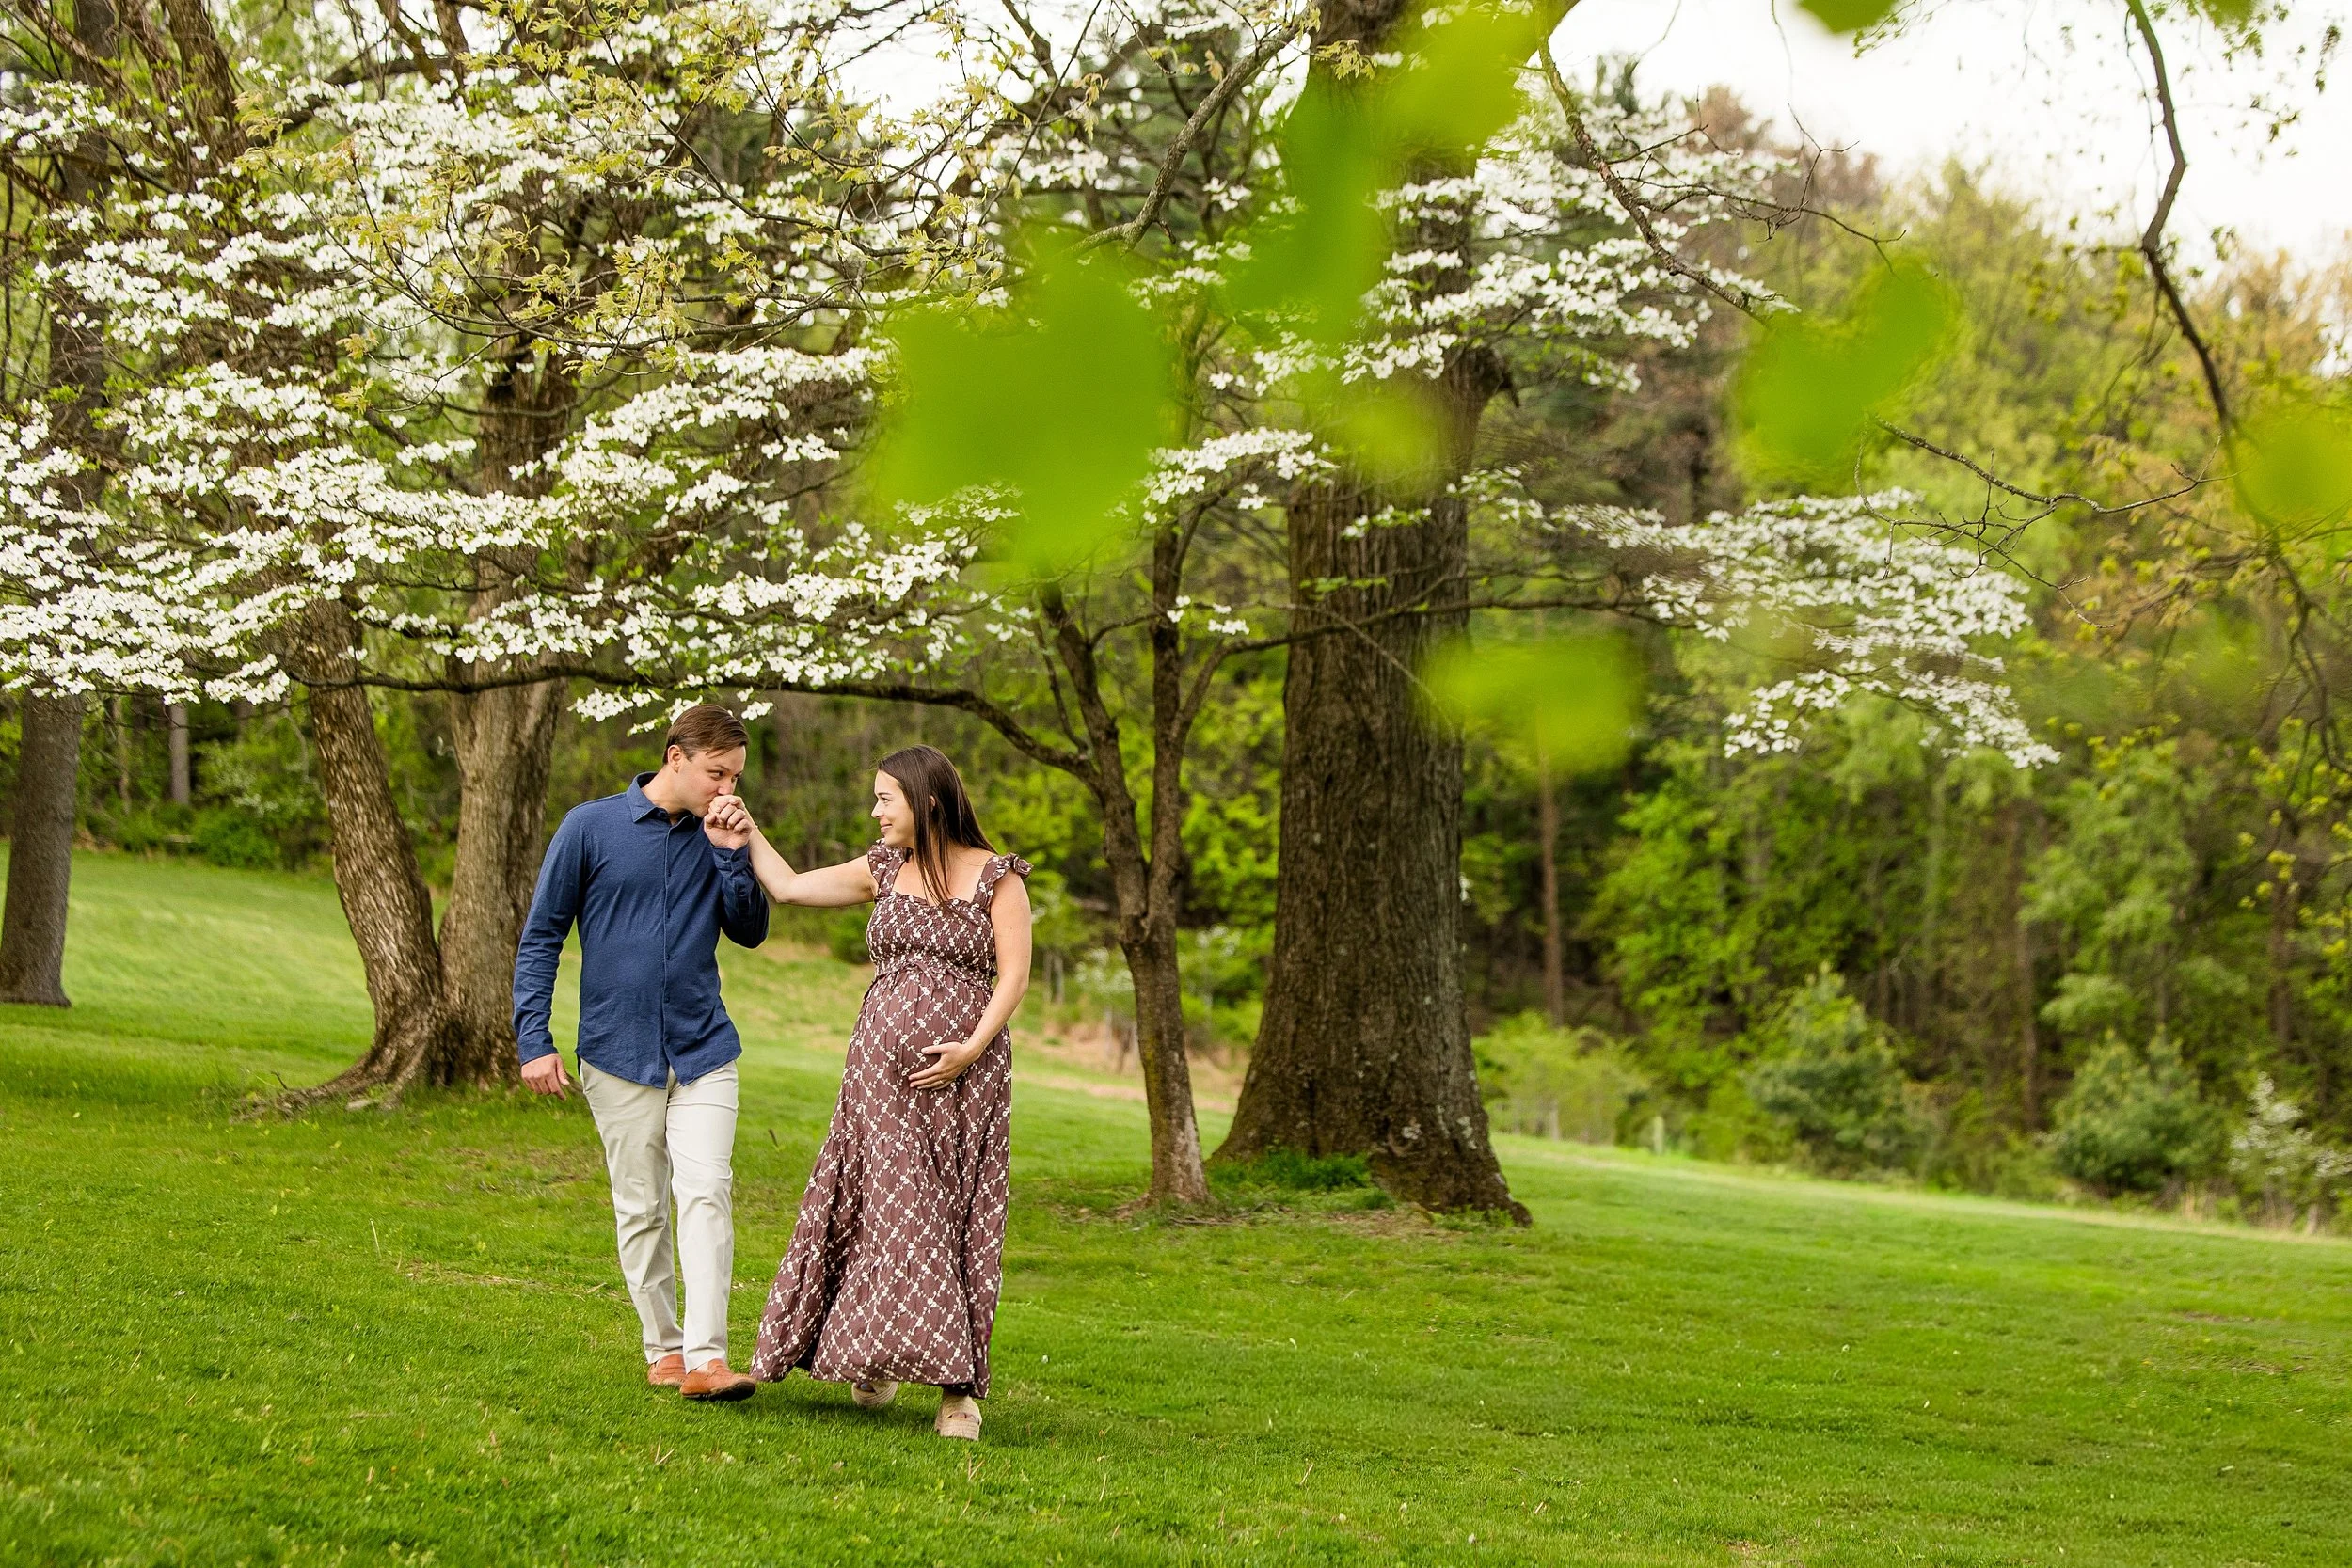
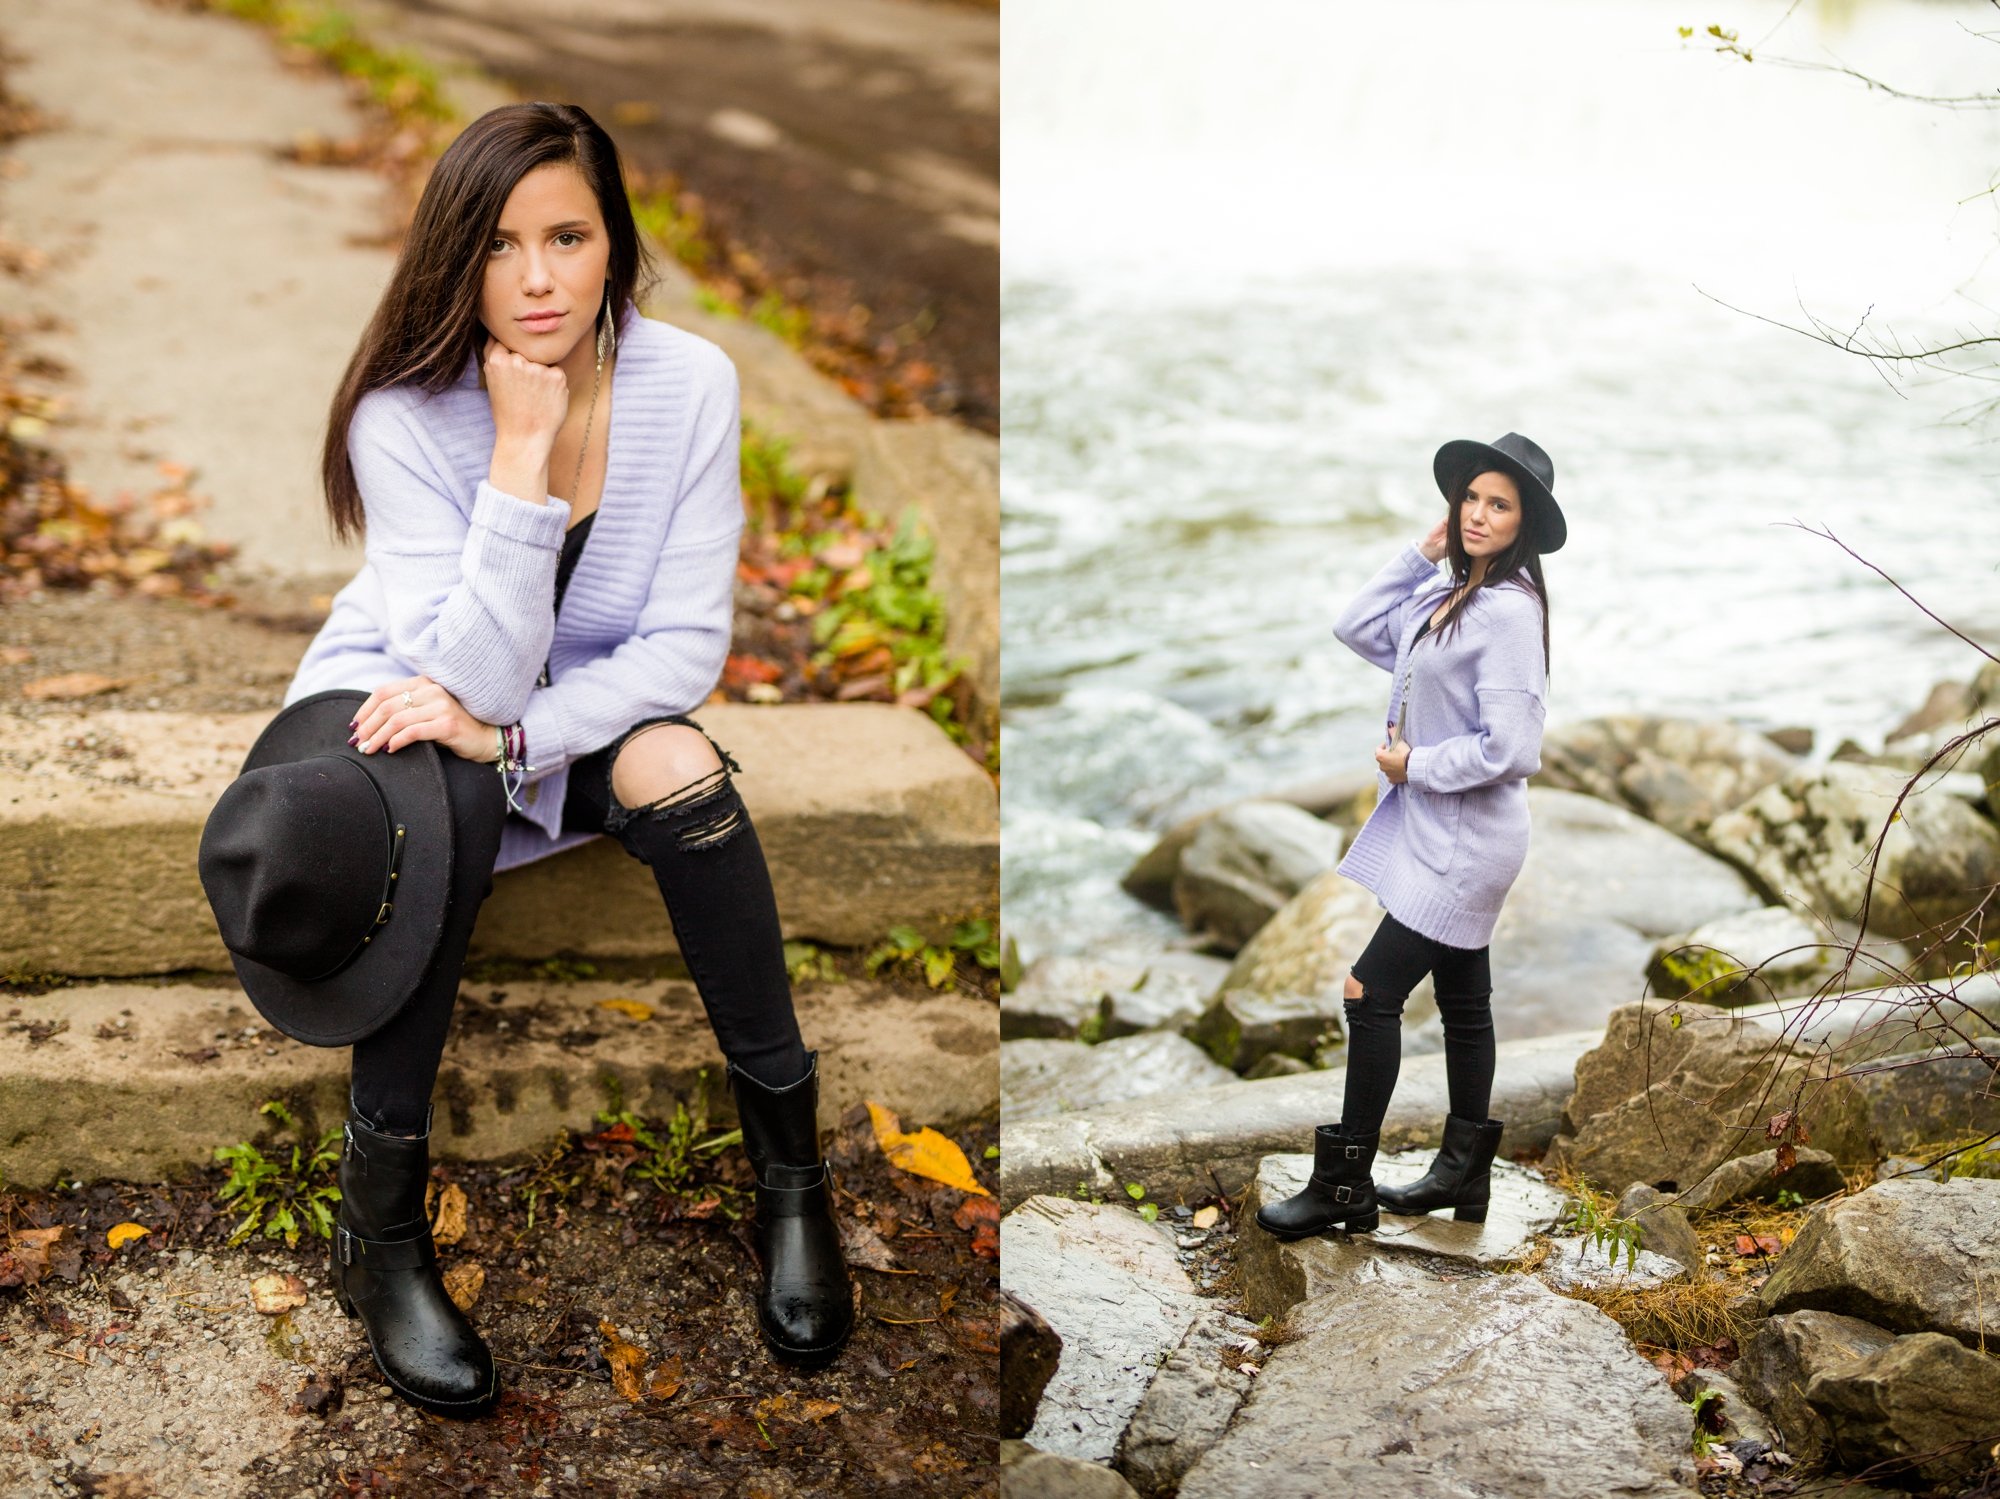
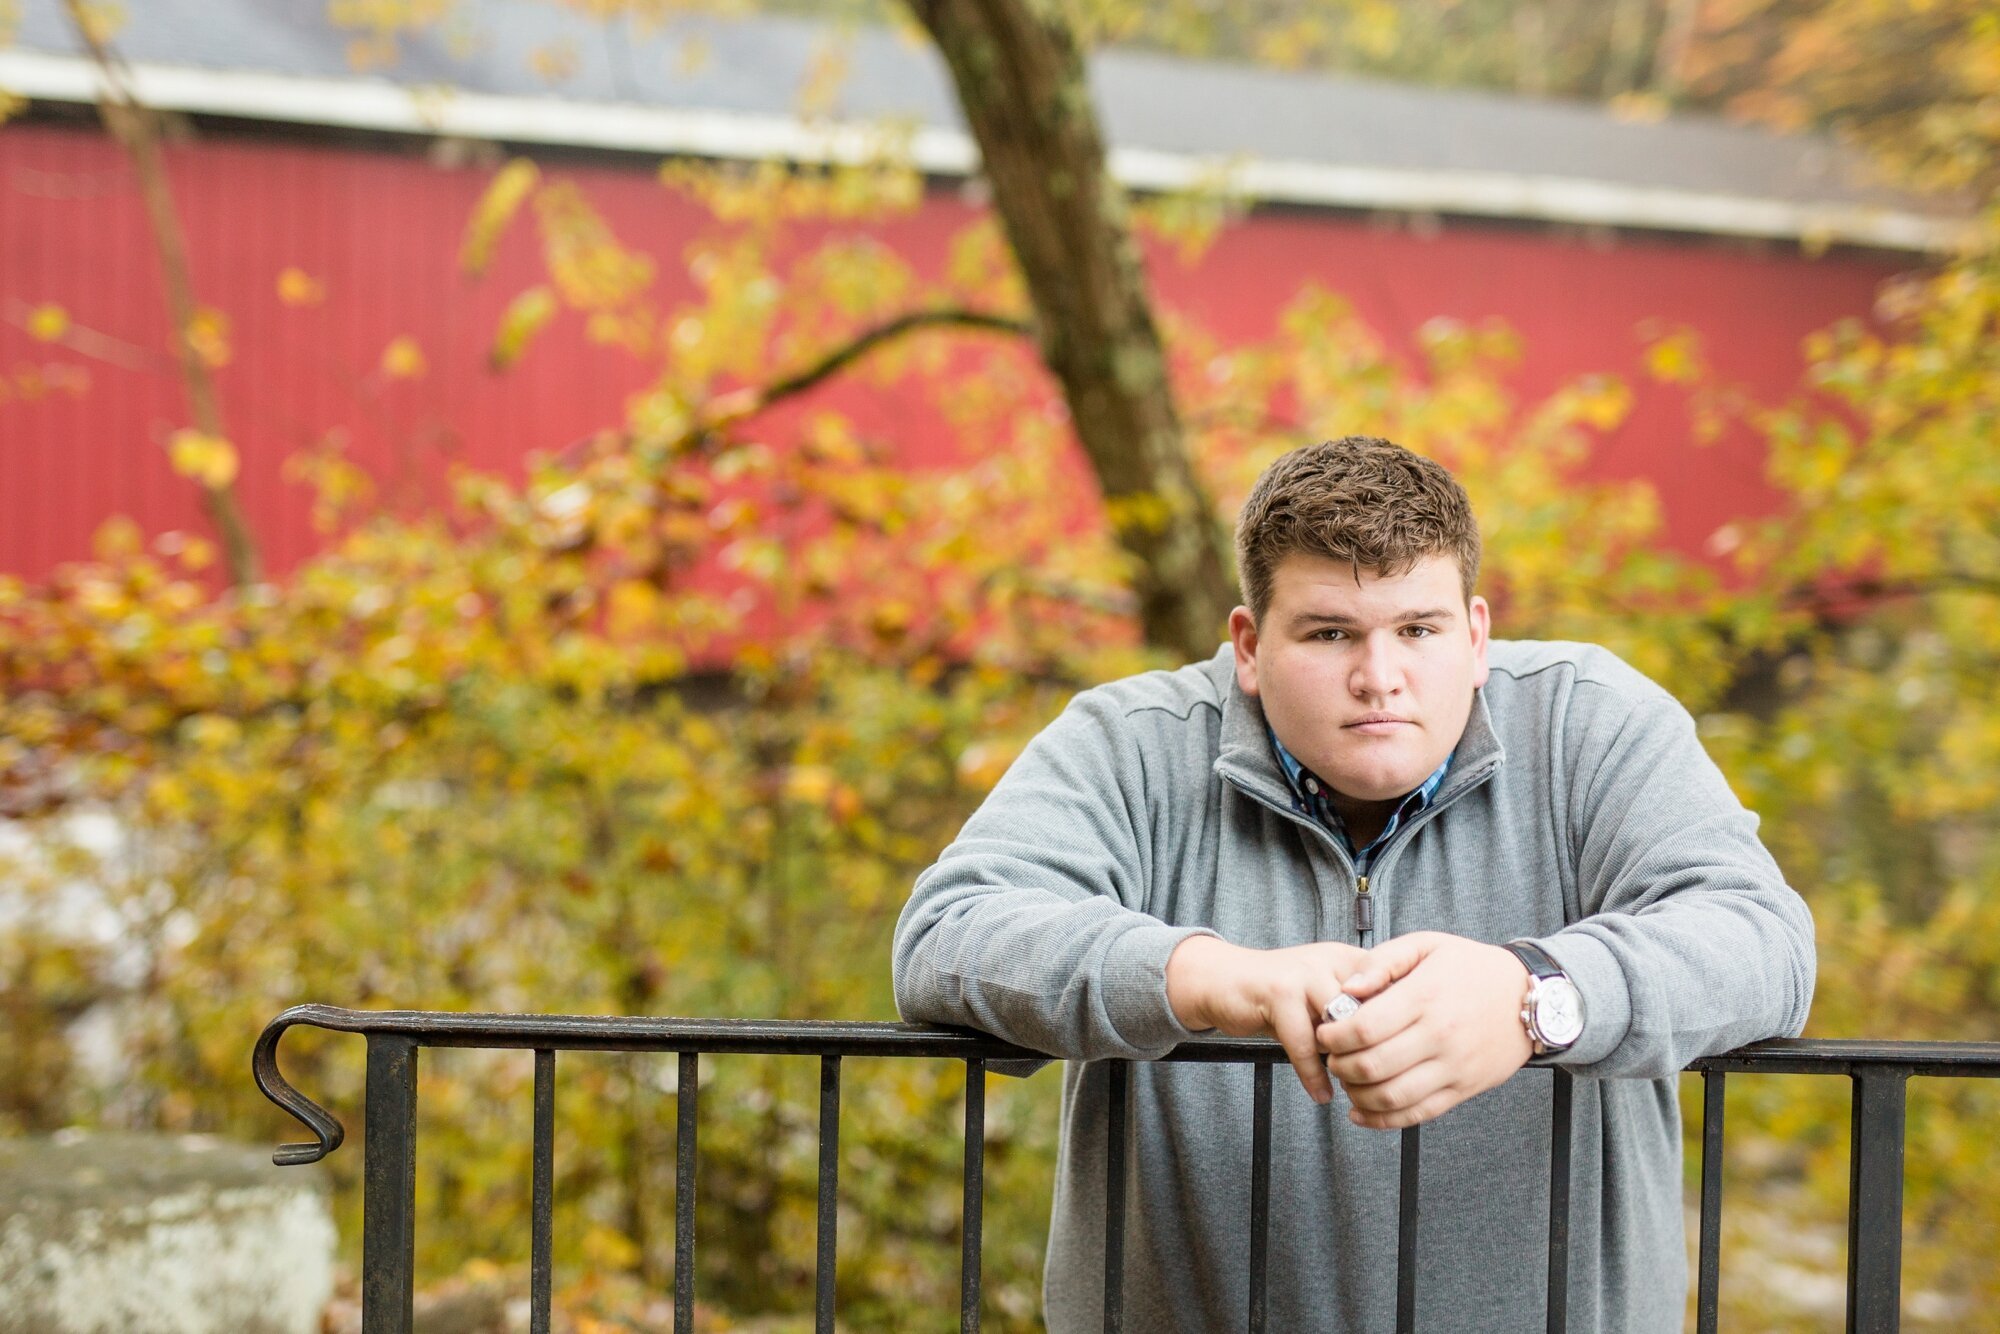
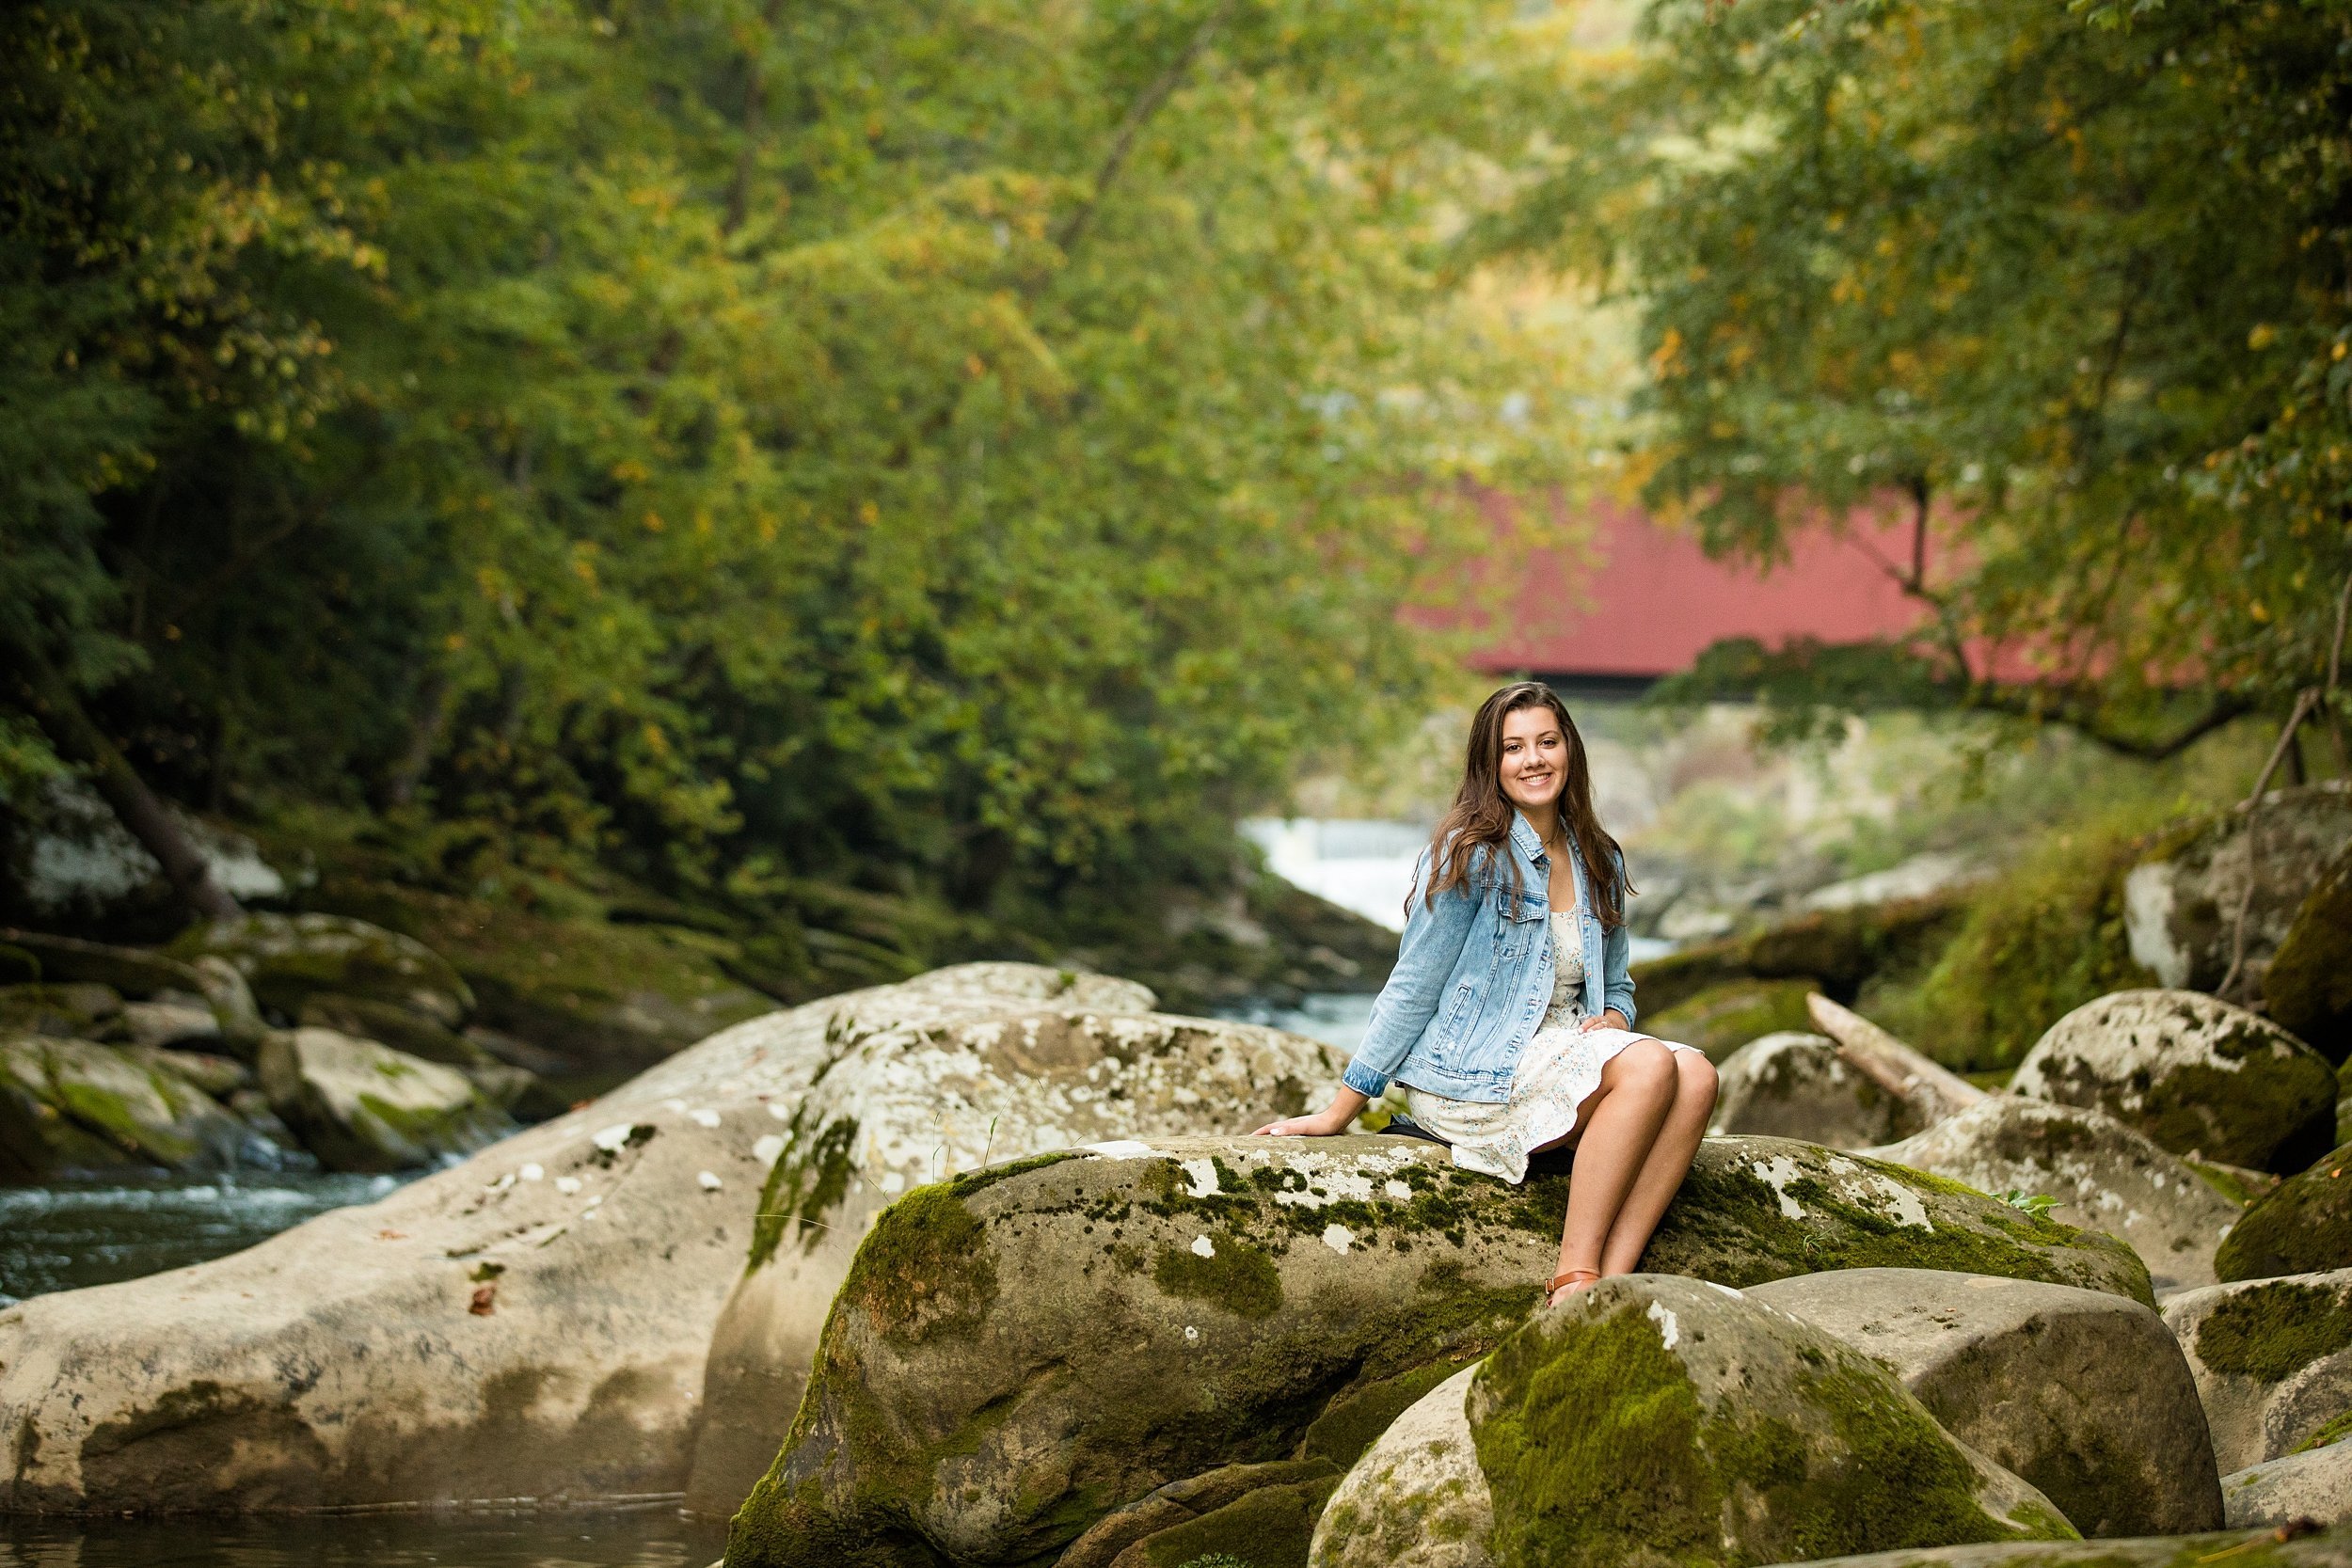
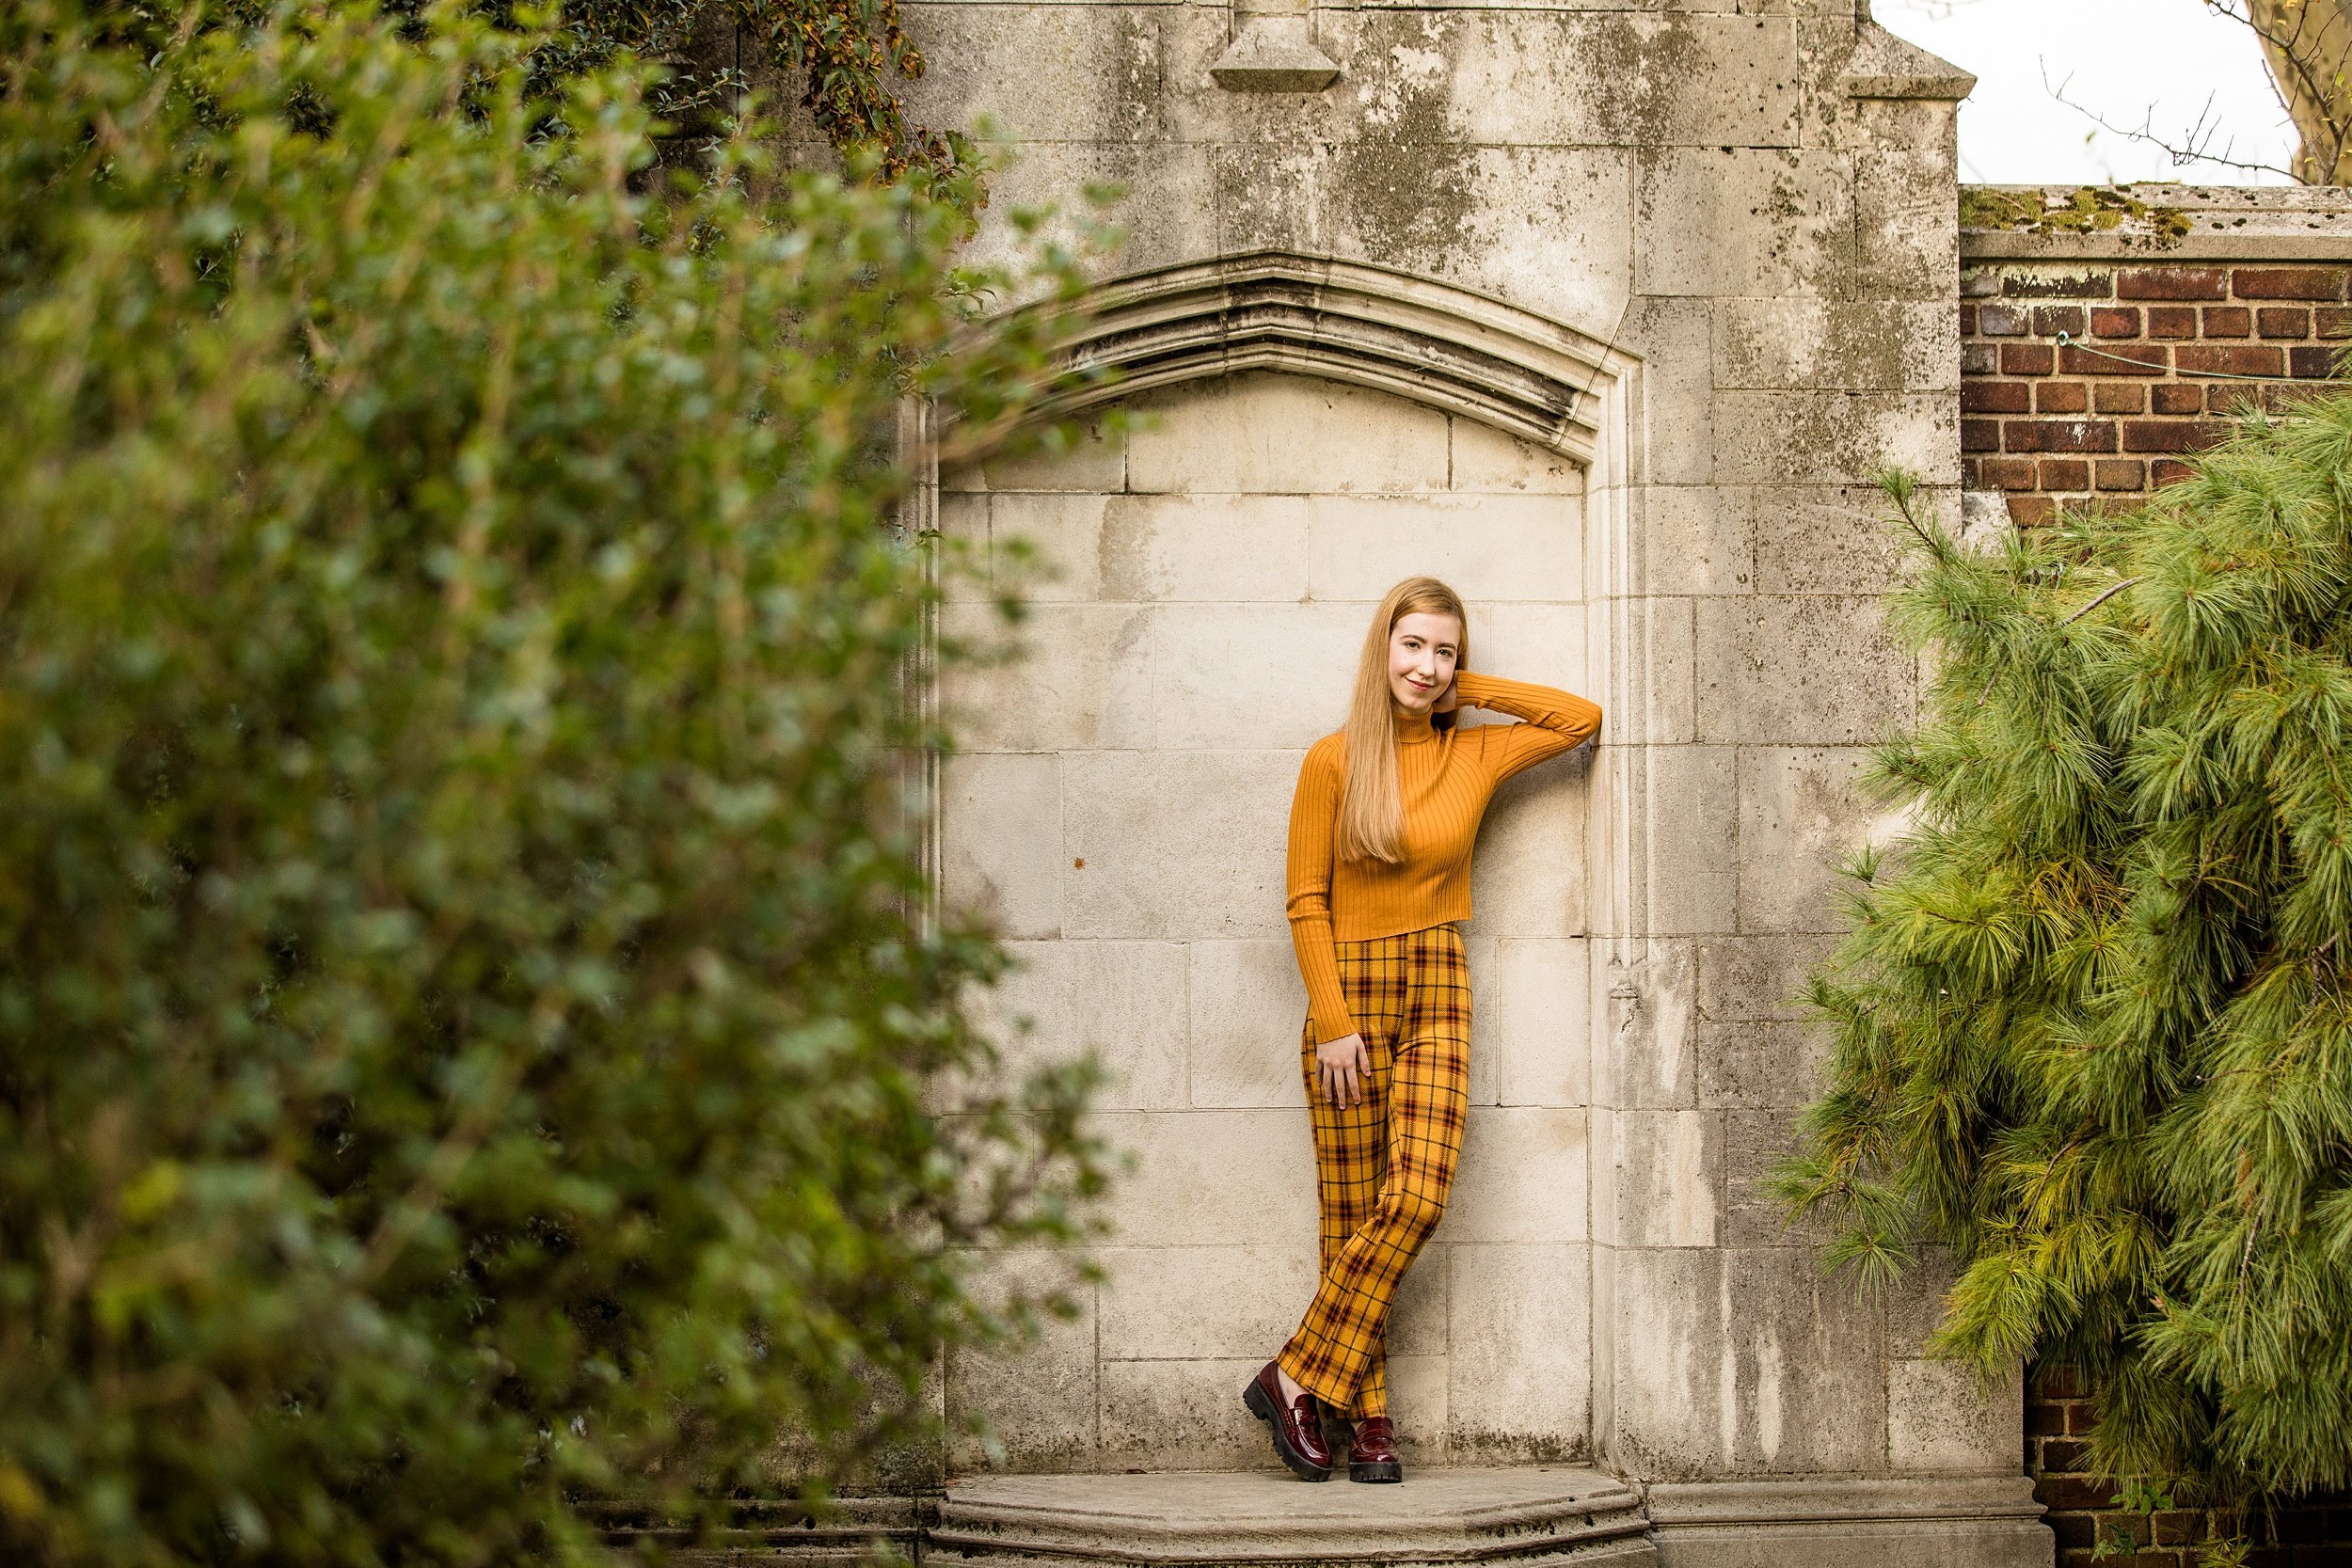
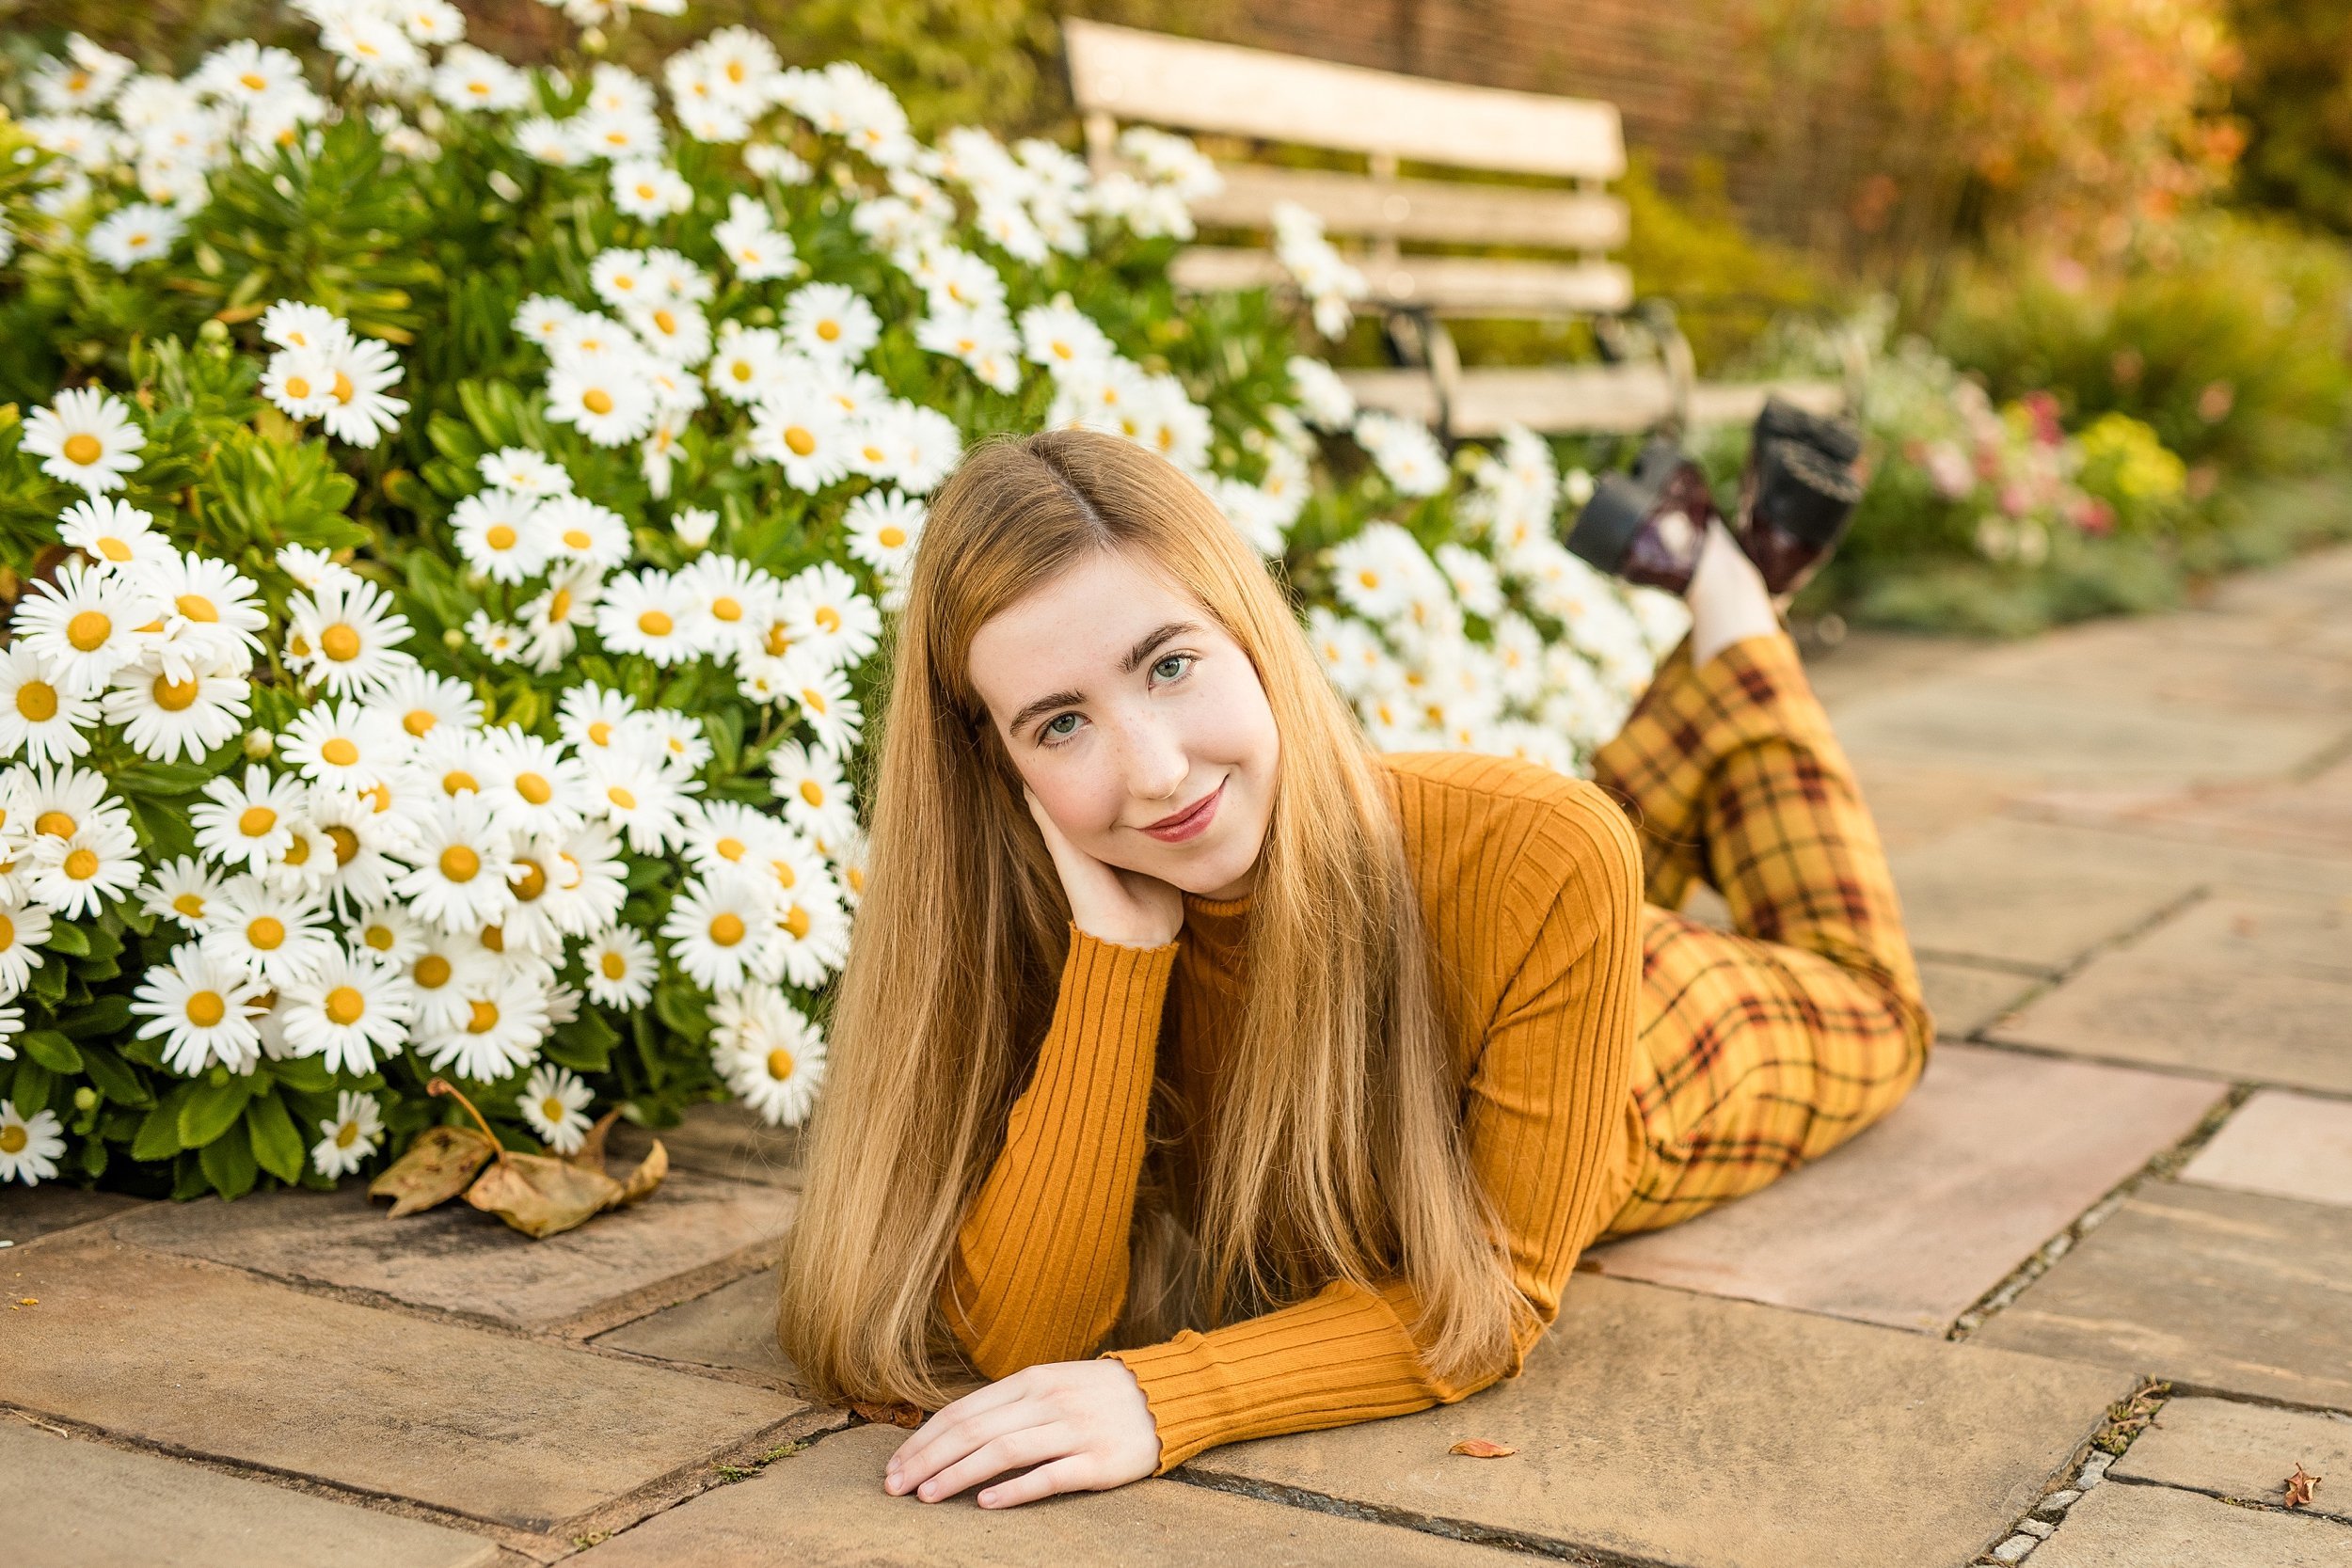
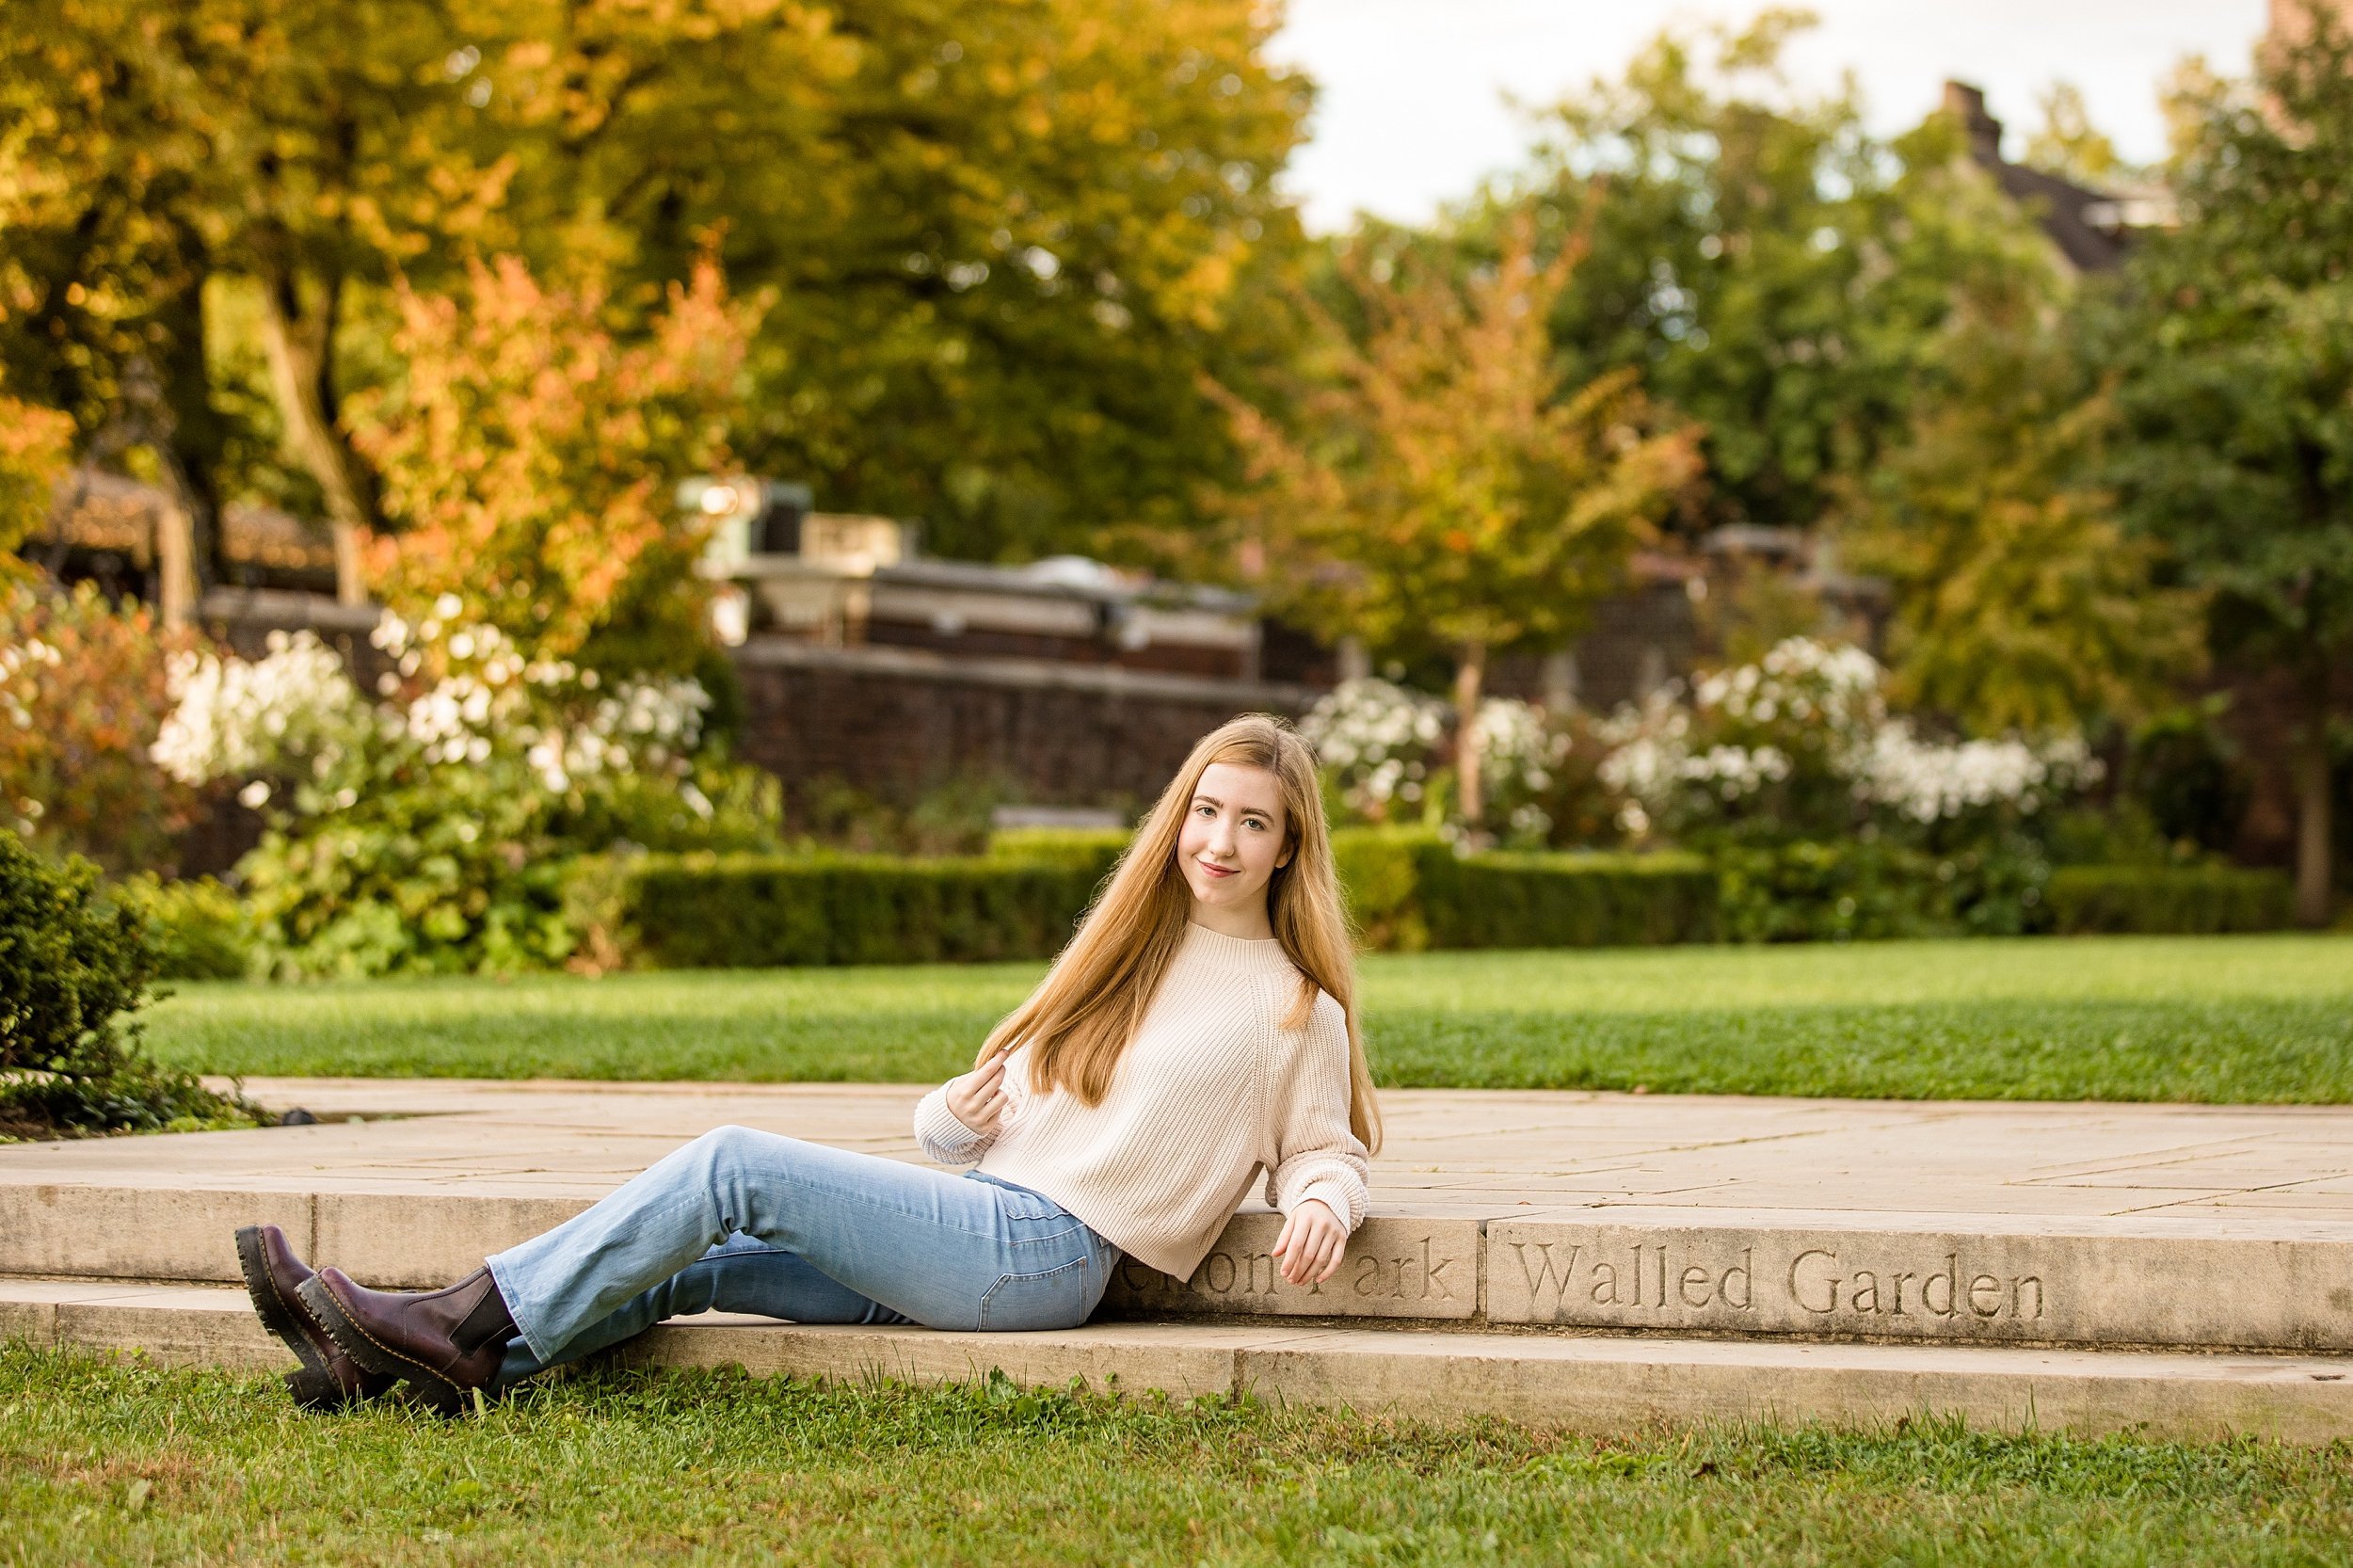
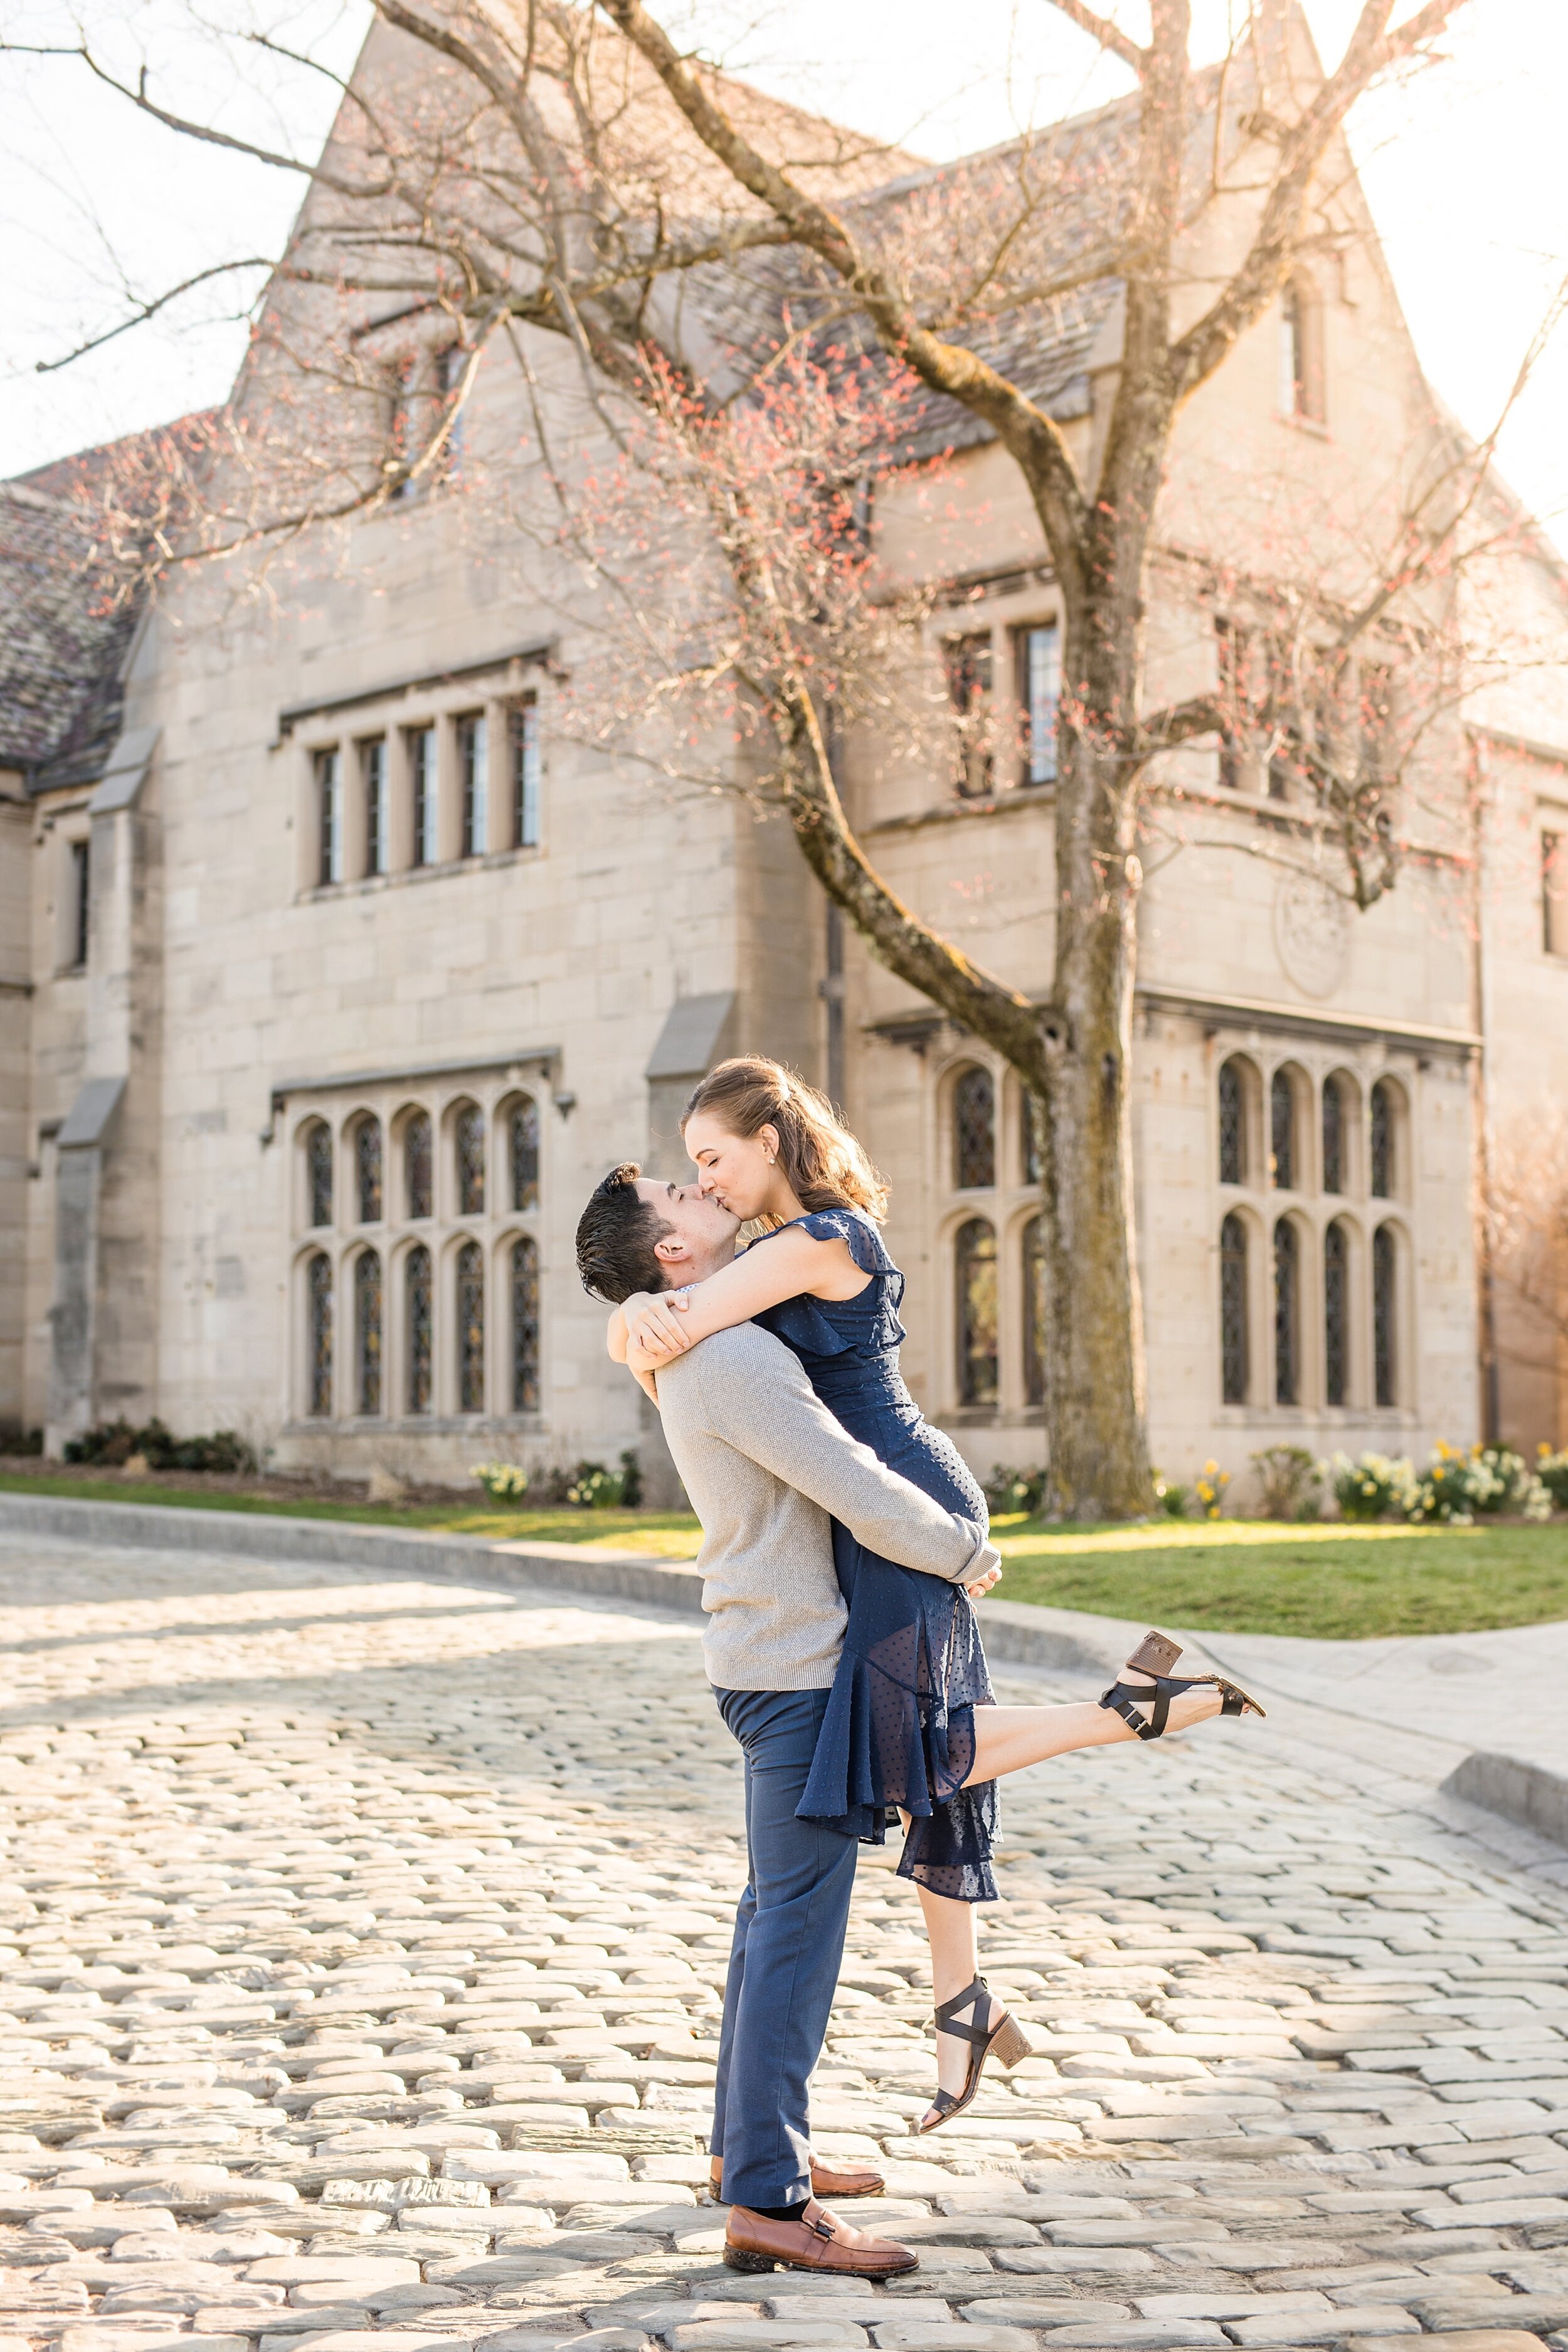
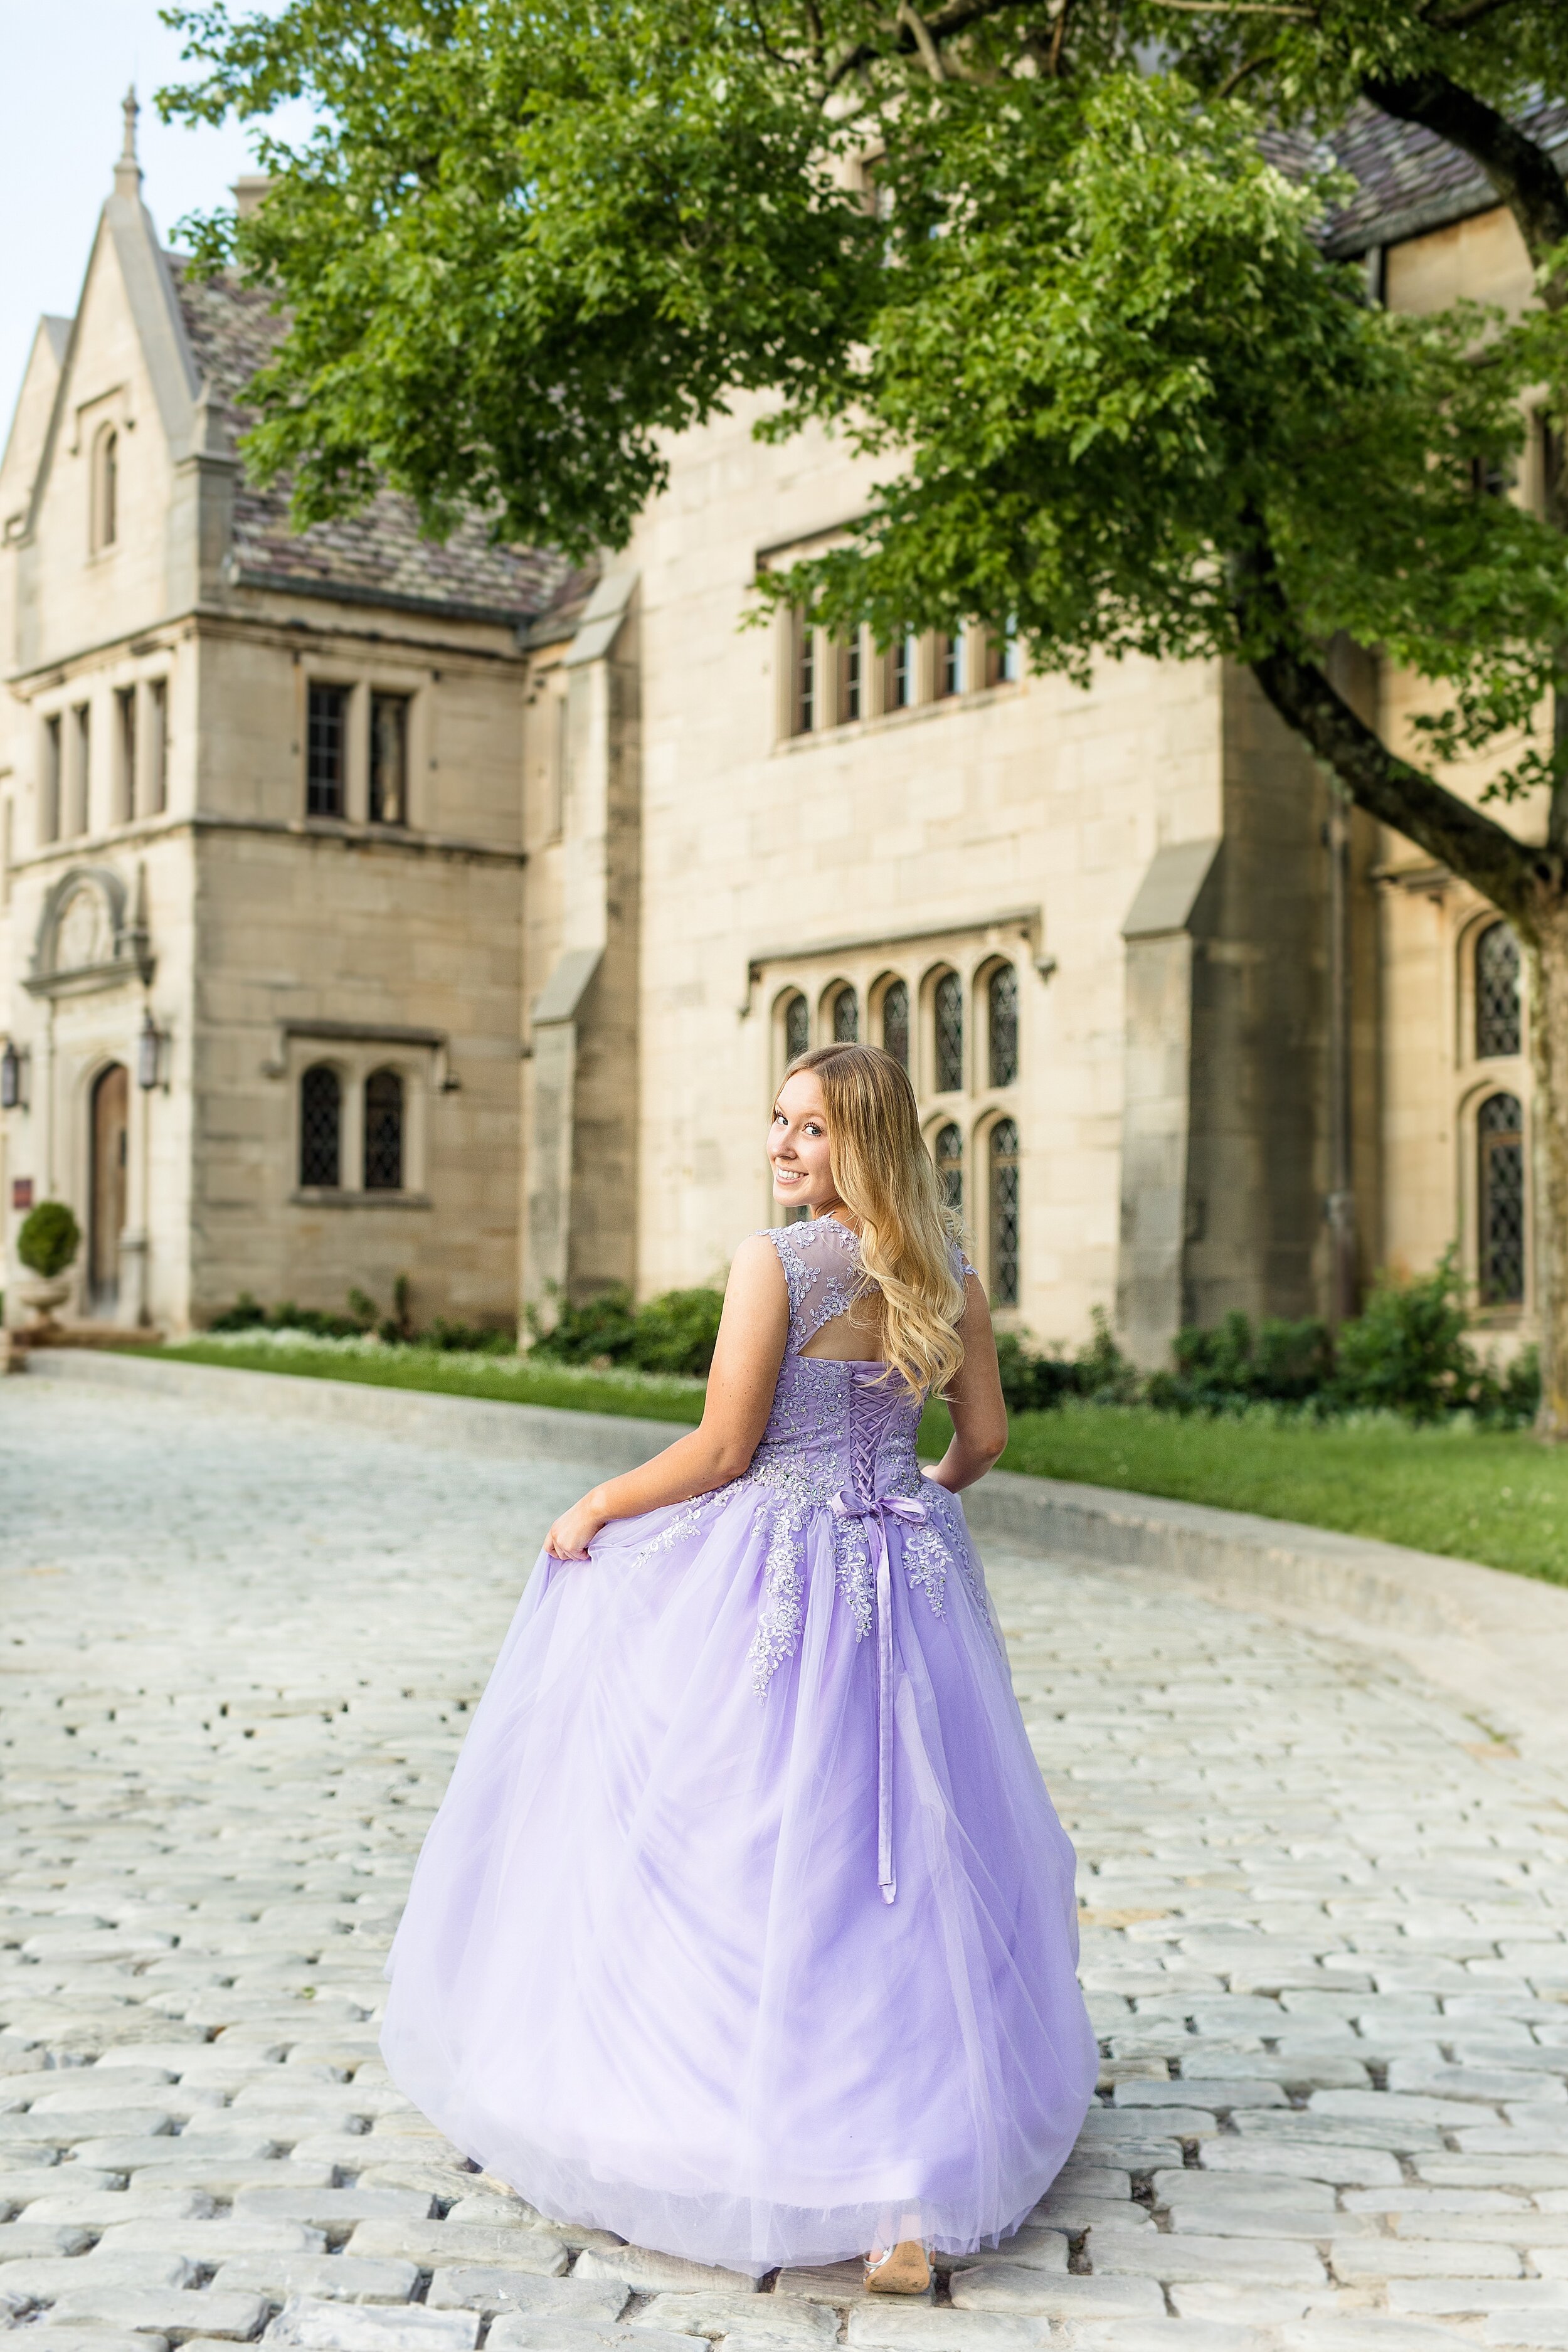
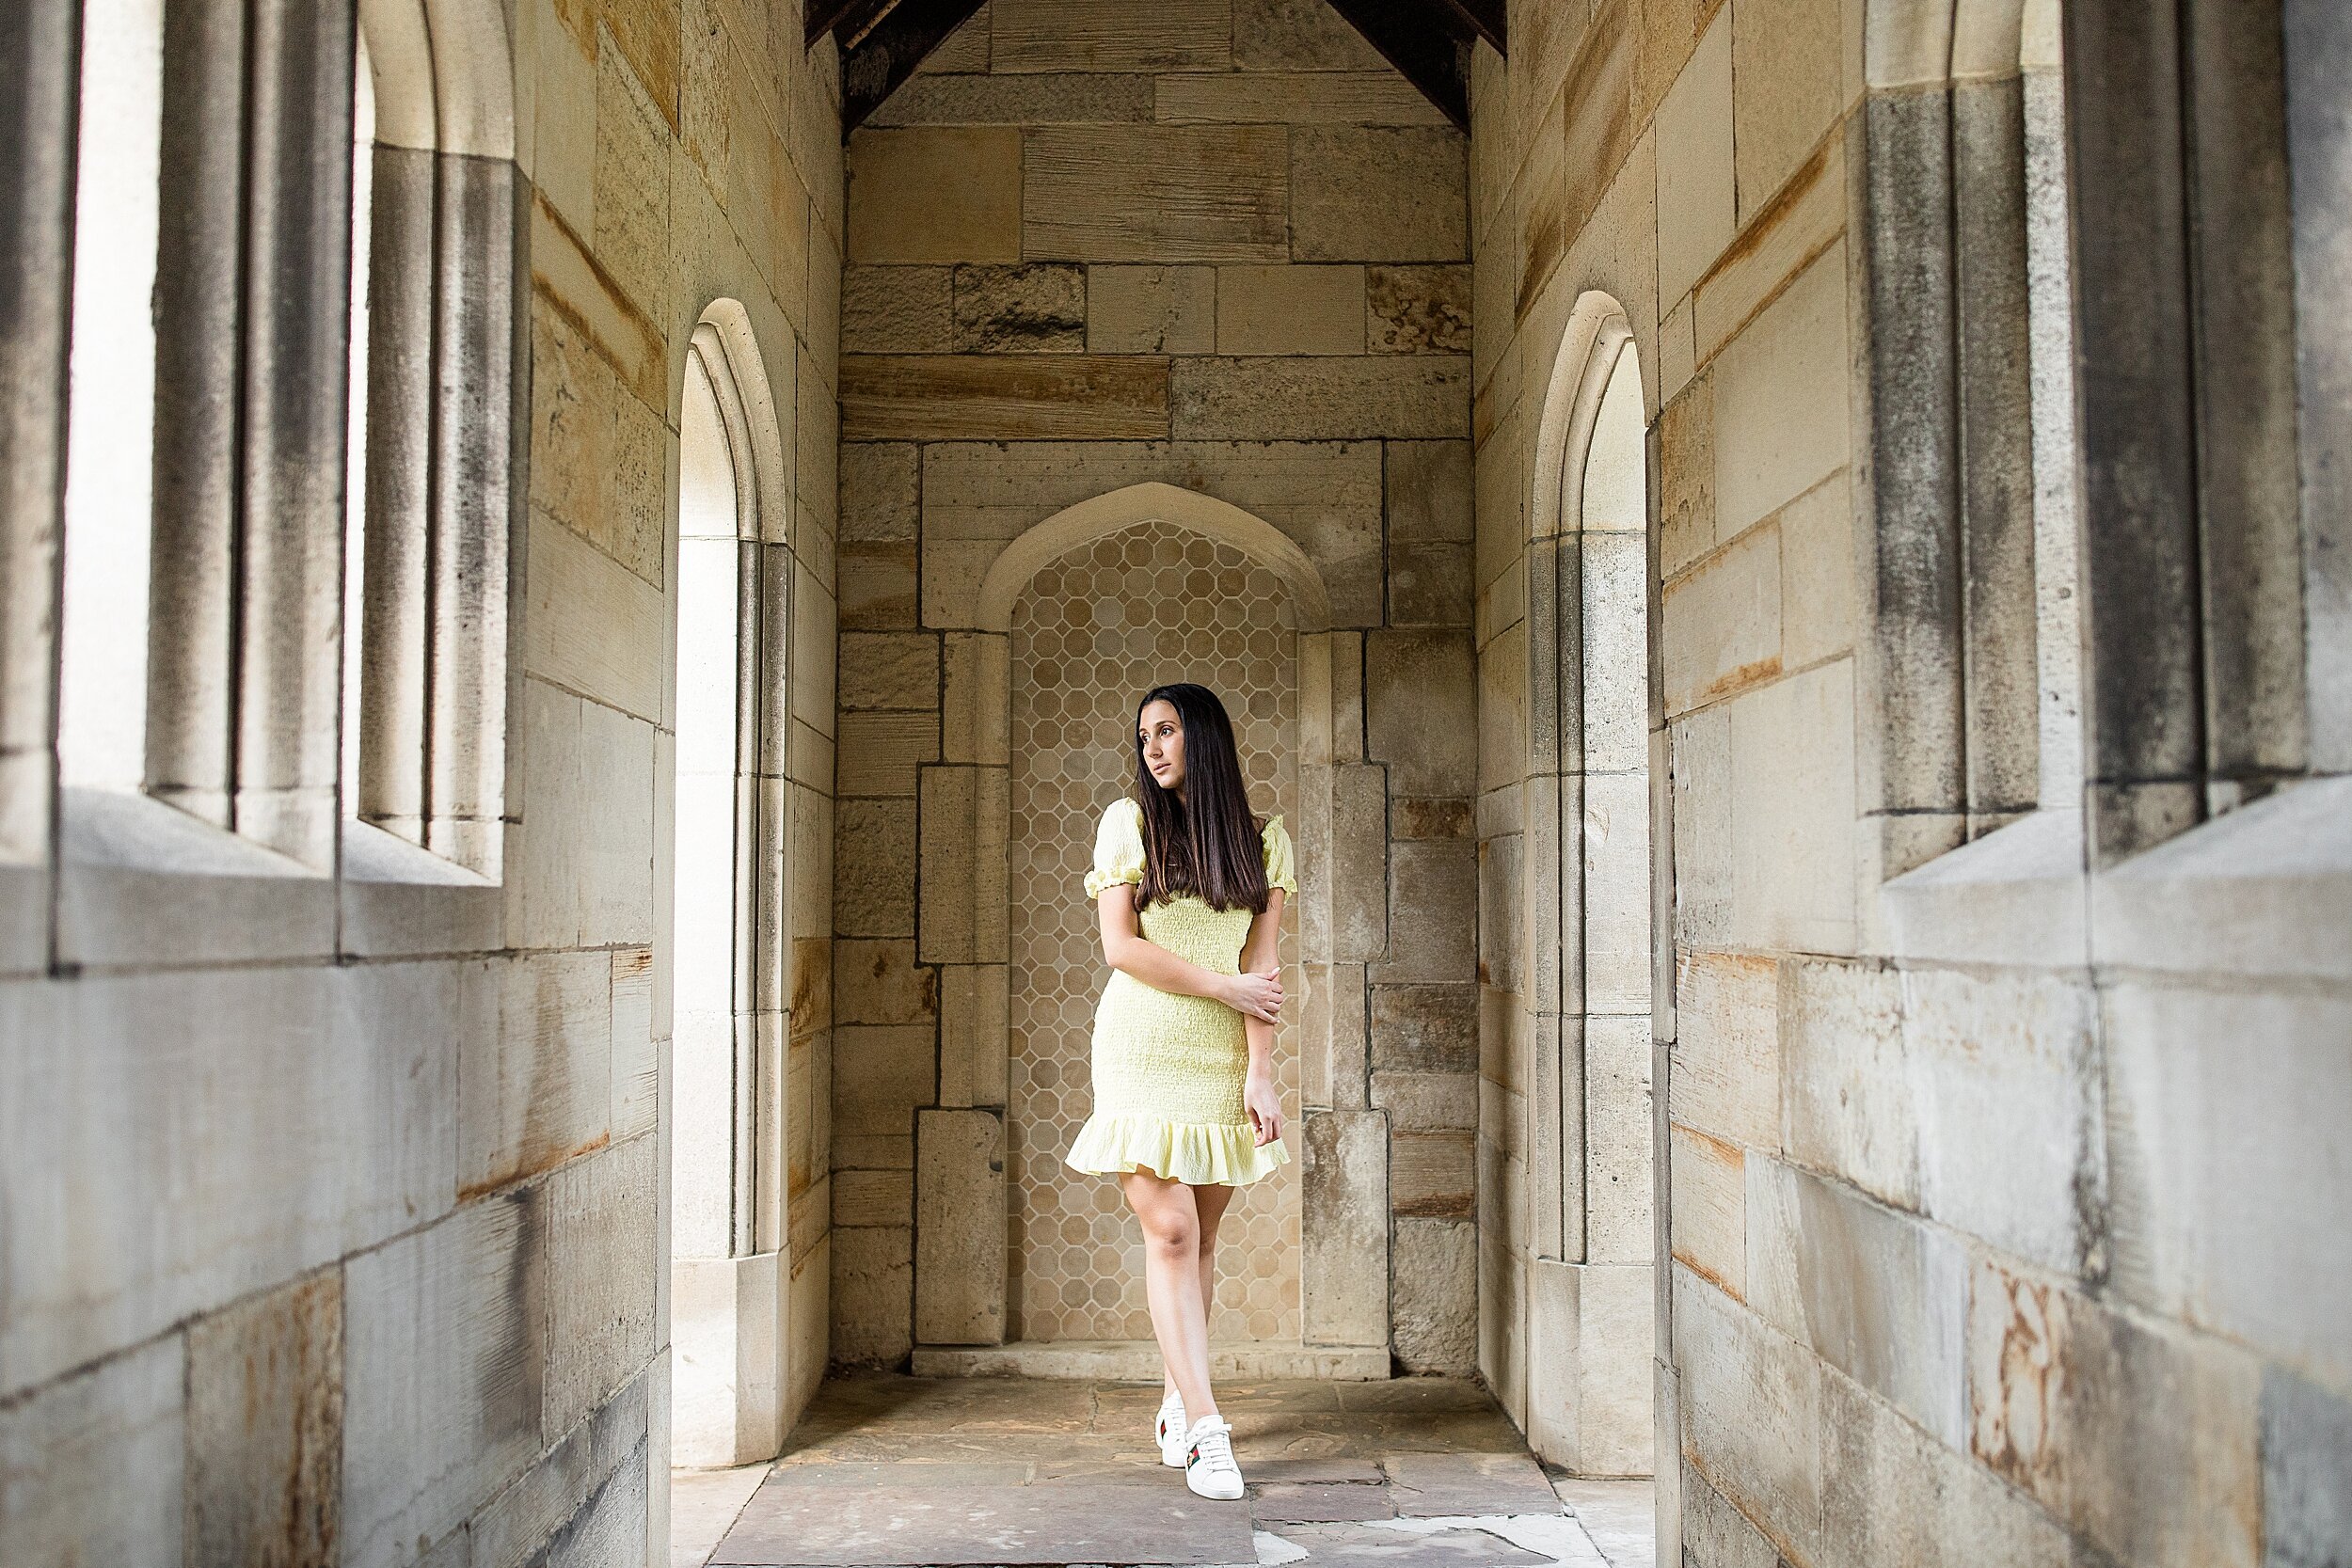
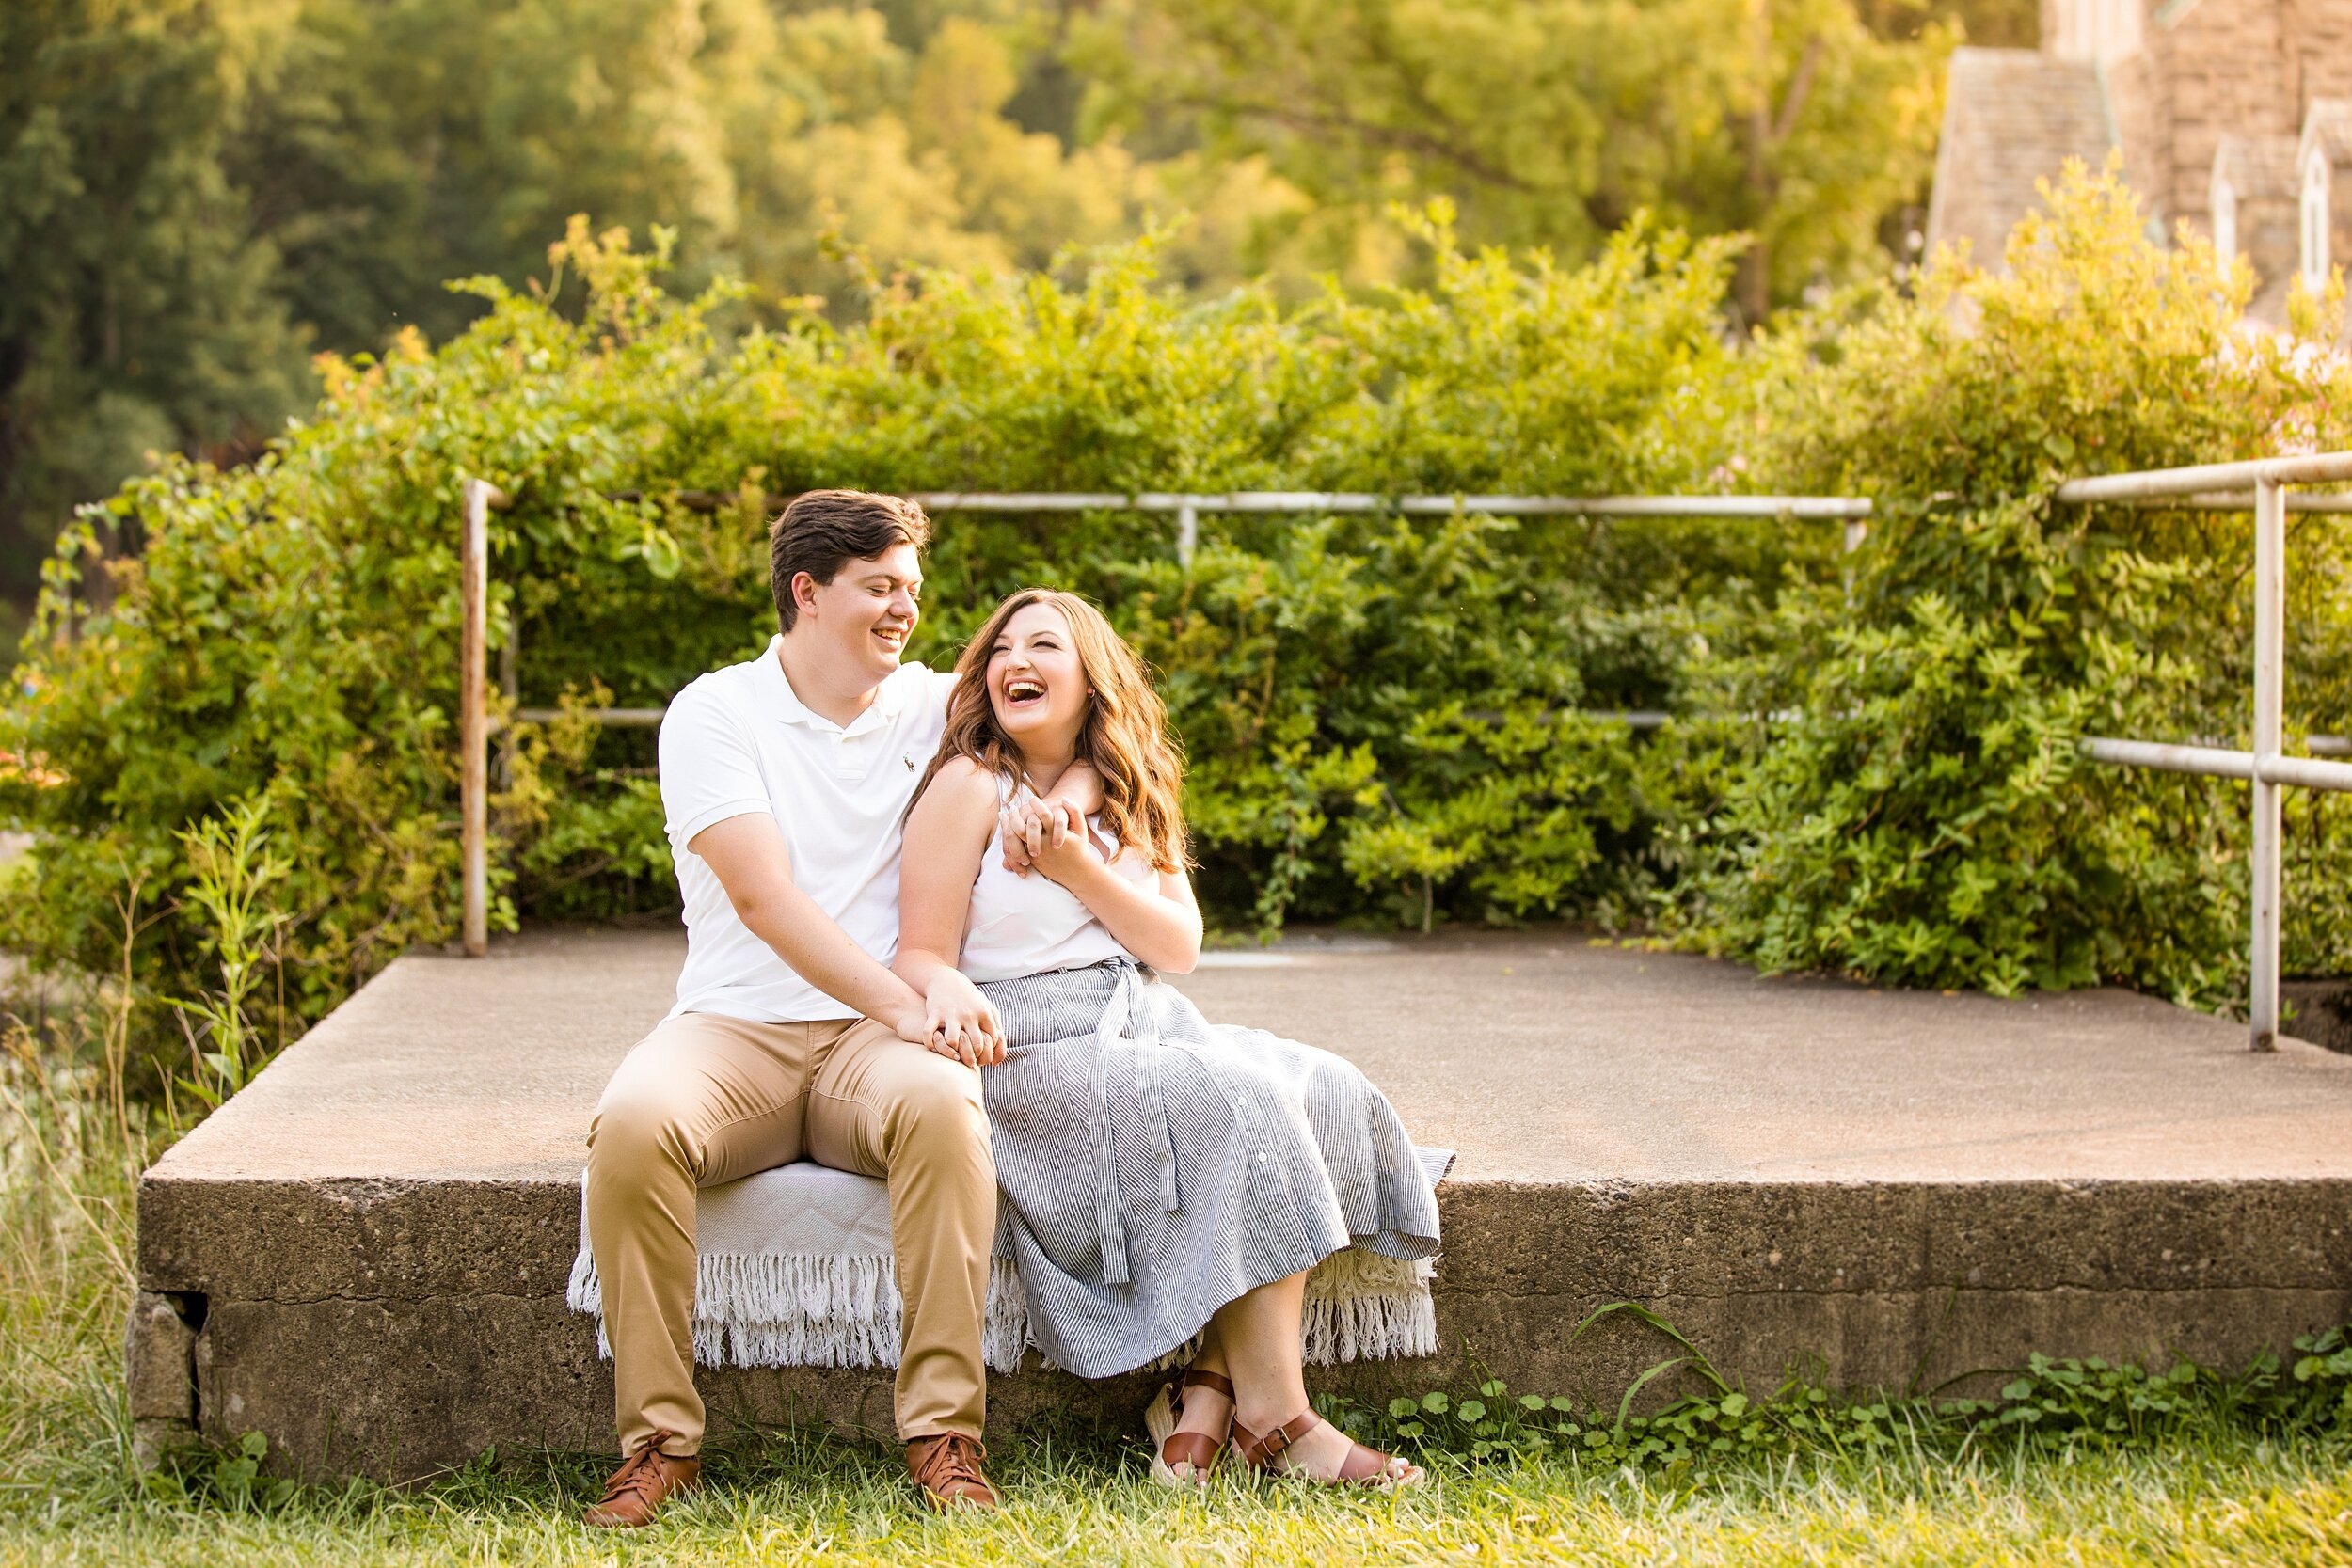
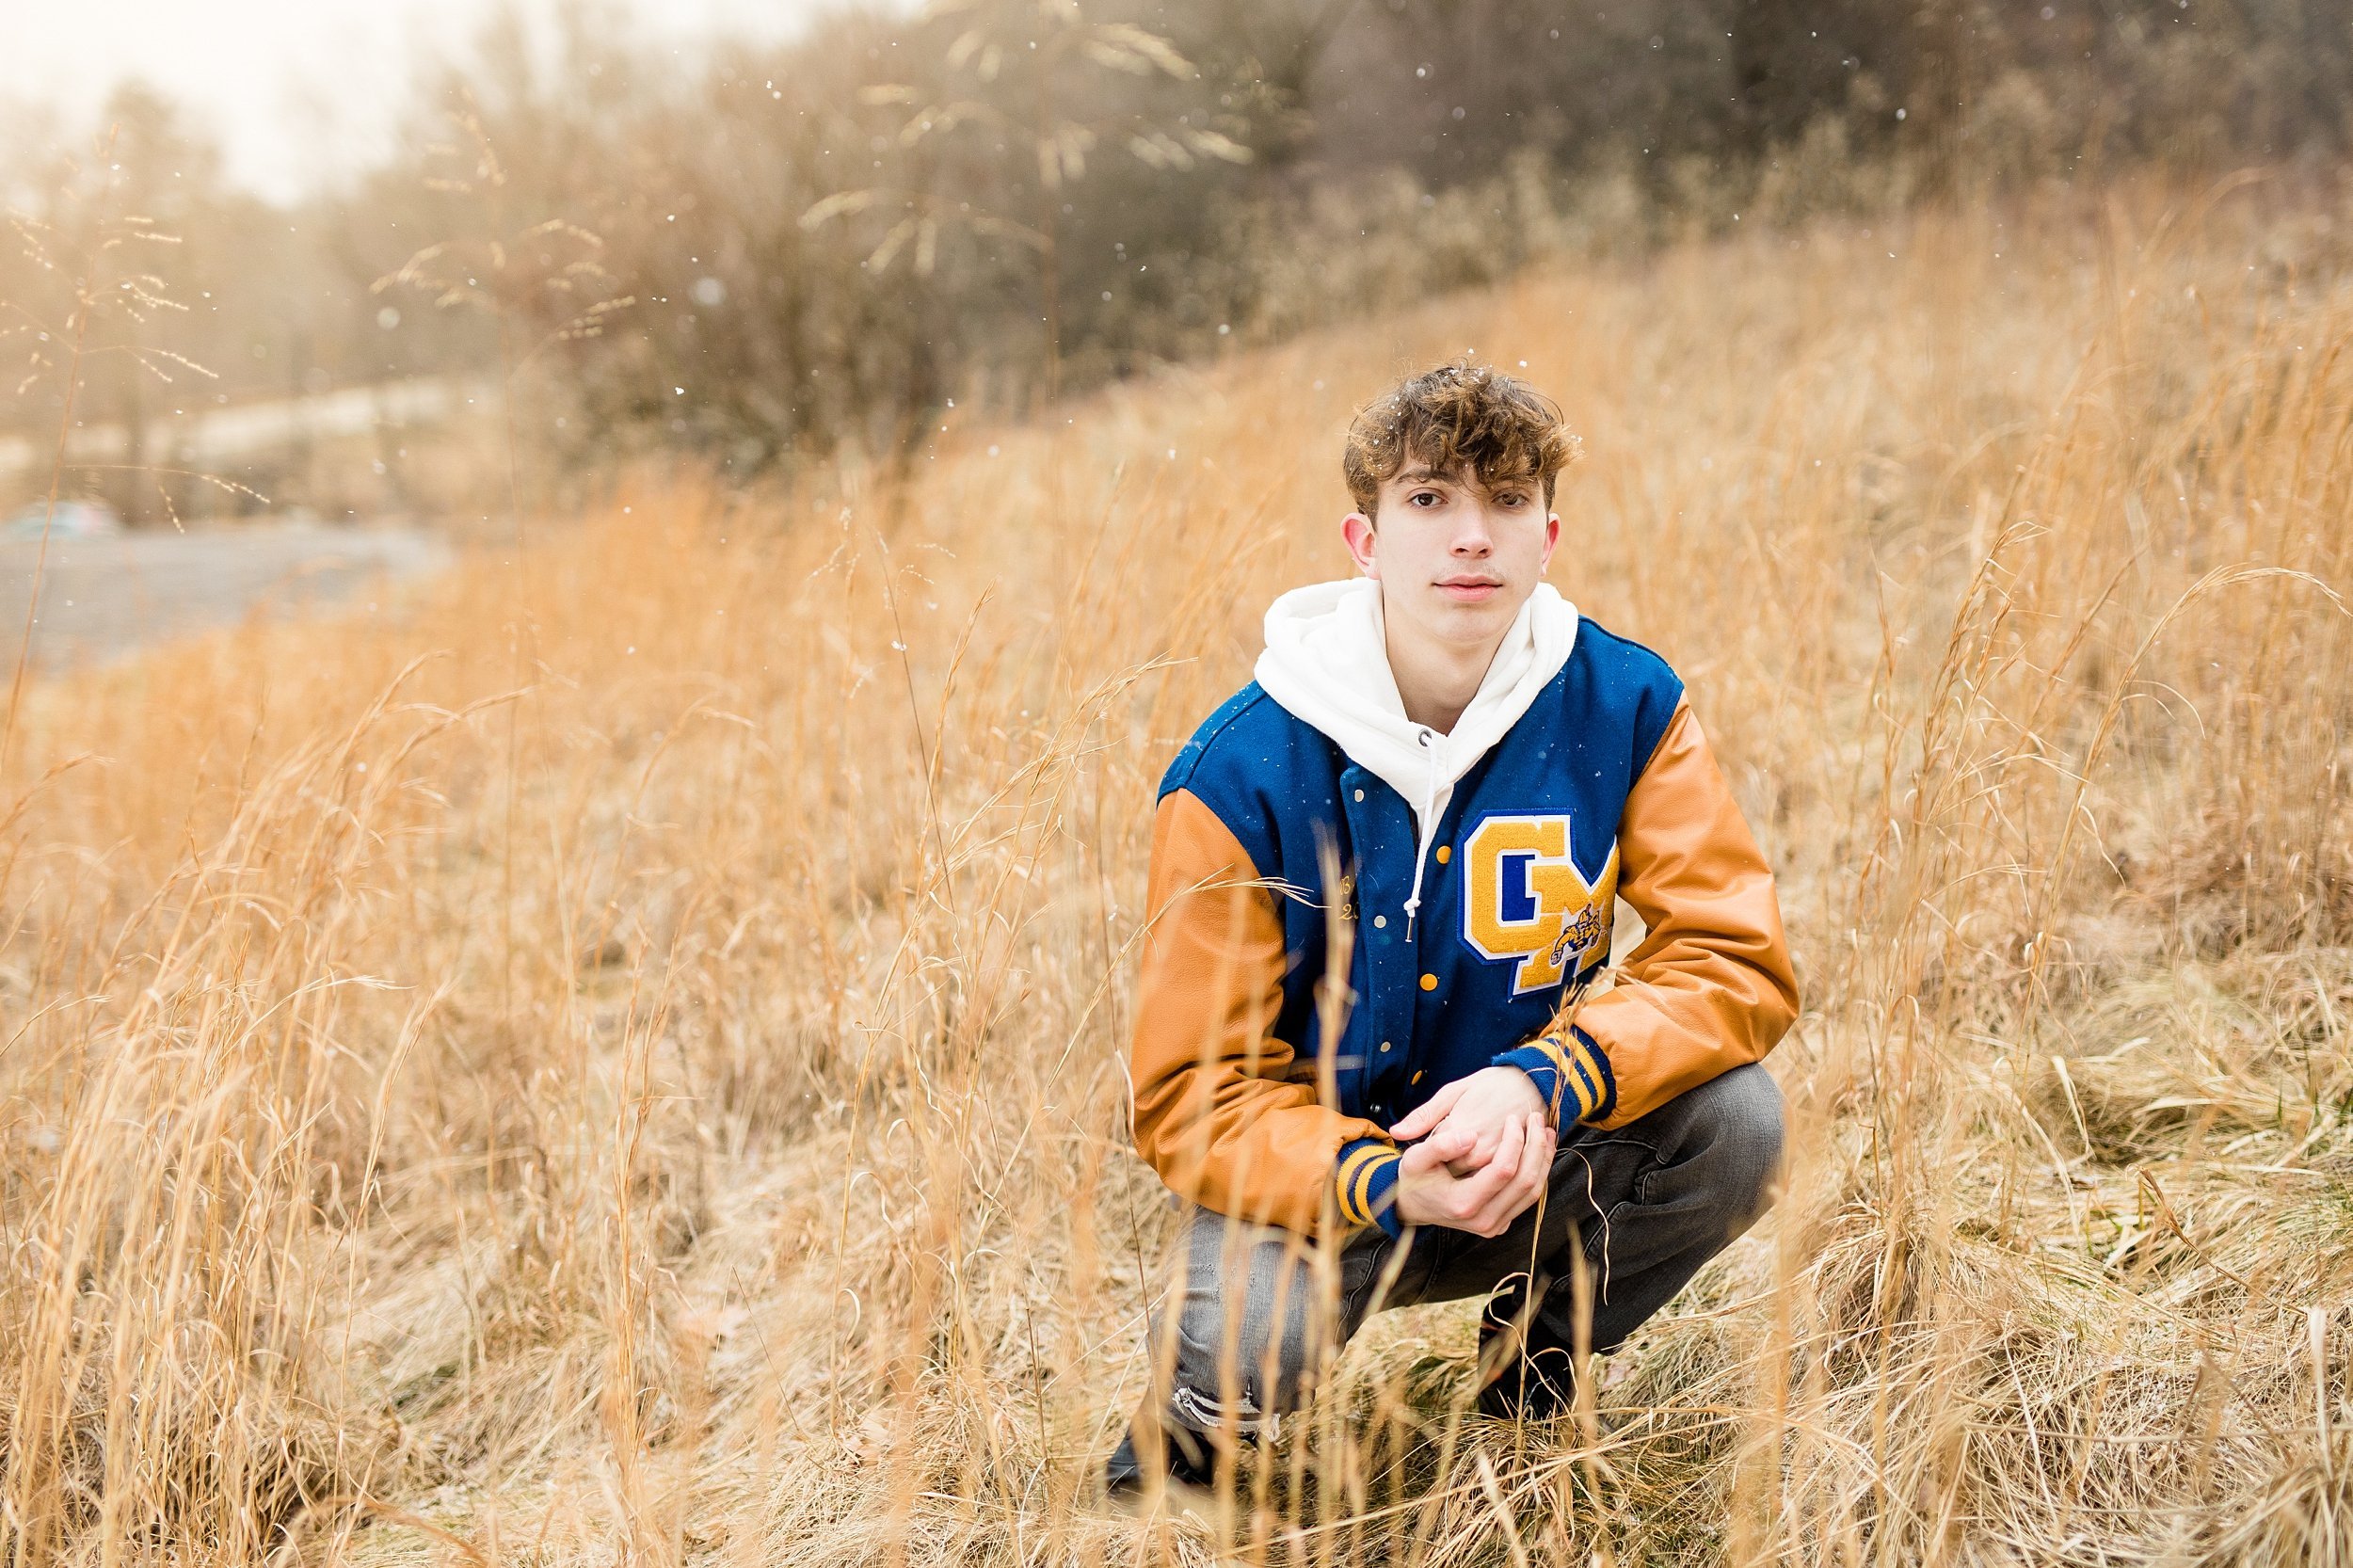
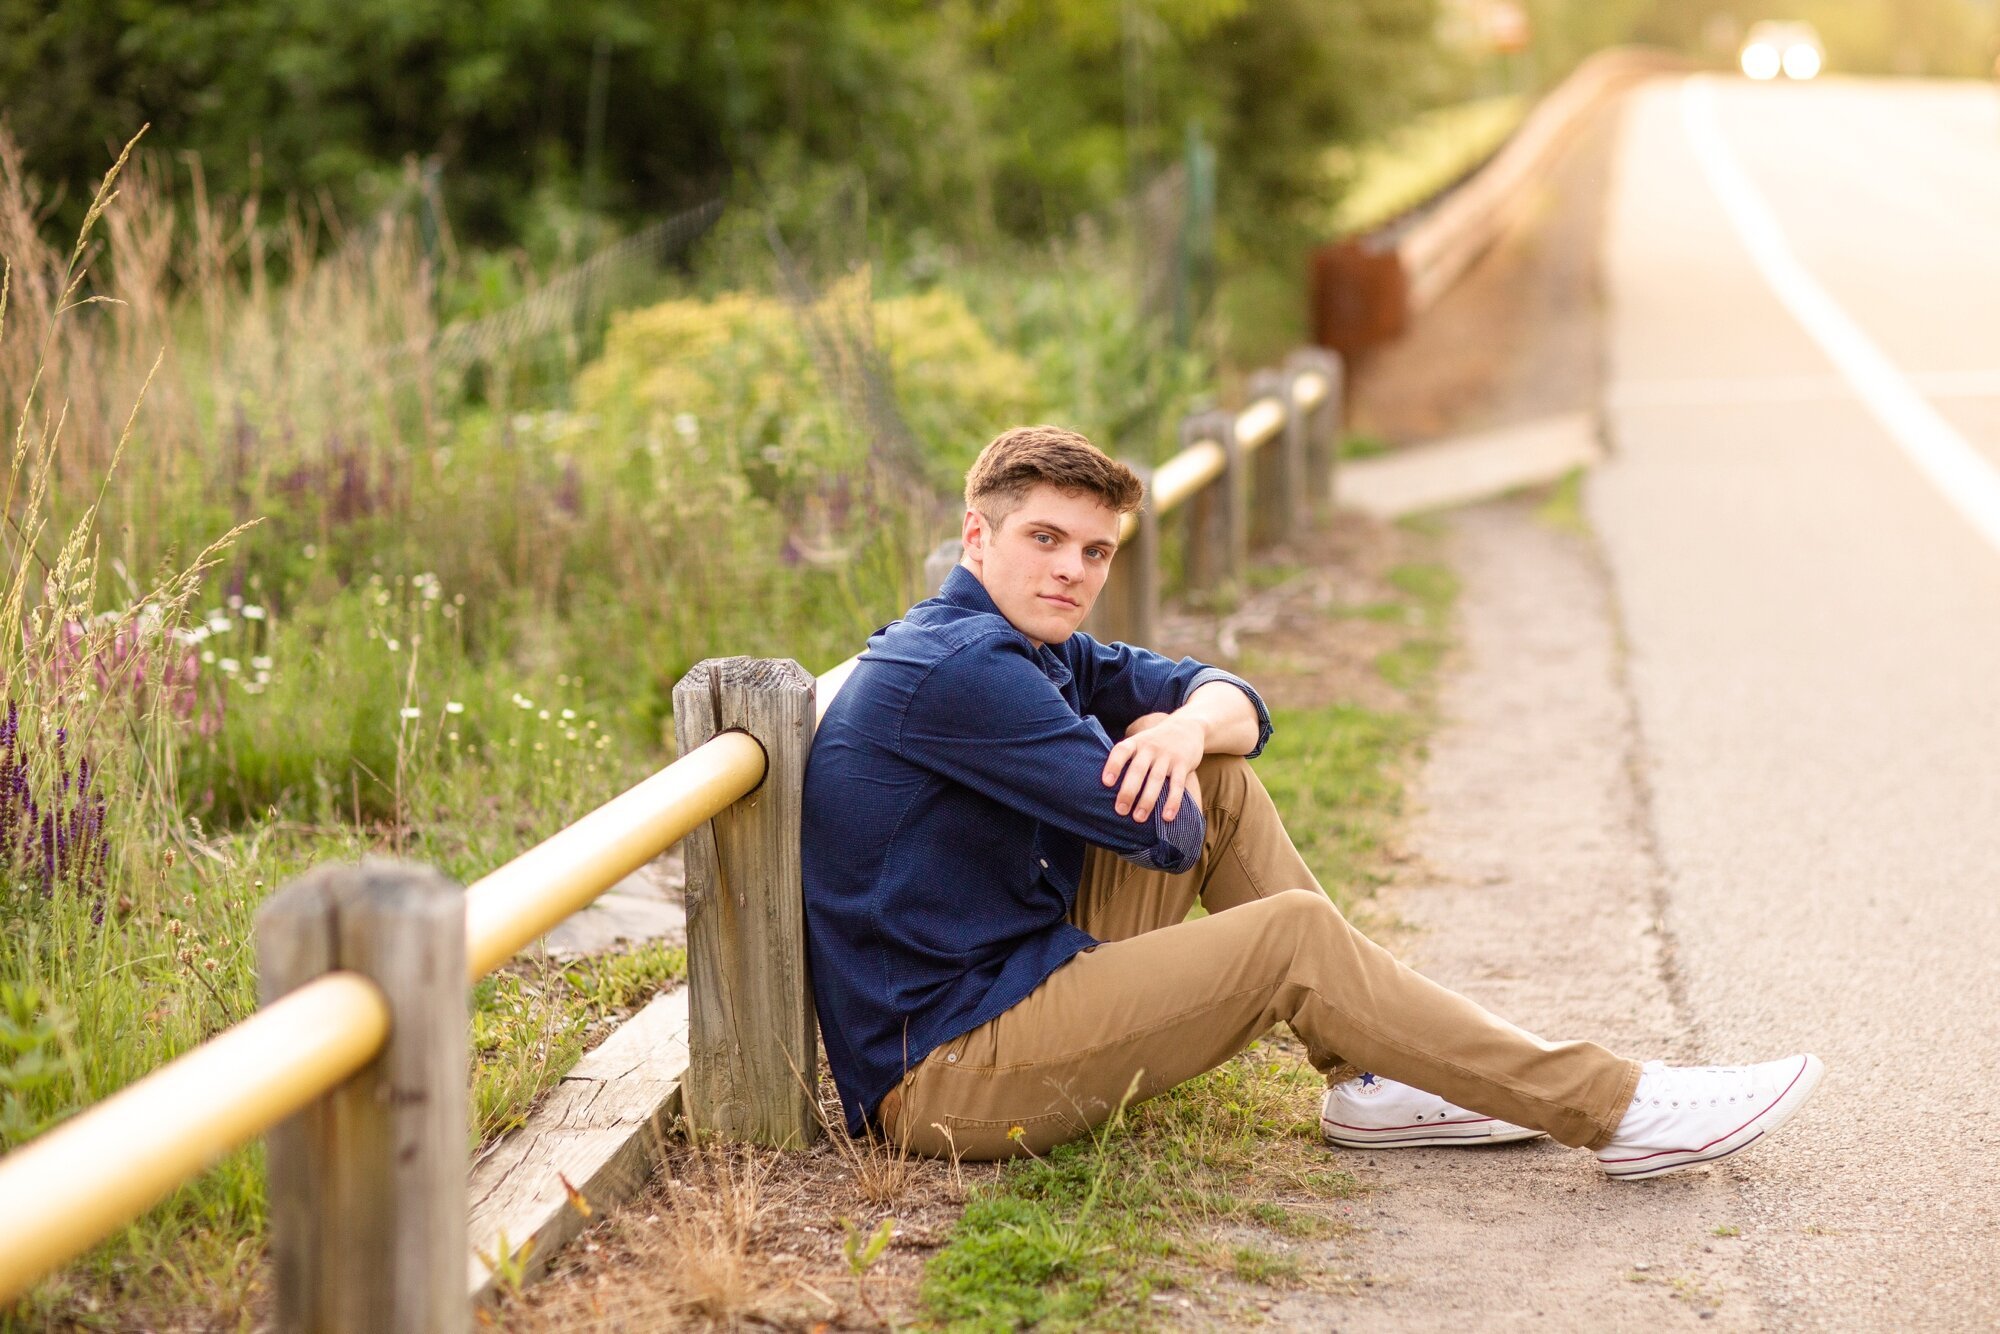
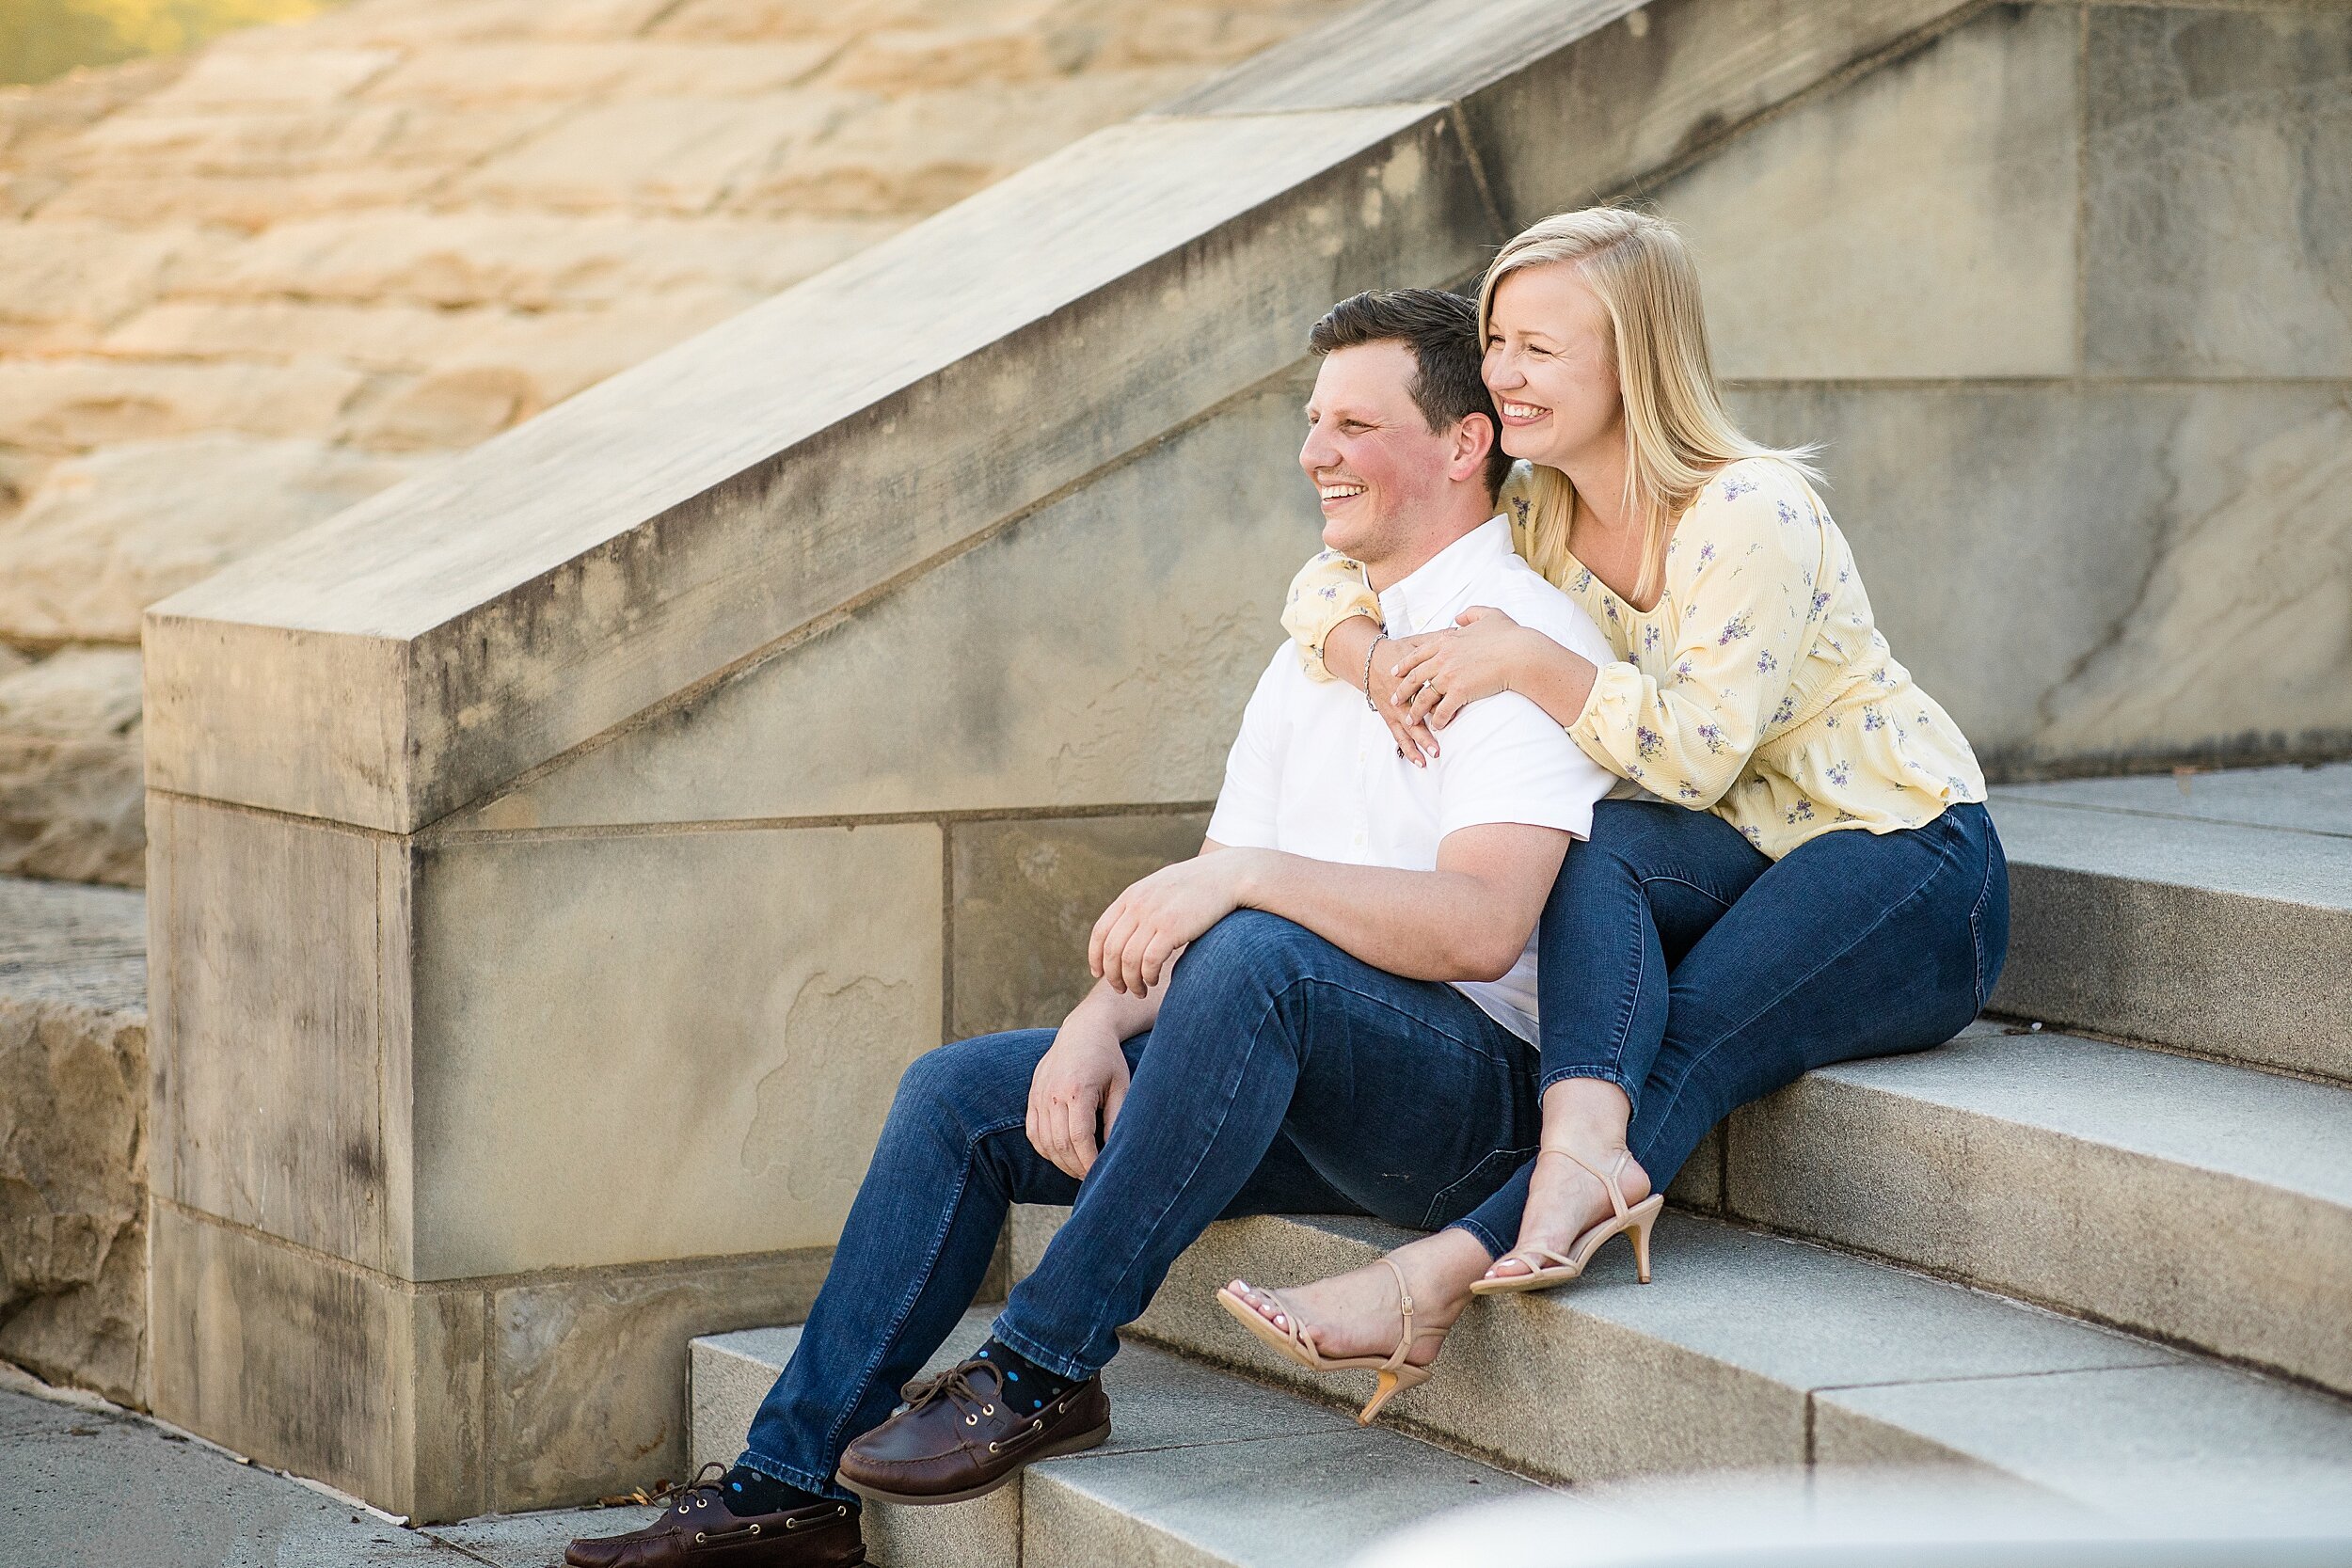
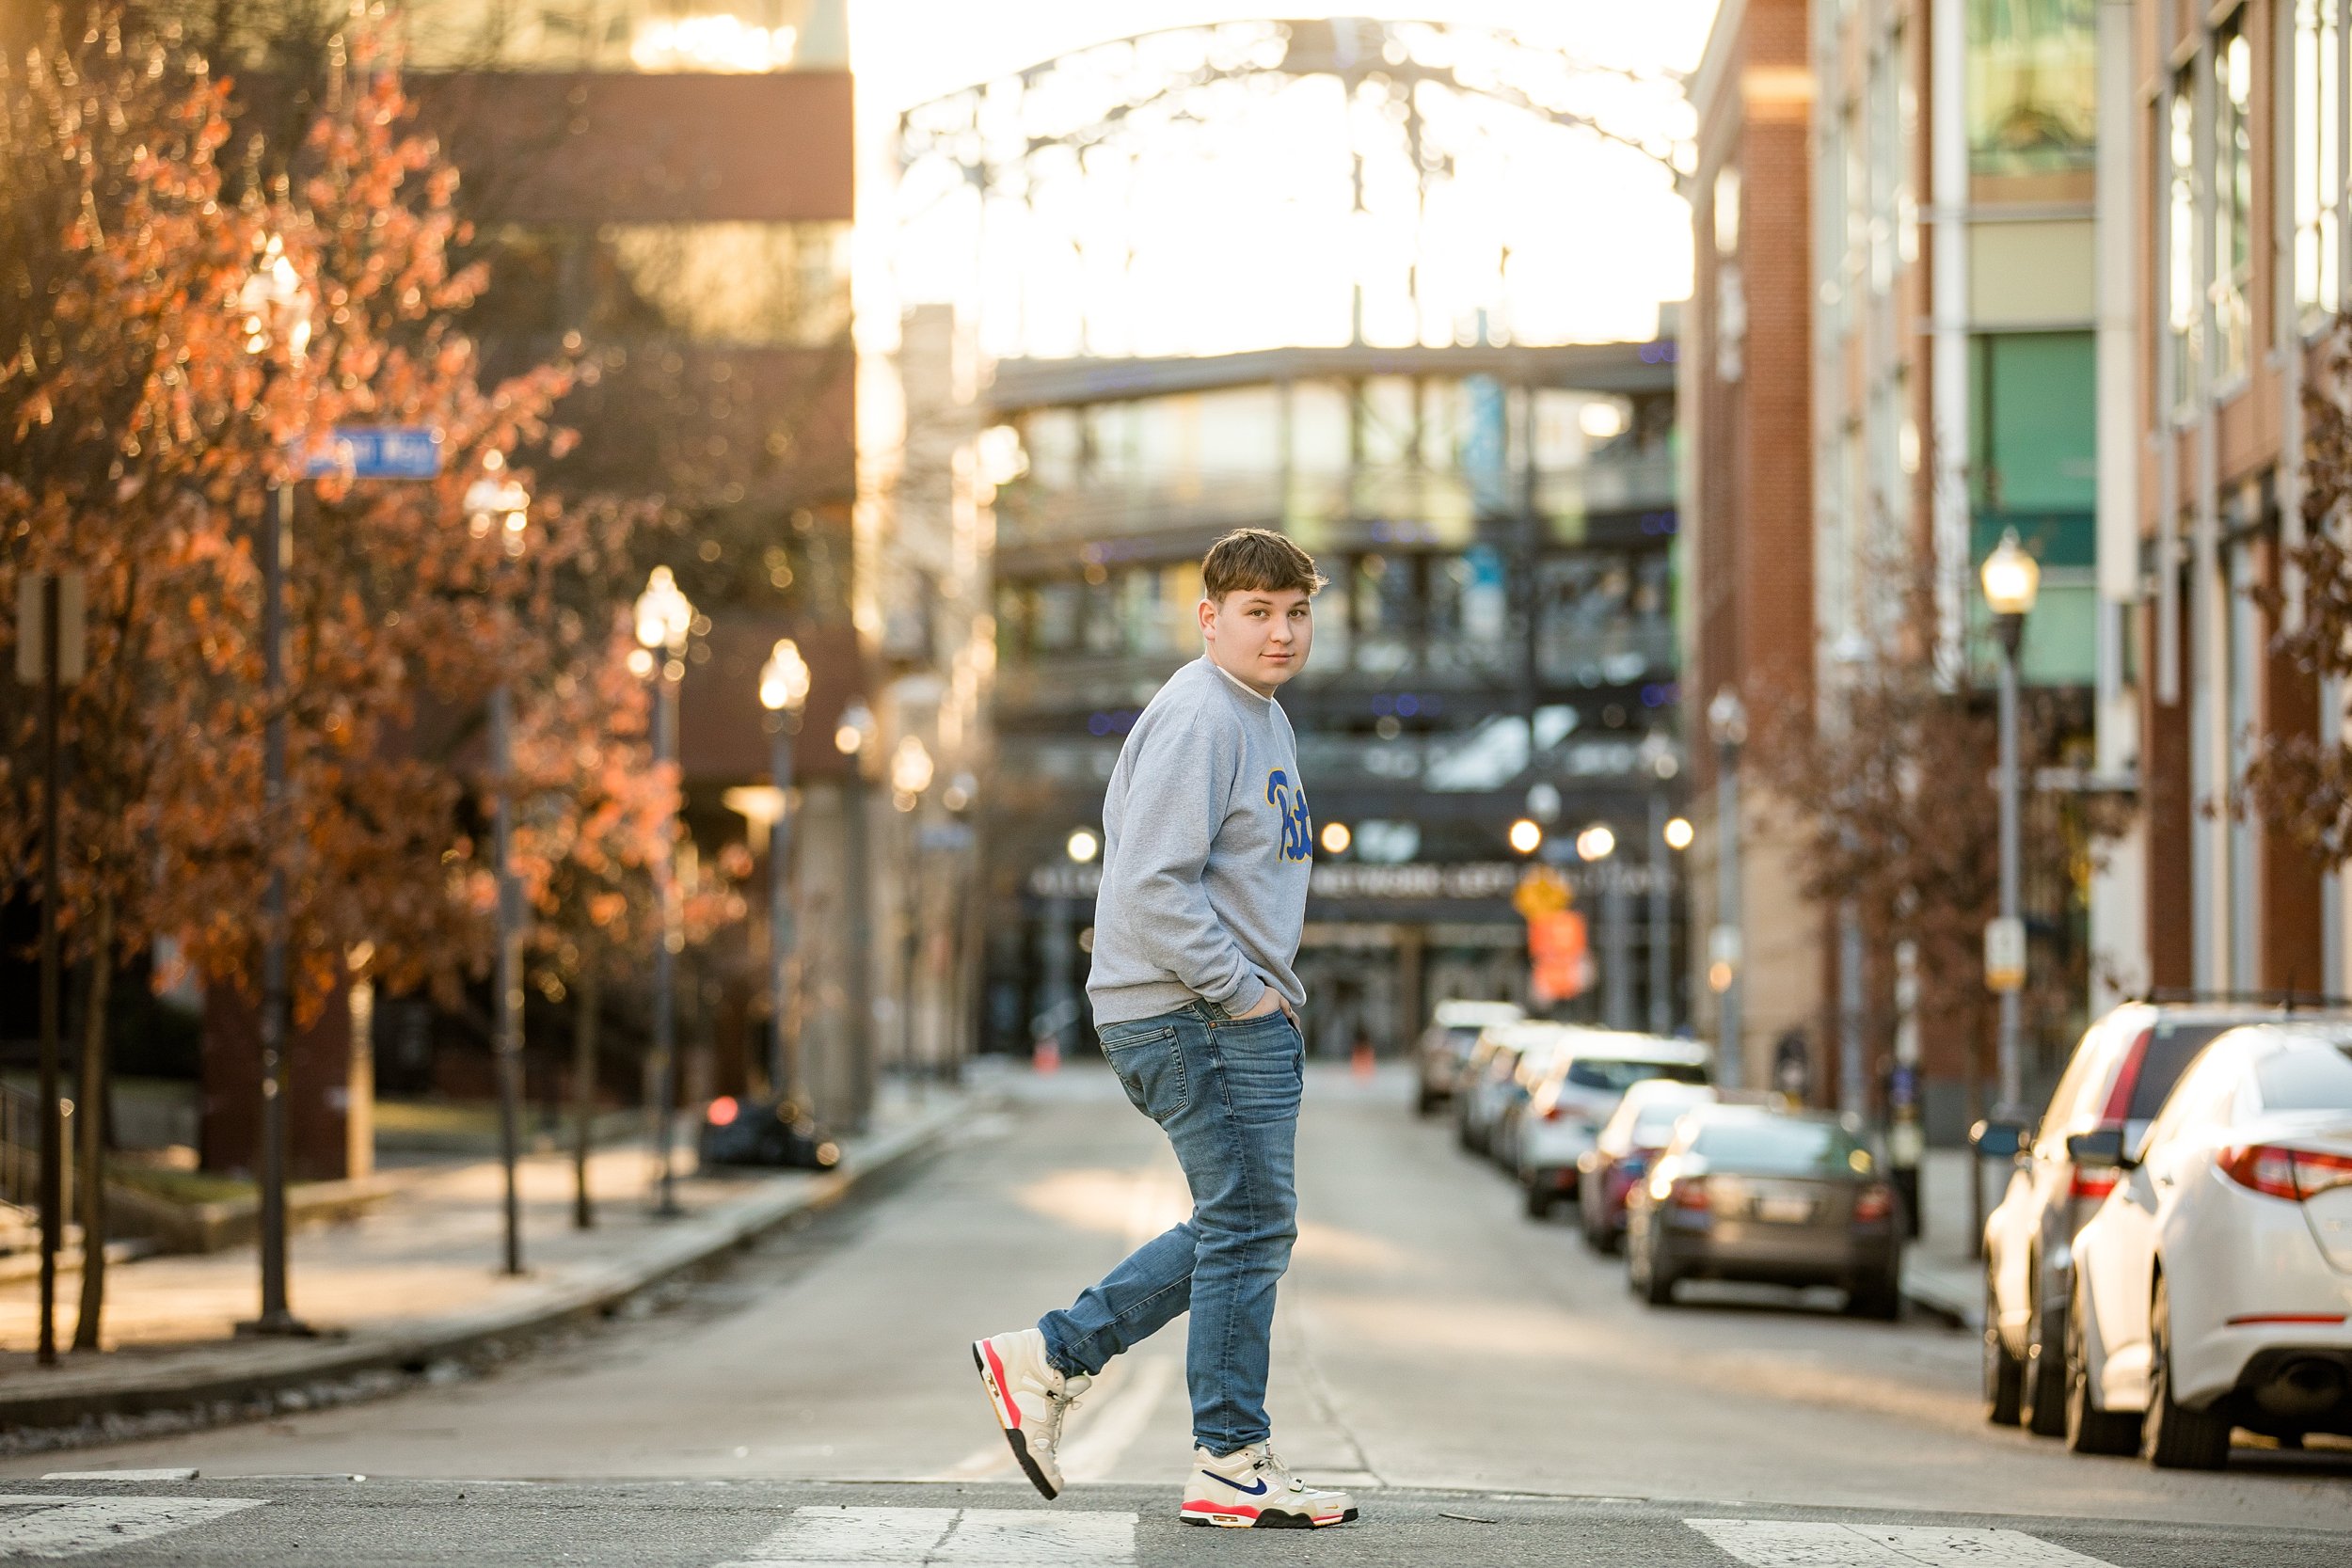
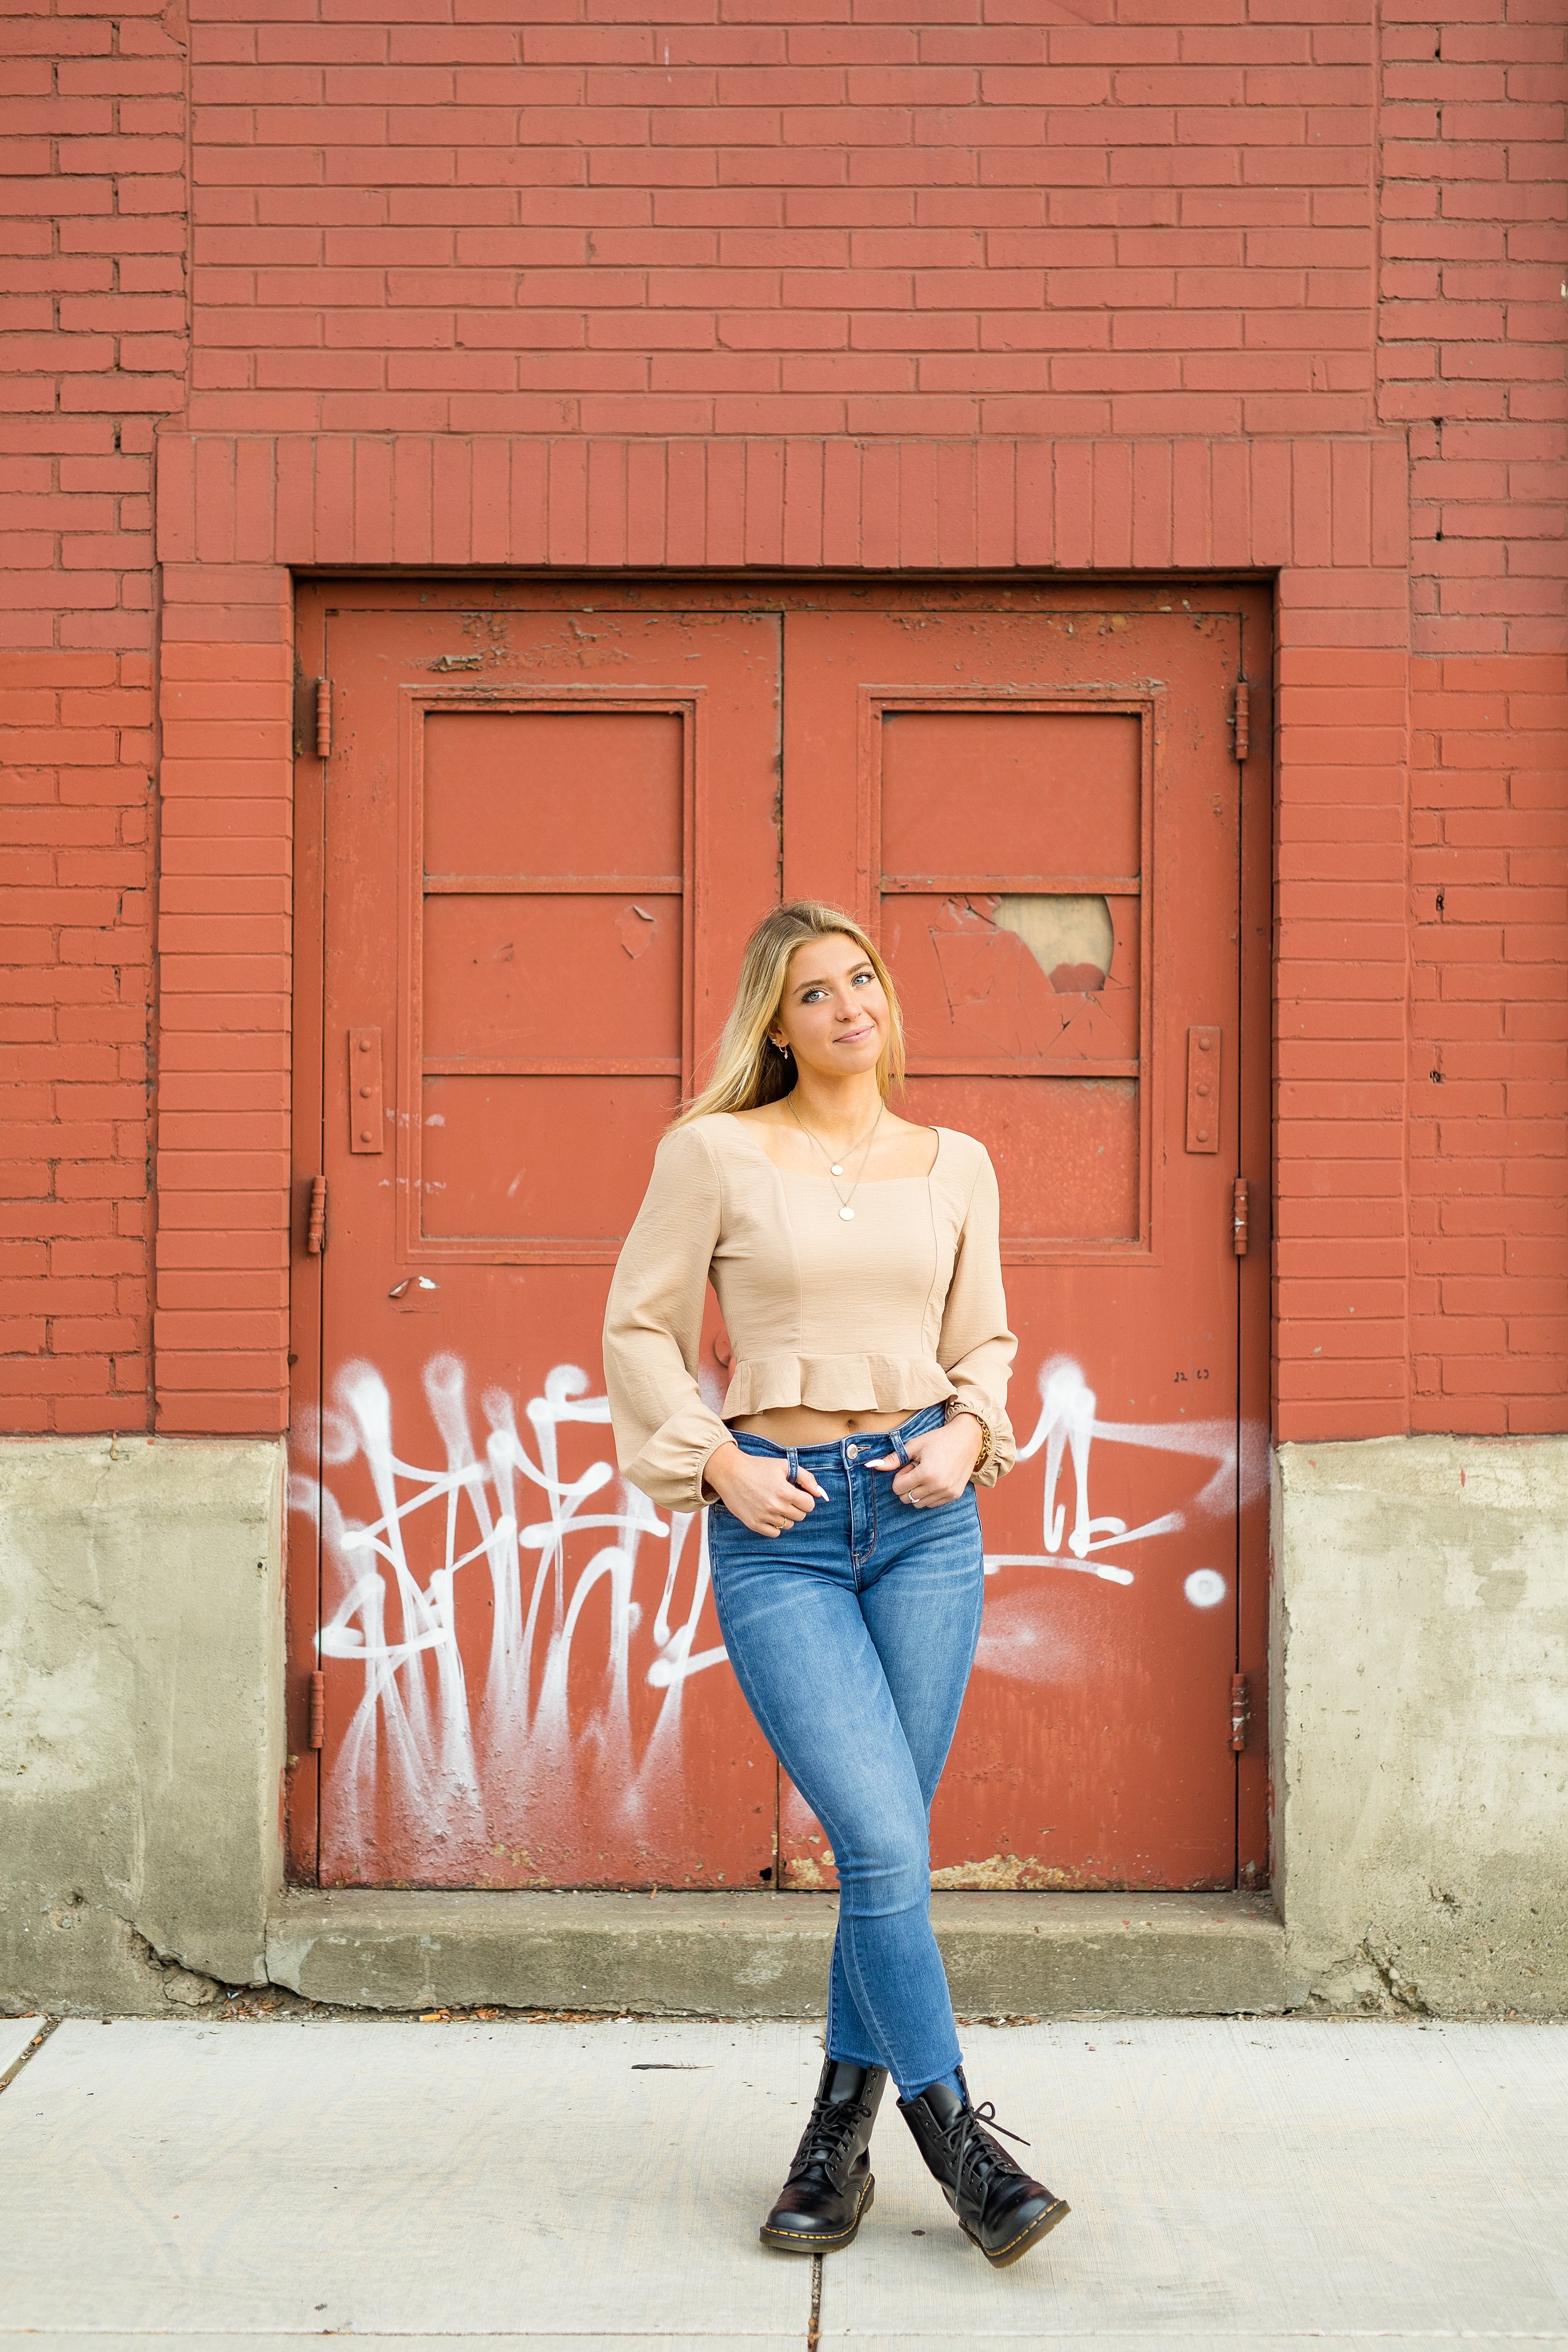
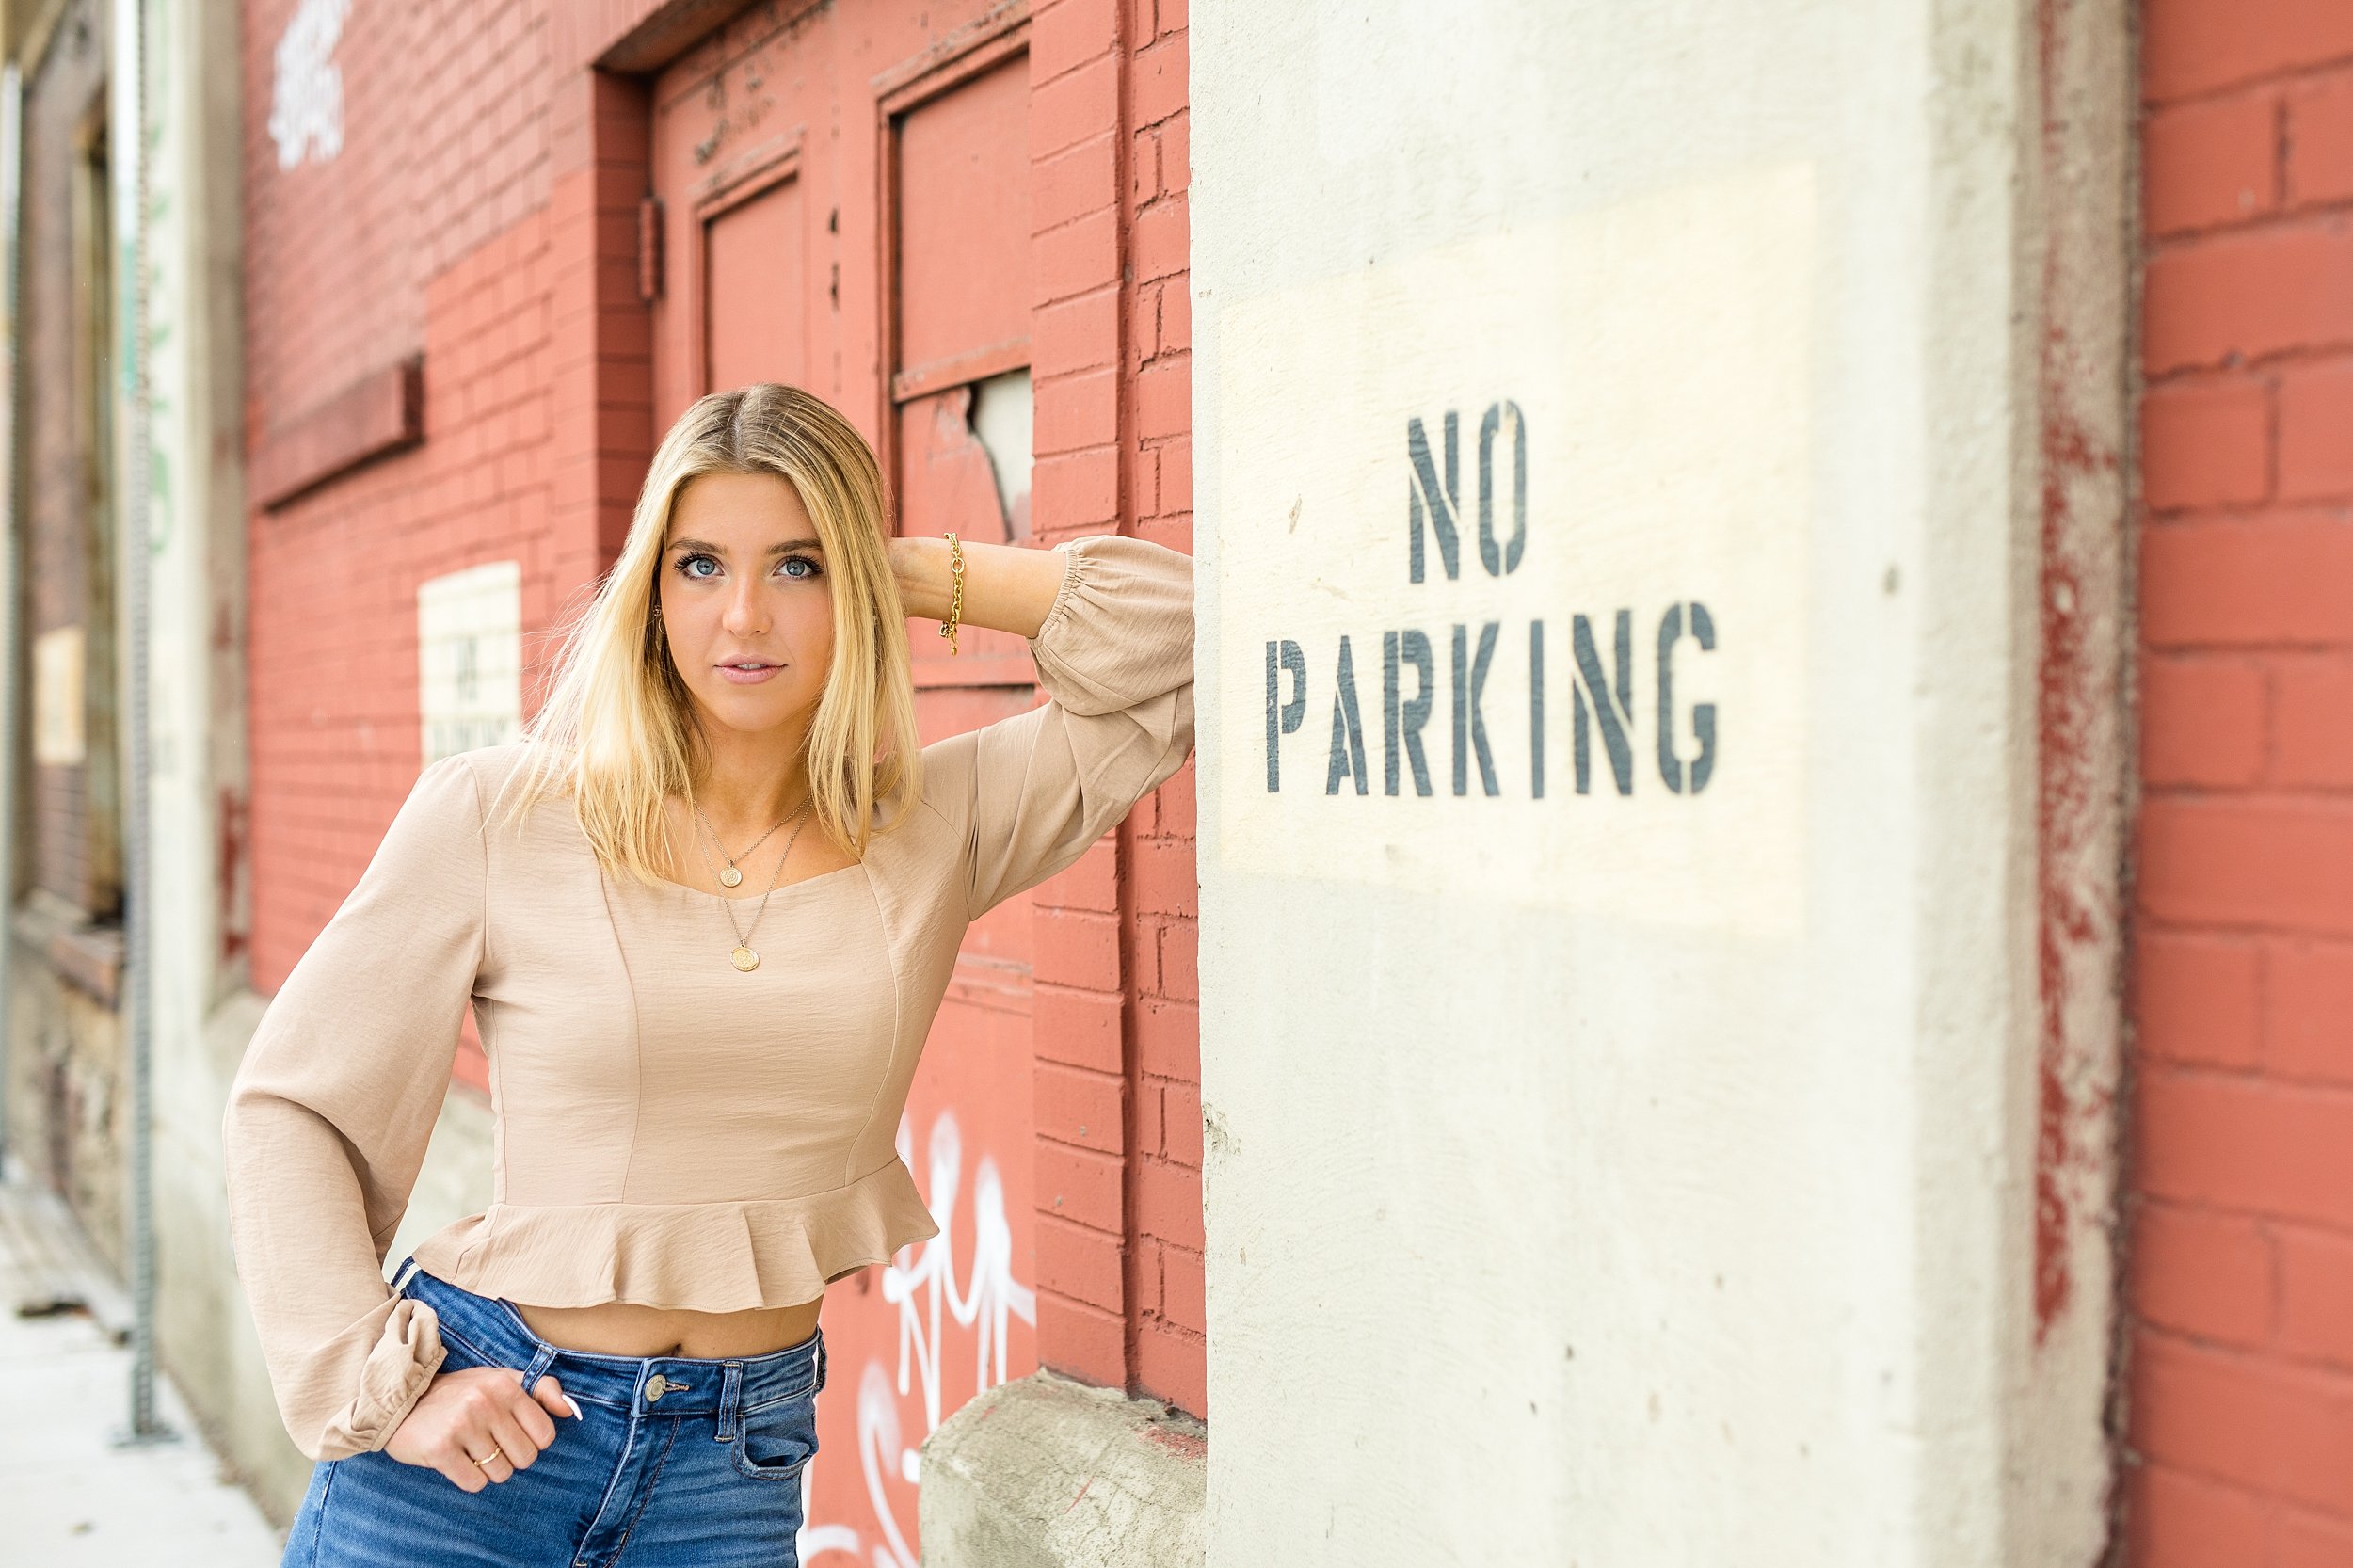
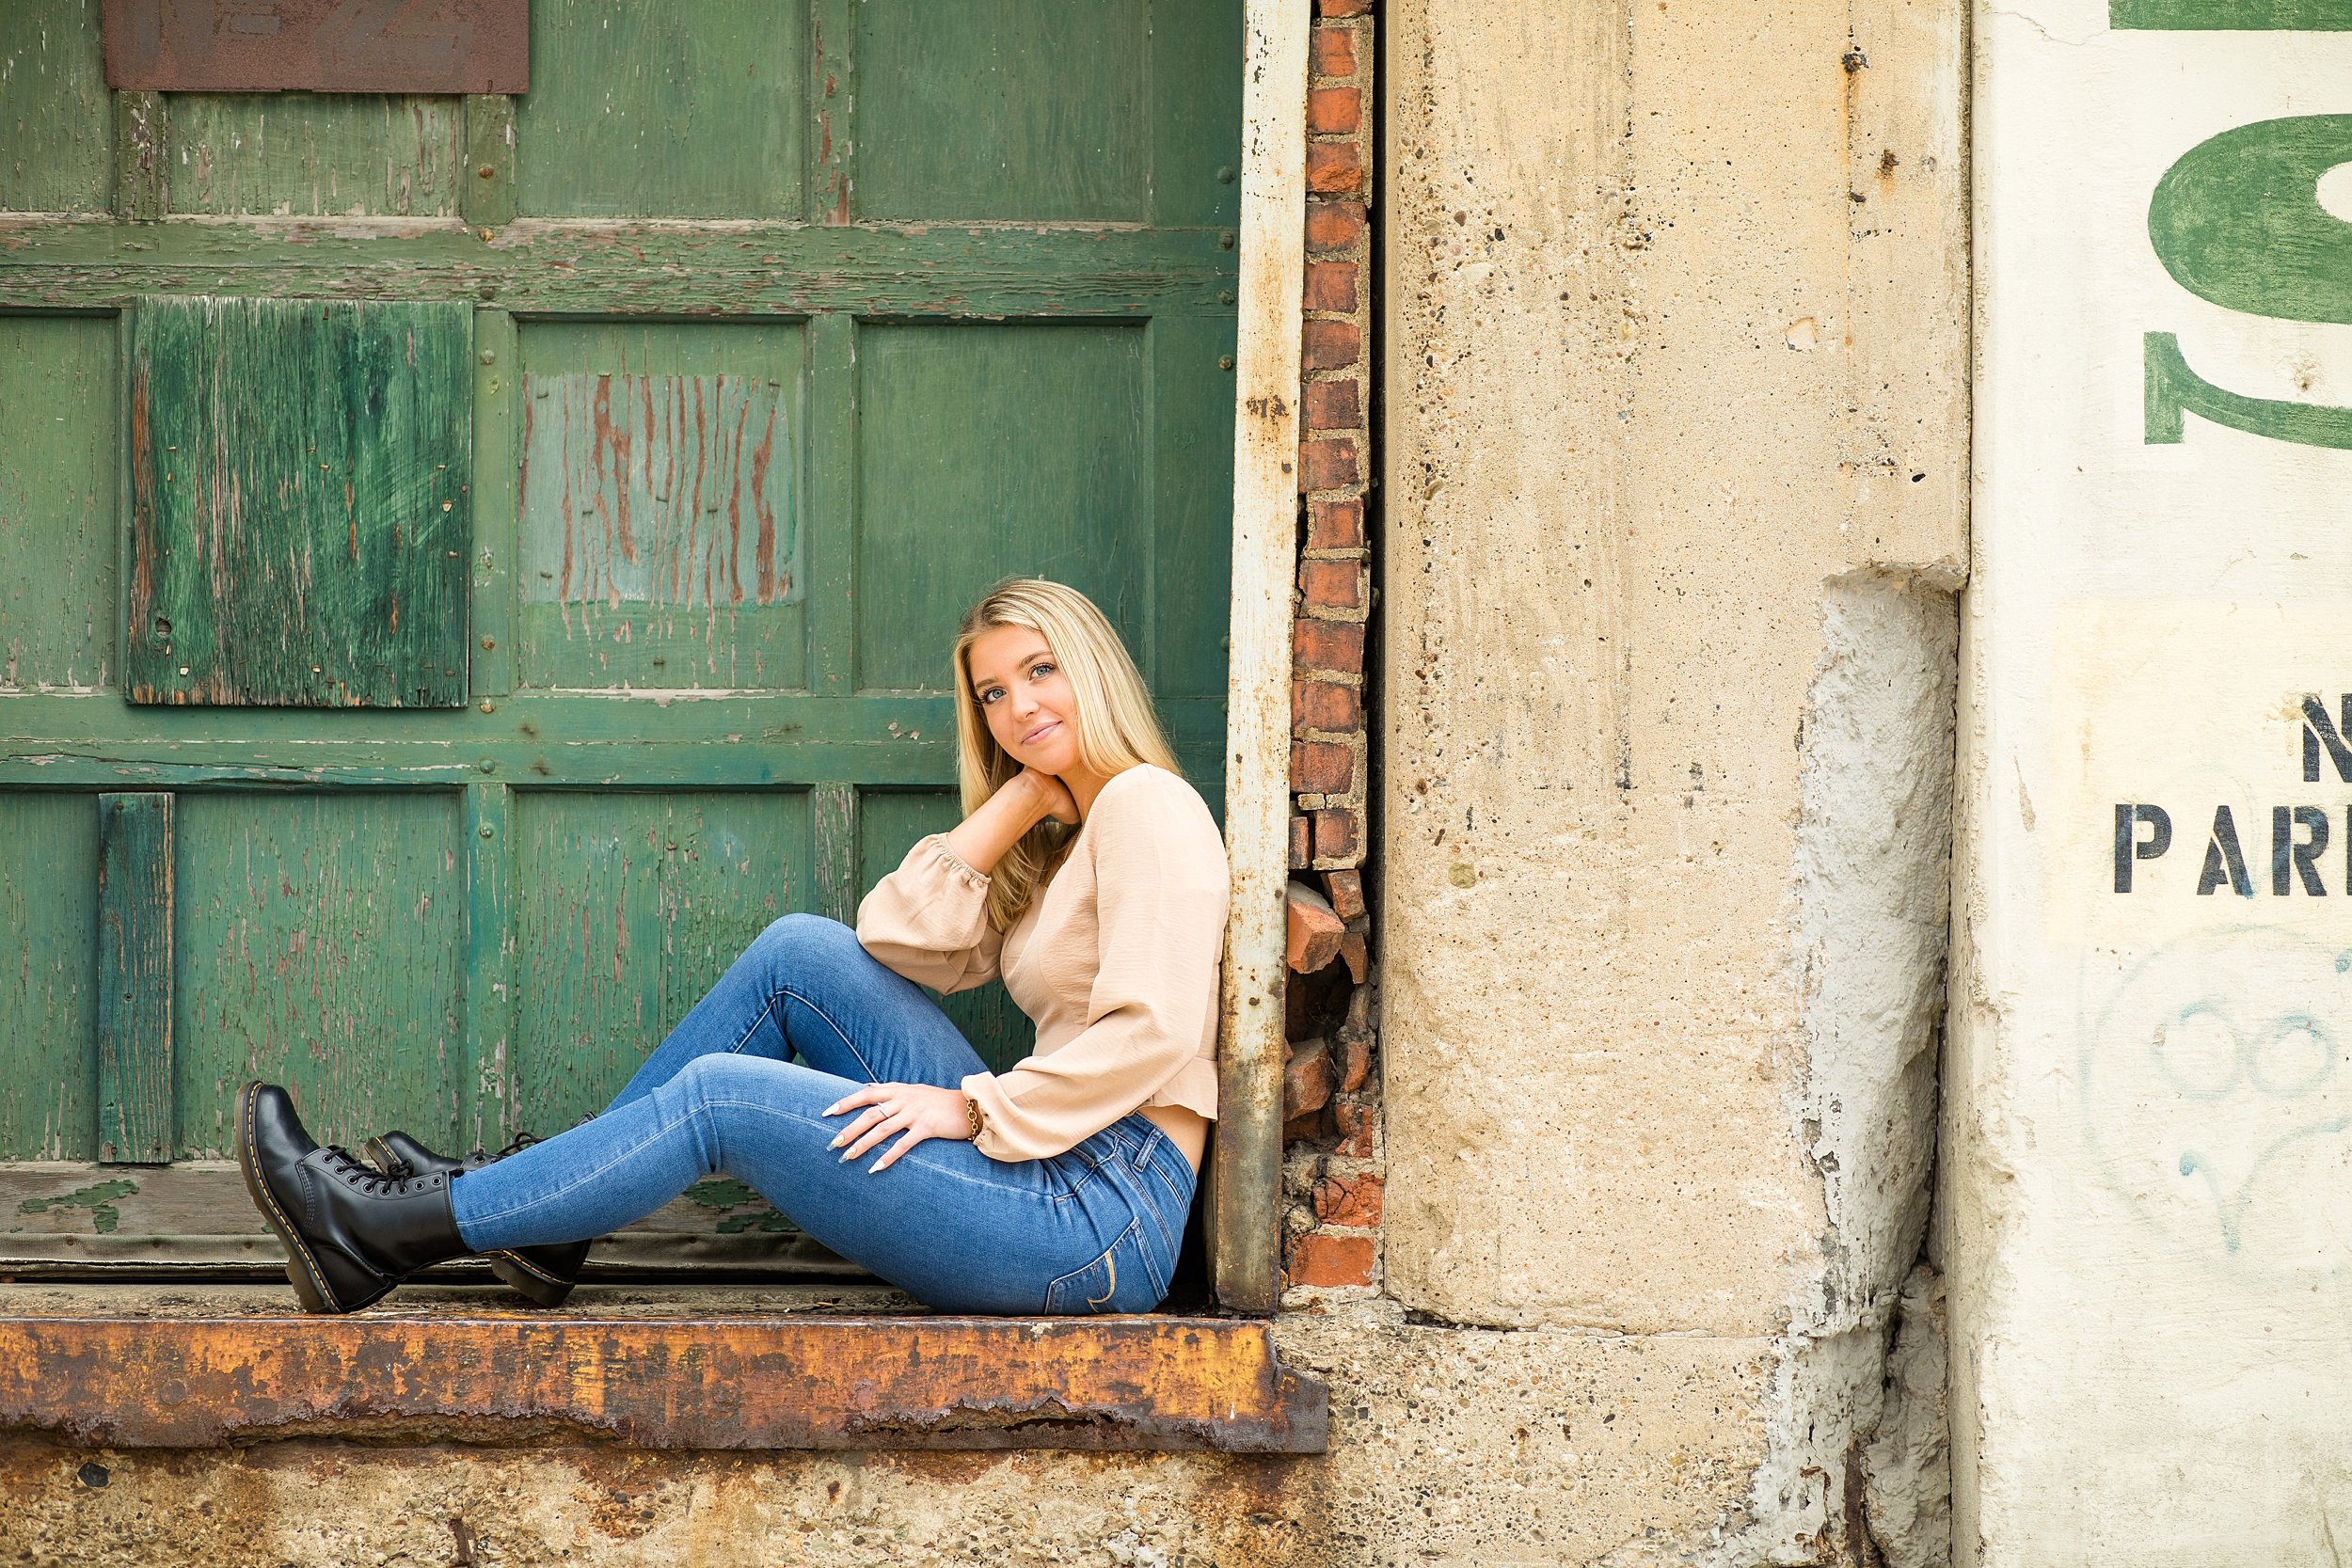
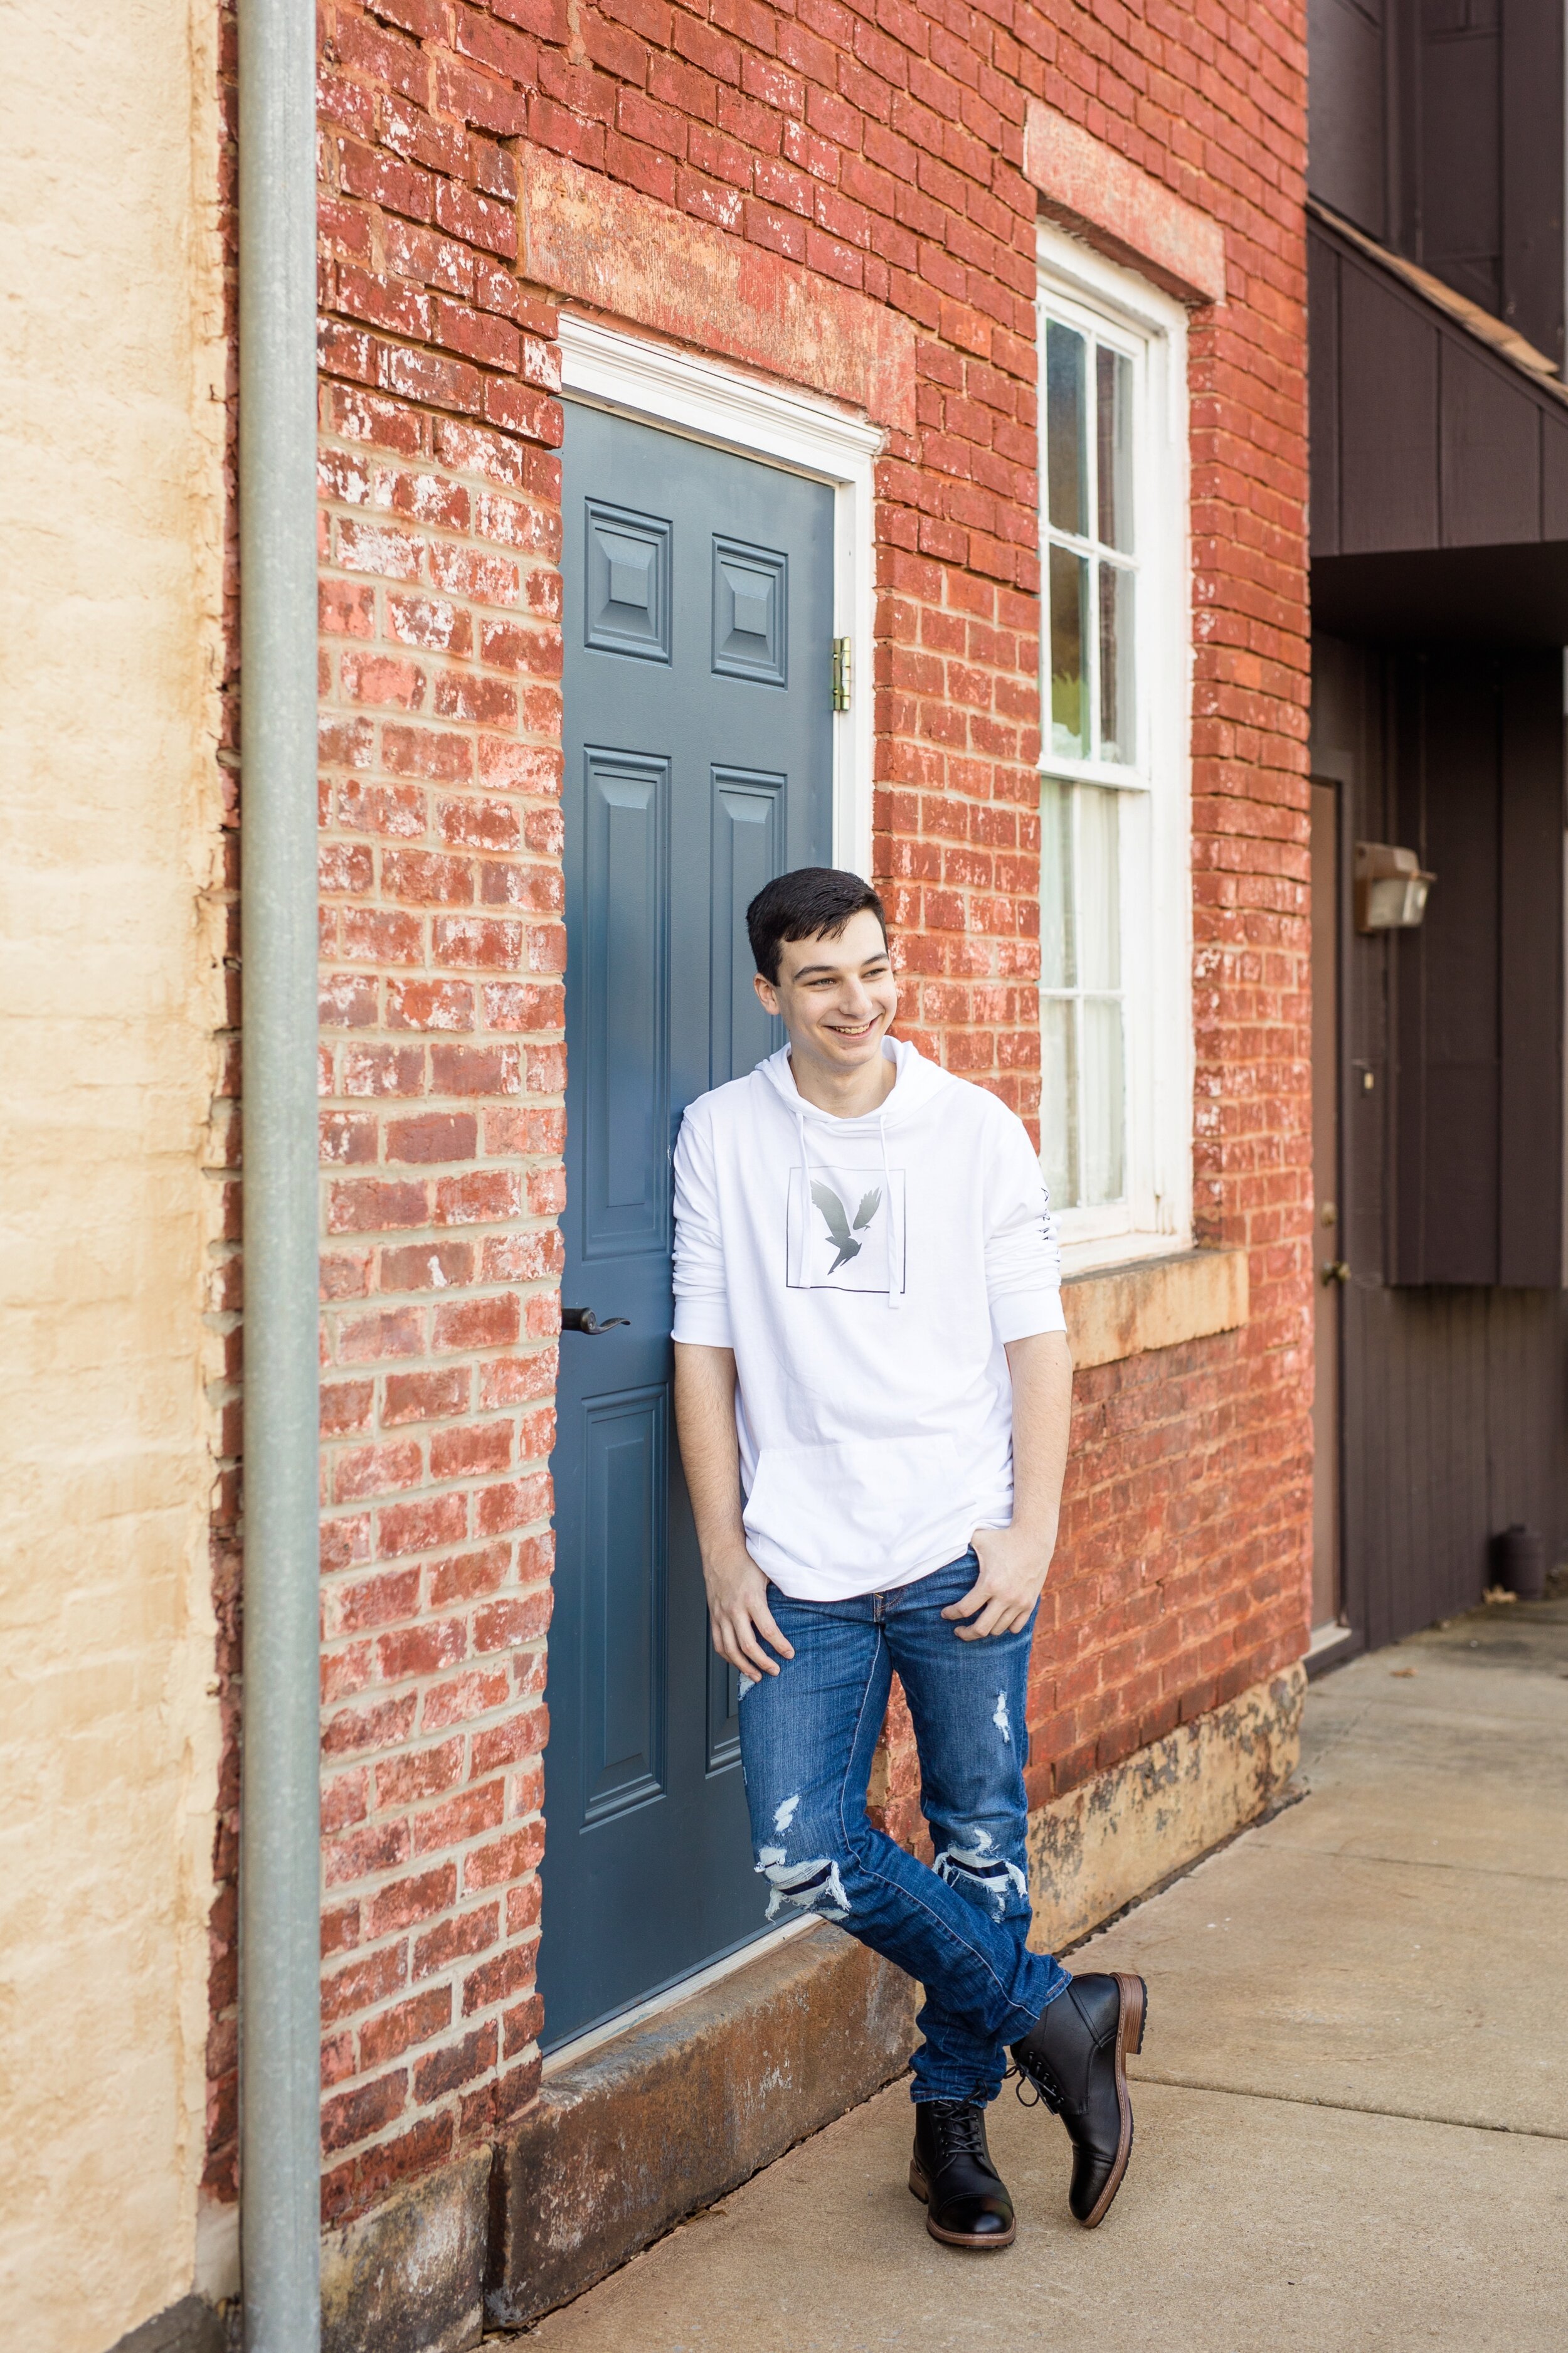
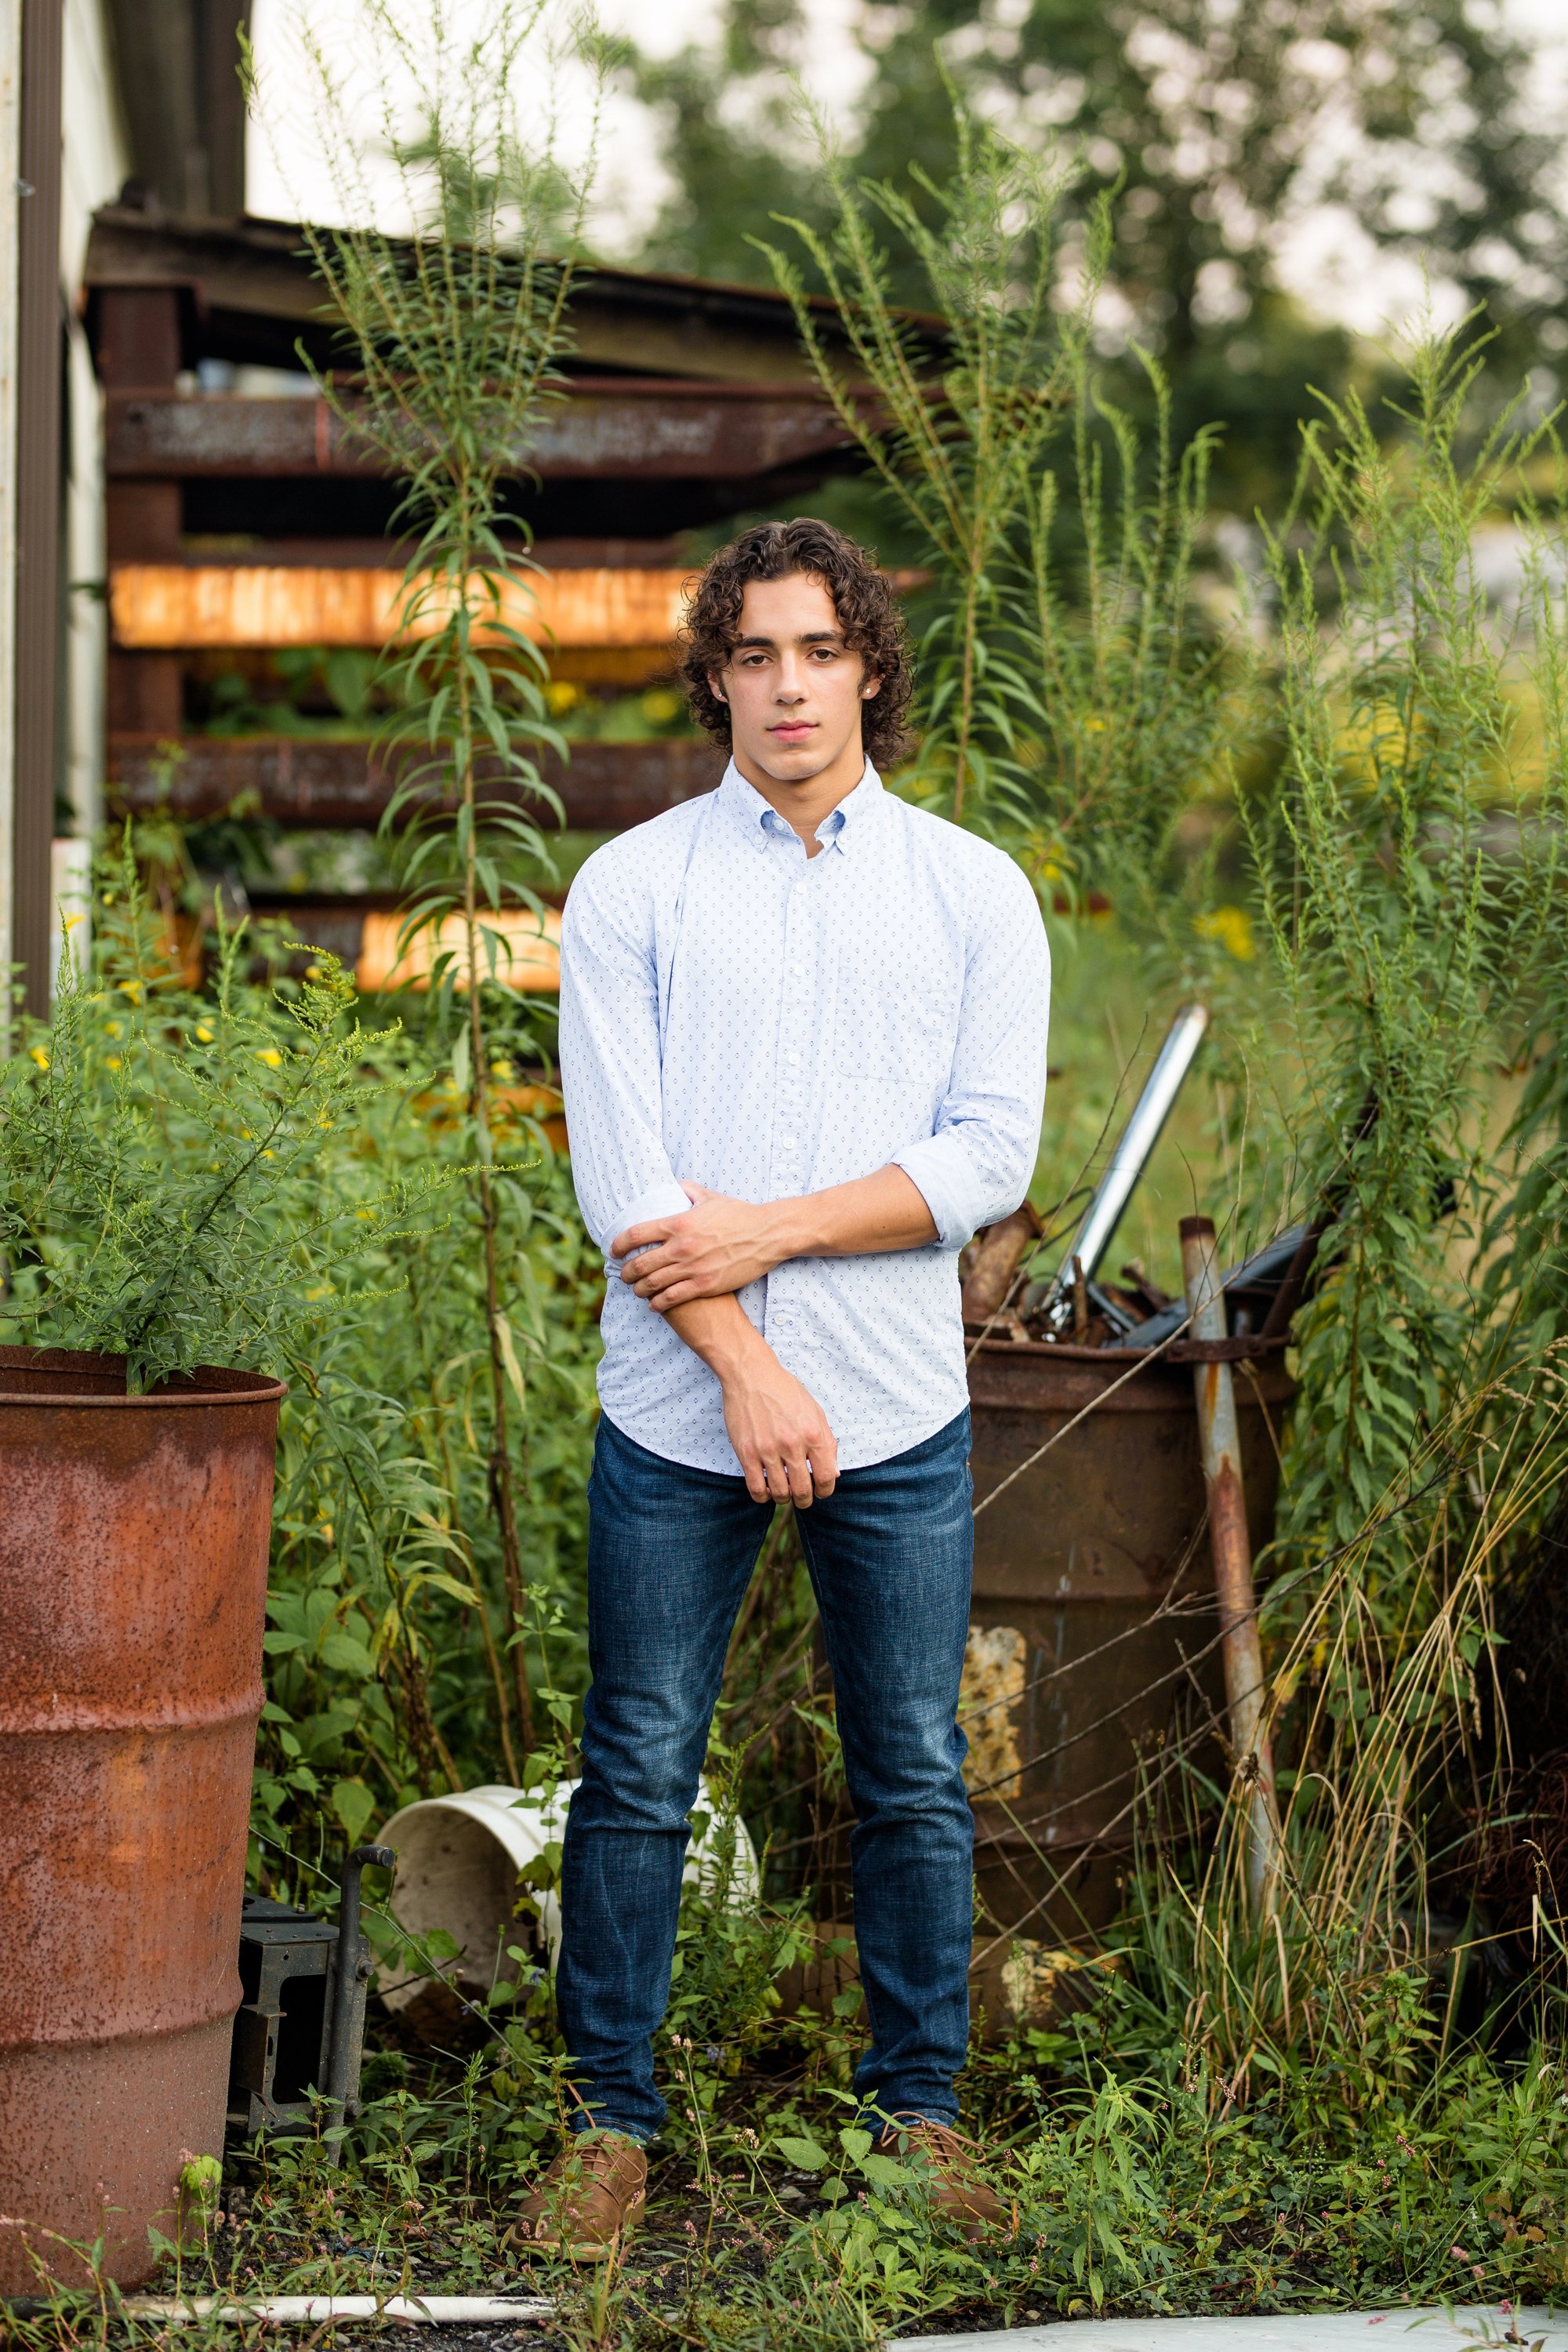
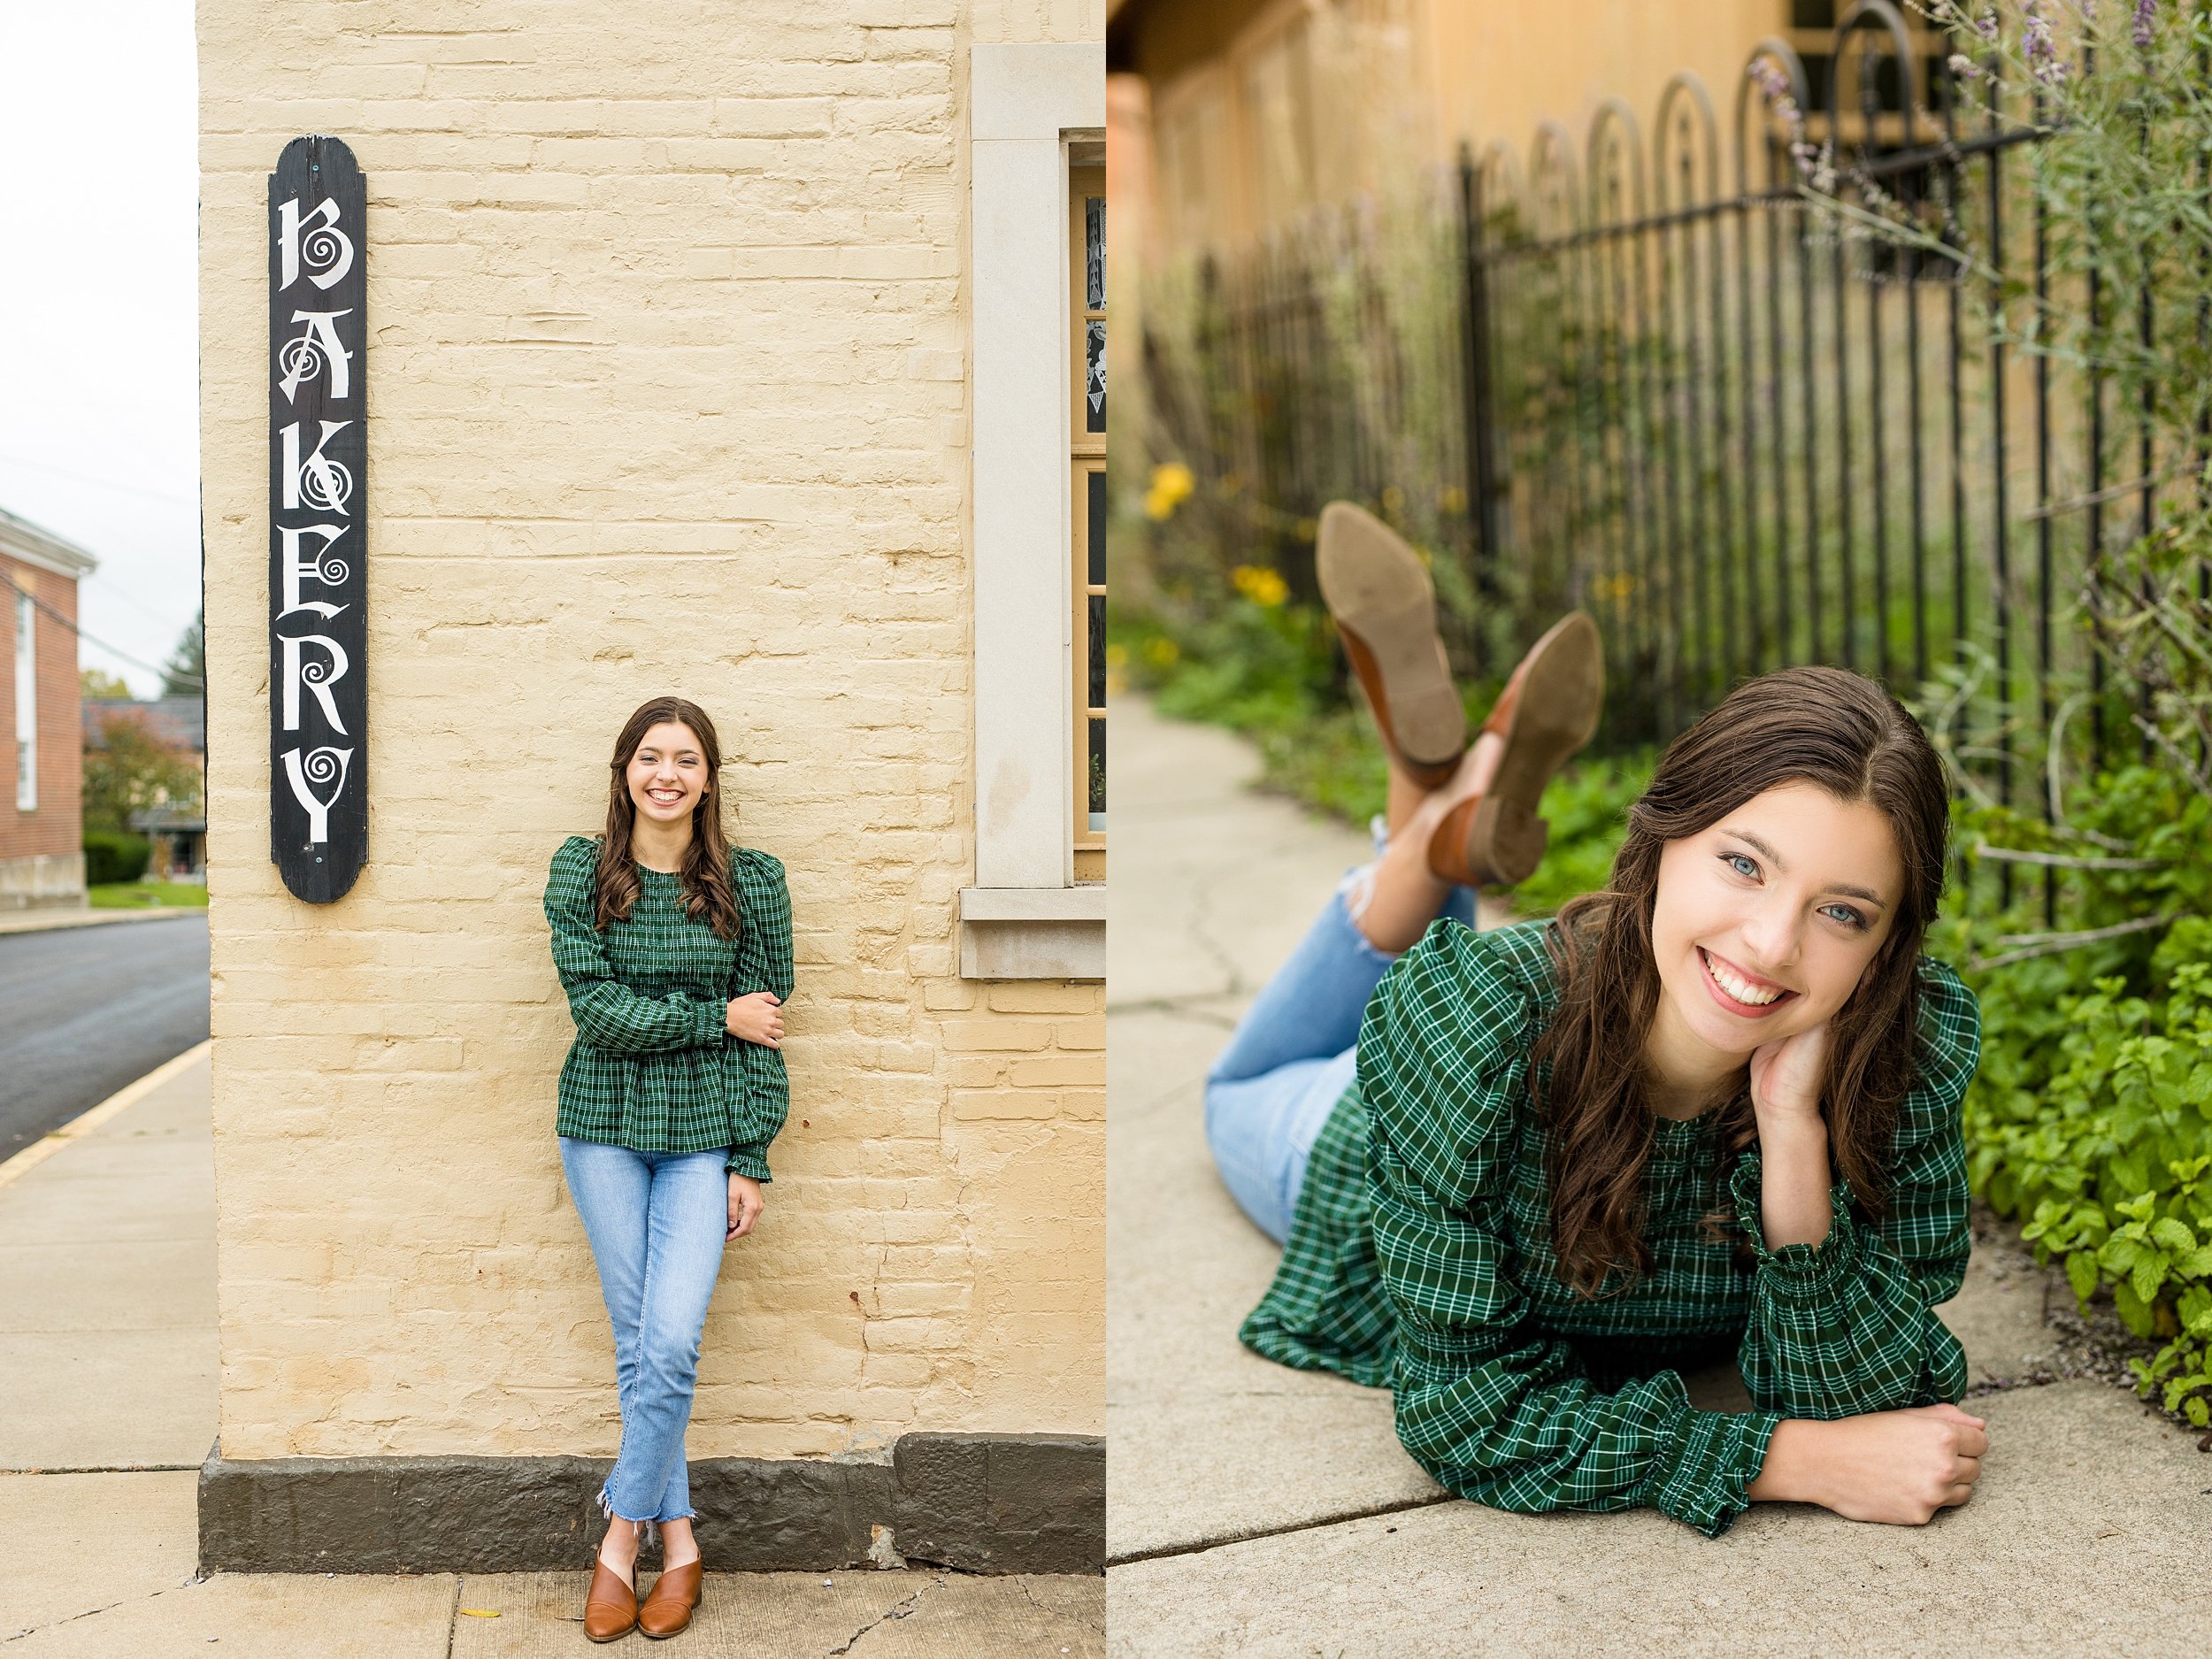
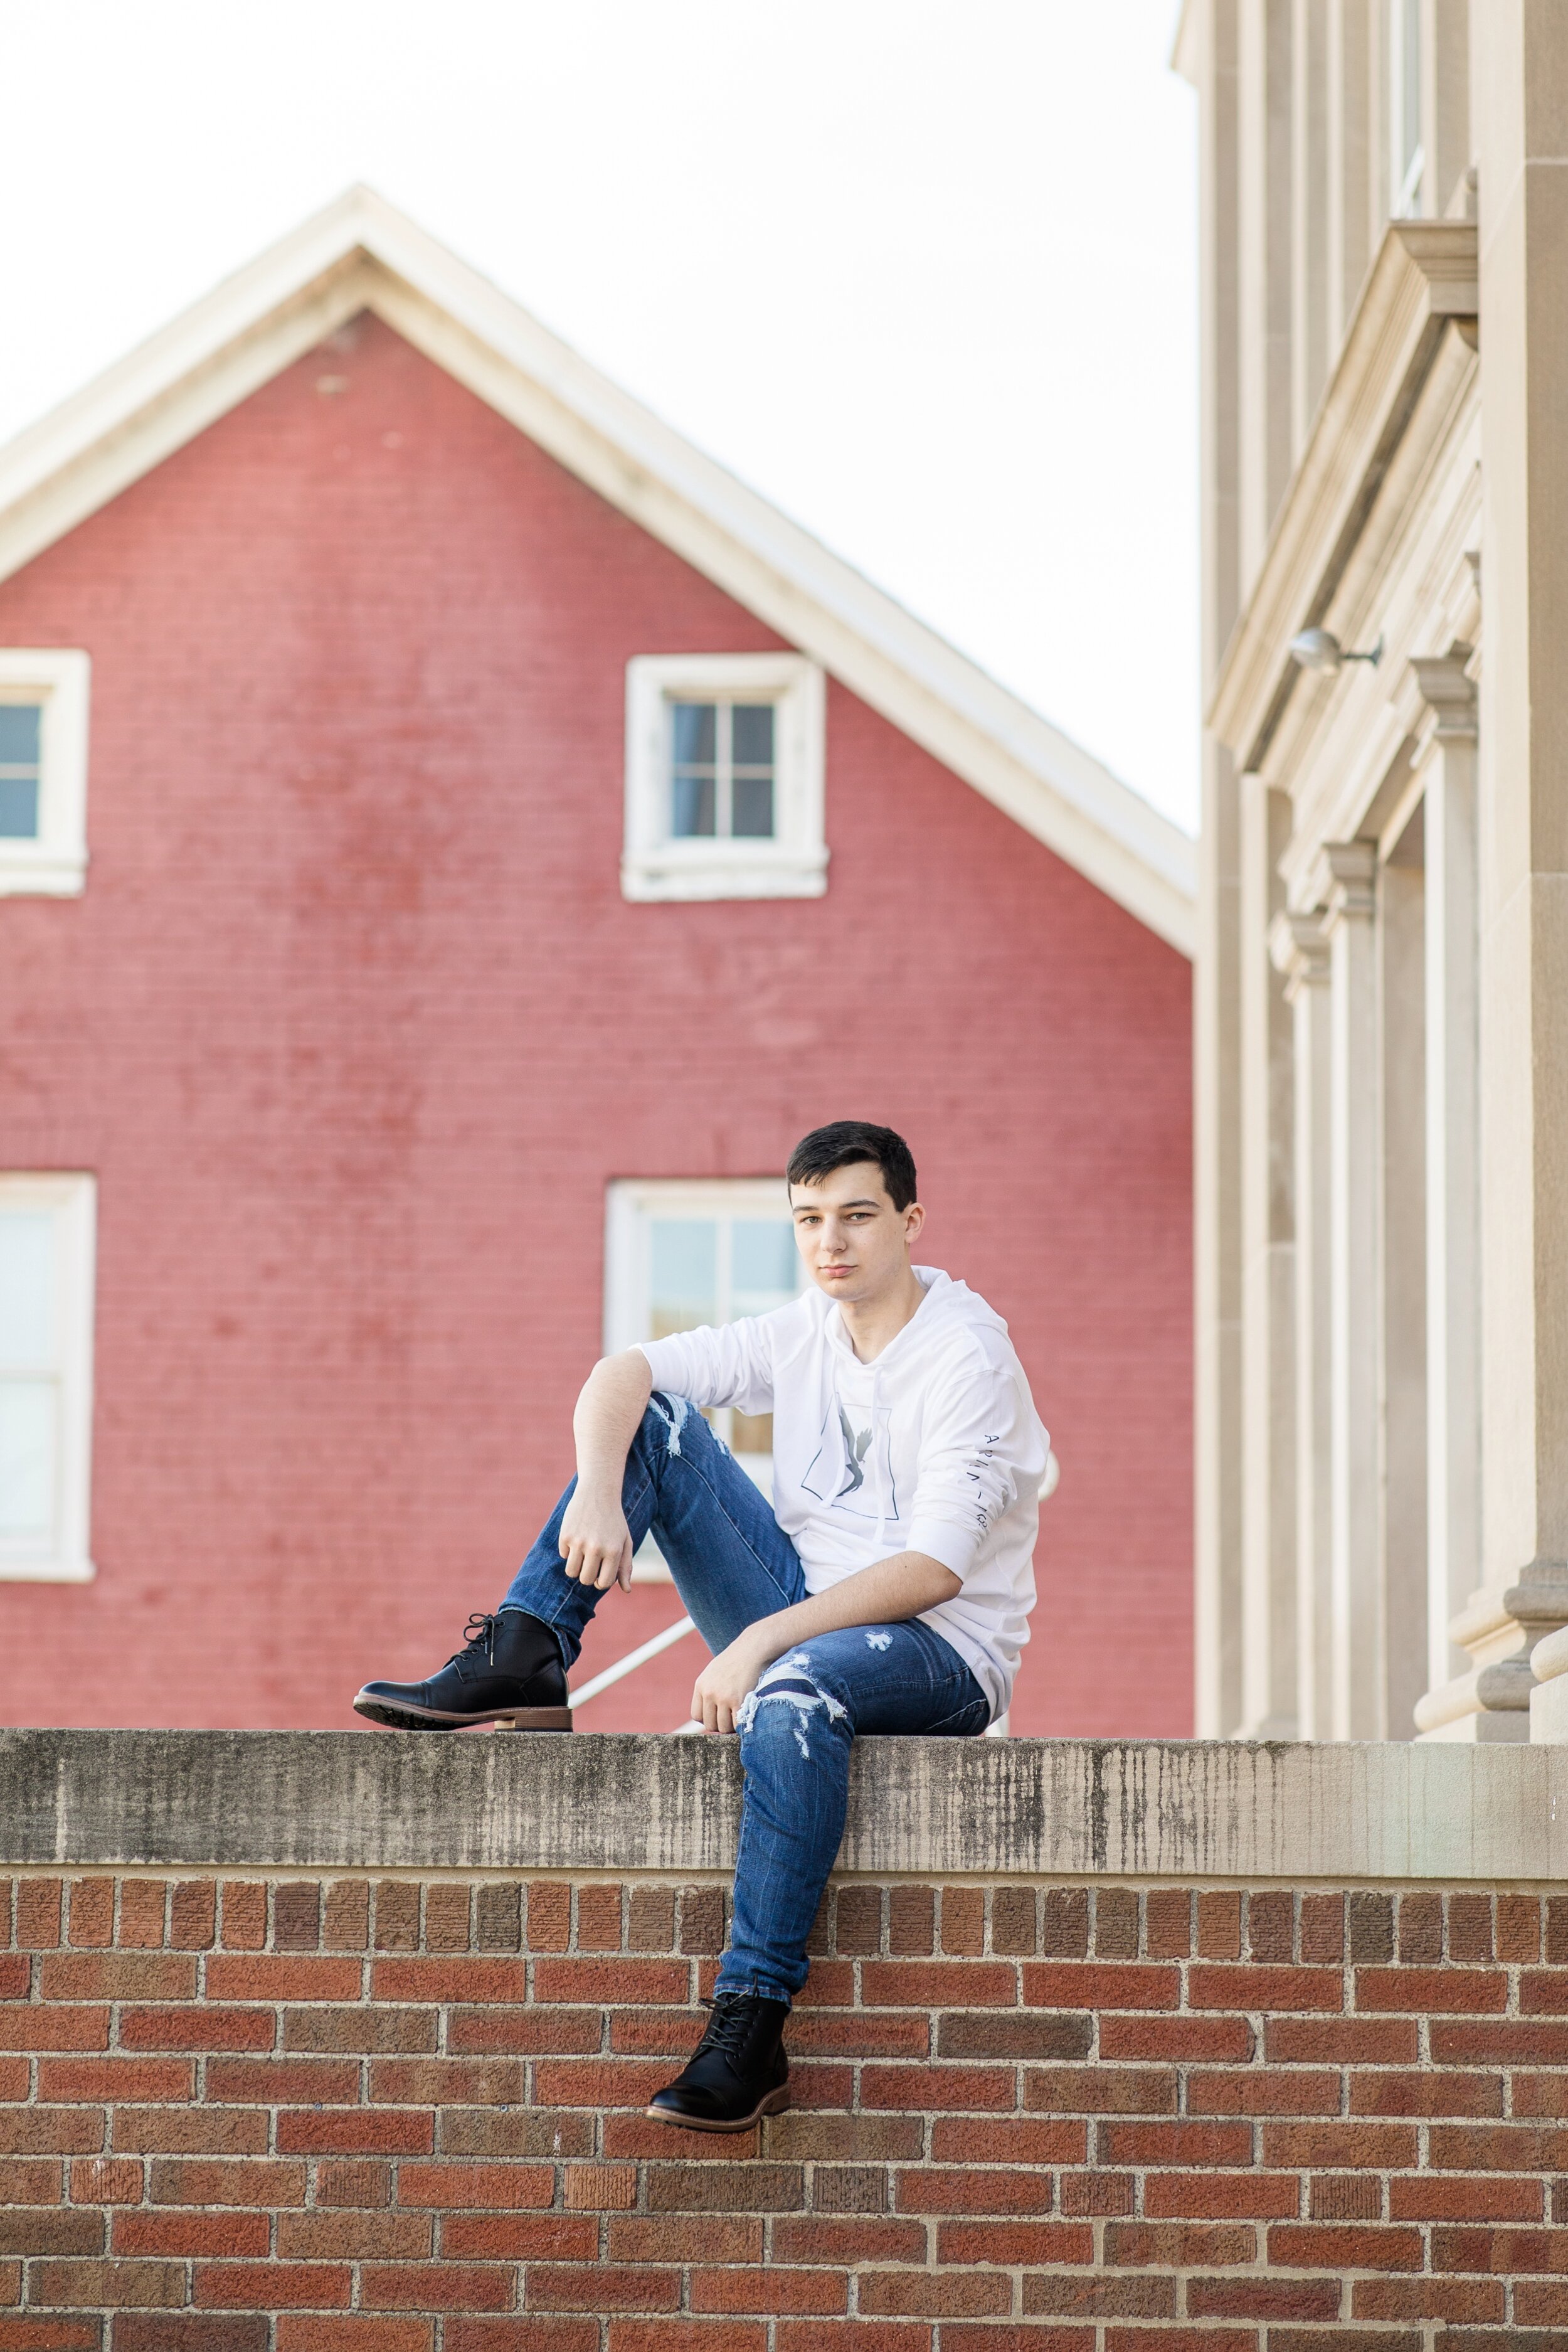
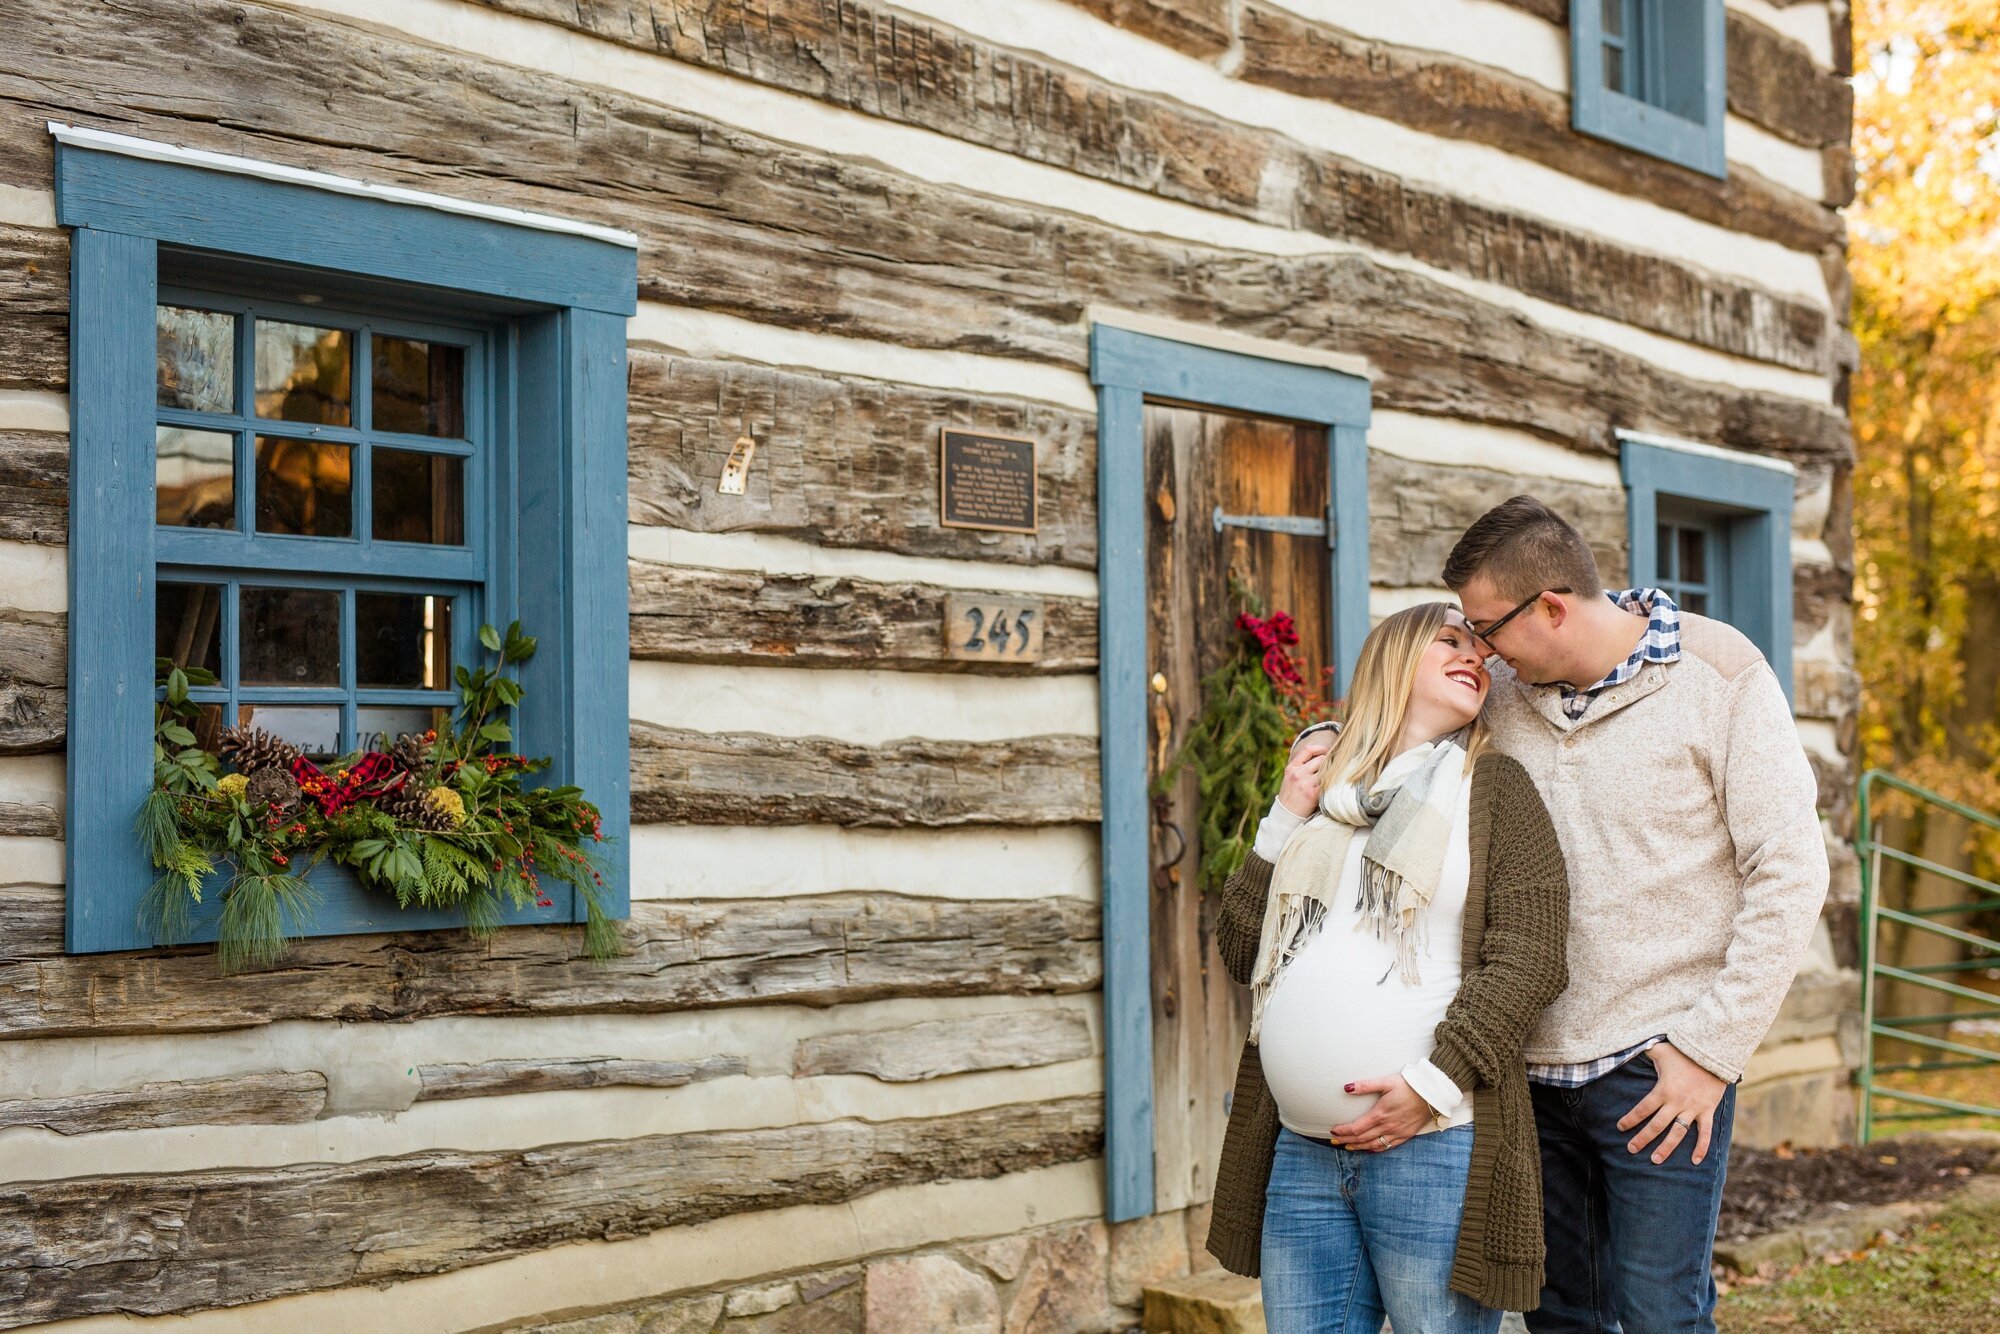
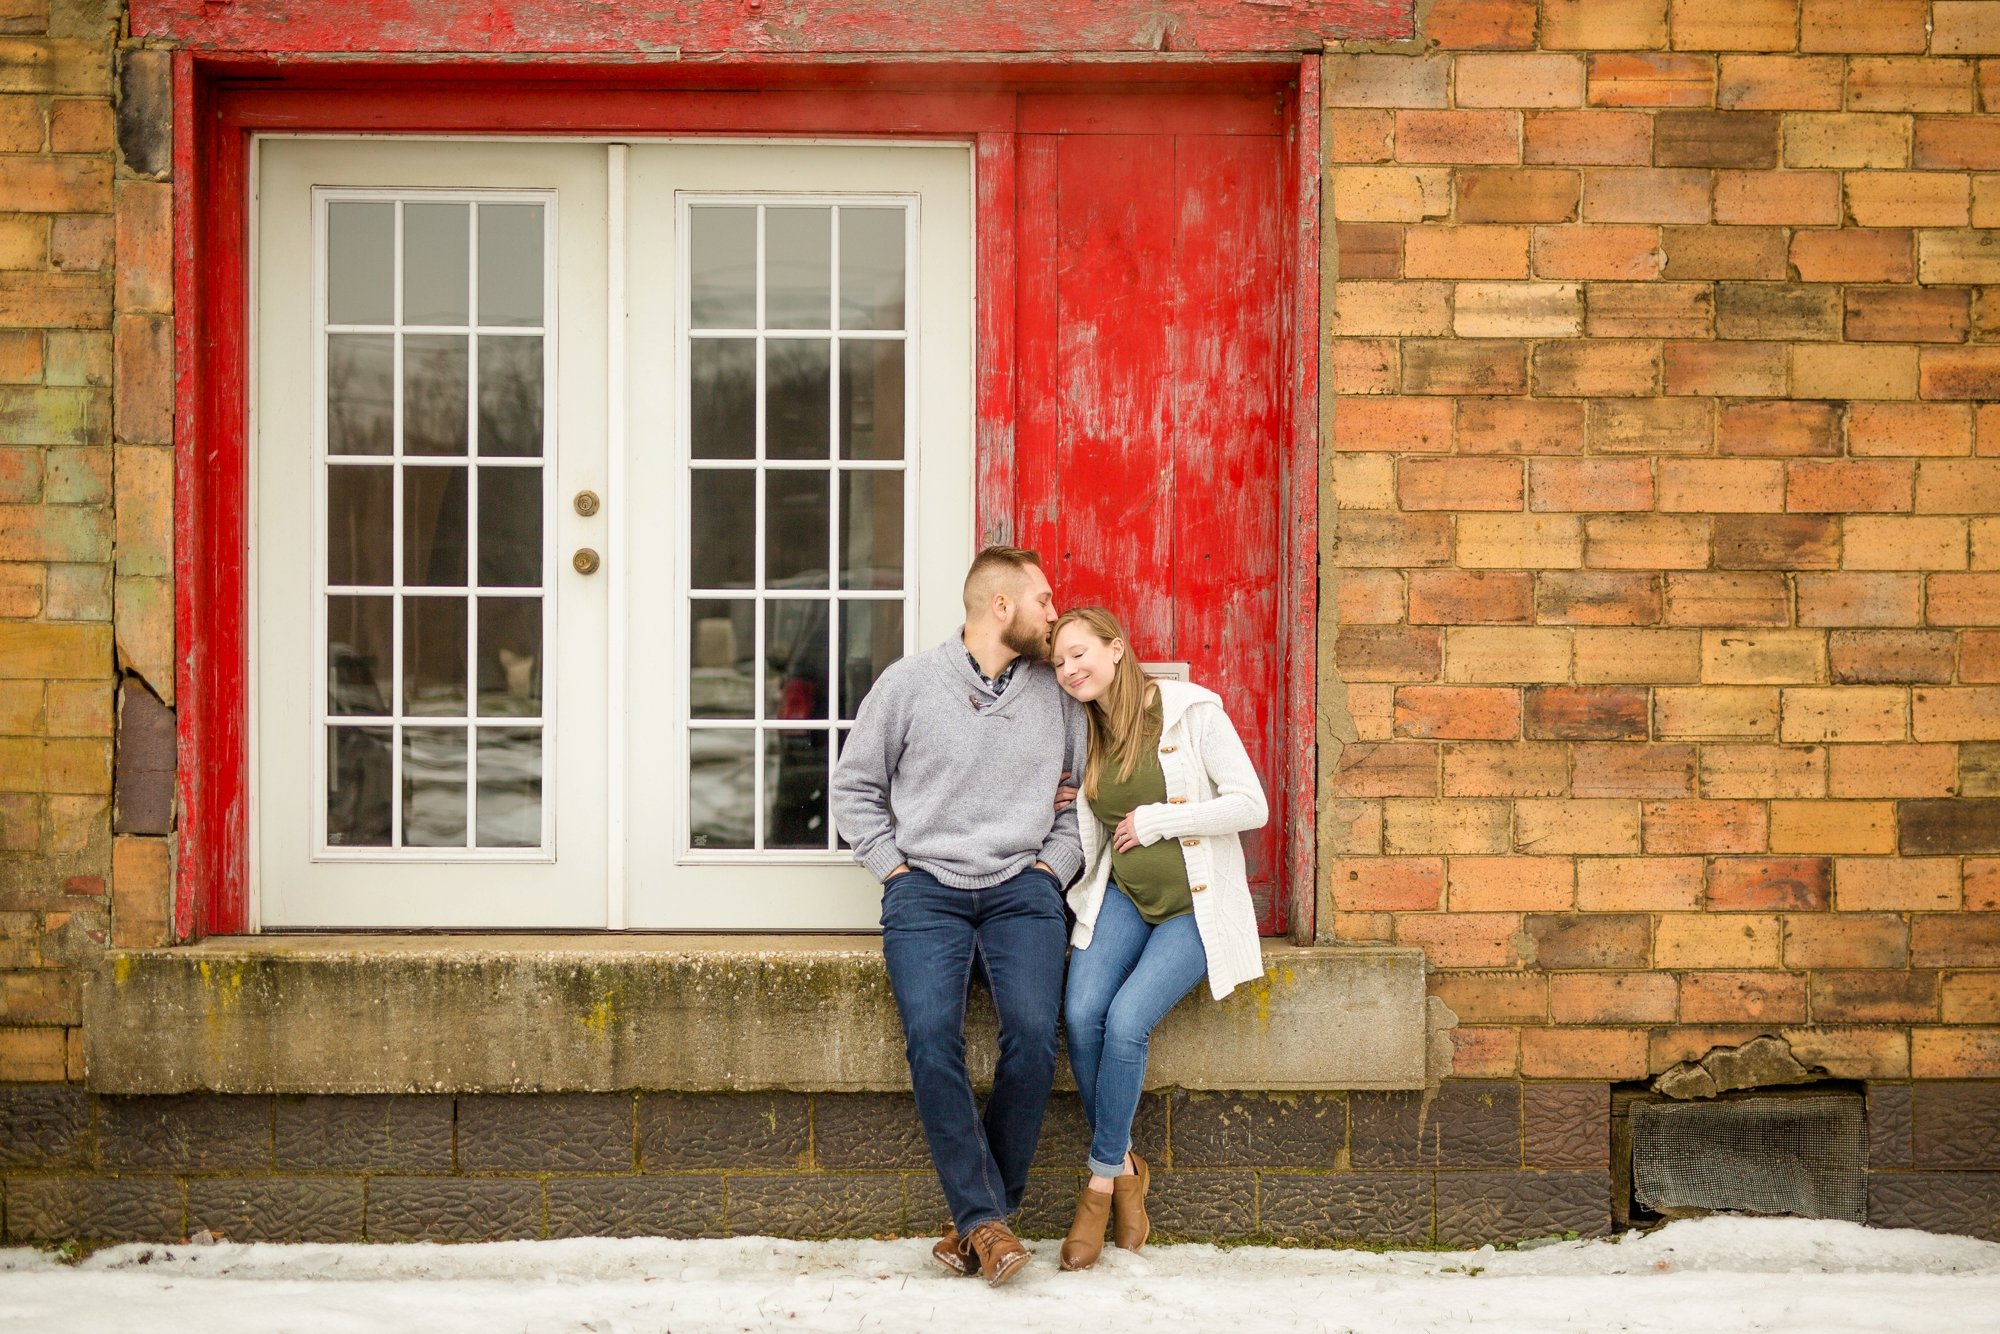
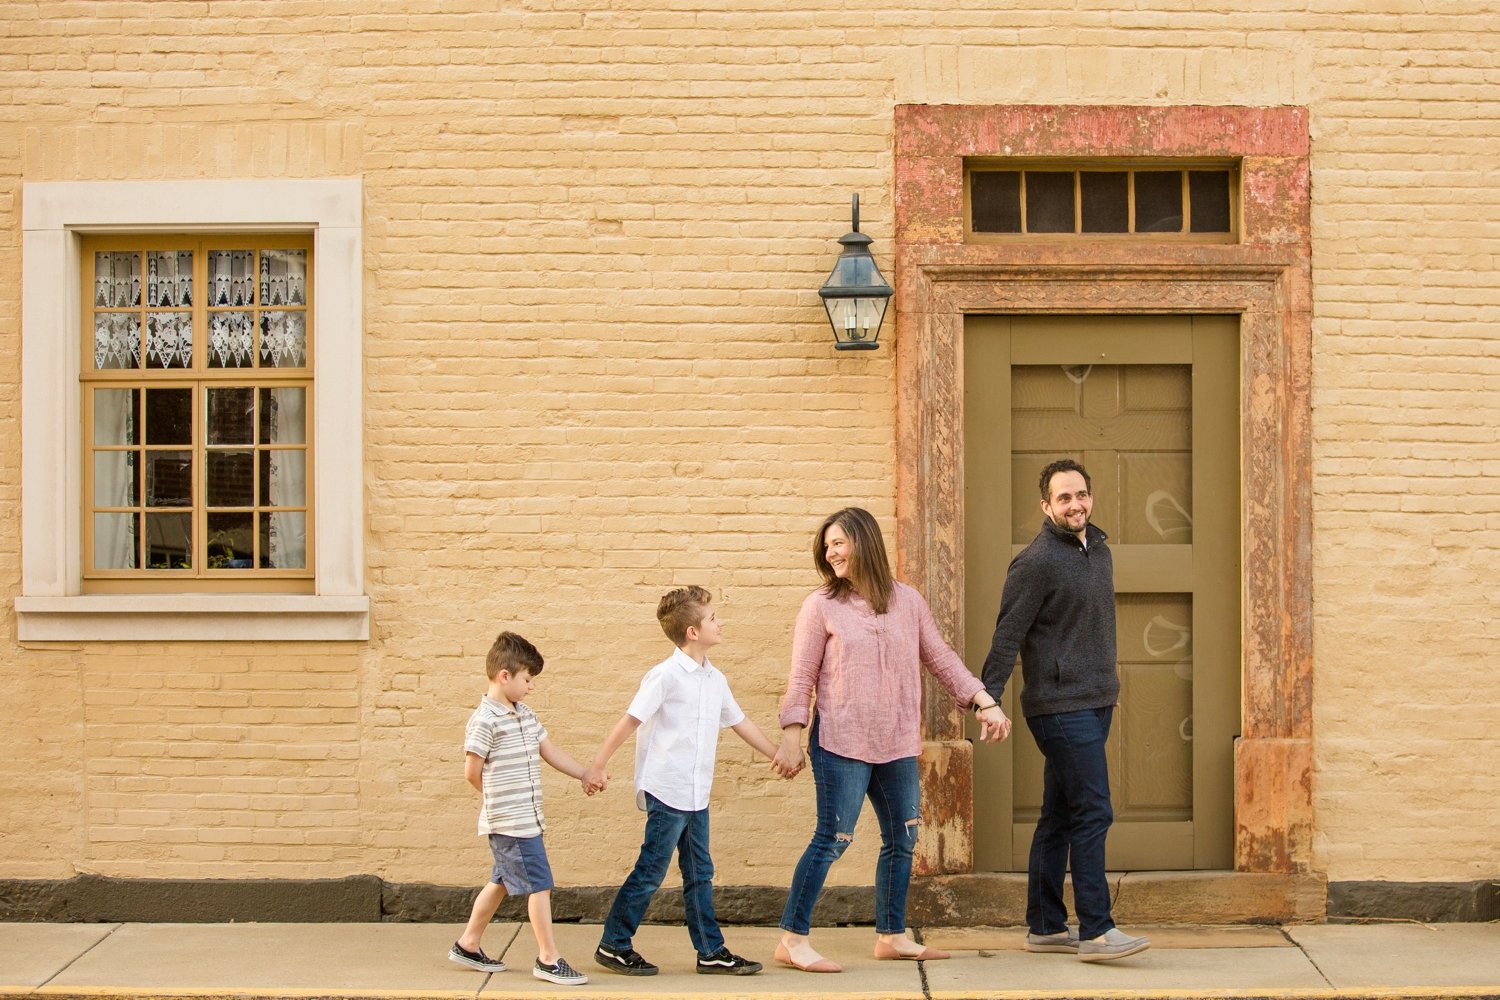
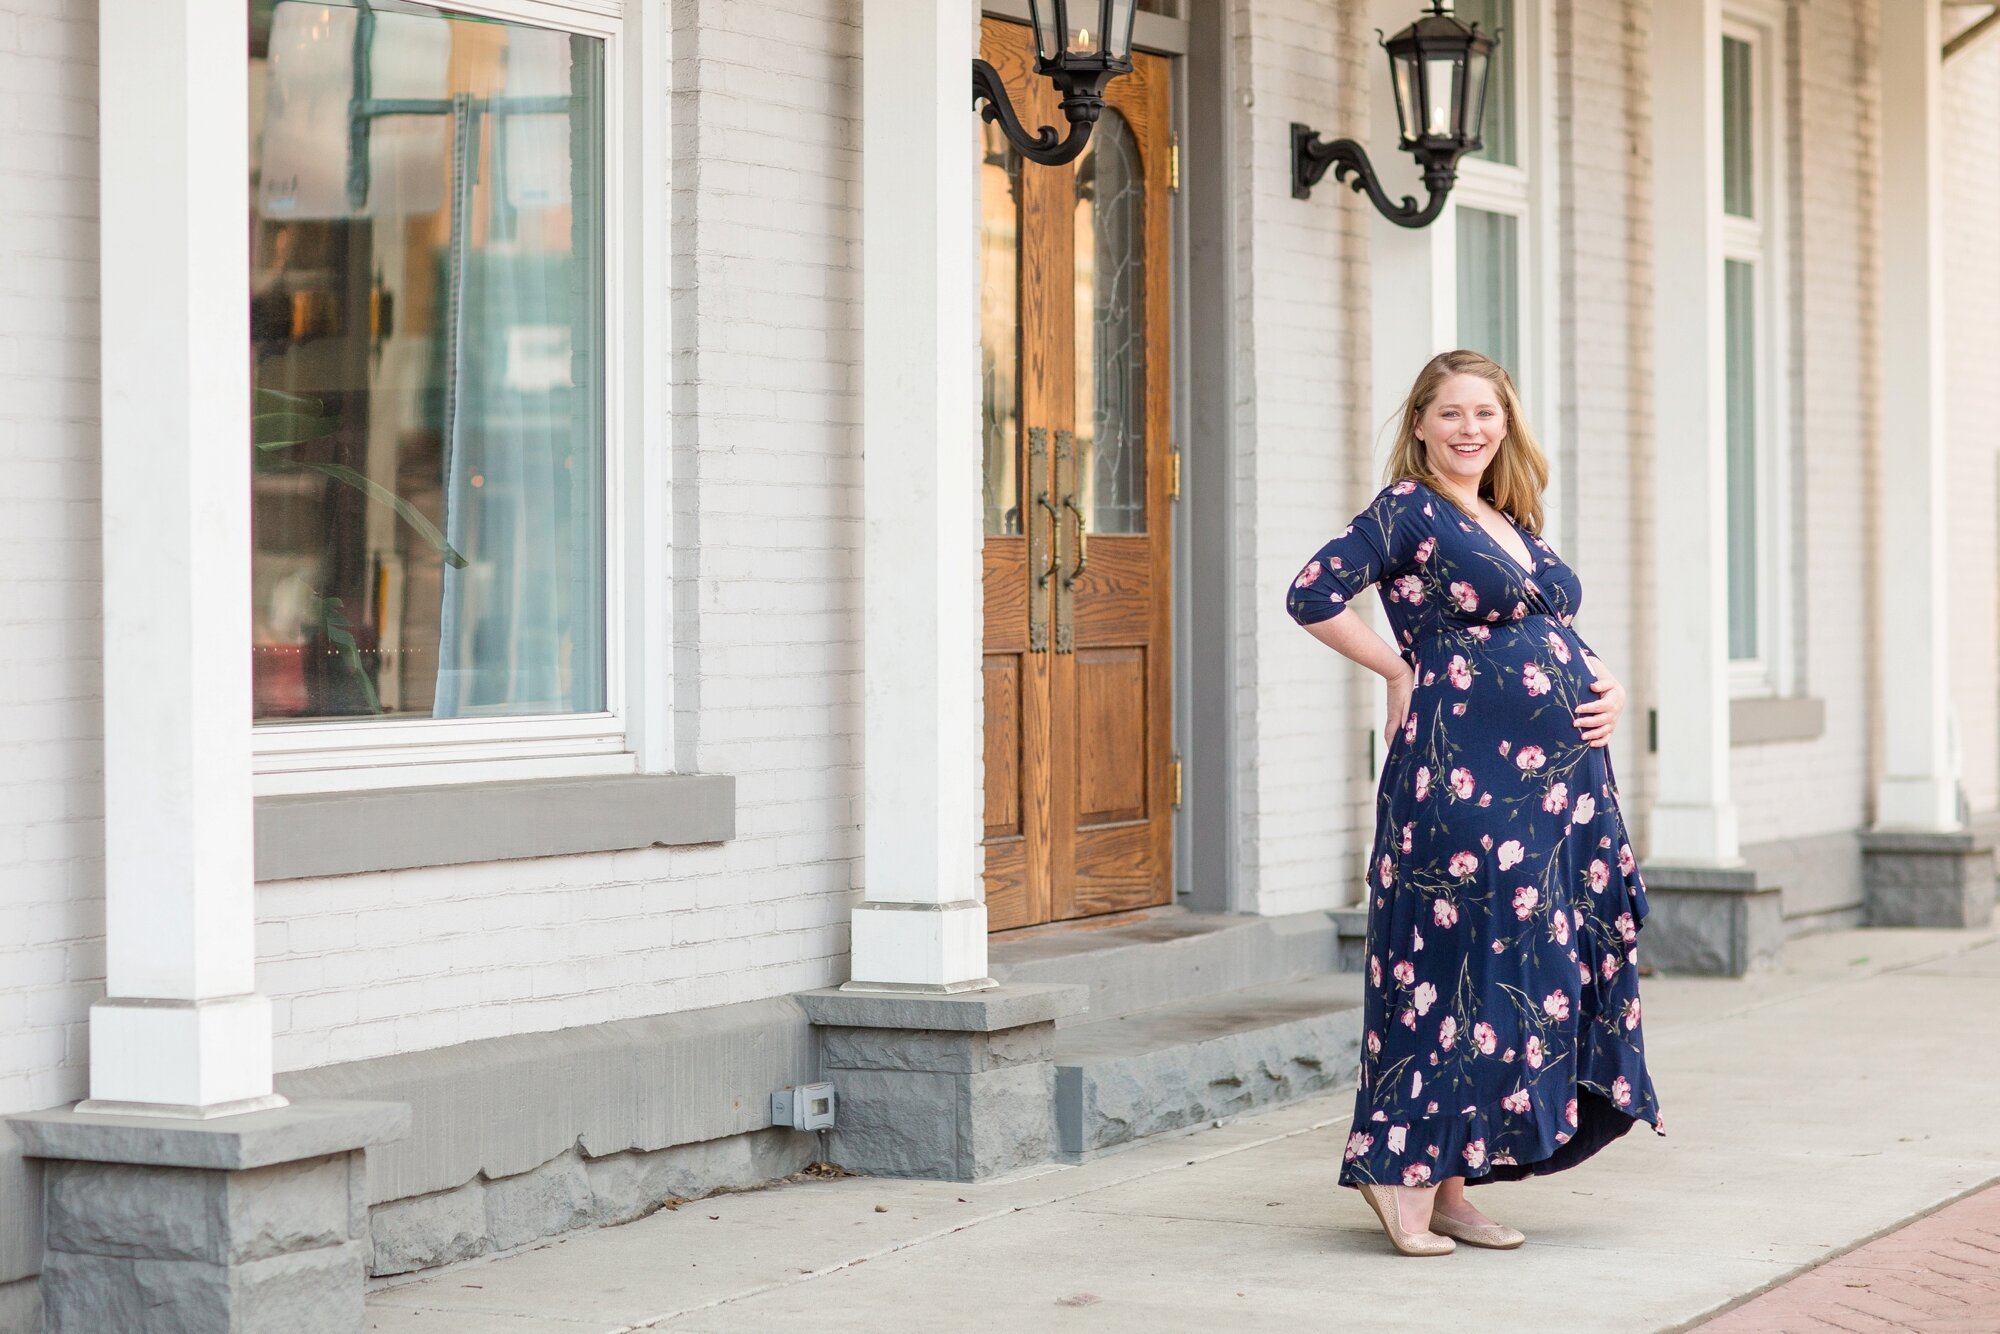
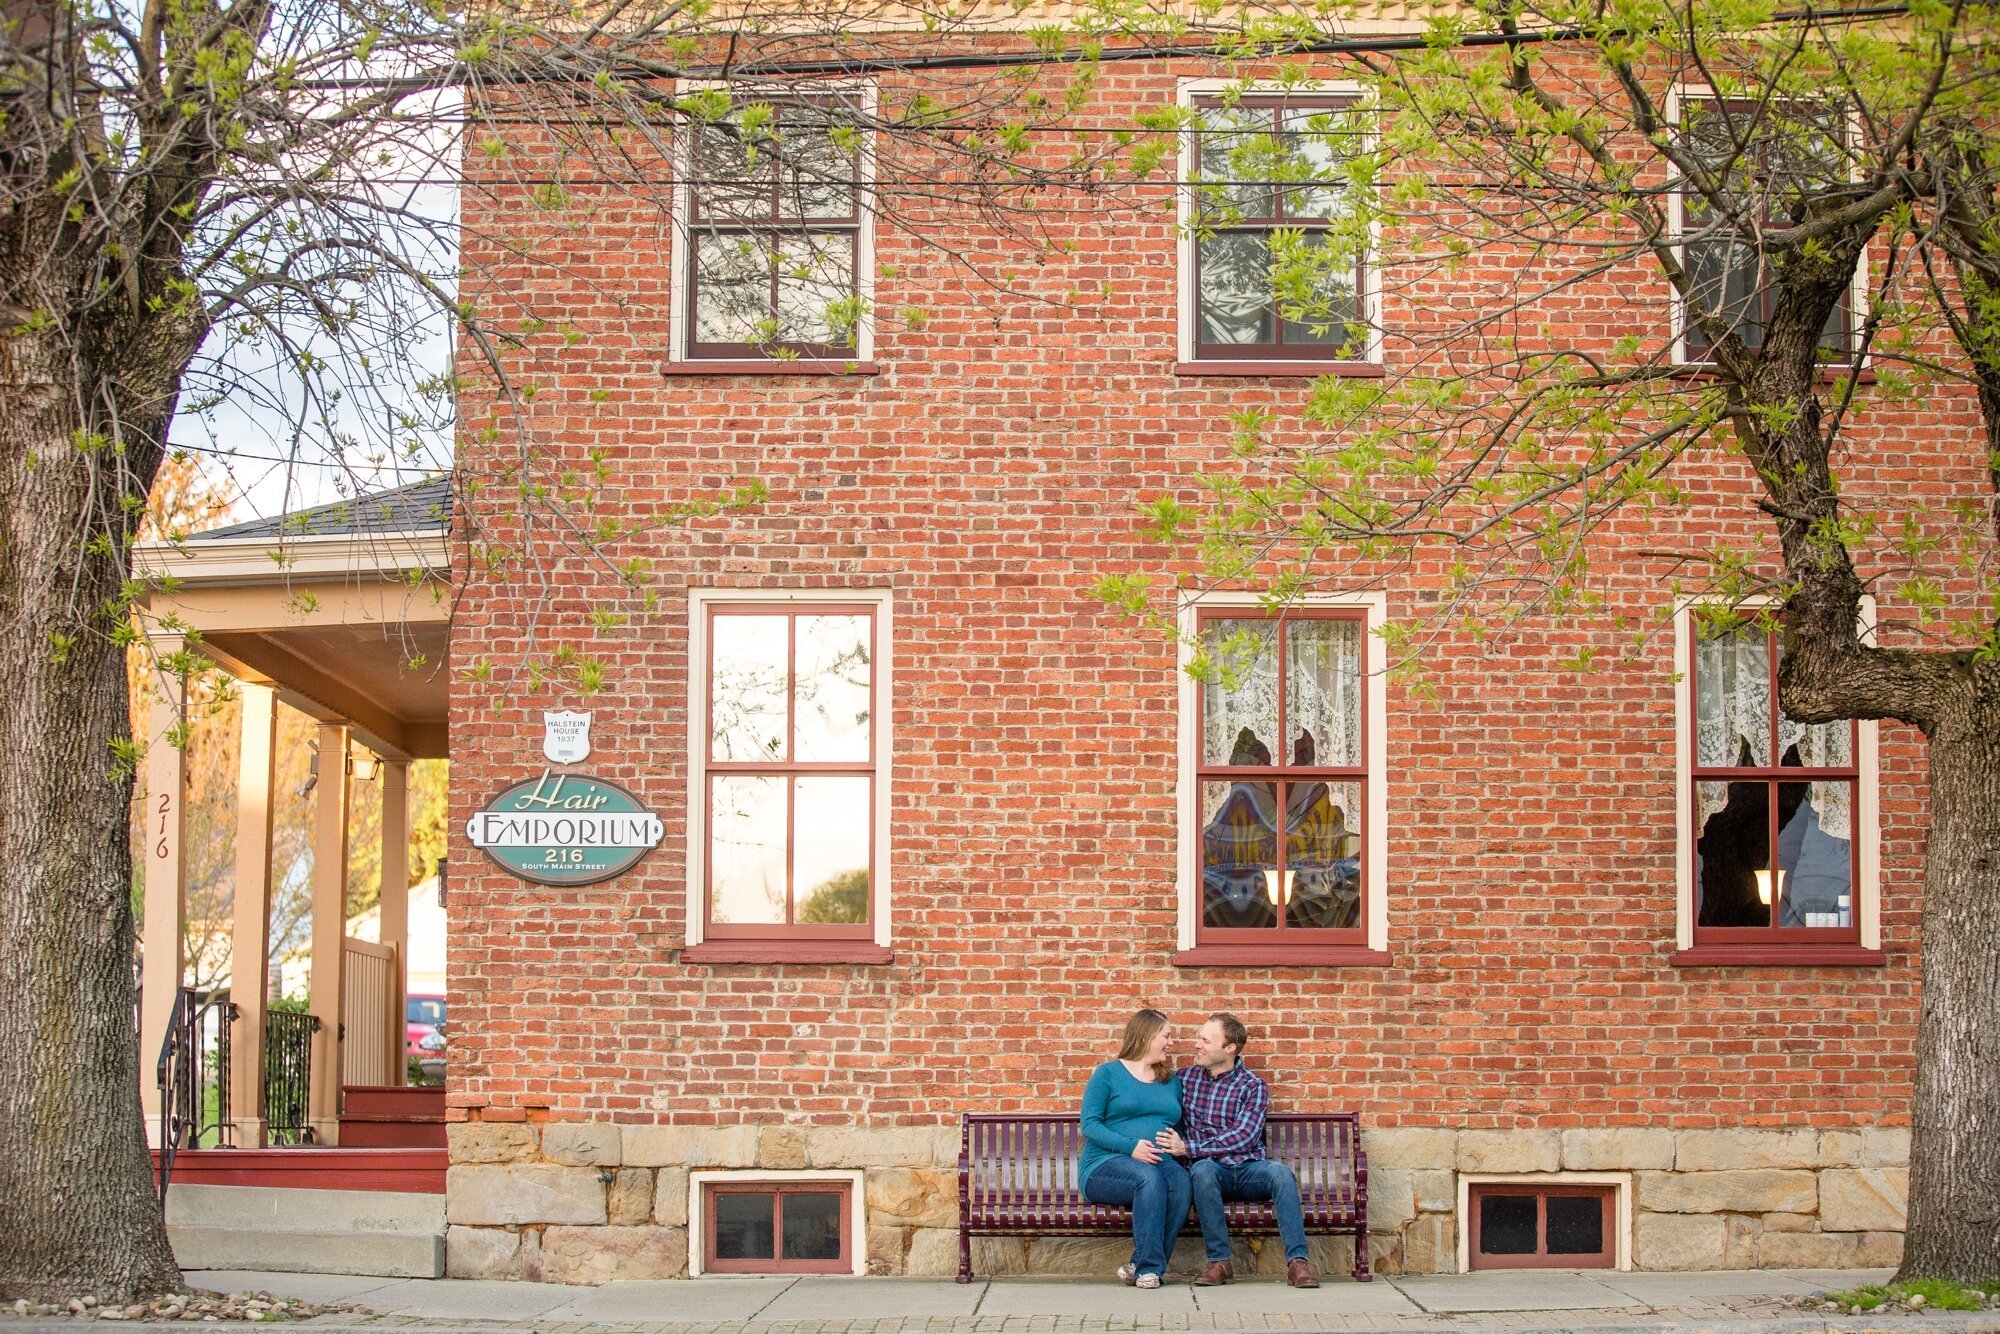
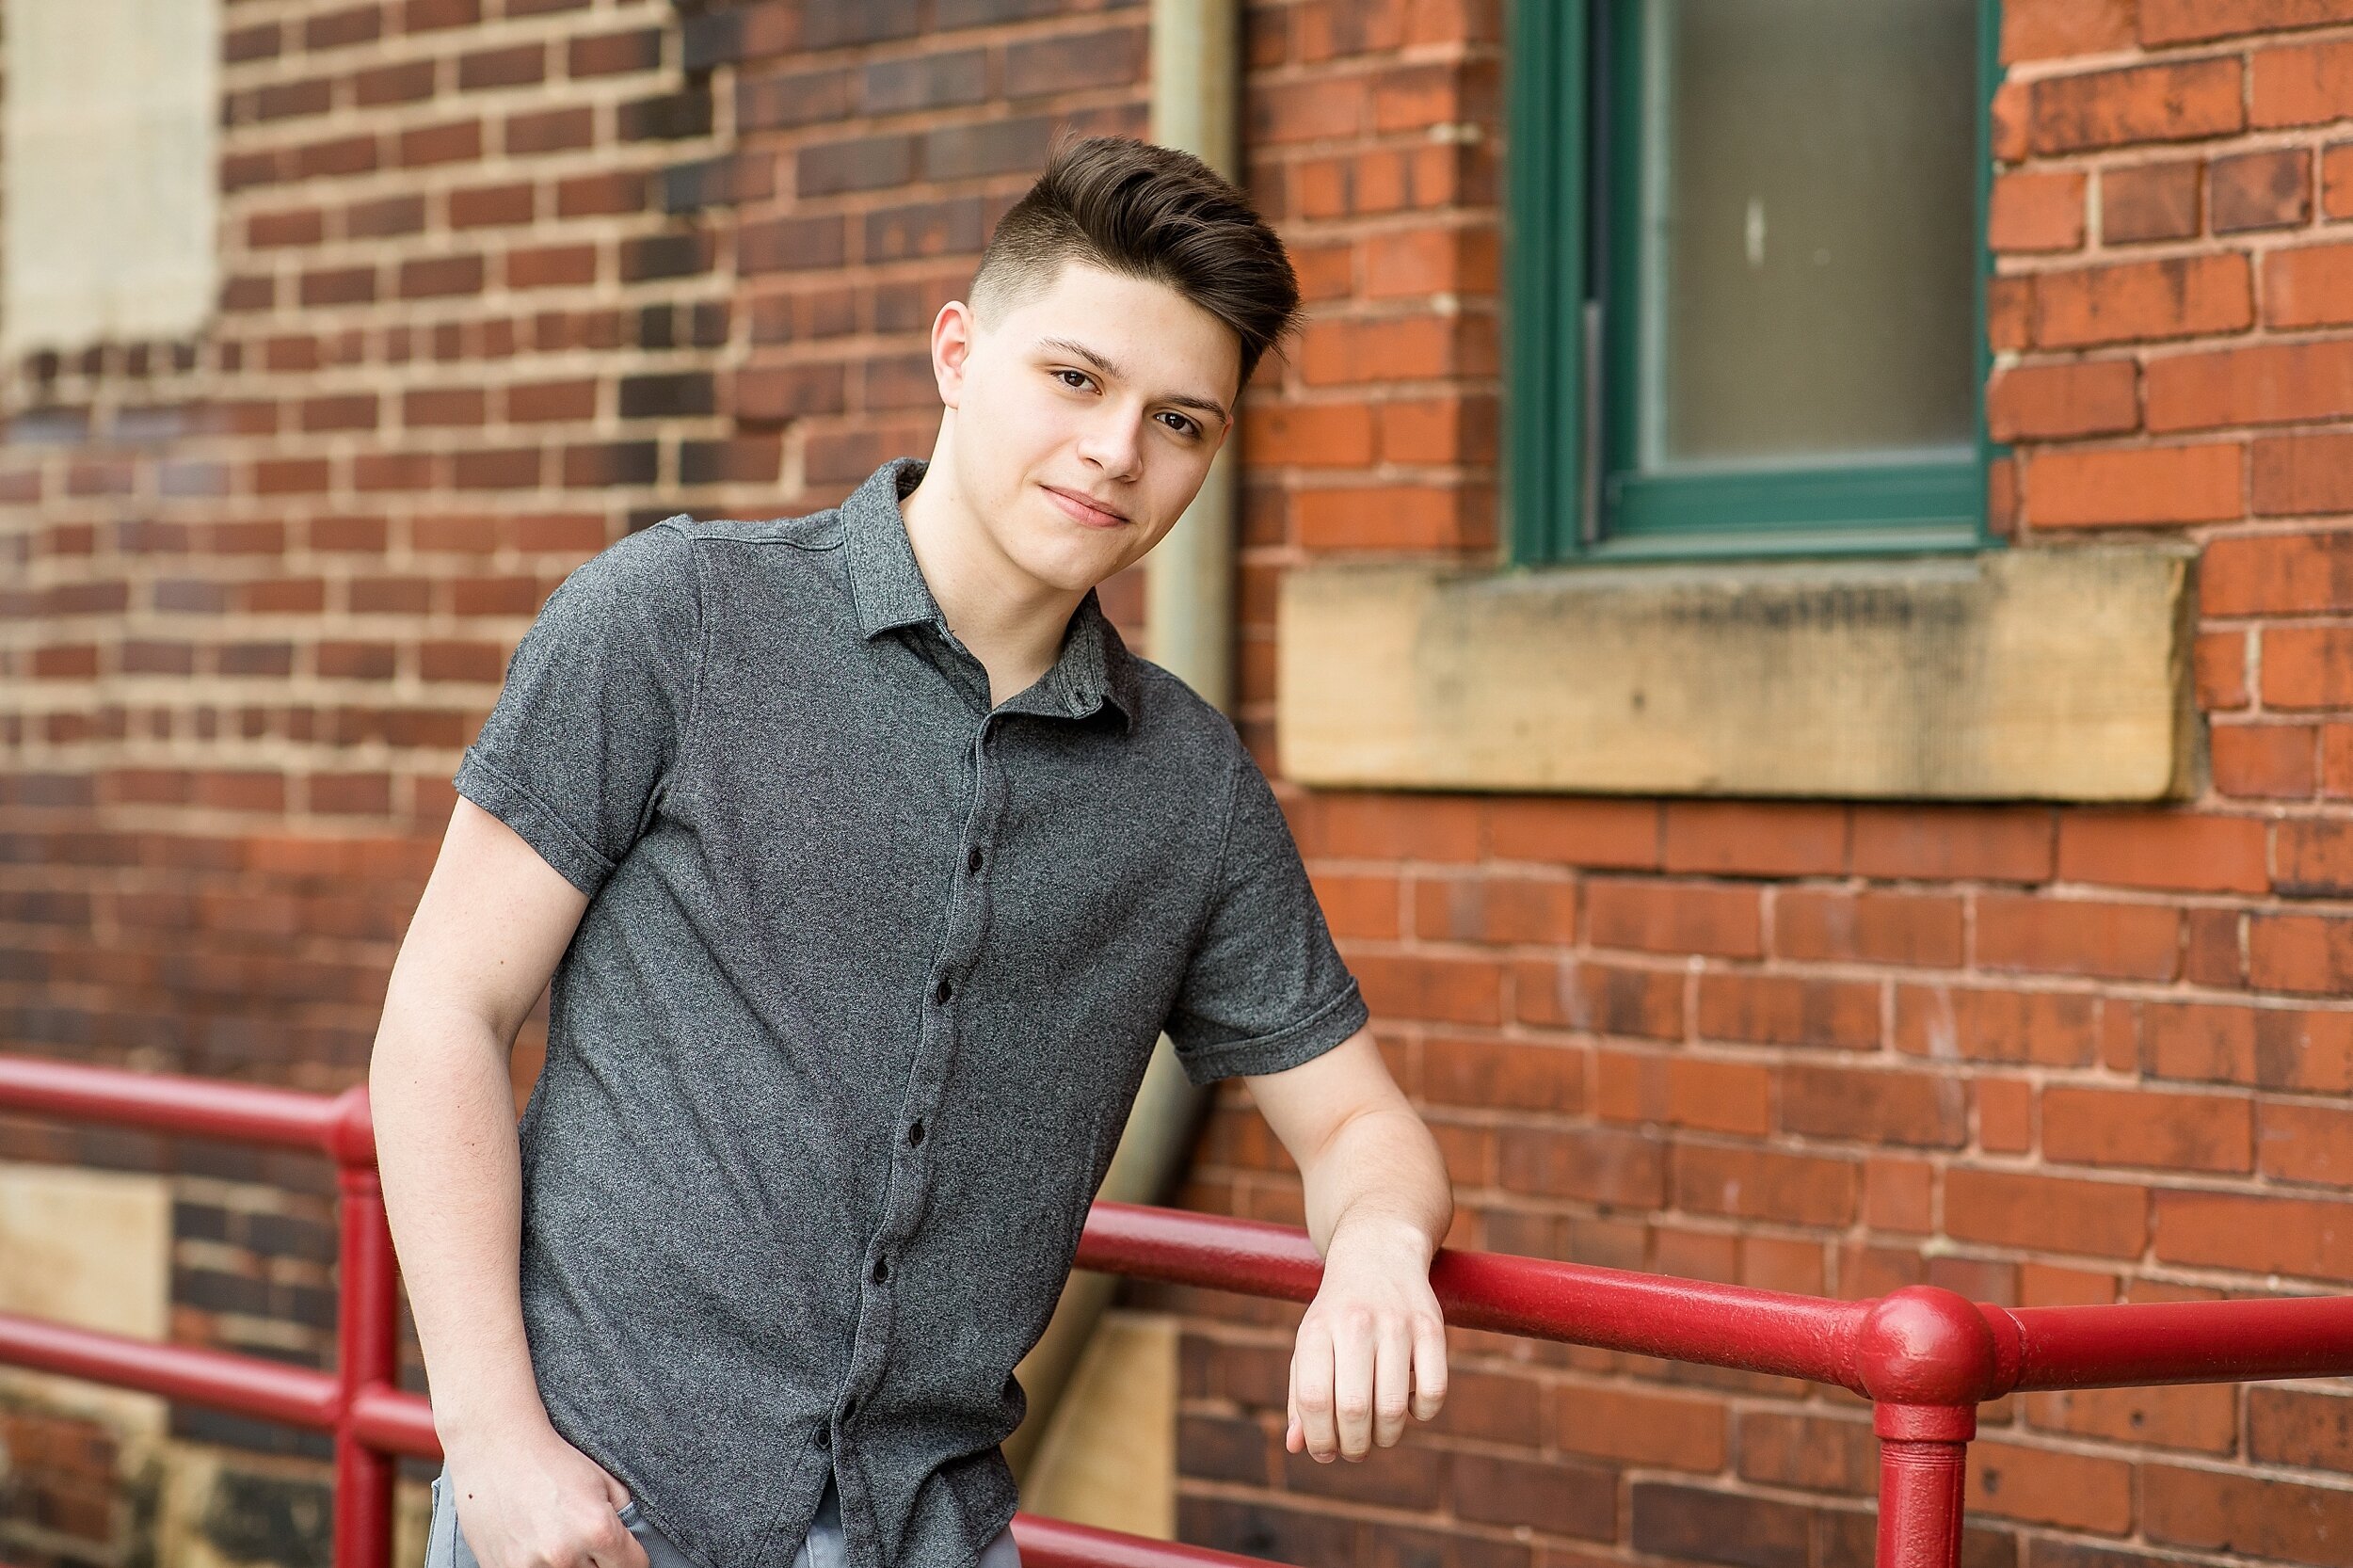
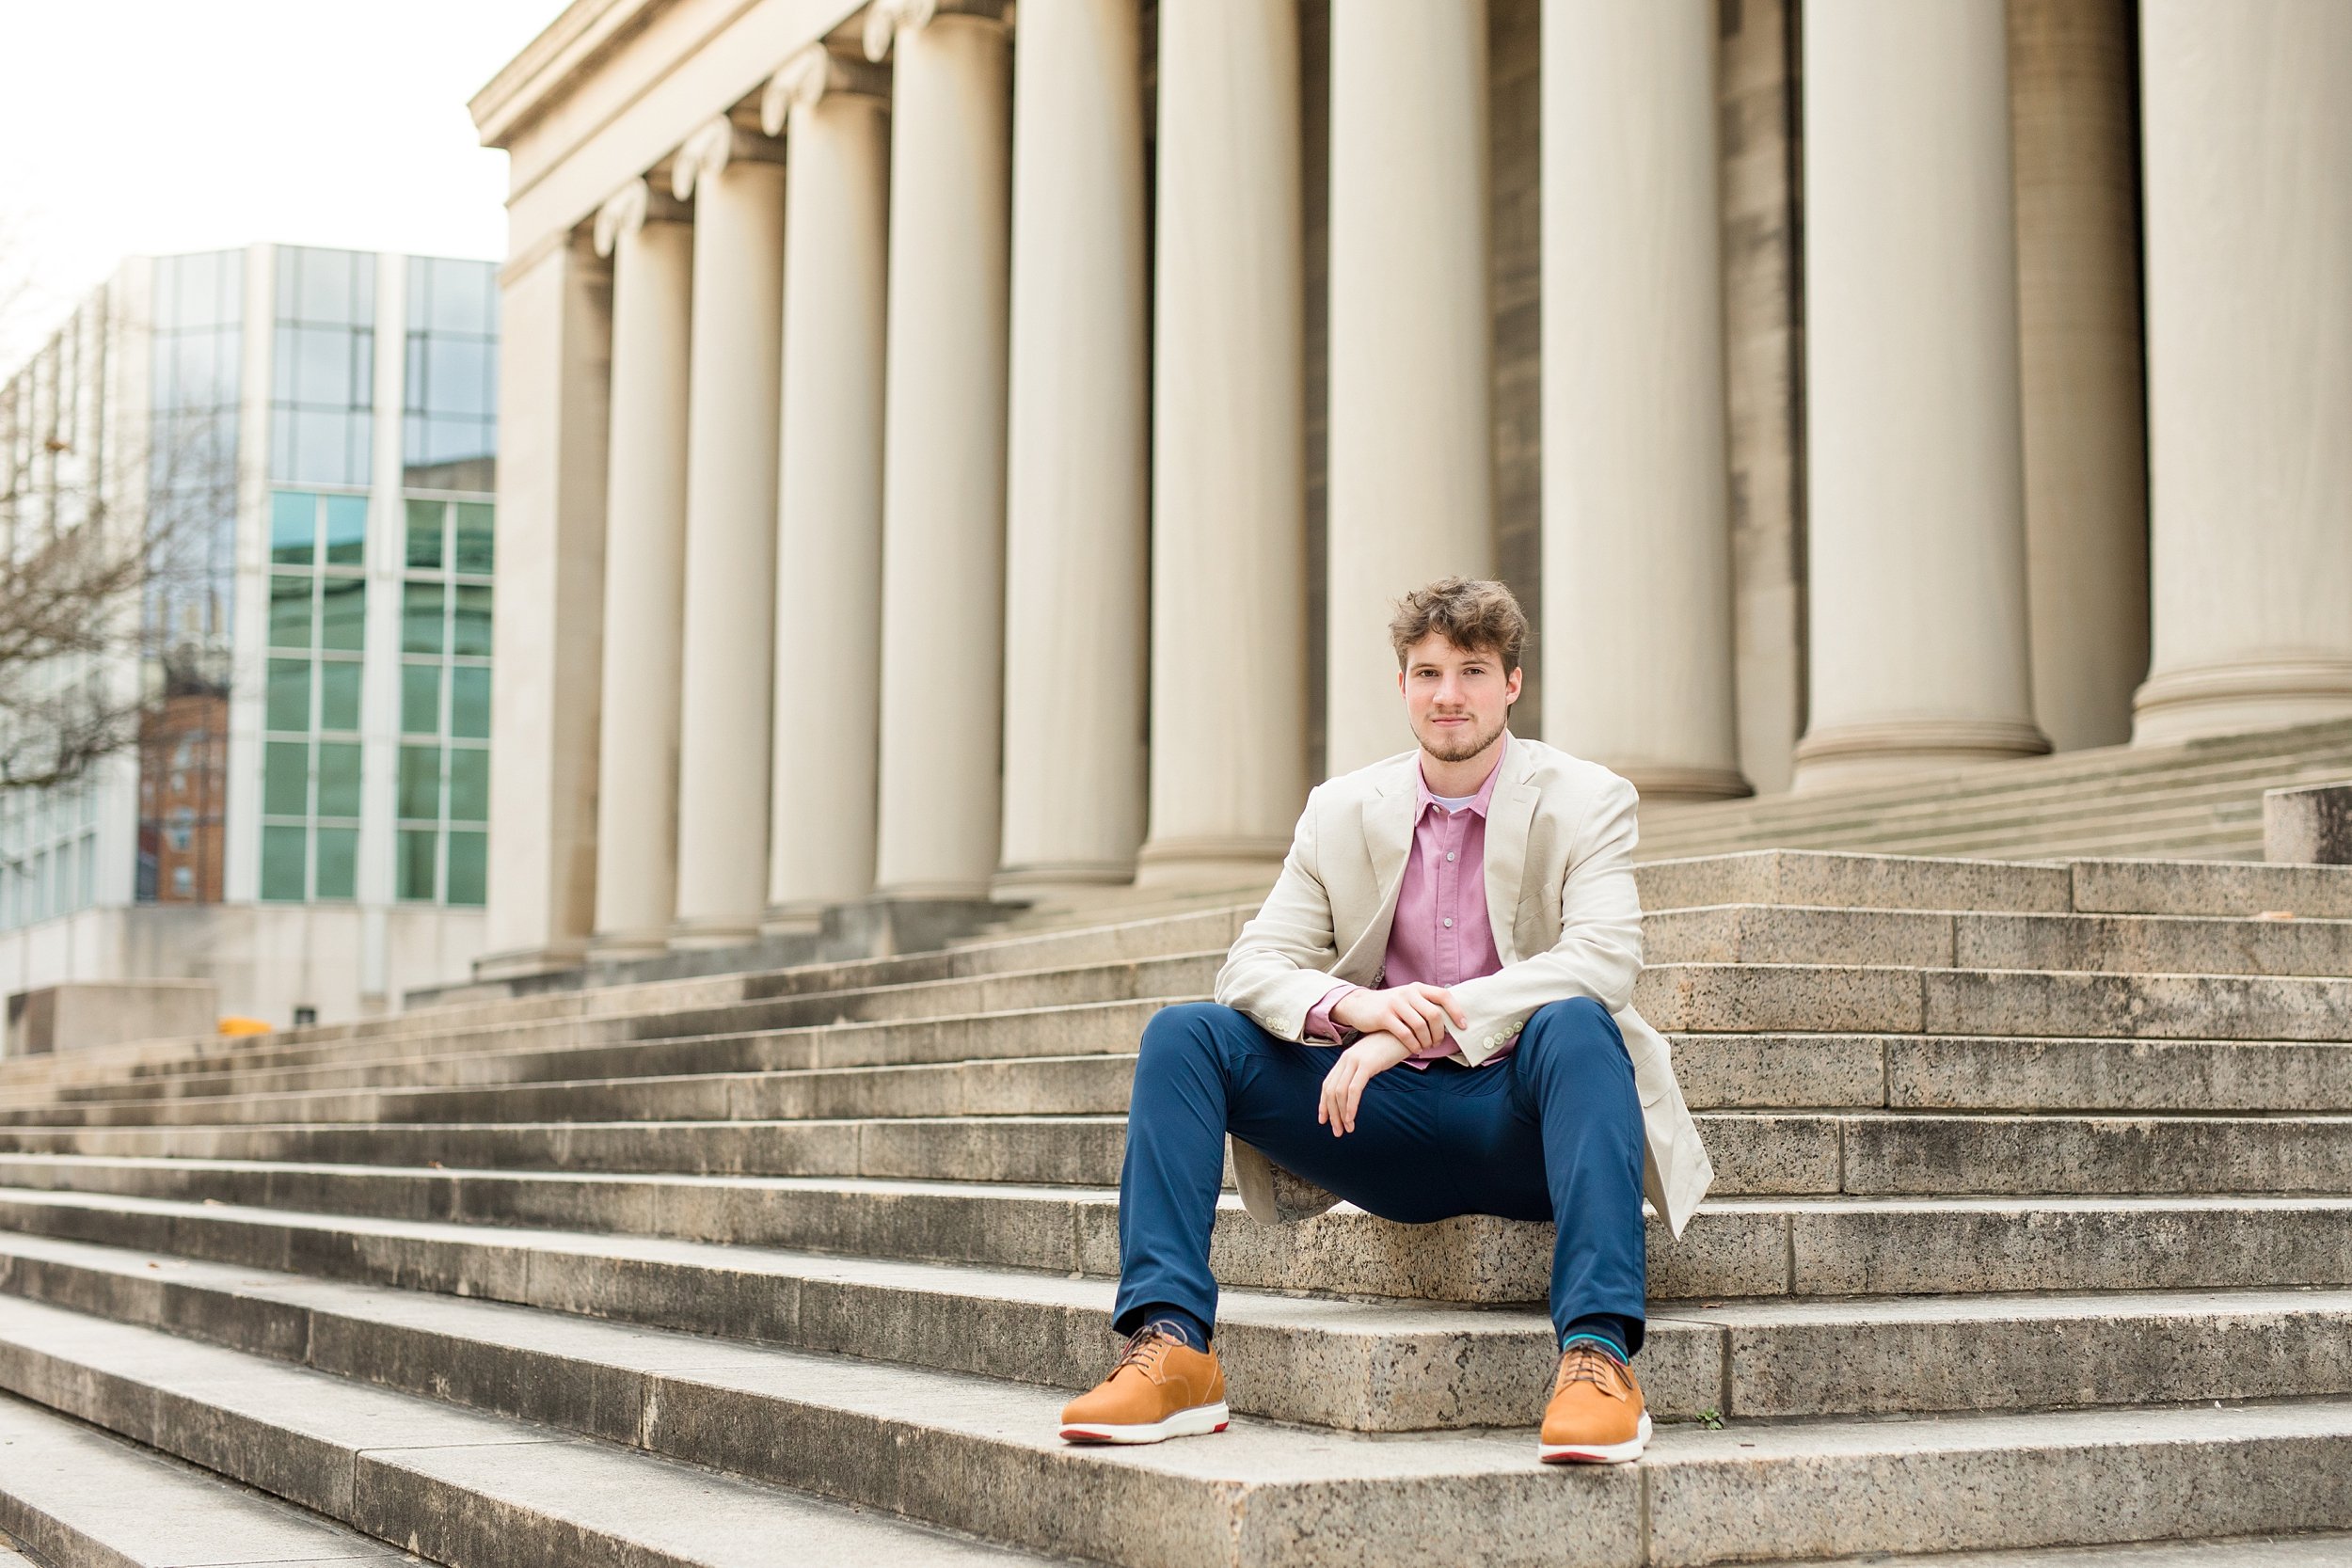
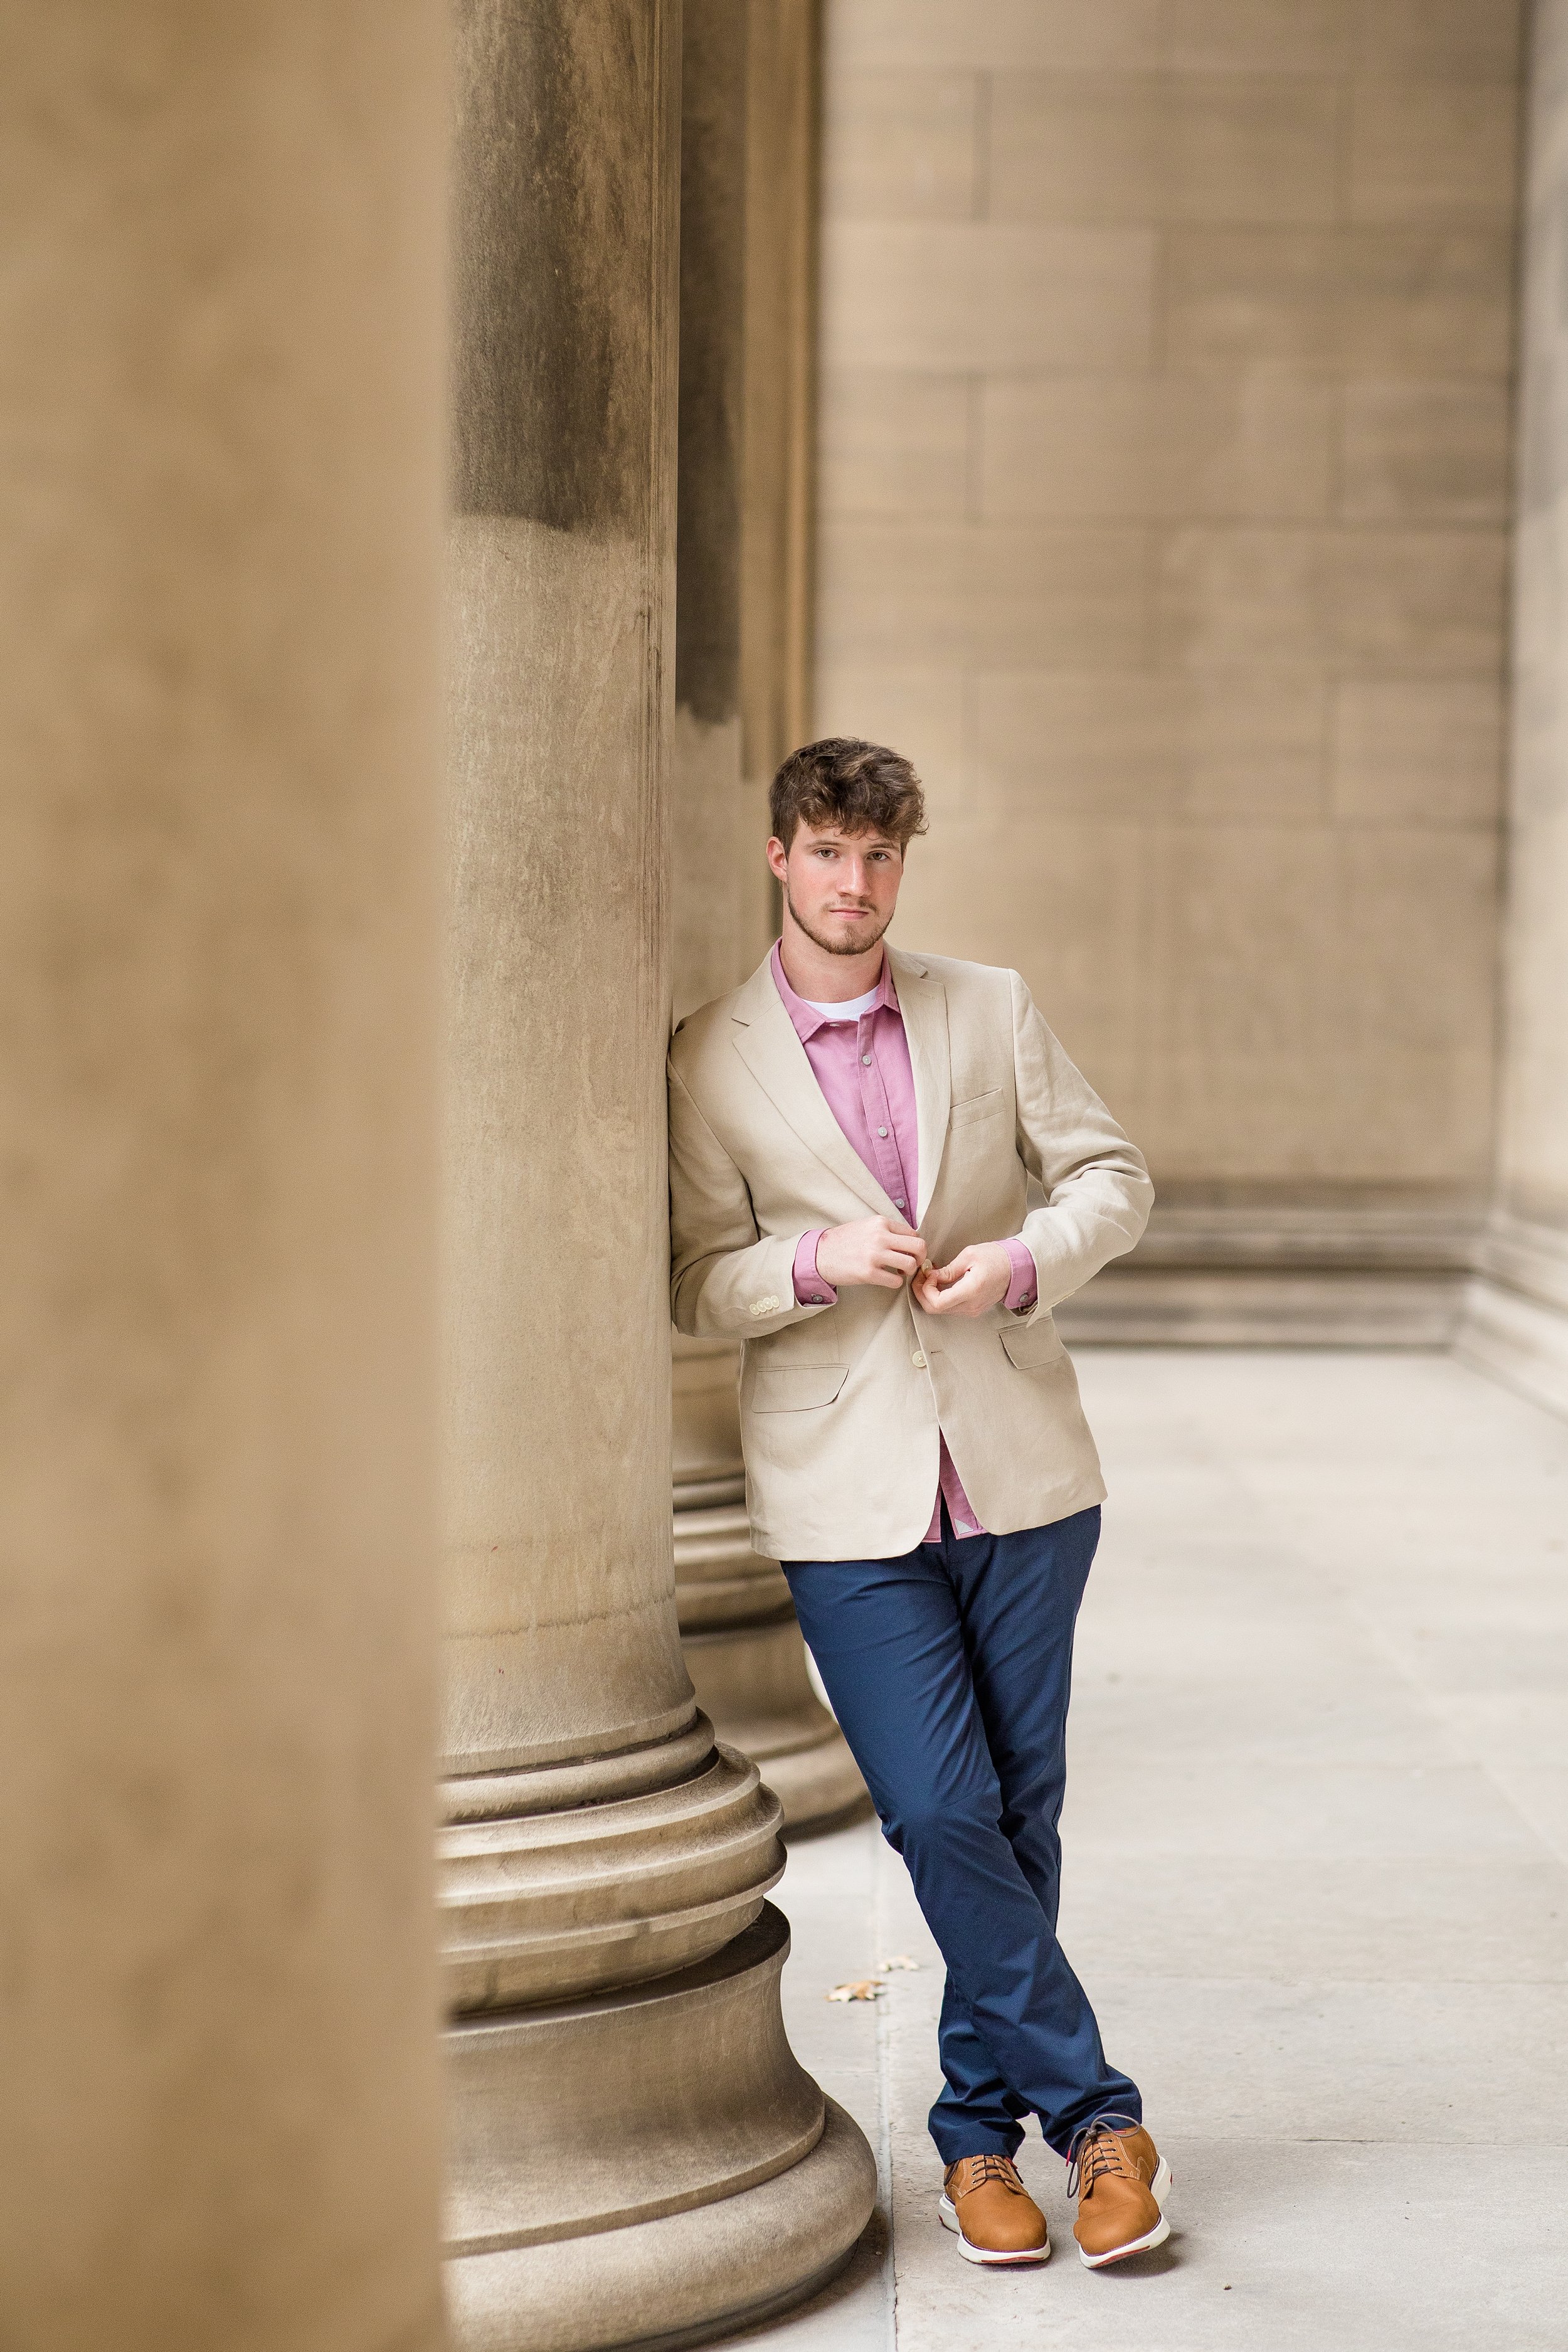
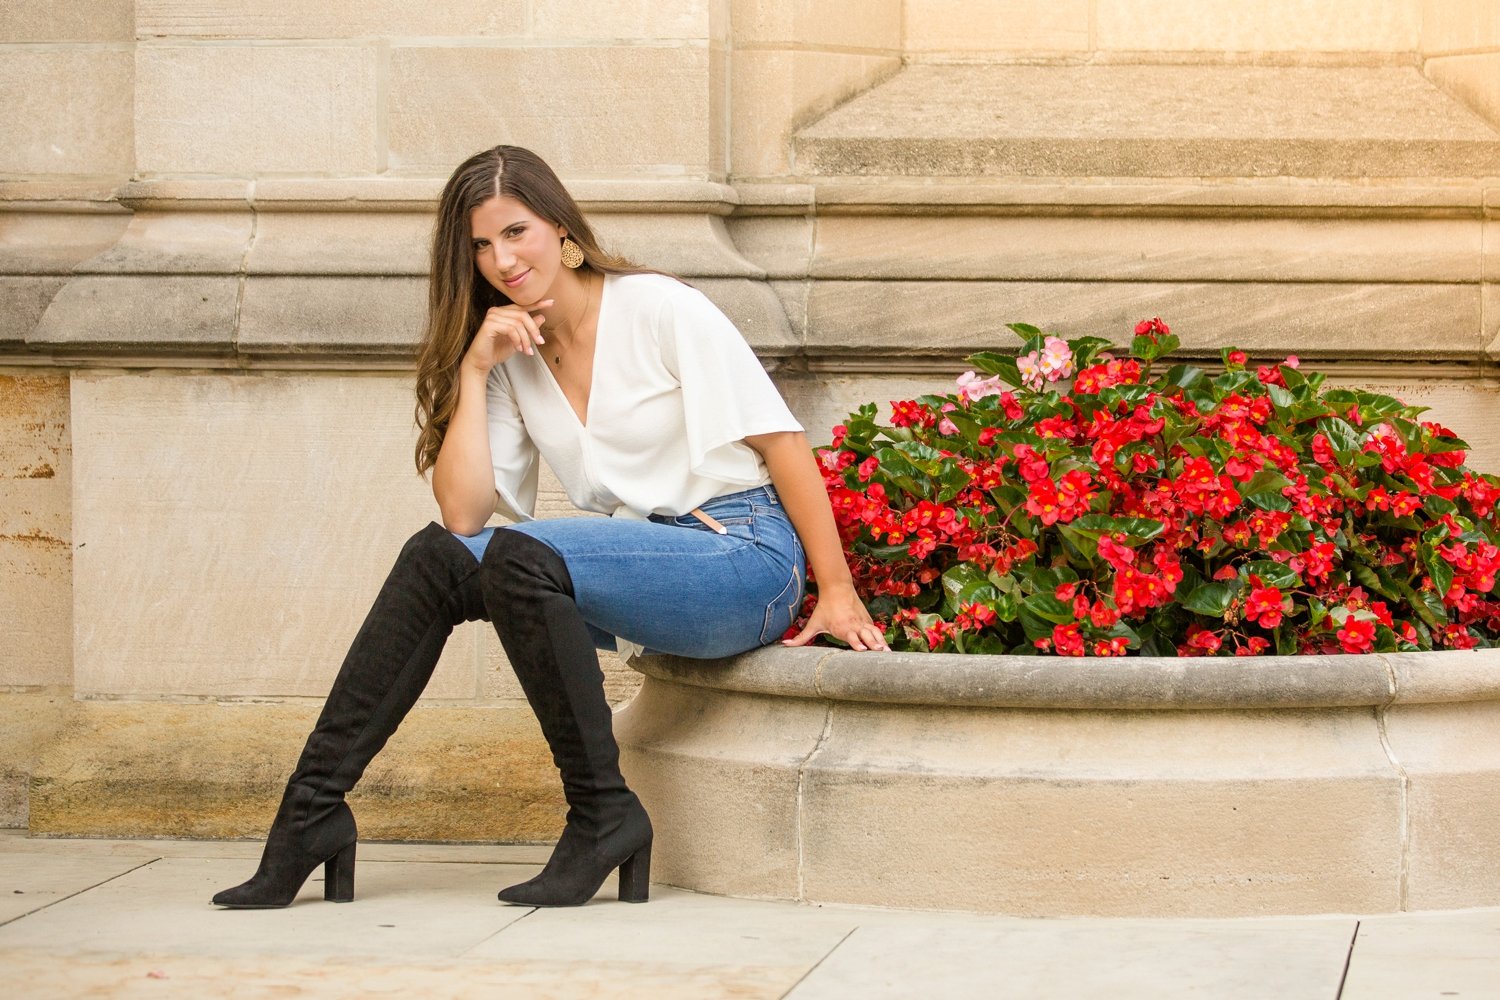
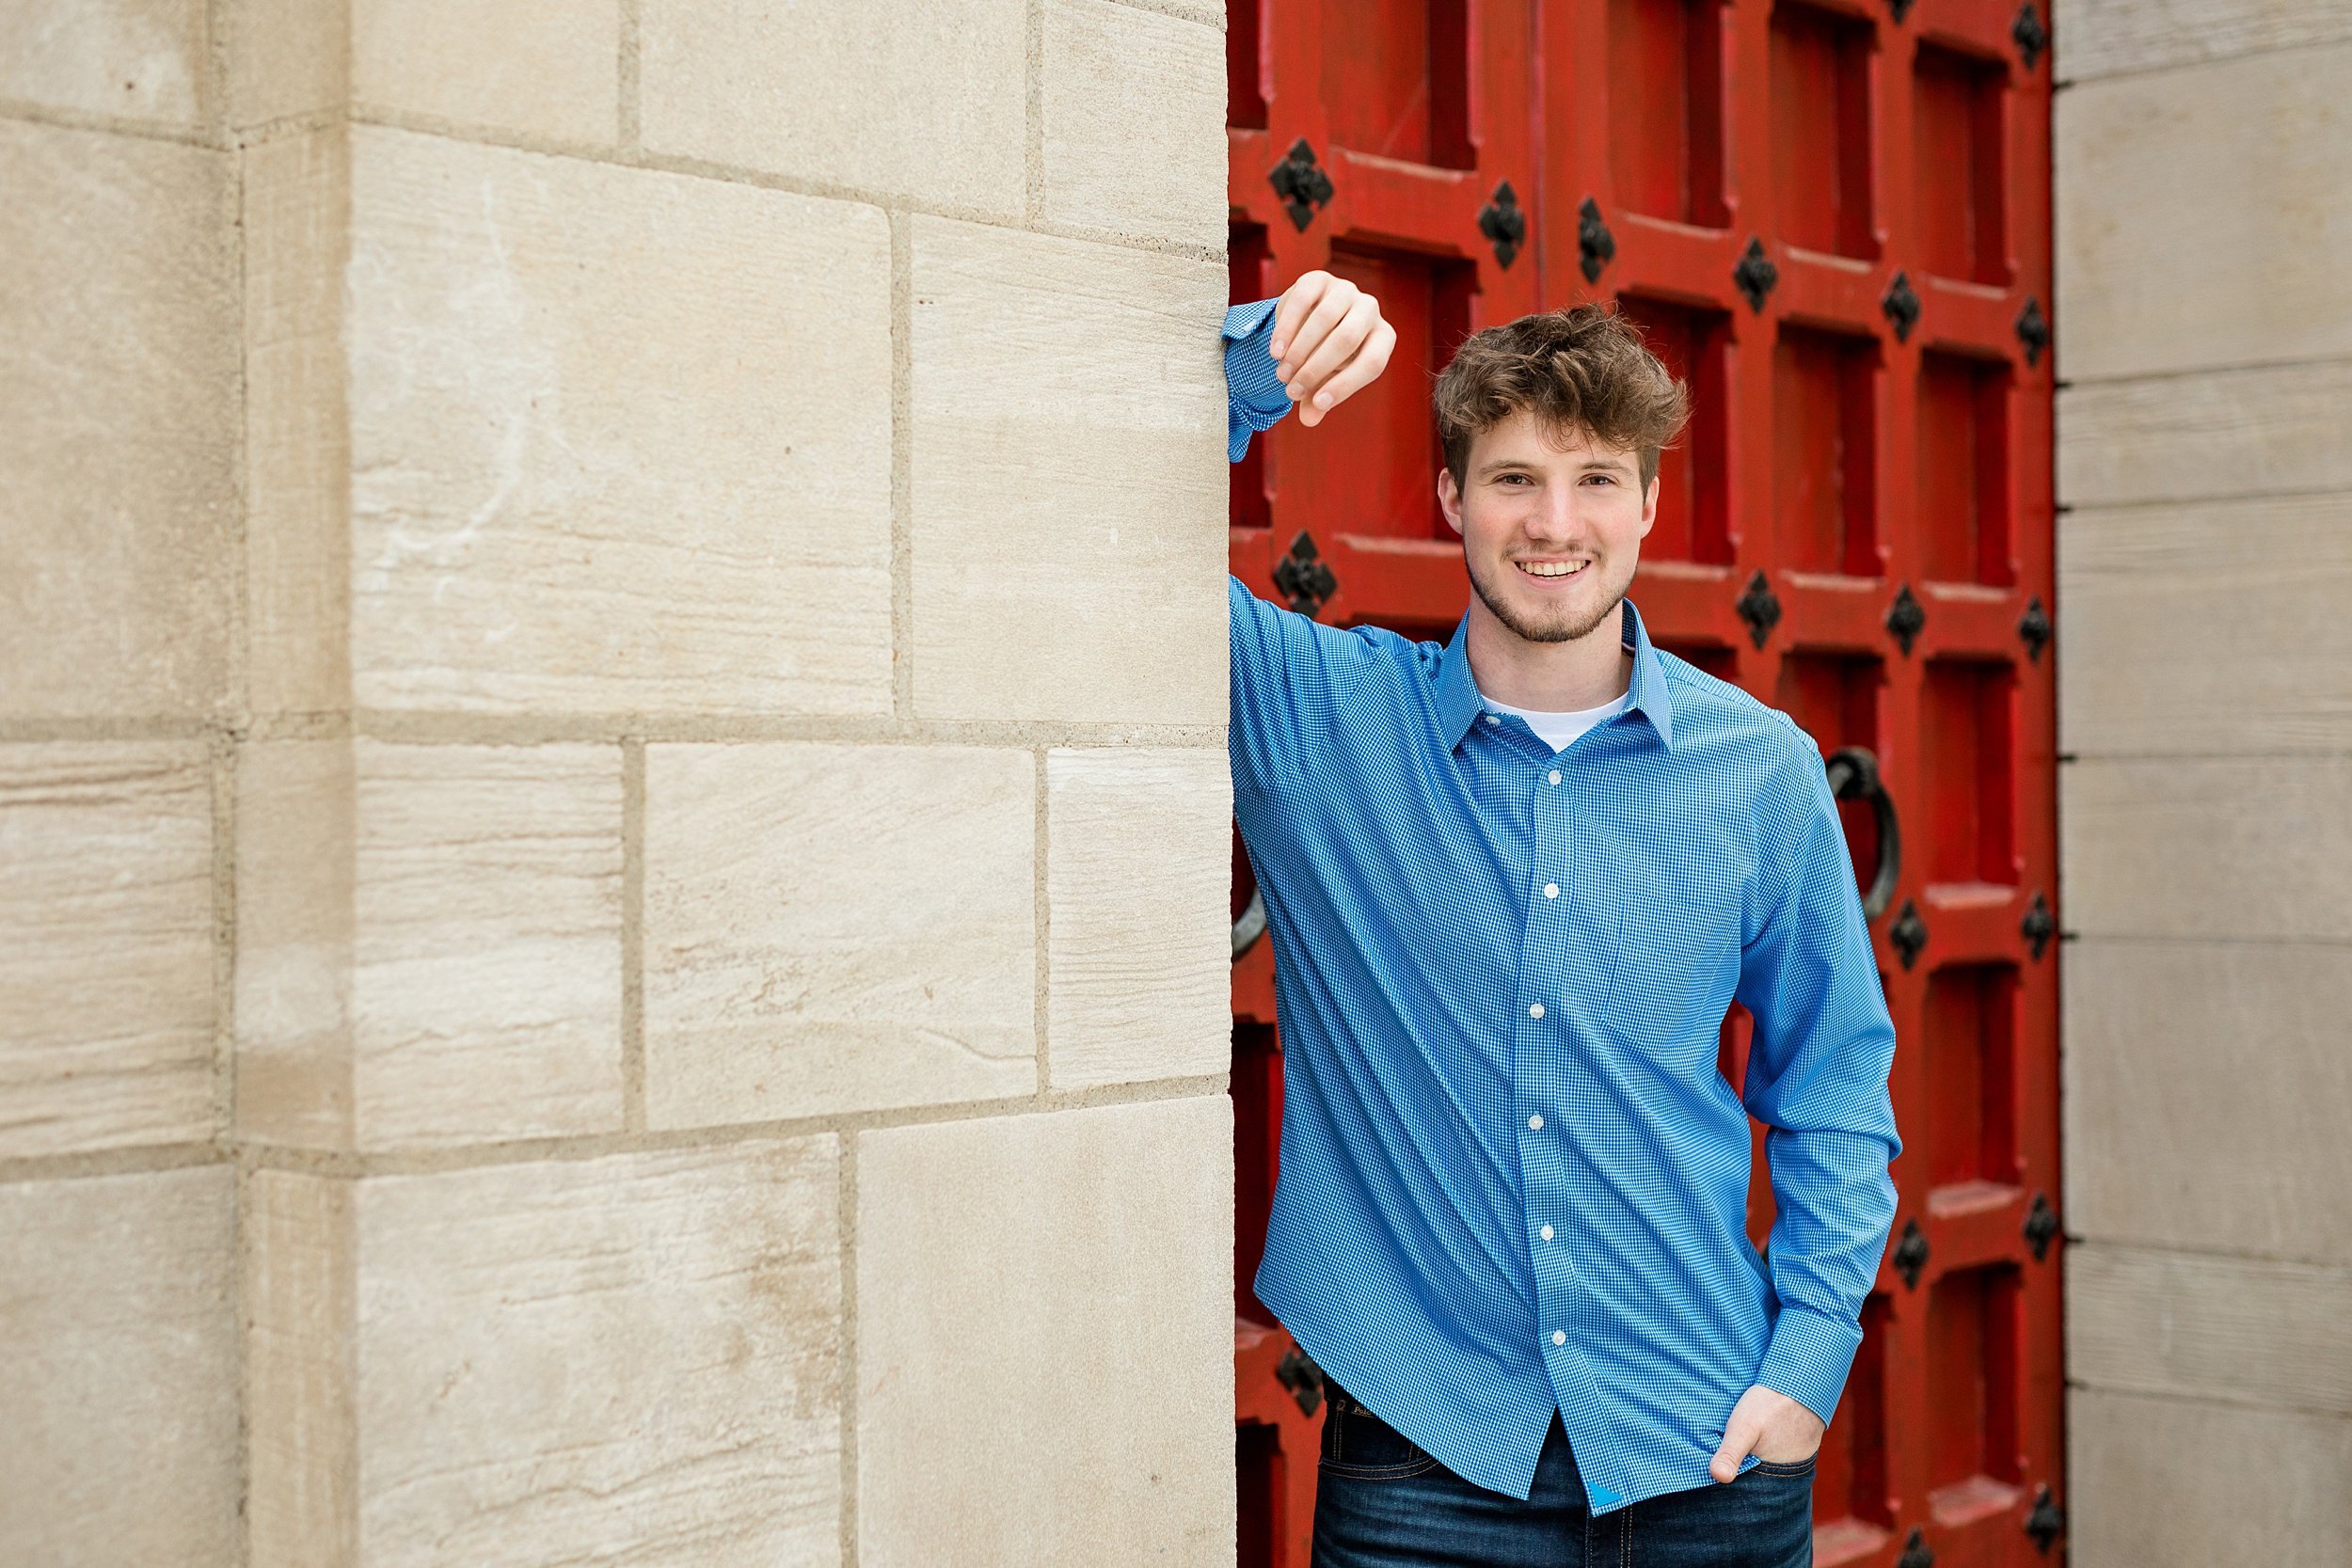
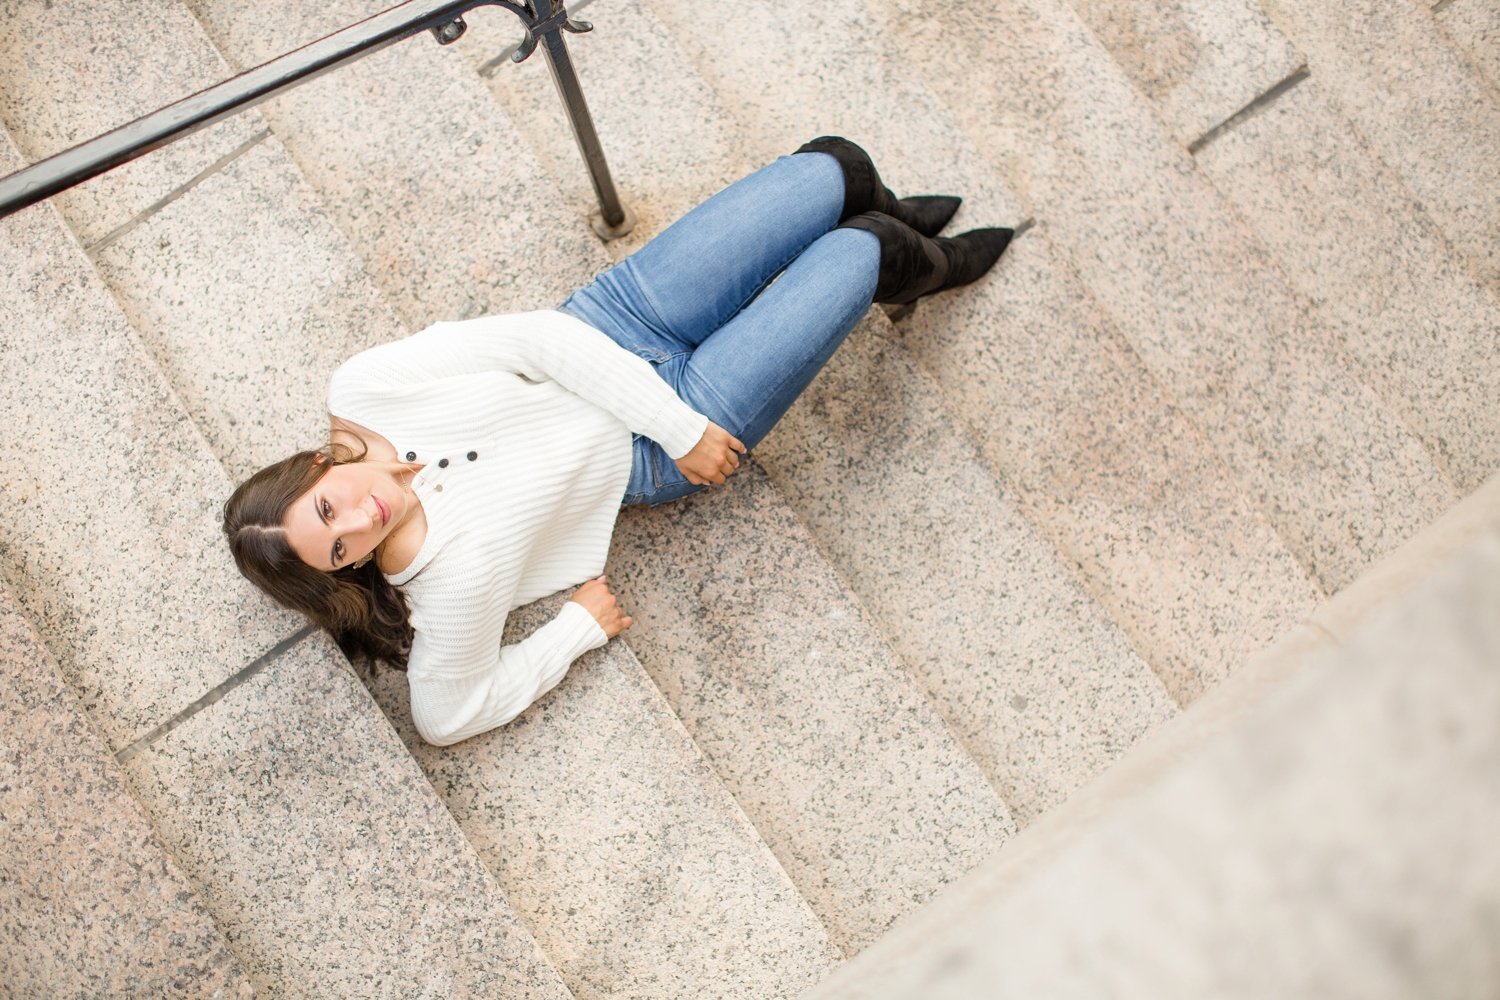
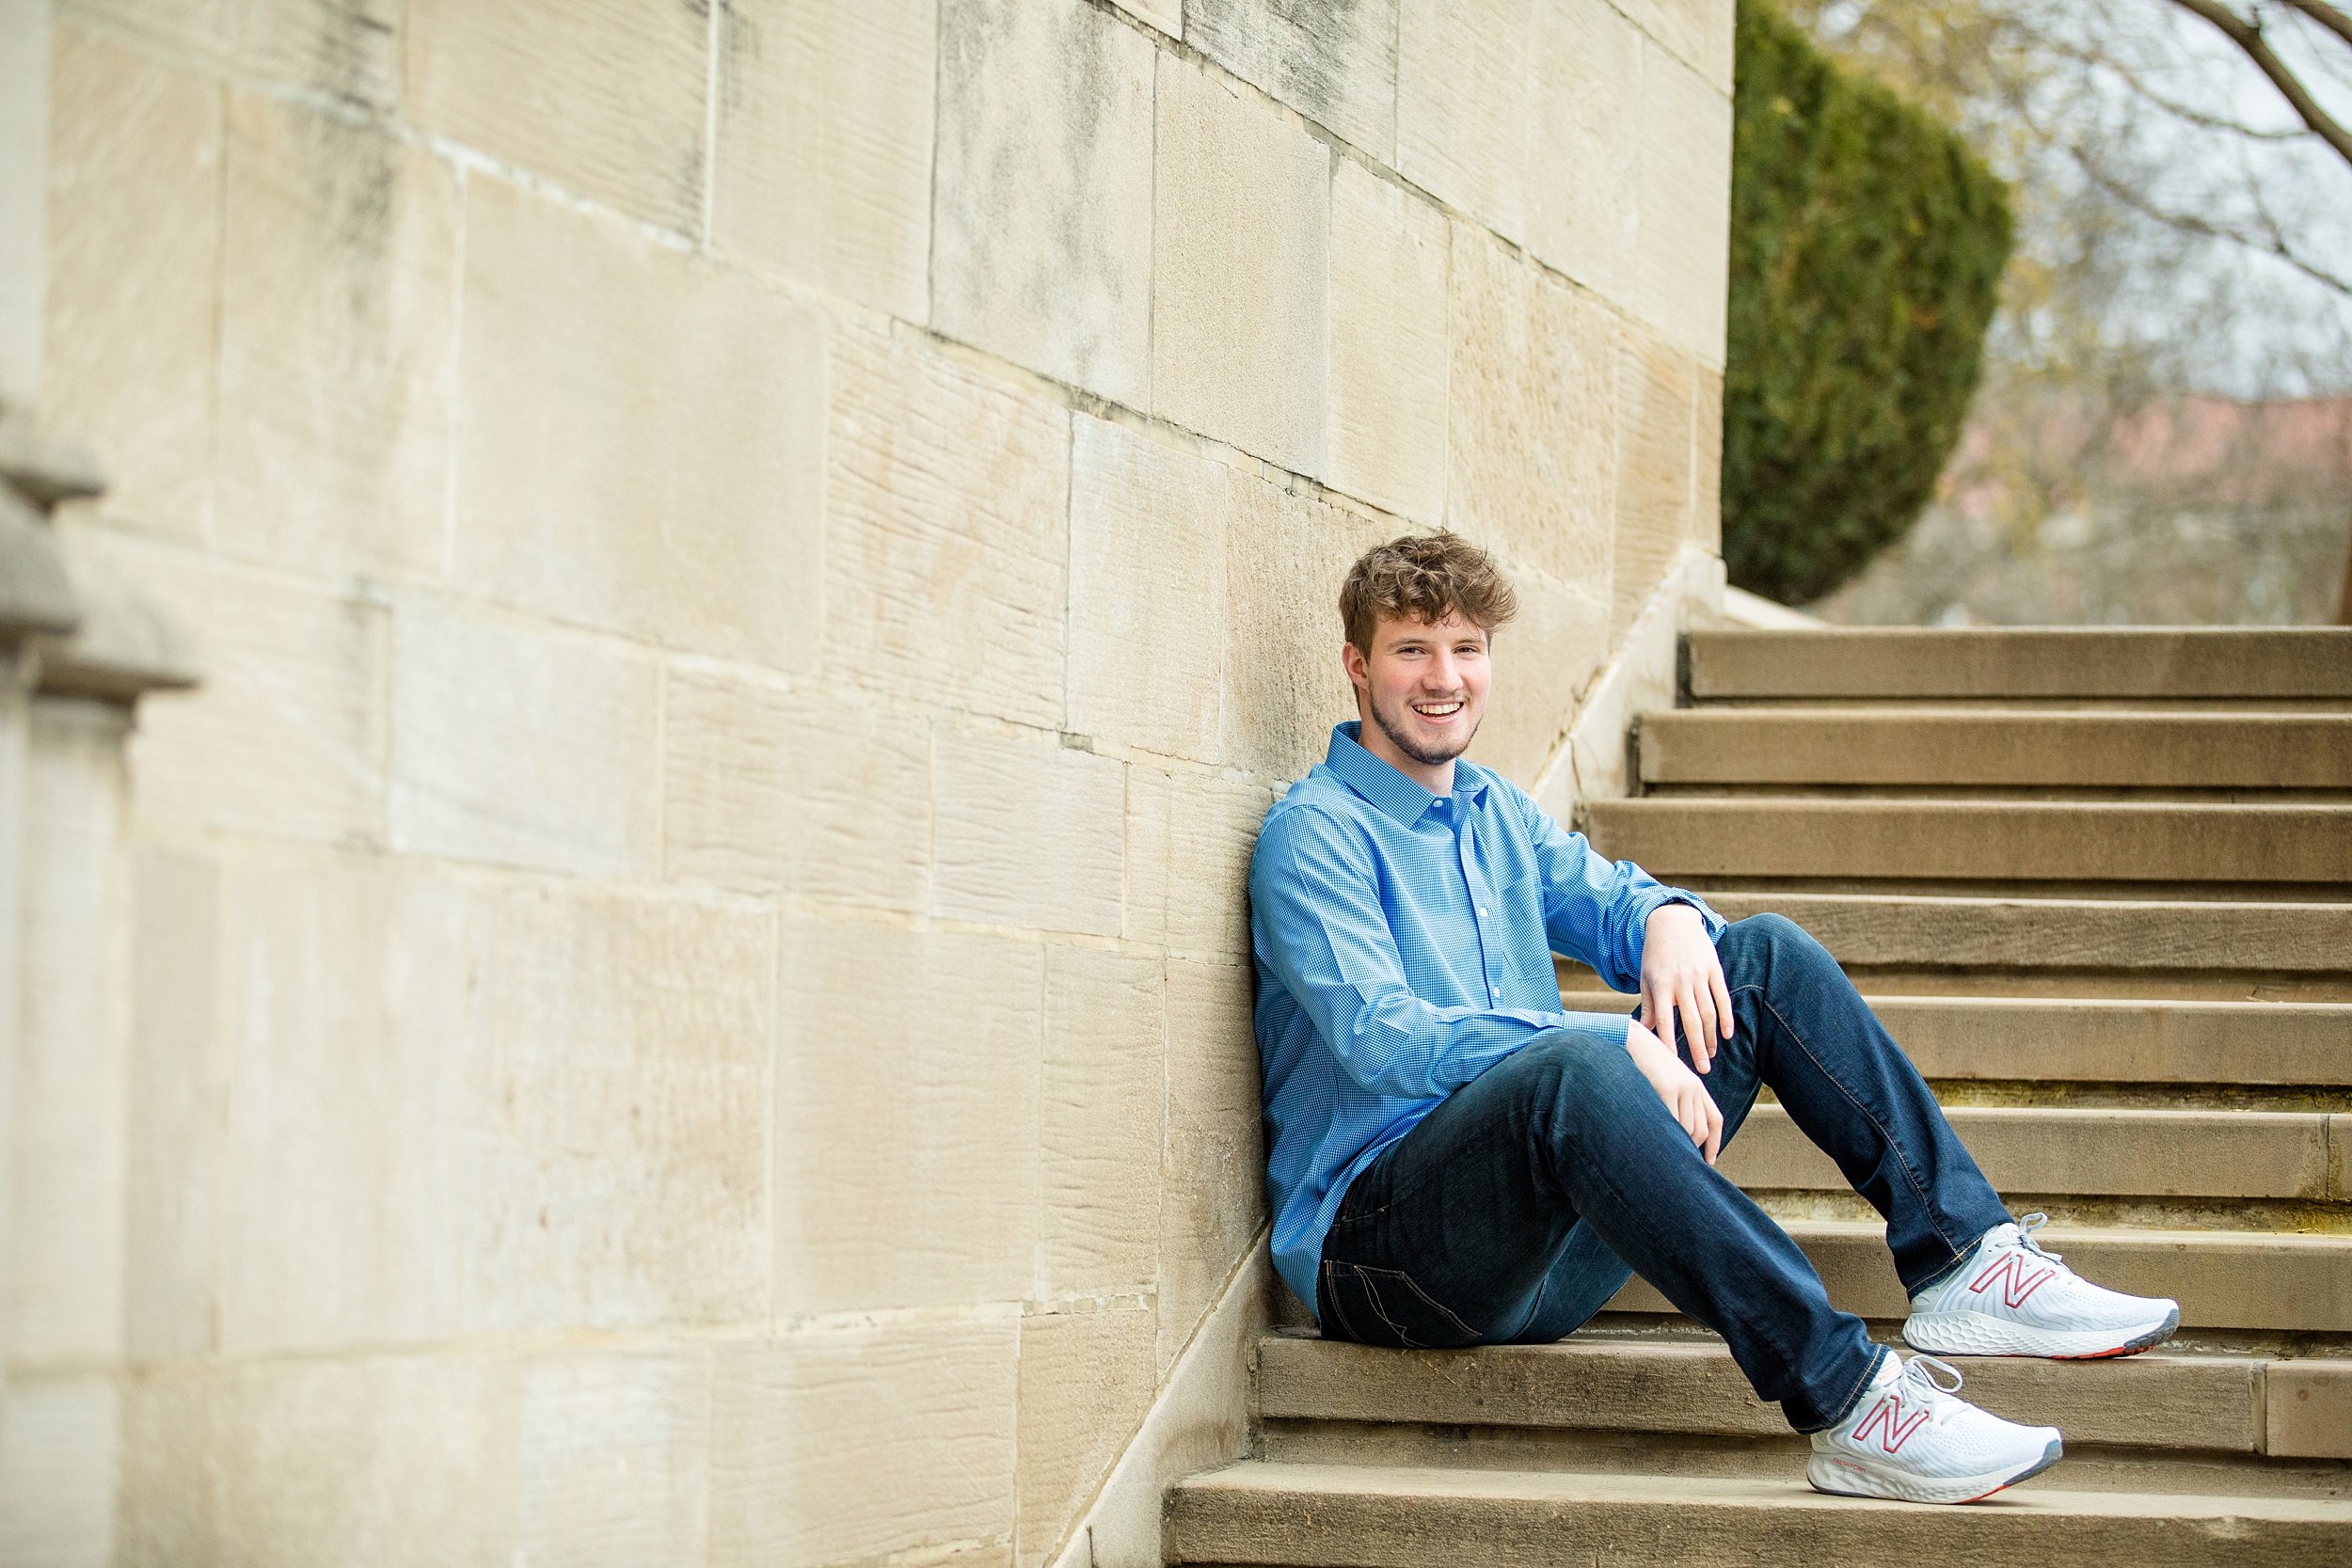
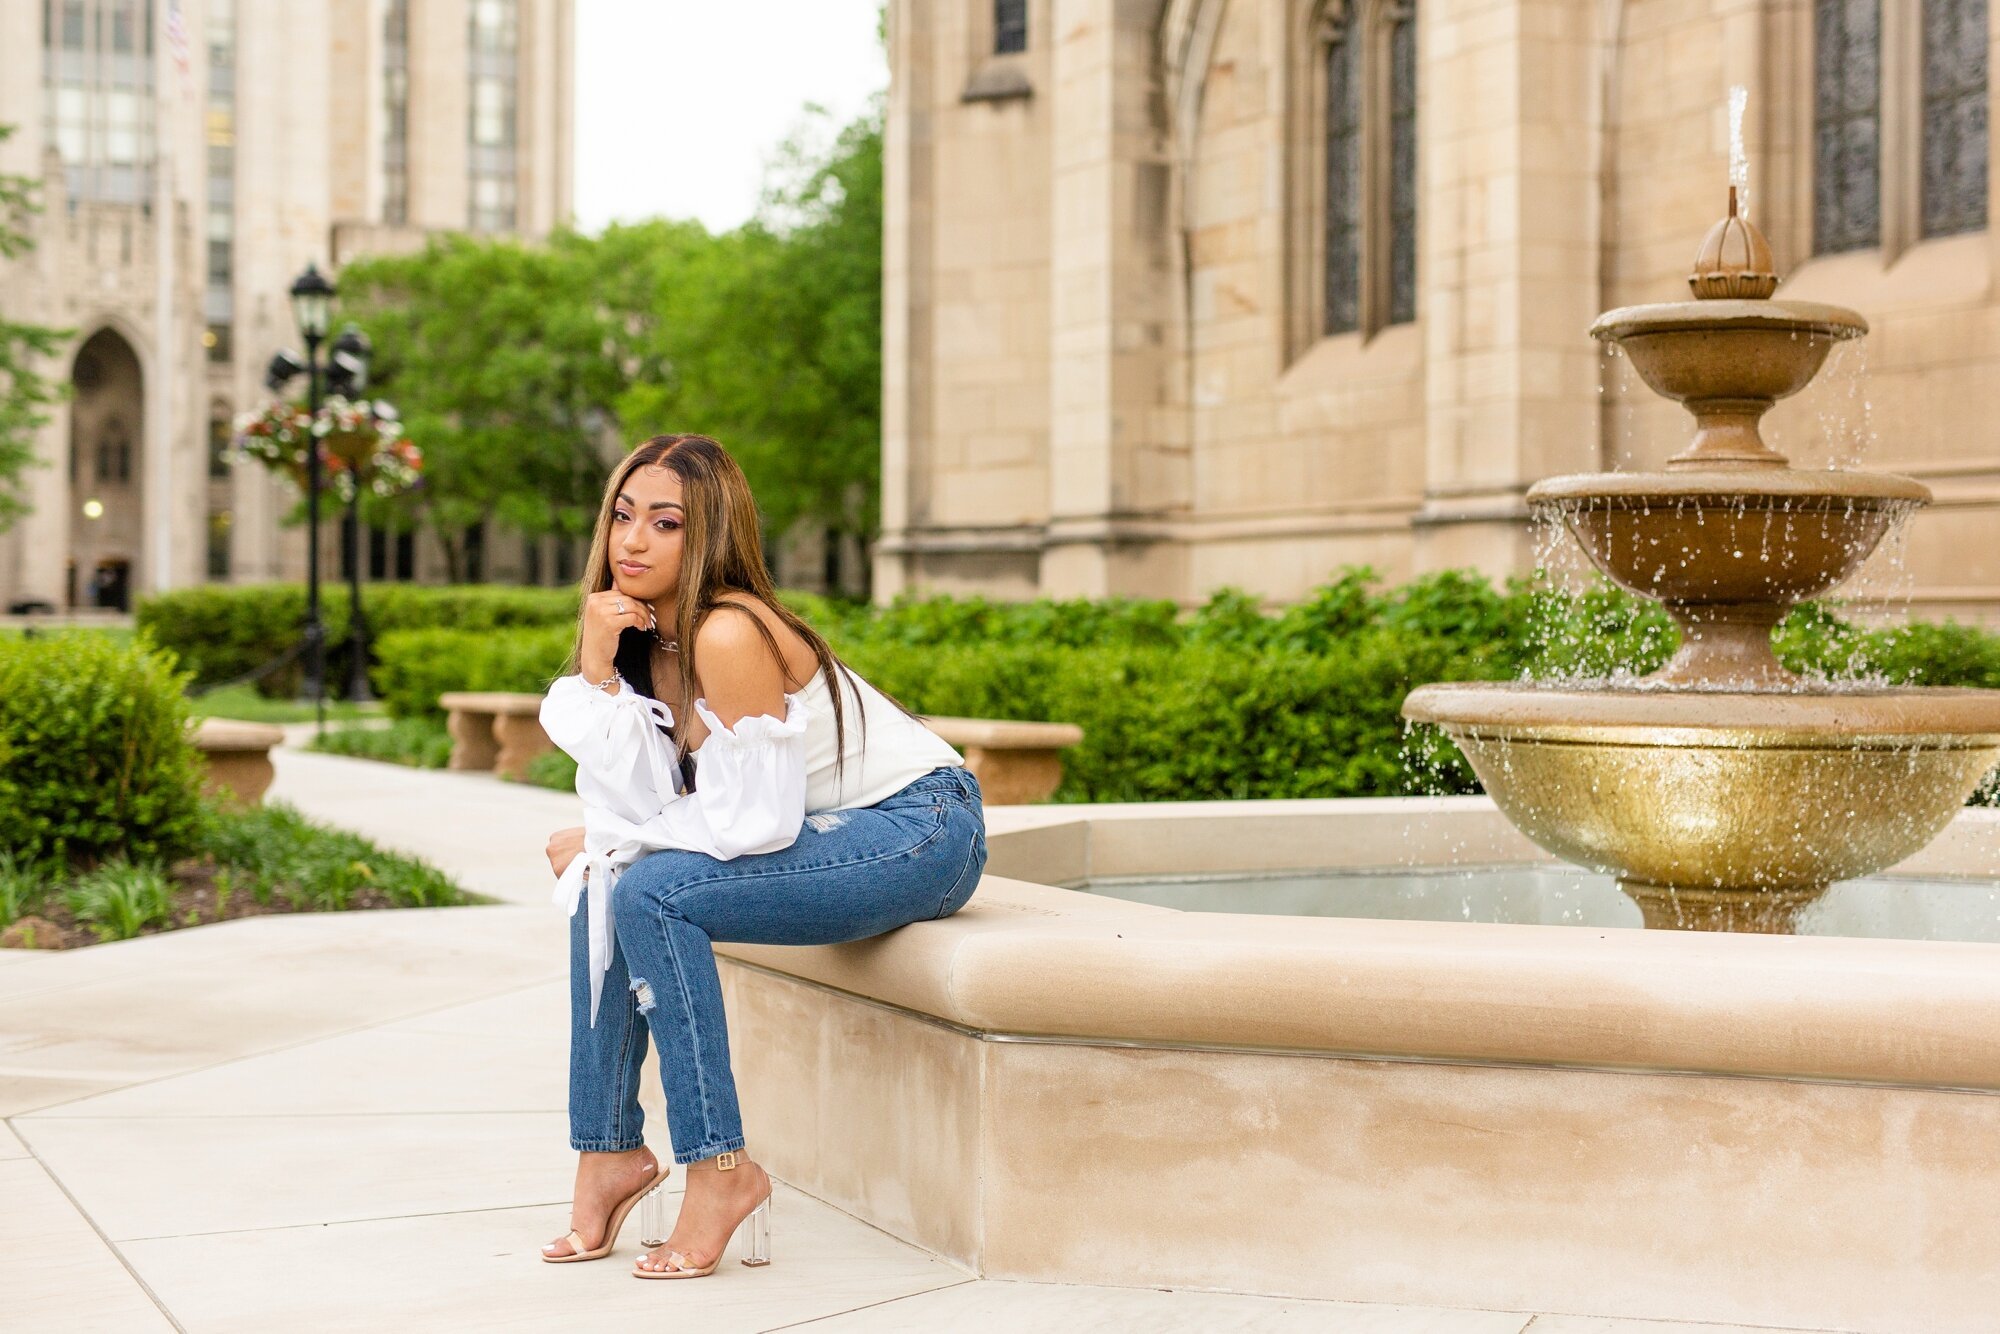
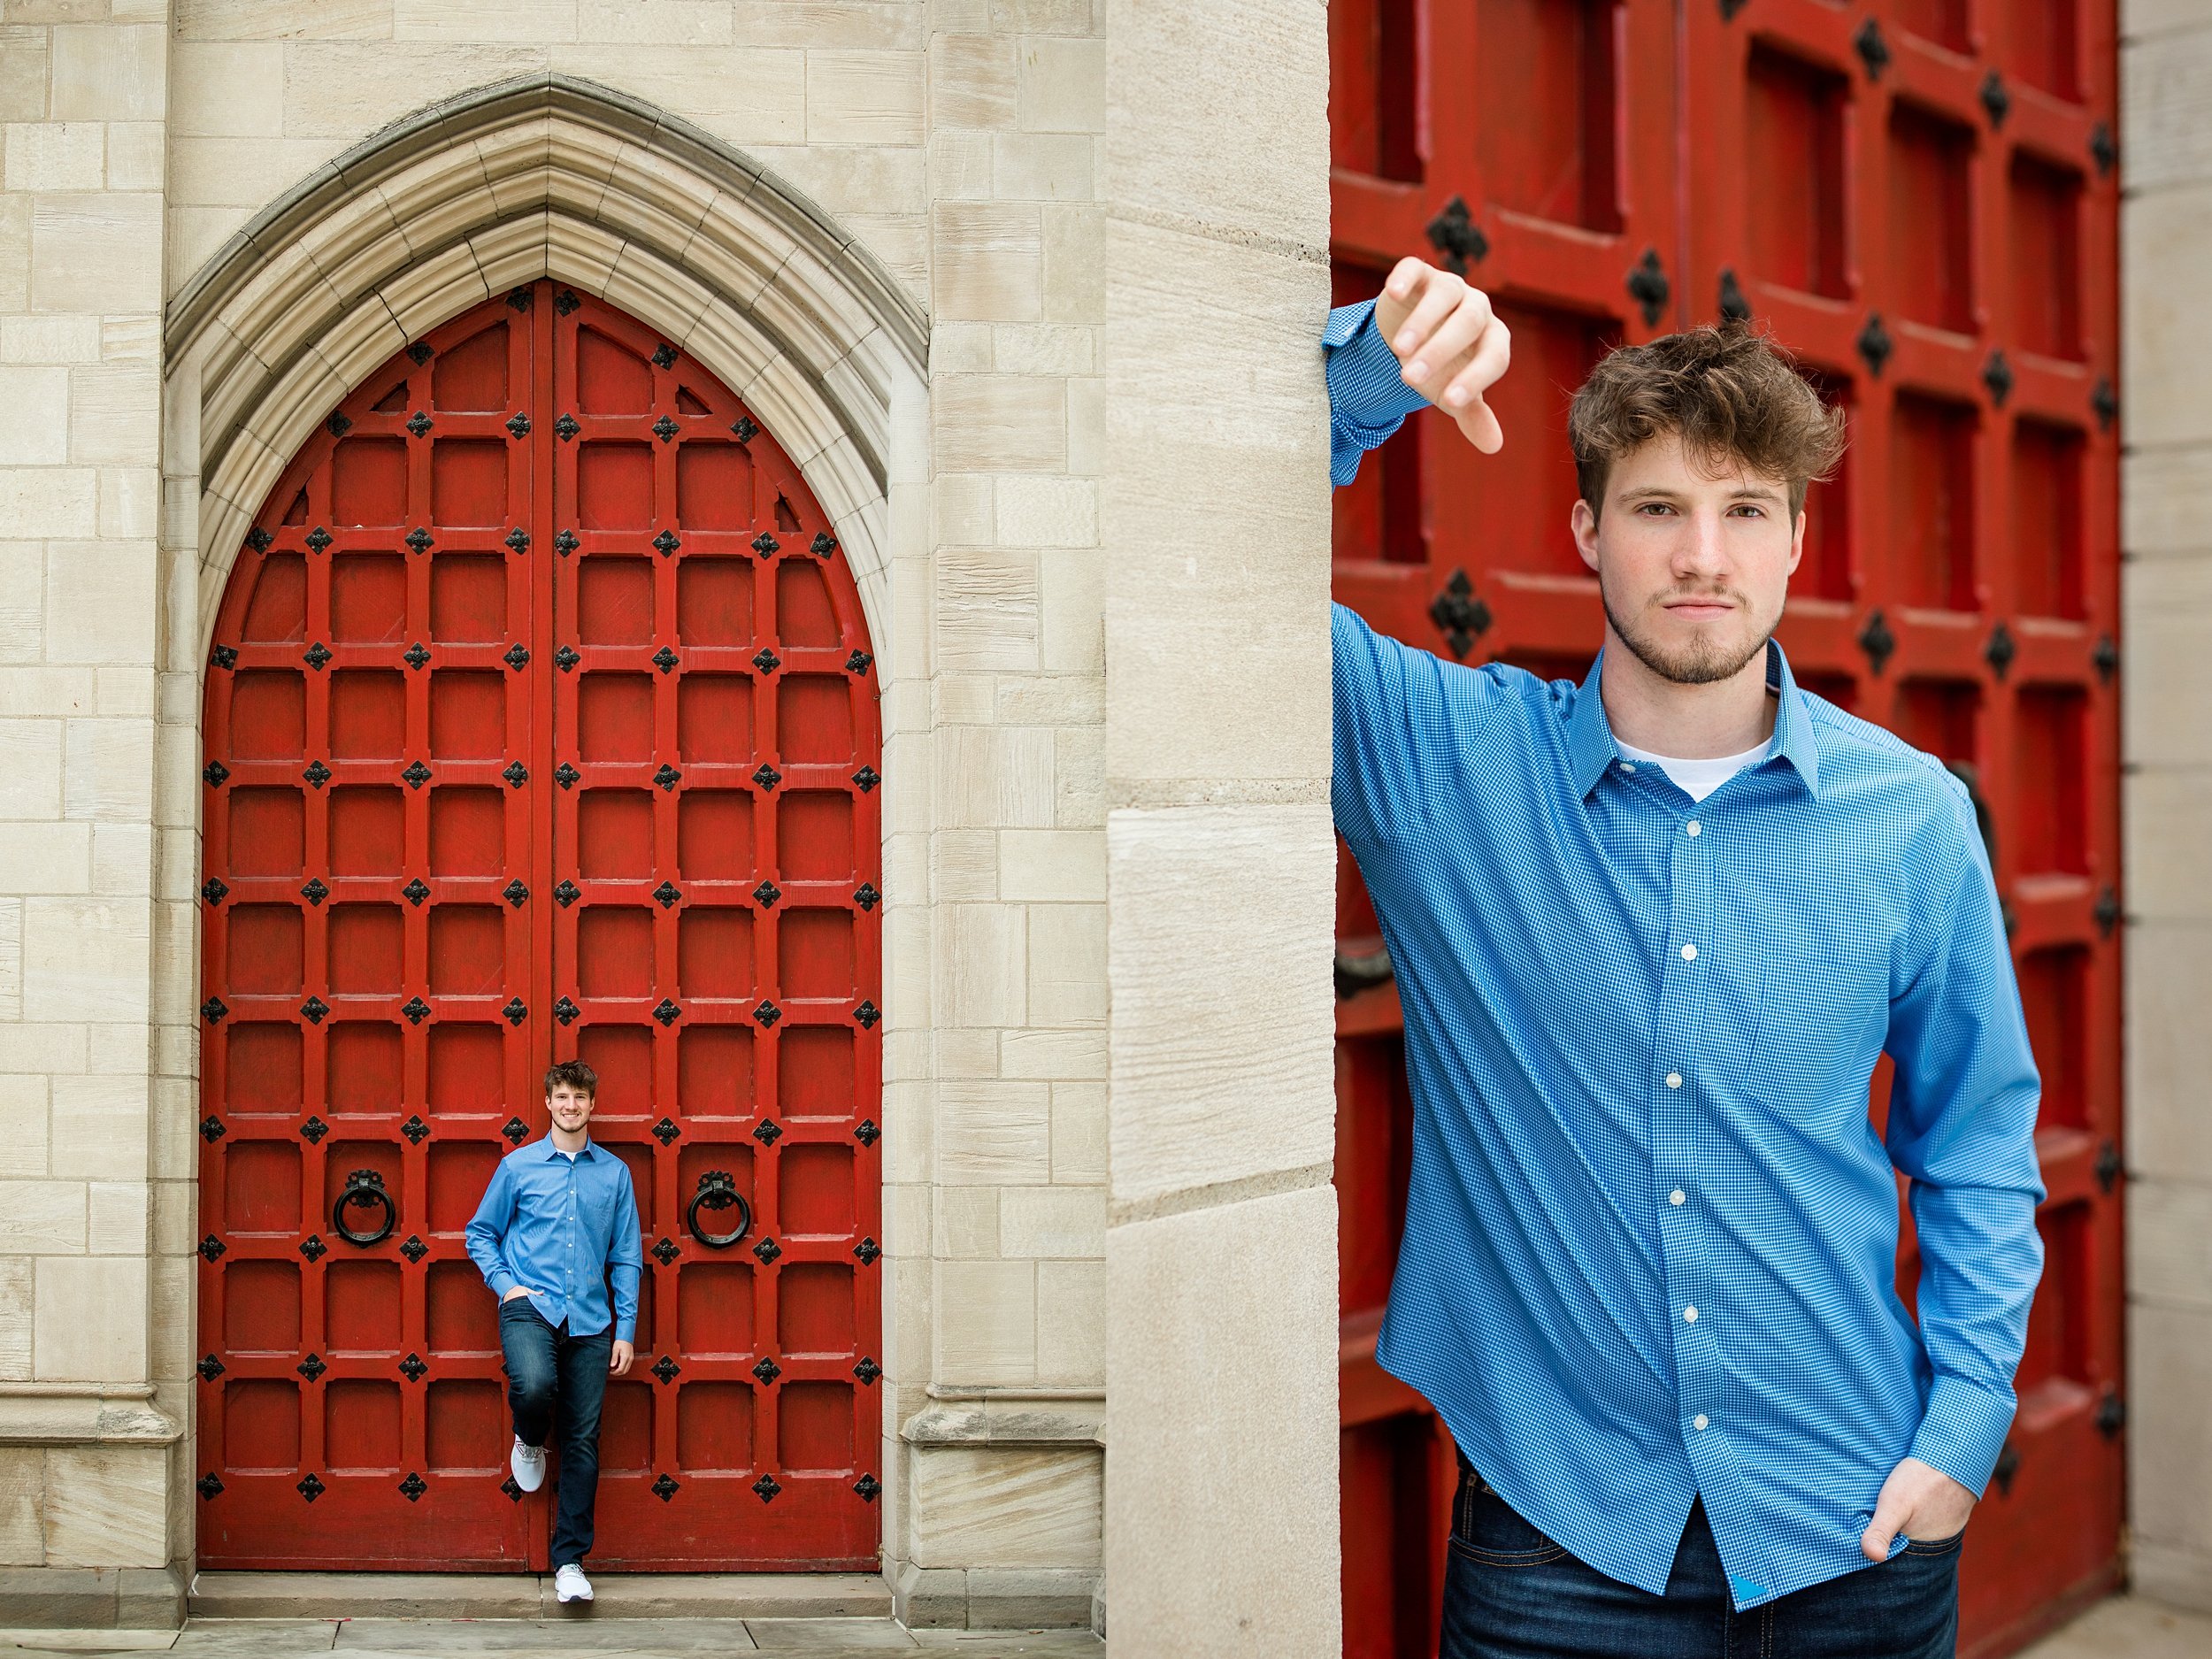
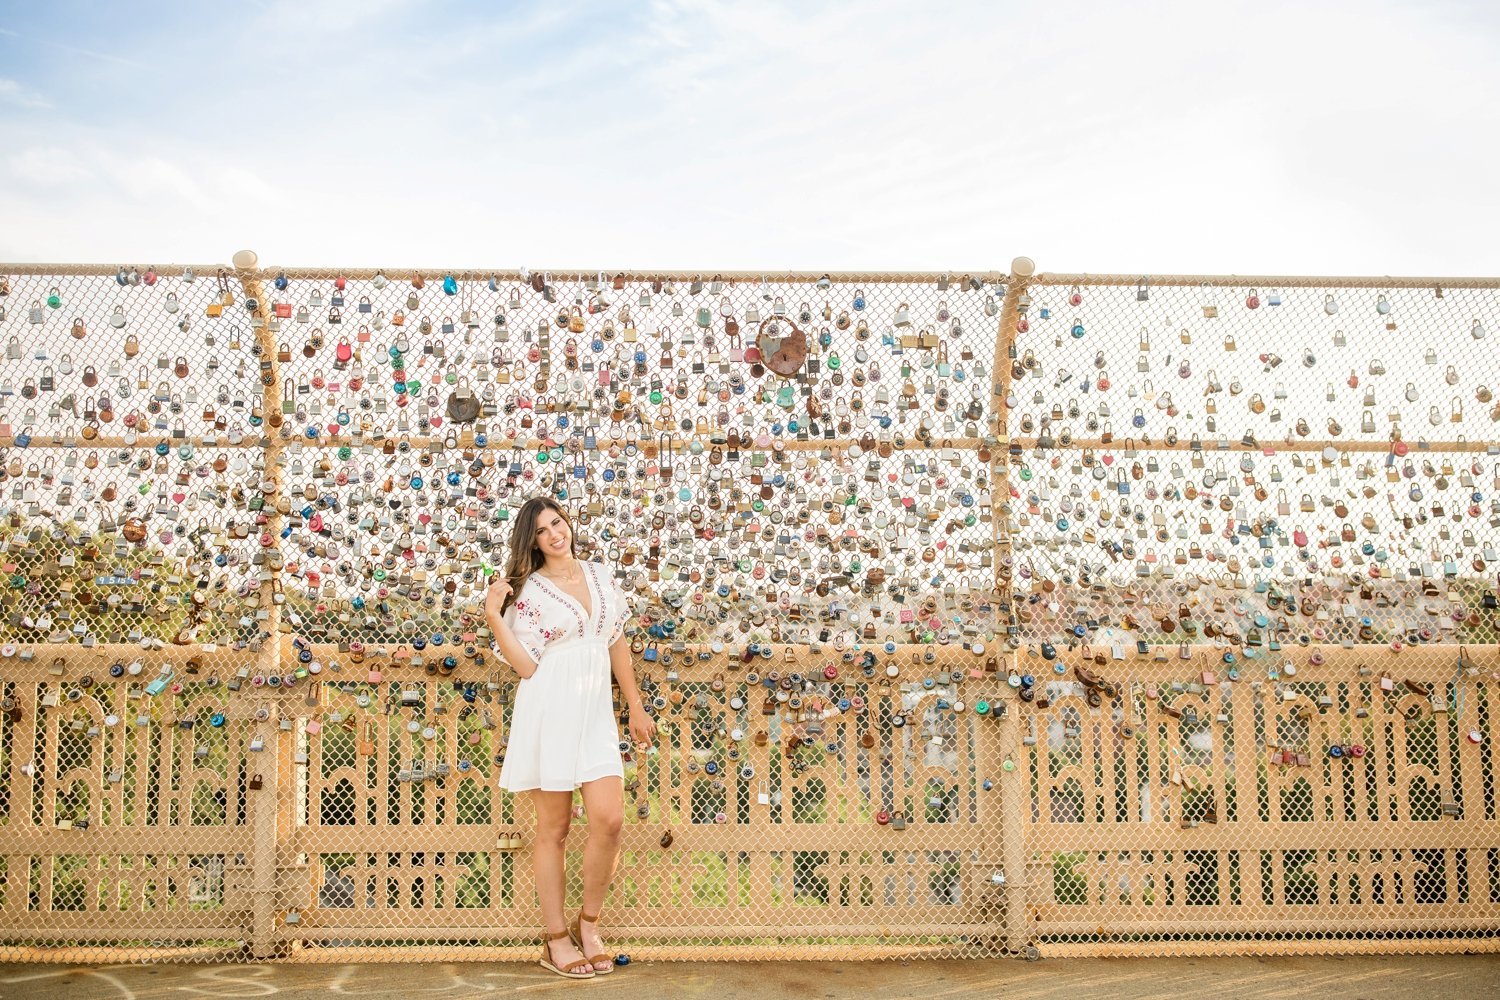
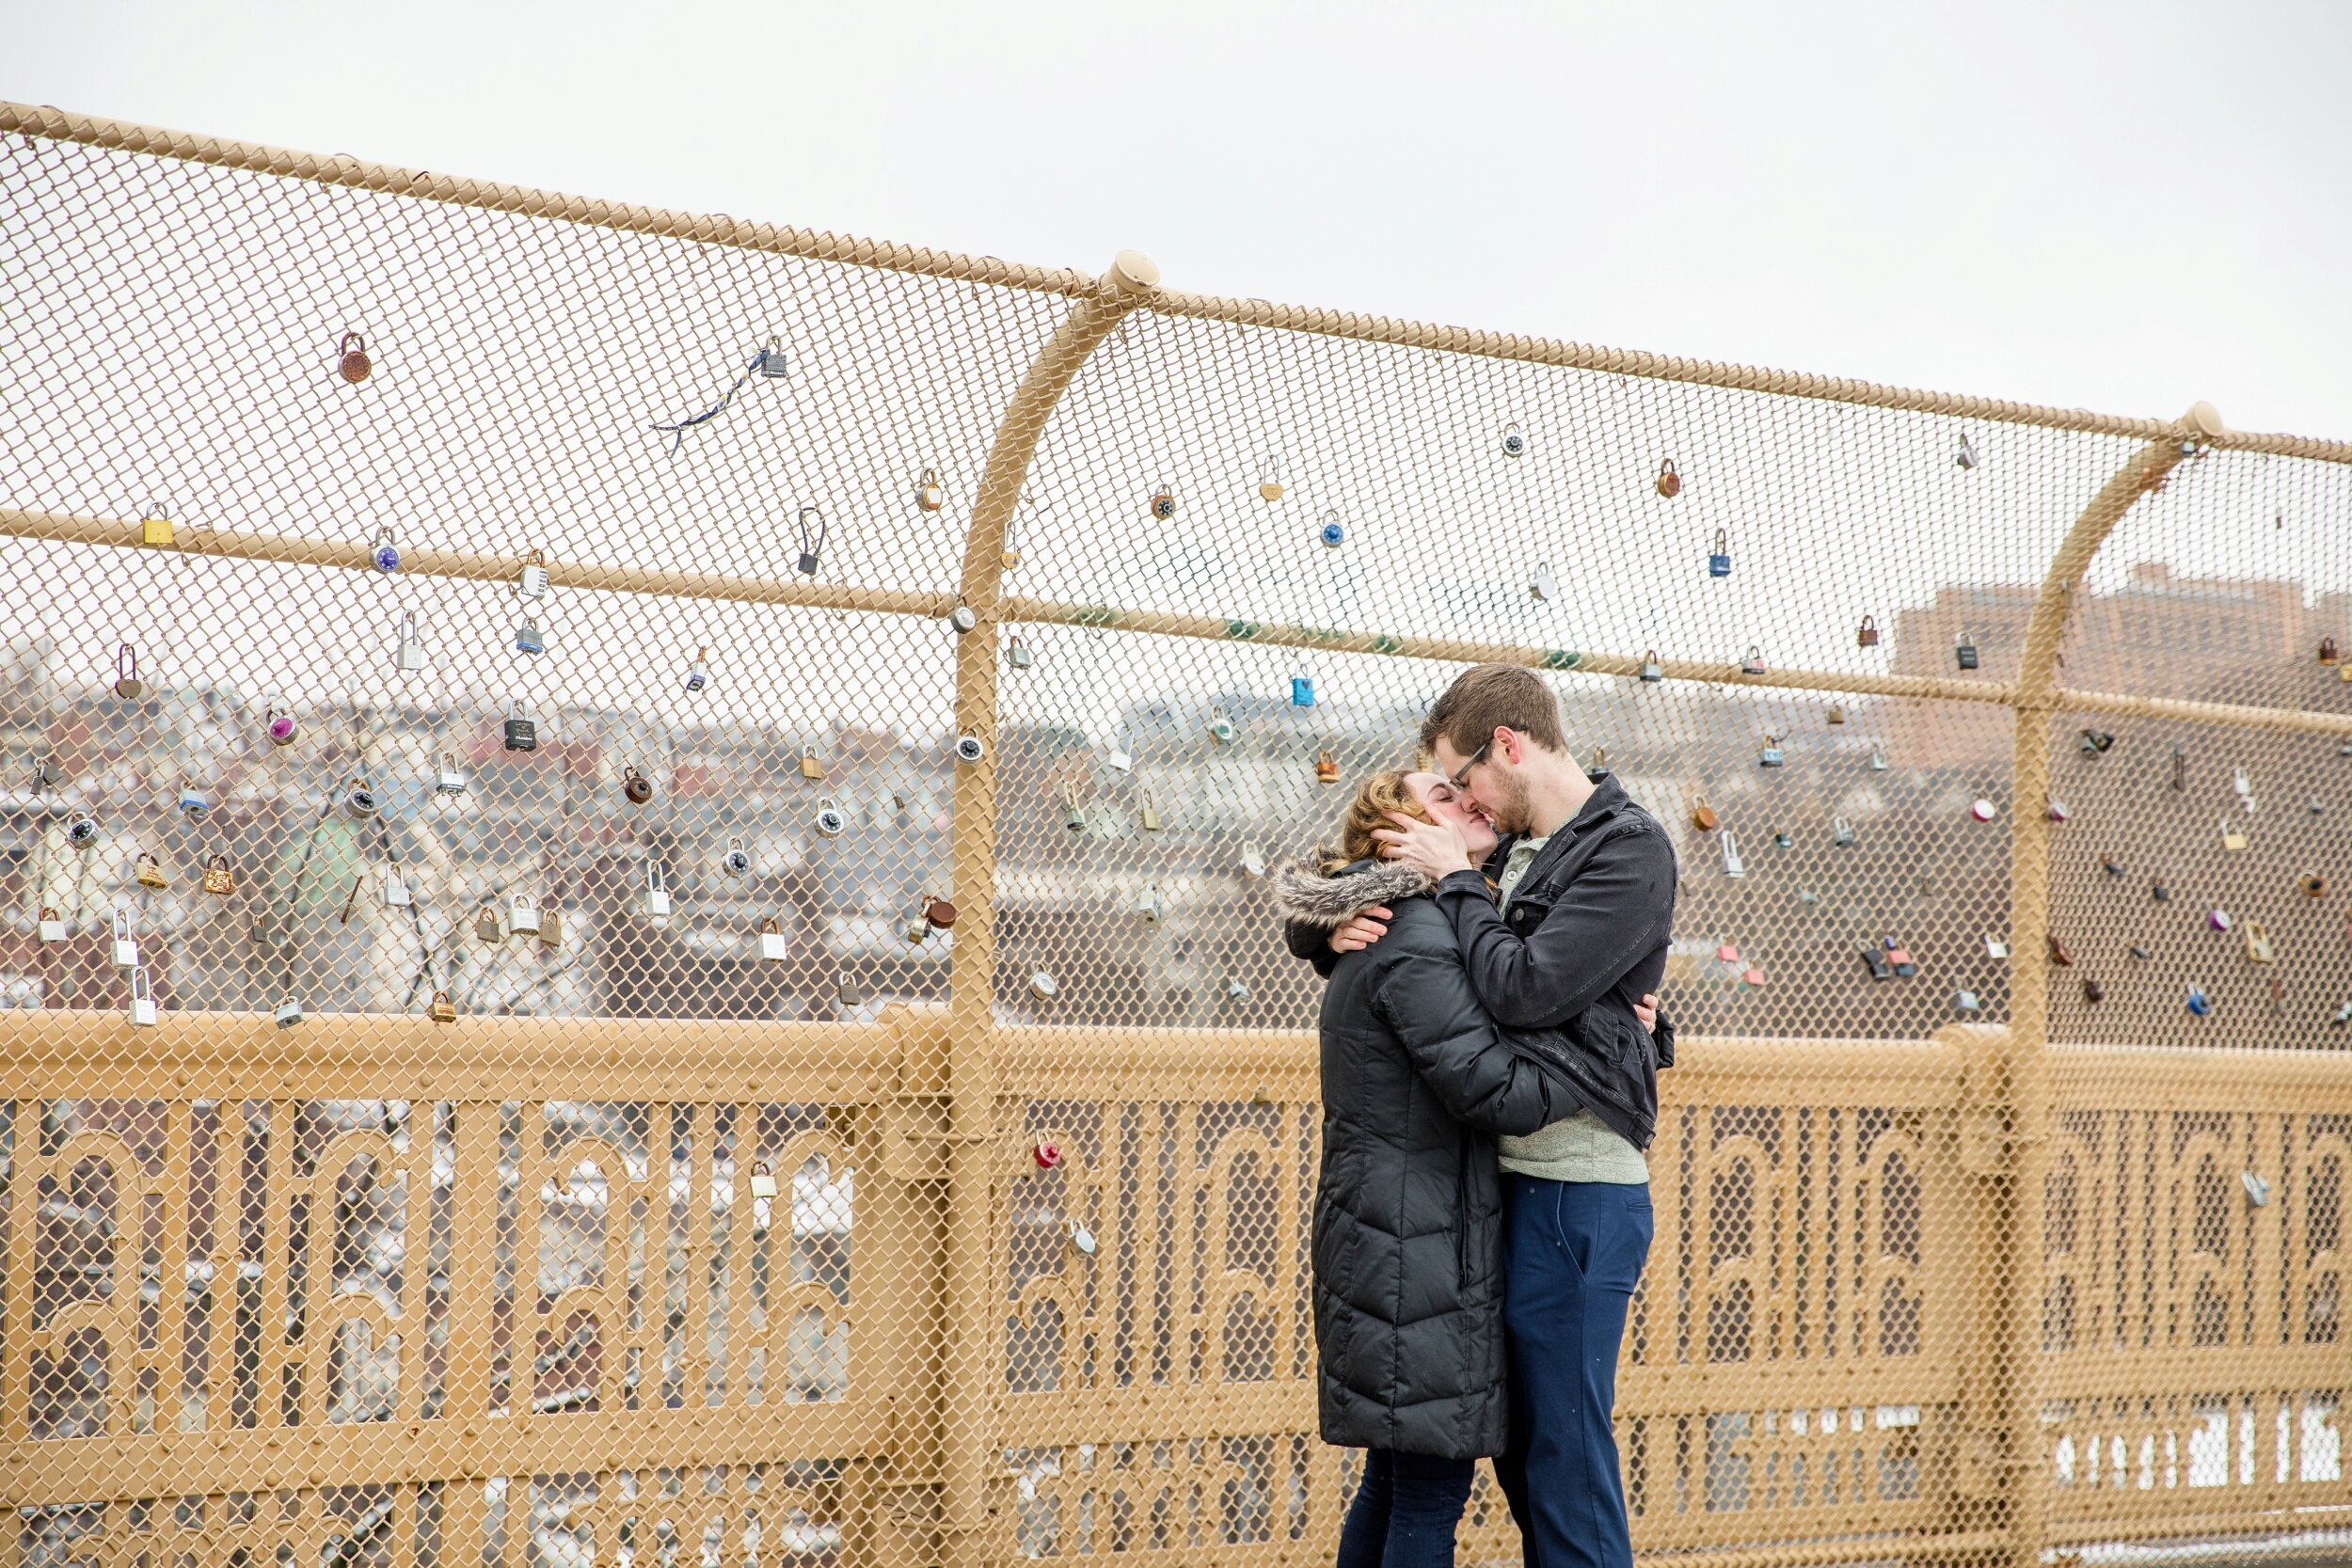
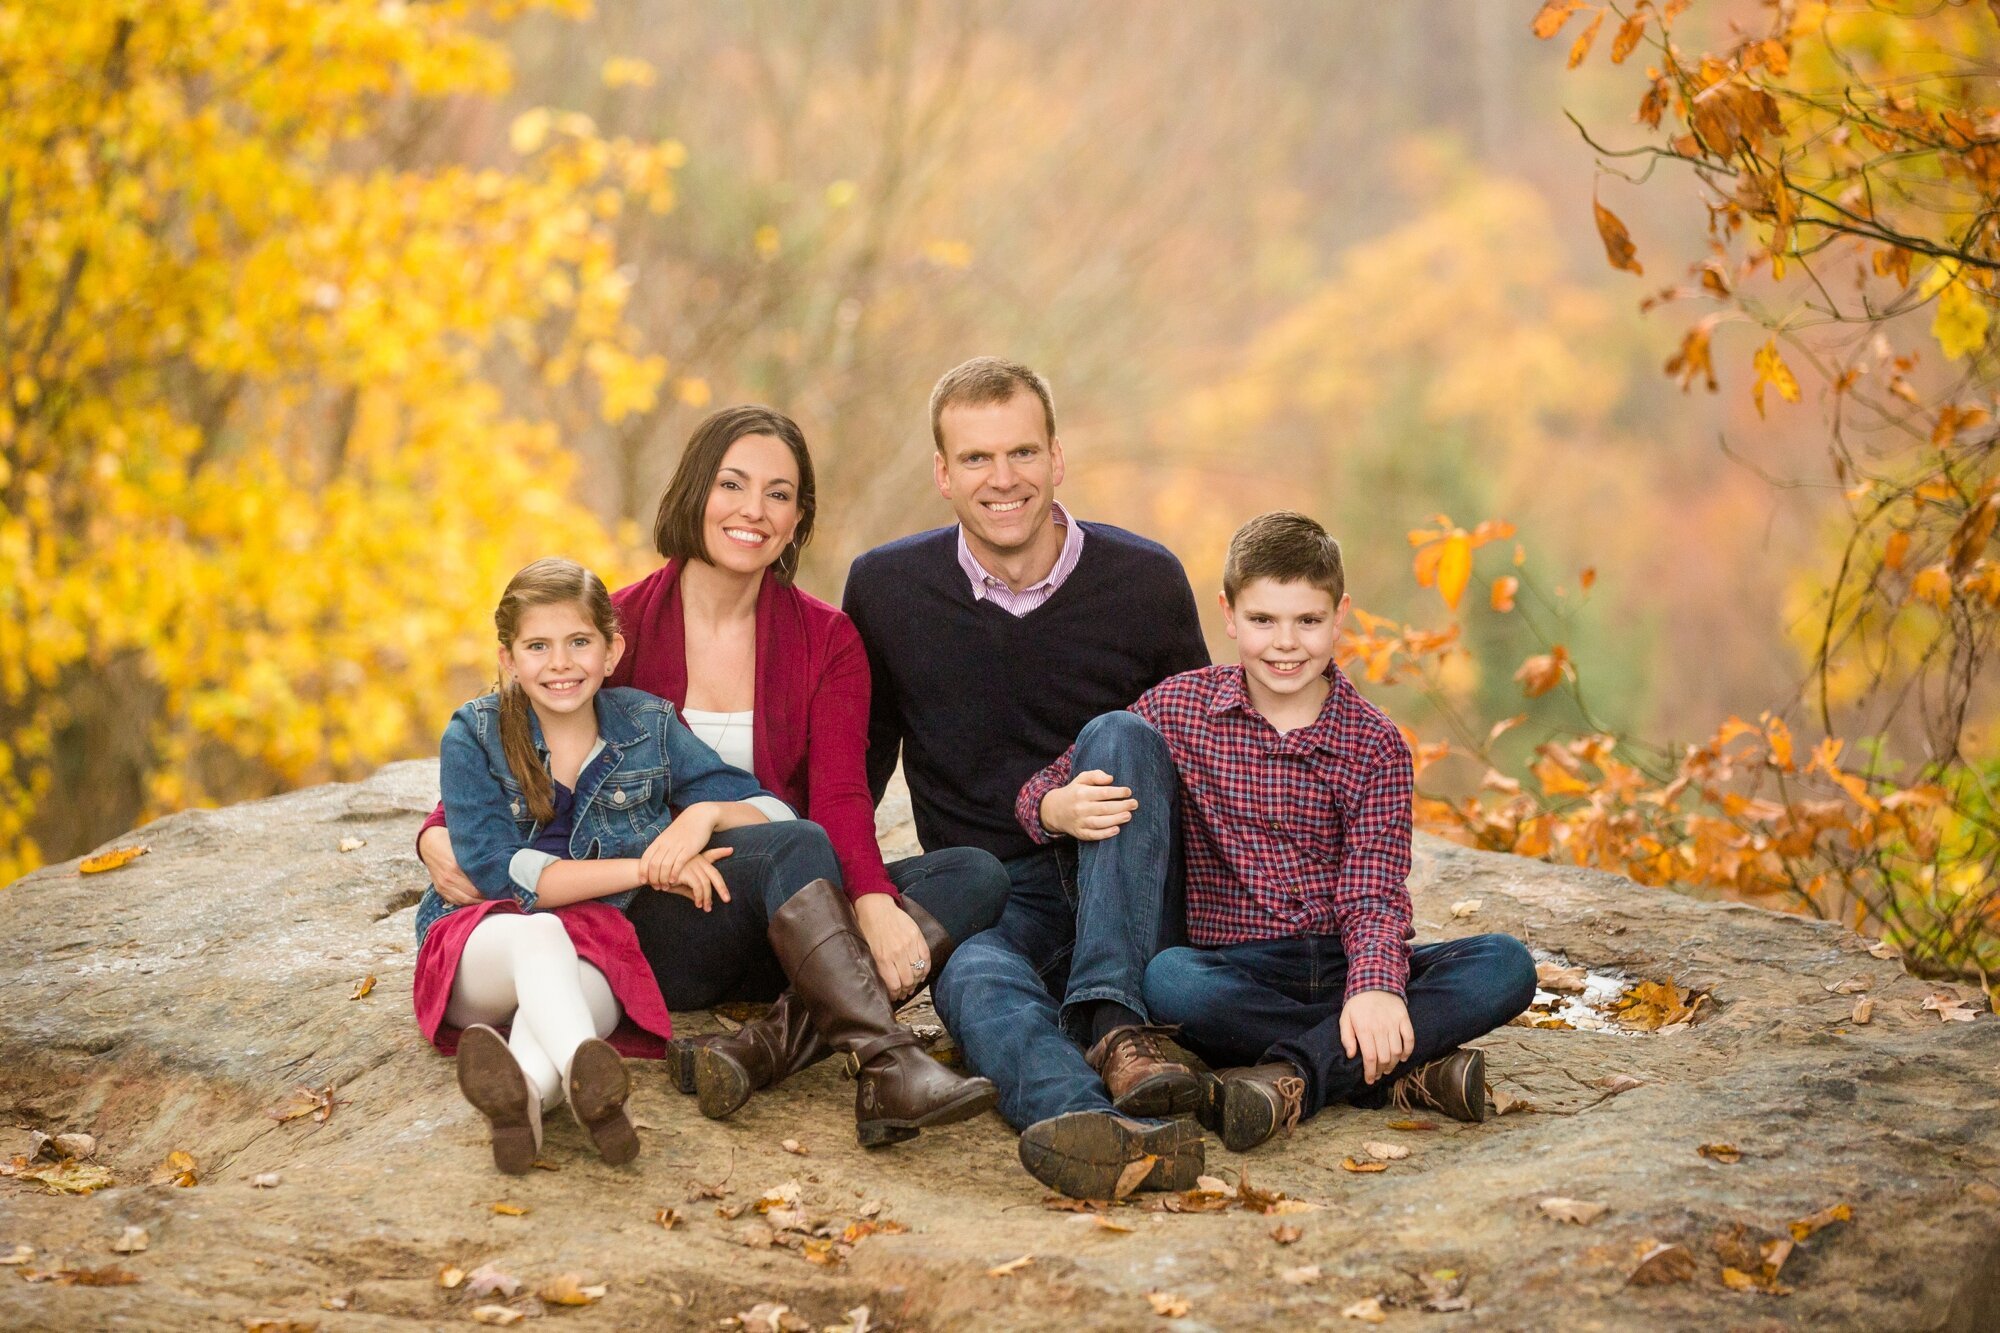
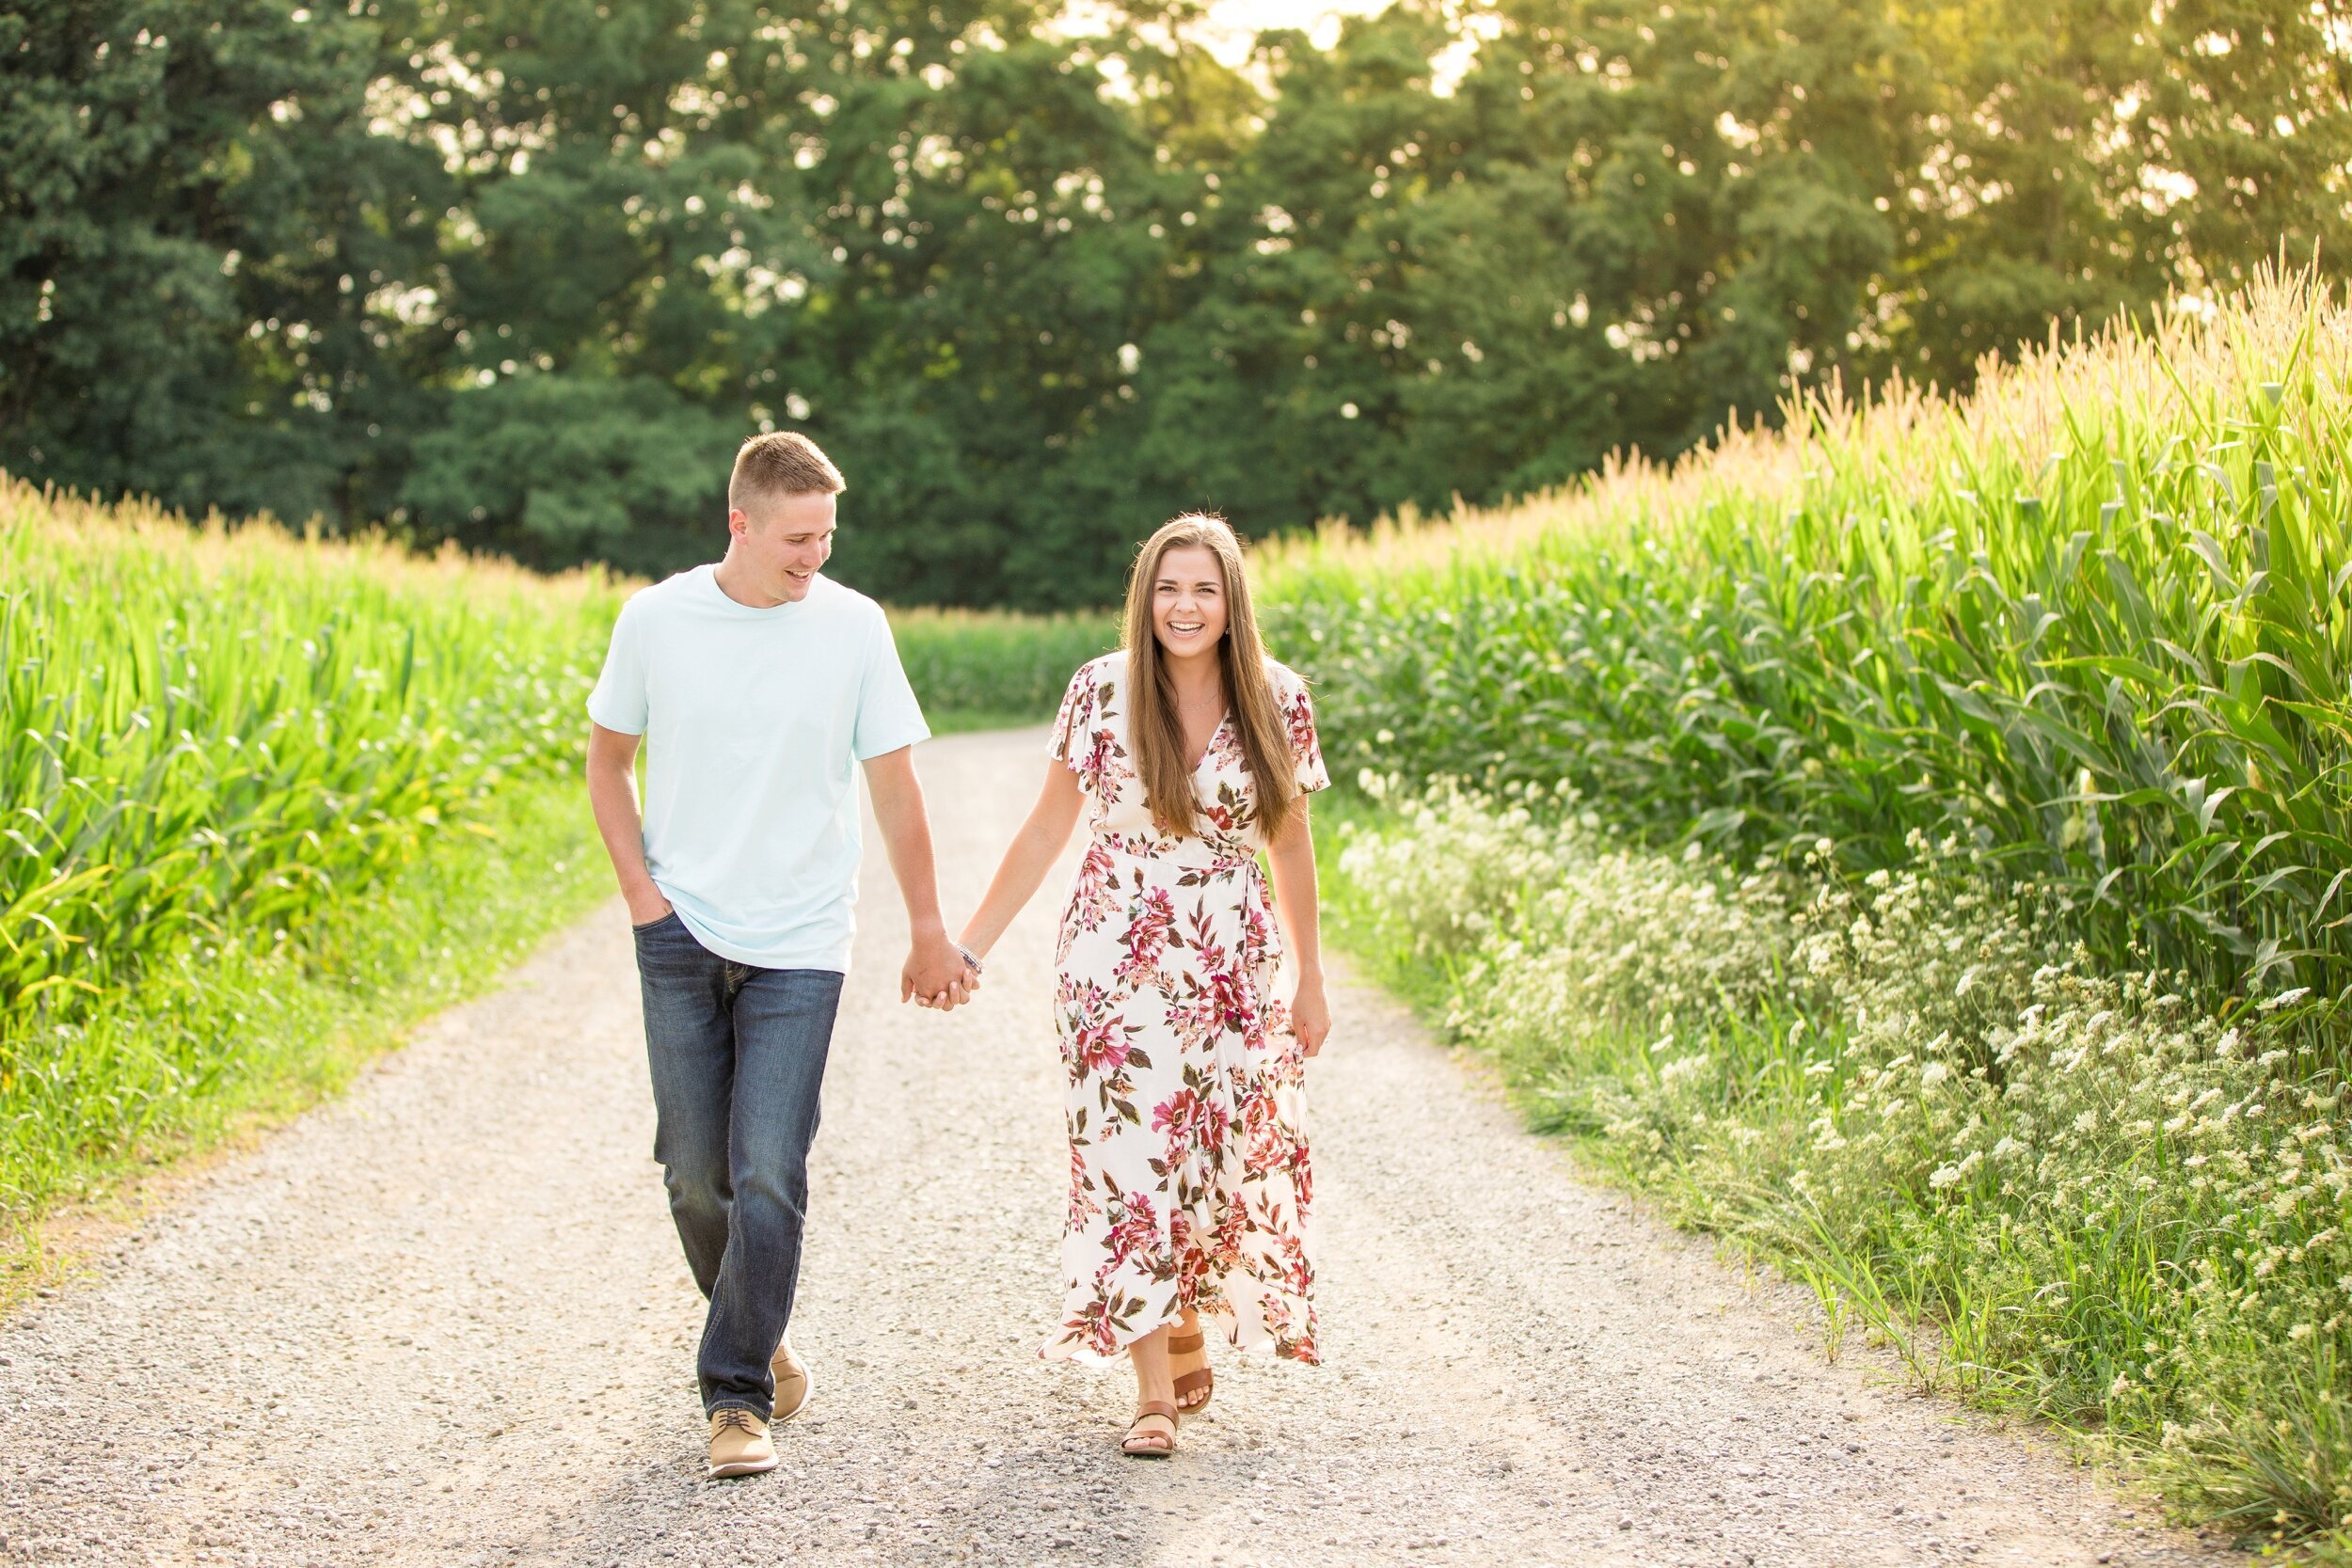
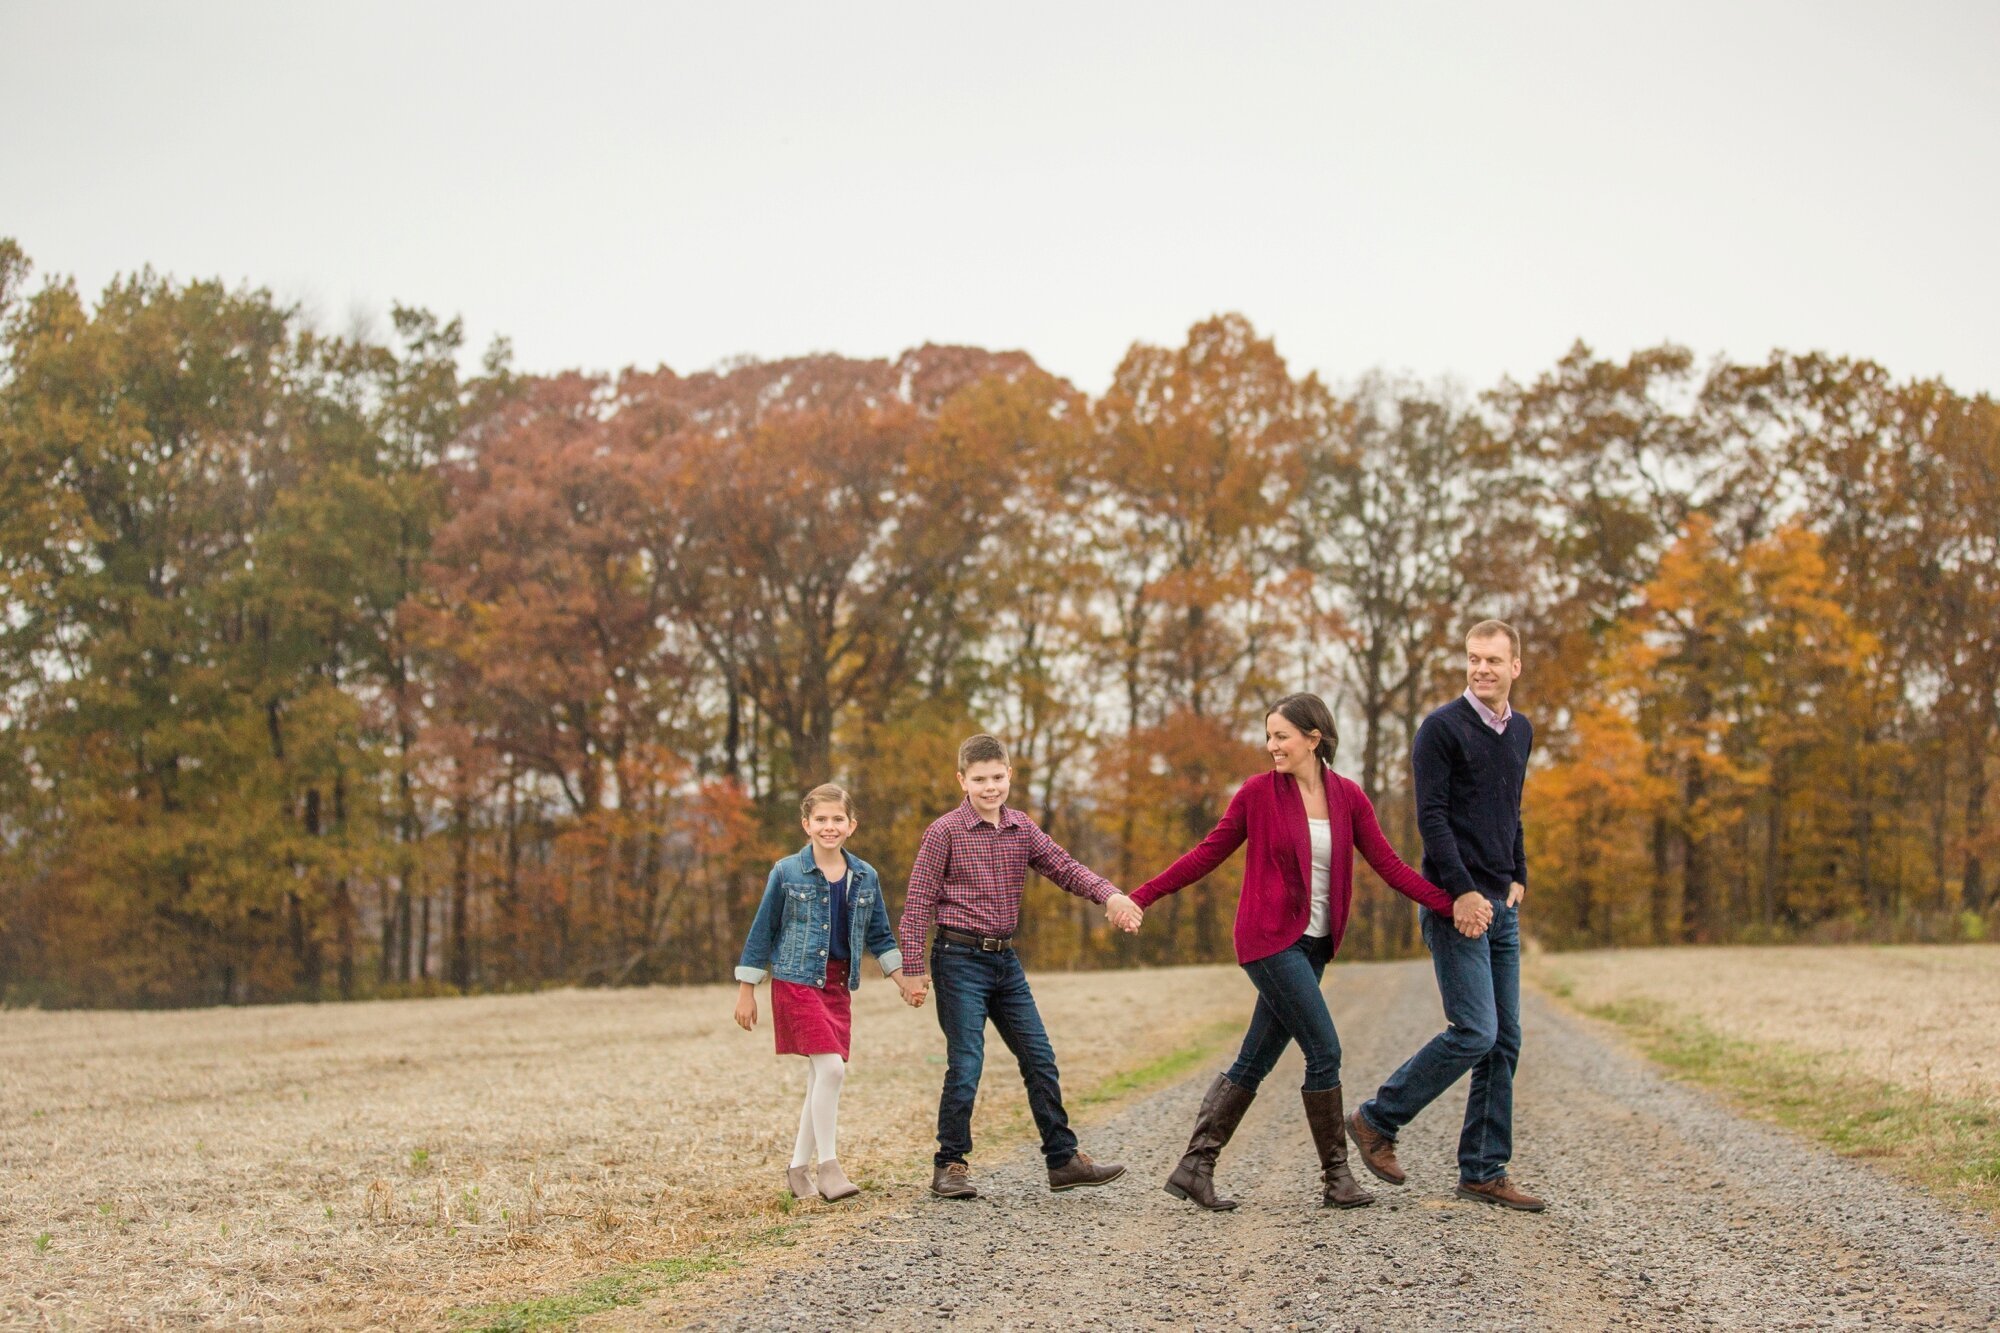
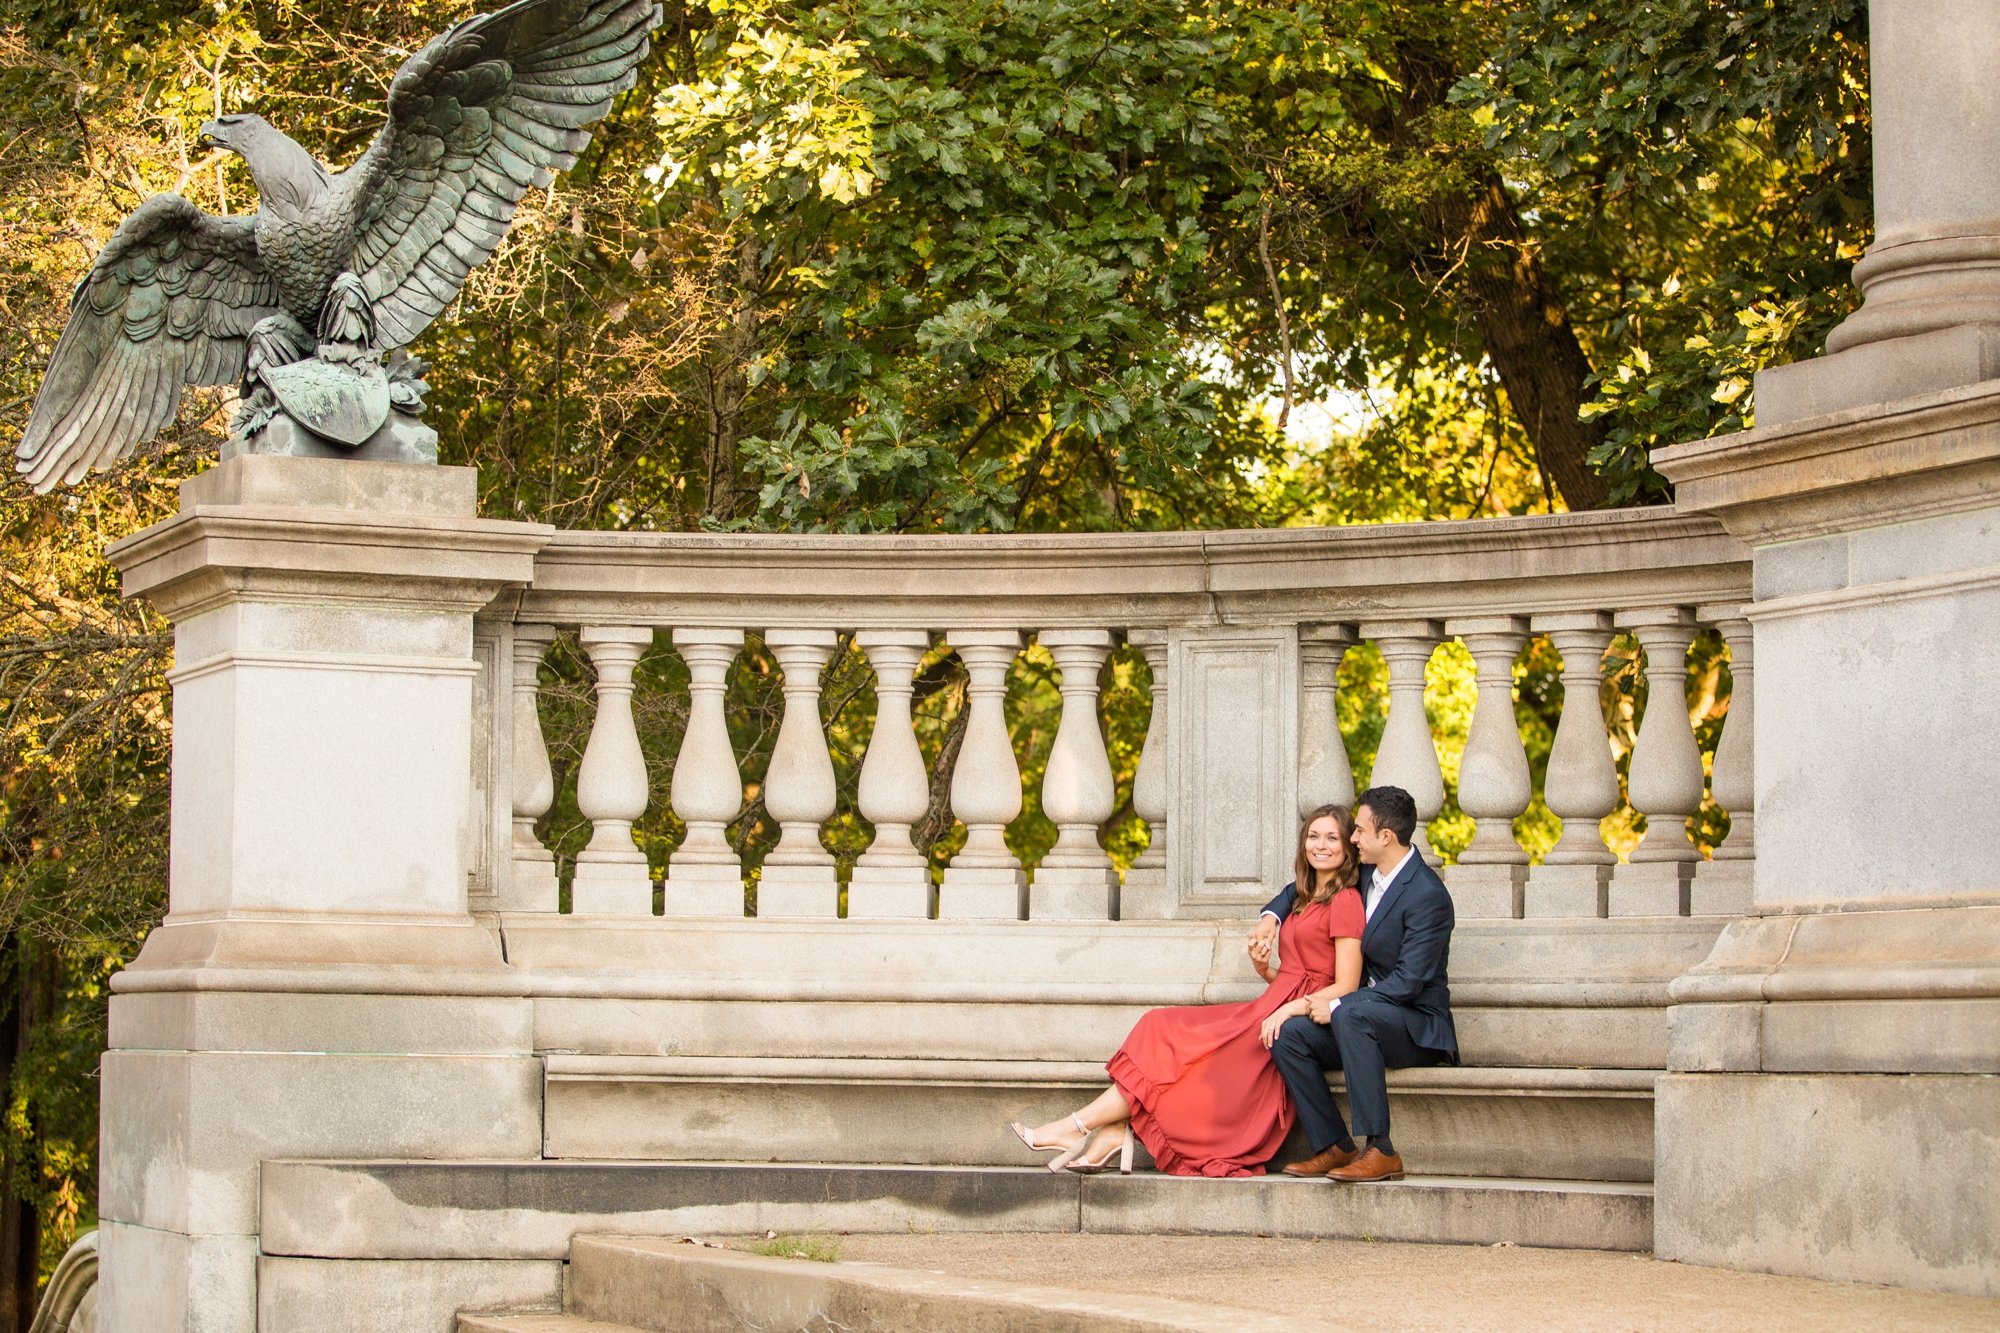
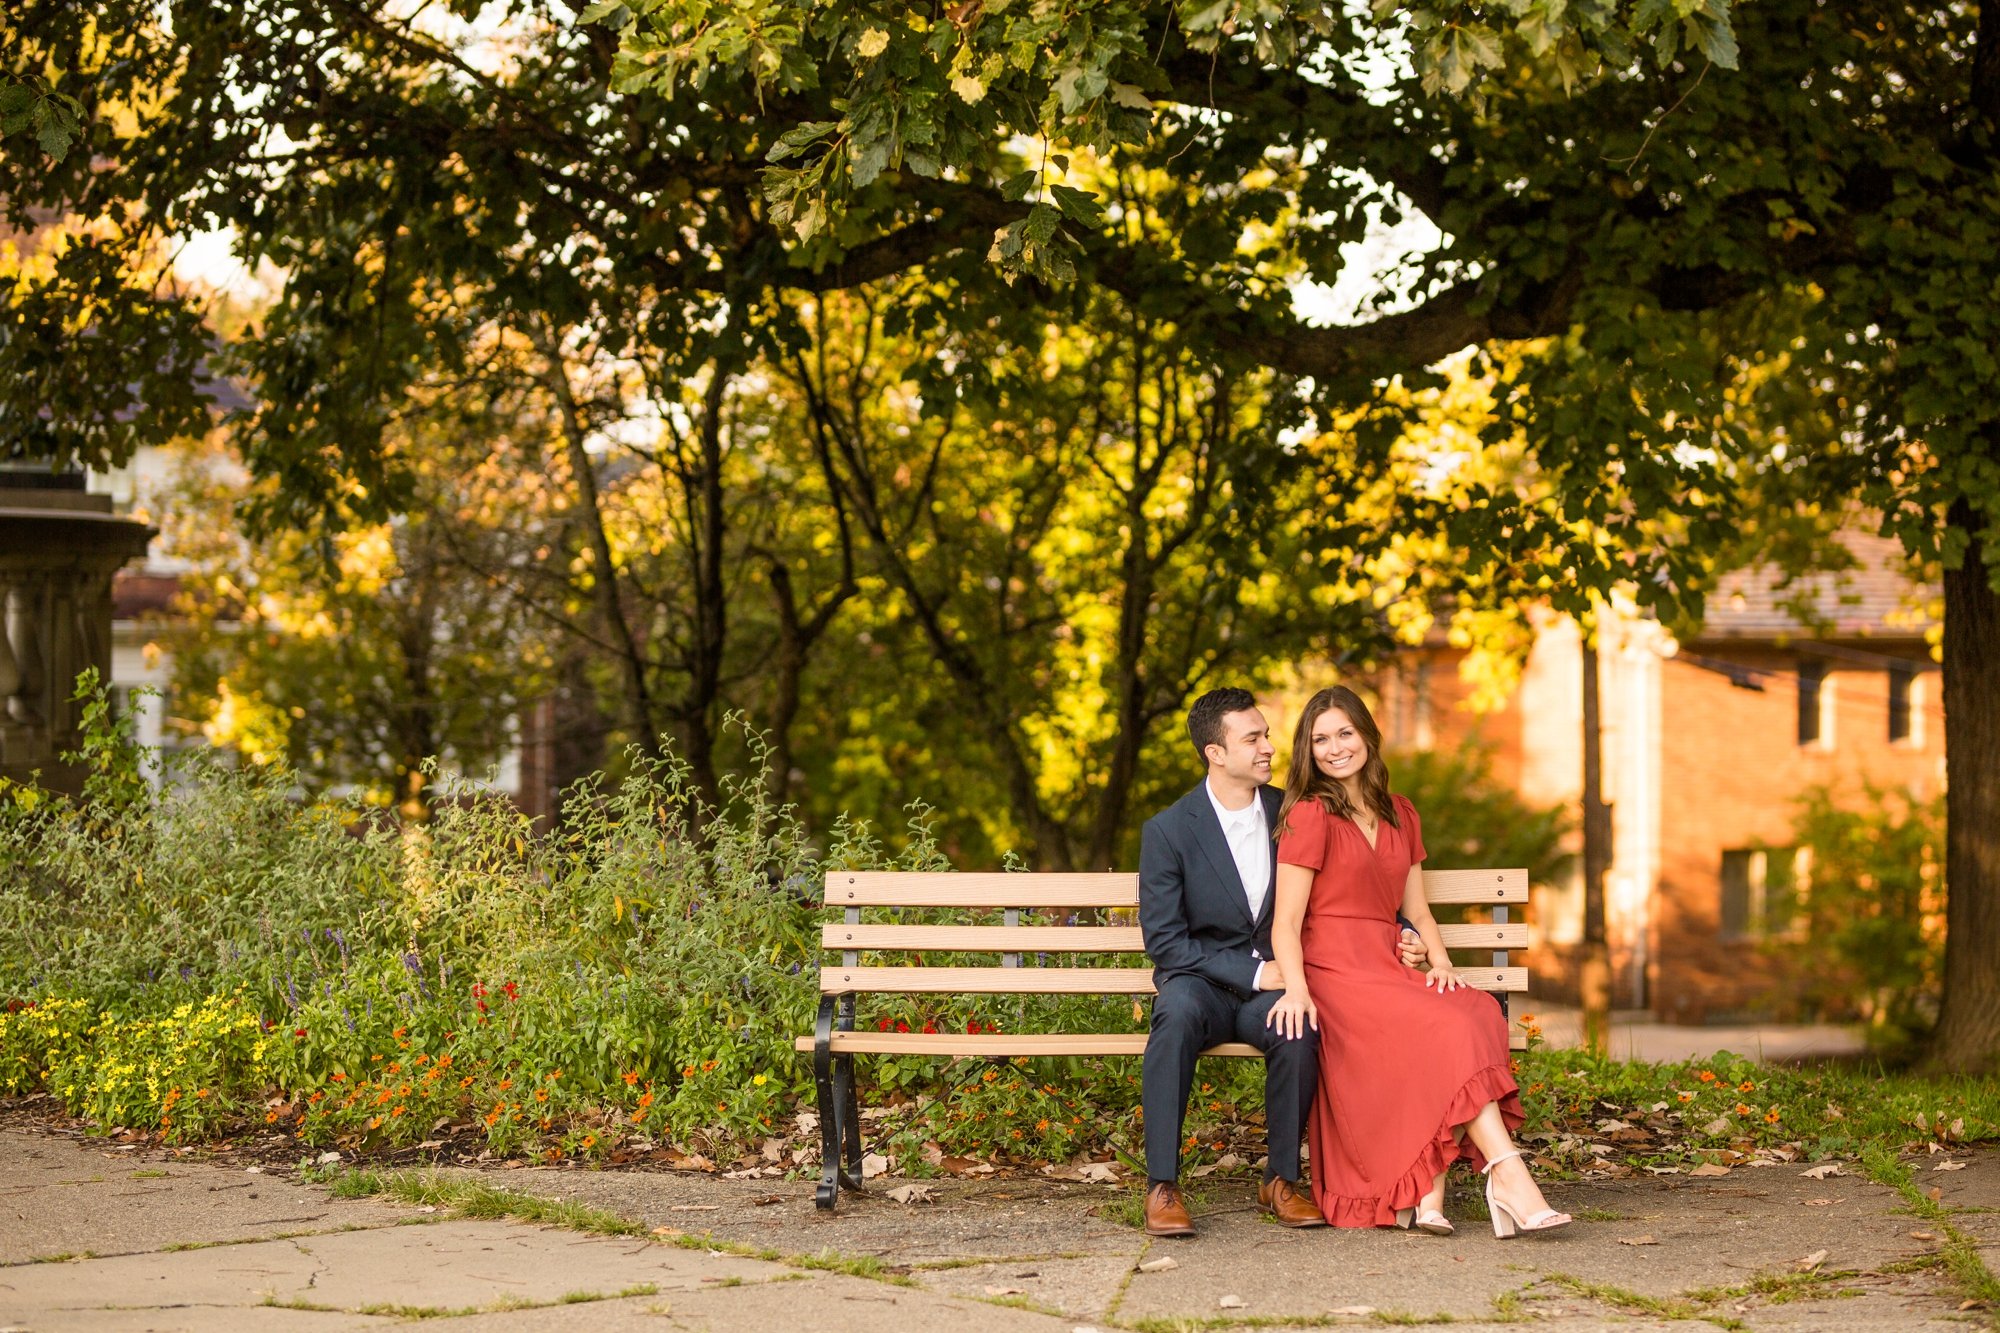
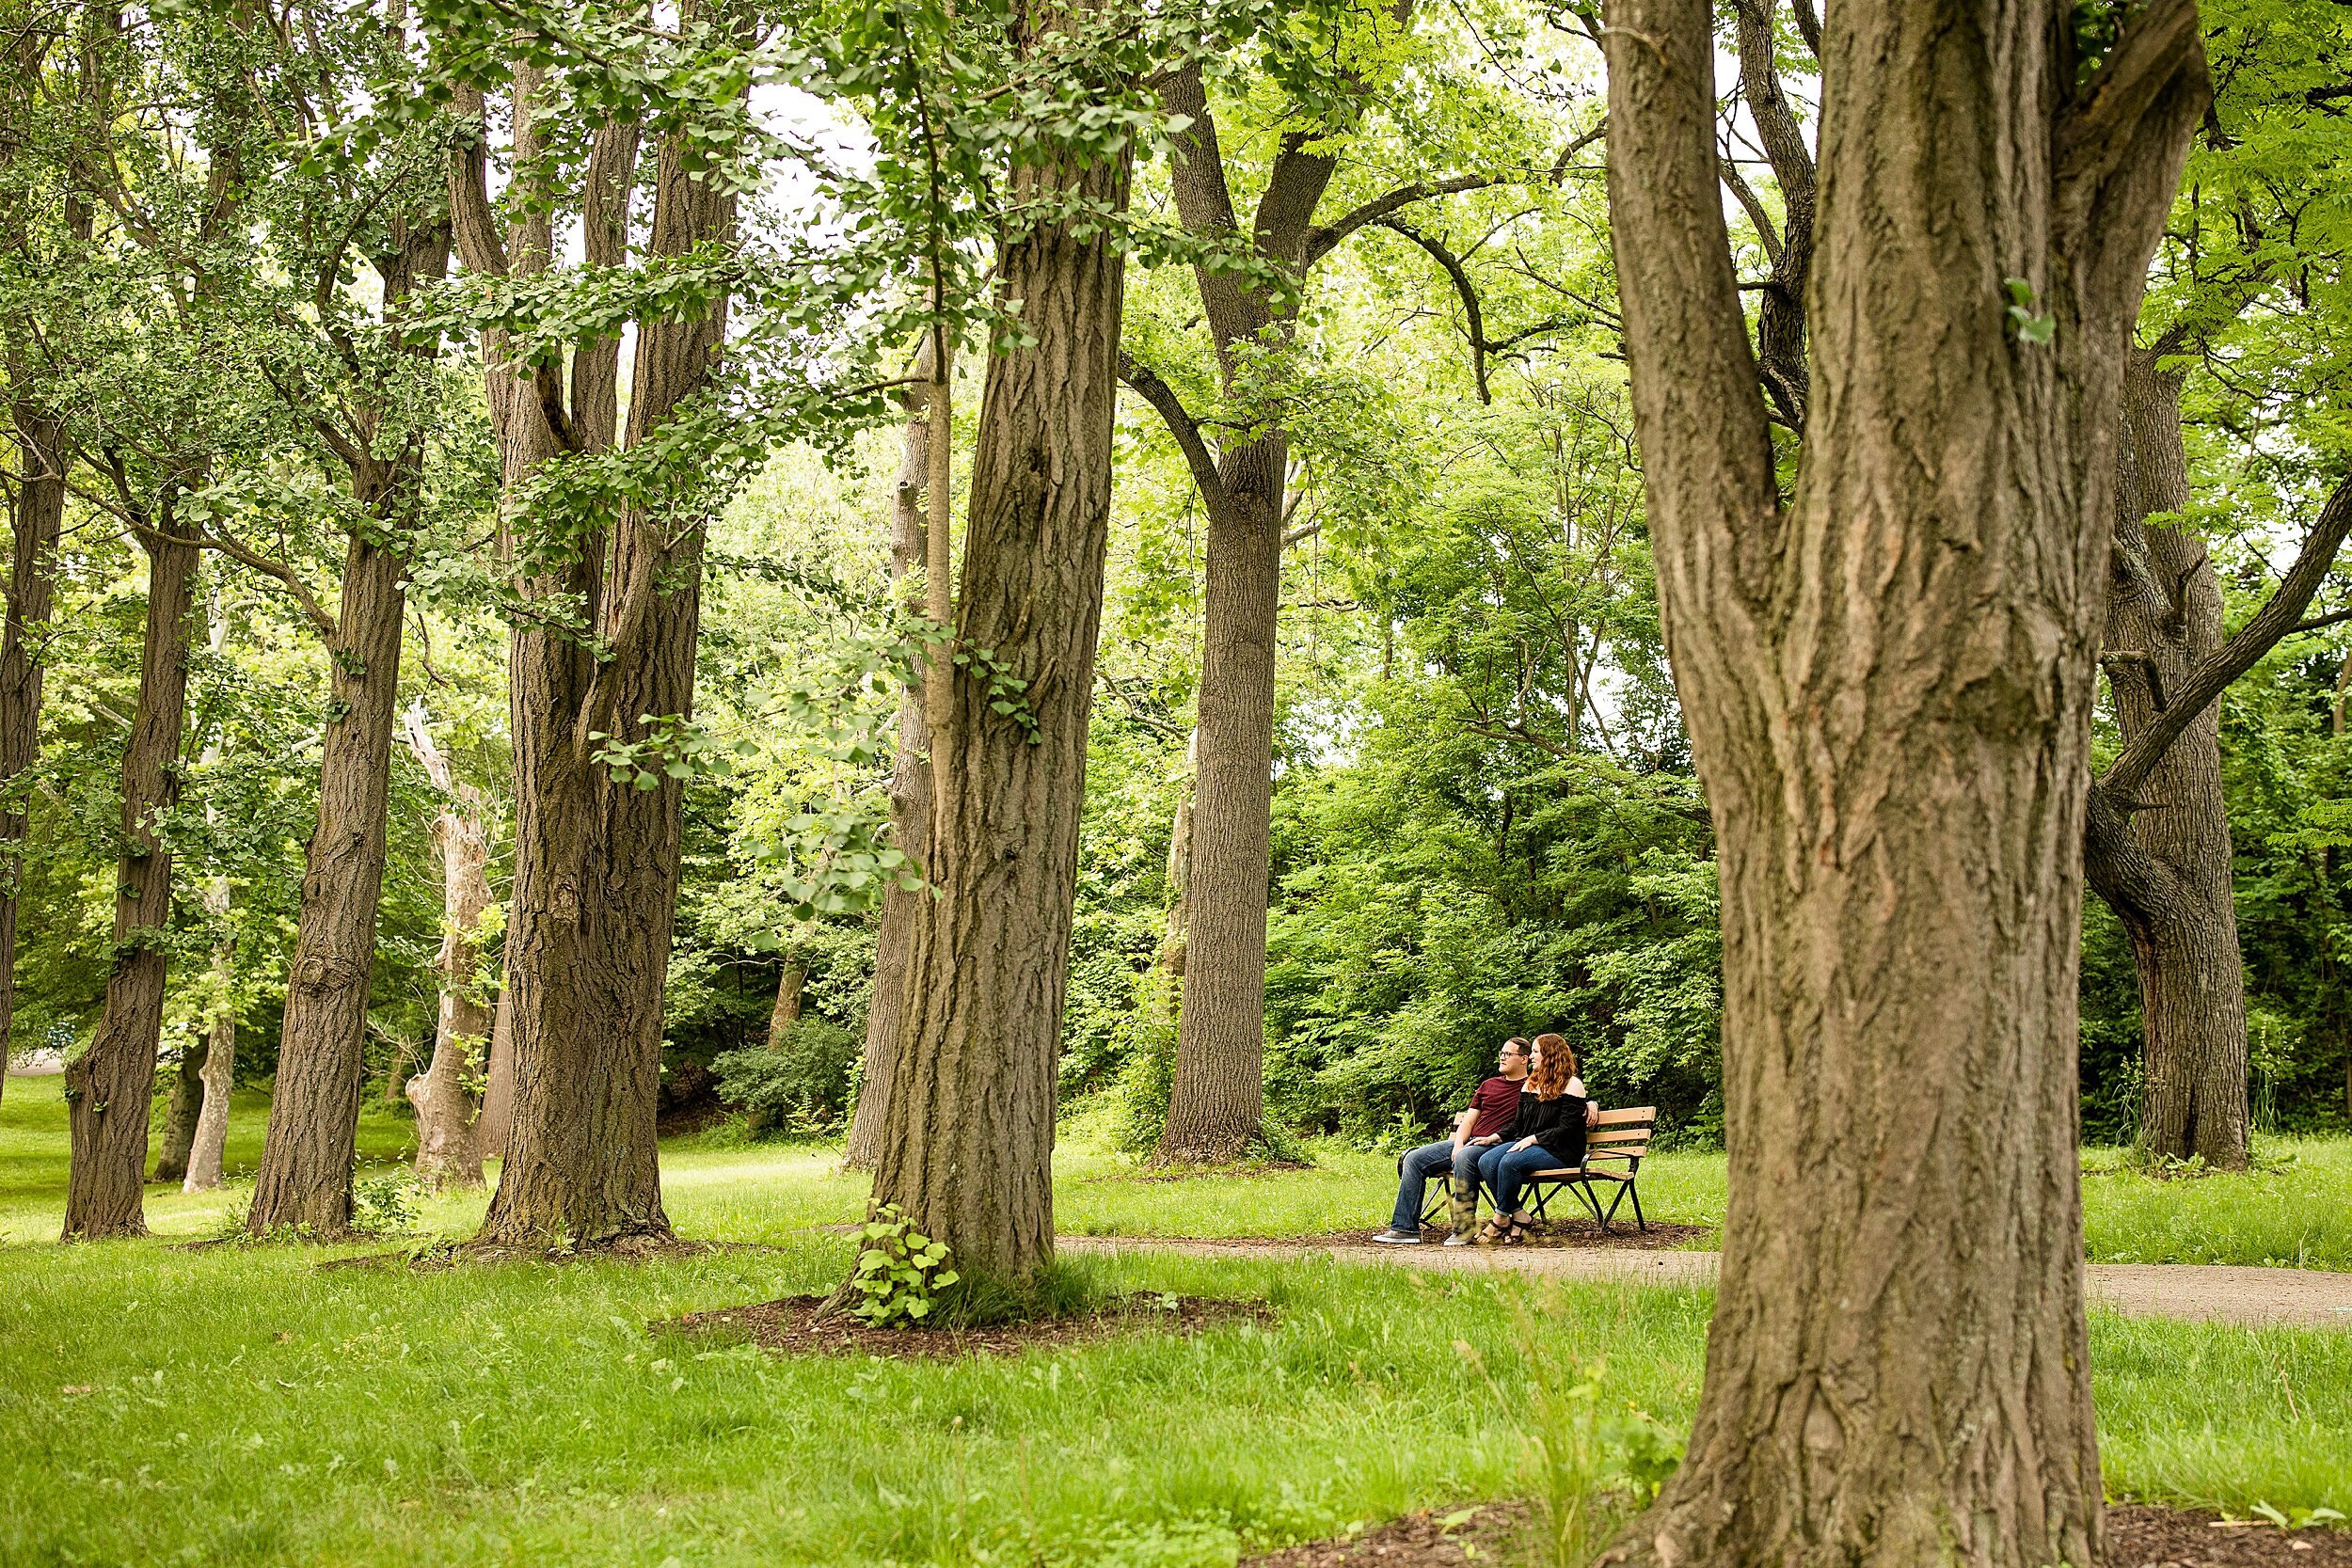
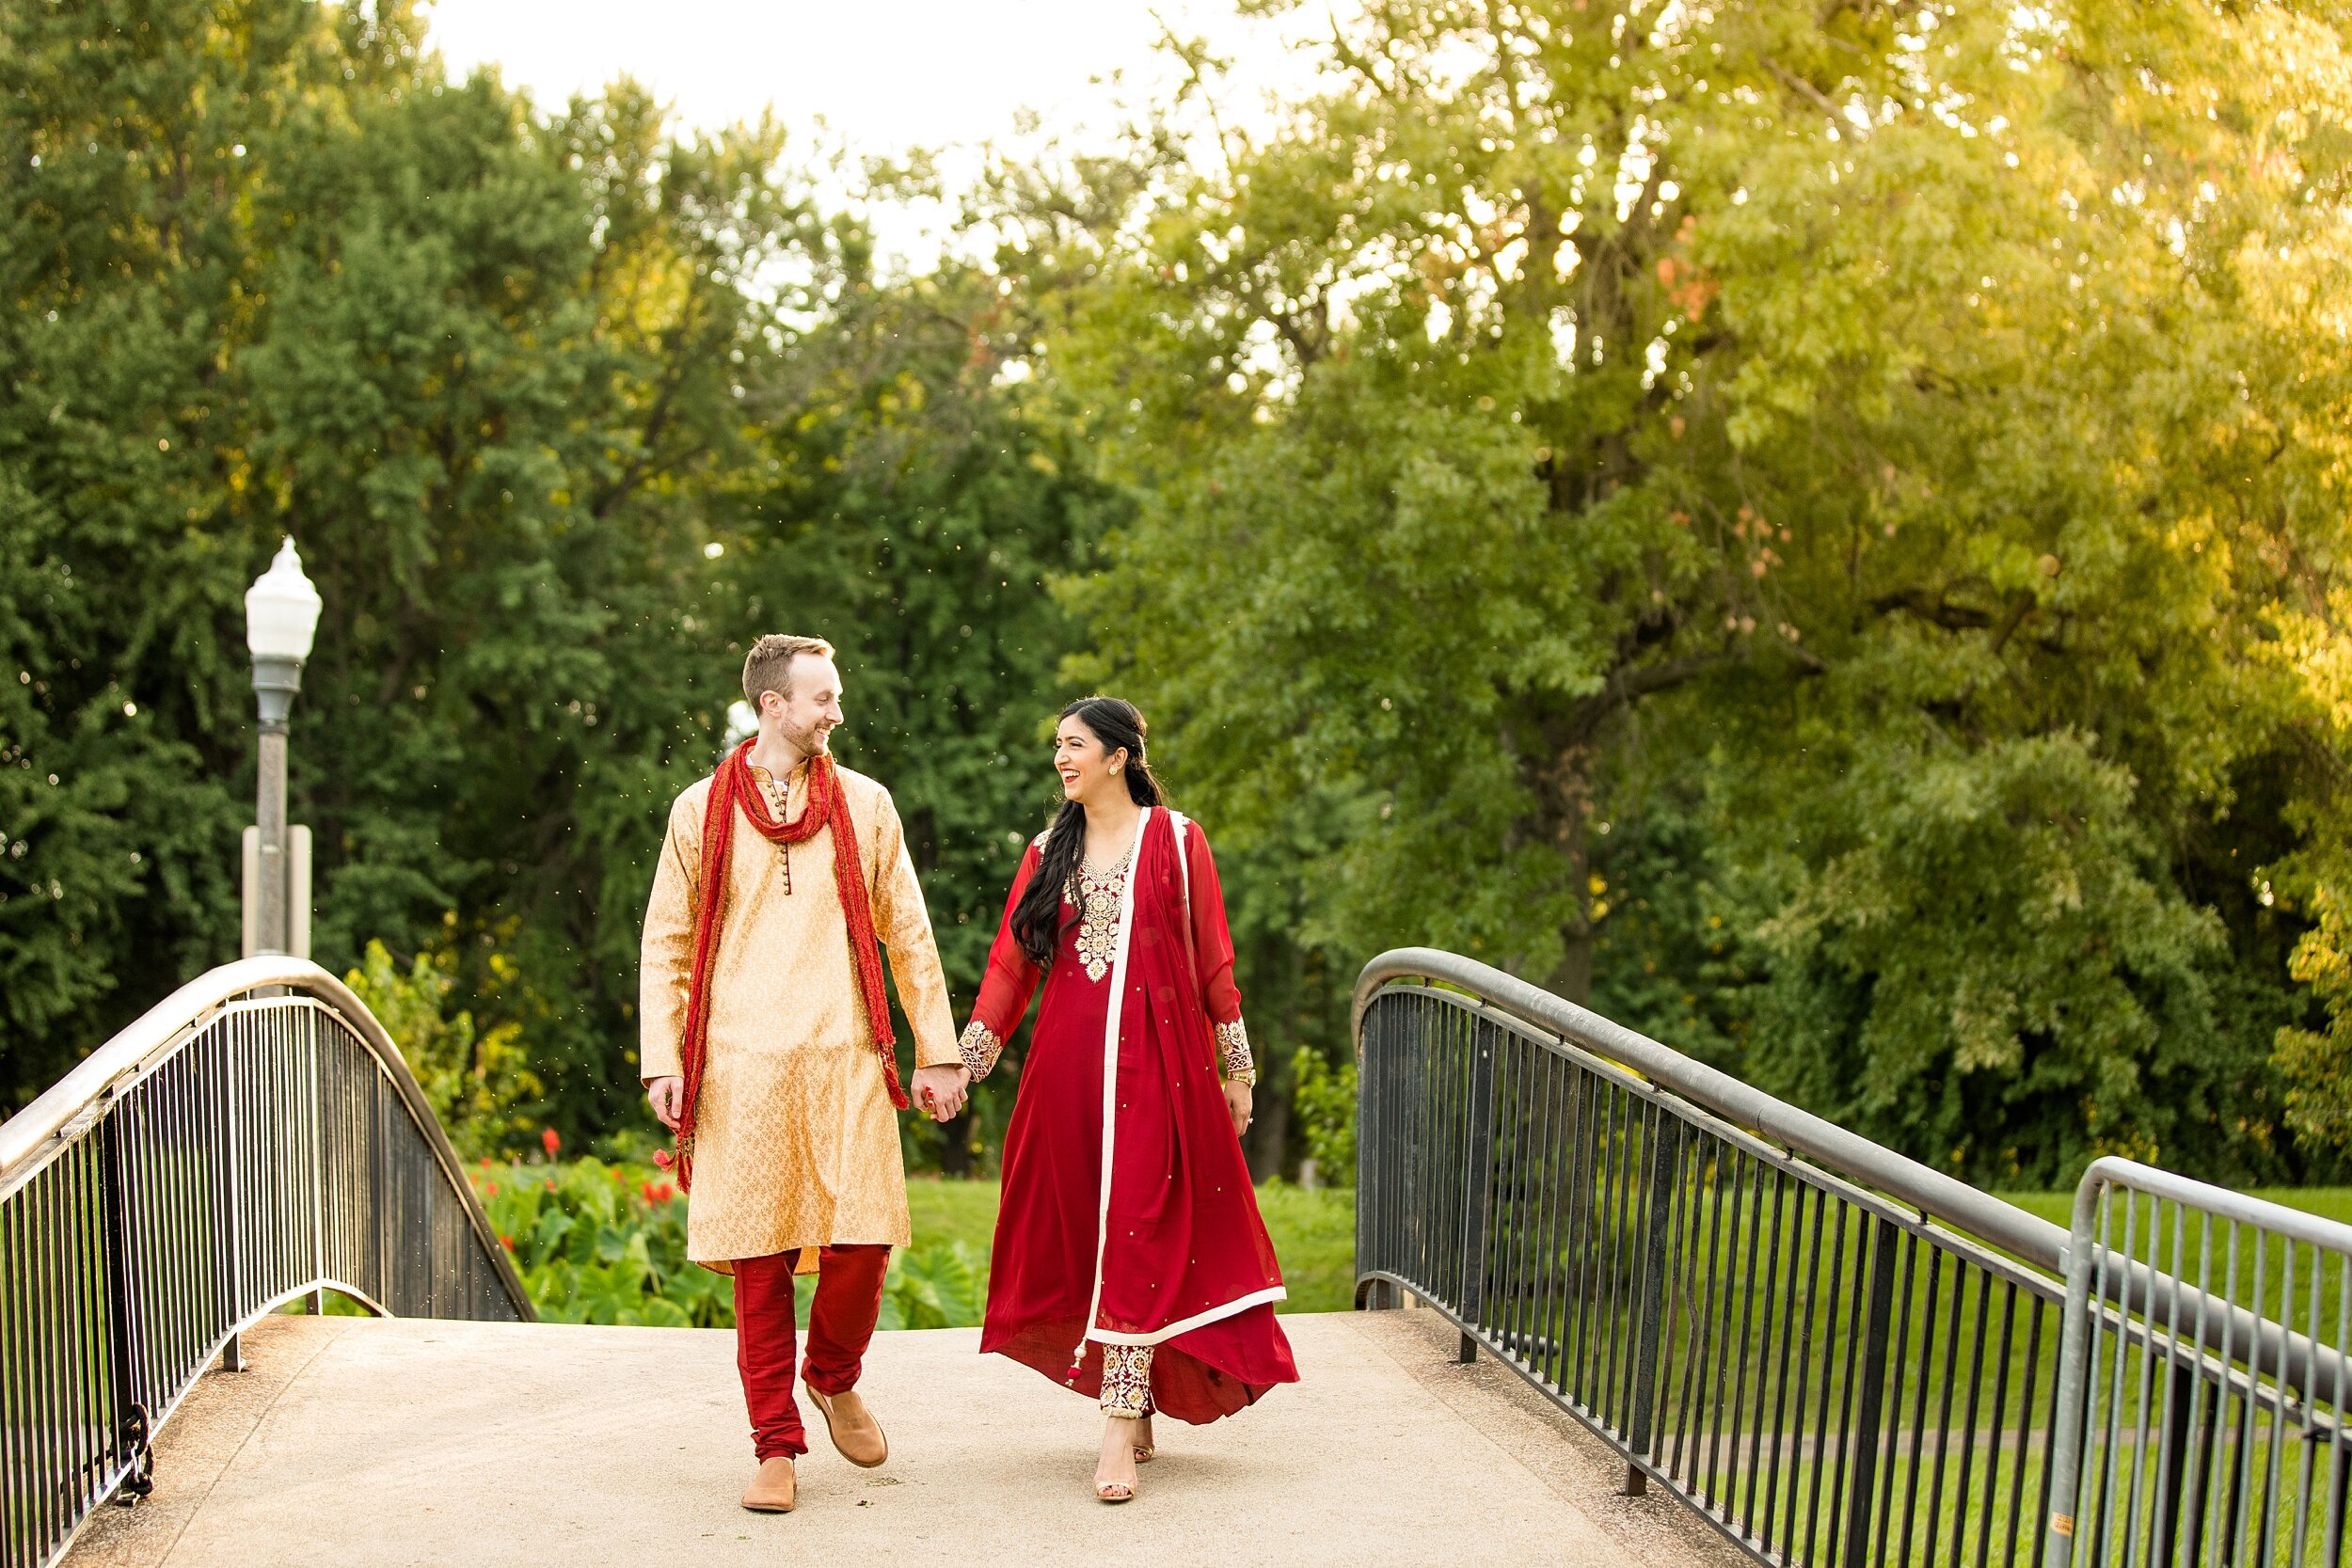
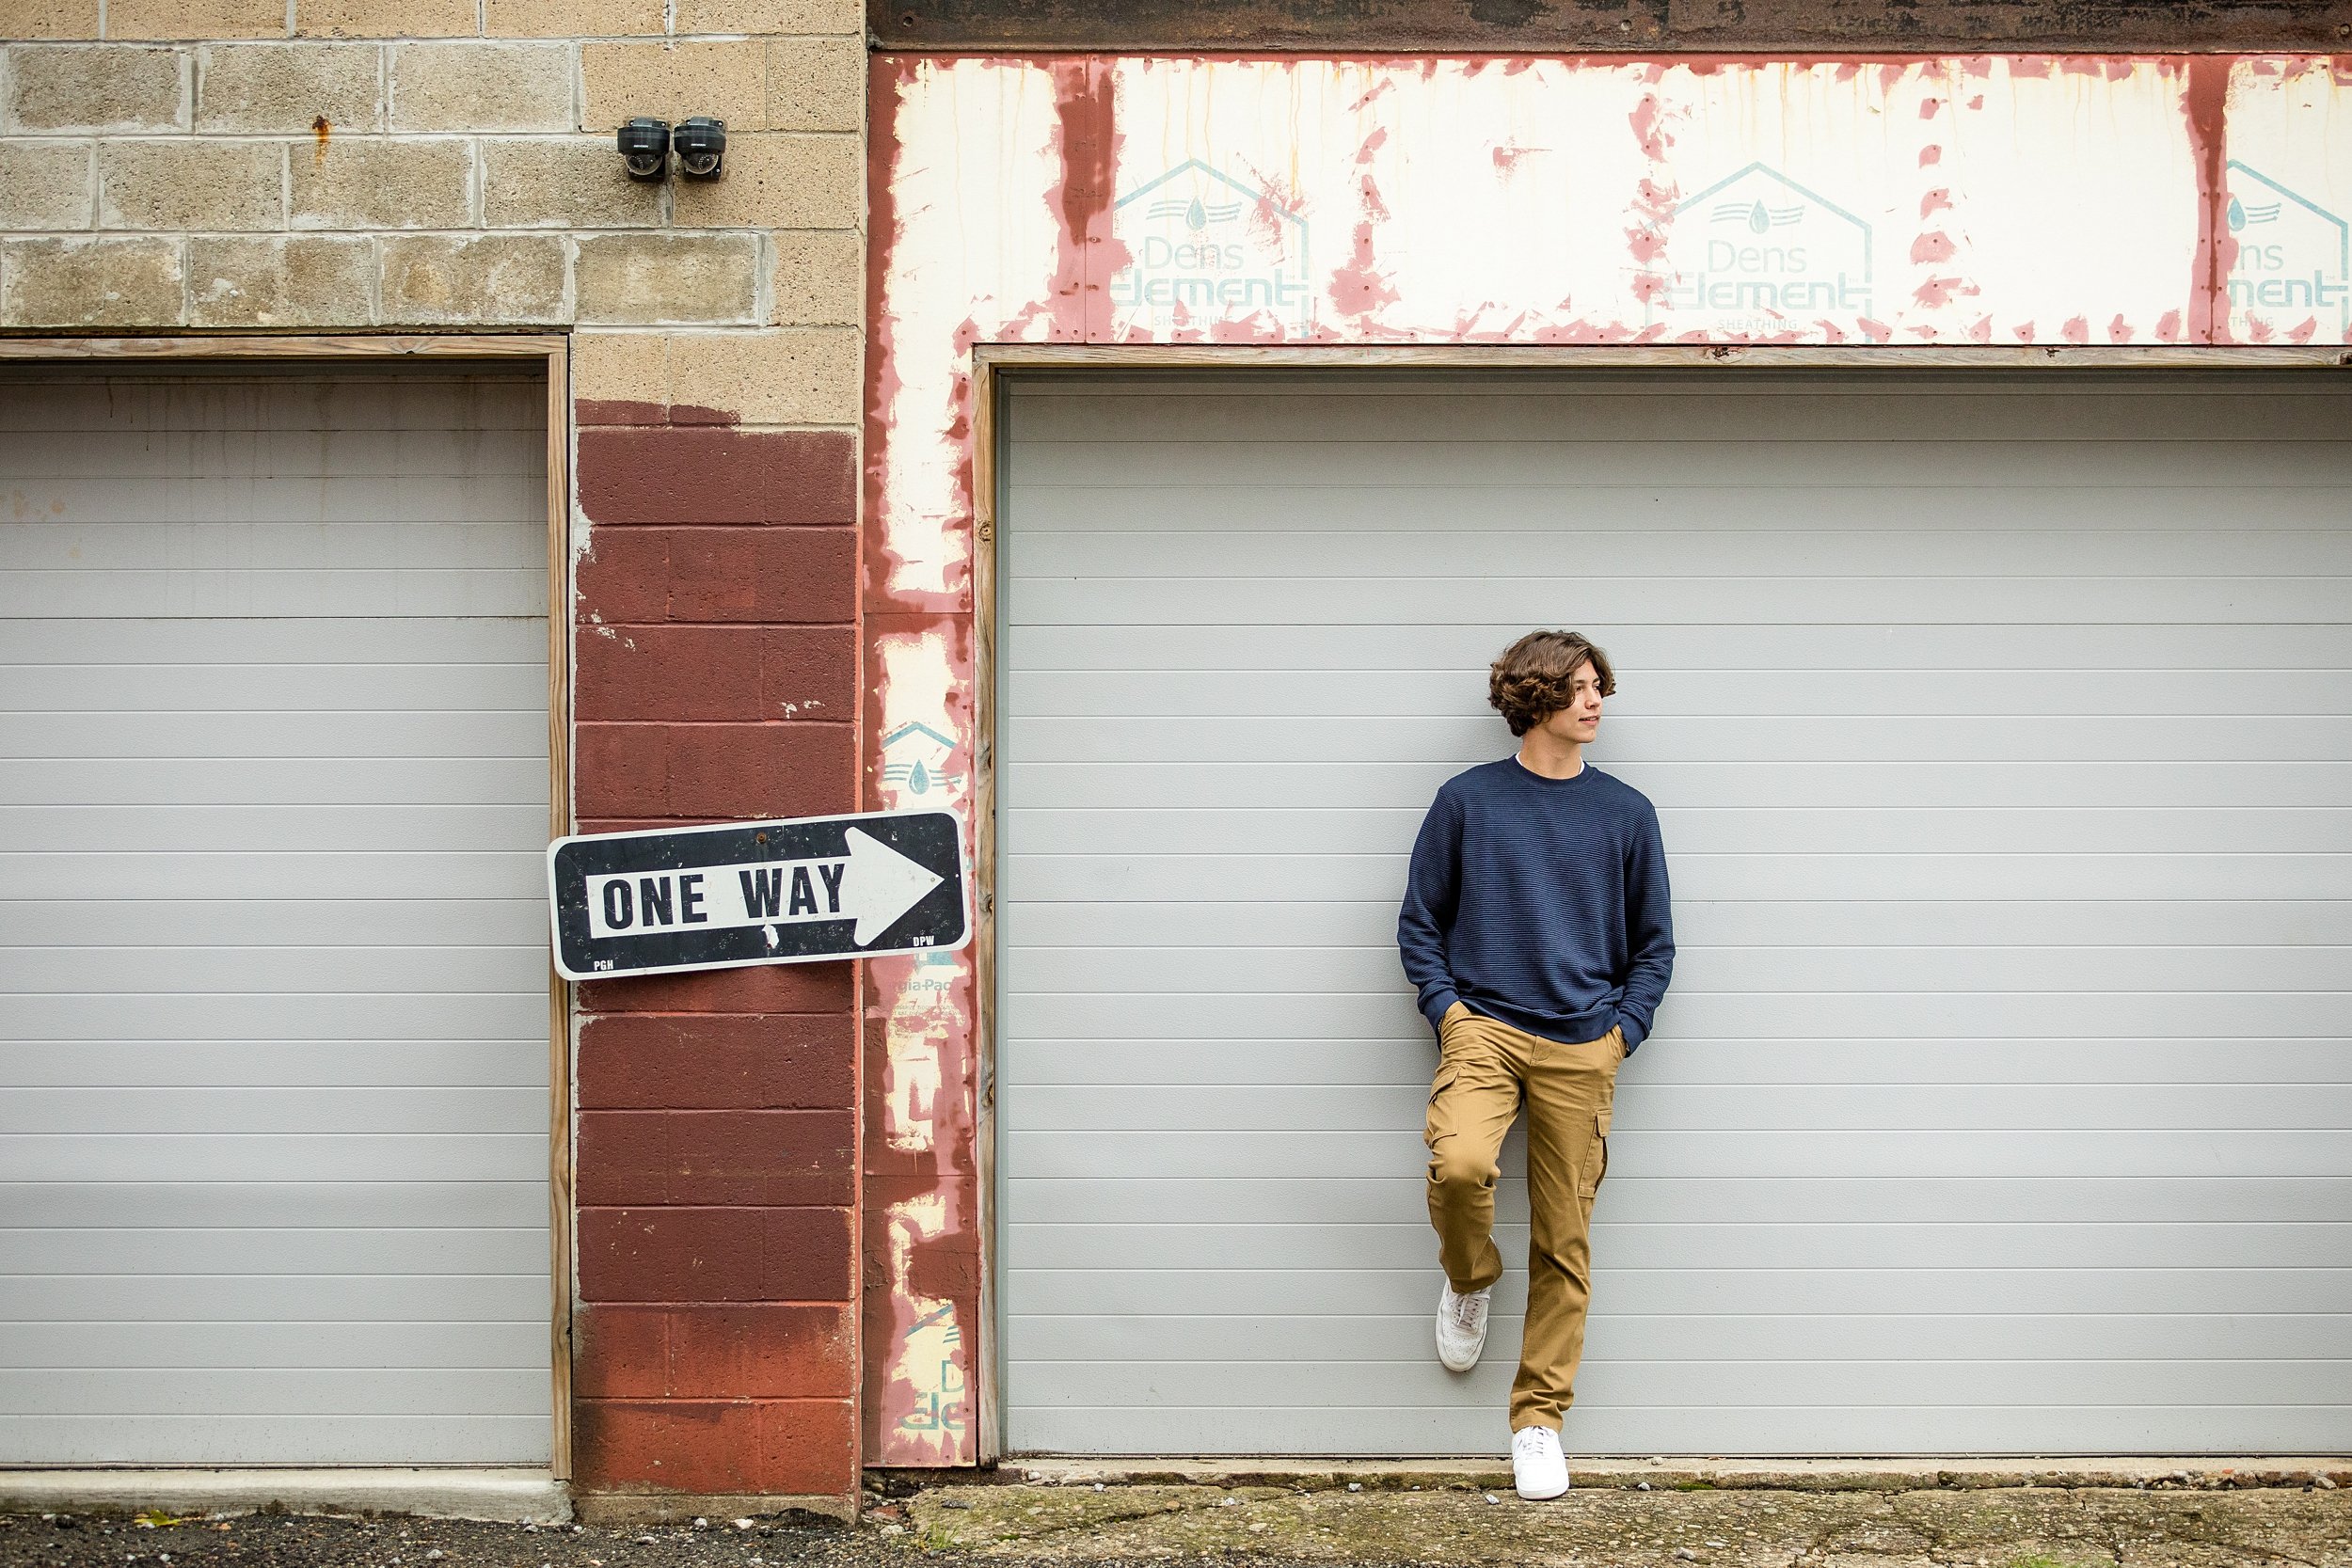
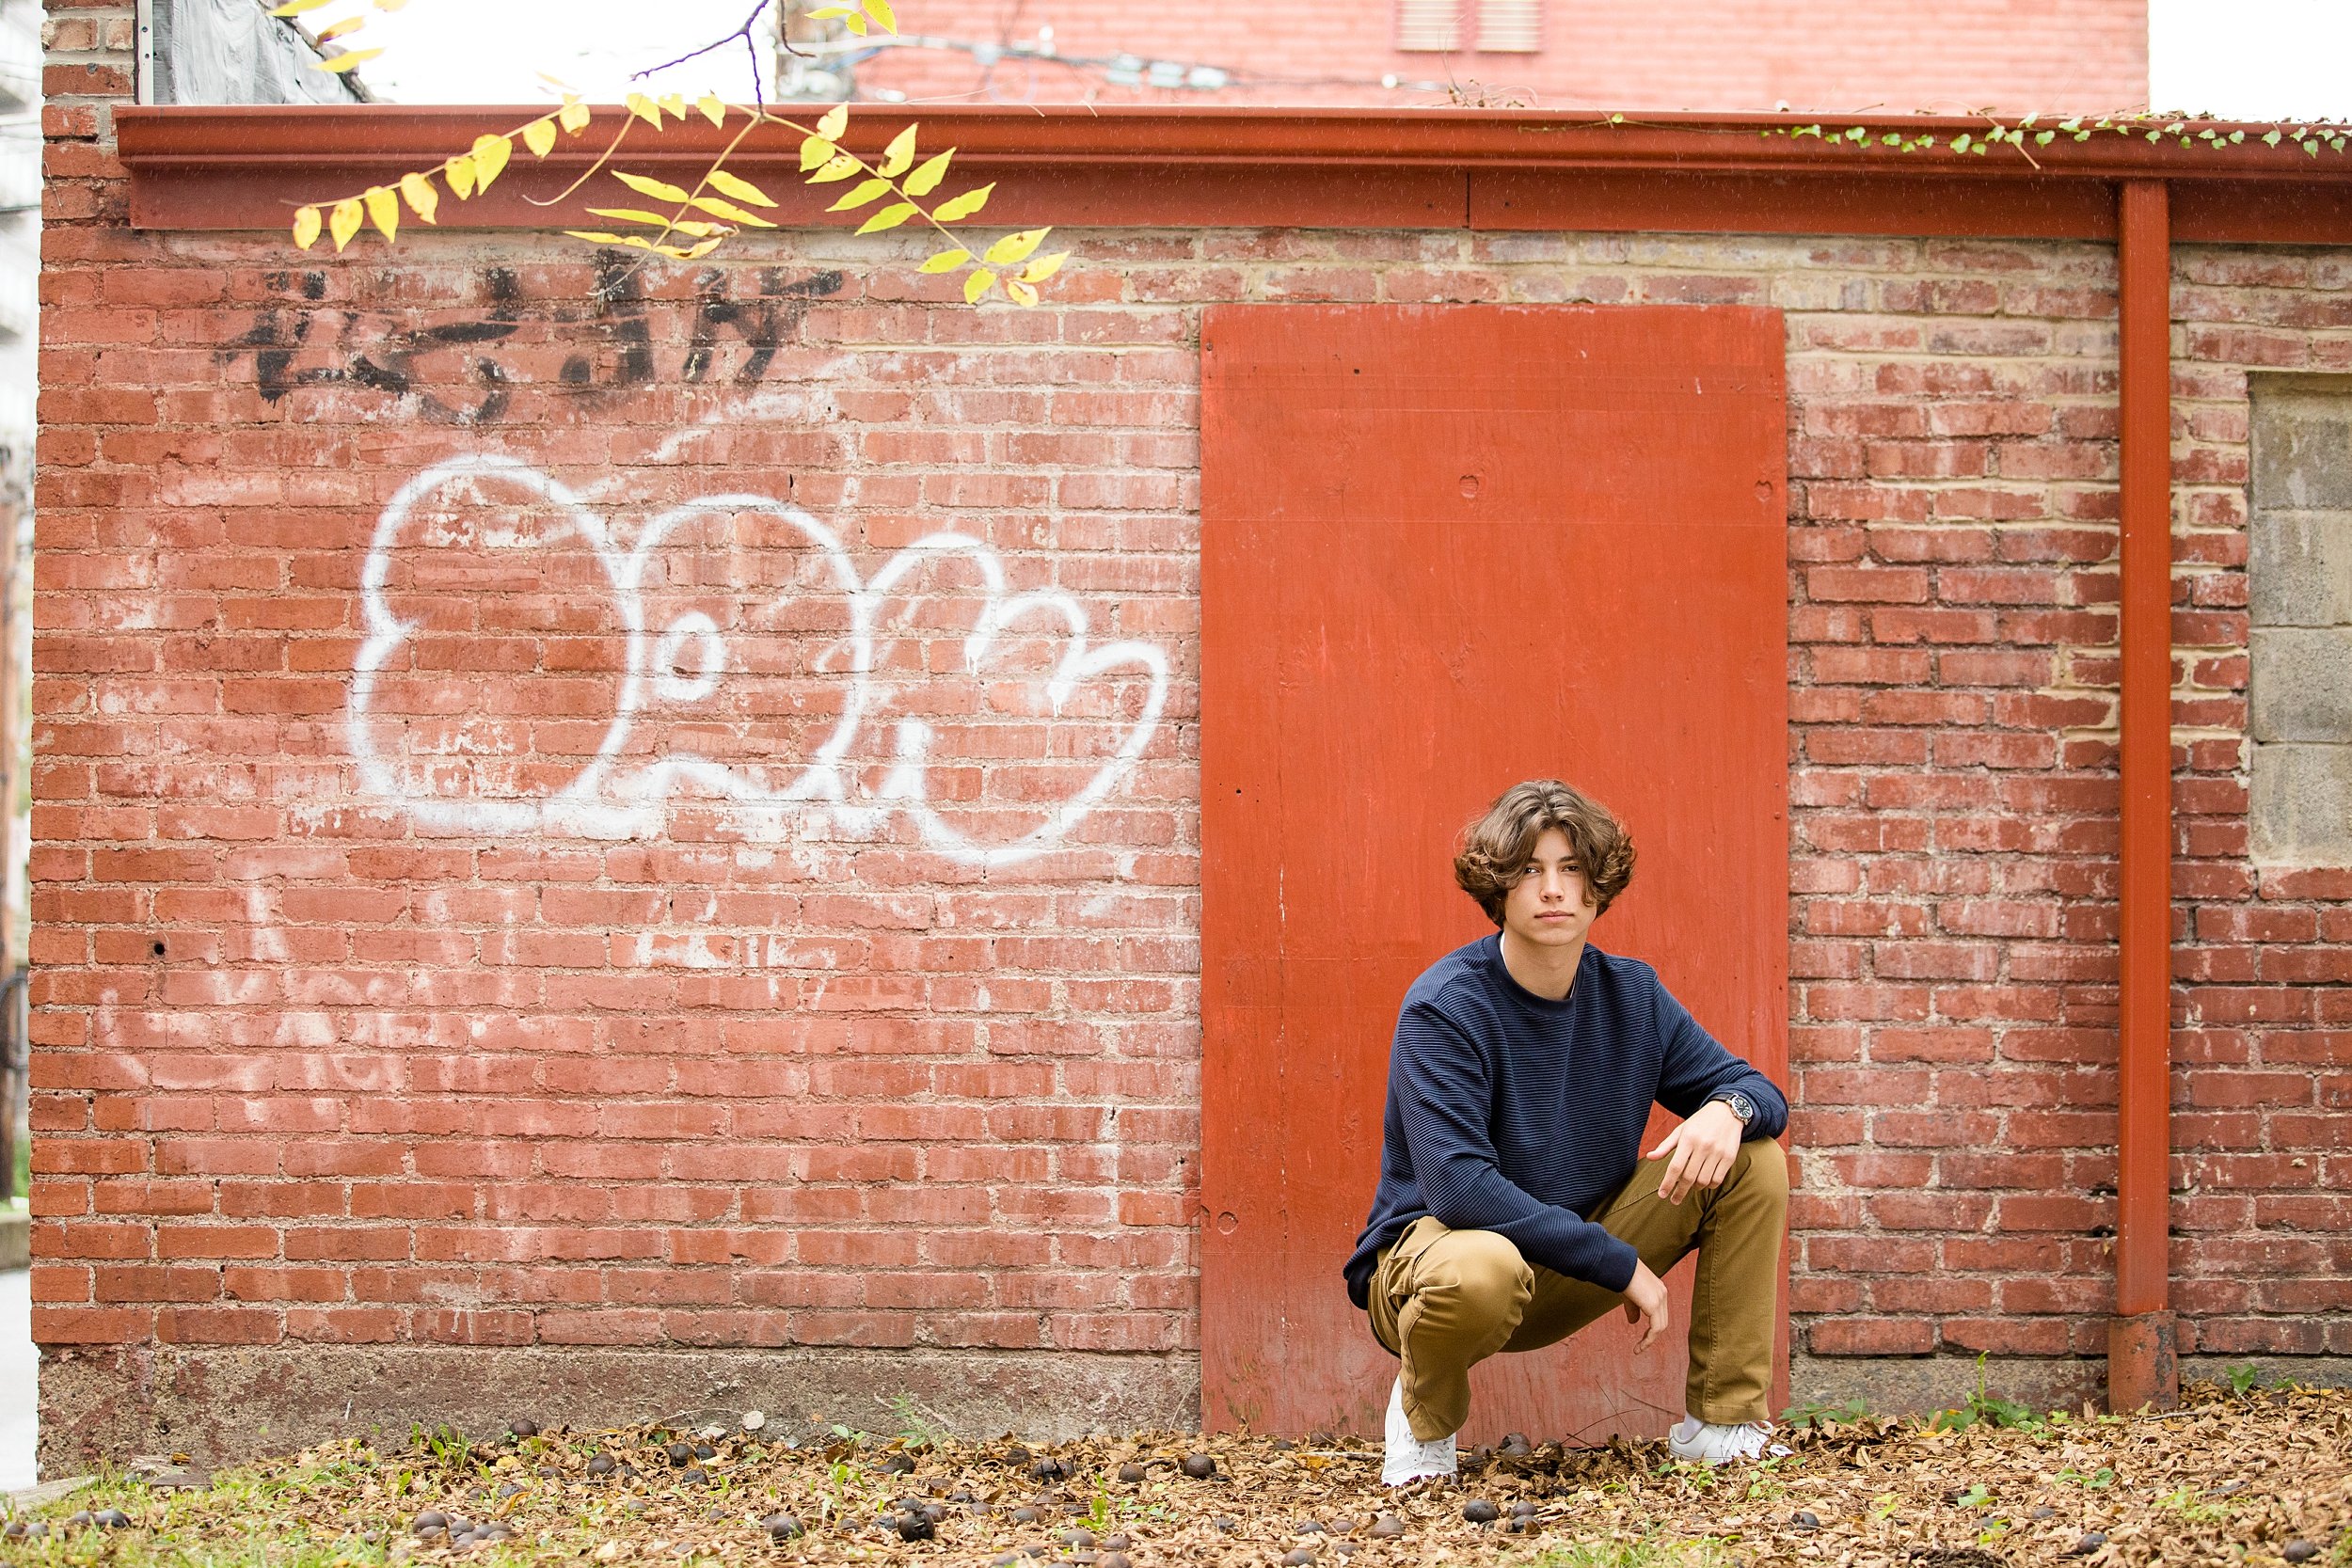
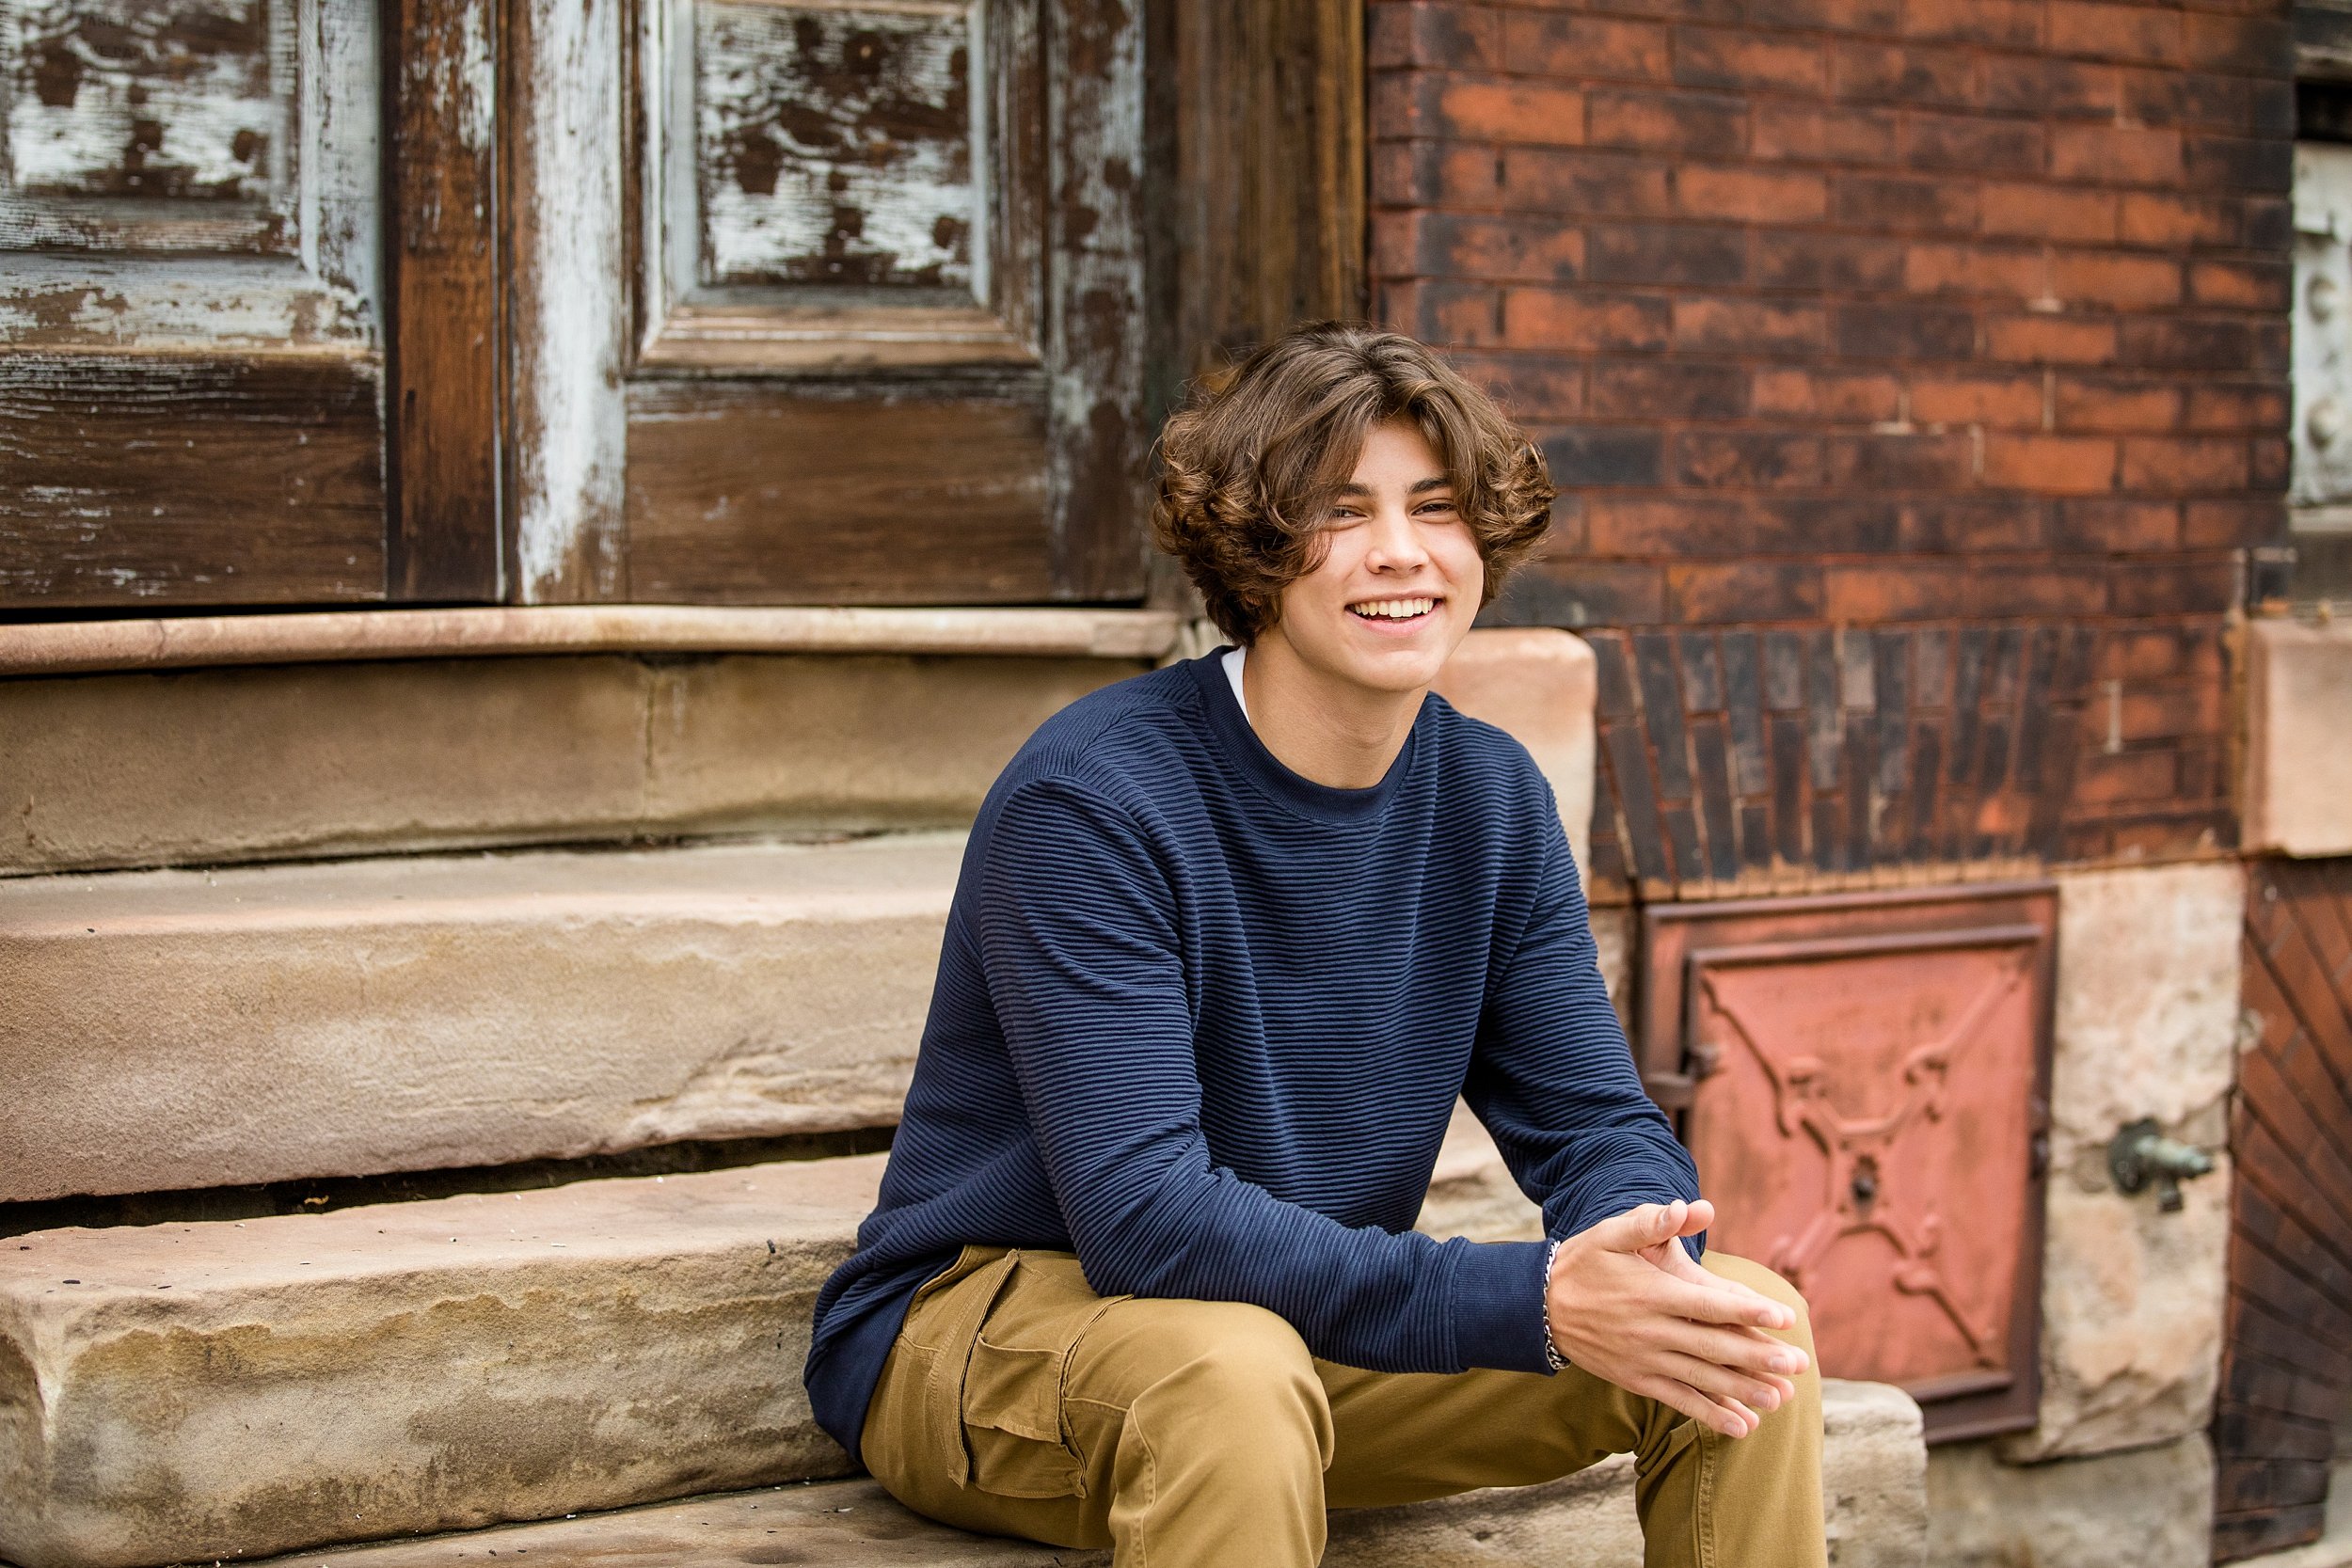
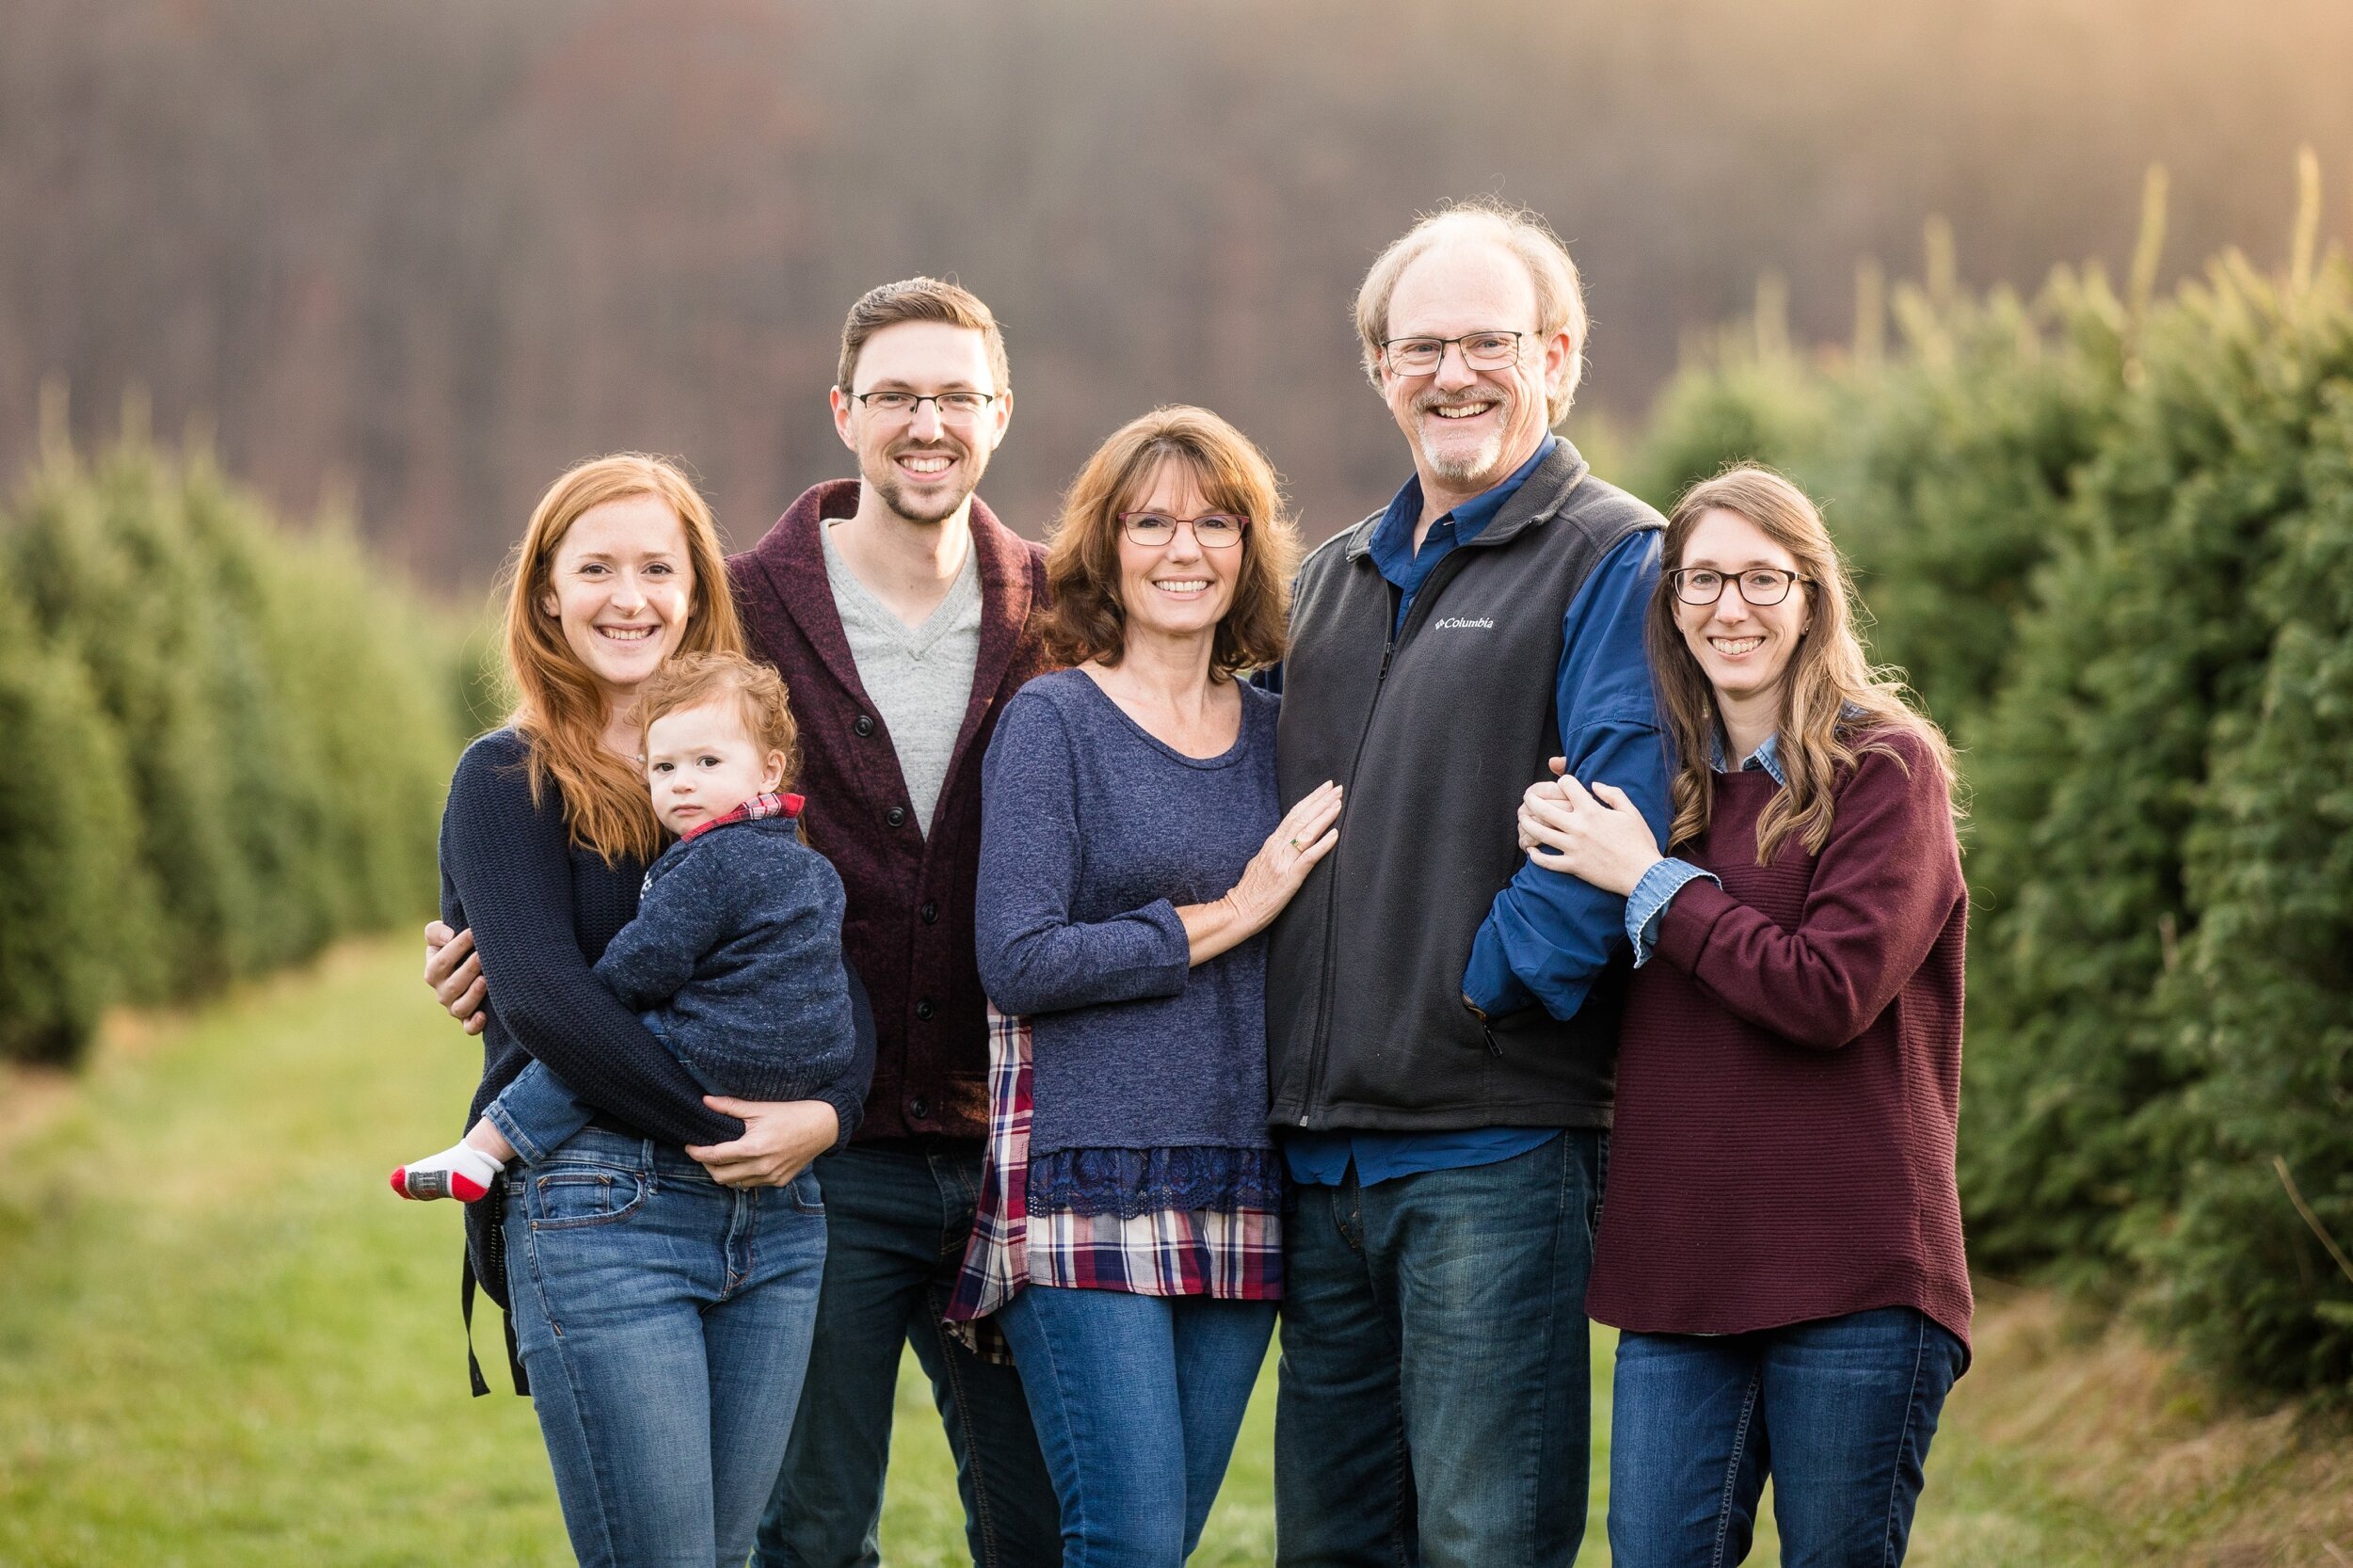
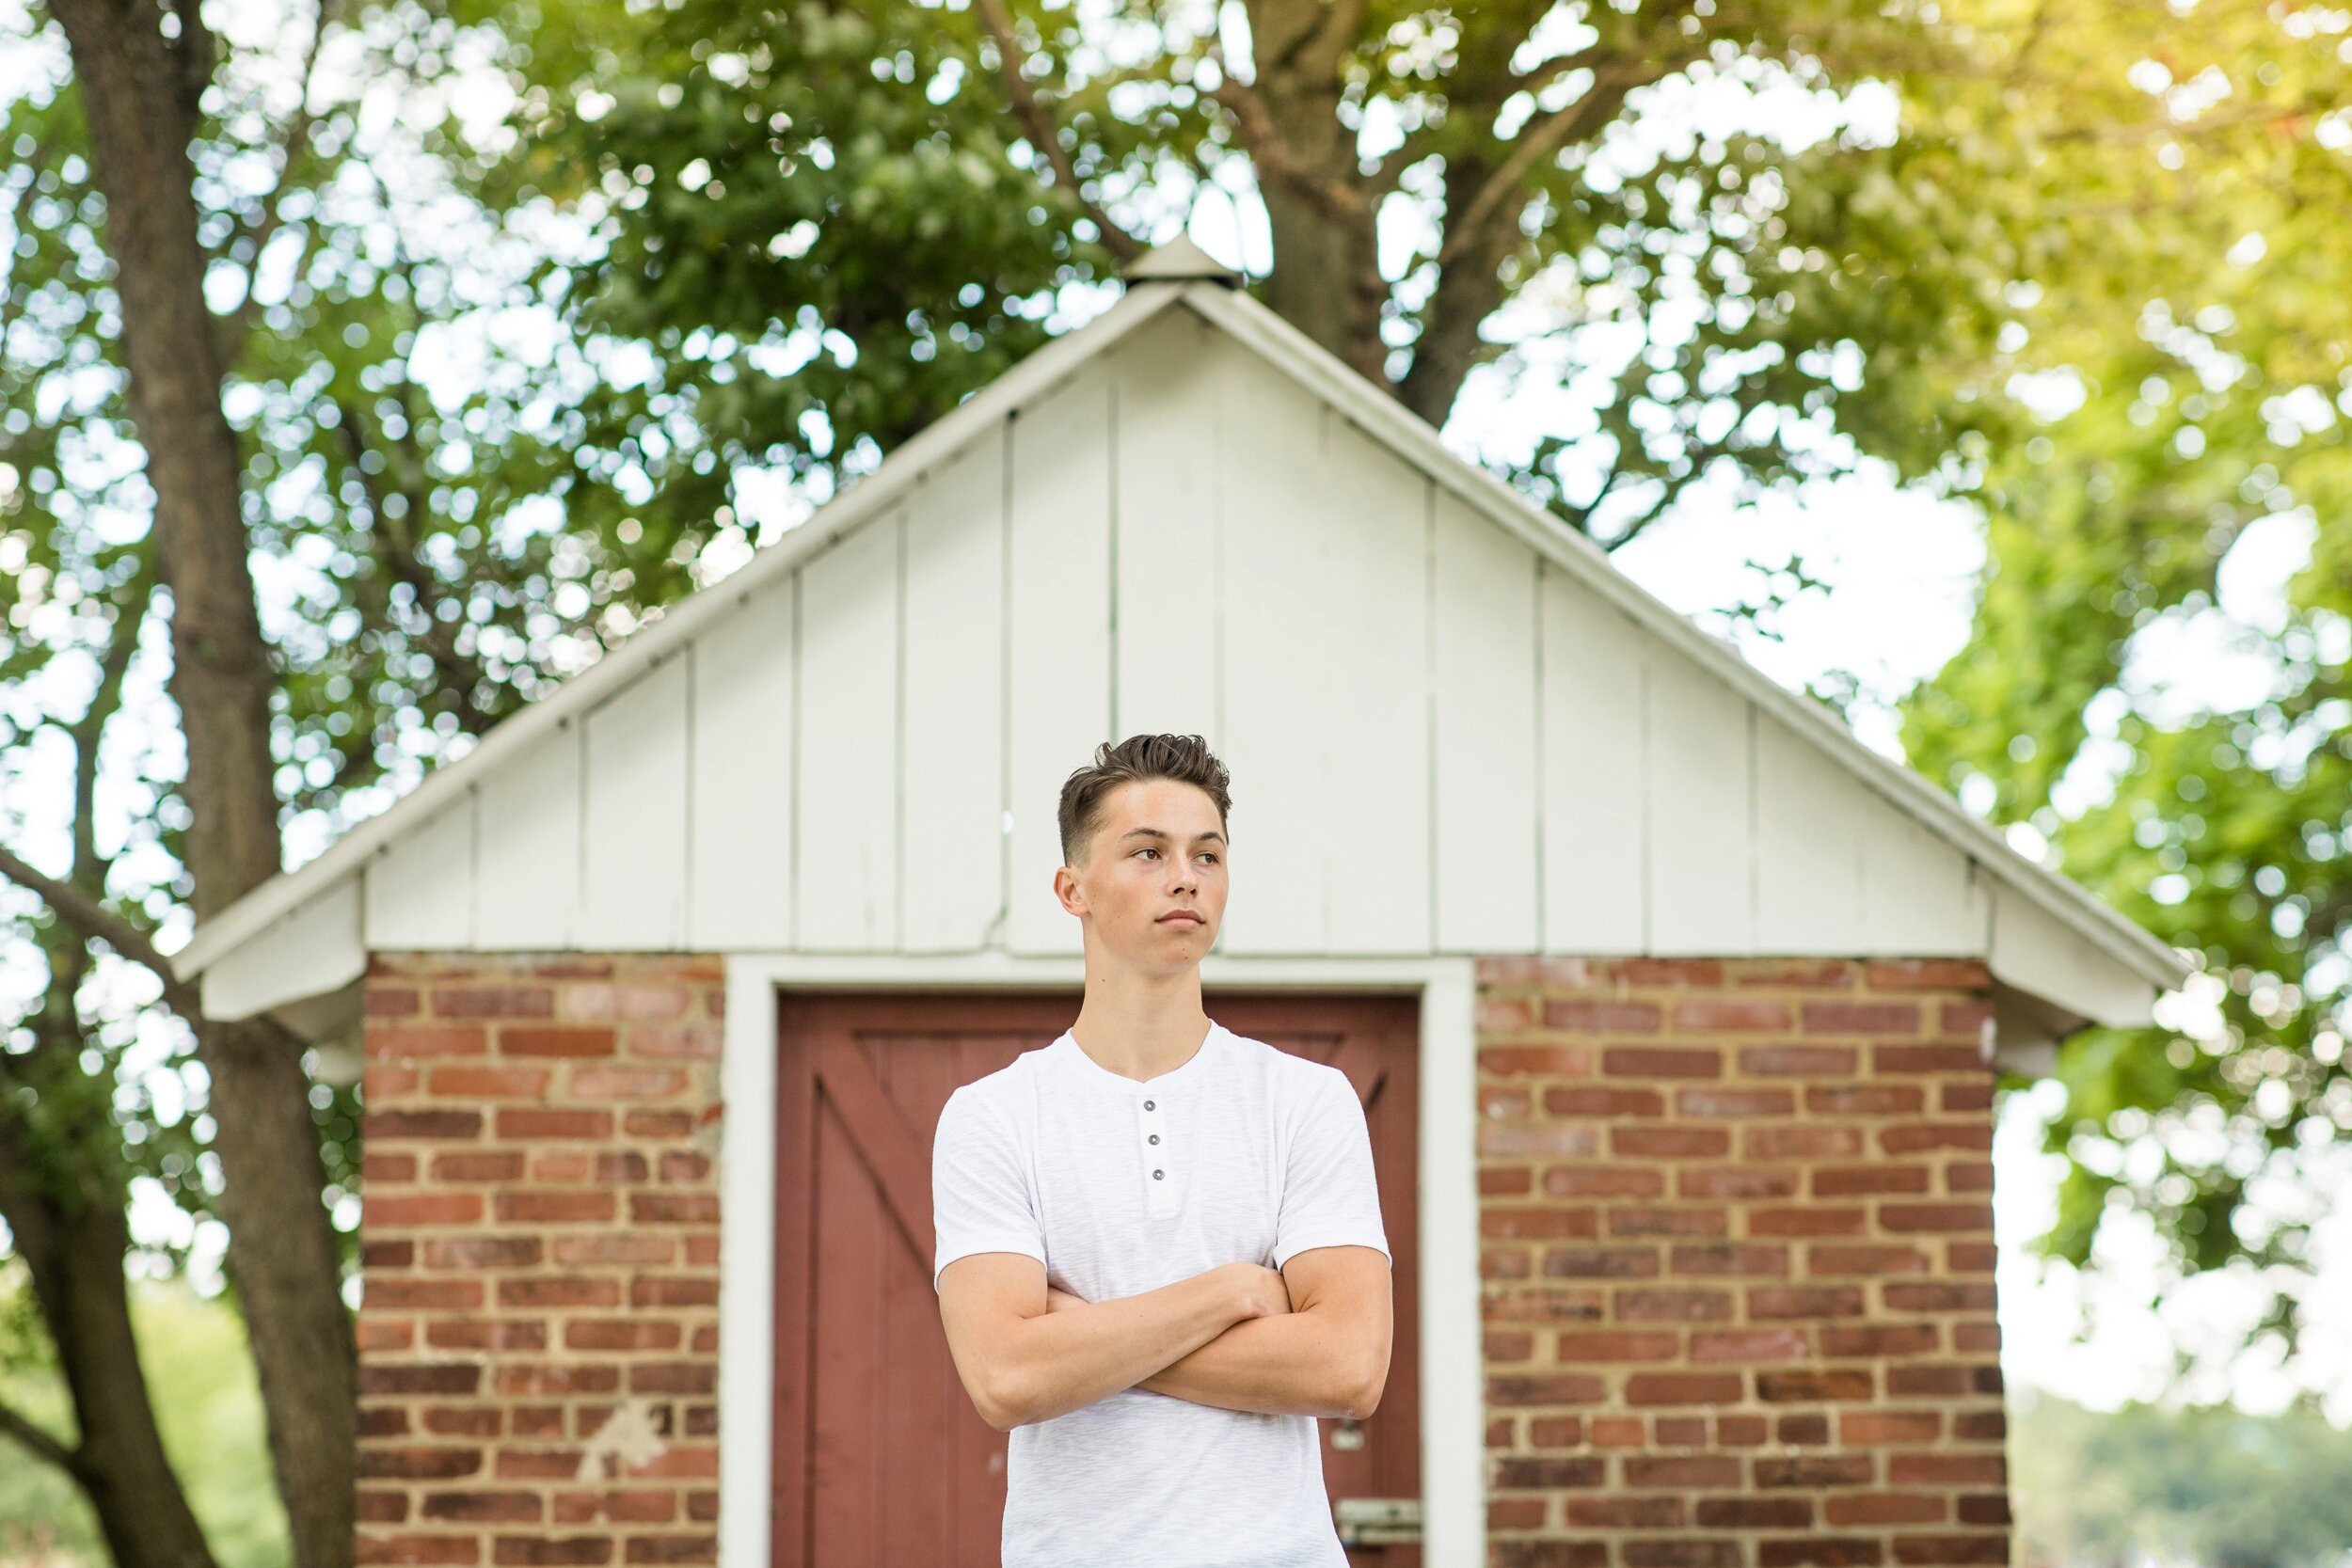
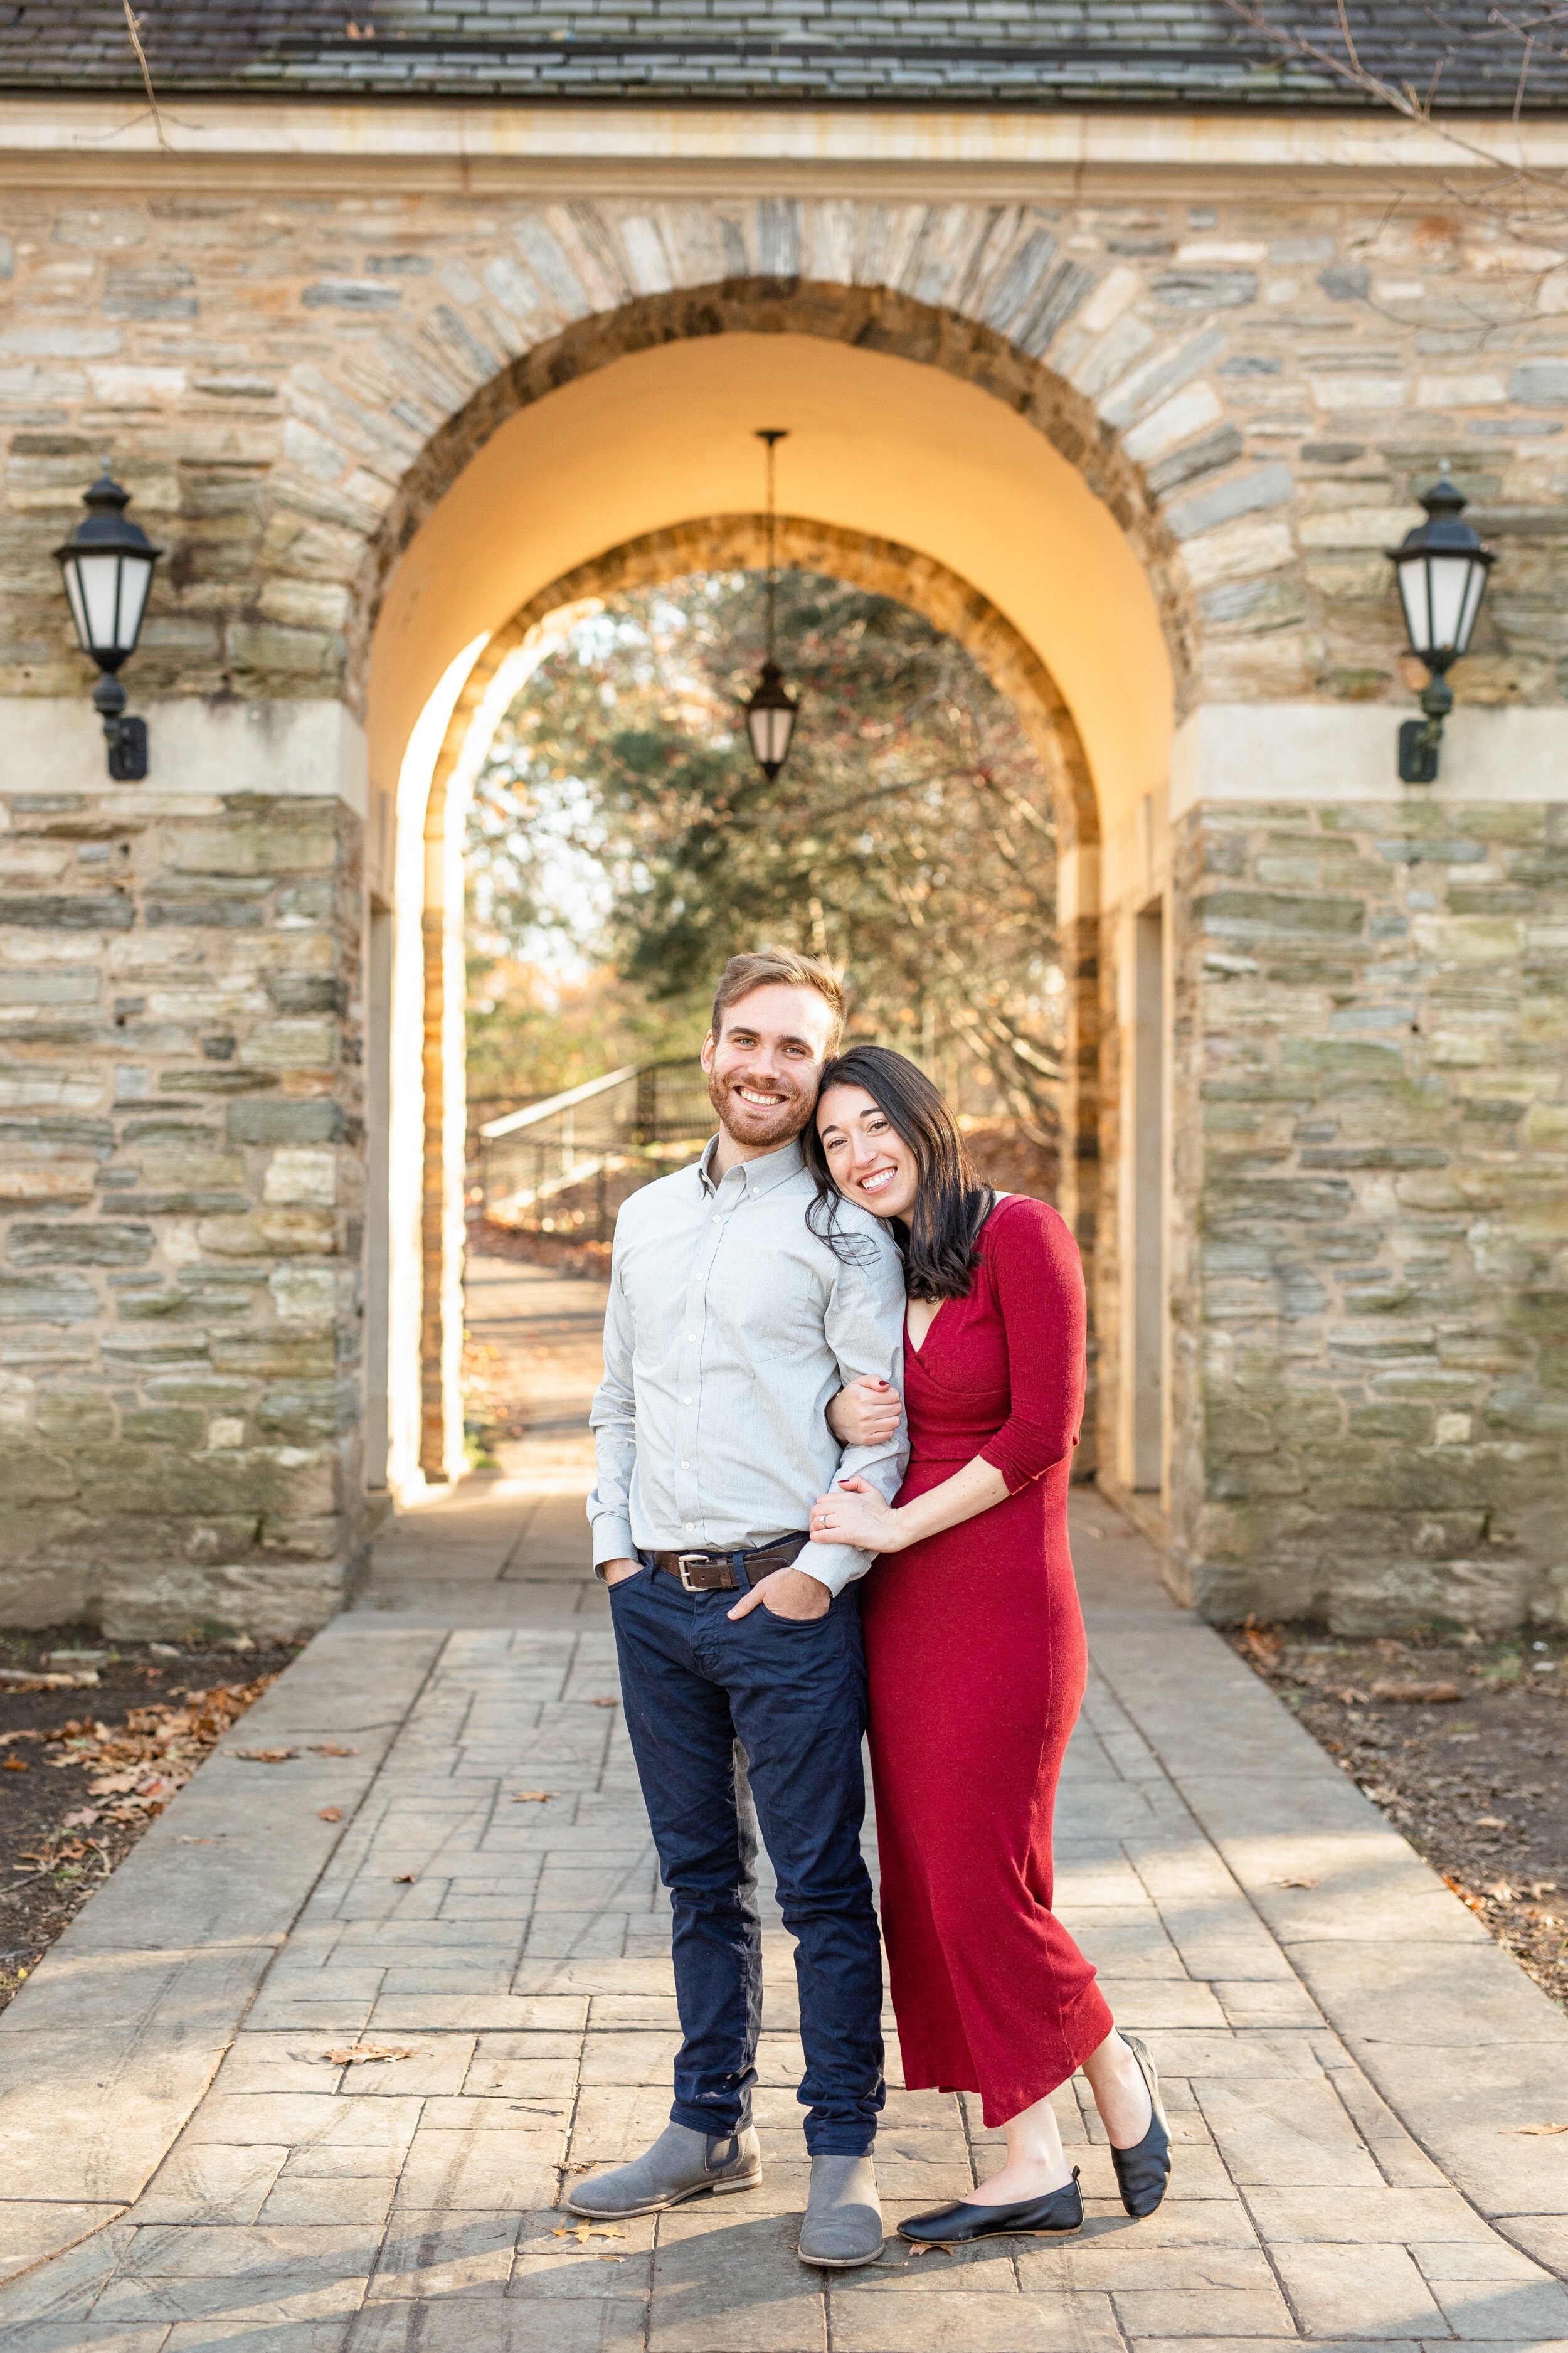
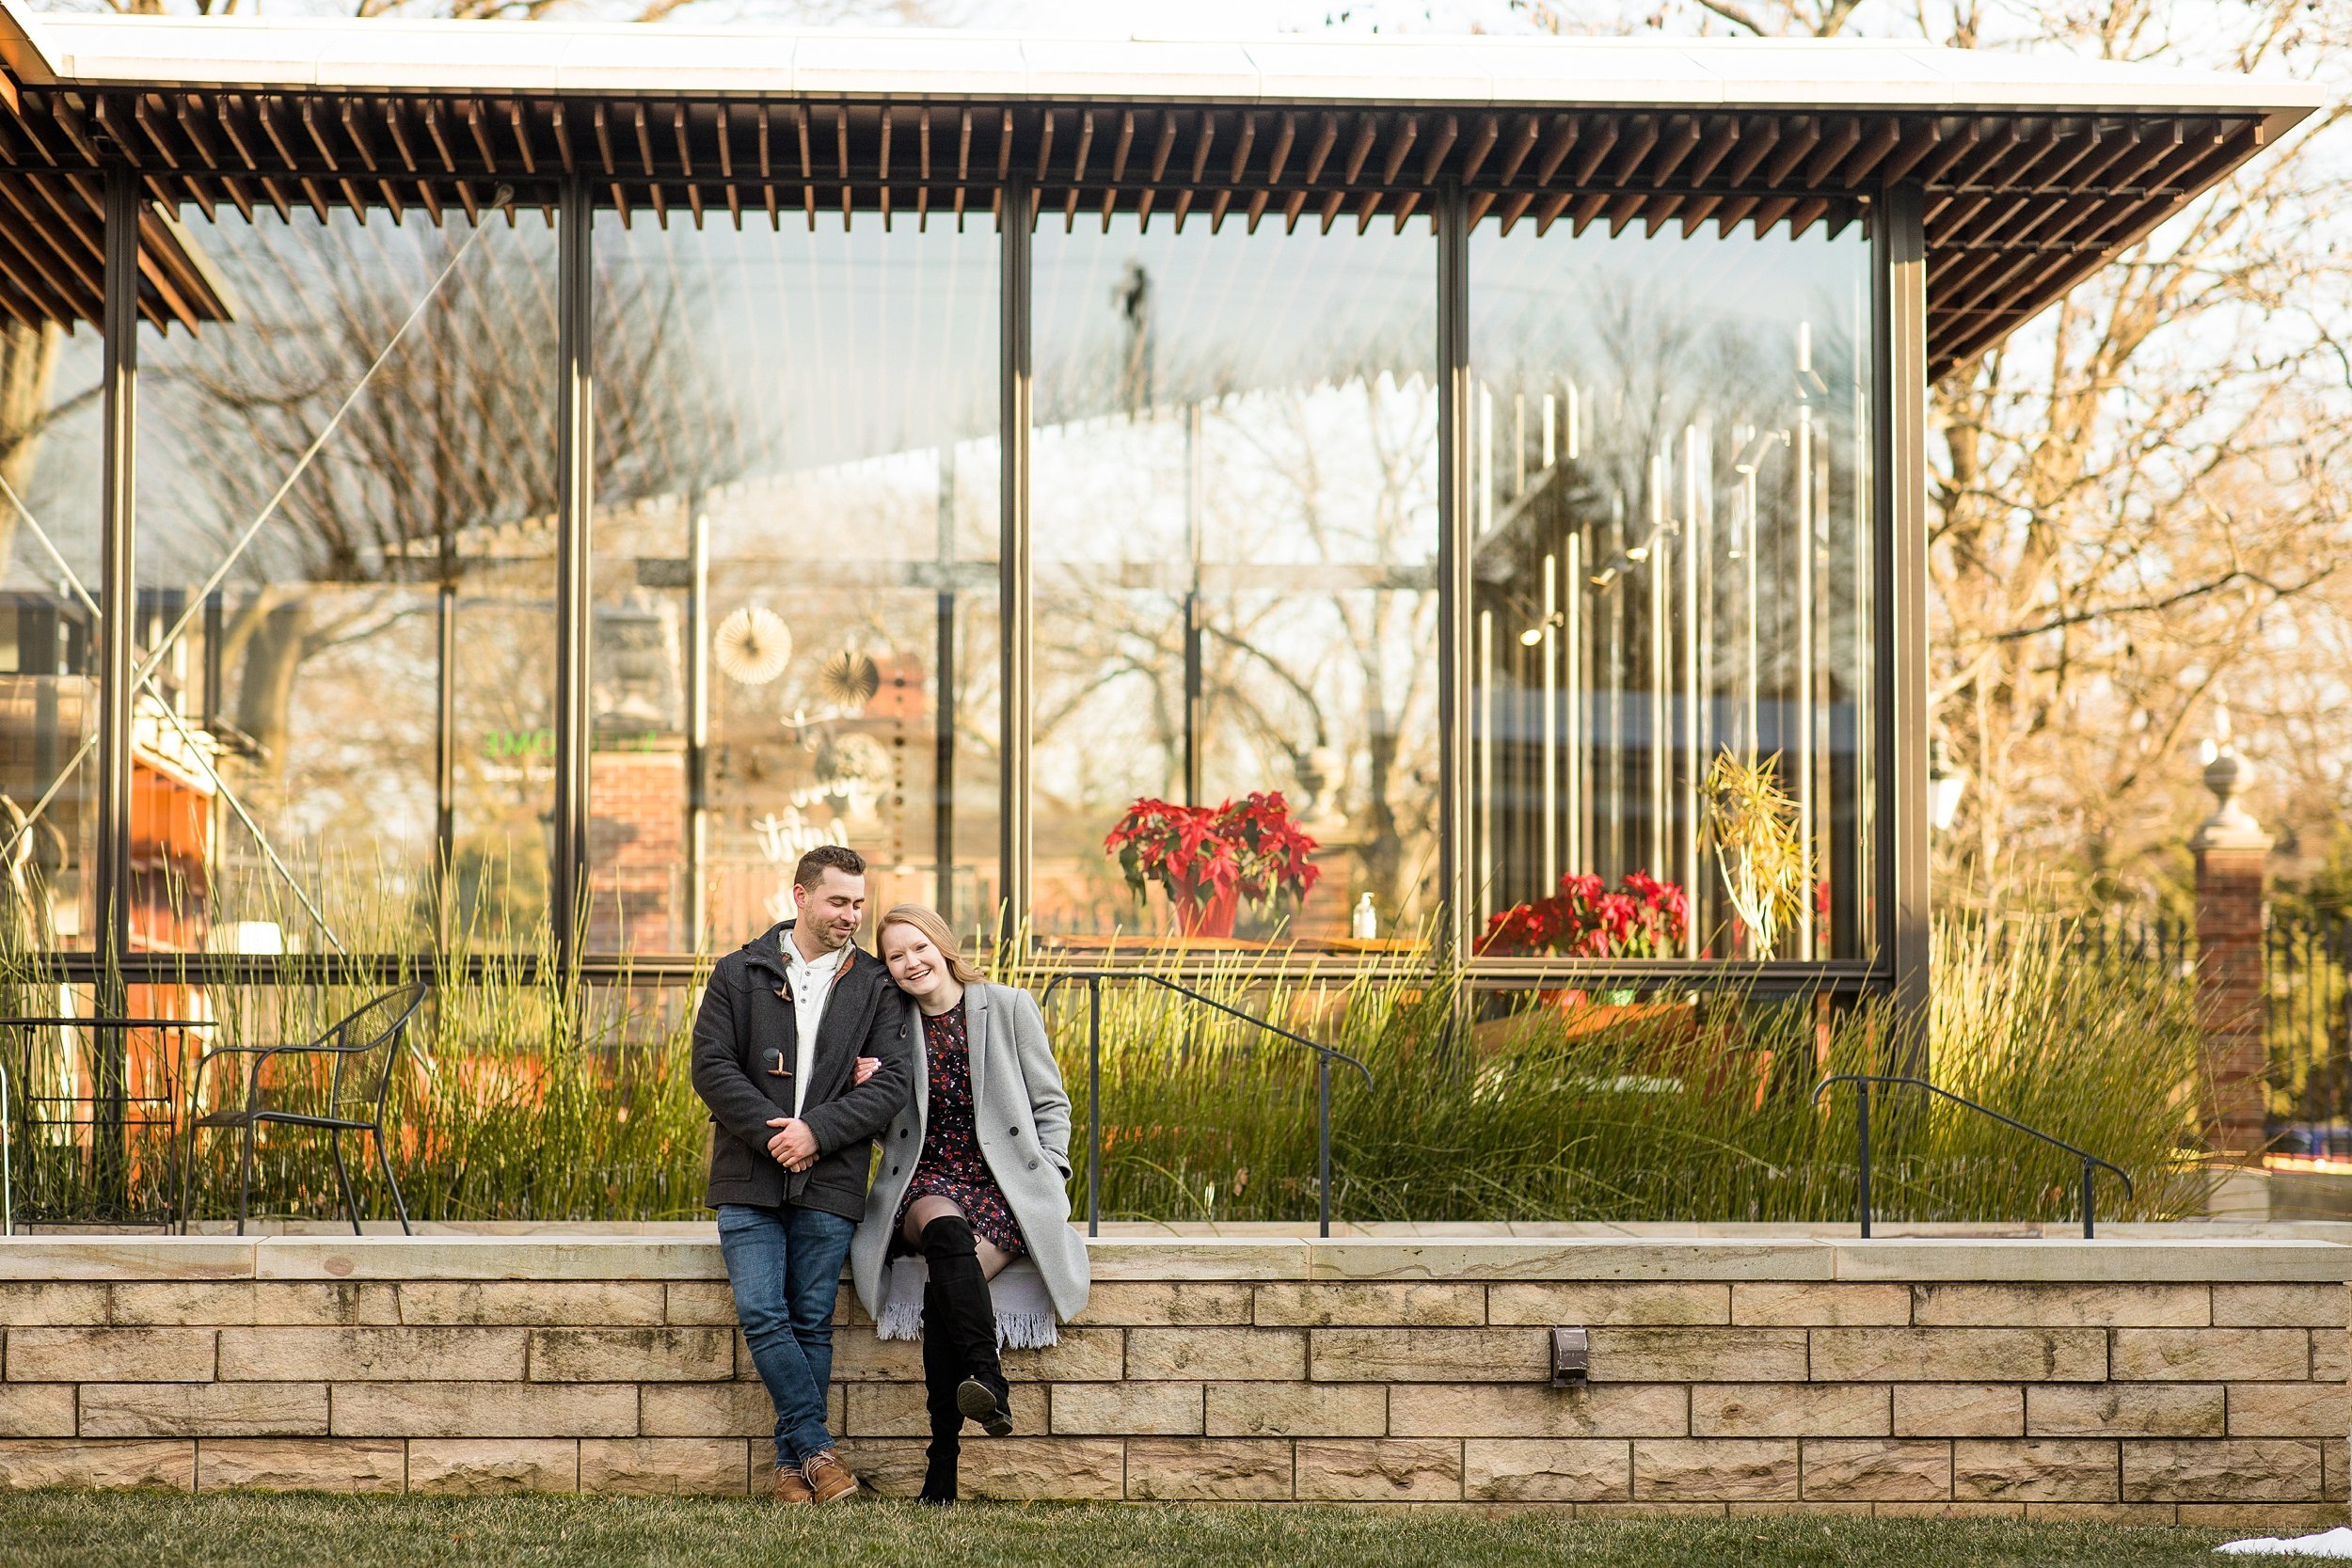
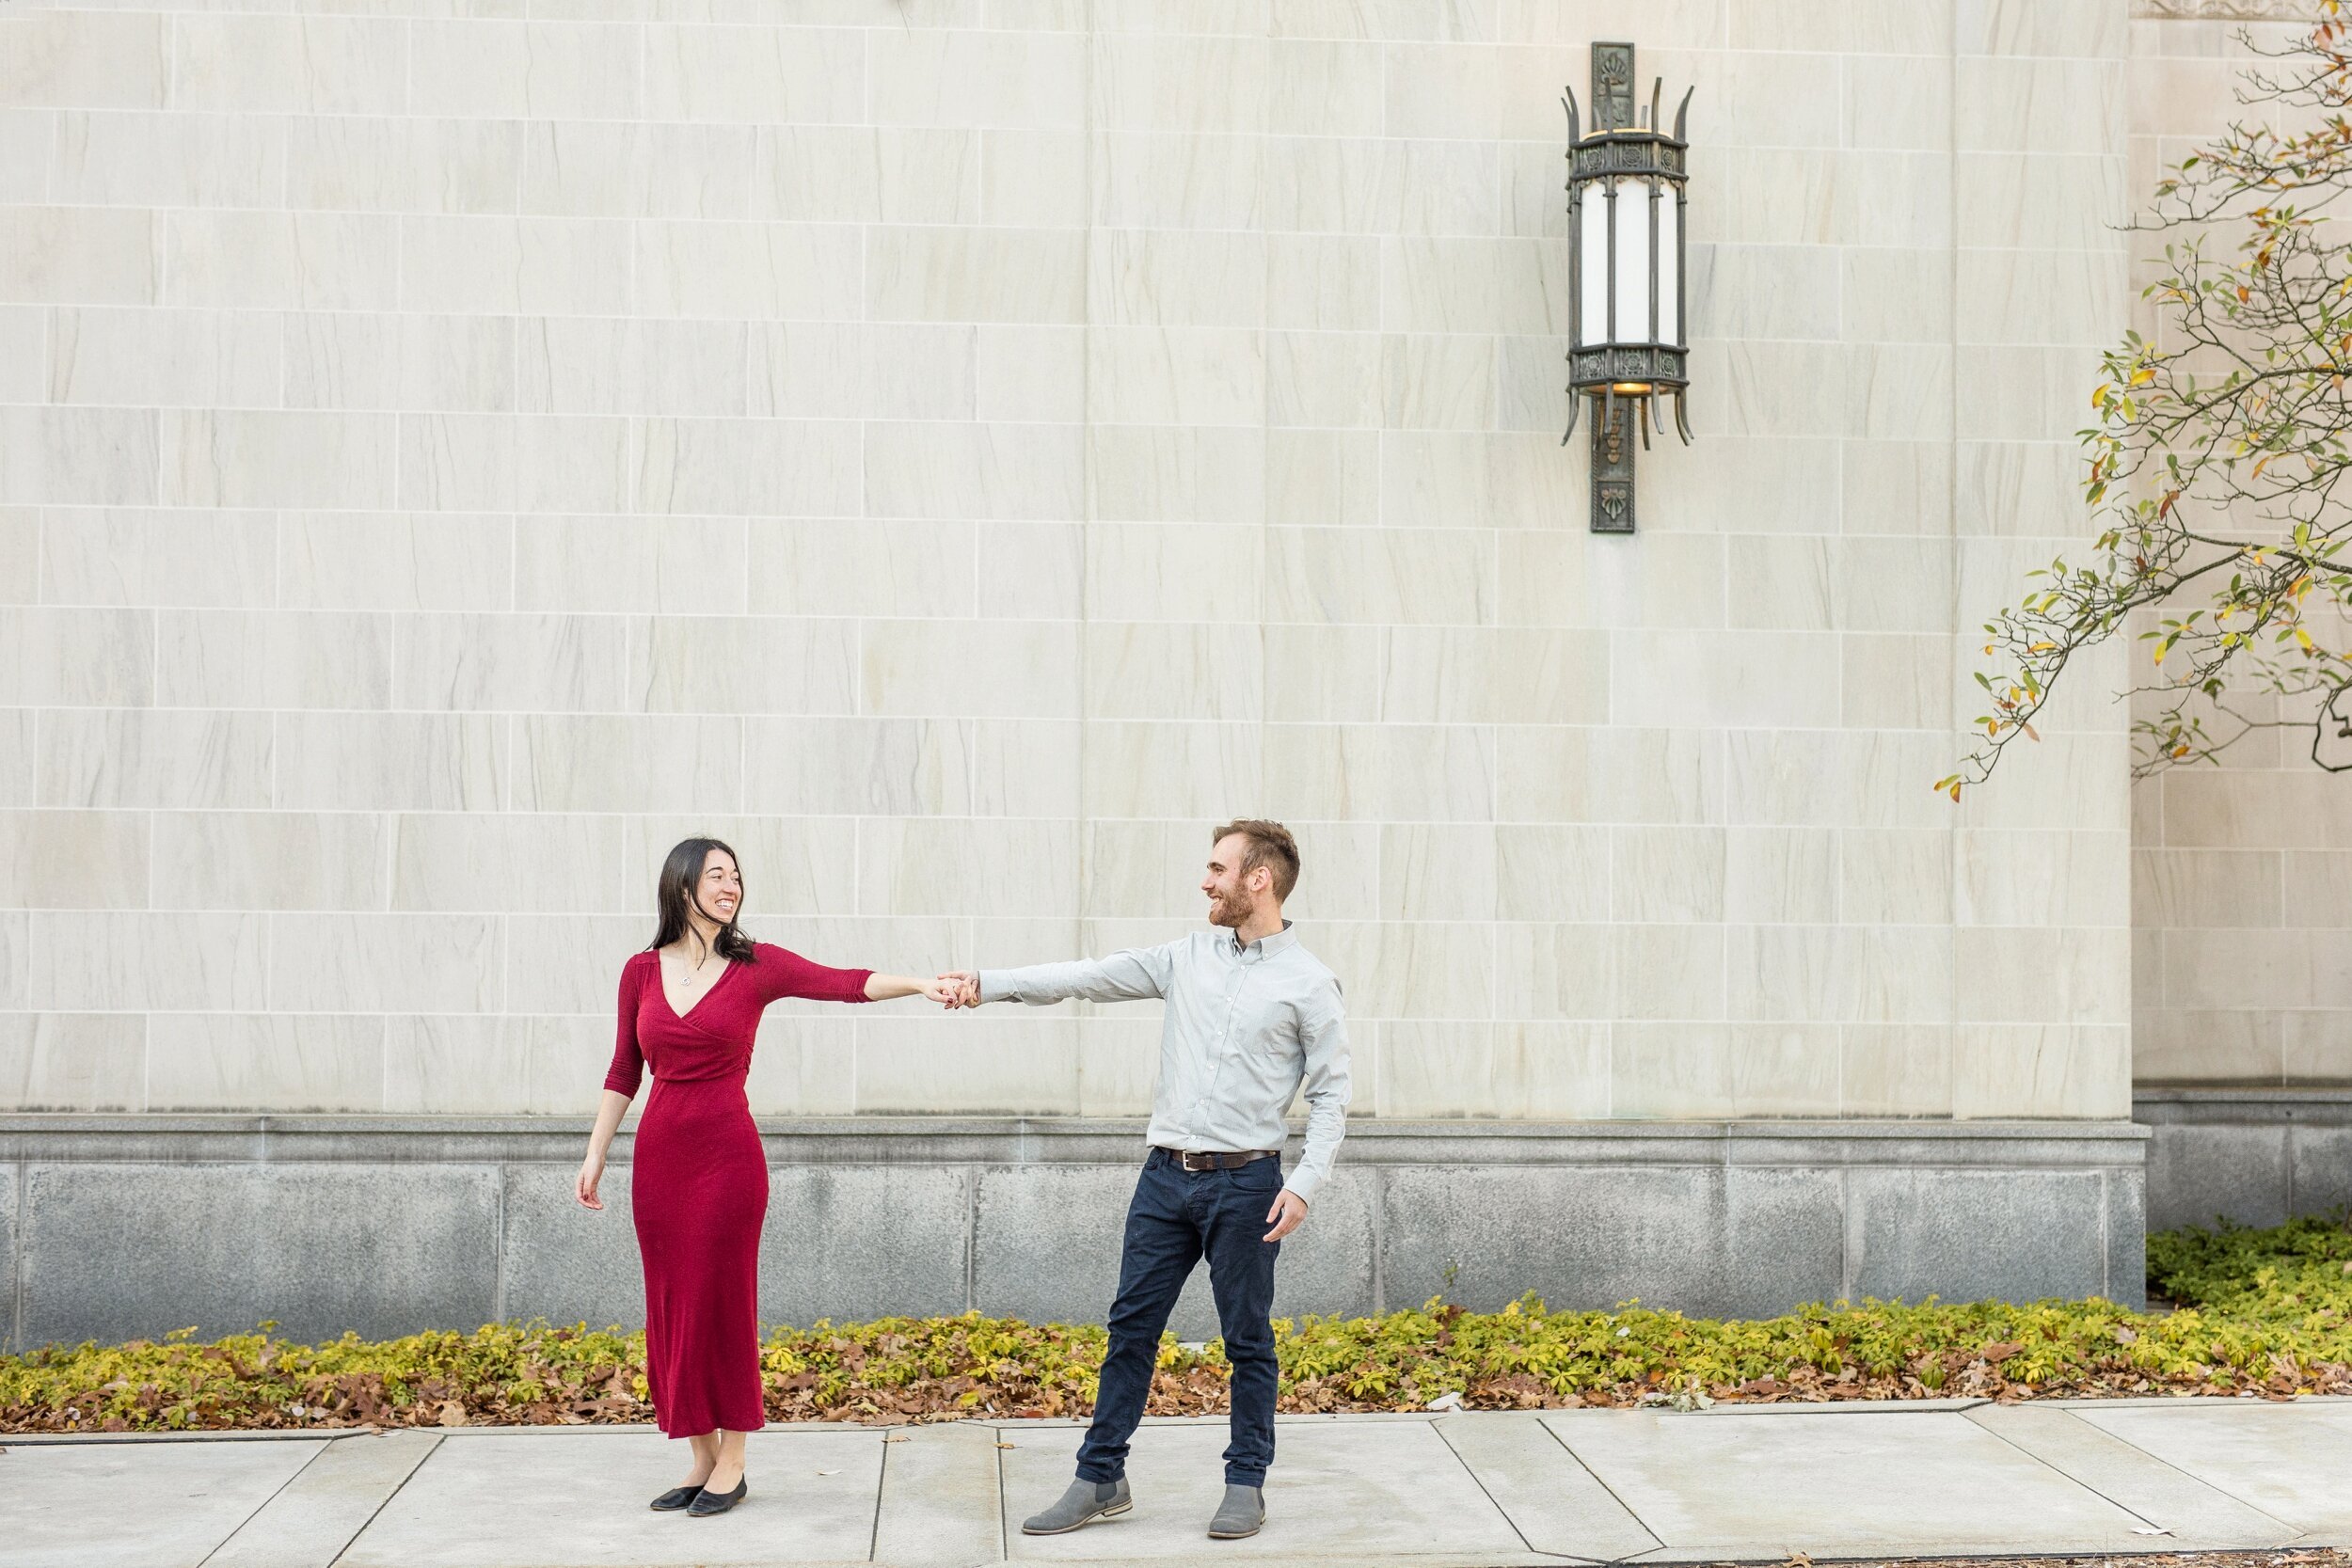
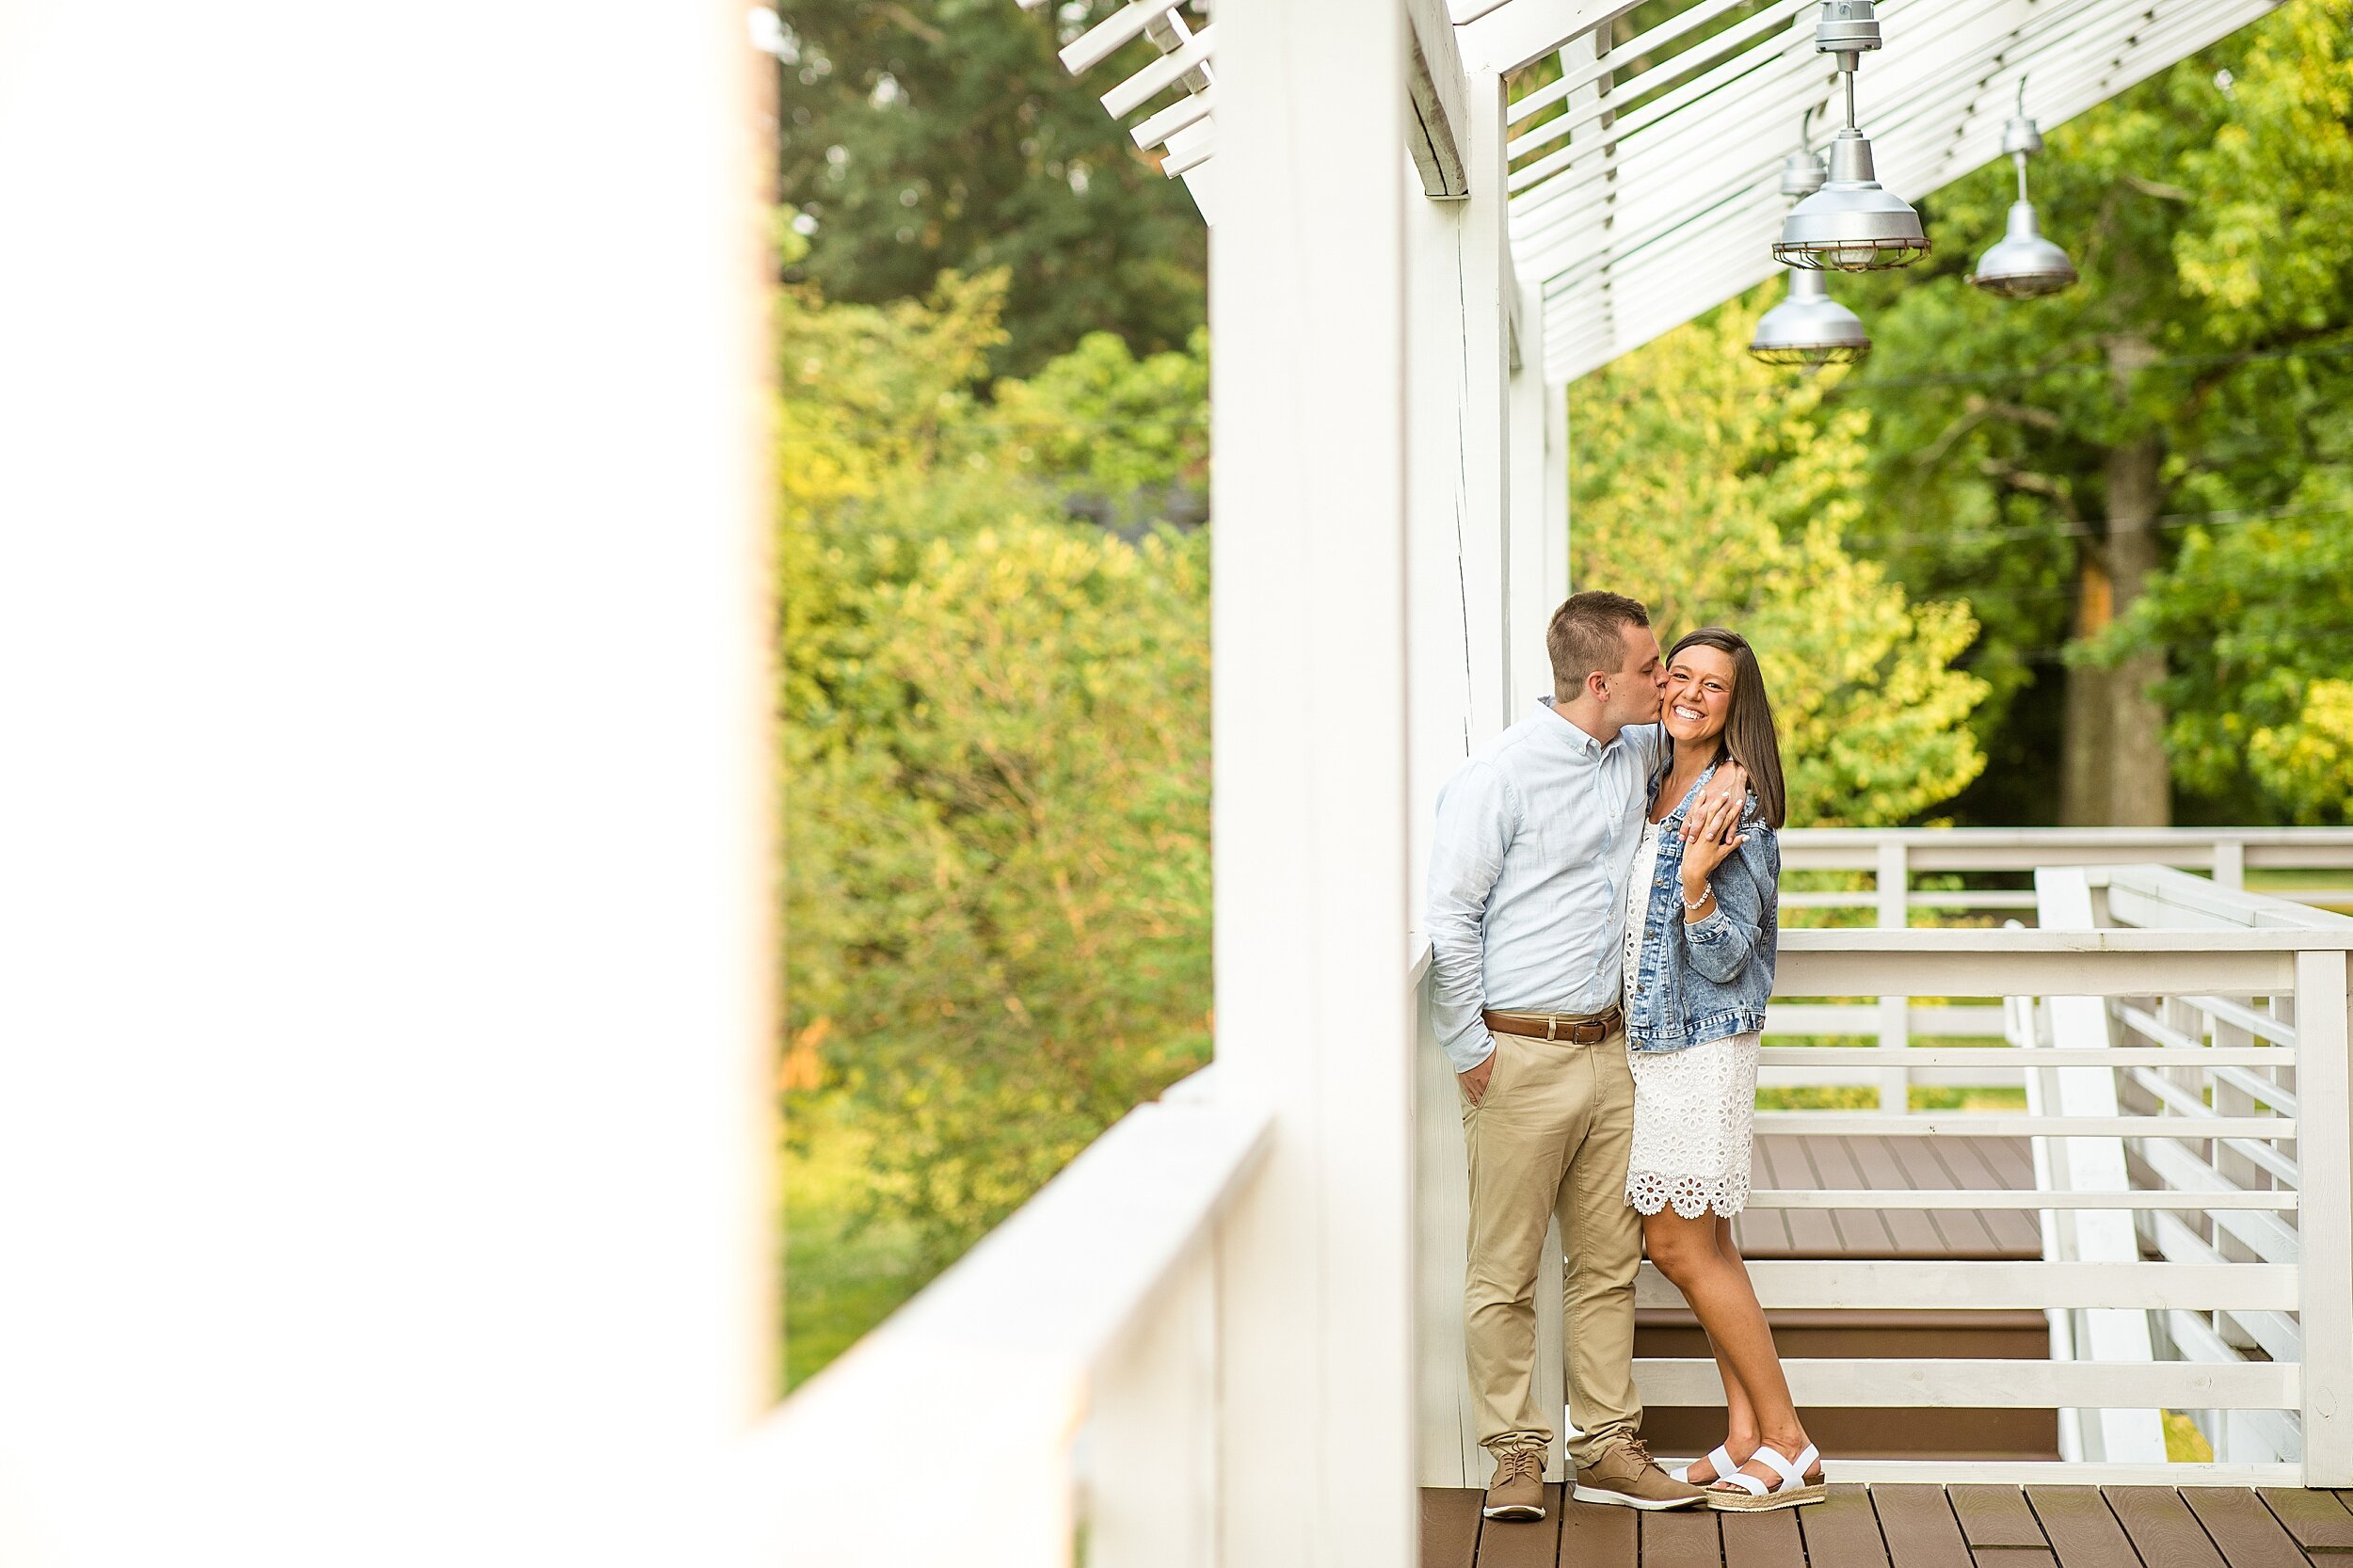
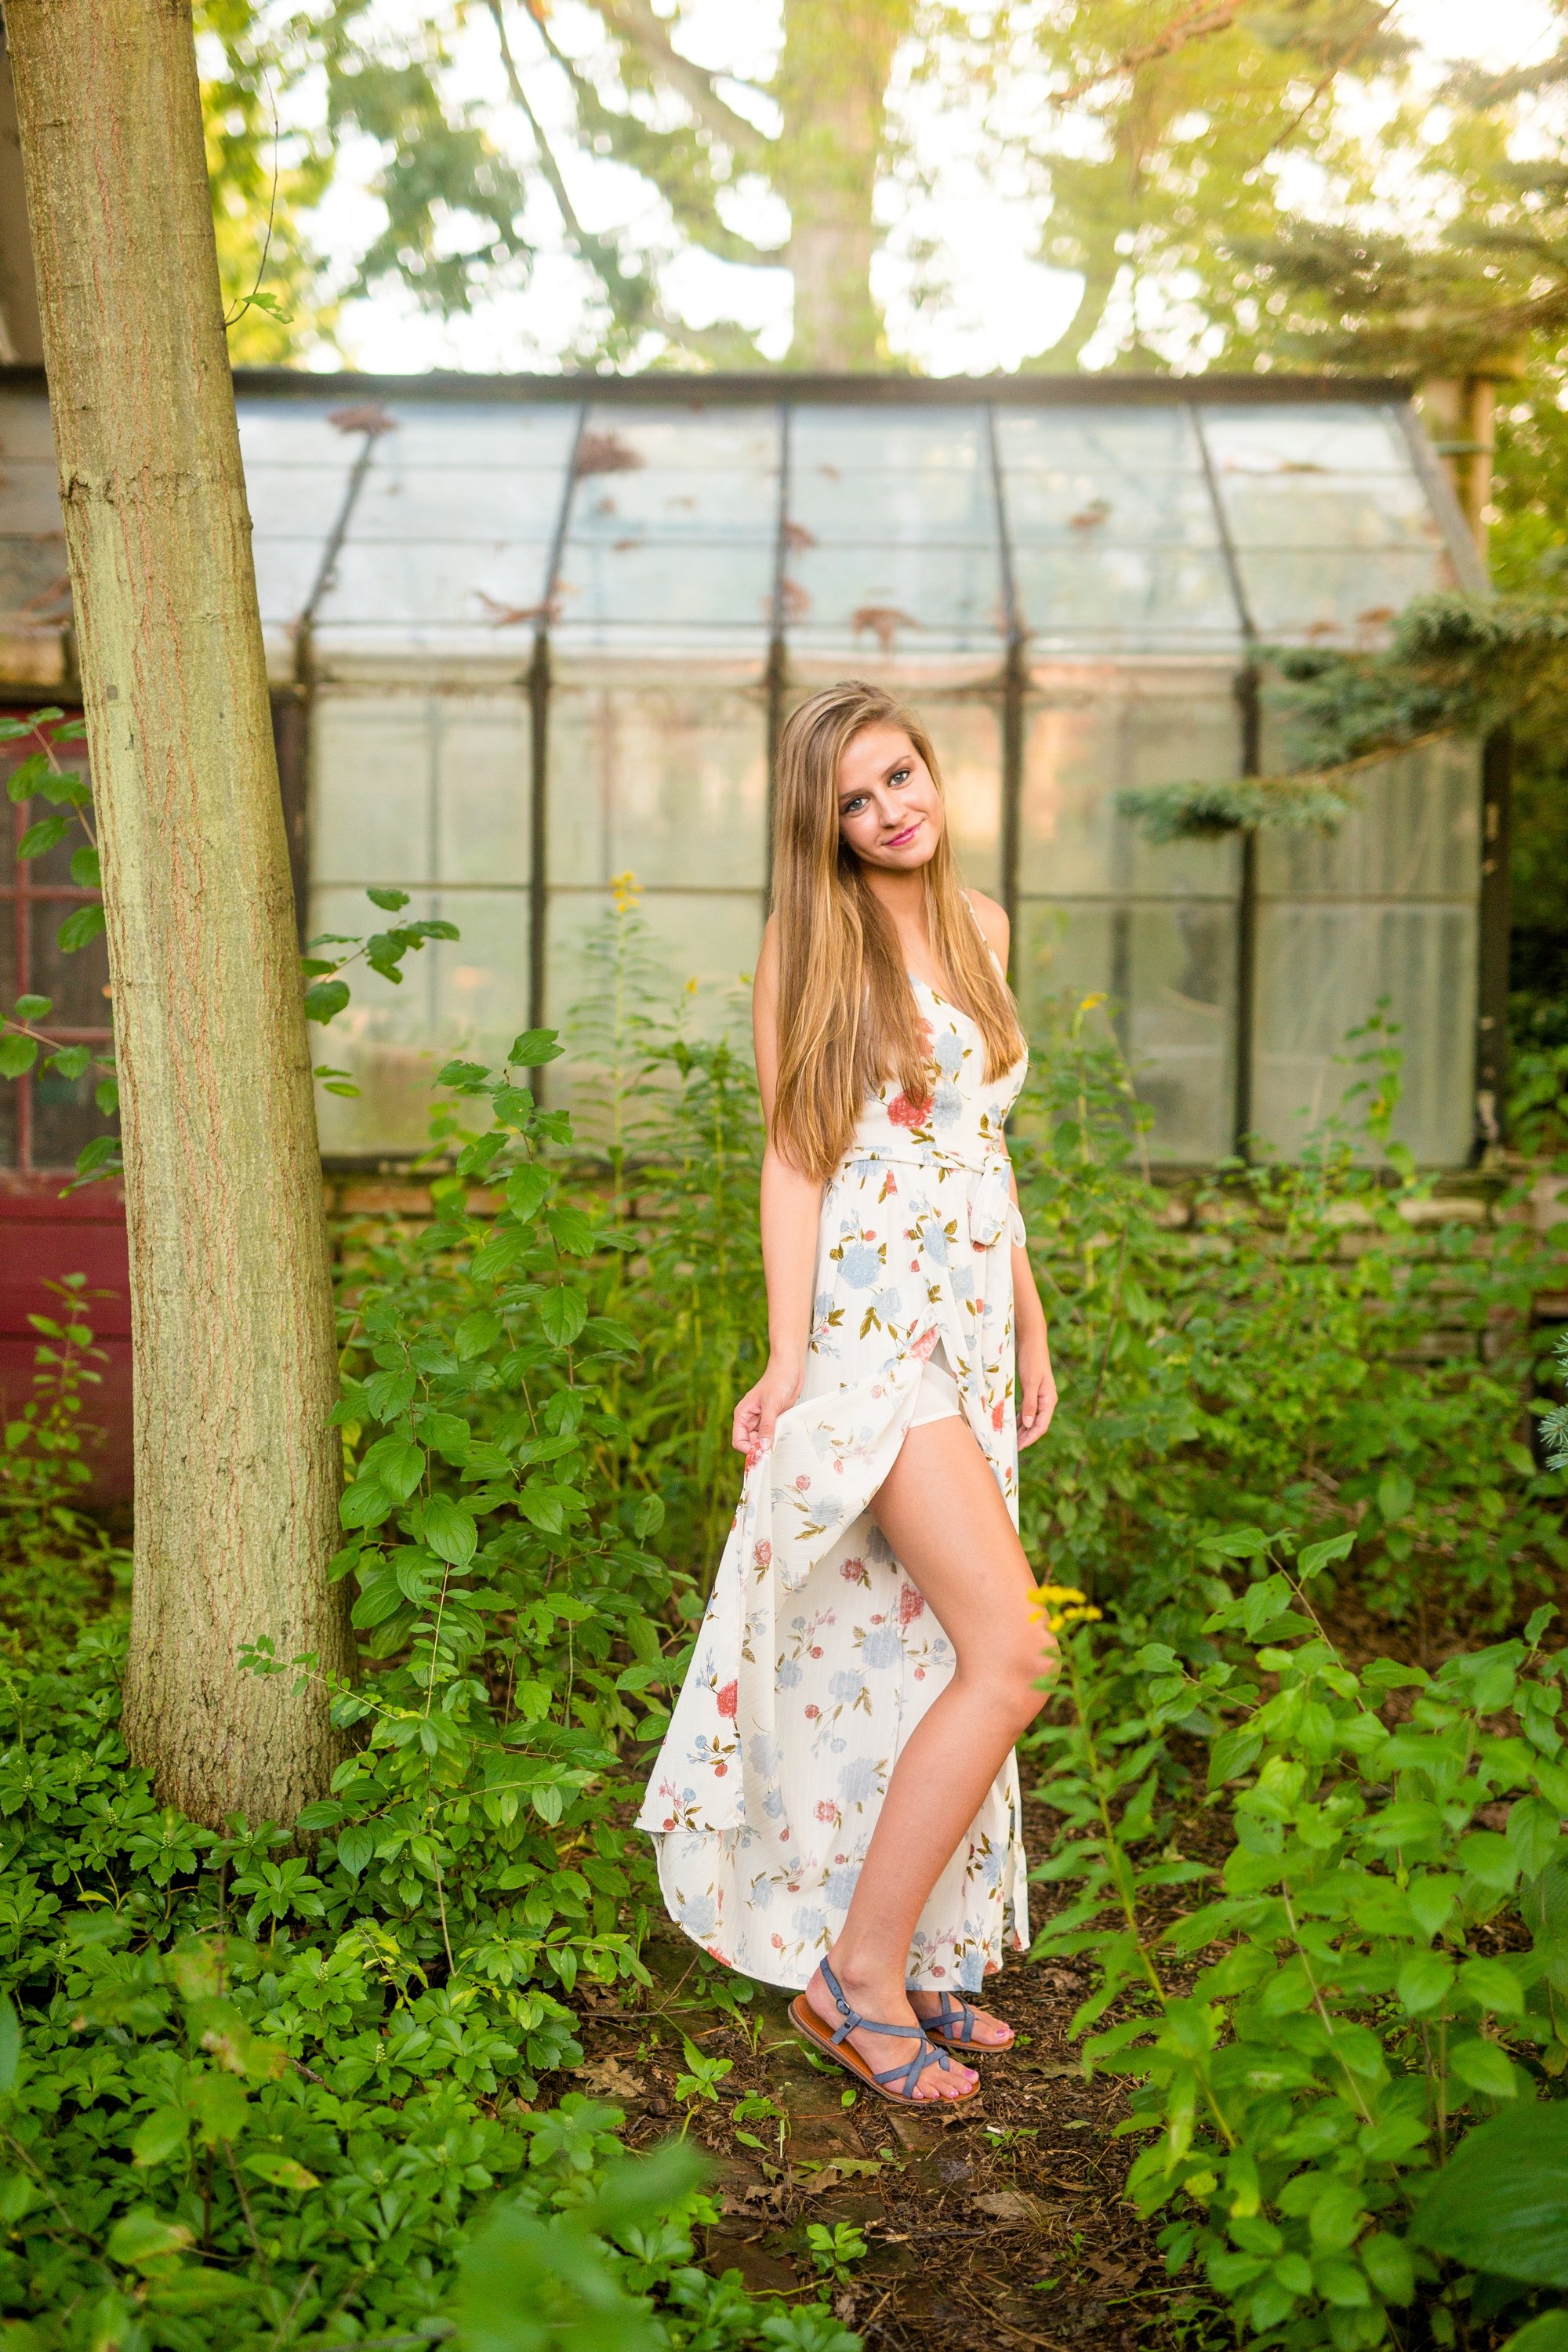
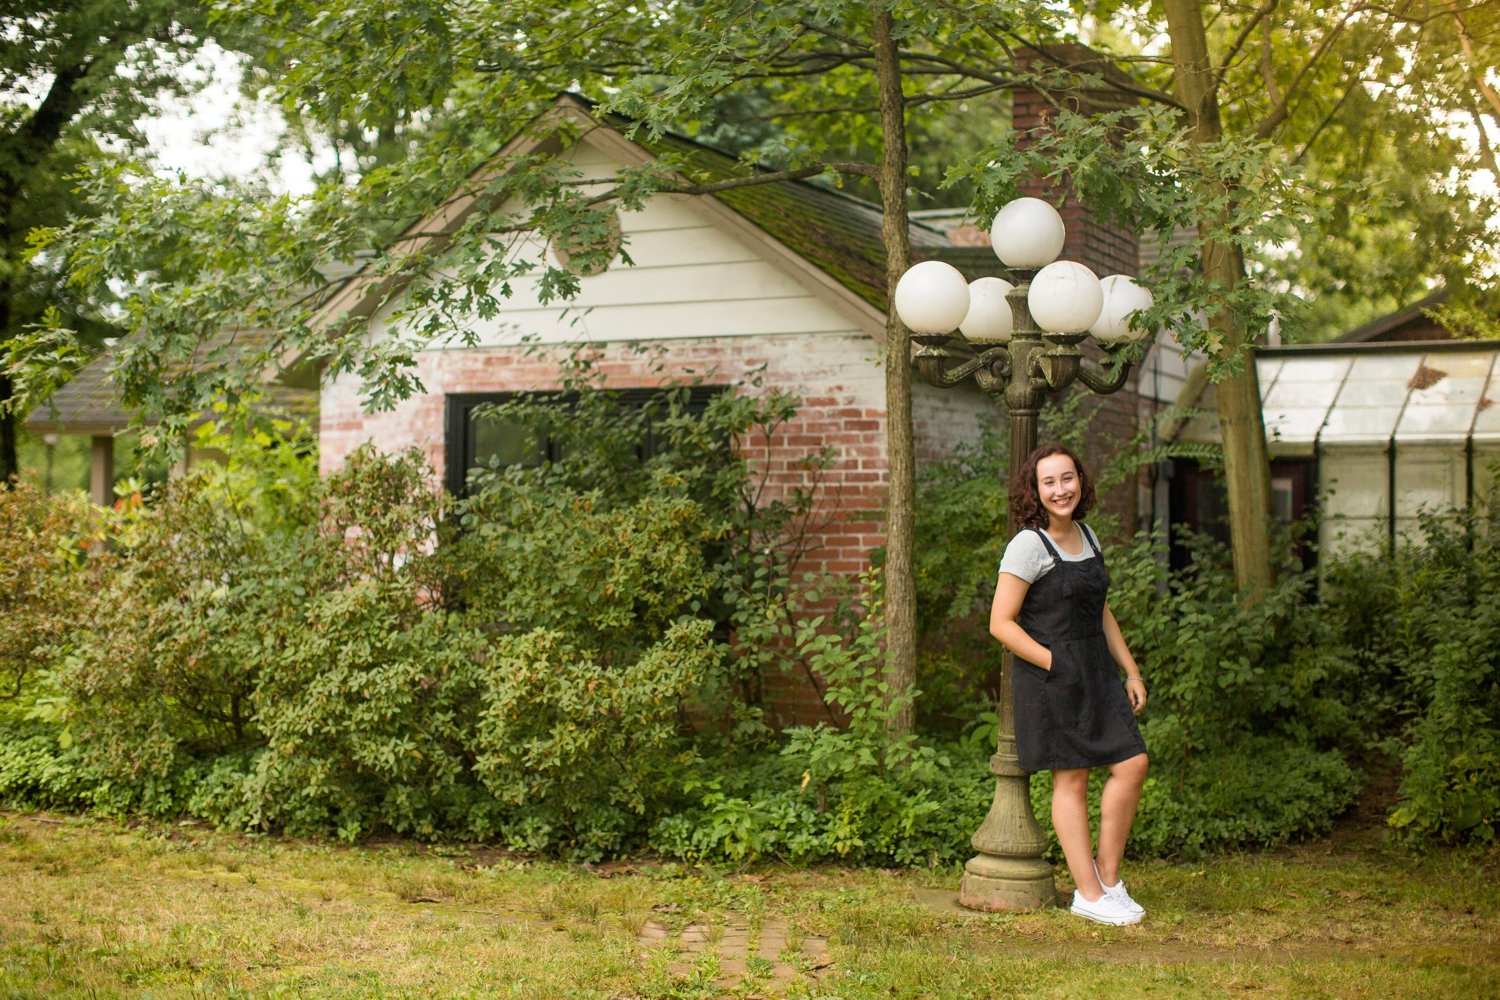
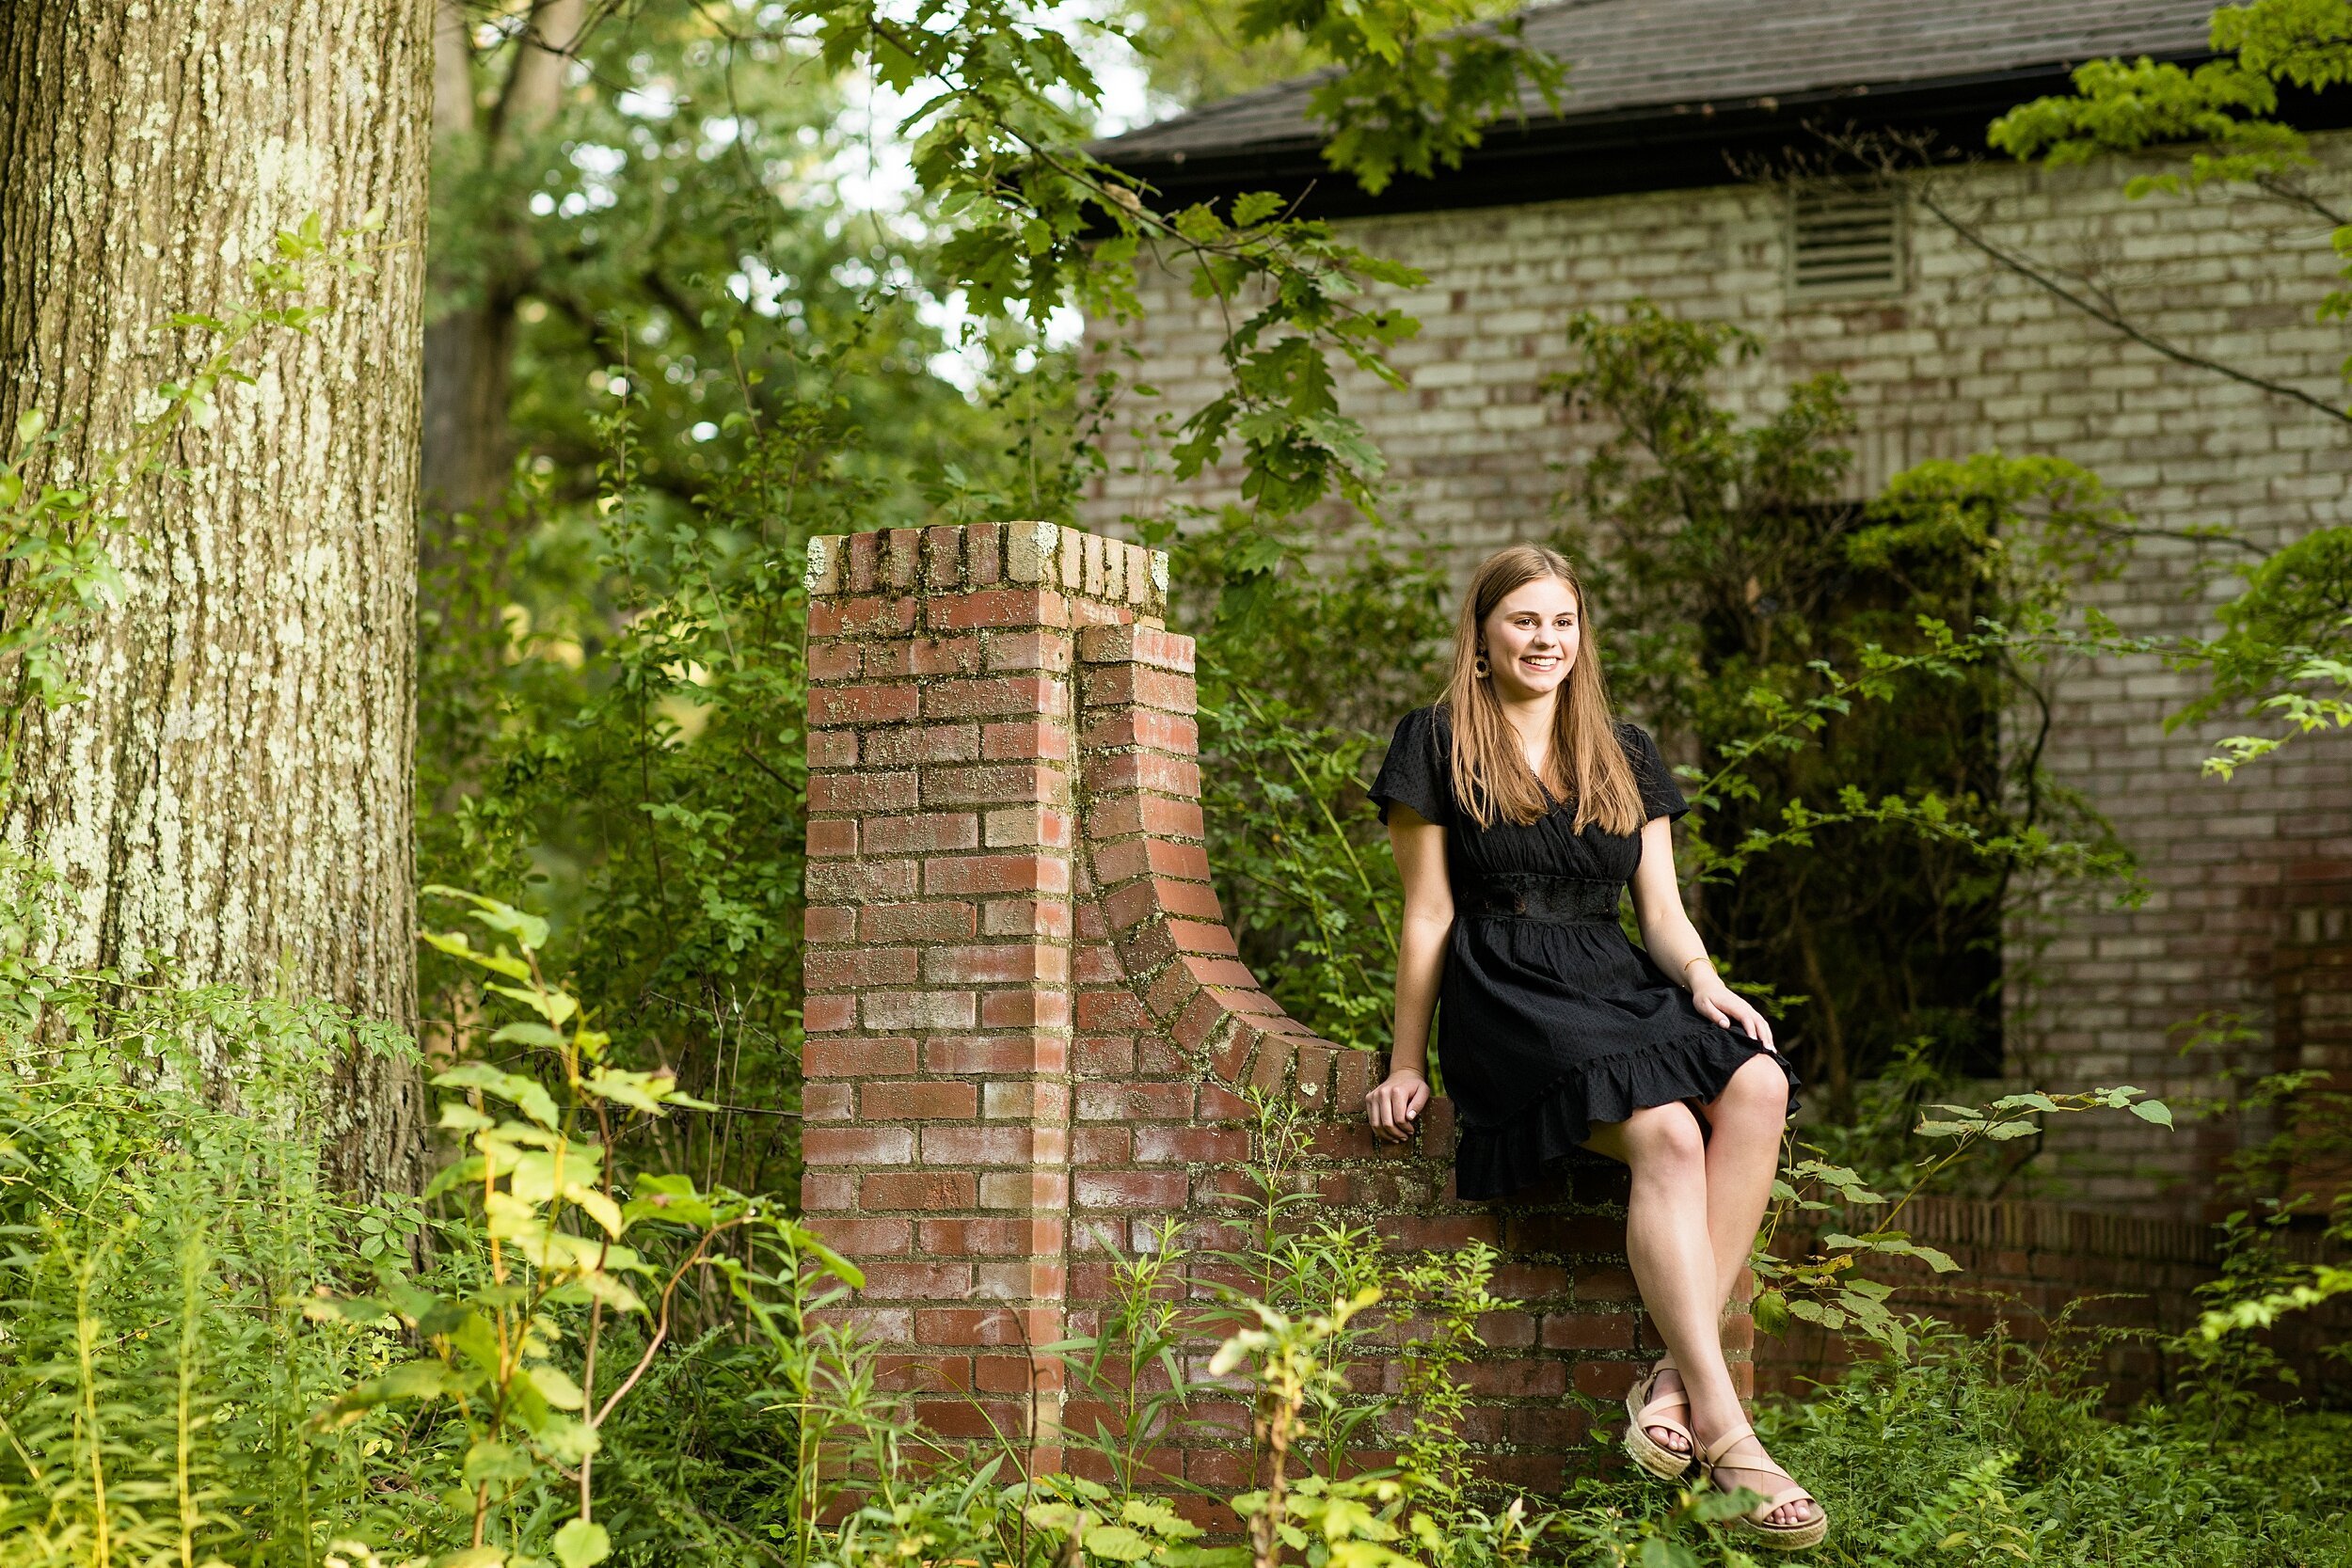
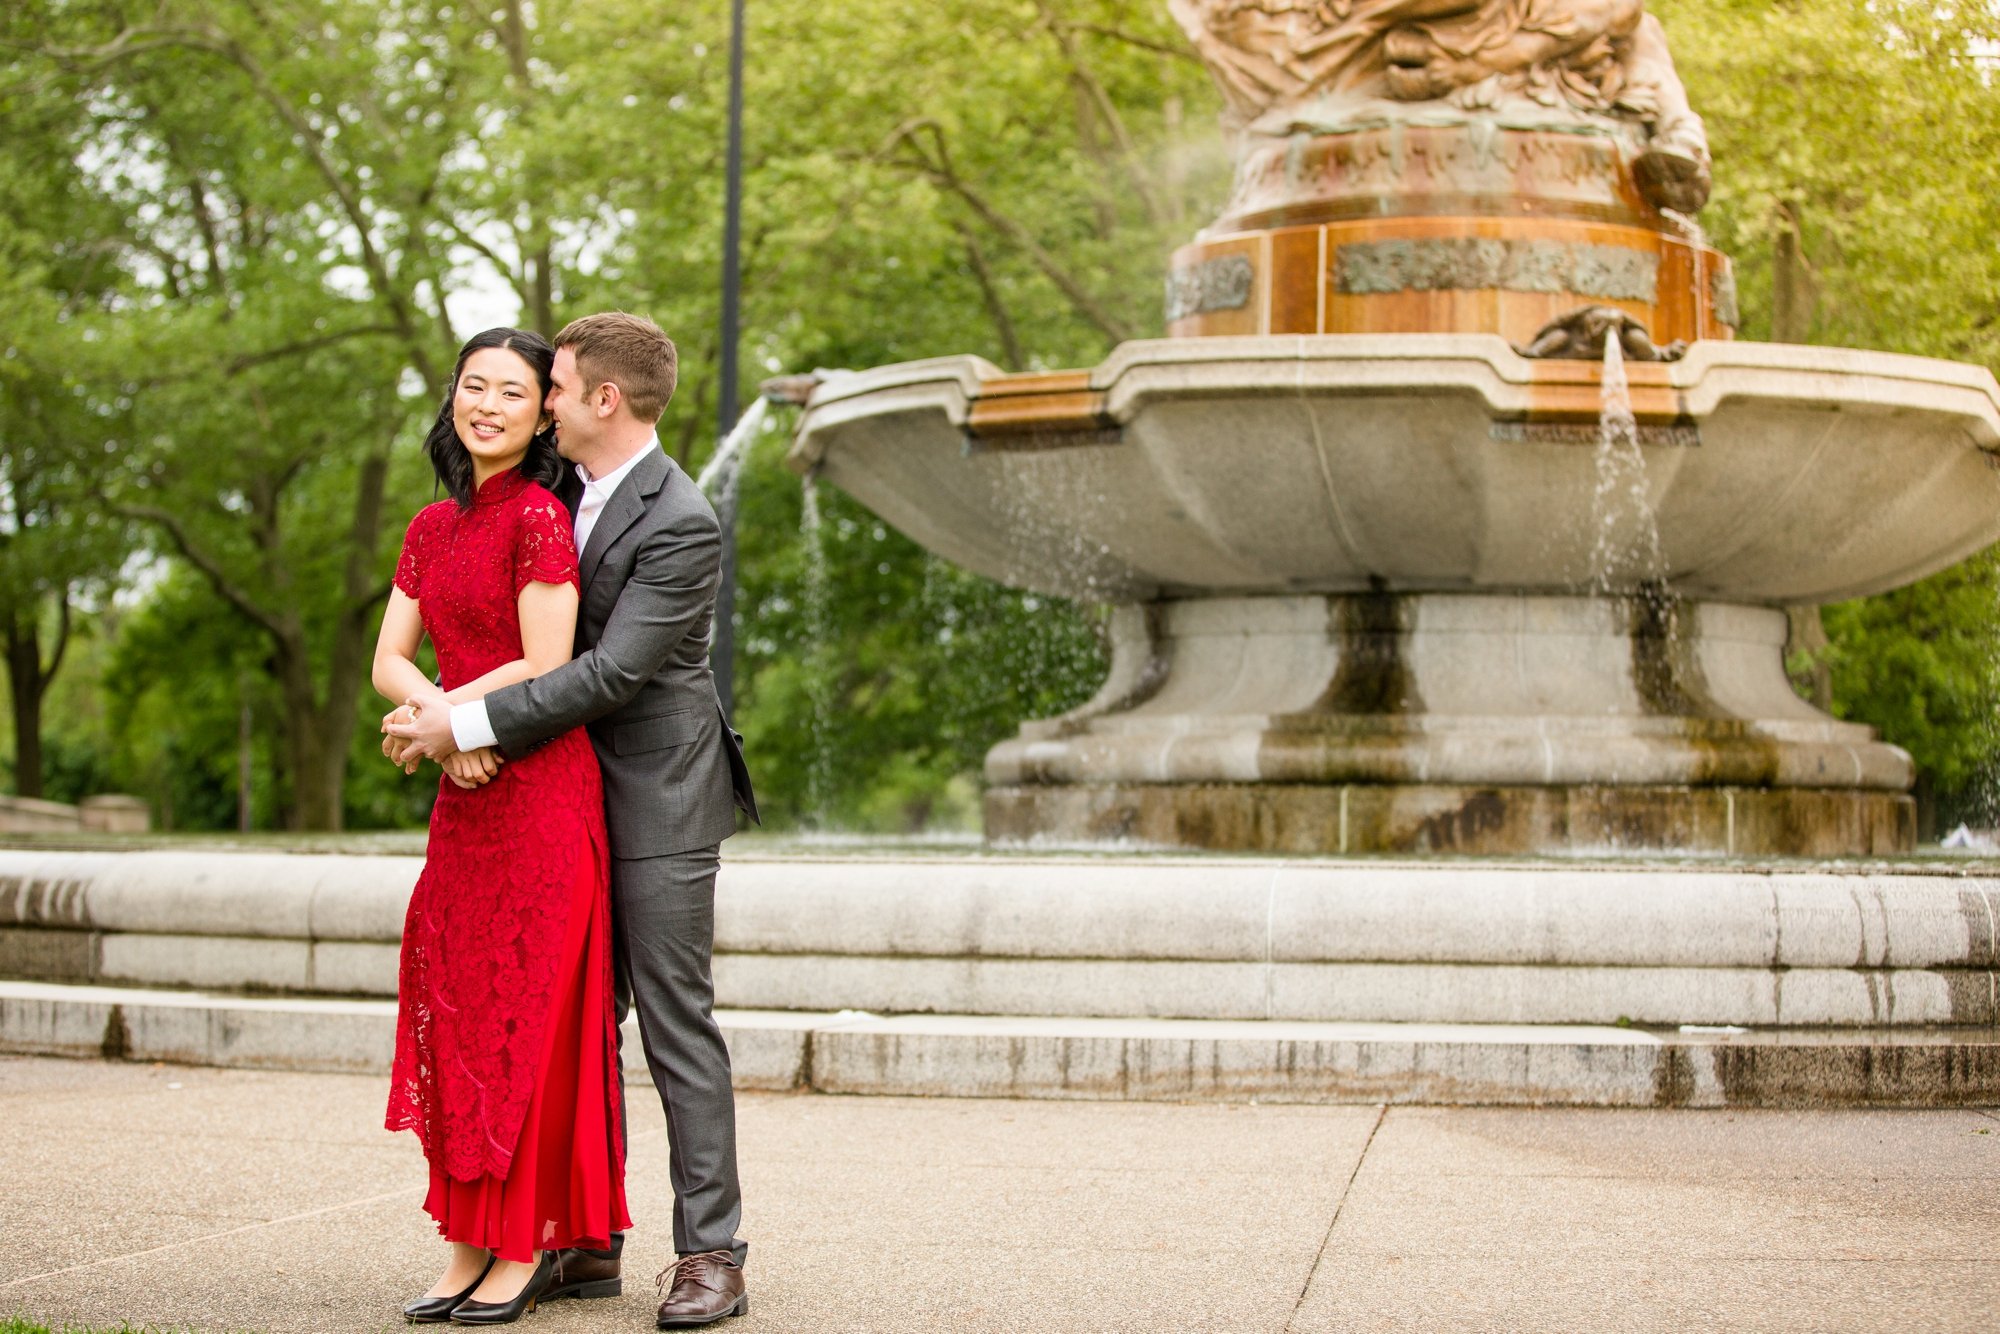
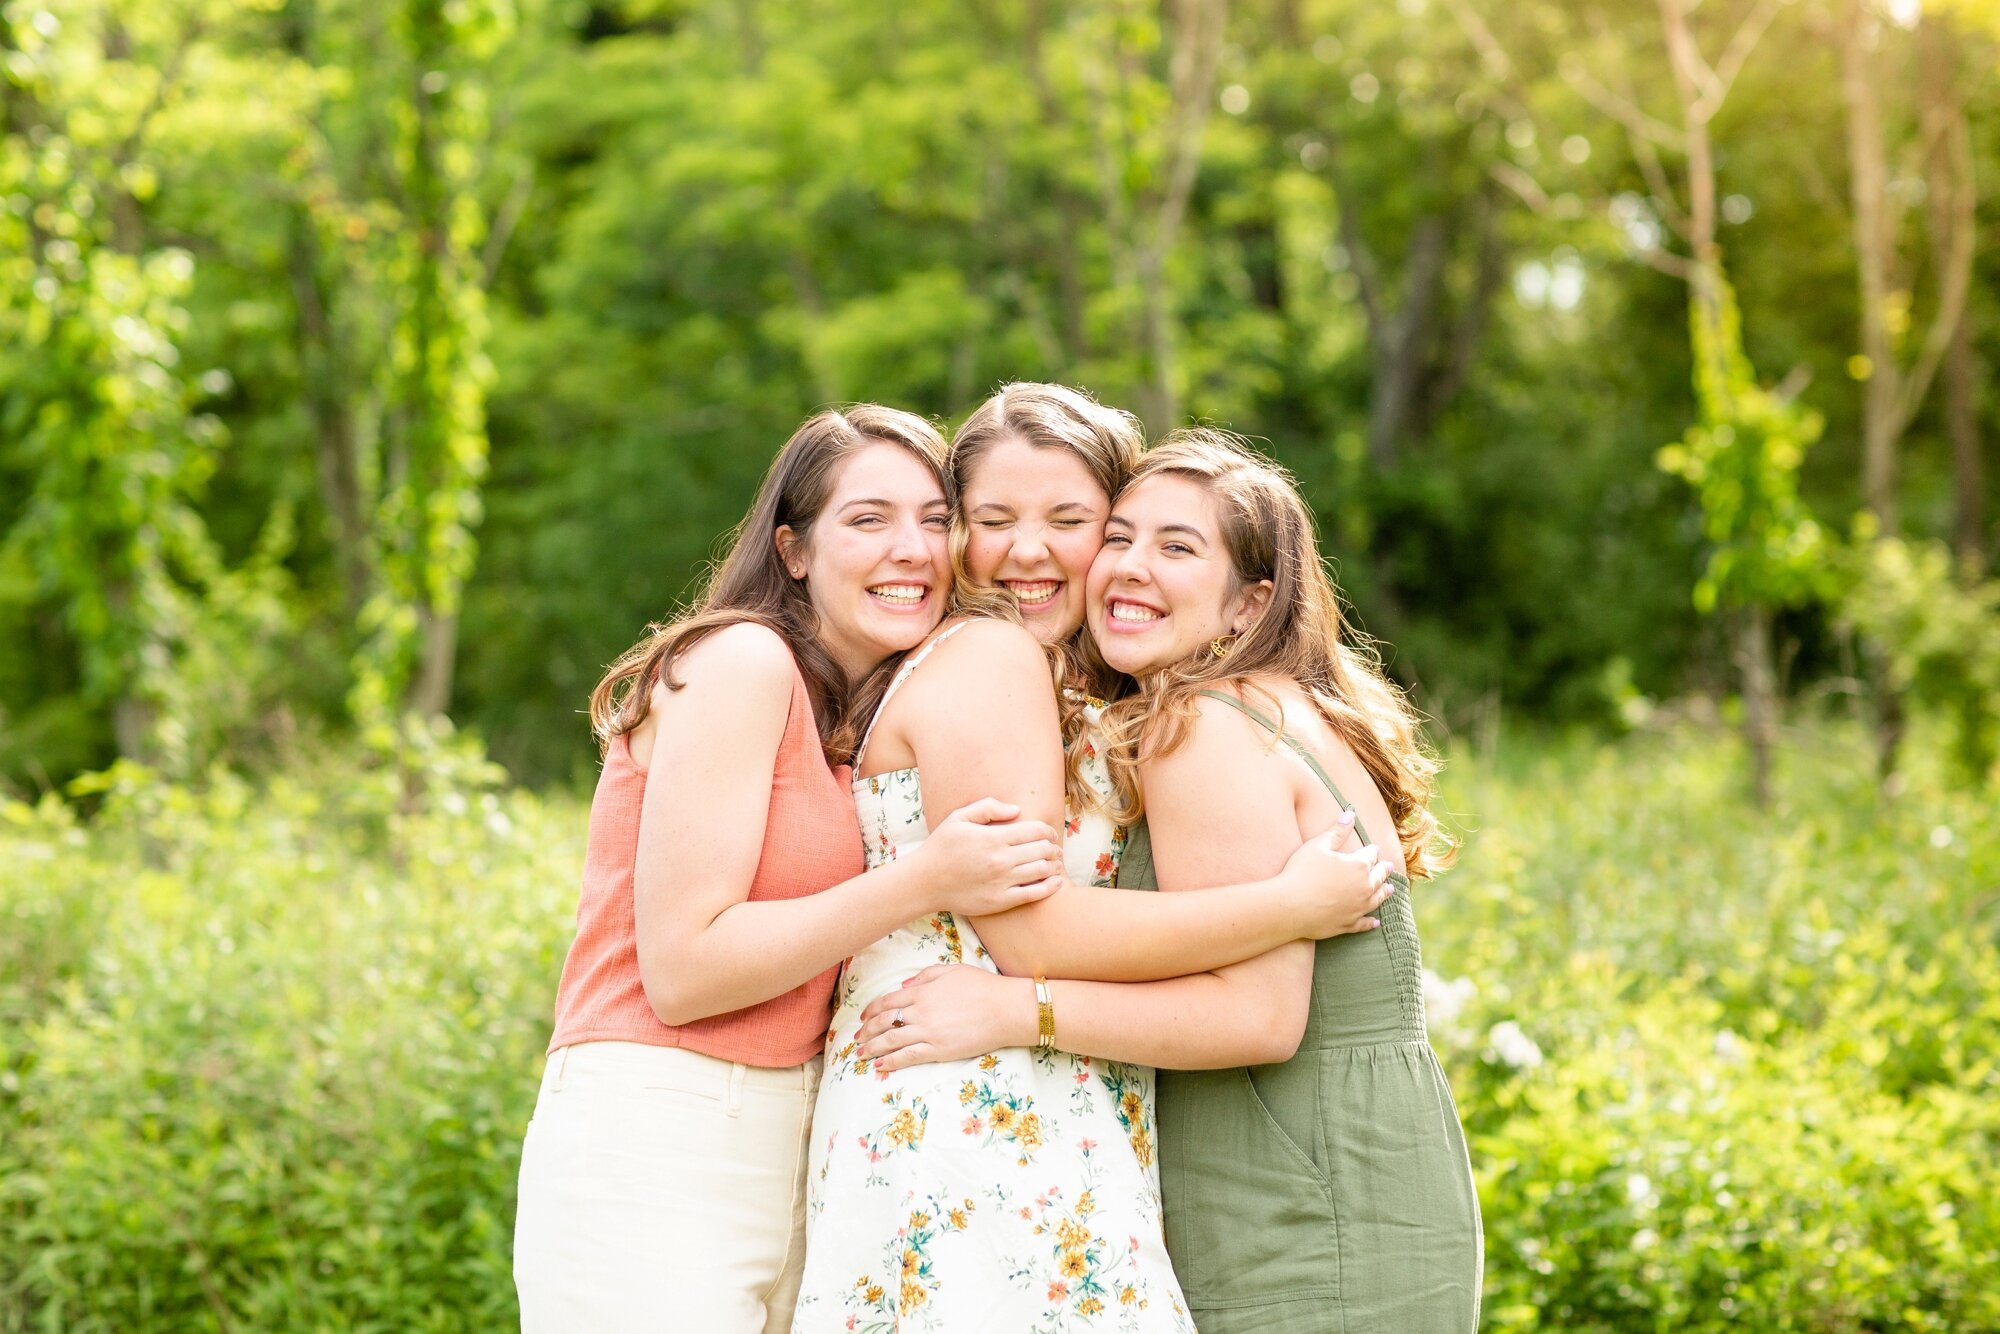
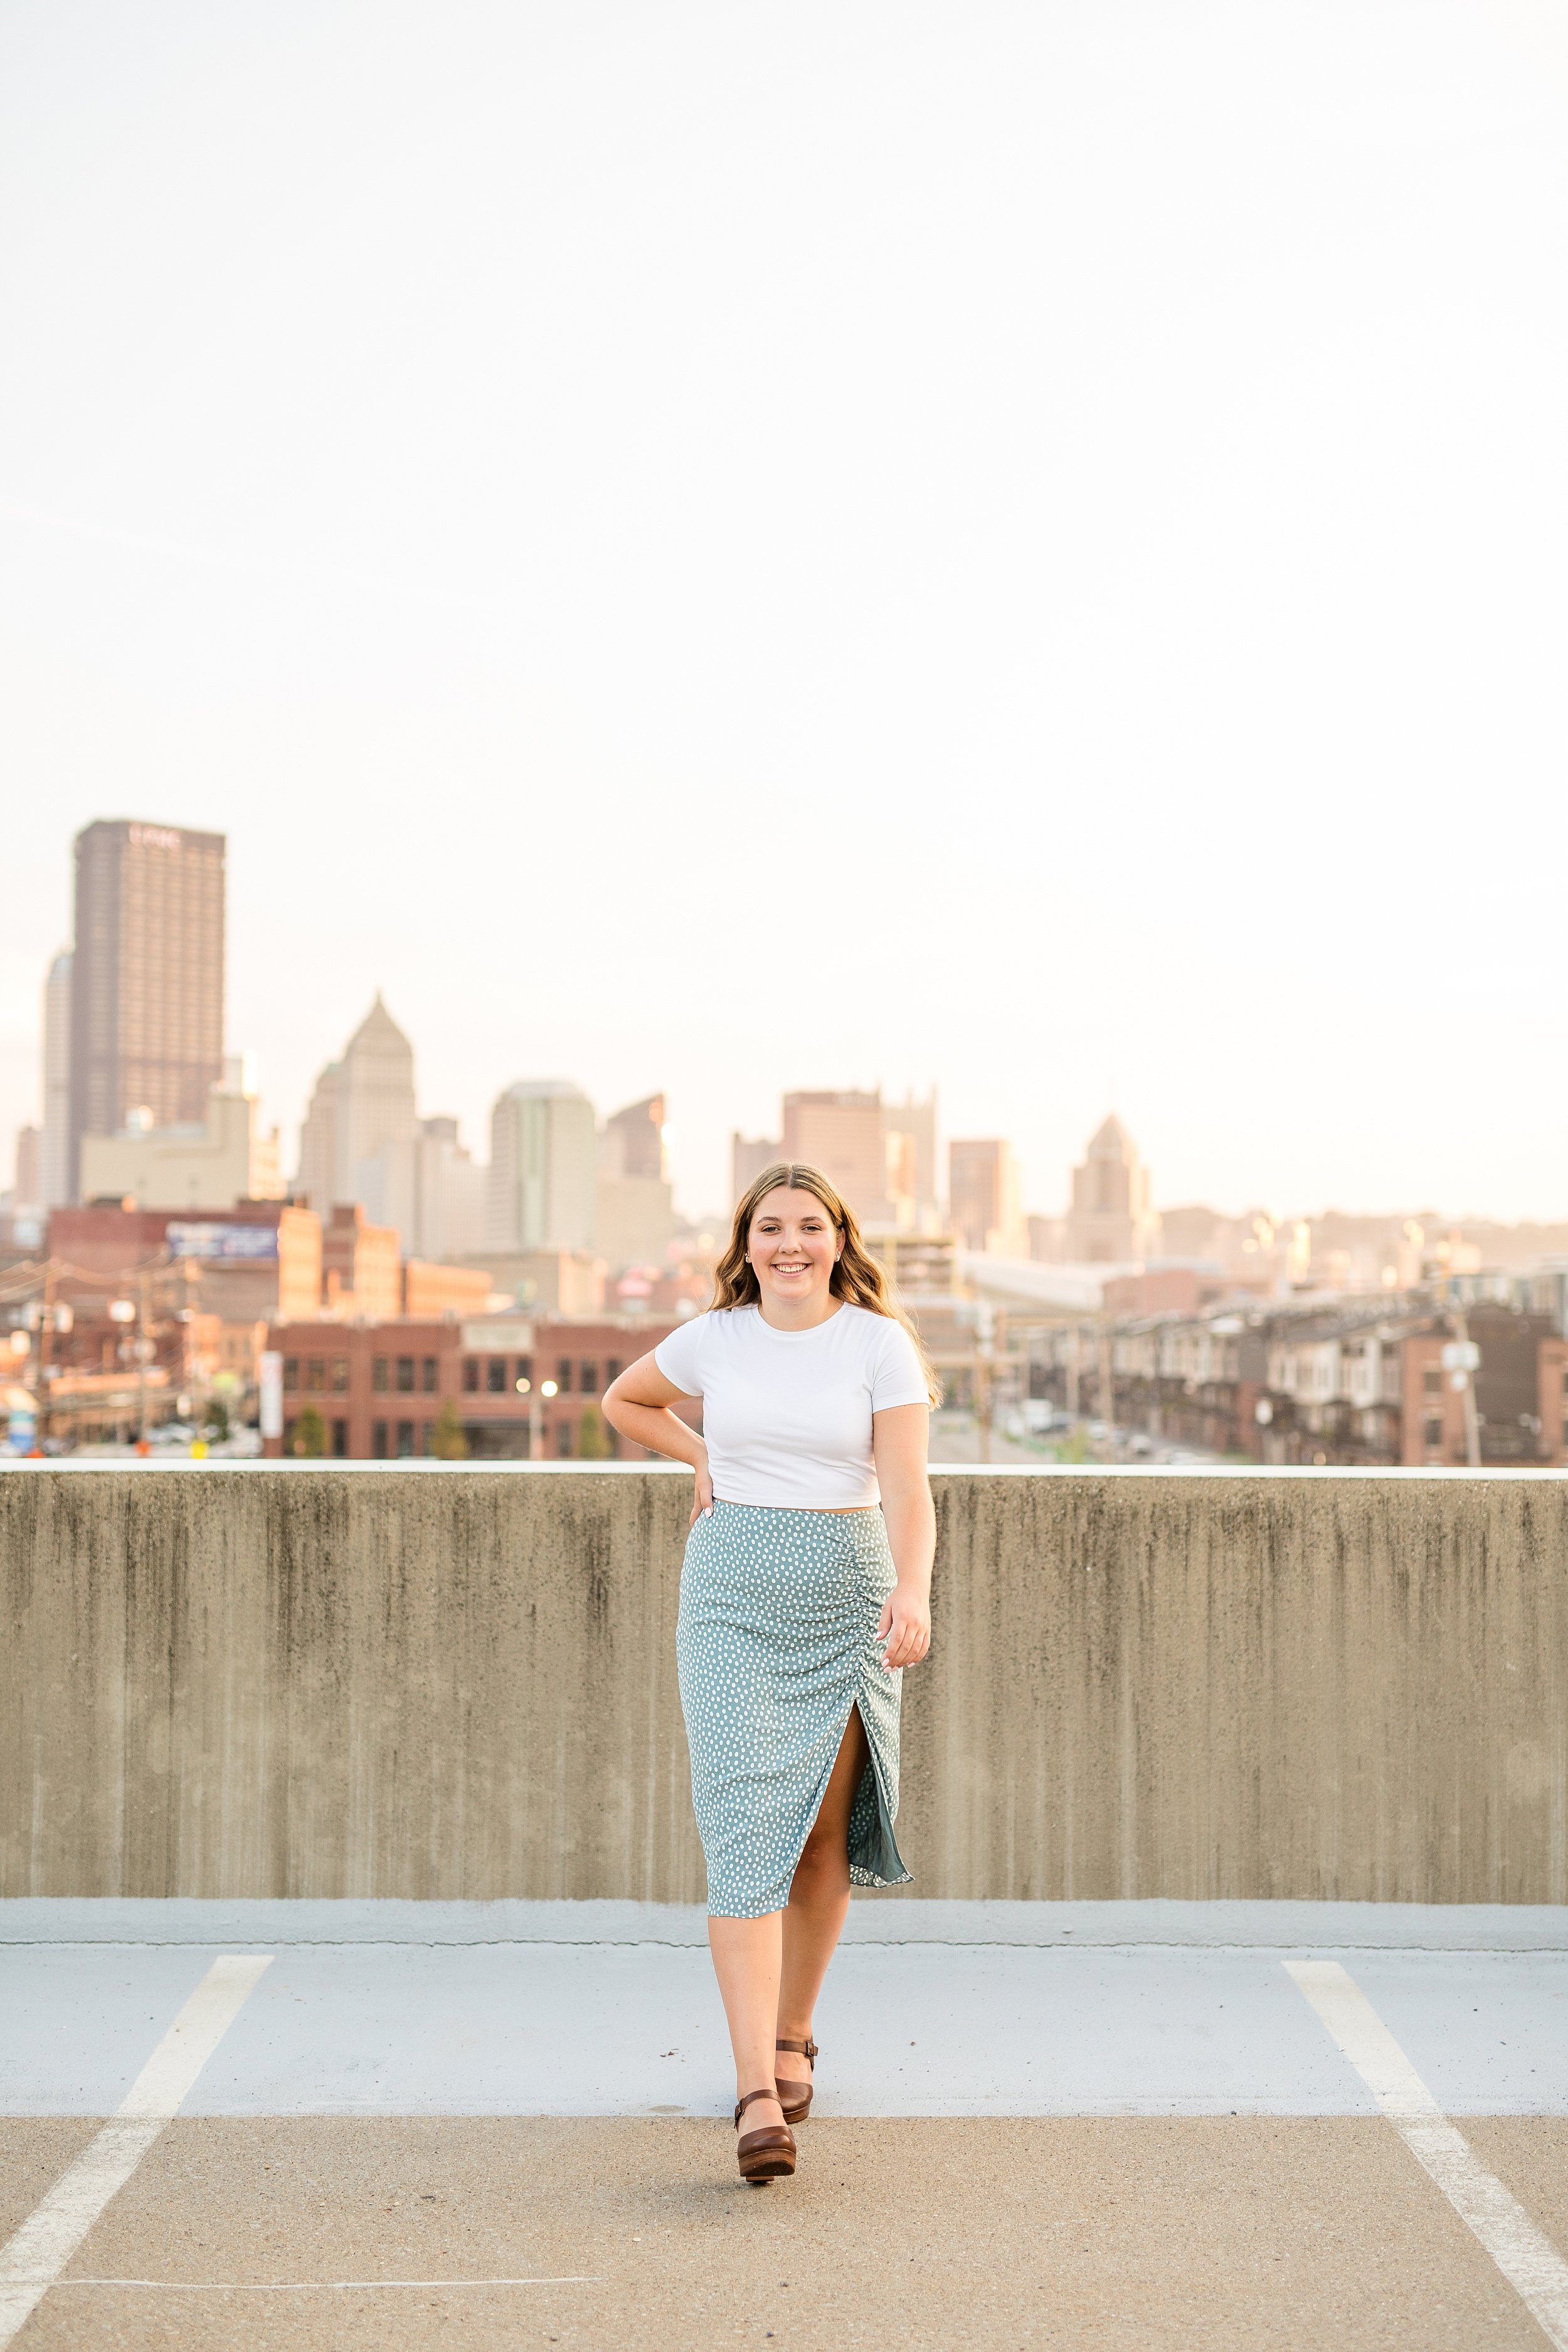
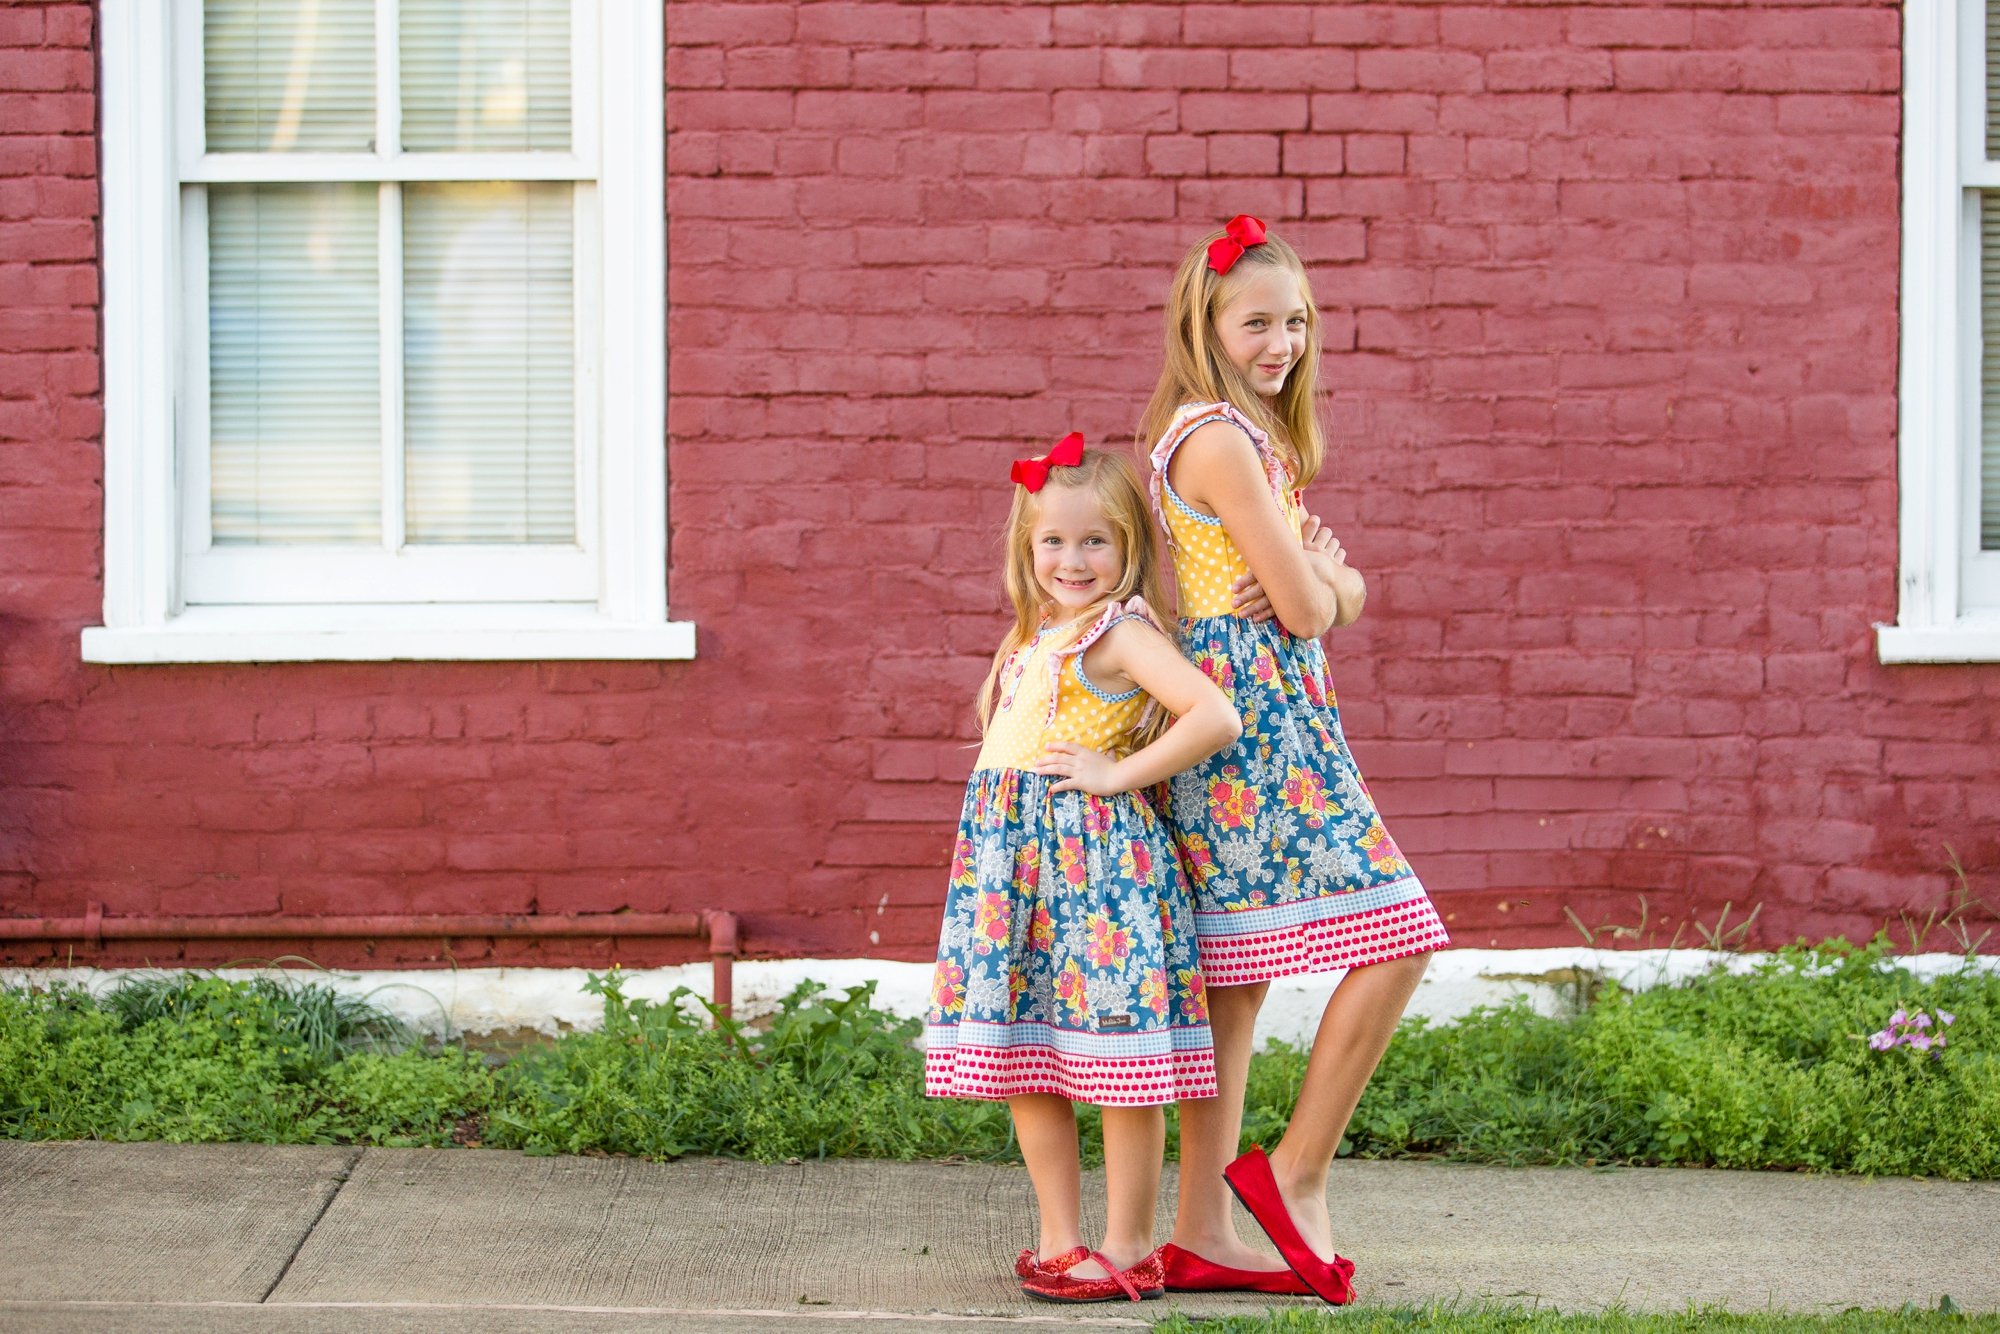
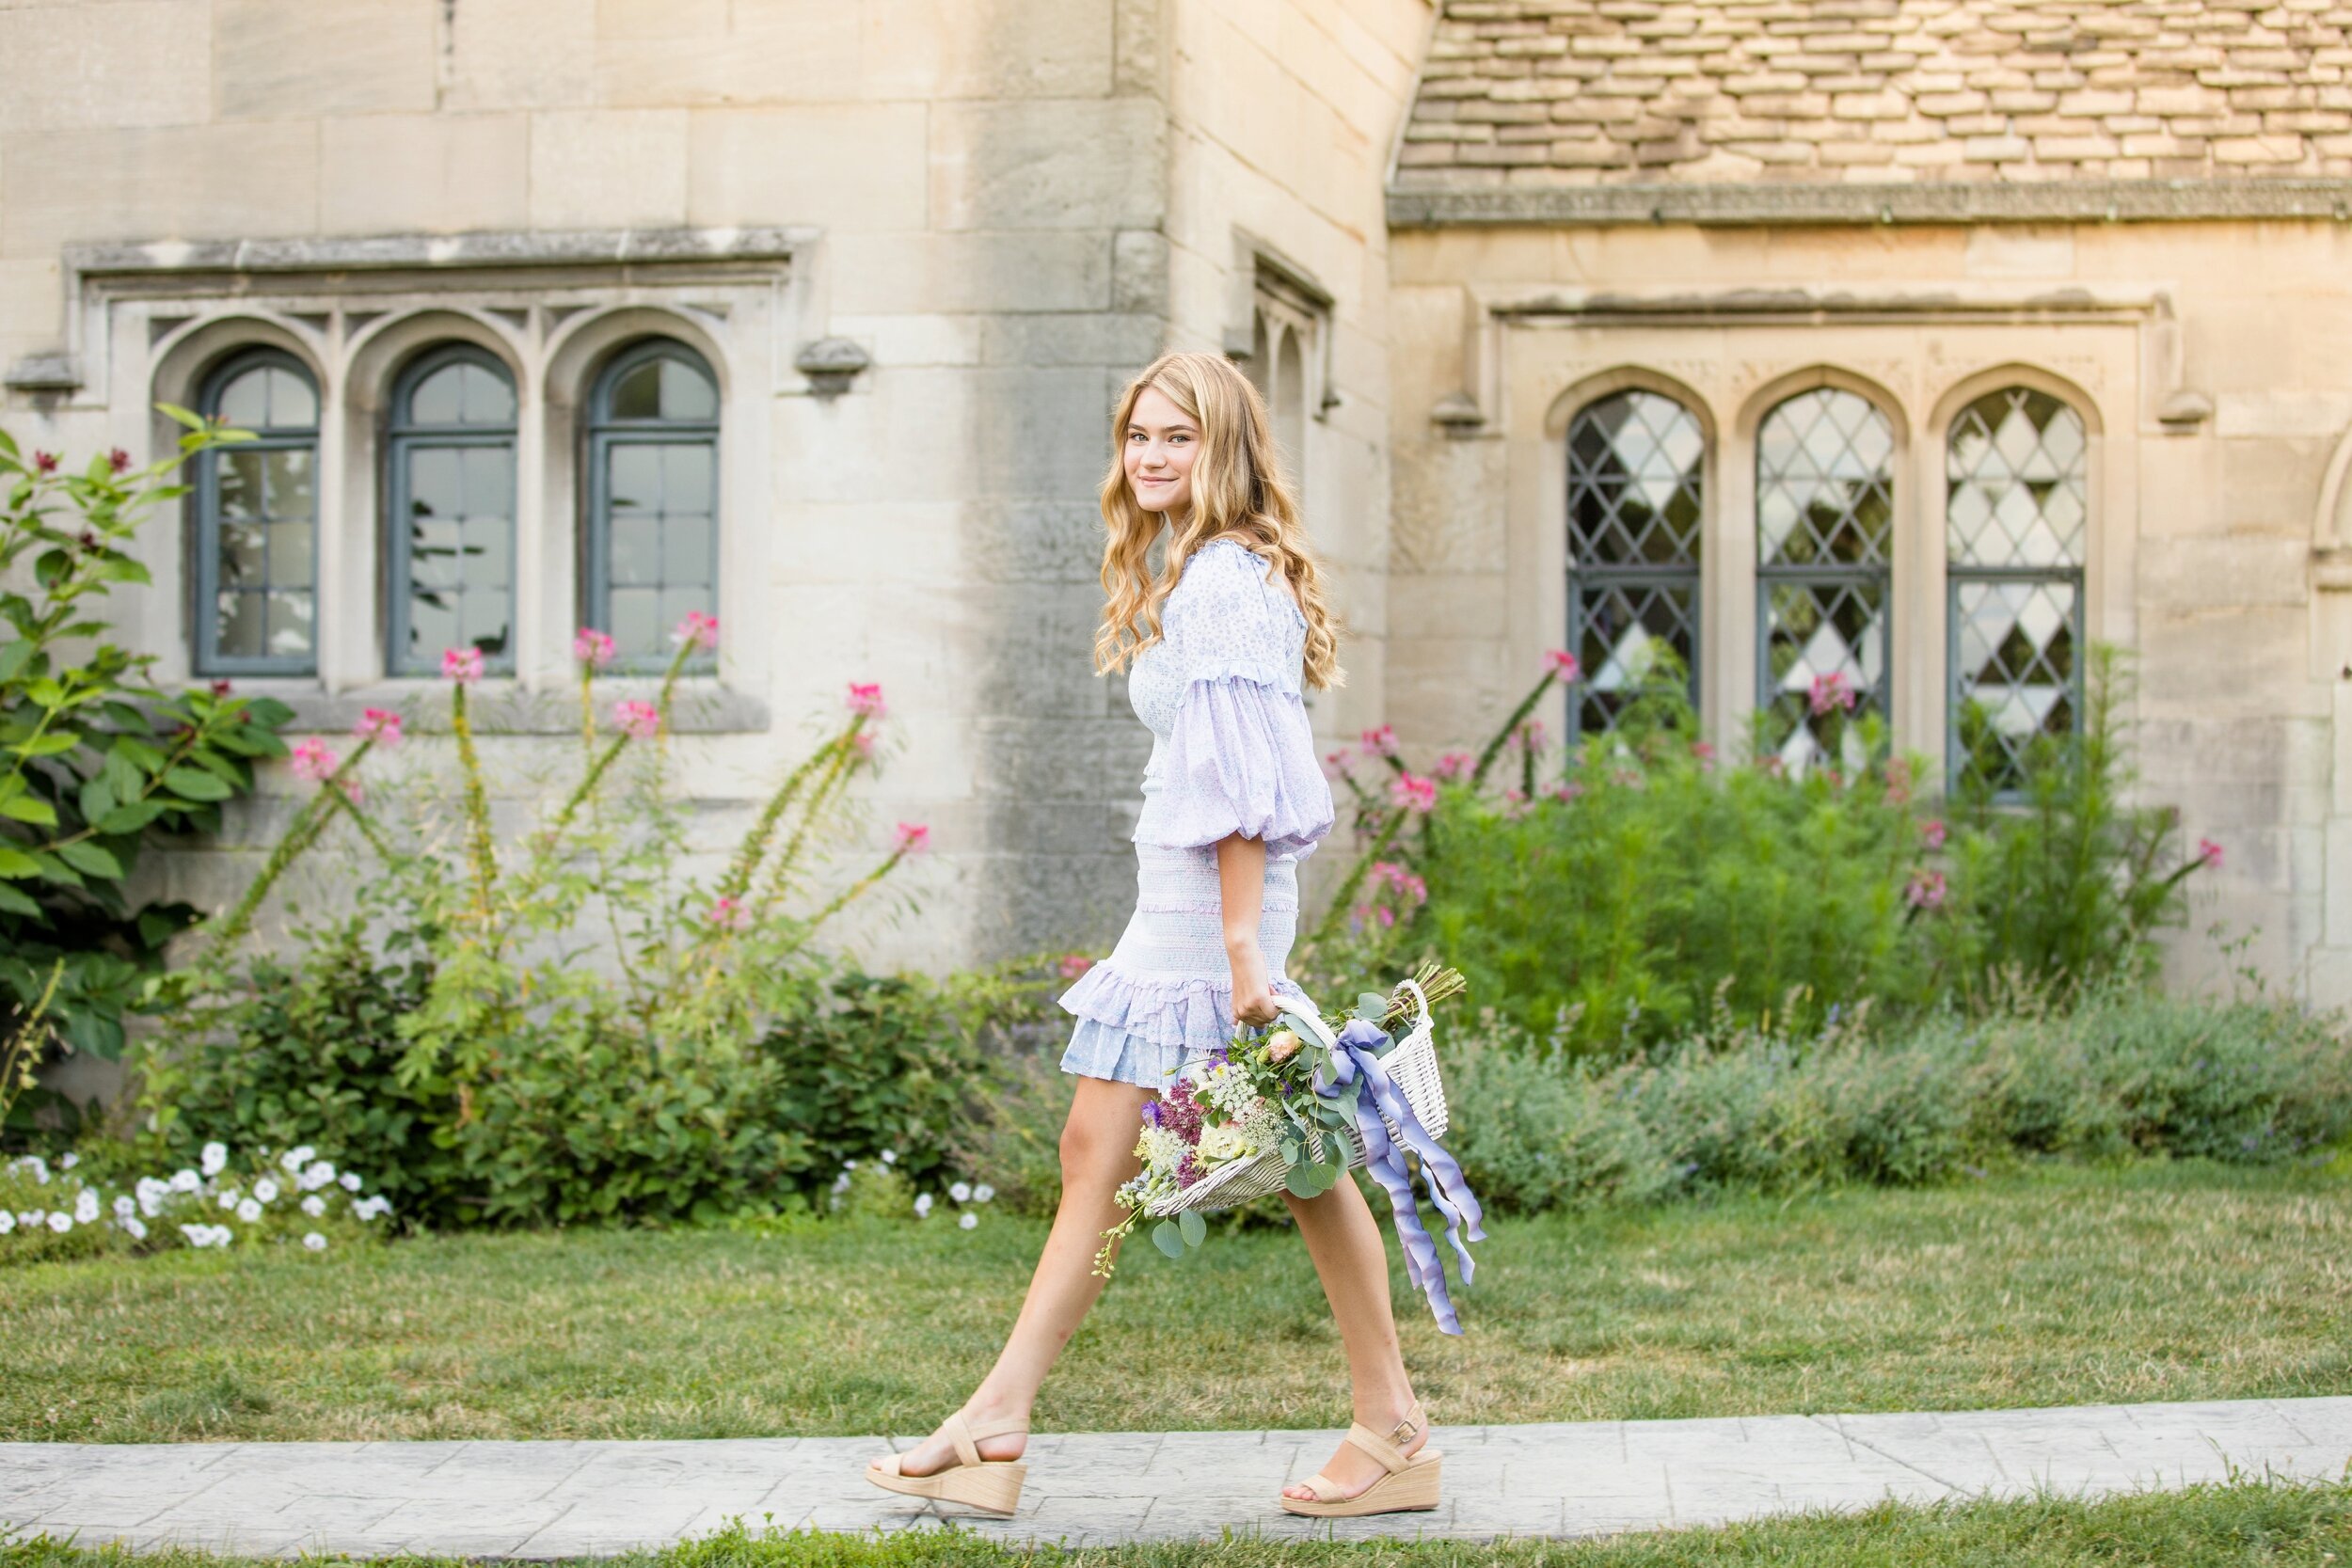
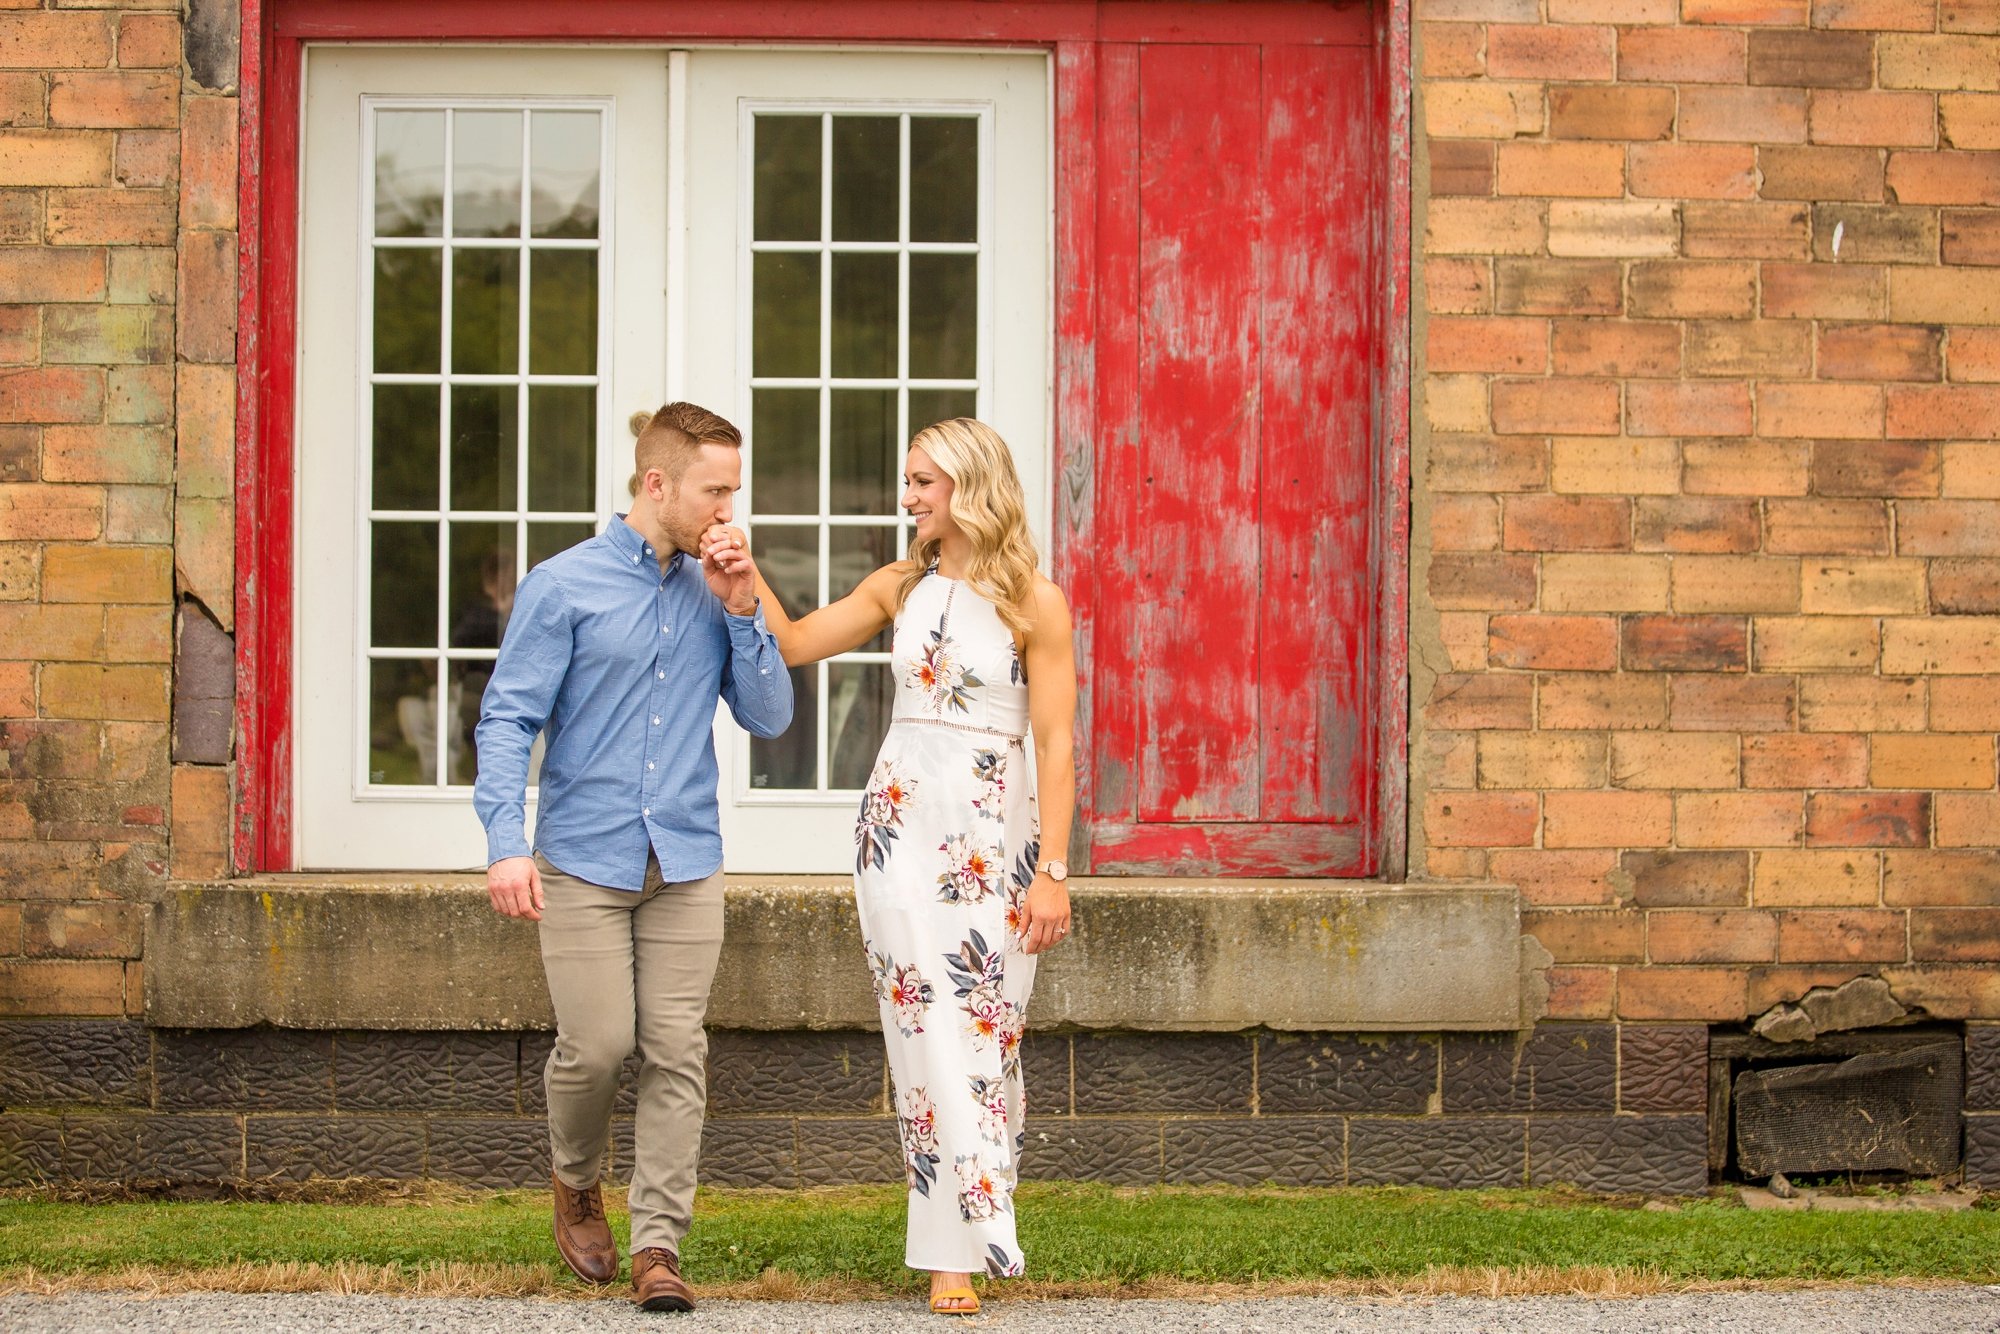
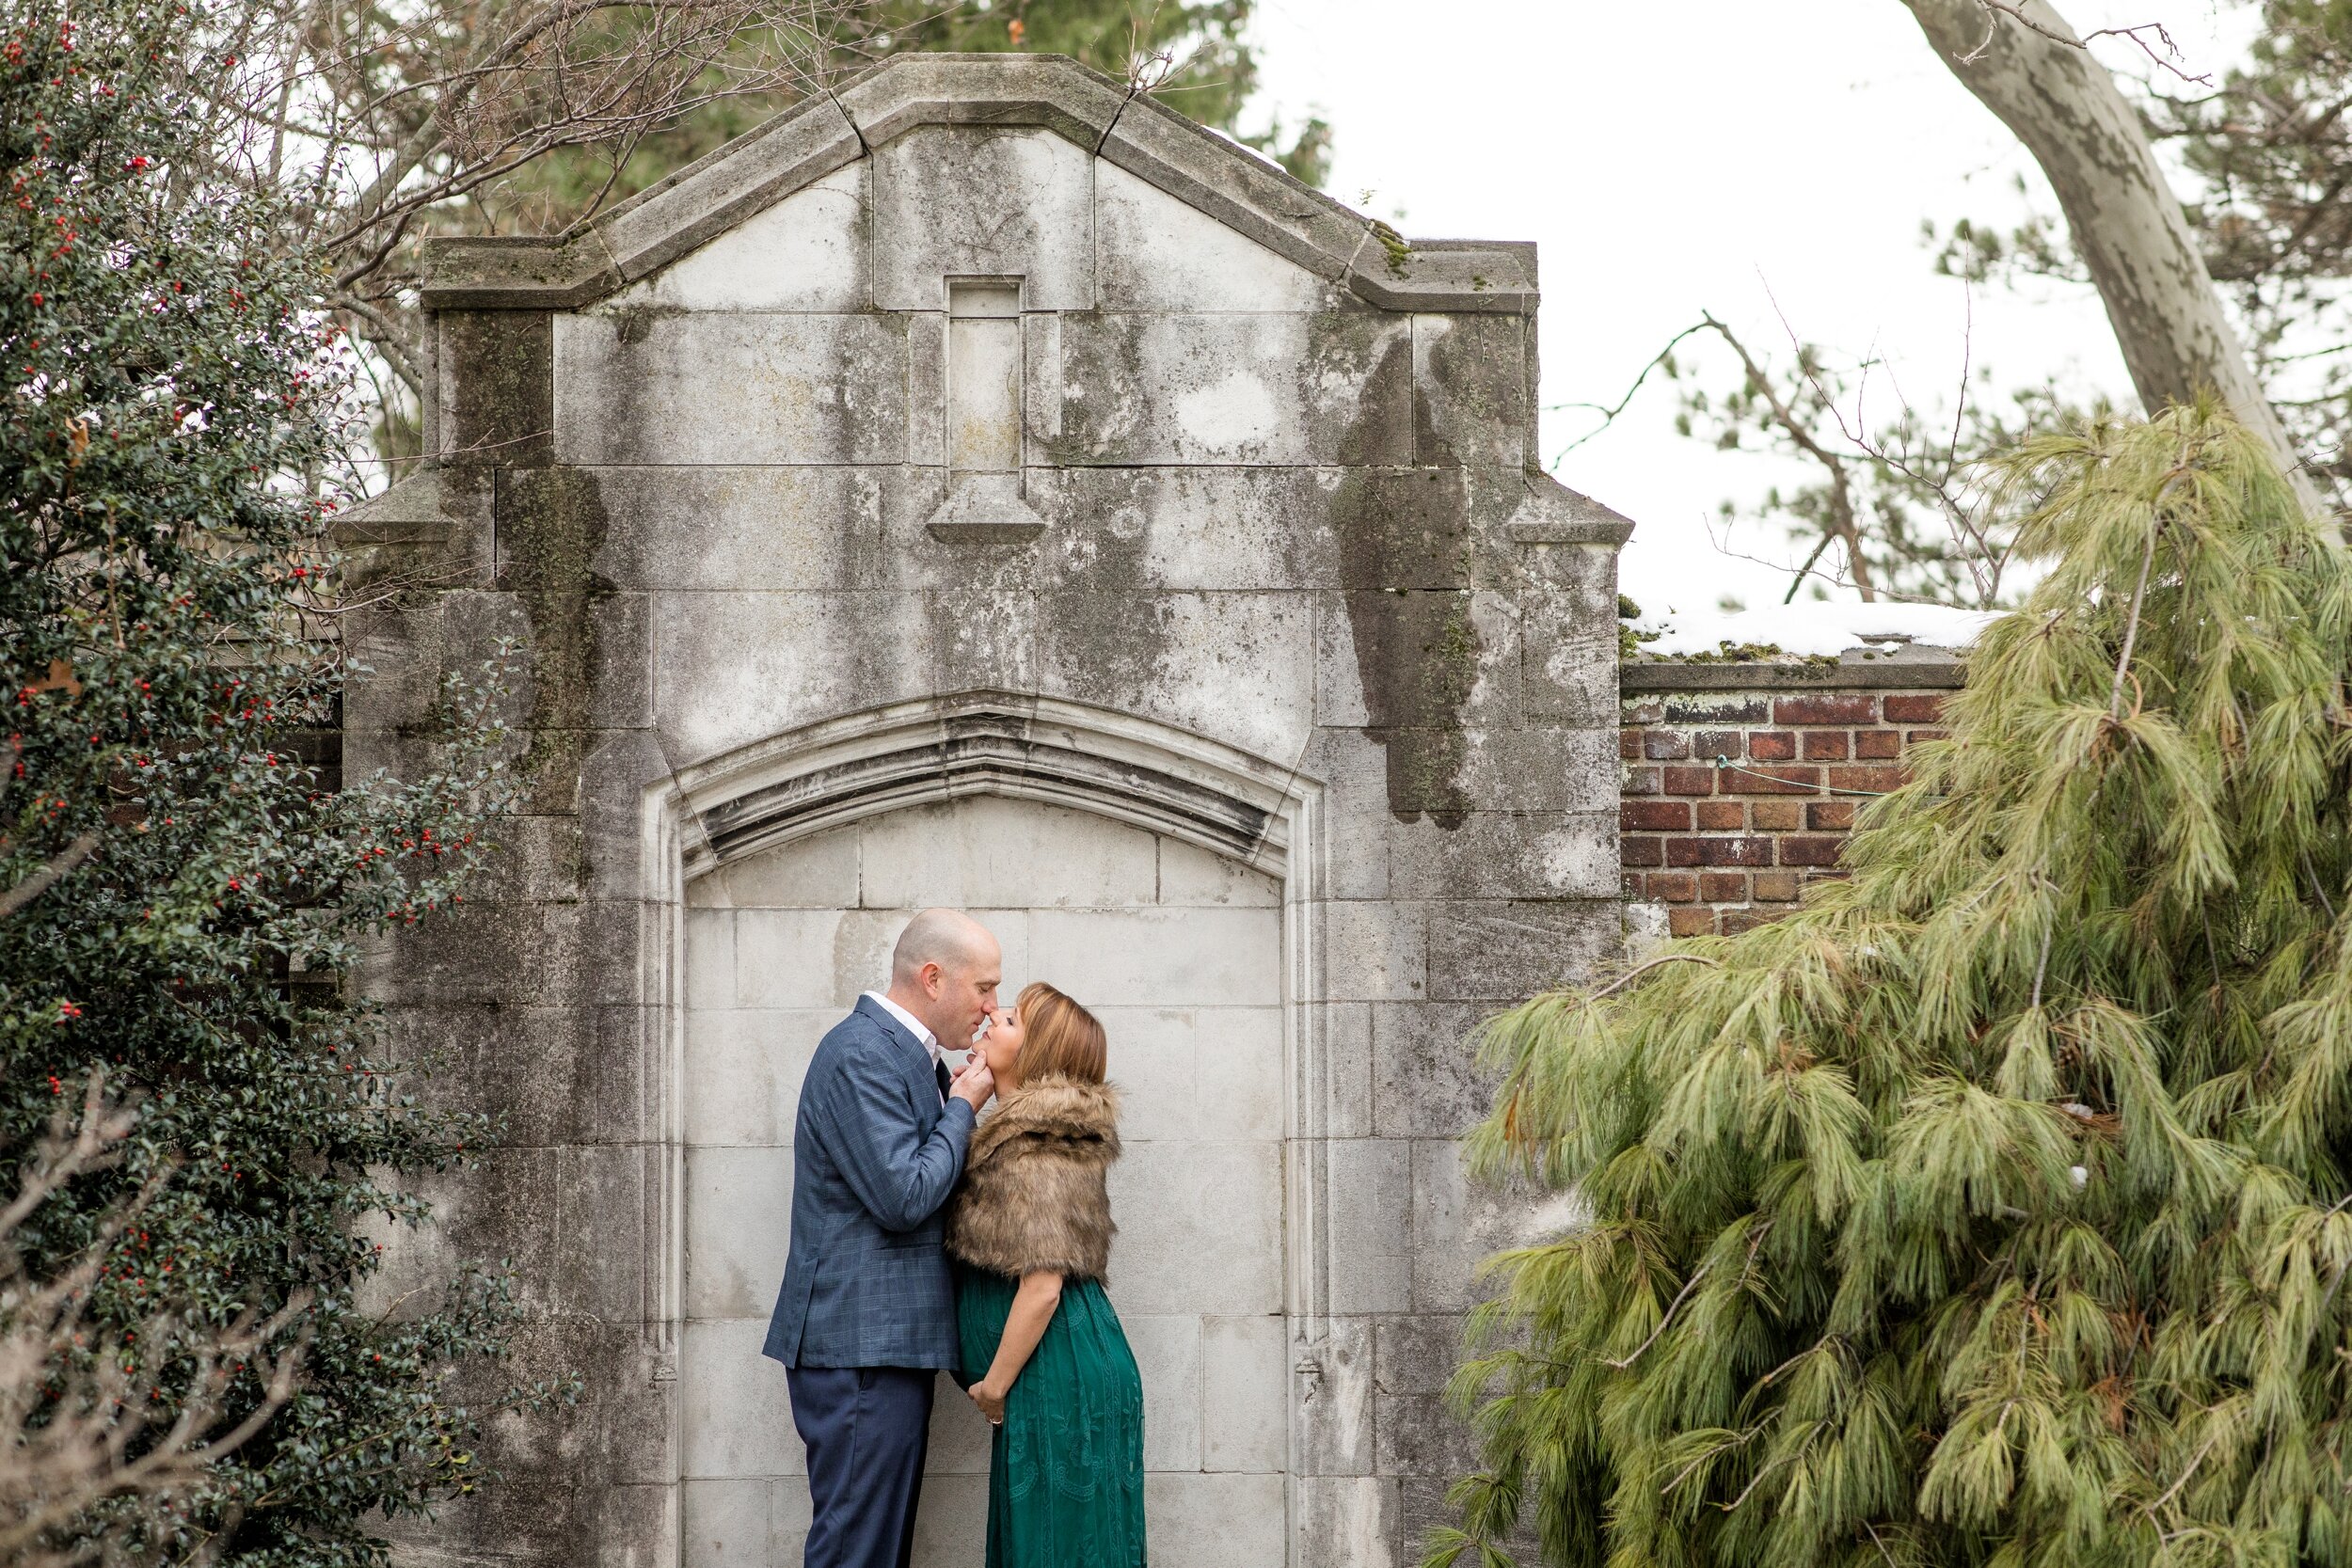
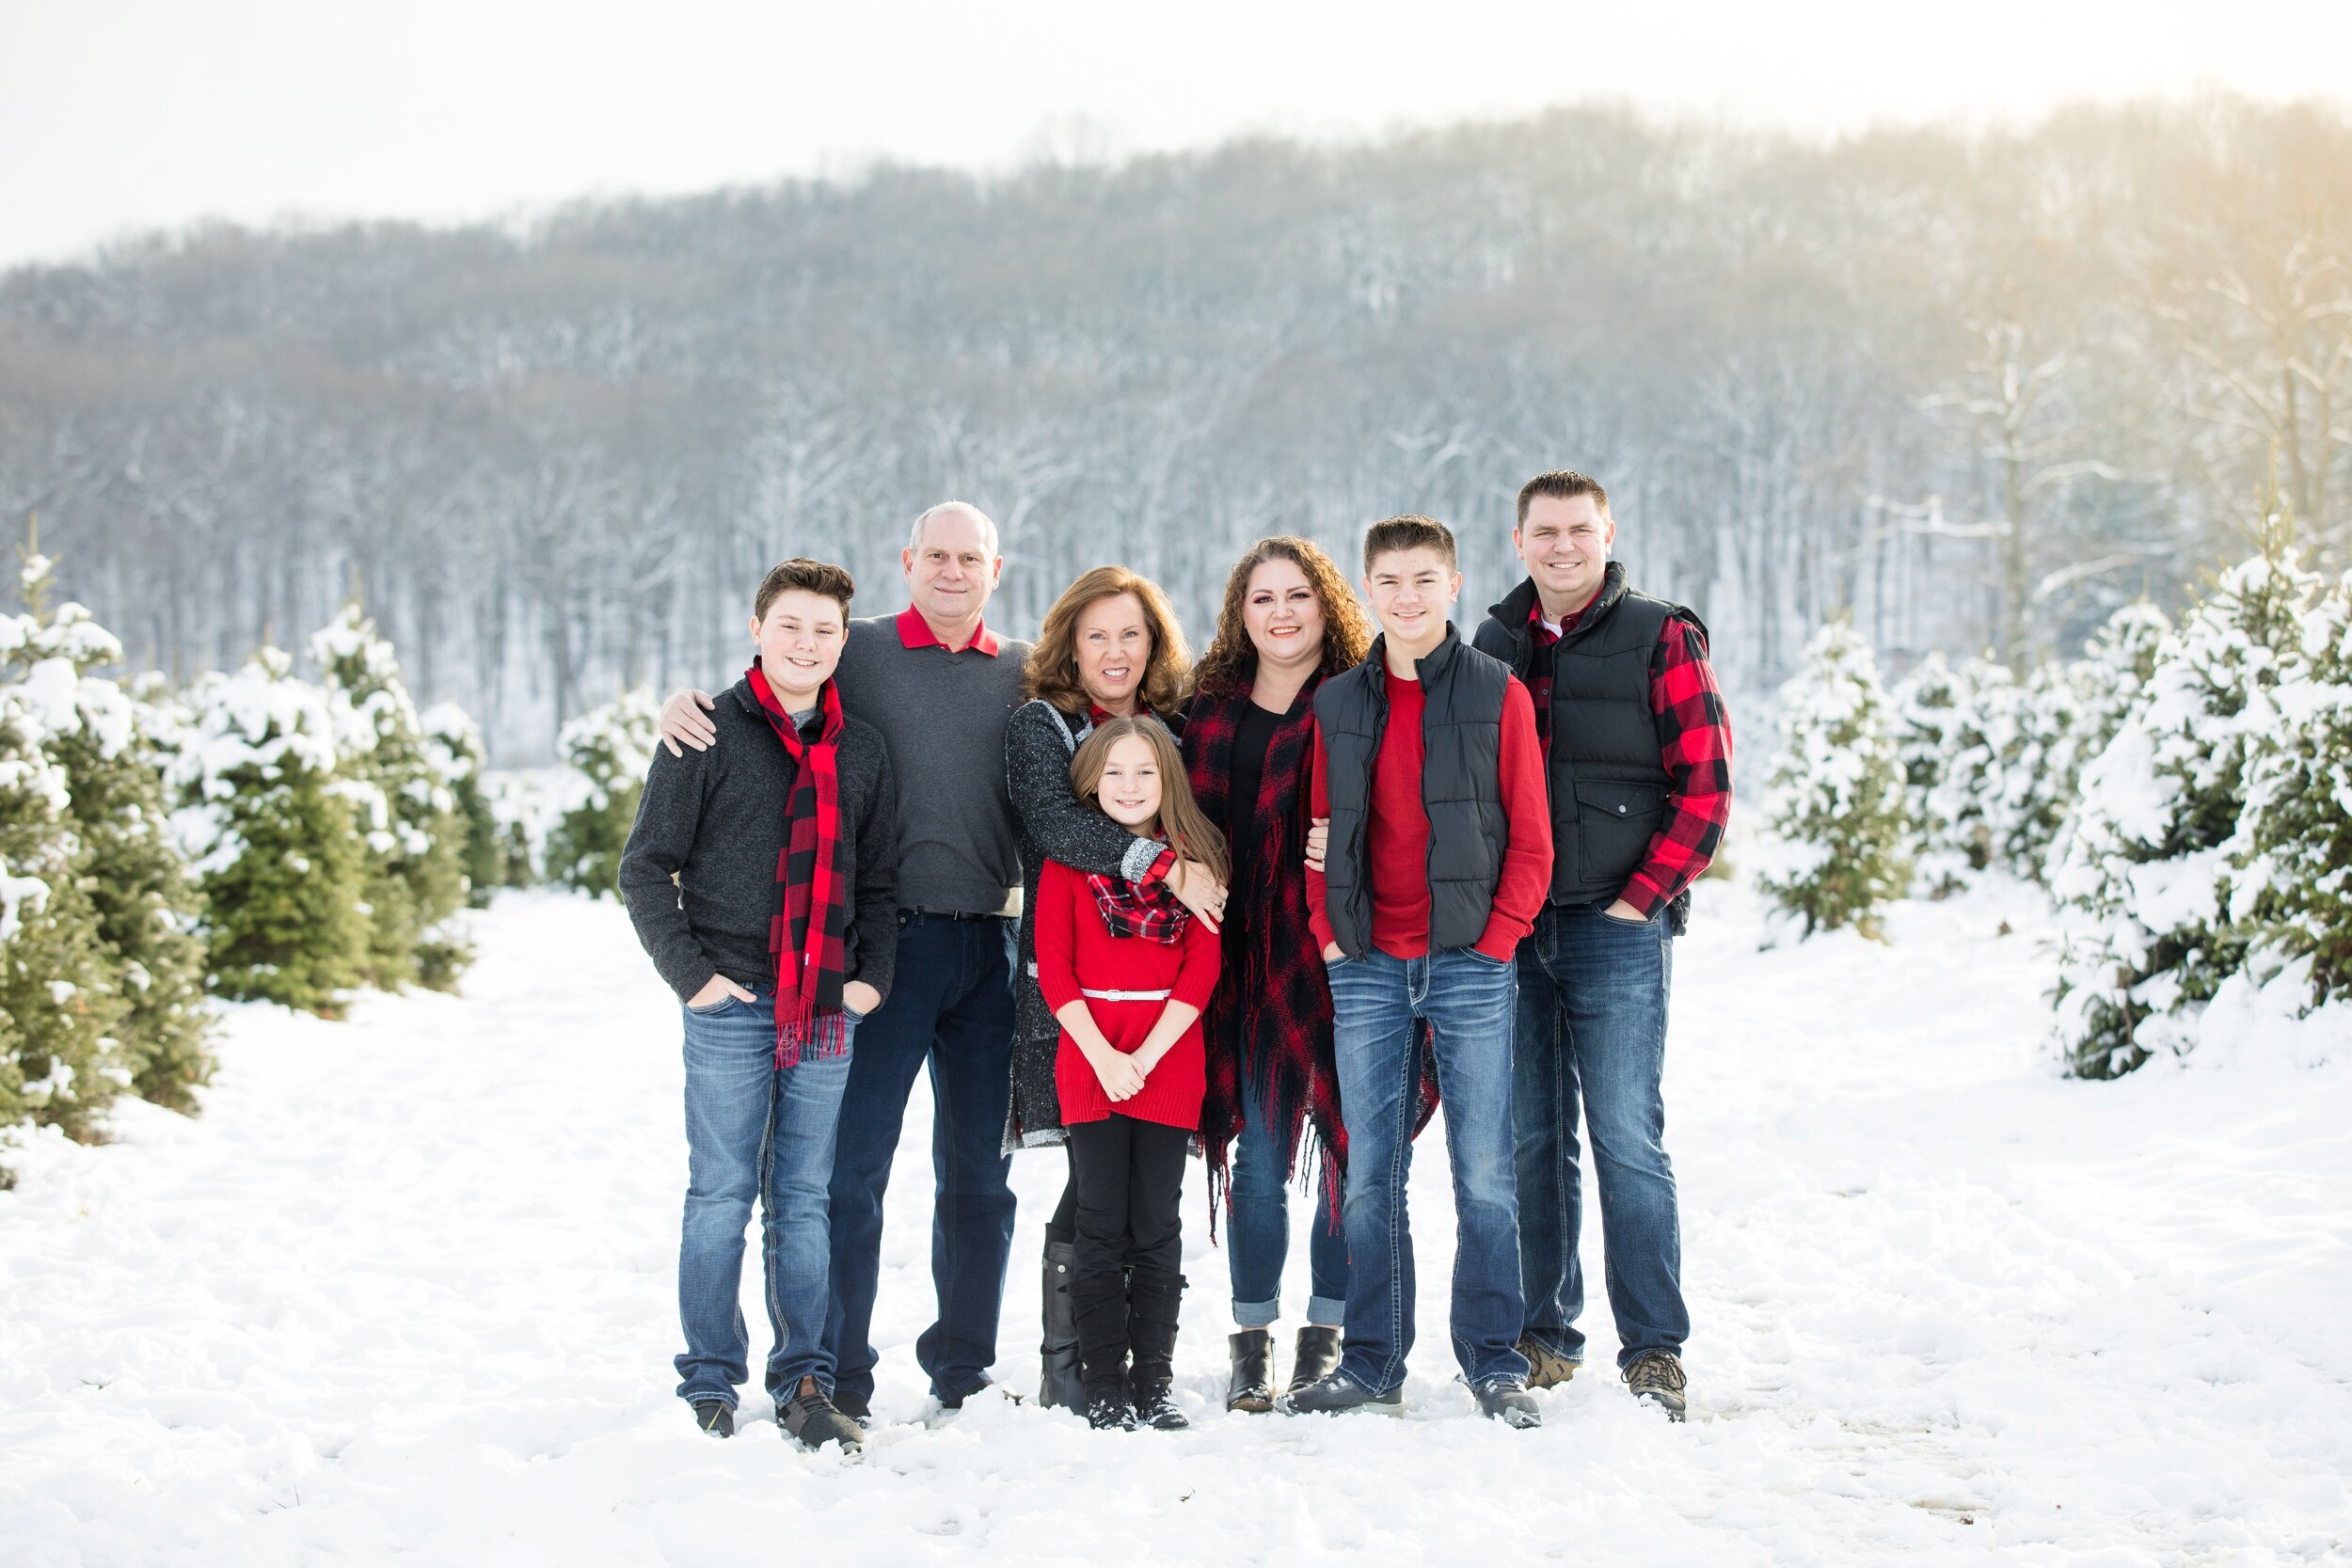
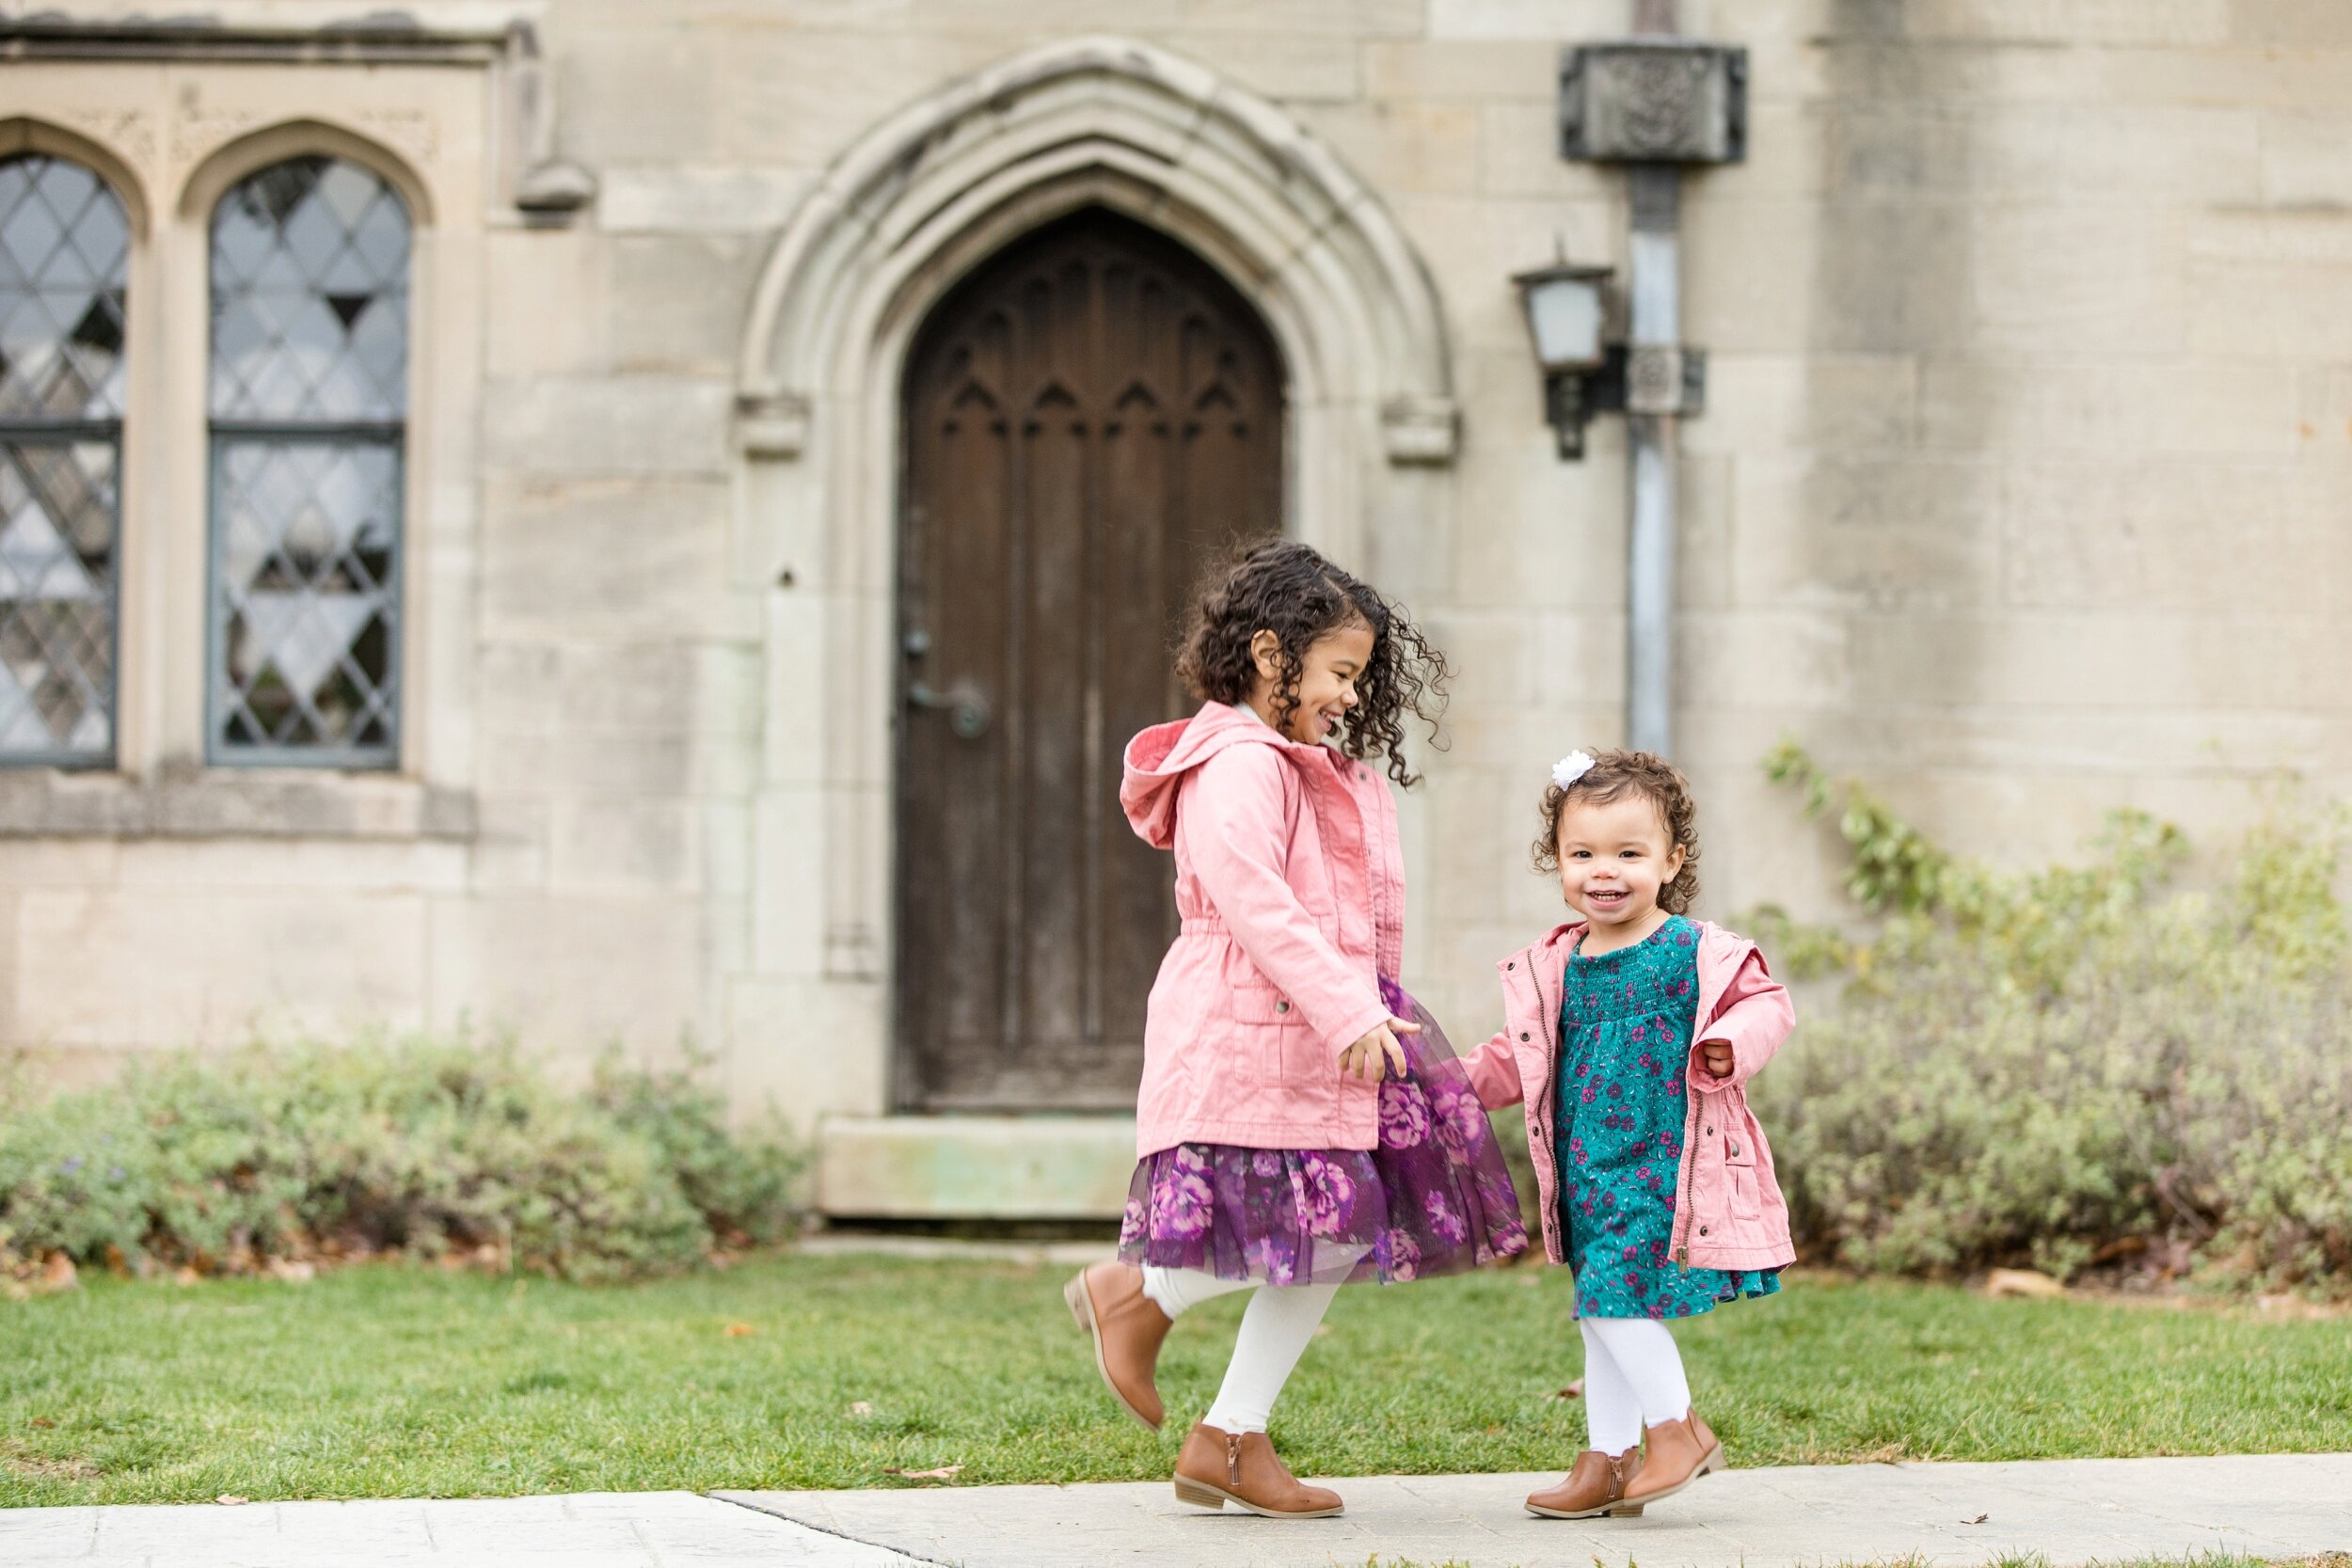
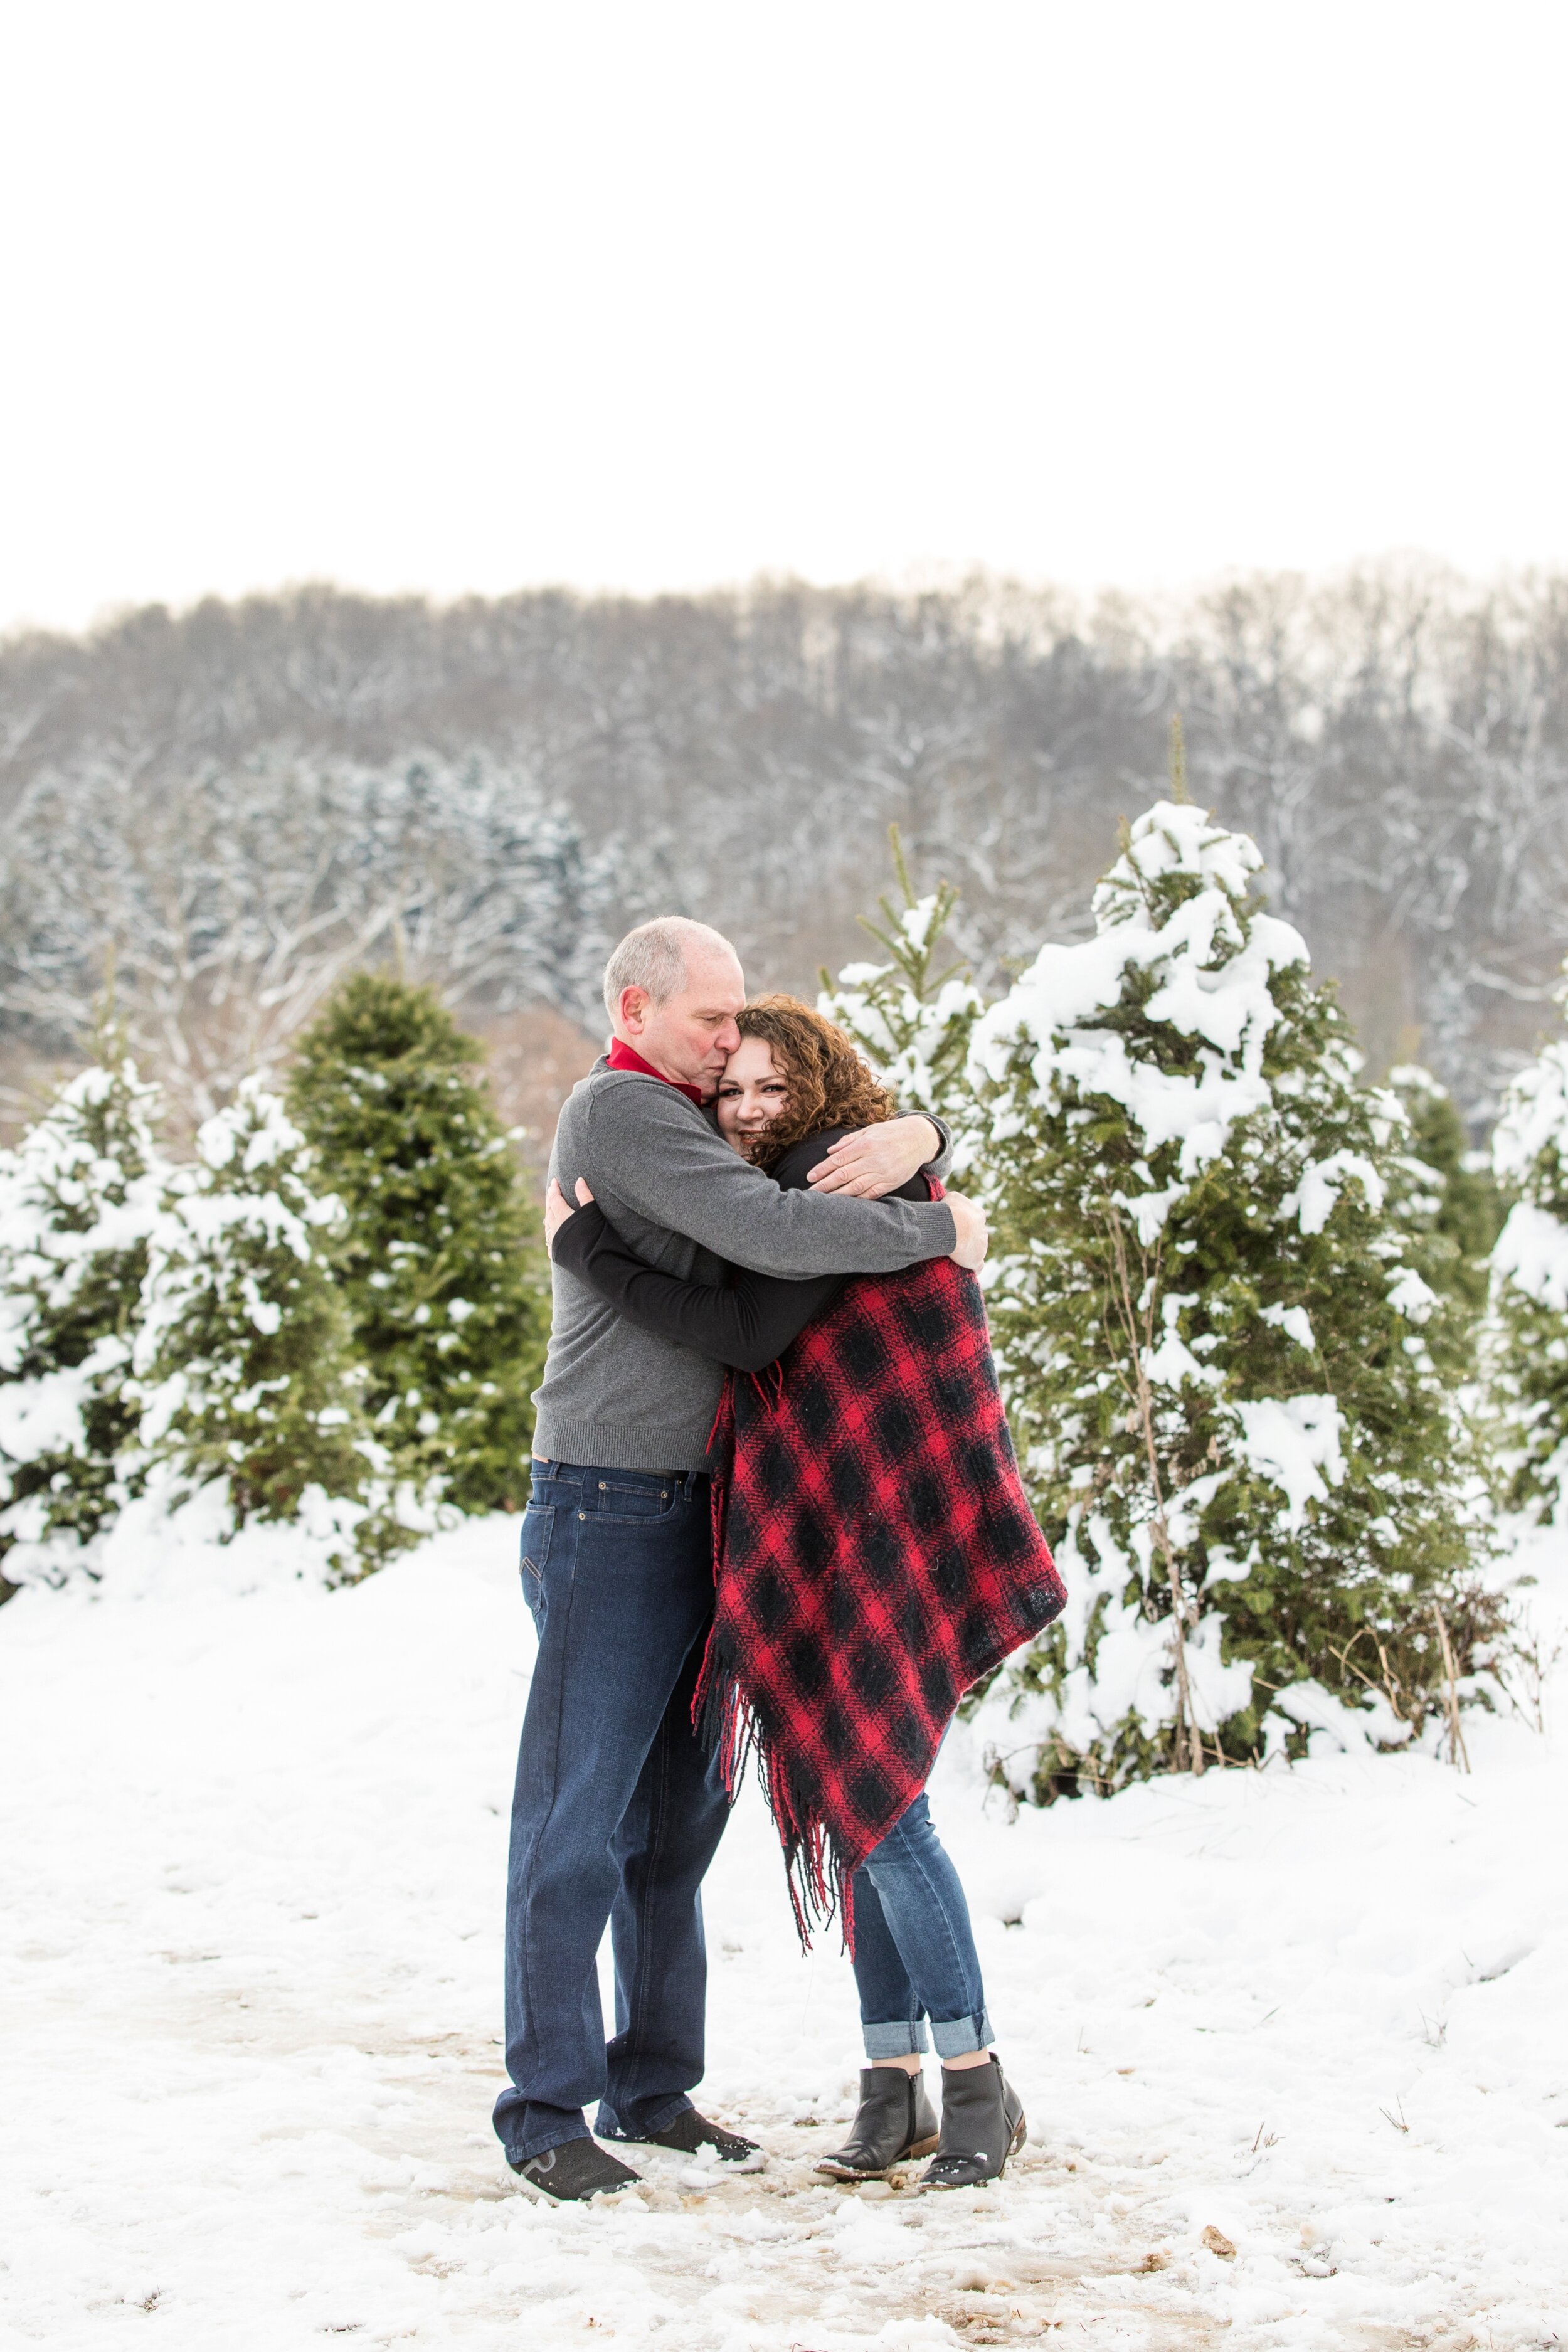
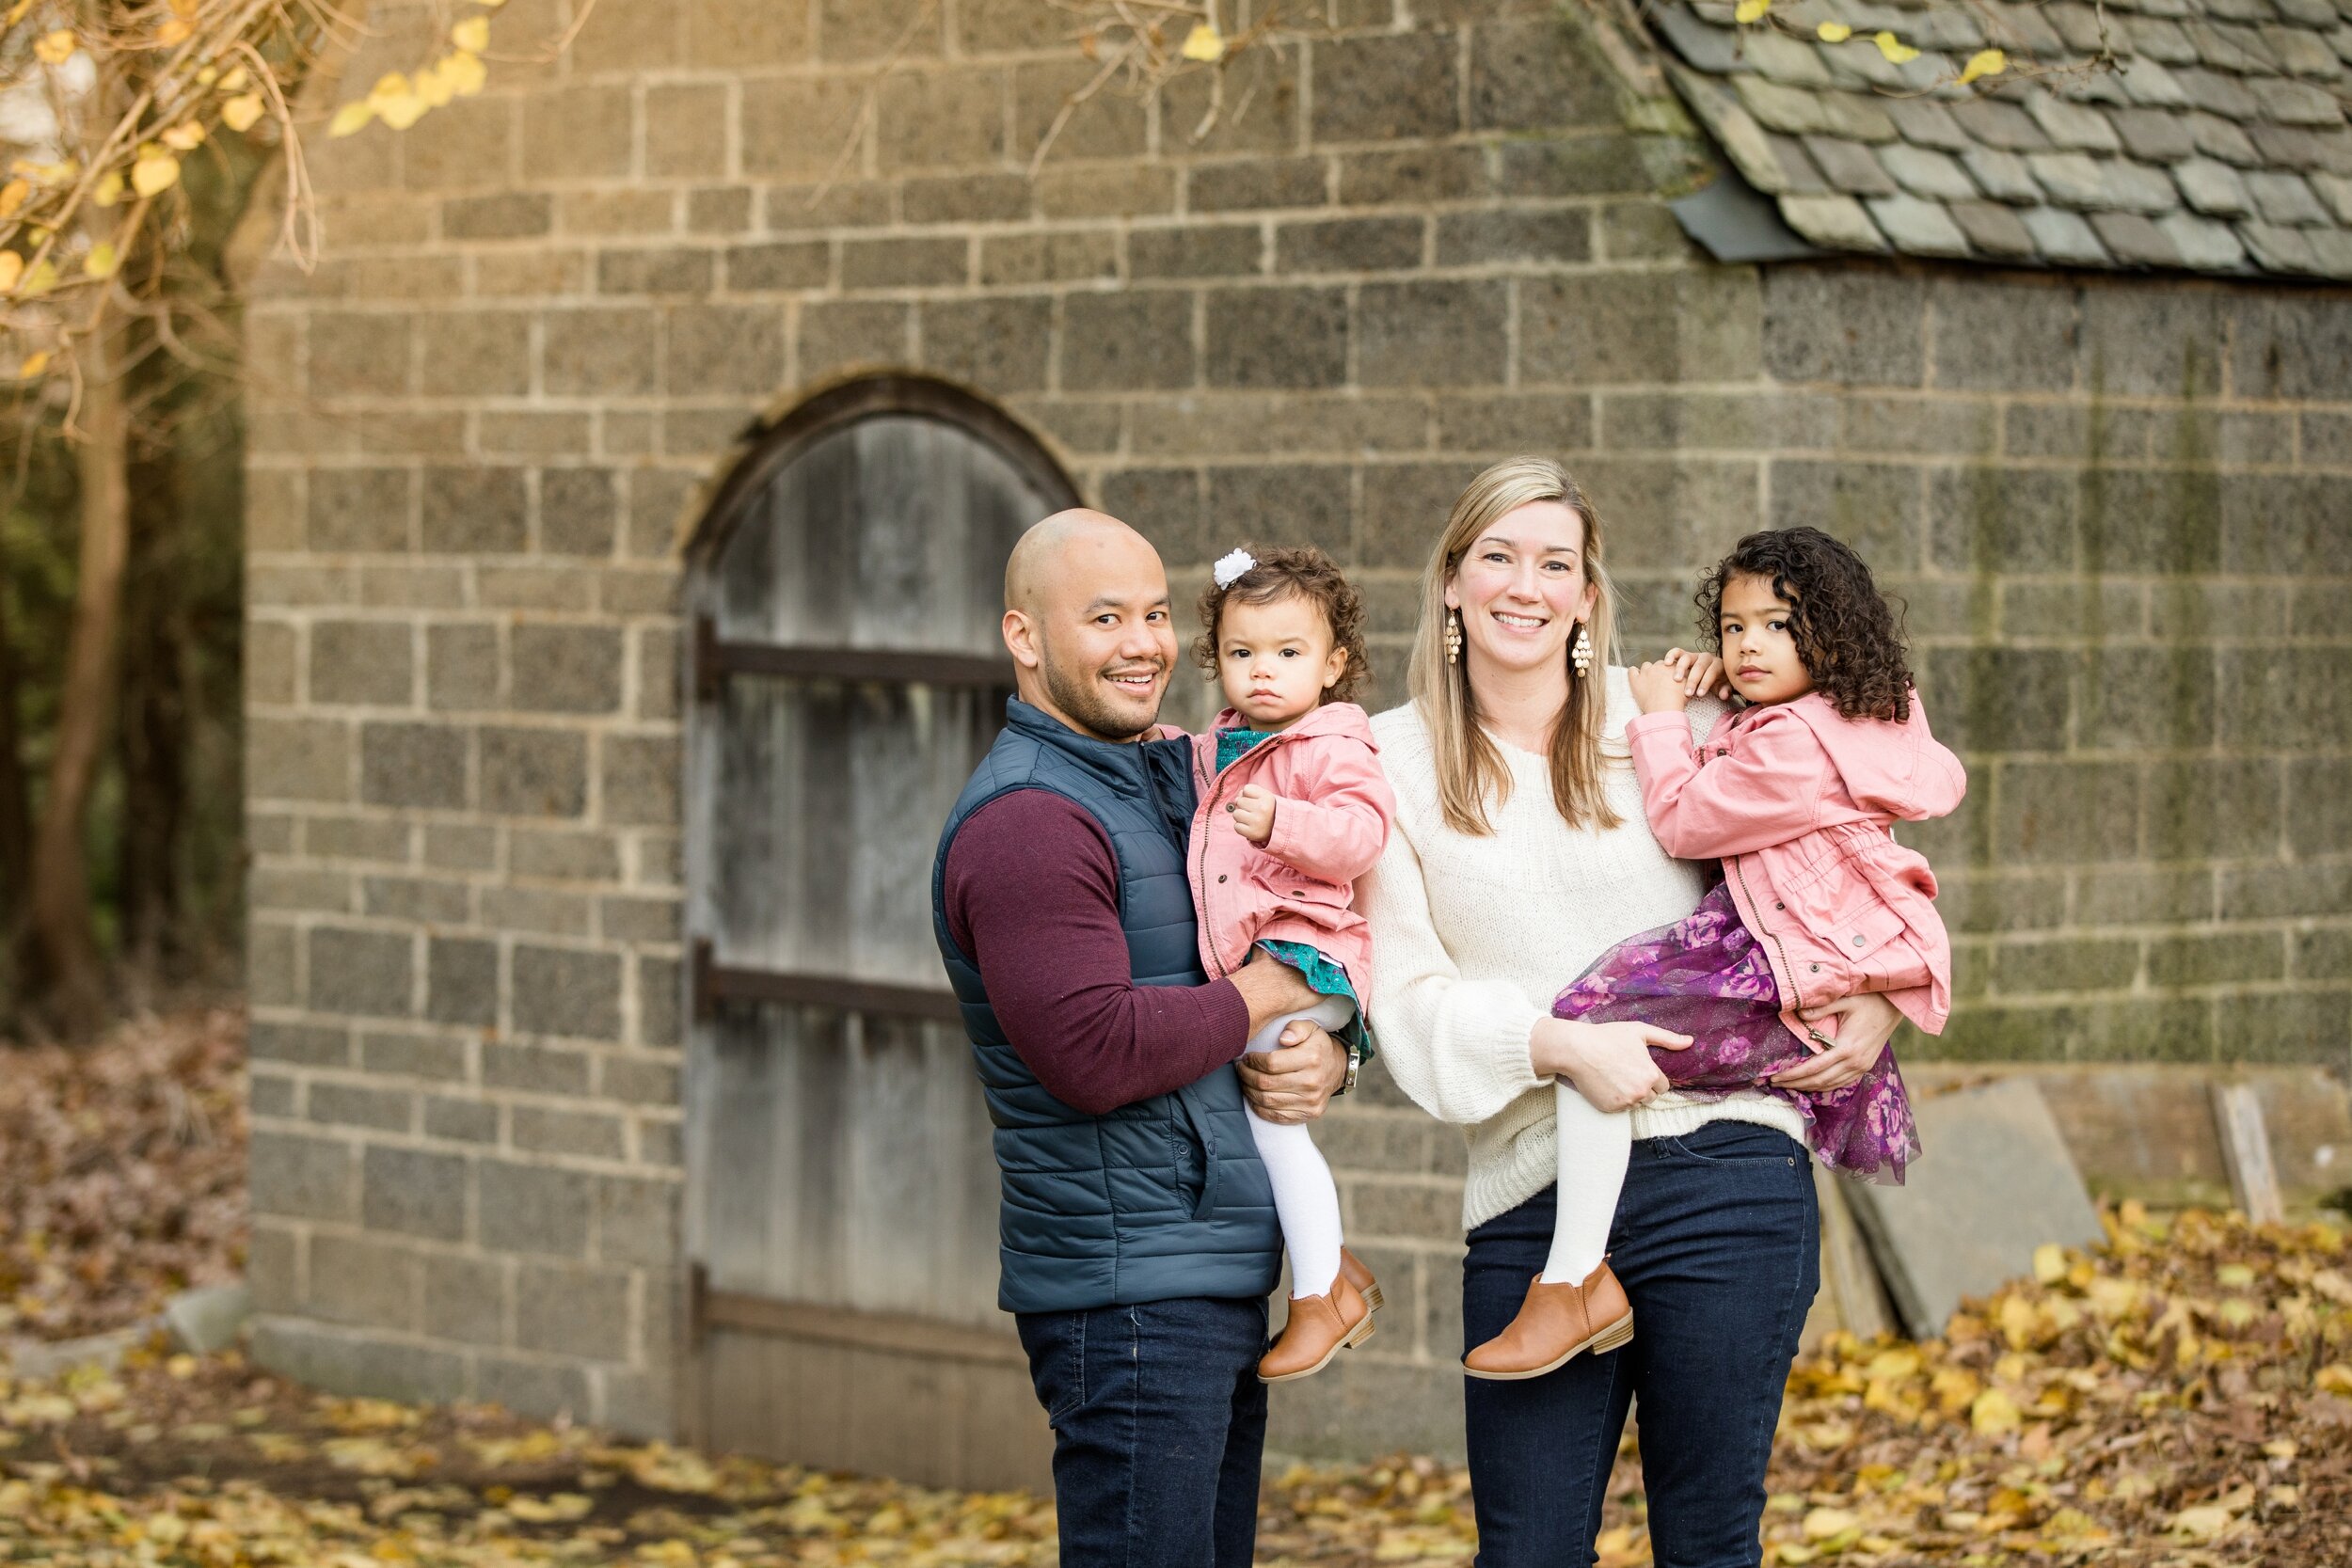
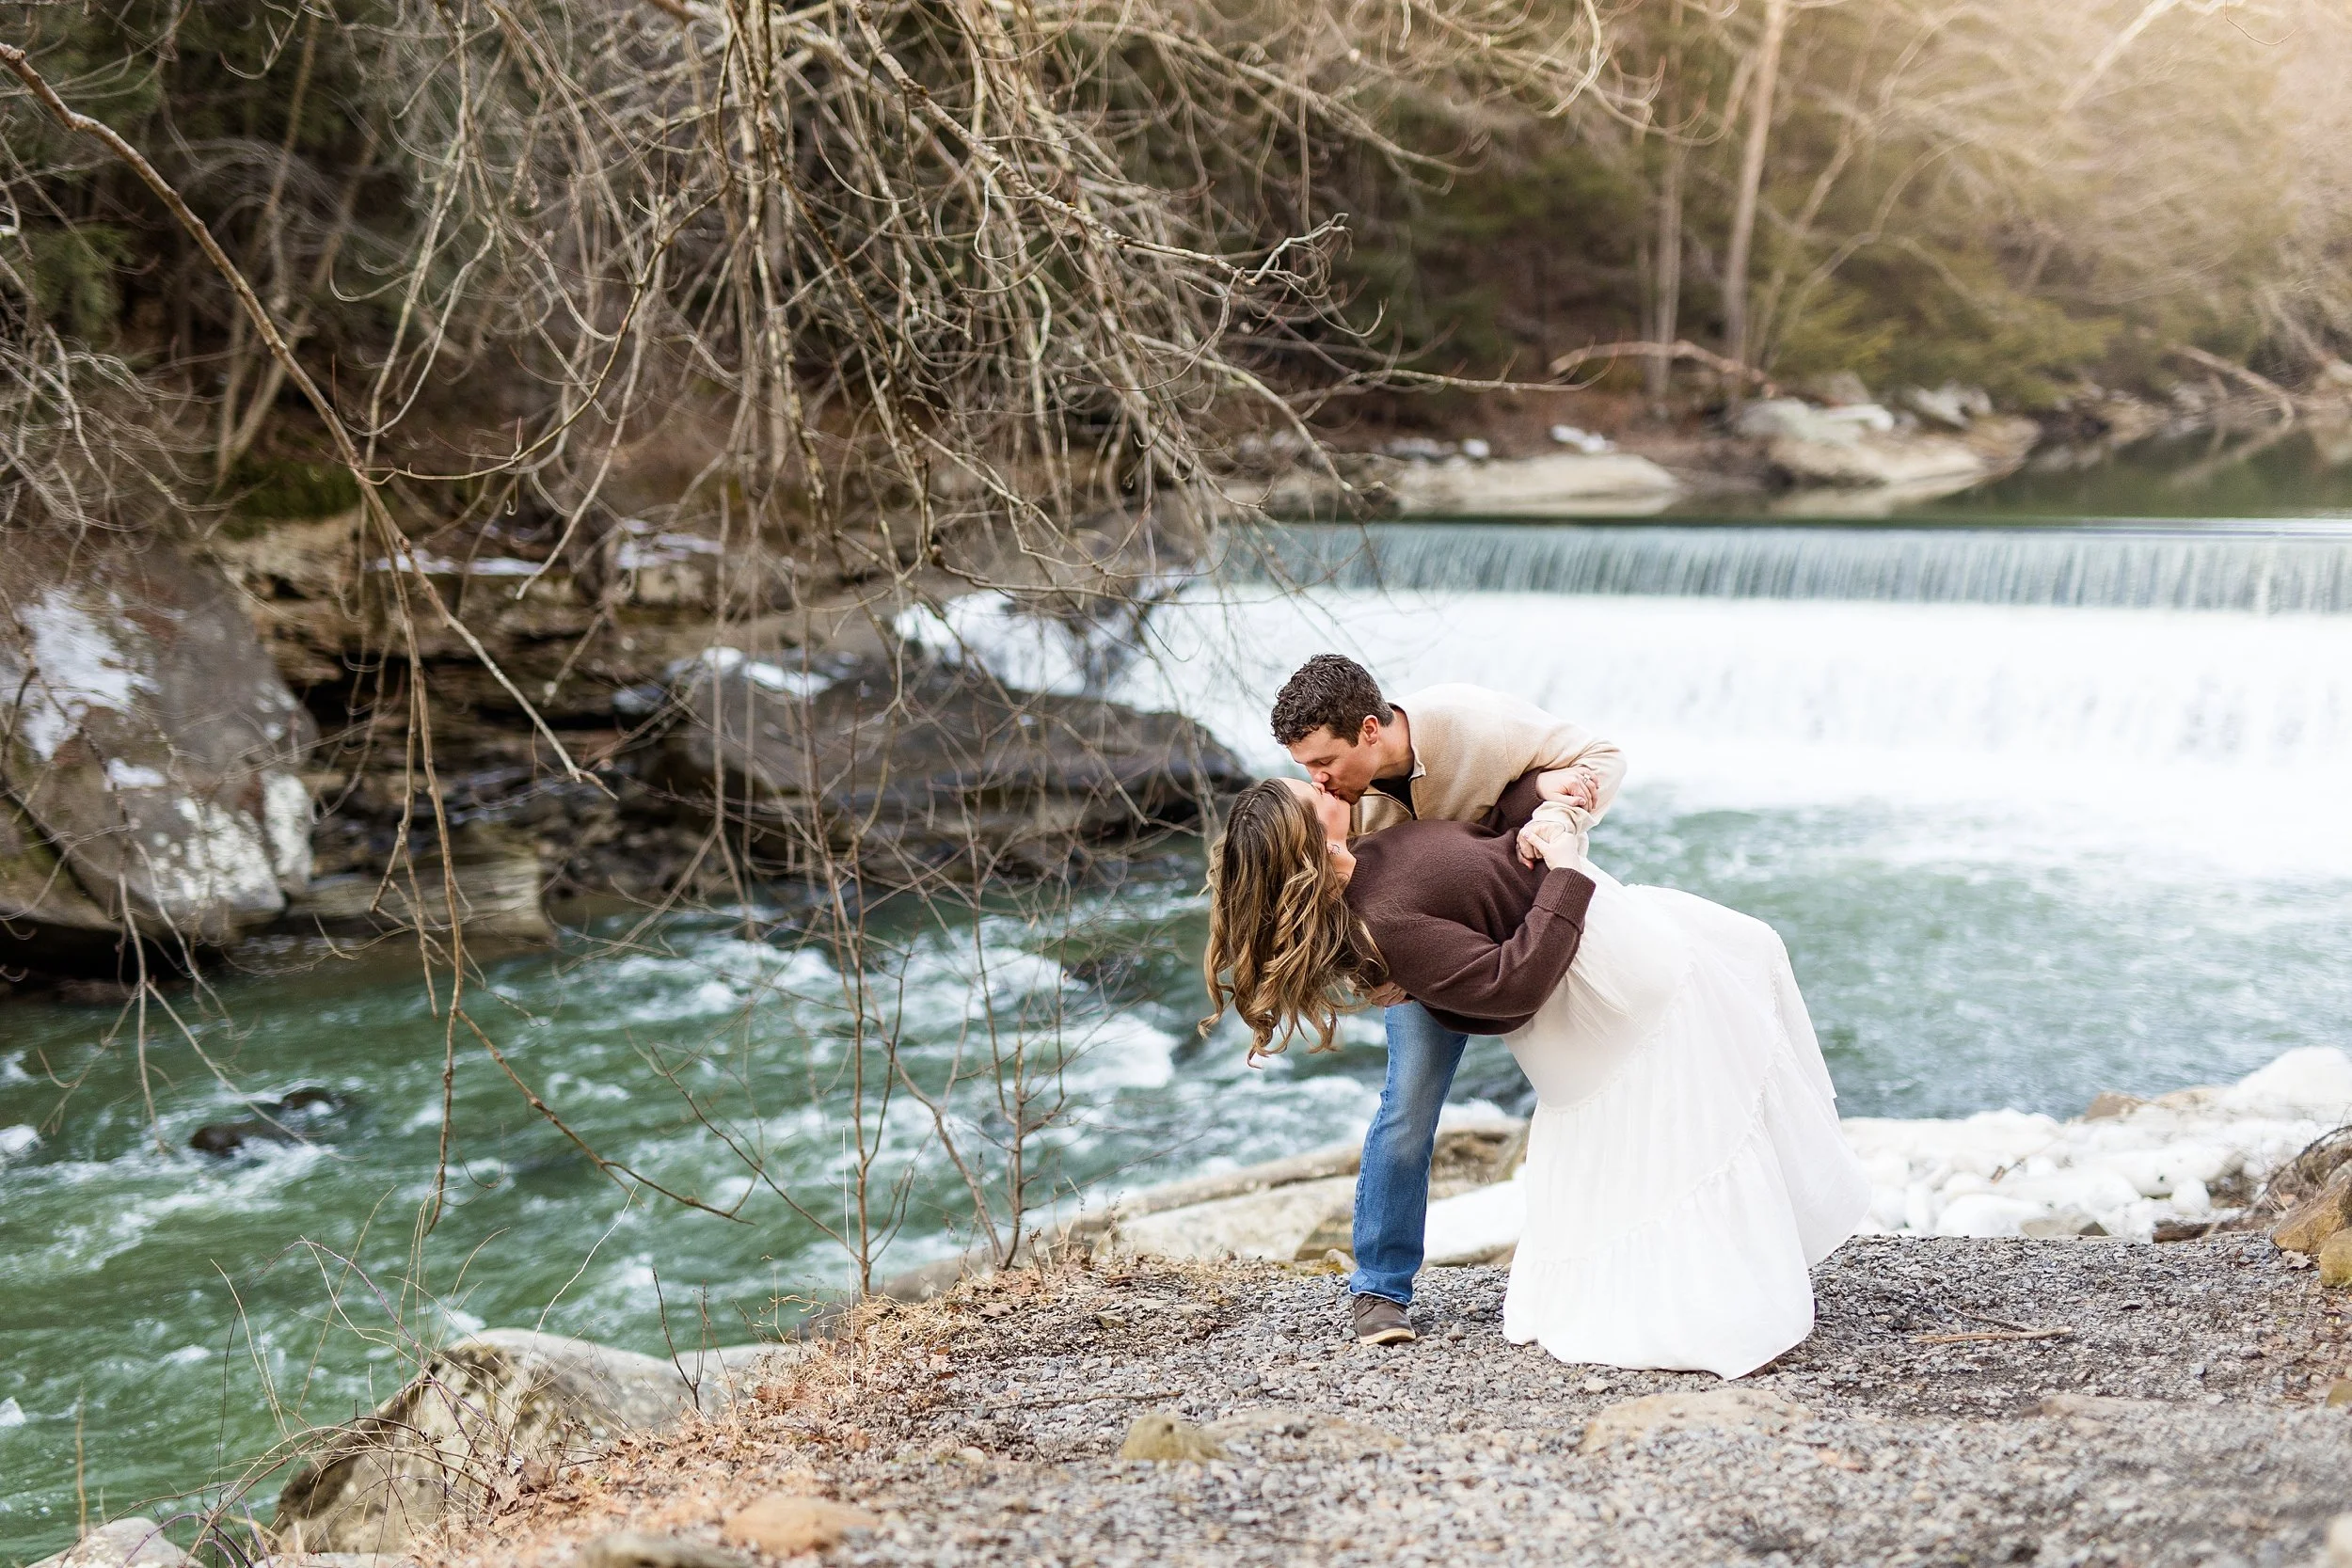
Let me explain - a “natural reflector” is any light that bounces off of the scenery around my subject (the ground, a wall, etc.) onto their faces. Whatever surface is below my subject reflects trace amounts of light onto their faces, especially on a very bright day (the brighter the sun = the more intense reflection of surface light). This means that placing my subject on a large patch of green grass in the middle of the afternoon can create a green color cast on their skin, making them look a bit sickly. Putting my subject next to a large, red brick wall on a bright day means that some of that red will reflect onto their face. However, putting that same subject on a white or cream colored cement or cobblestone means that they will have flattering light reflected onto their face - because a white or cream colored surface reflects “clean” light that doesn’t have a color tint.

I always look for natural reflectors when I am looking at locations, because they help my subjects look their best, and are easiest to work with. This is especially helpful when it comes to photo sessions with larger groups (families & bridal parties, especially) when I can’t use an artificial reflector to correct the color as easily. (If you’re wondering what an artificial reflector looks like, click here!). I will often use an artificial reflector to correct color casts from green grass and brick buildings when I really want to use a location that doesn’t have an optimal natural reflector!

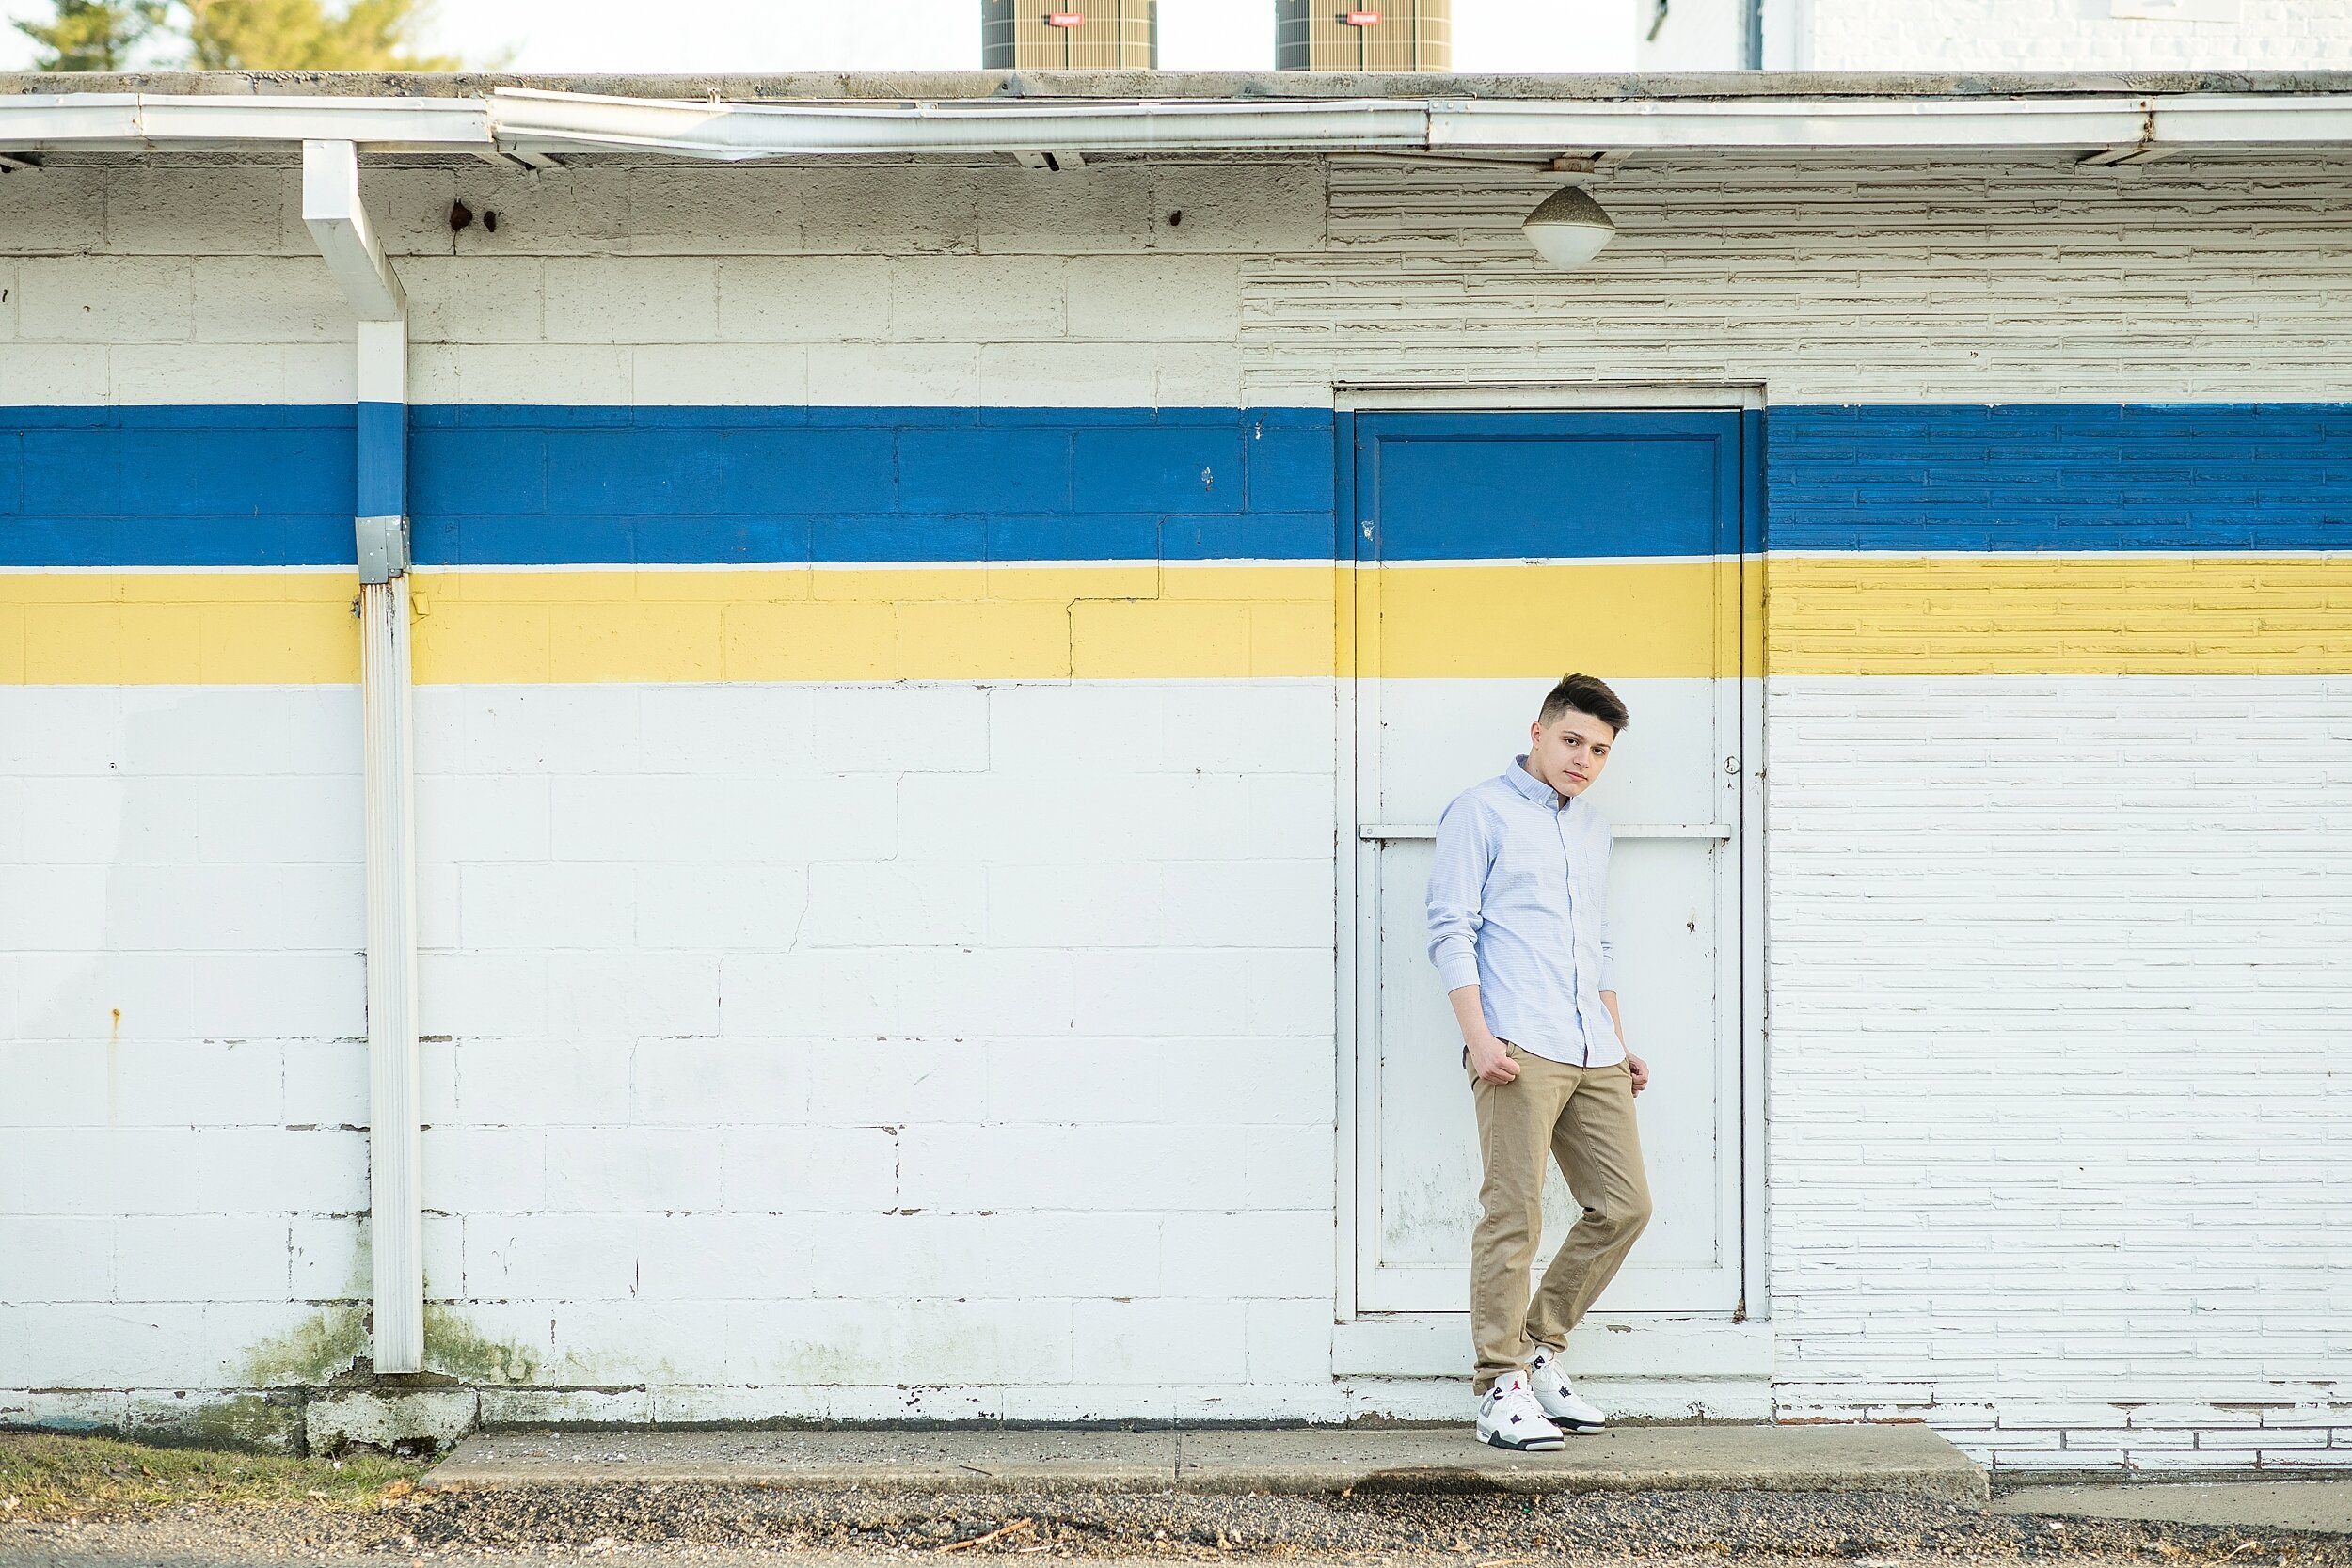
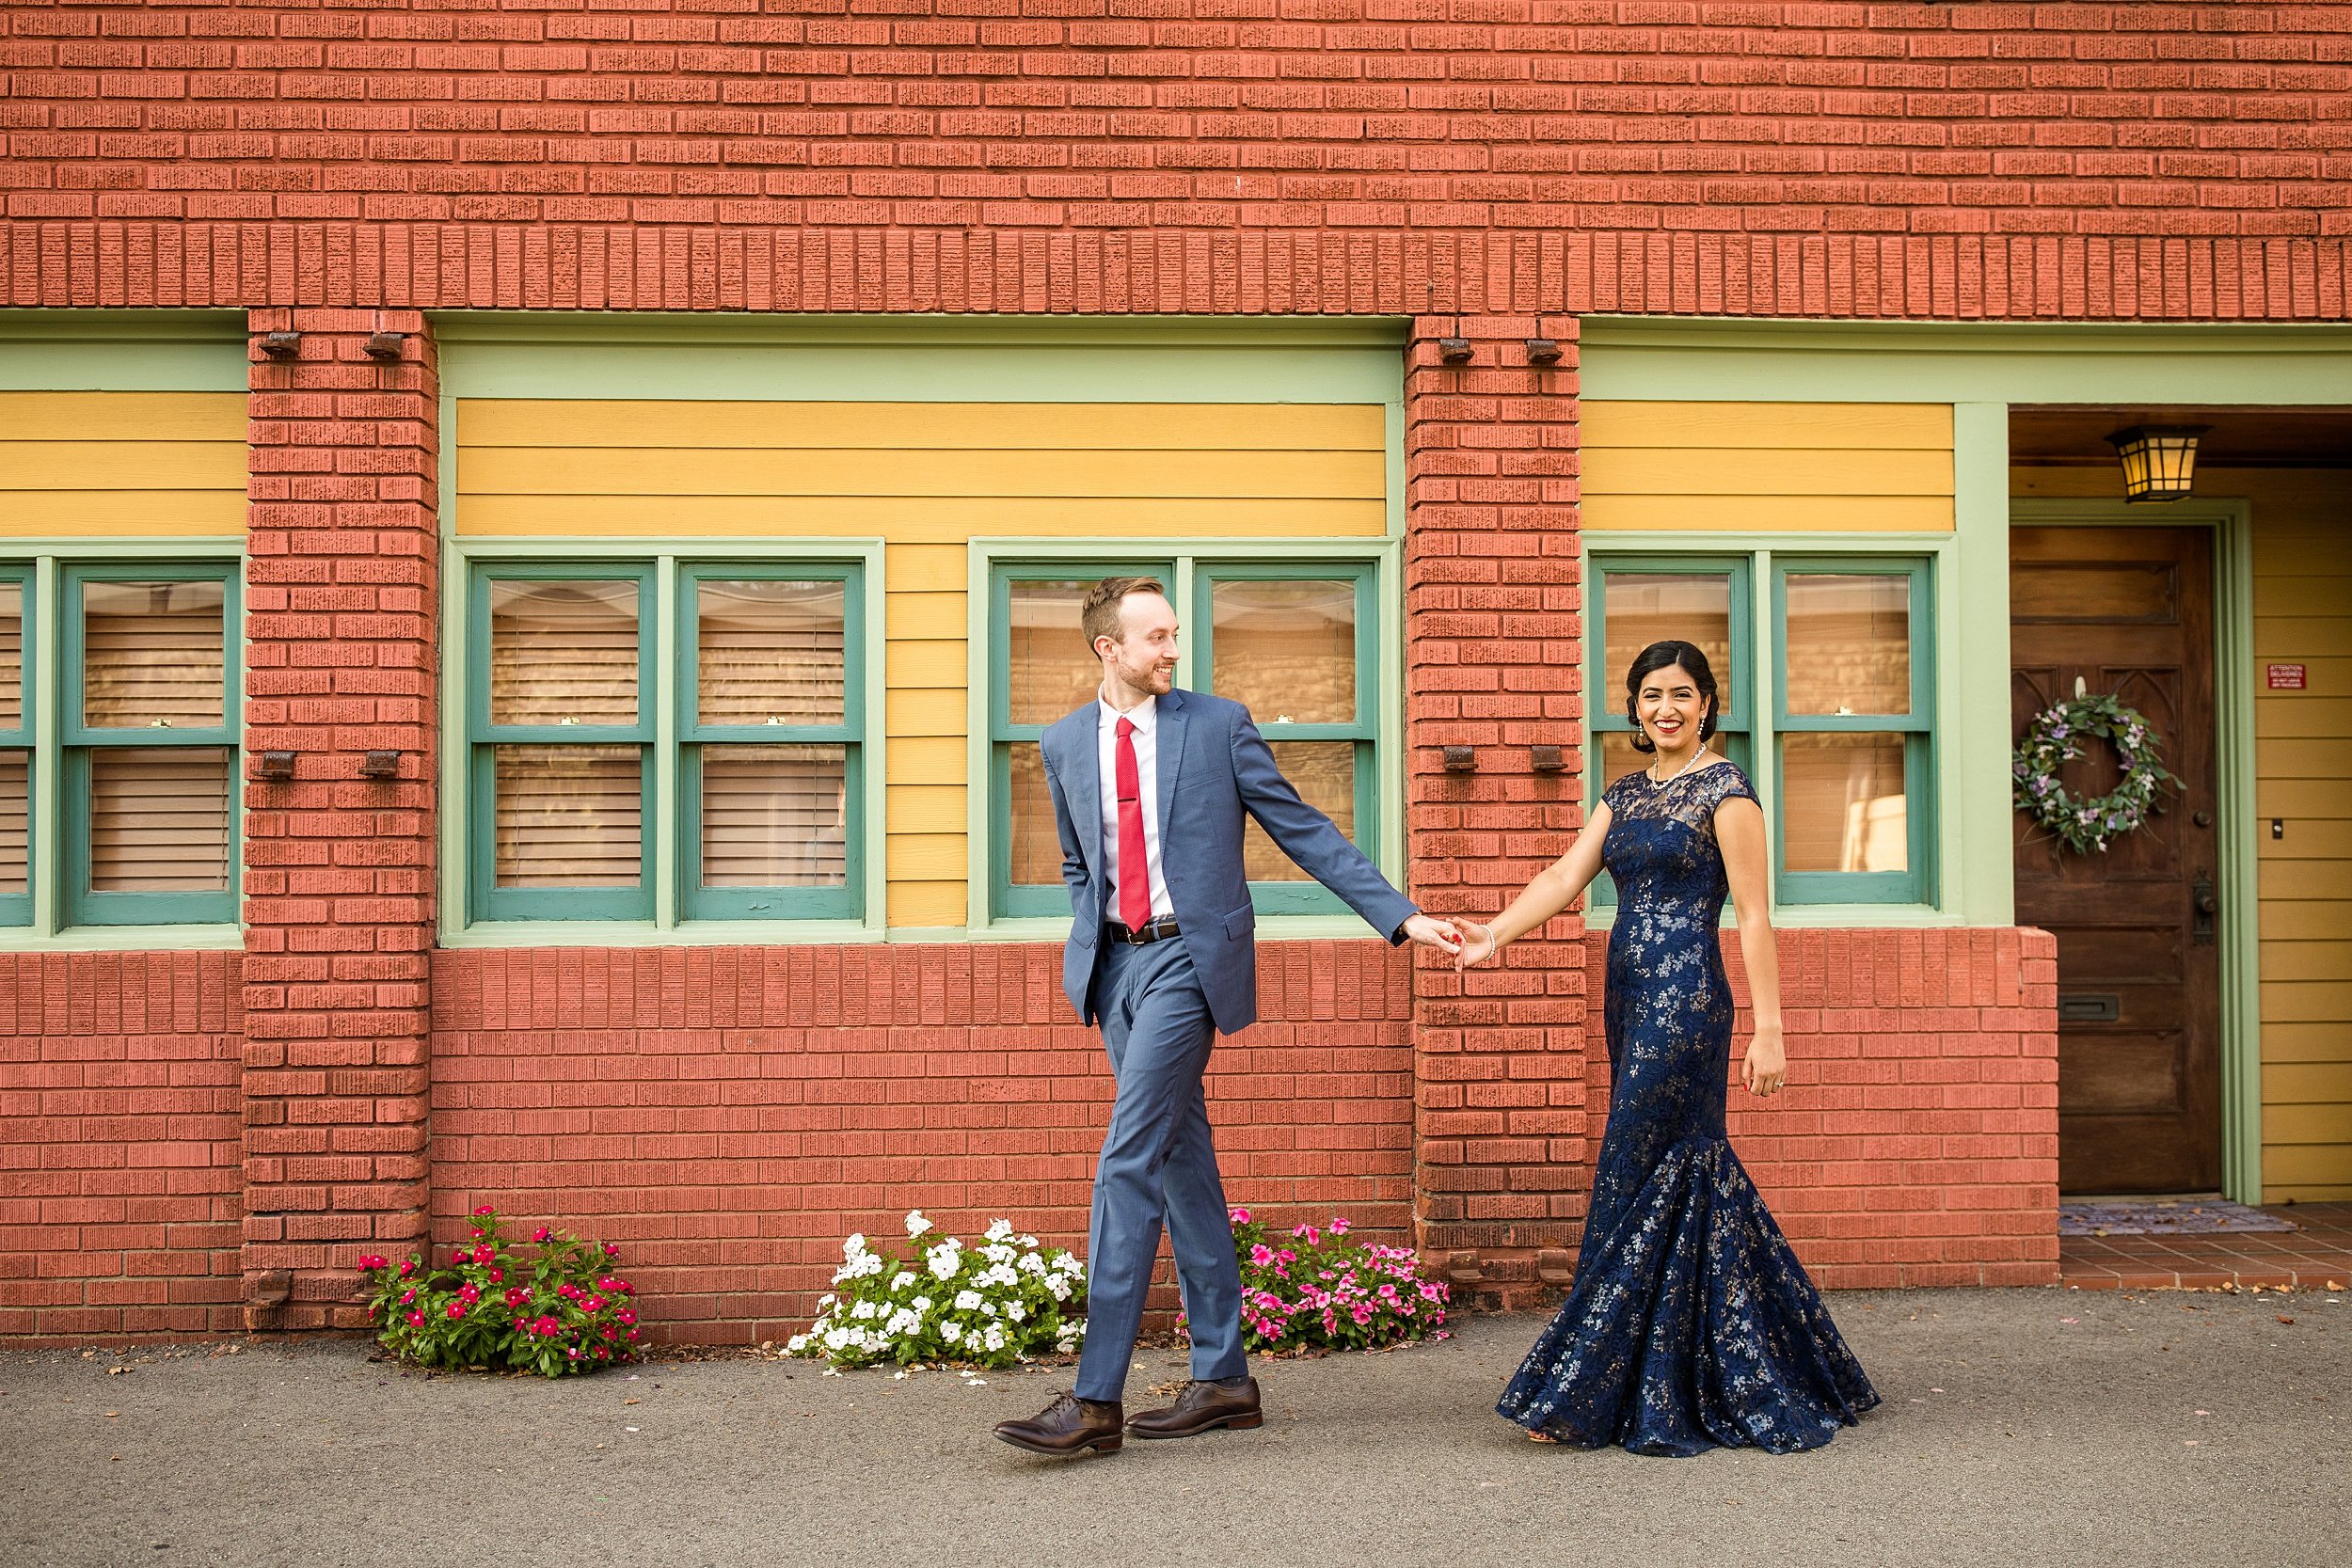
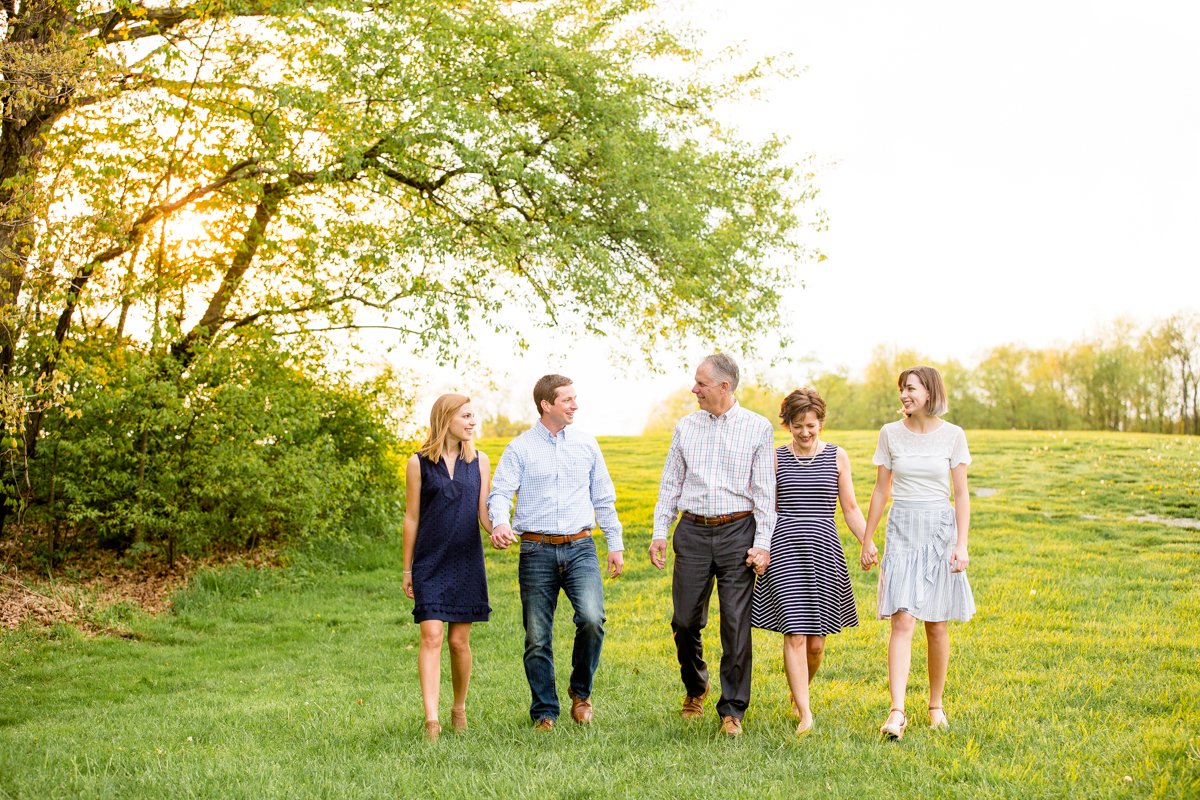
3 - Variety of Backdrops

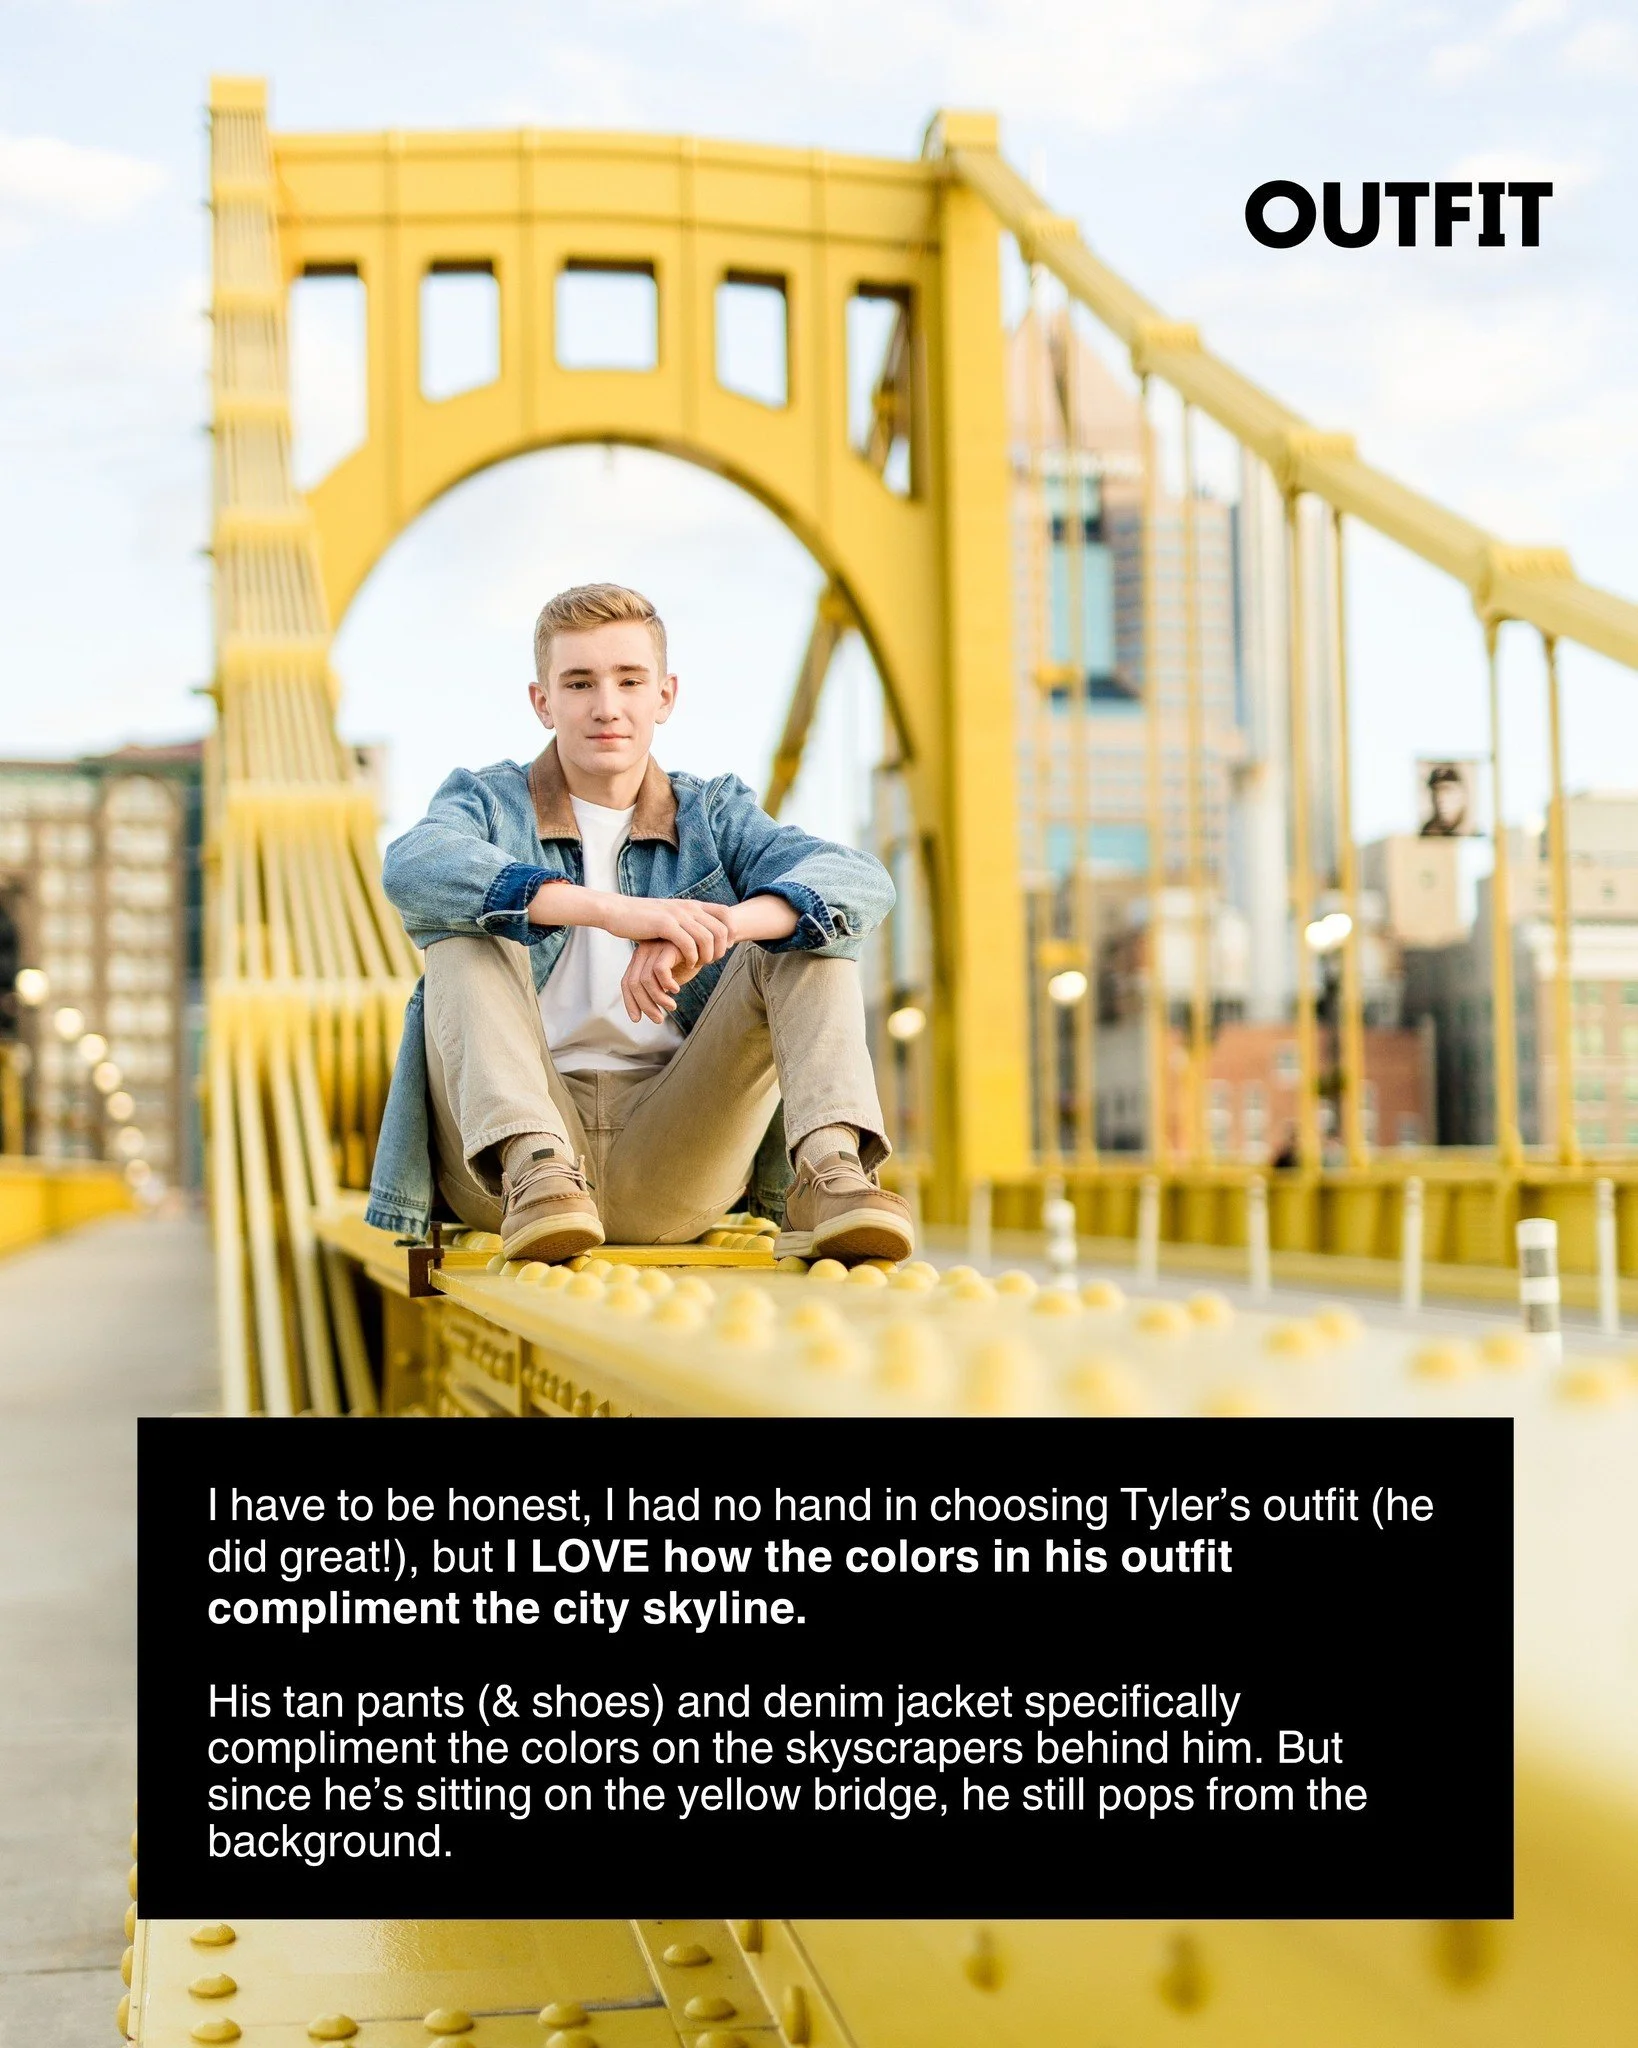
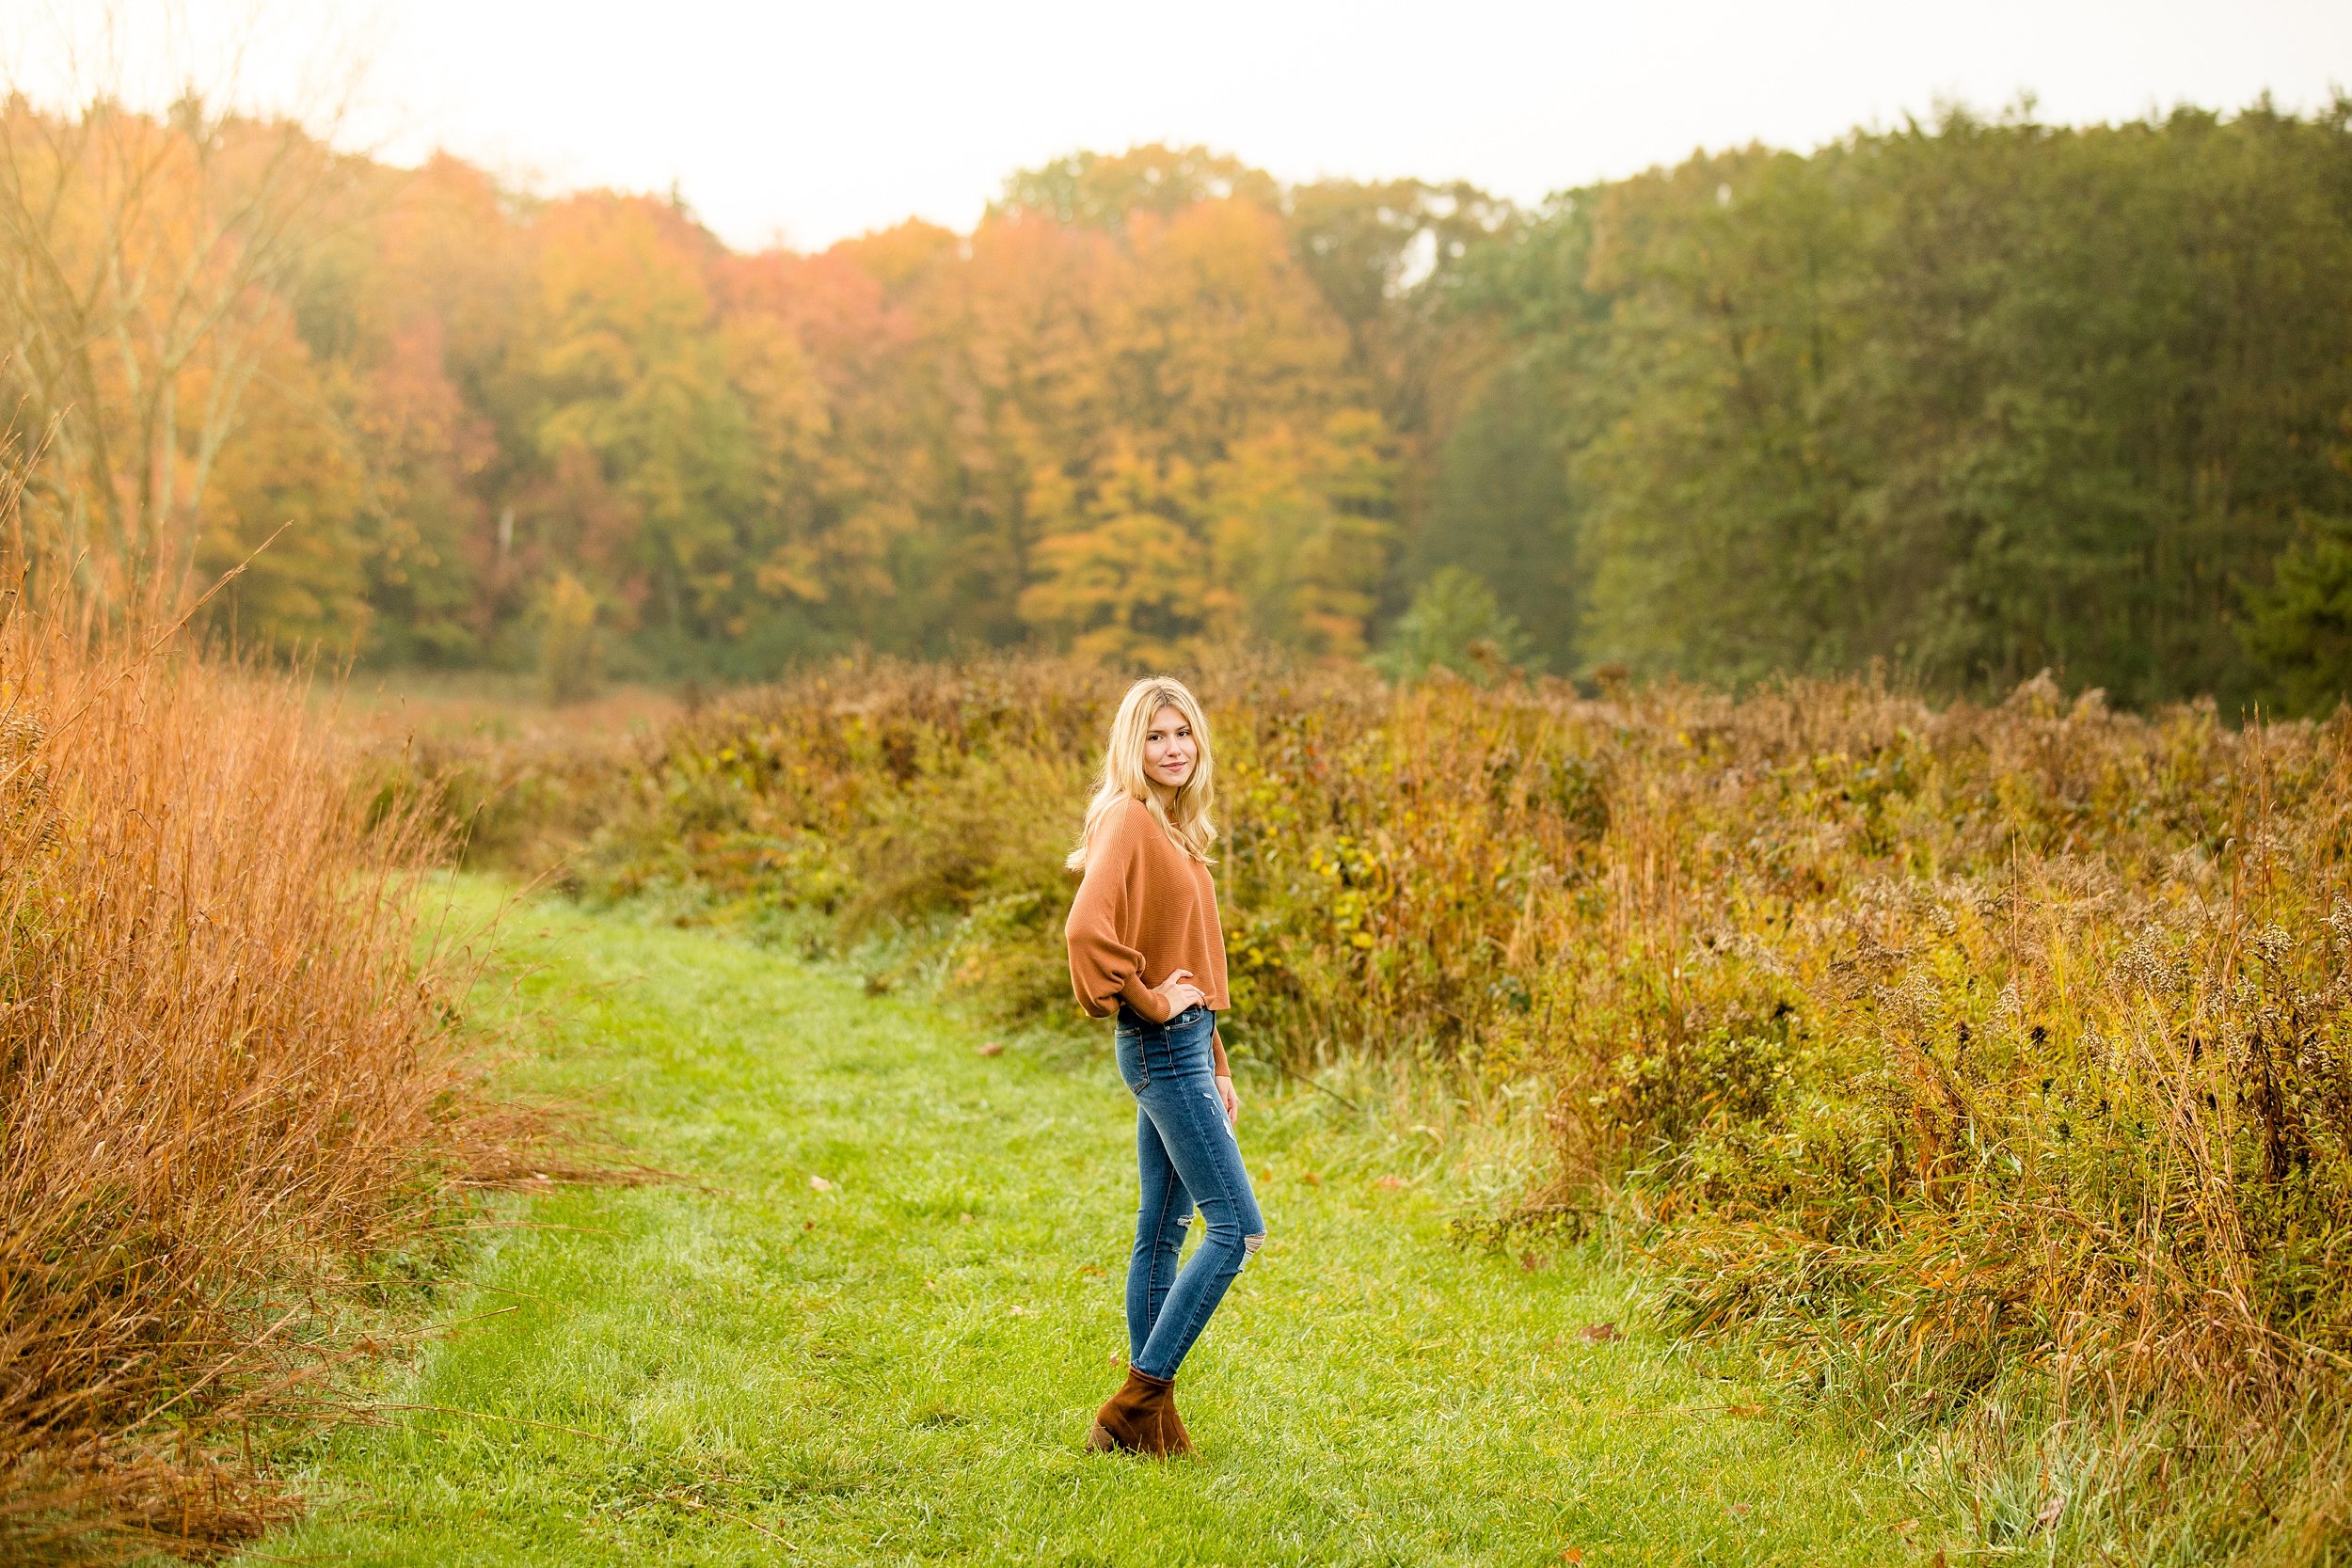
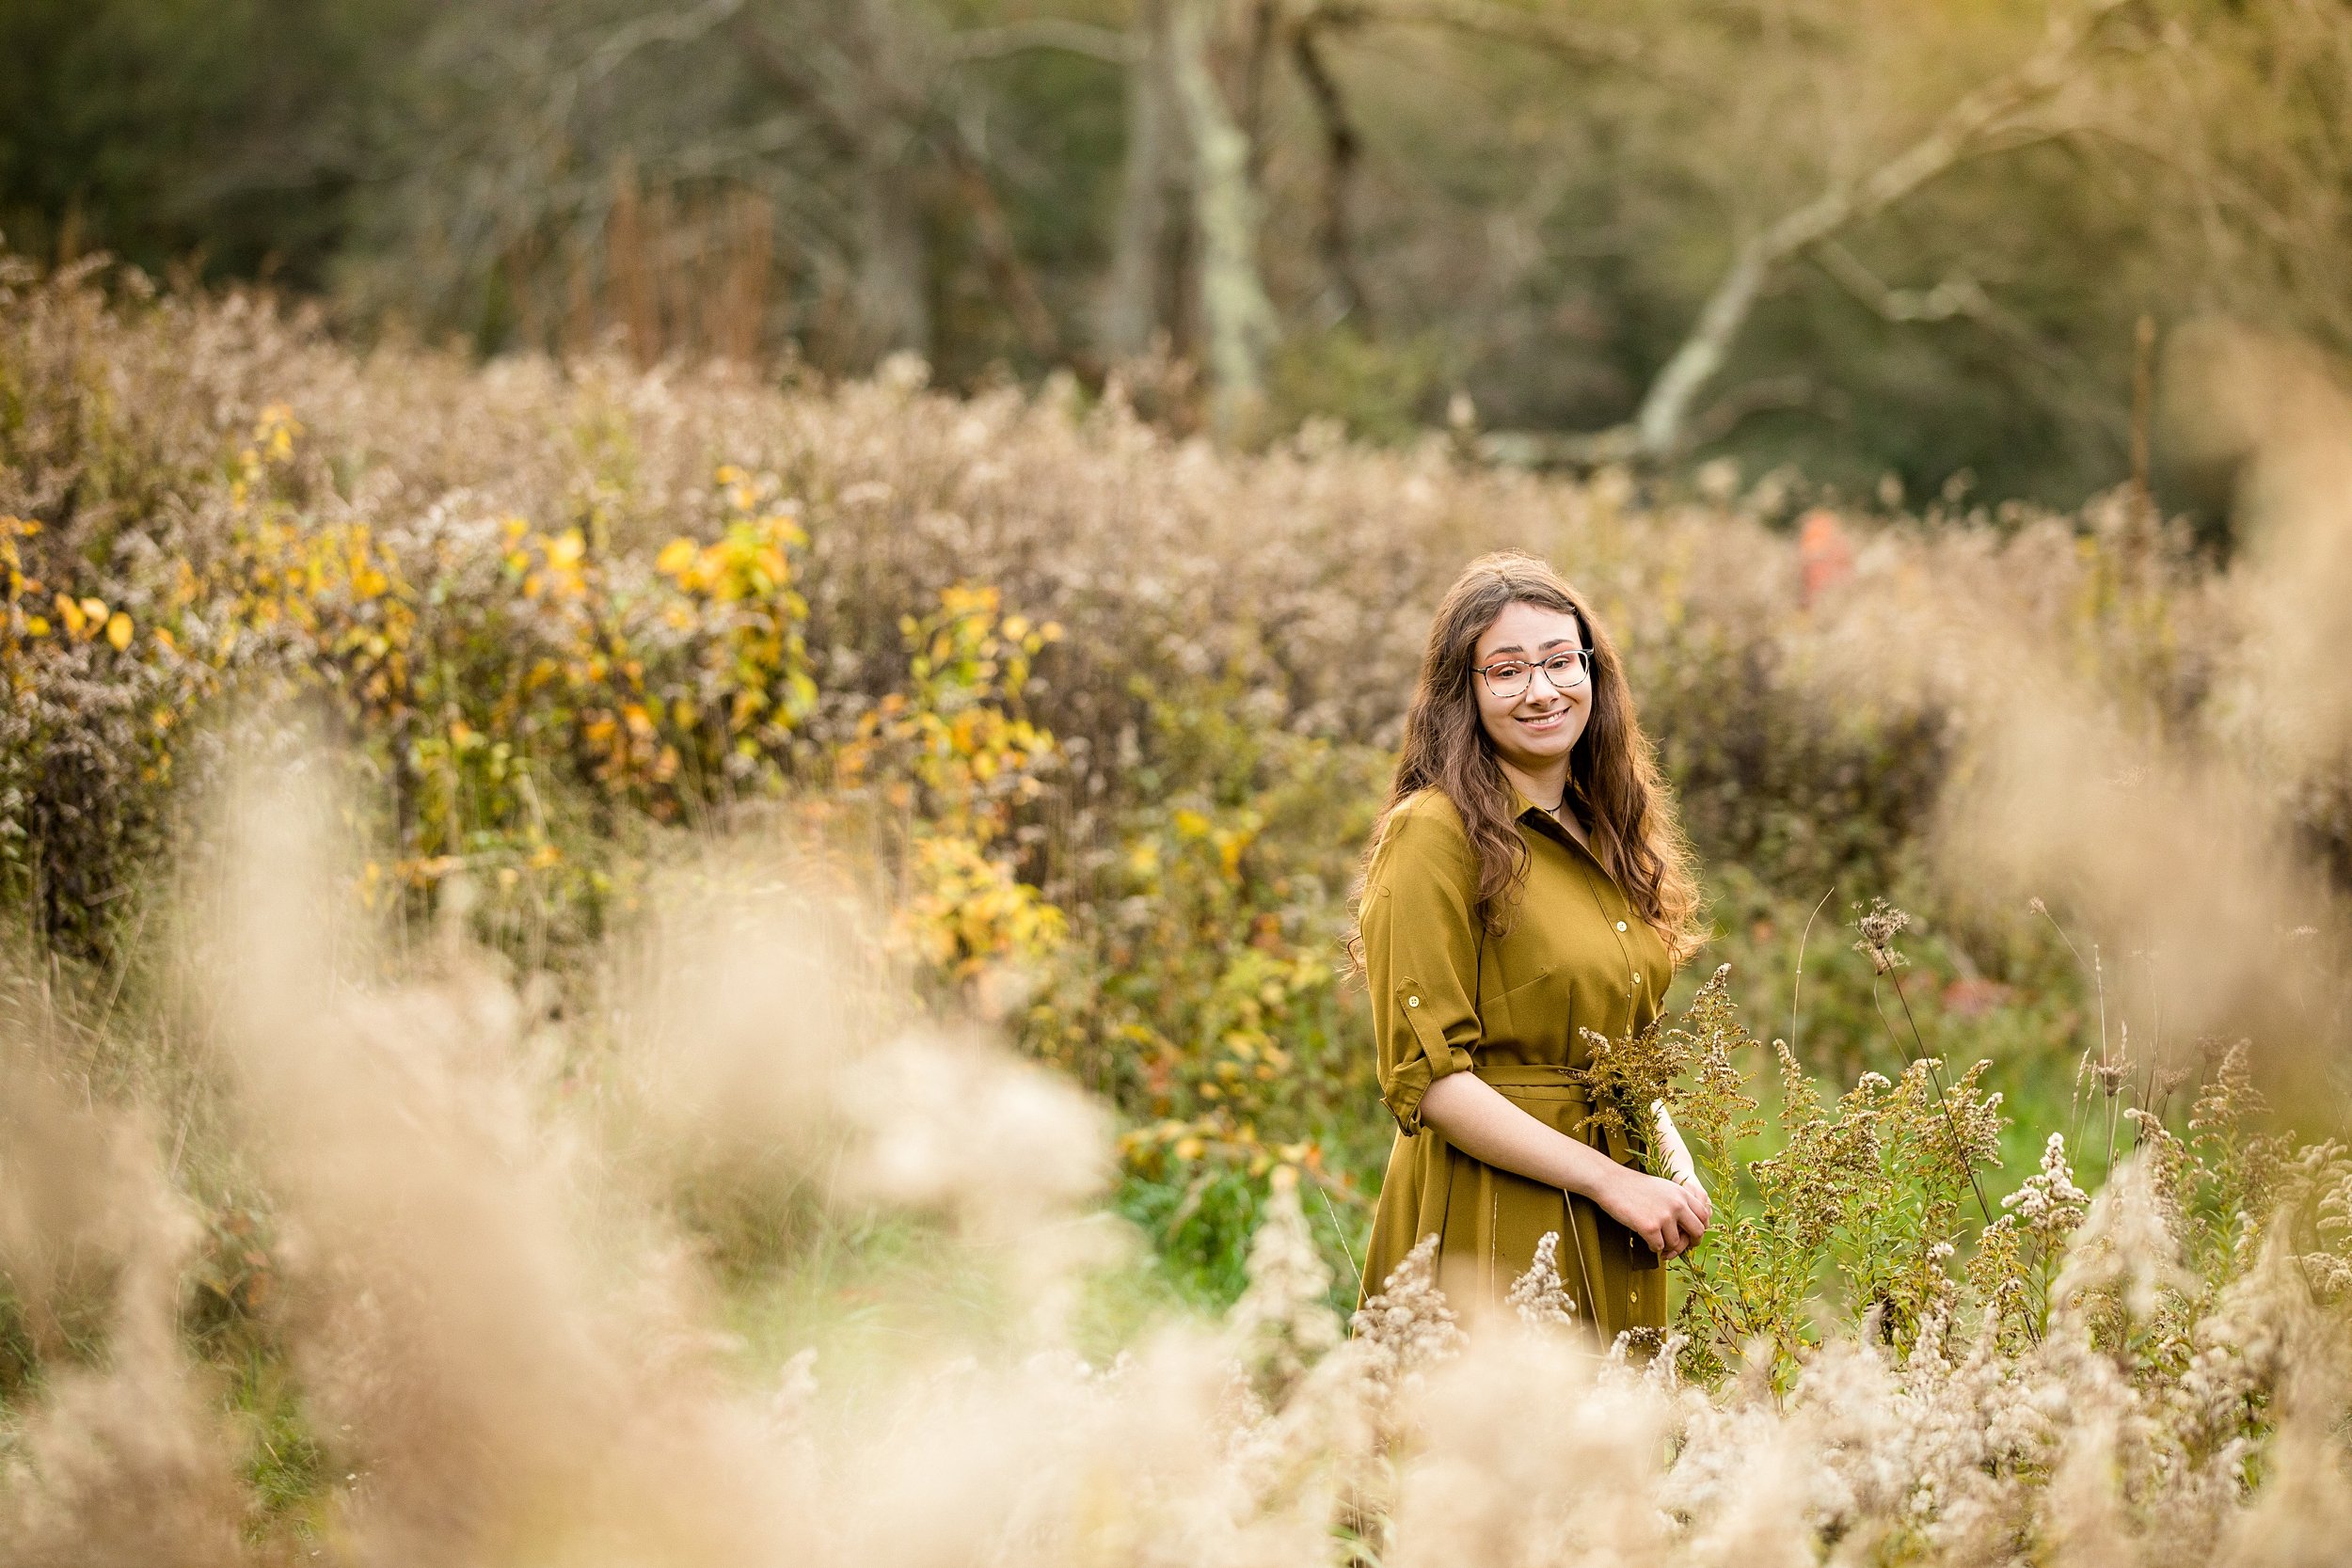
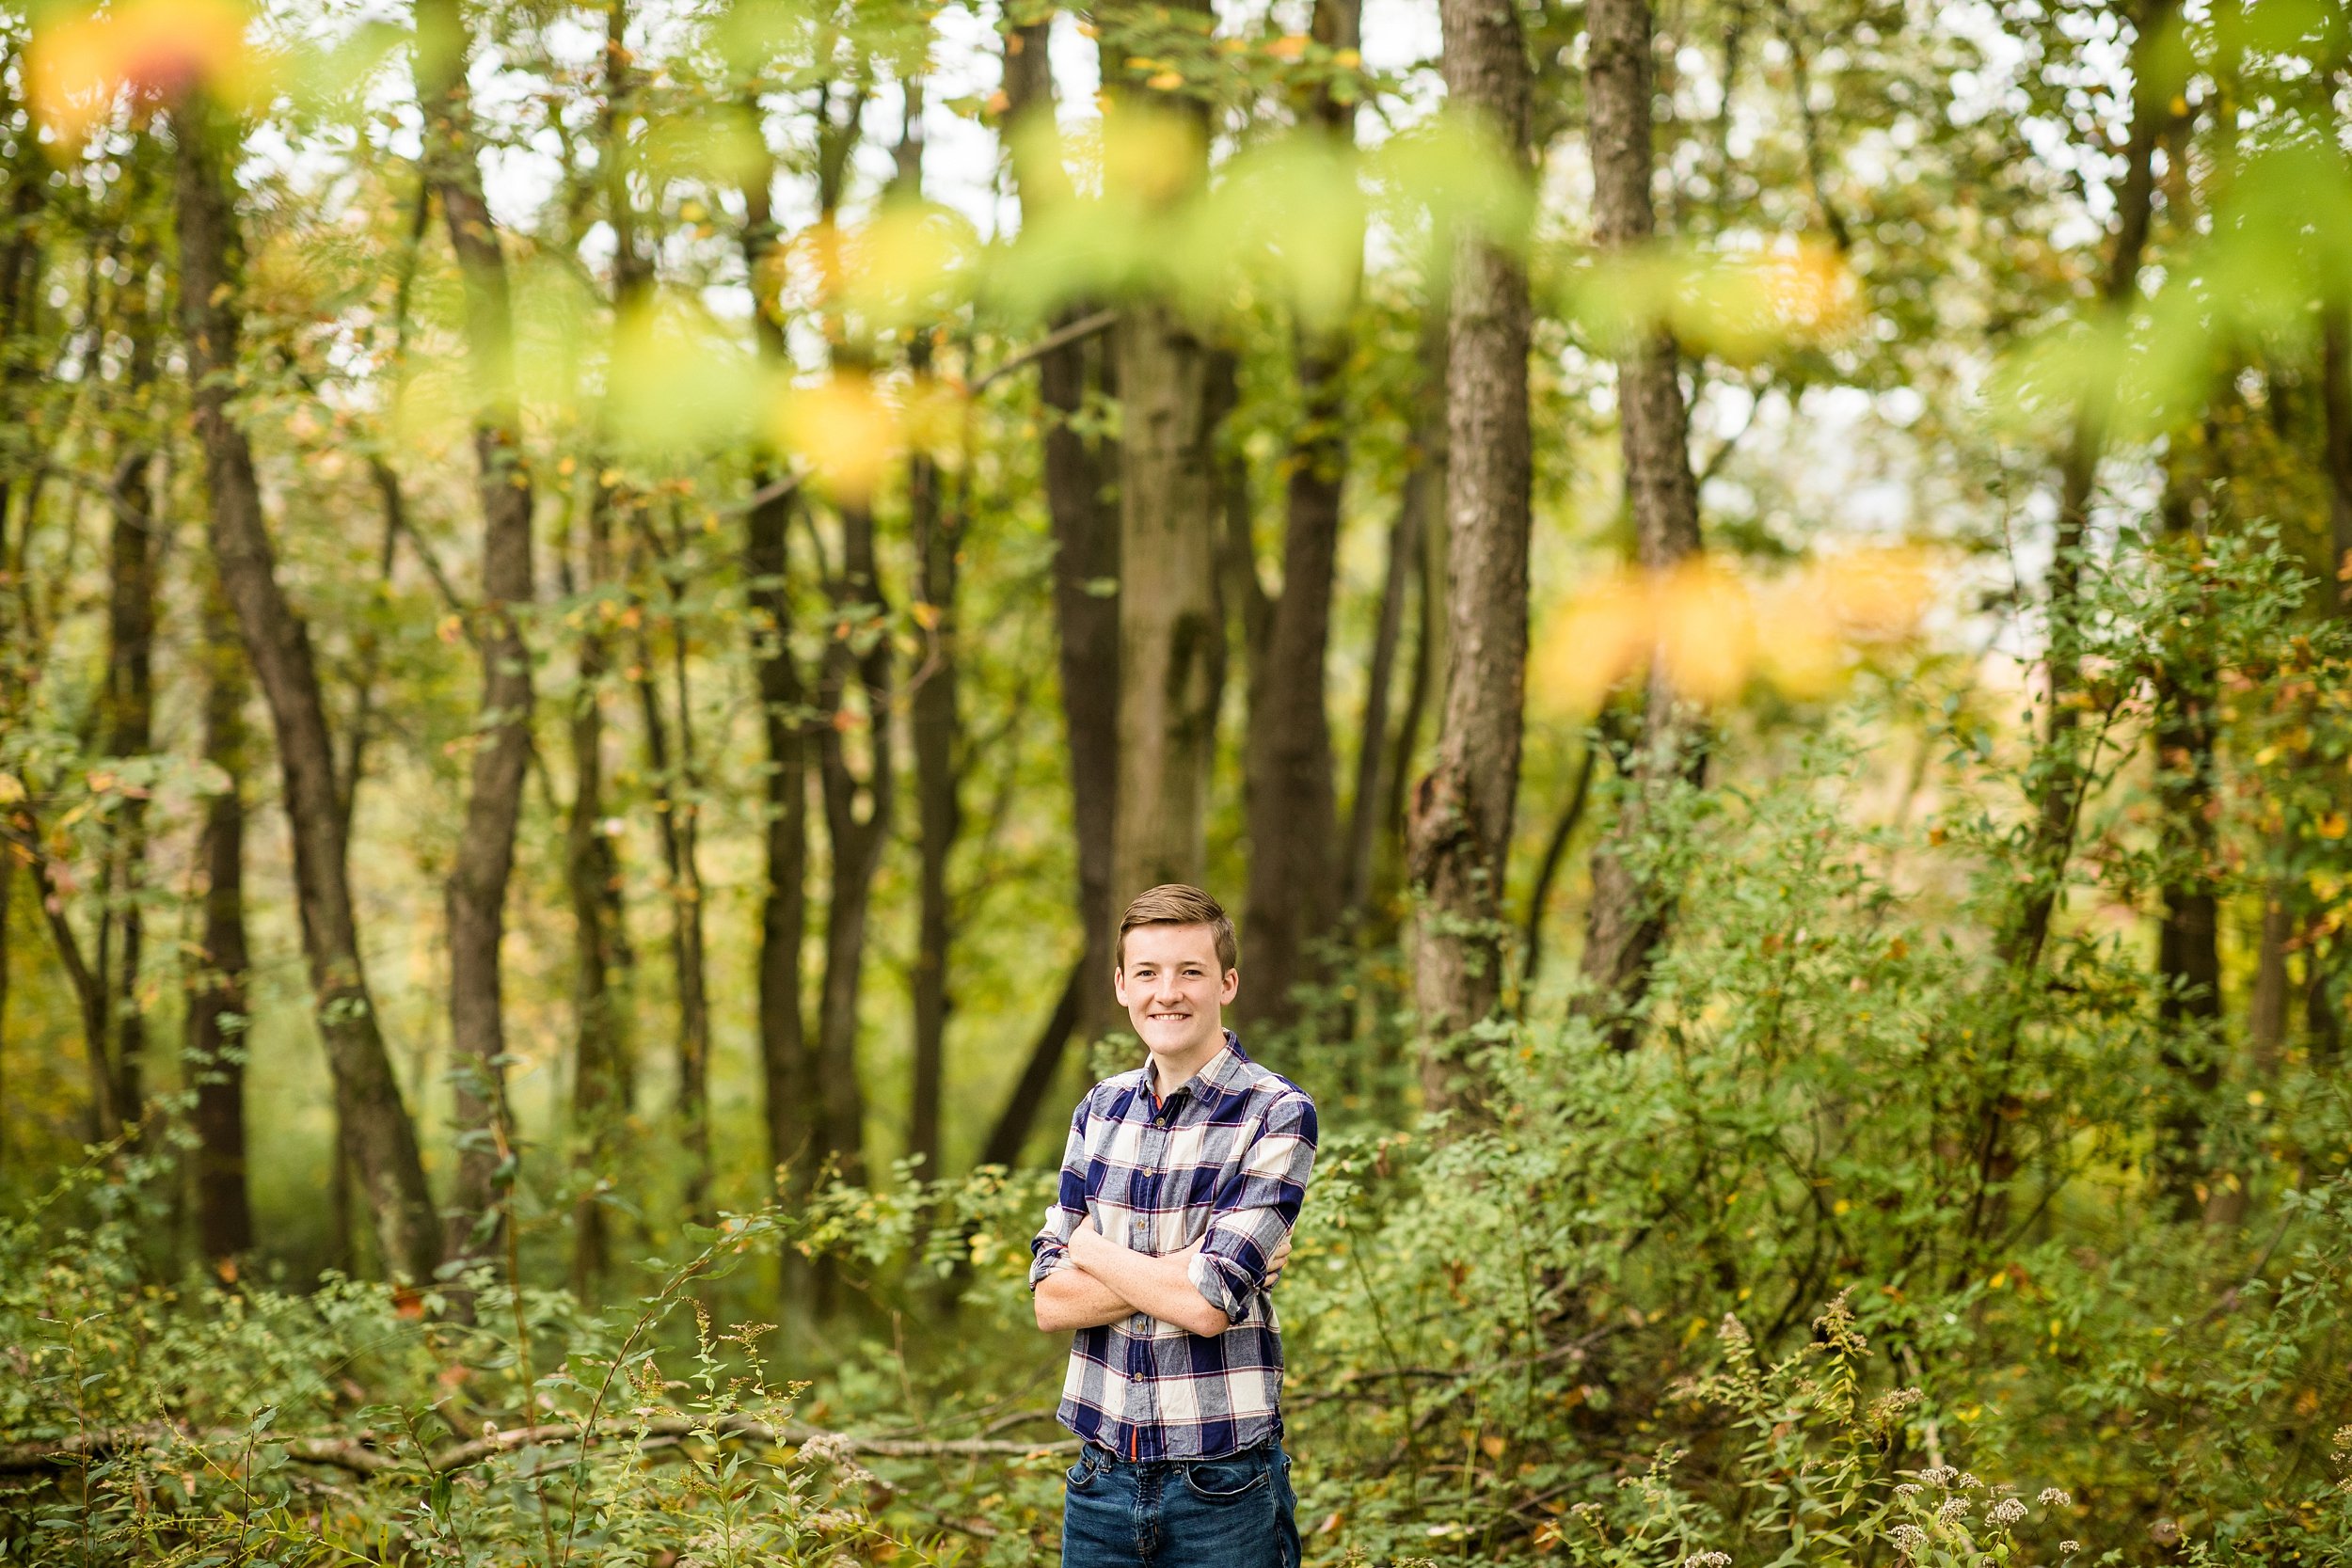
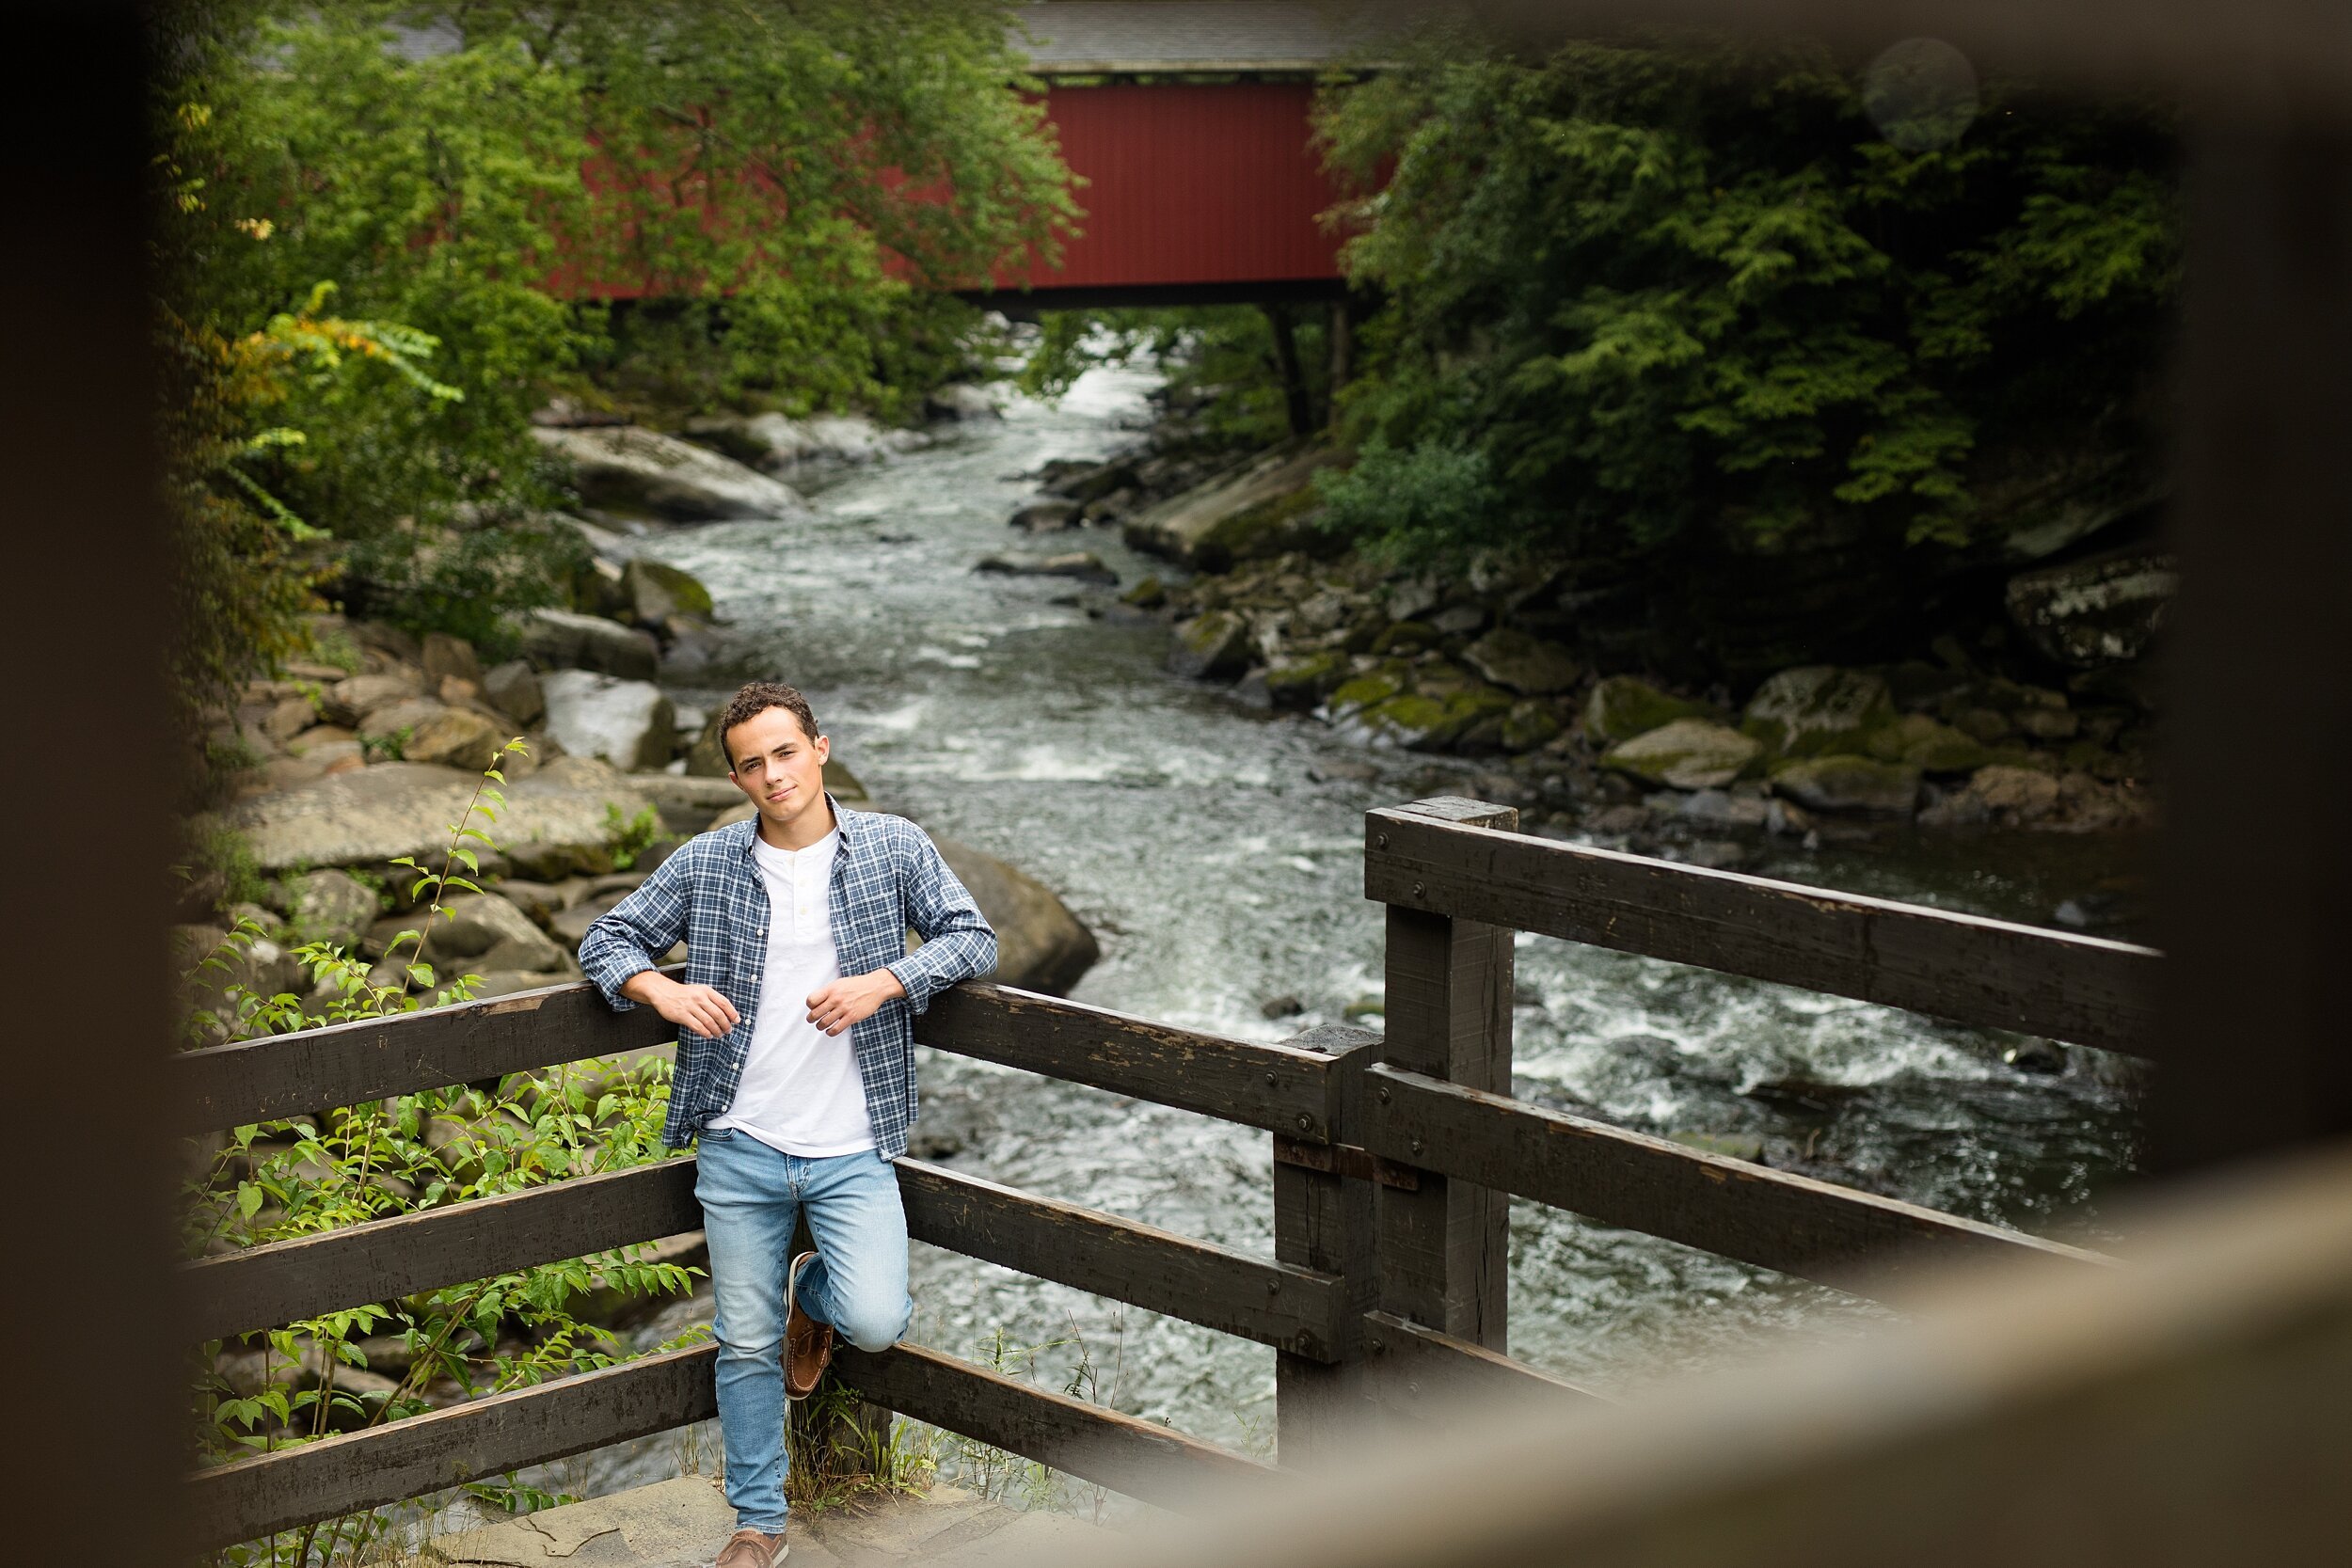
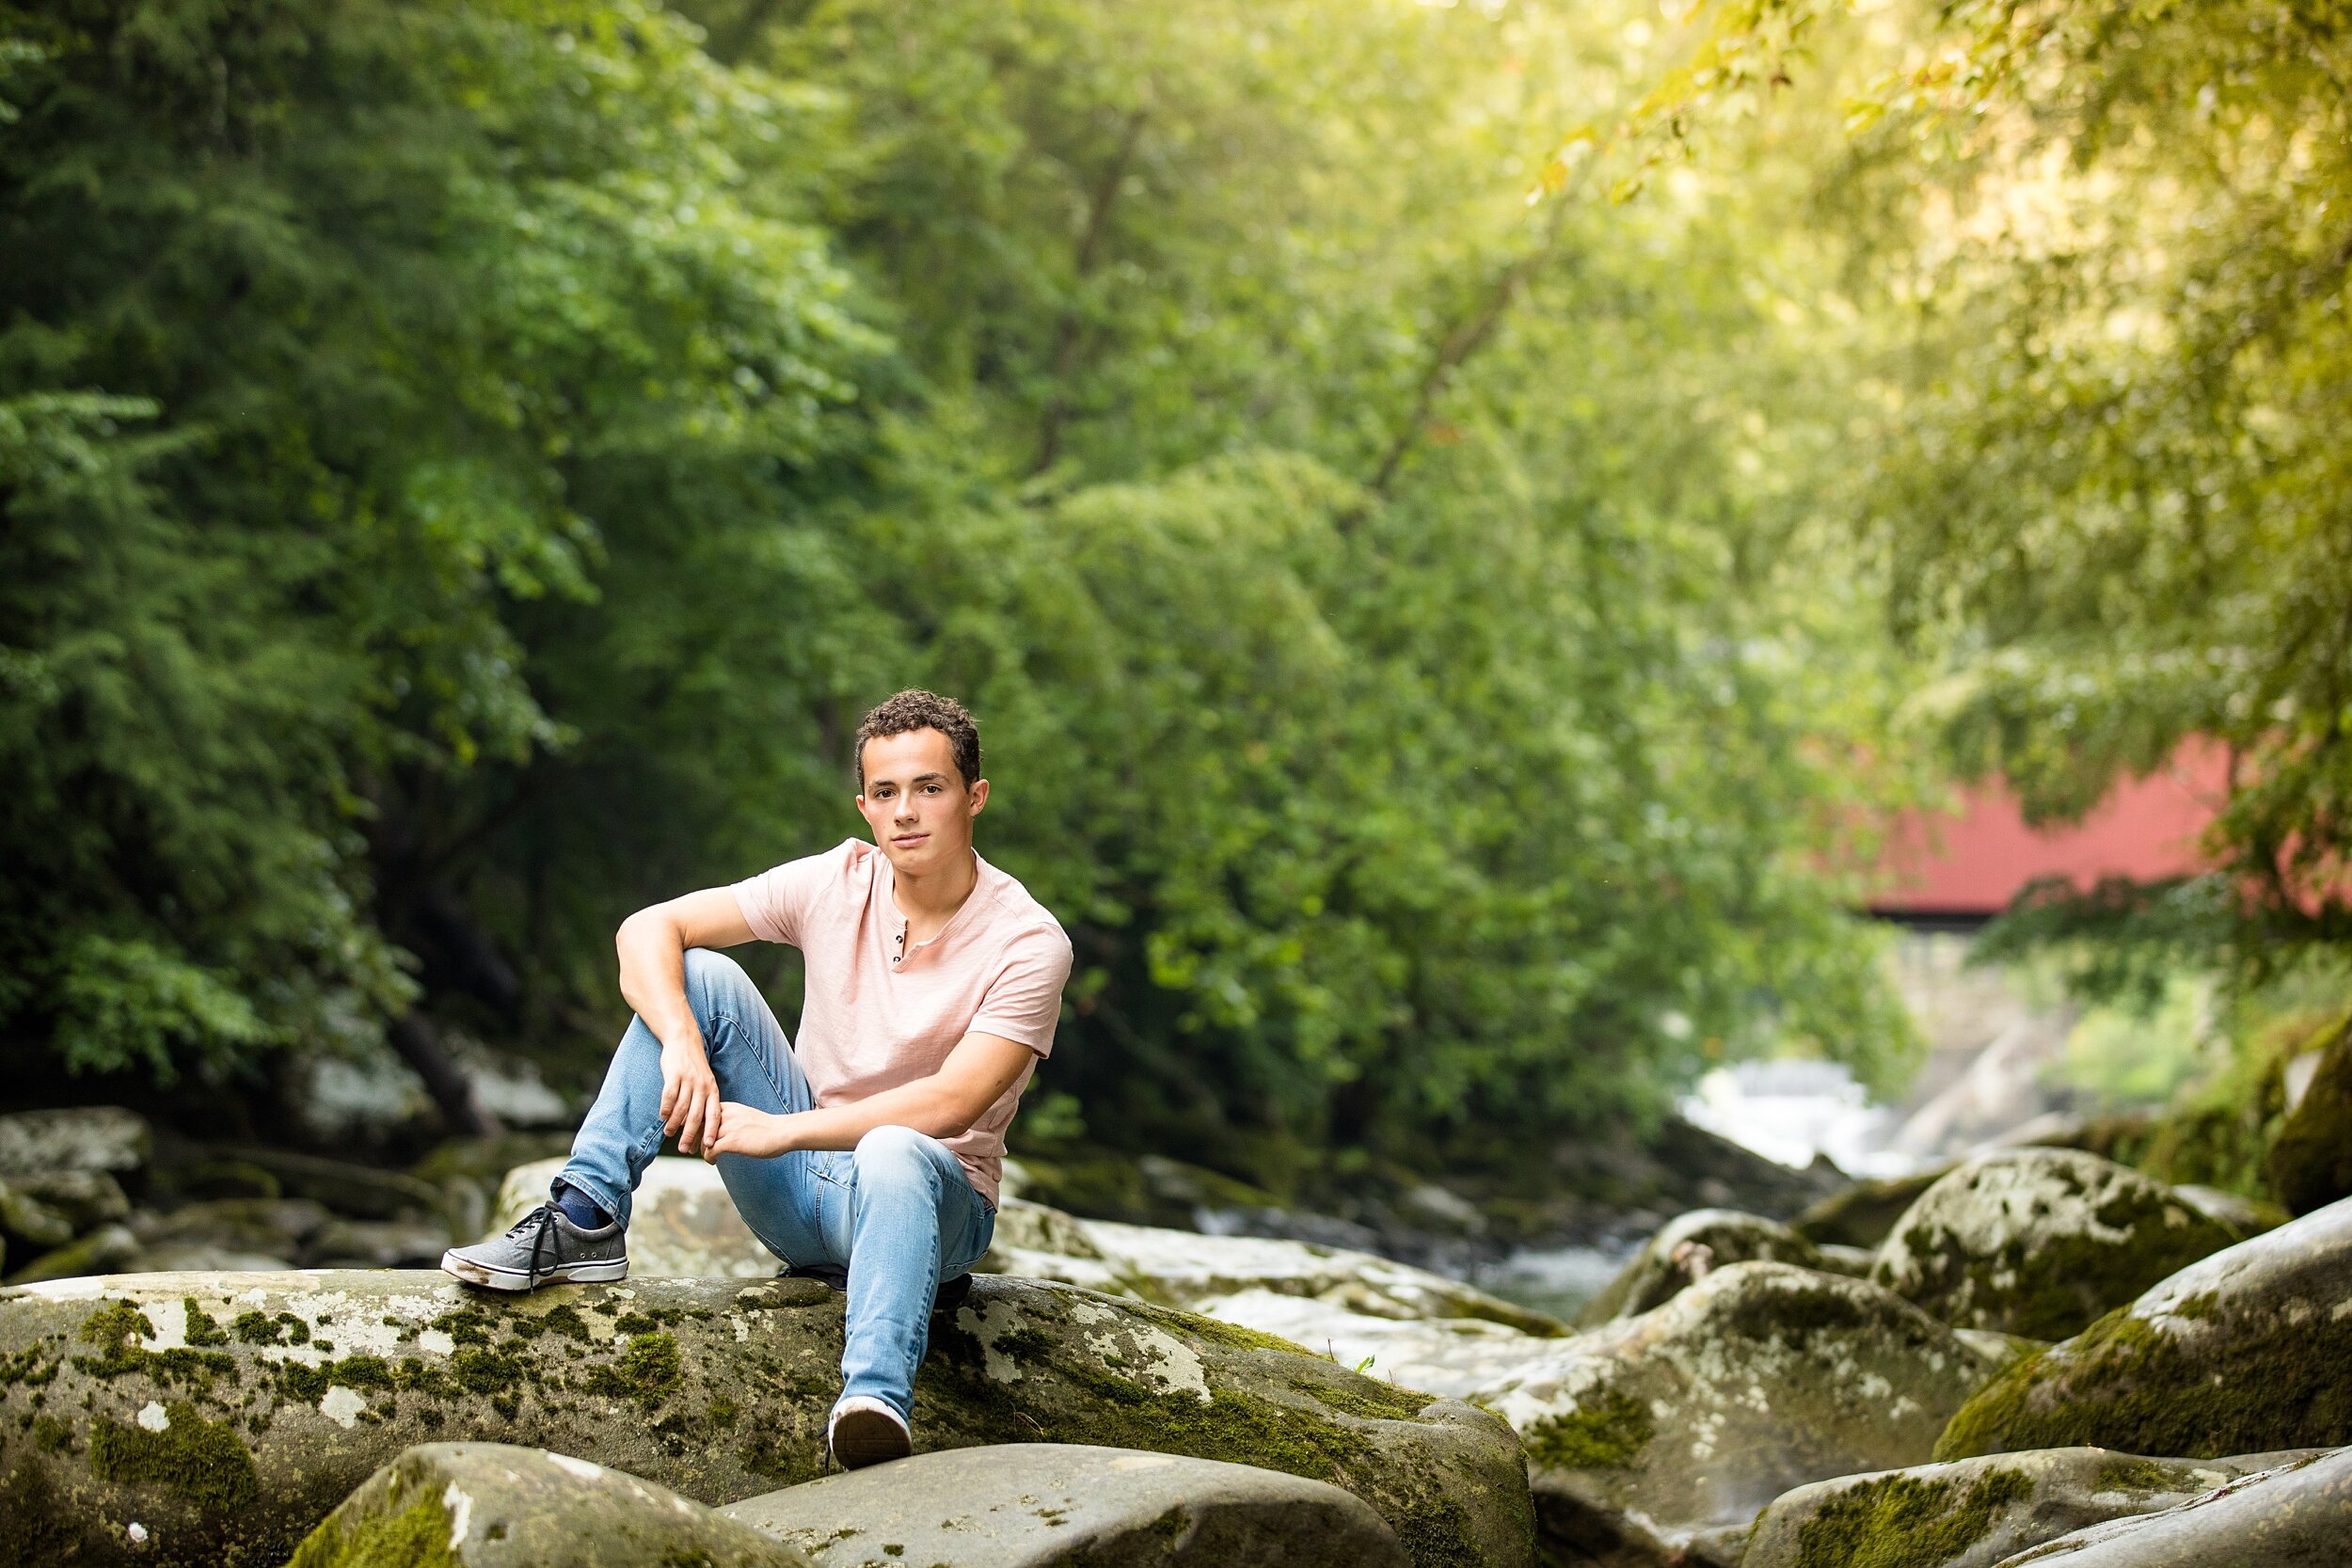
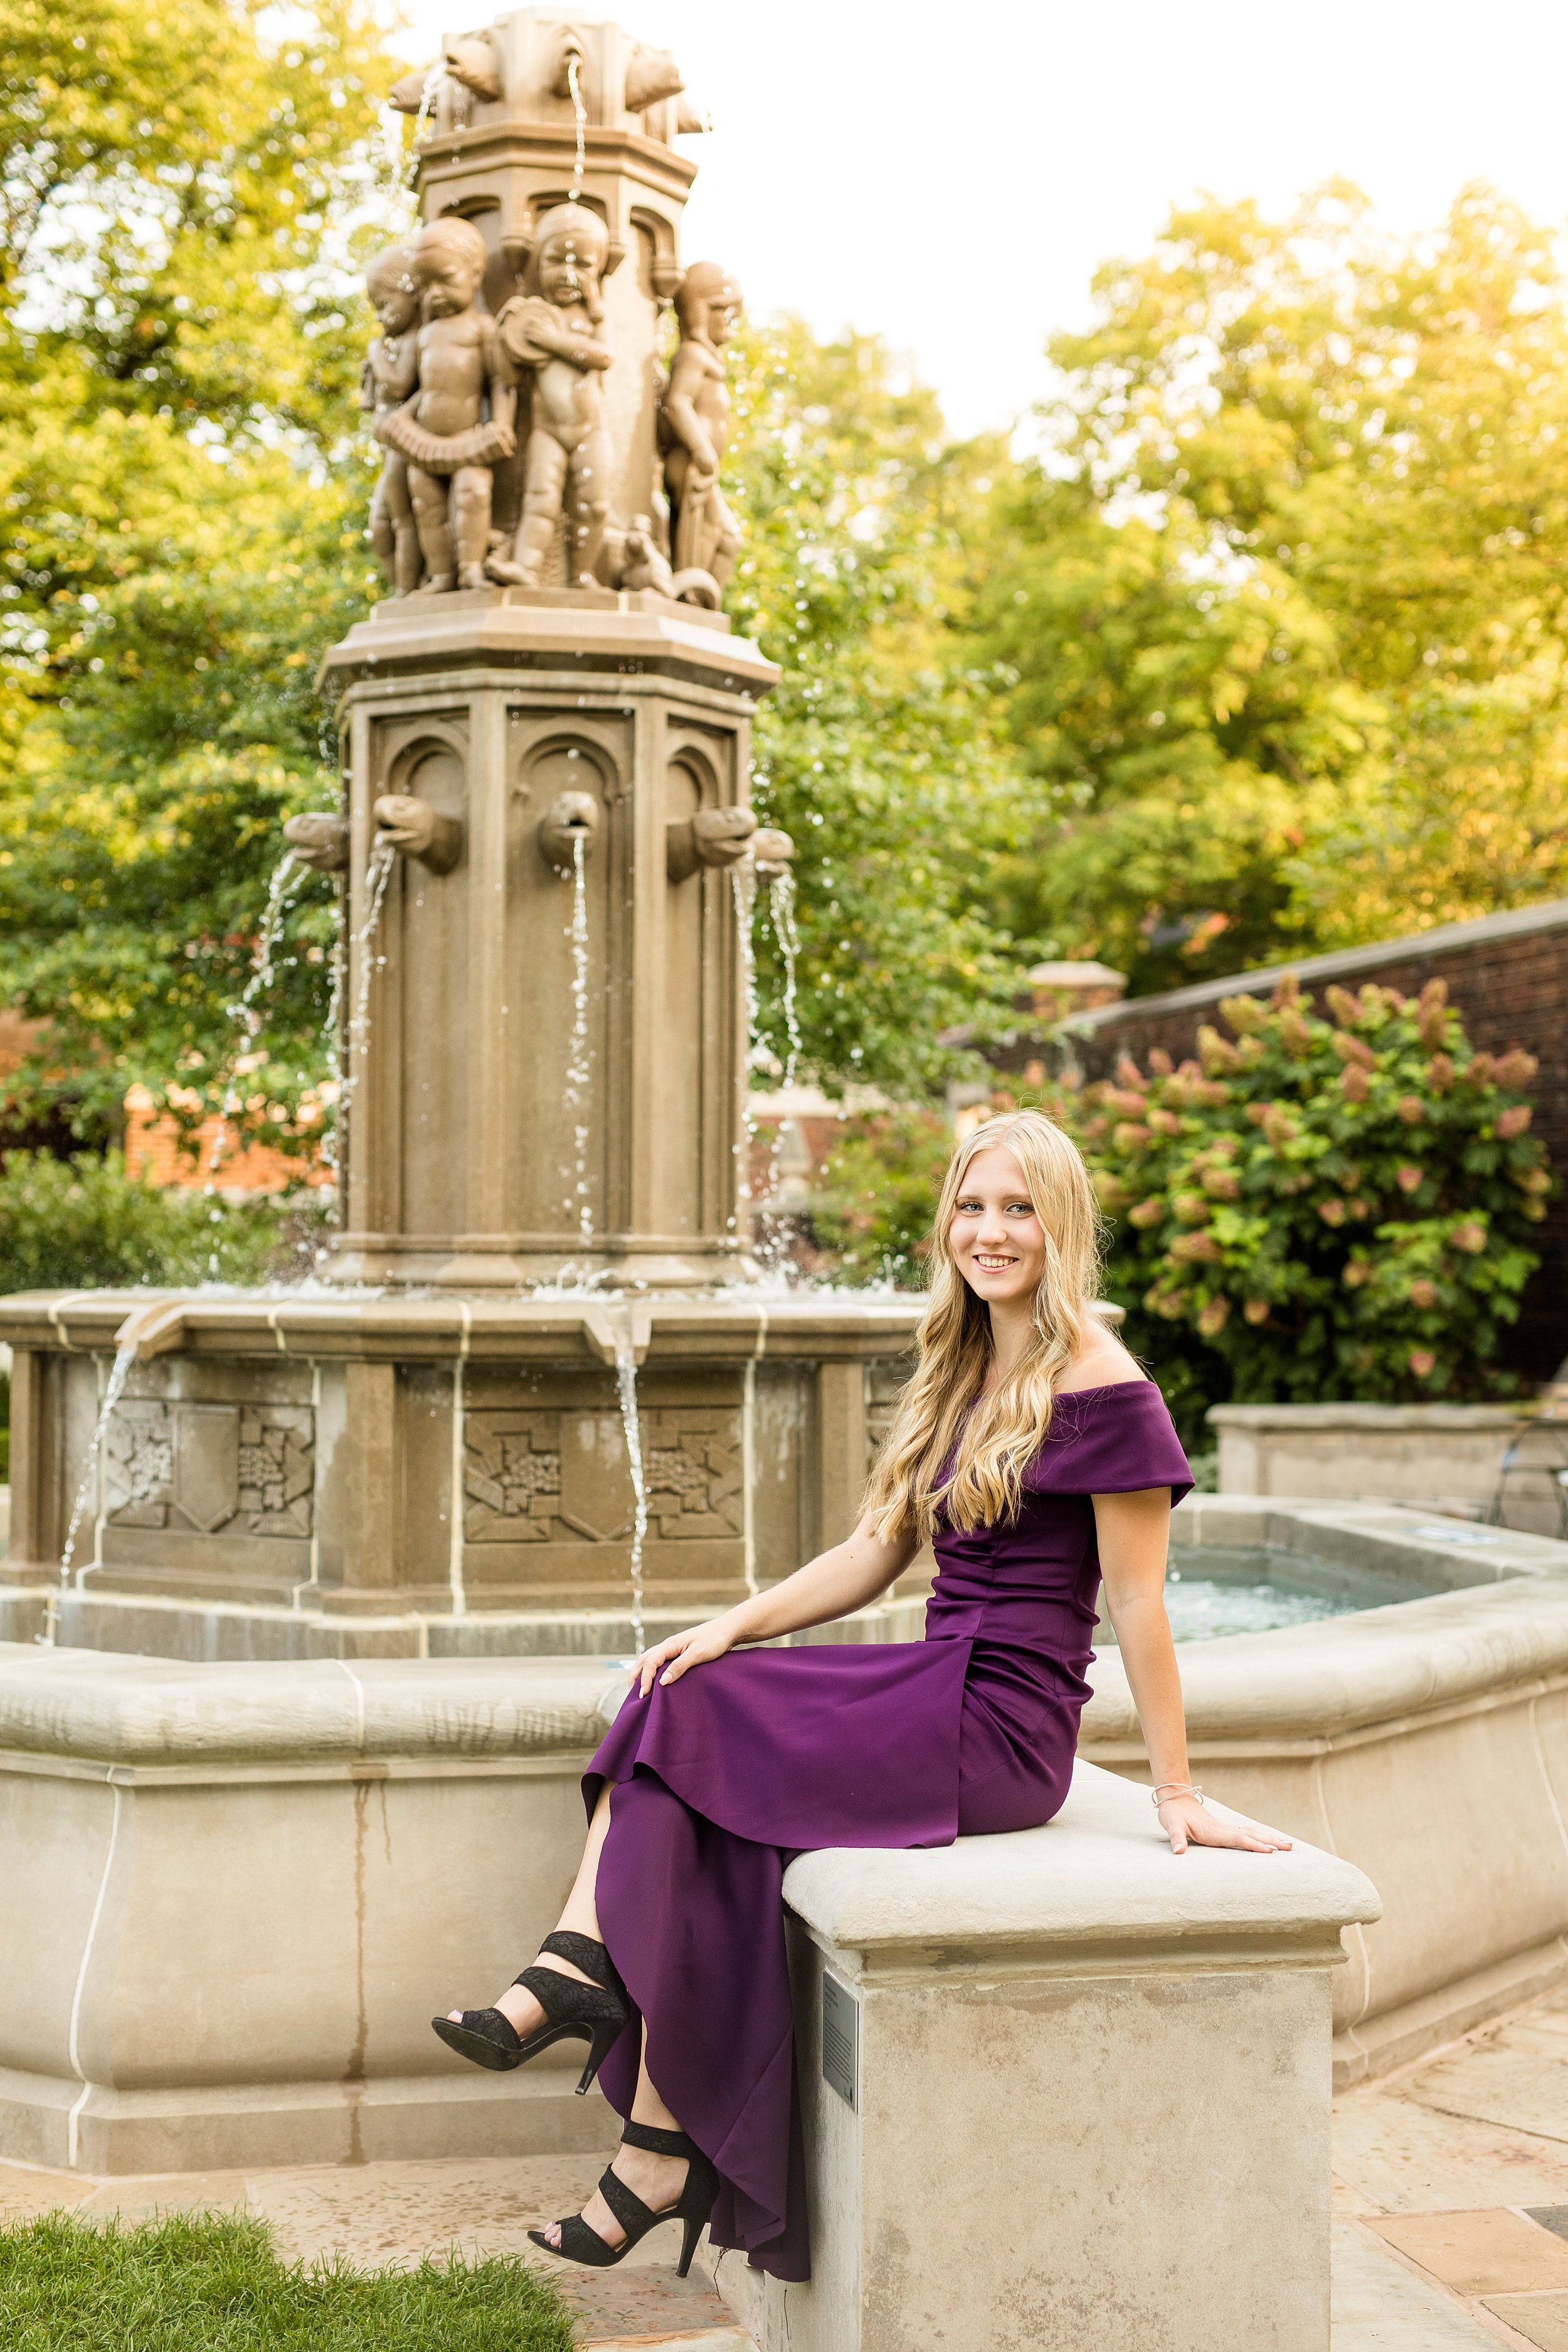
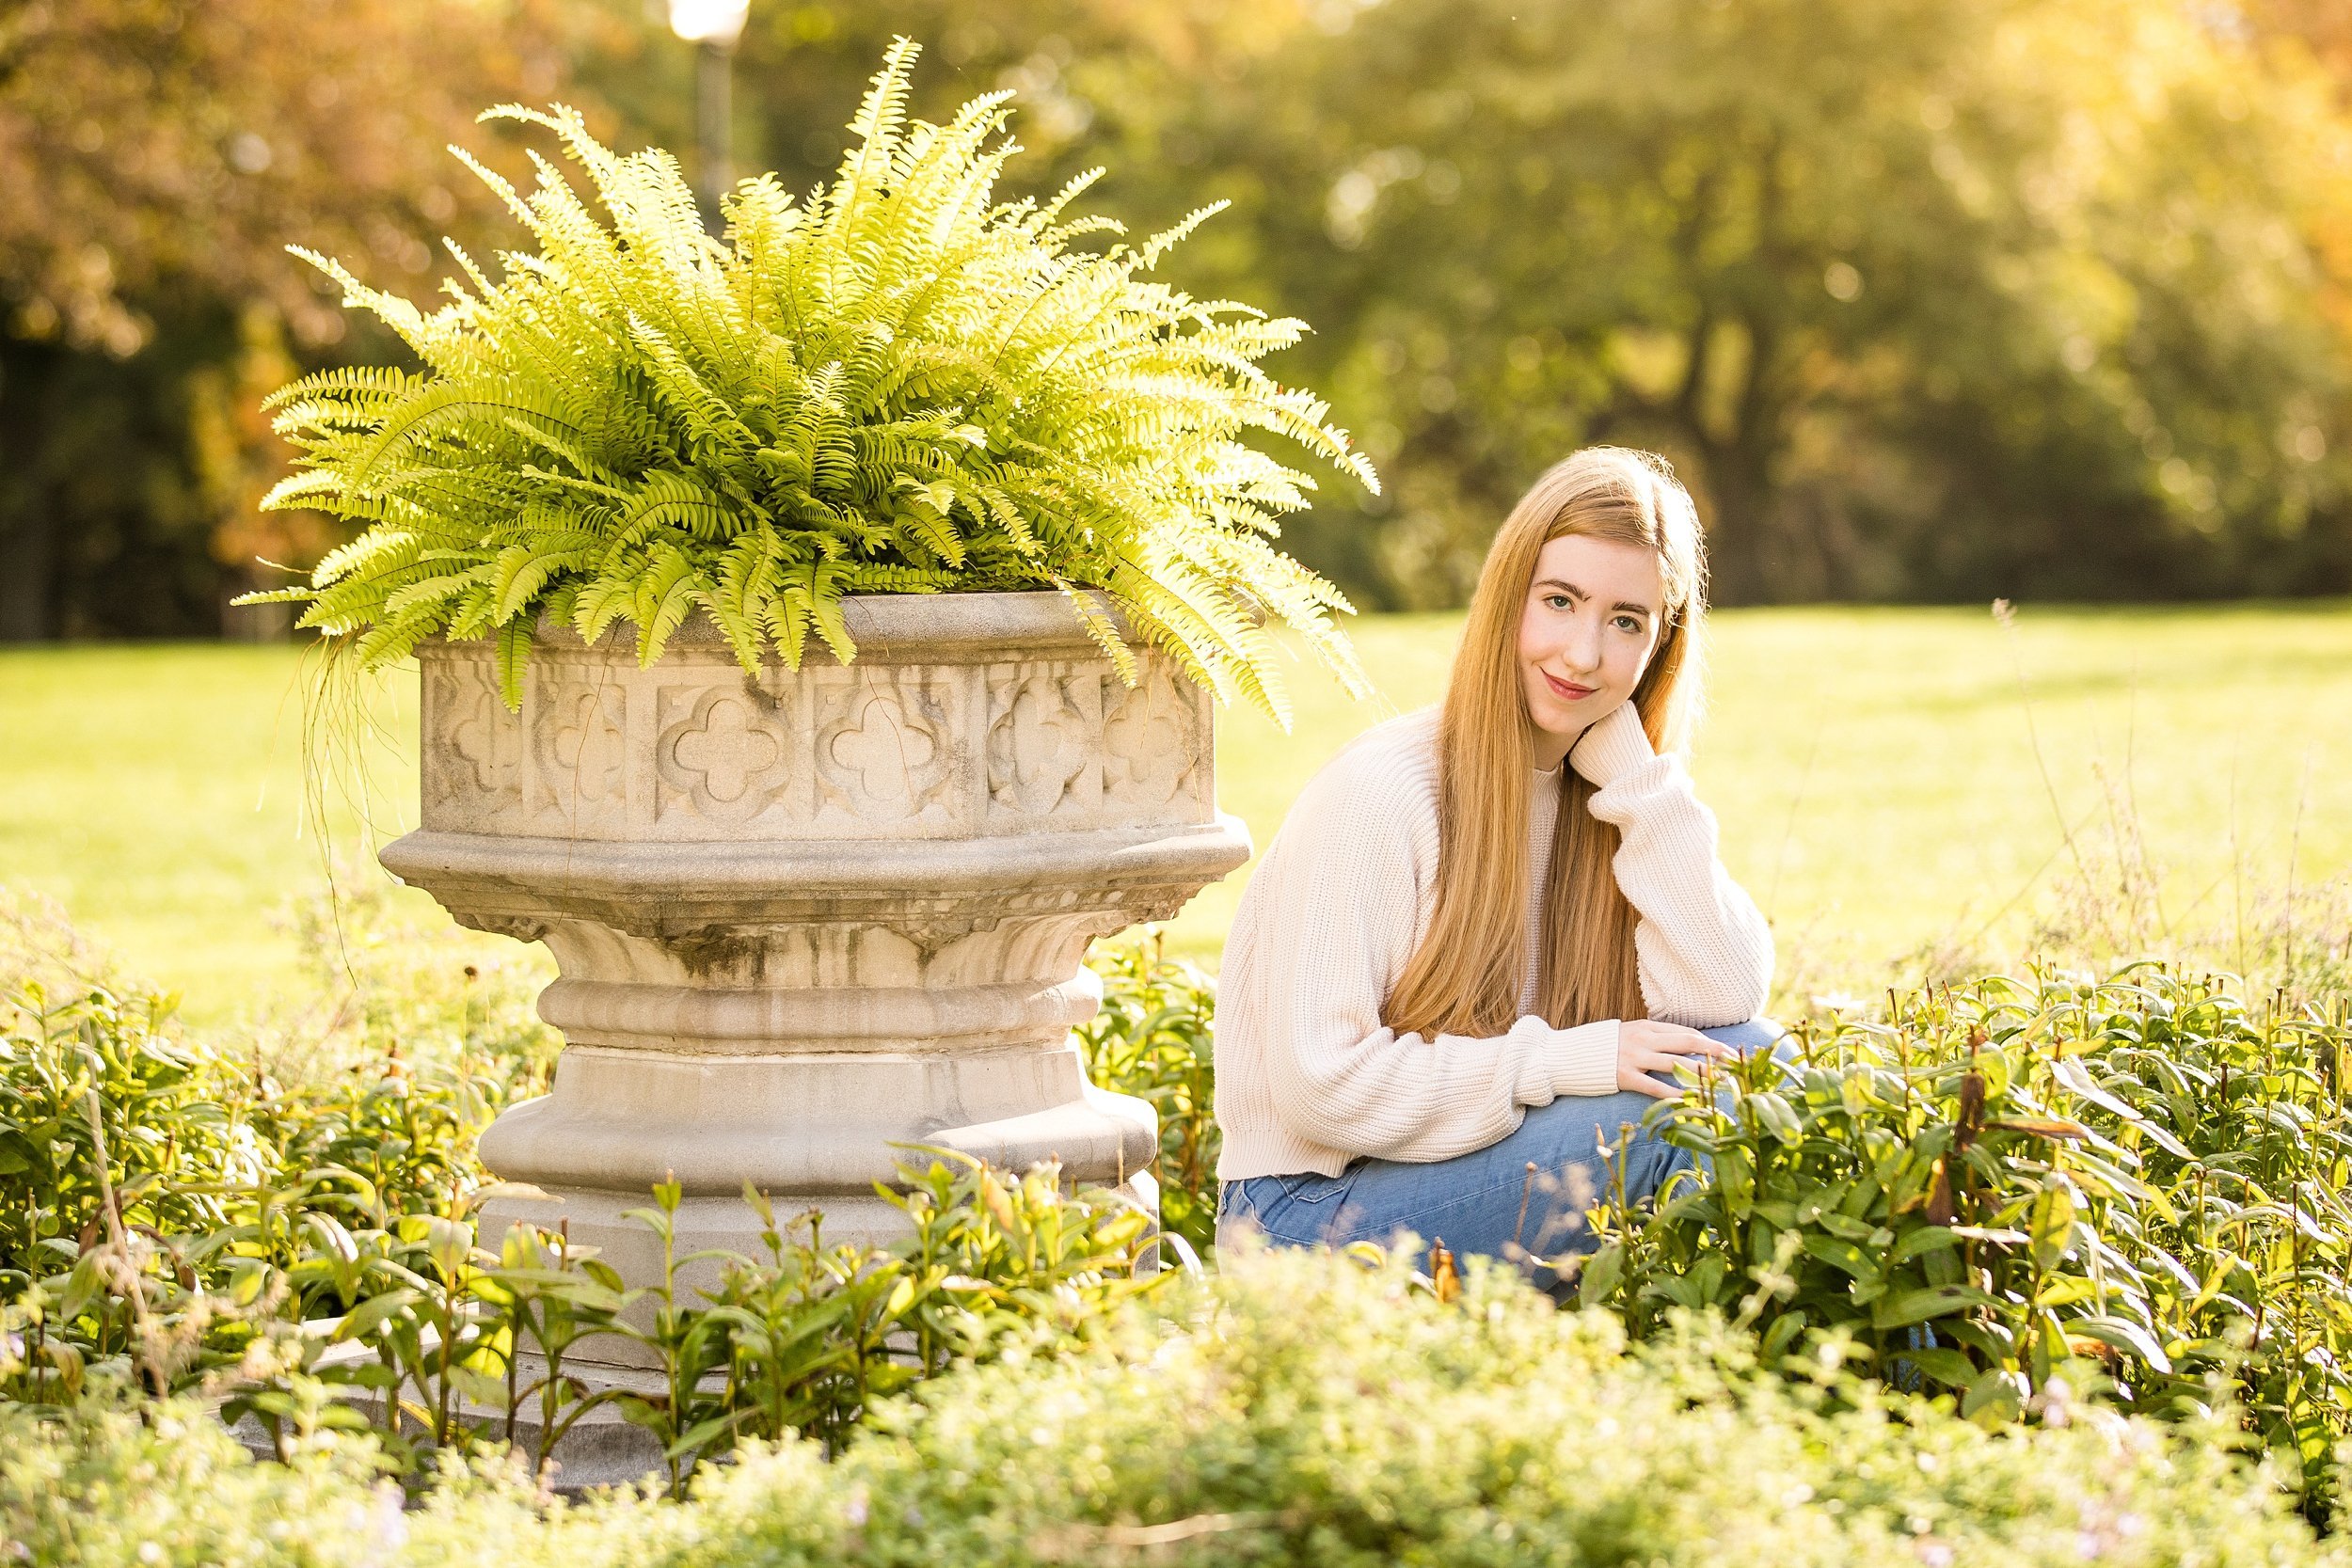
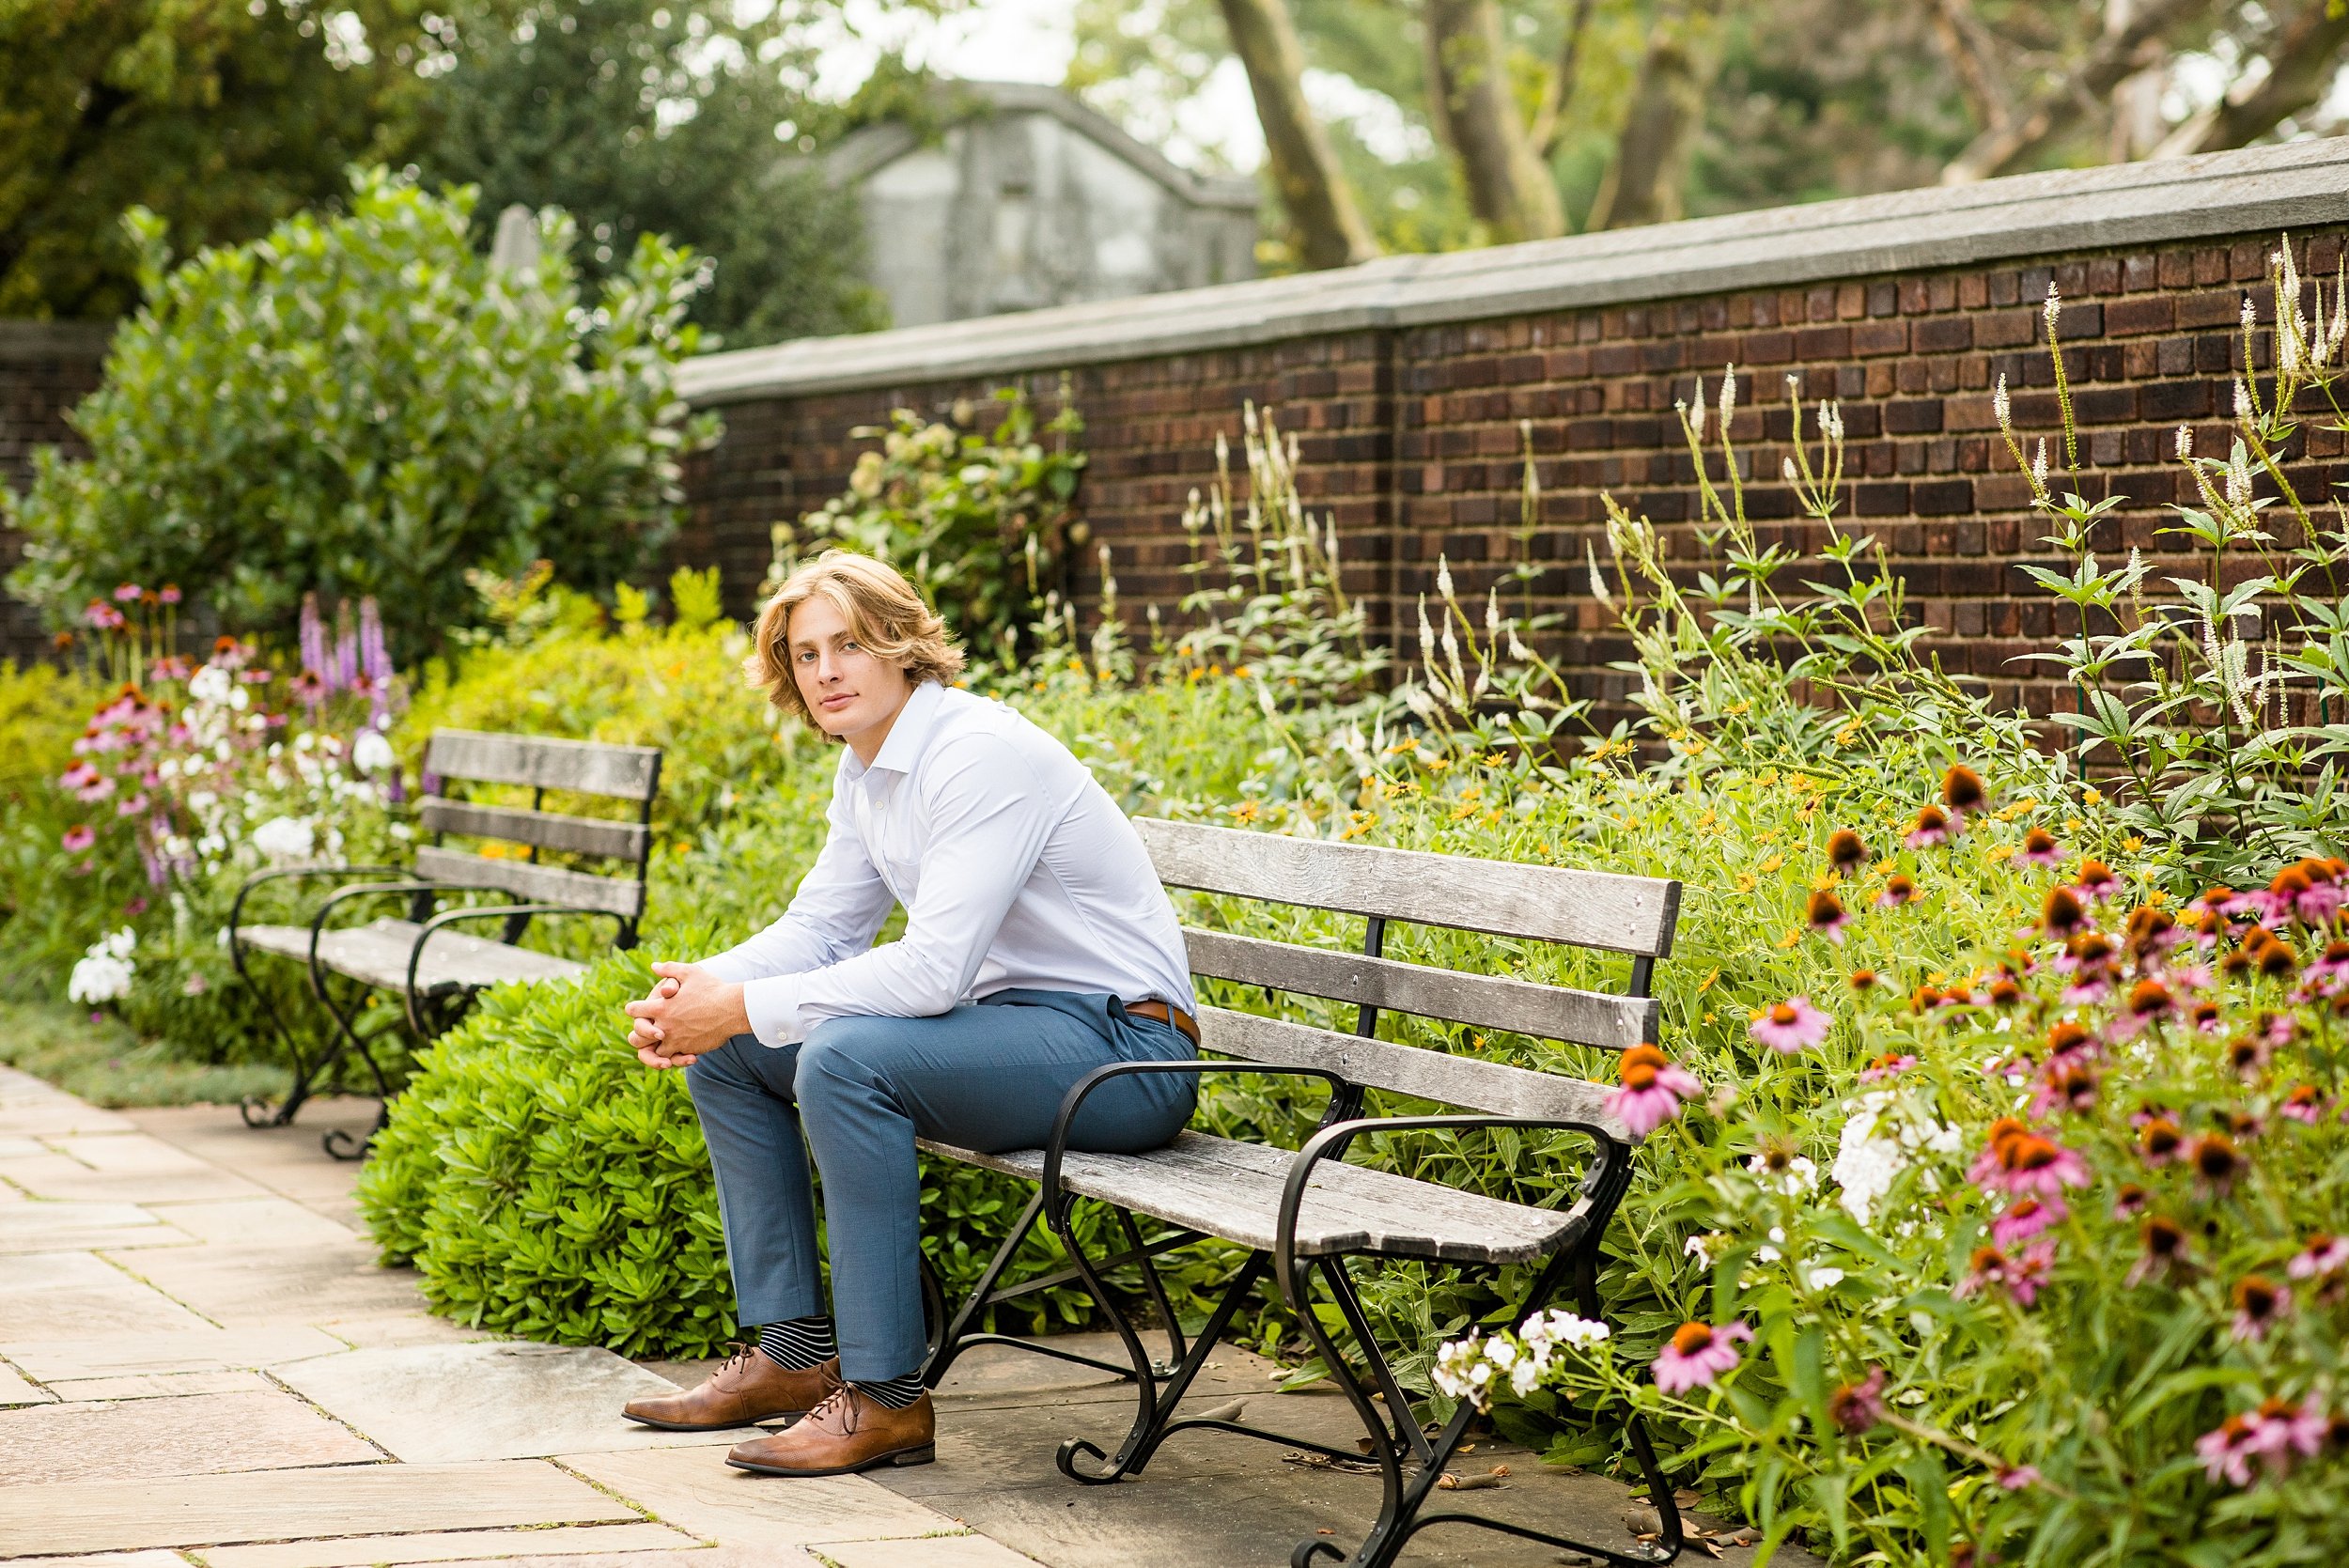
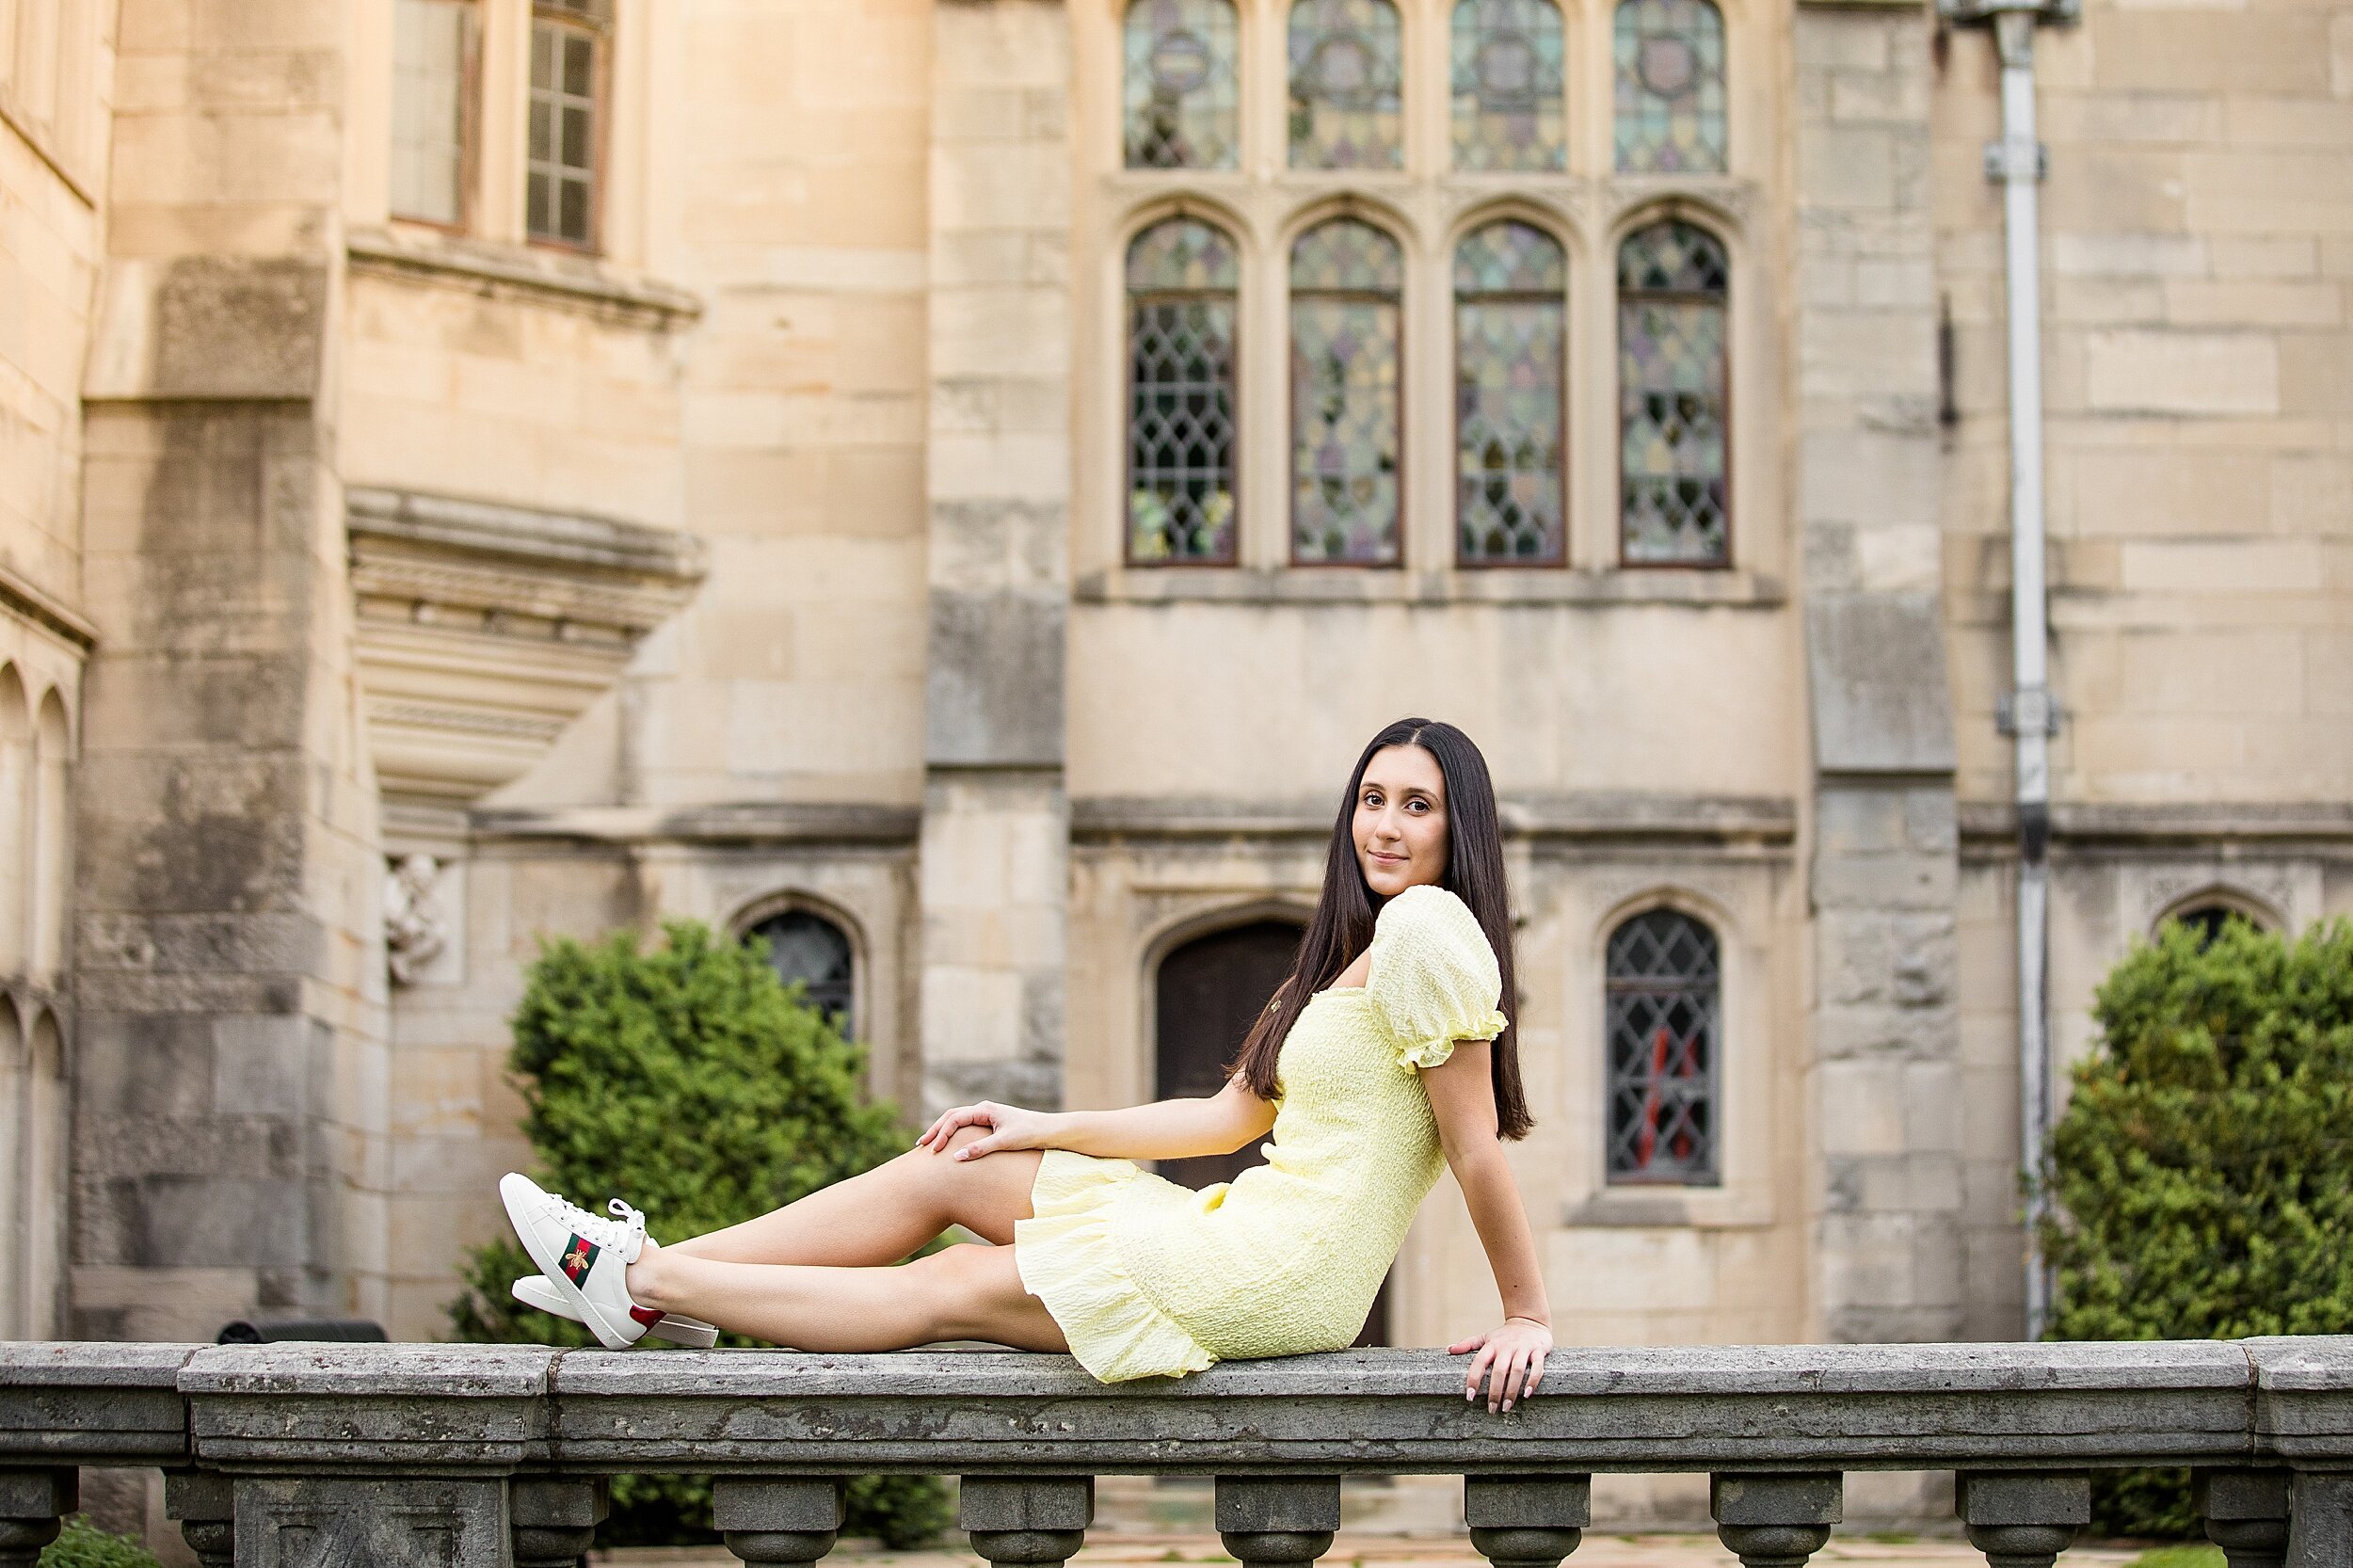
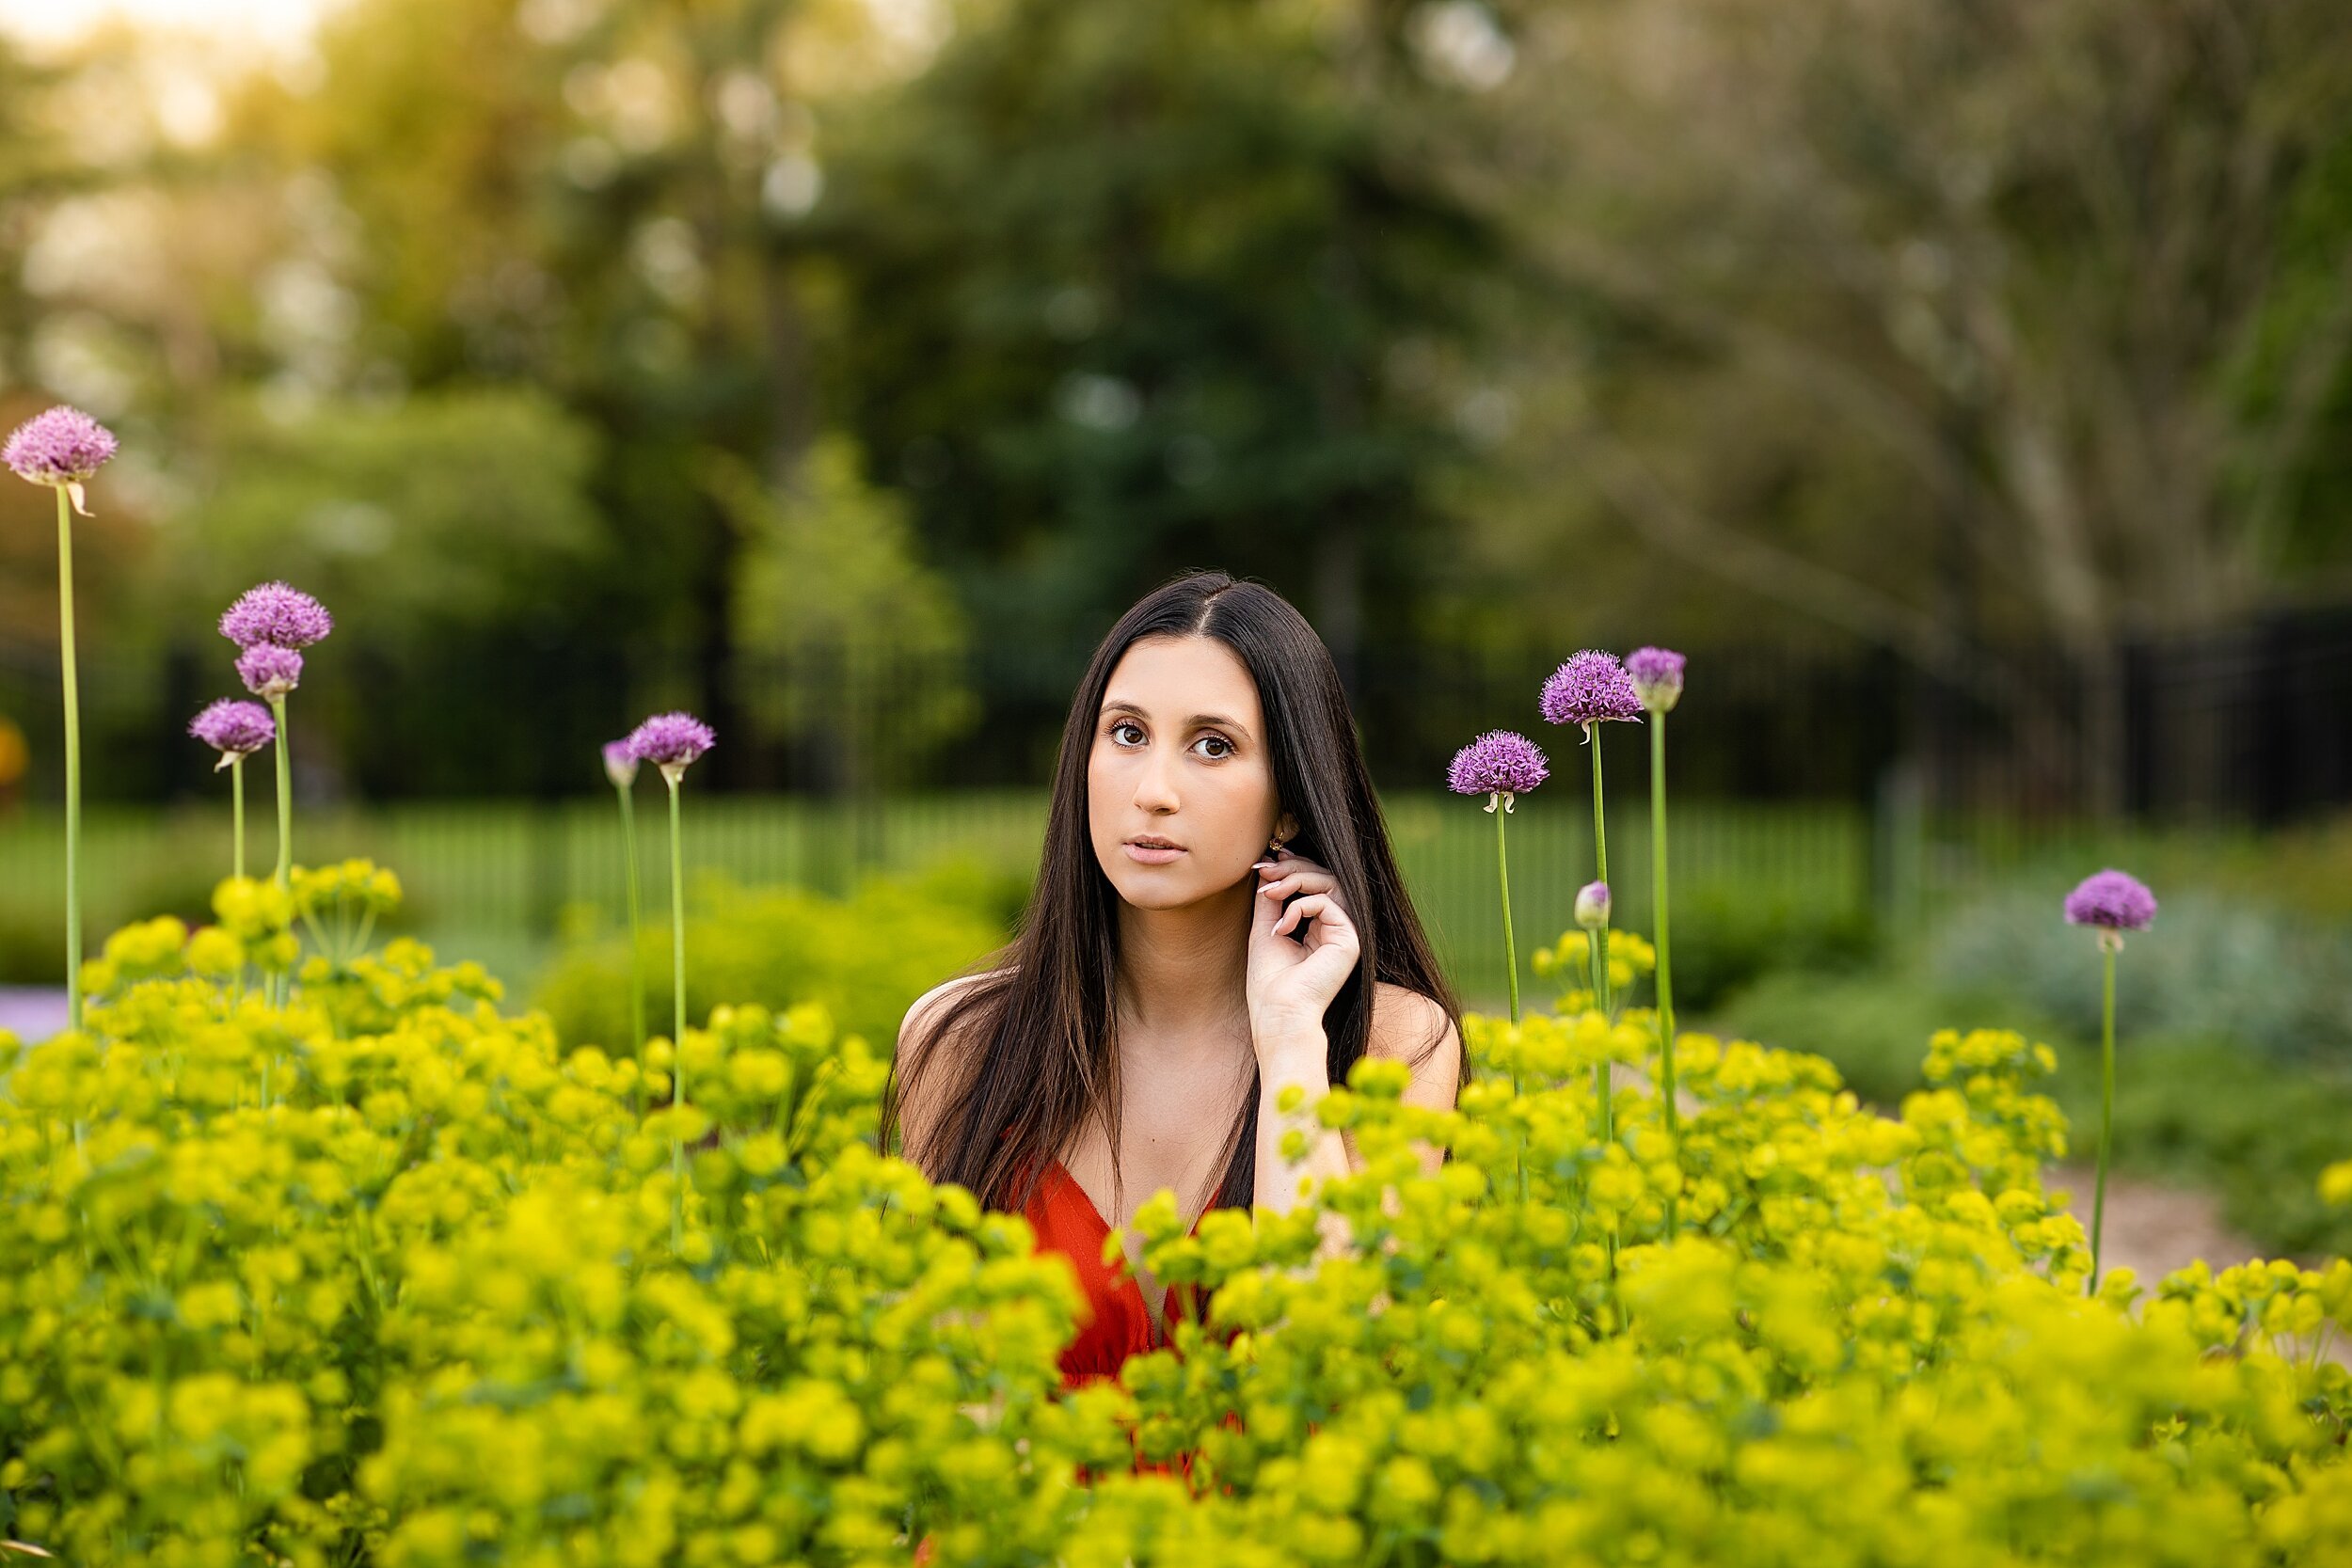
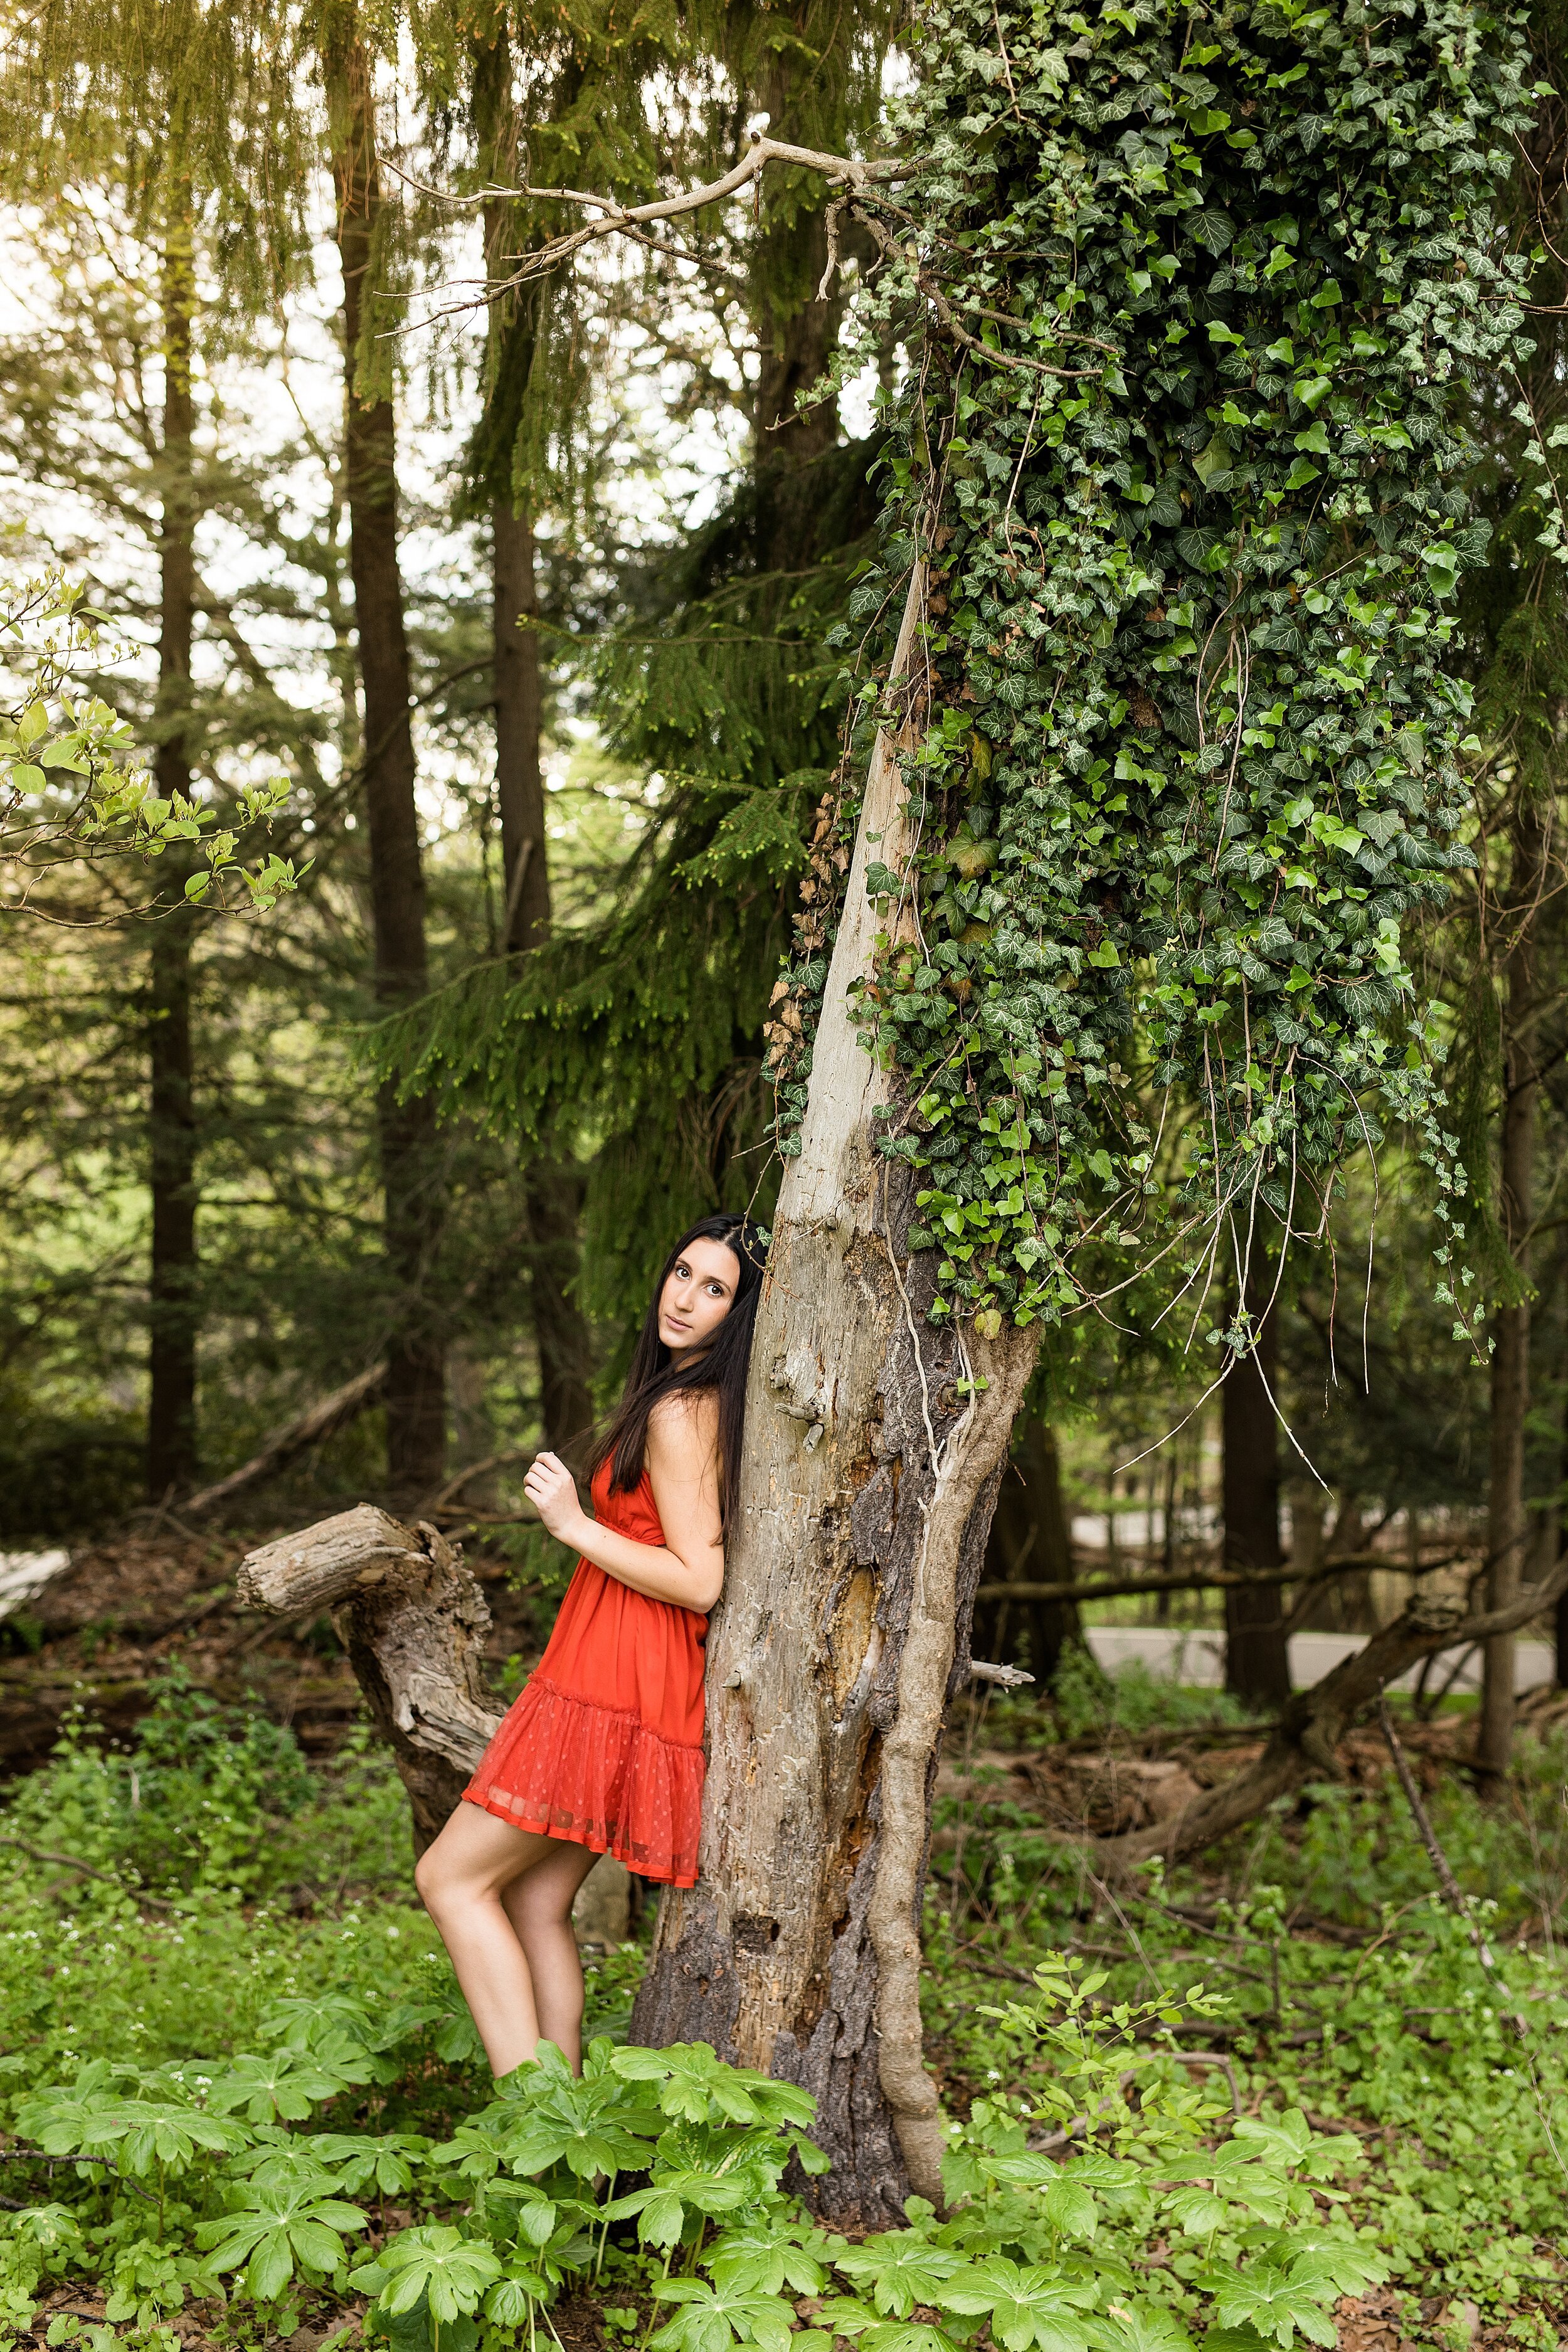
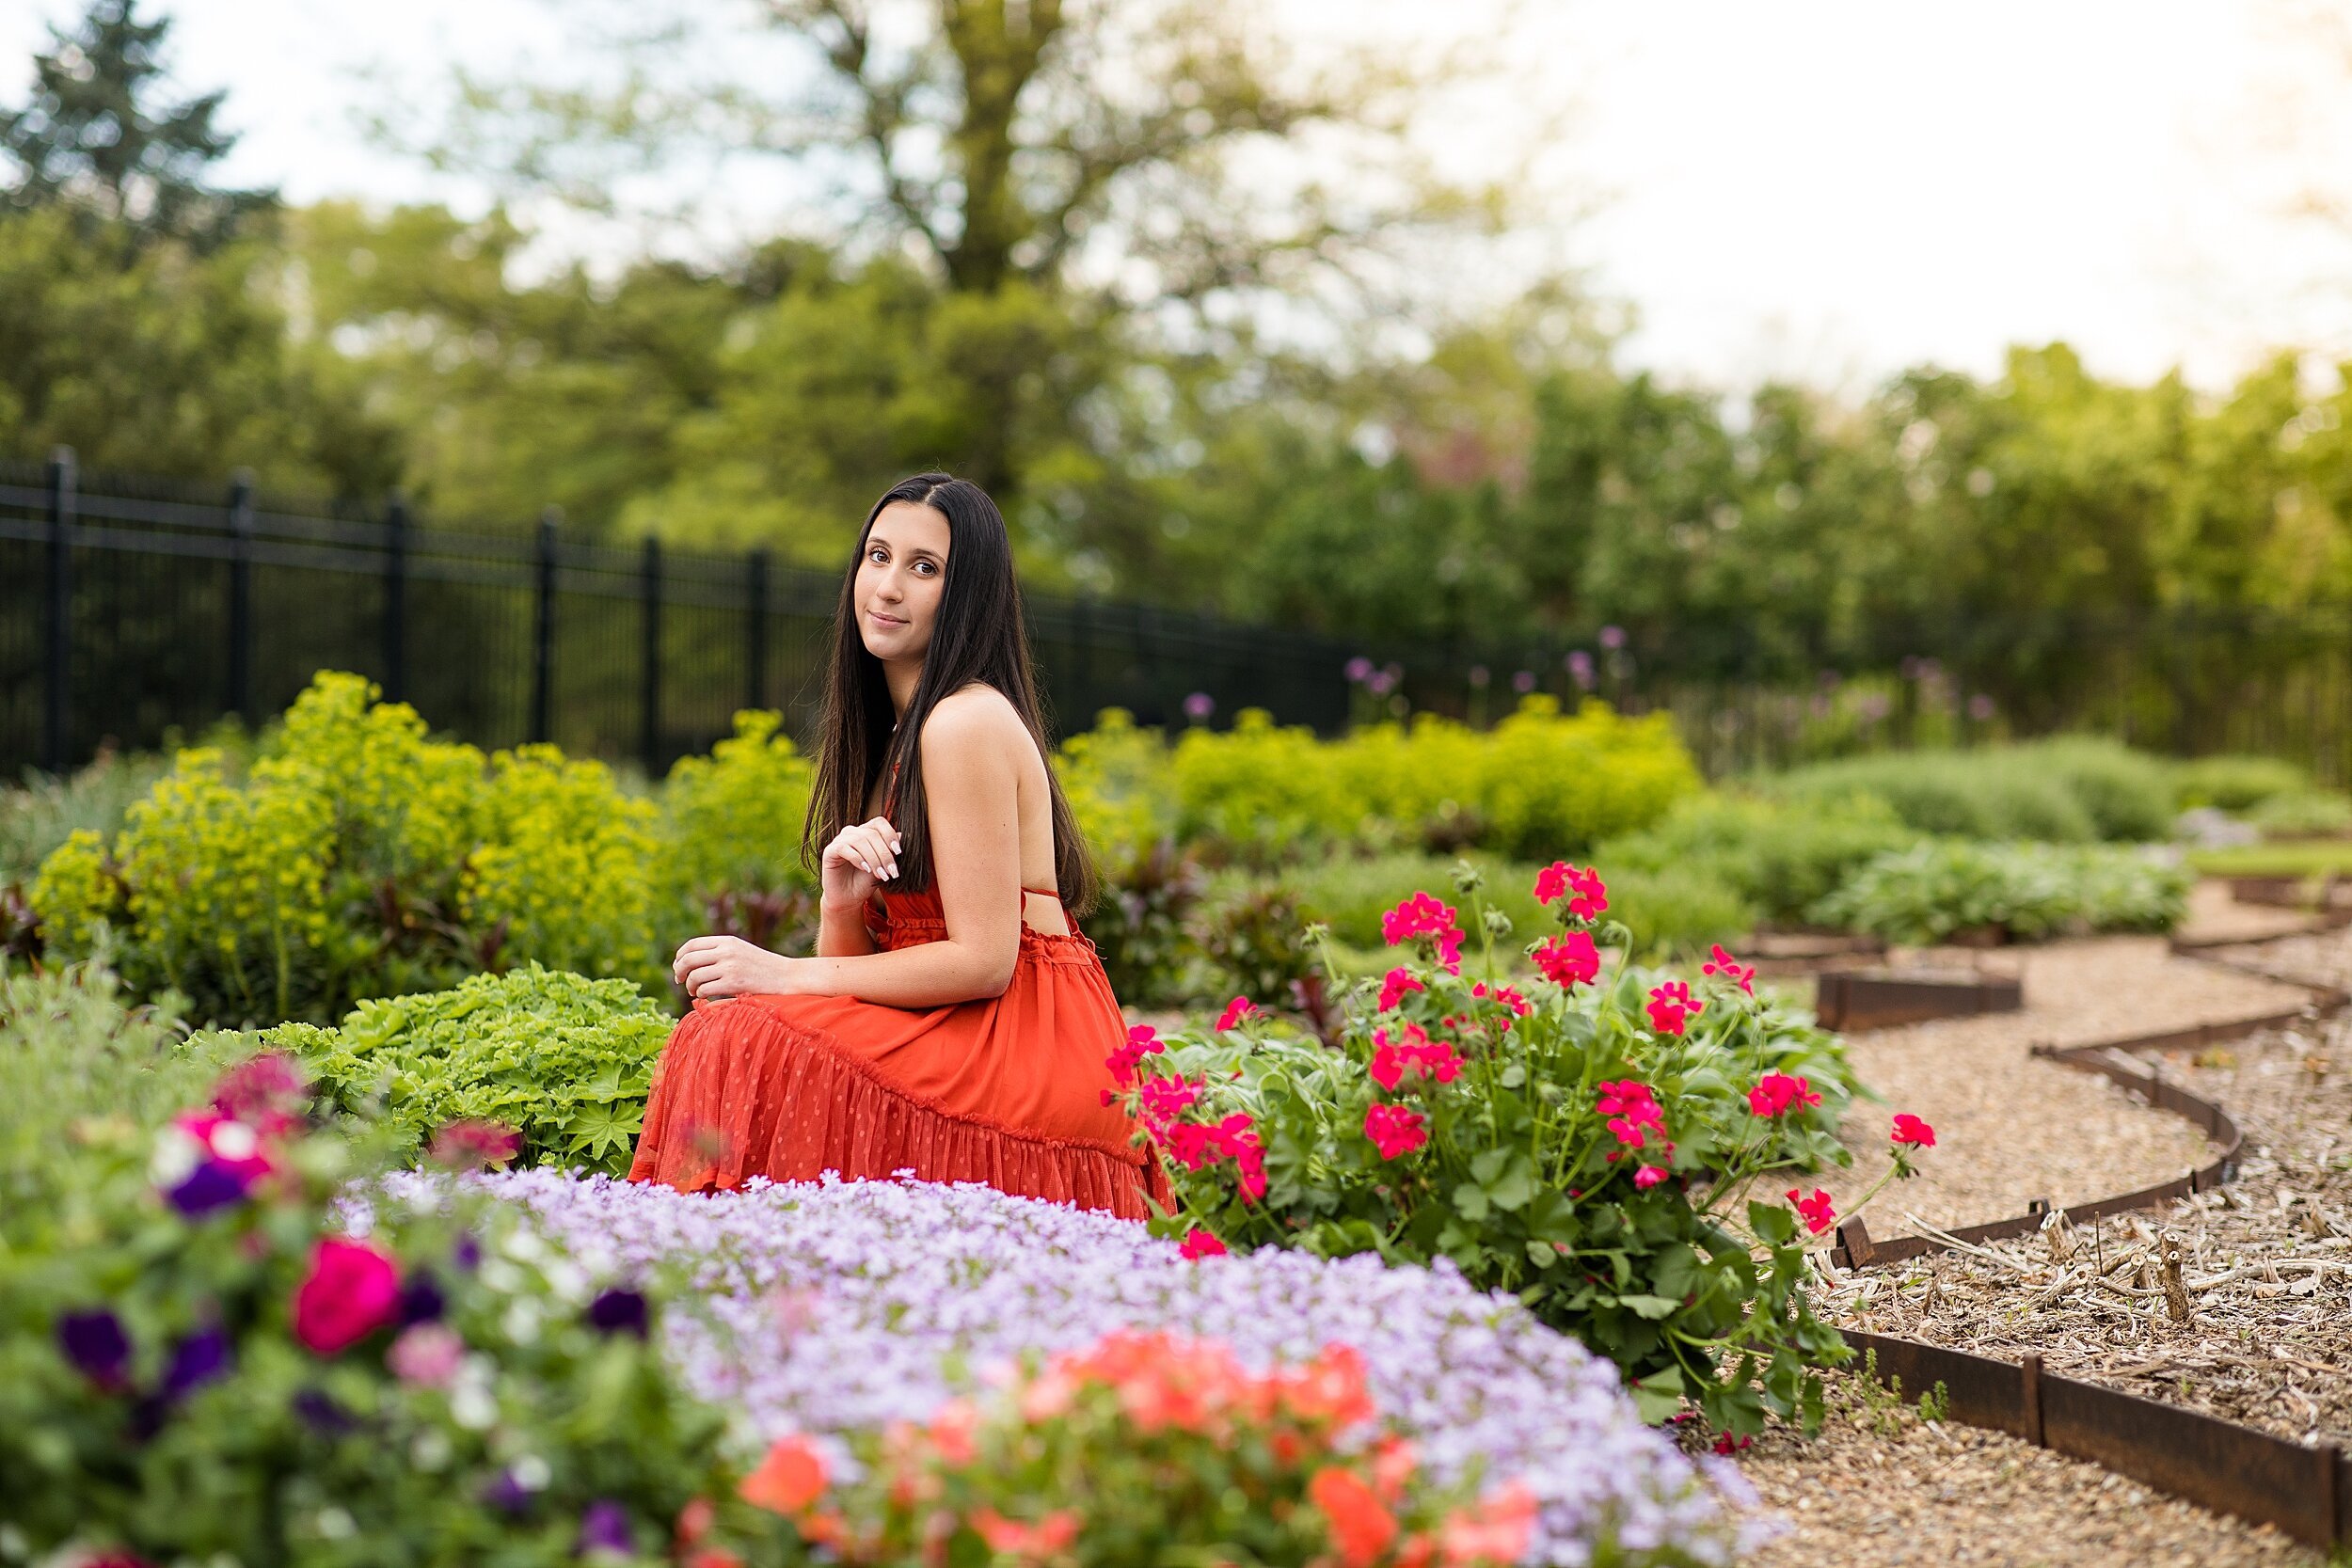
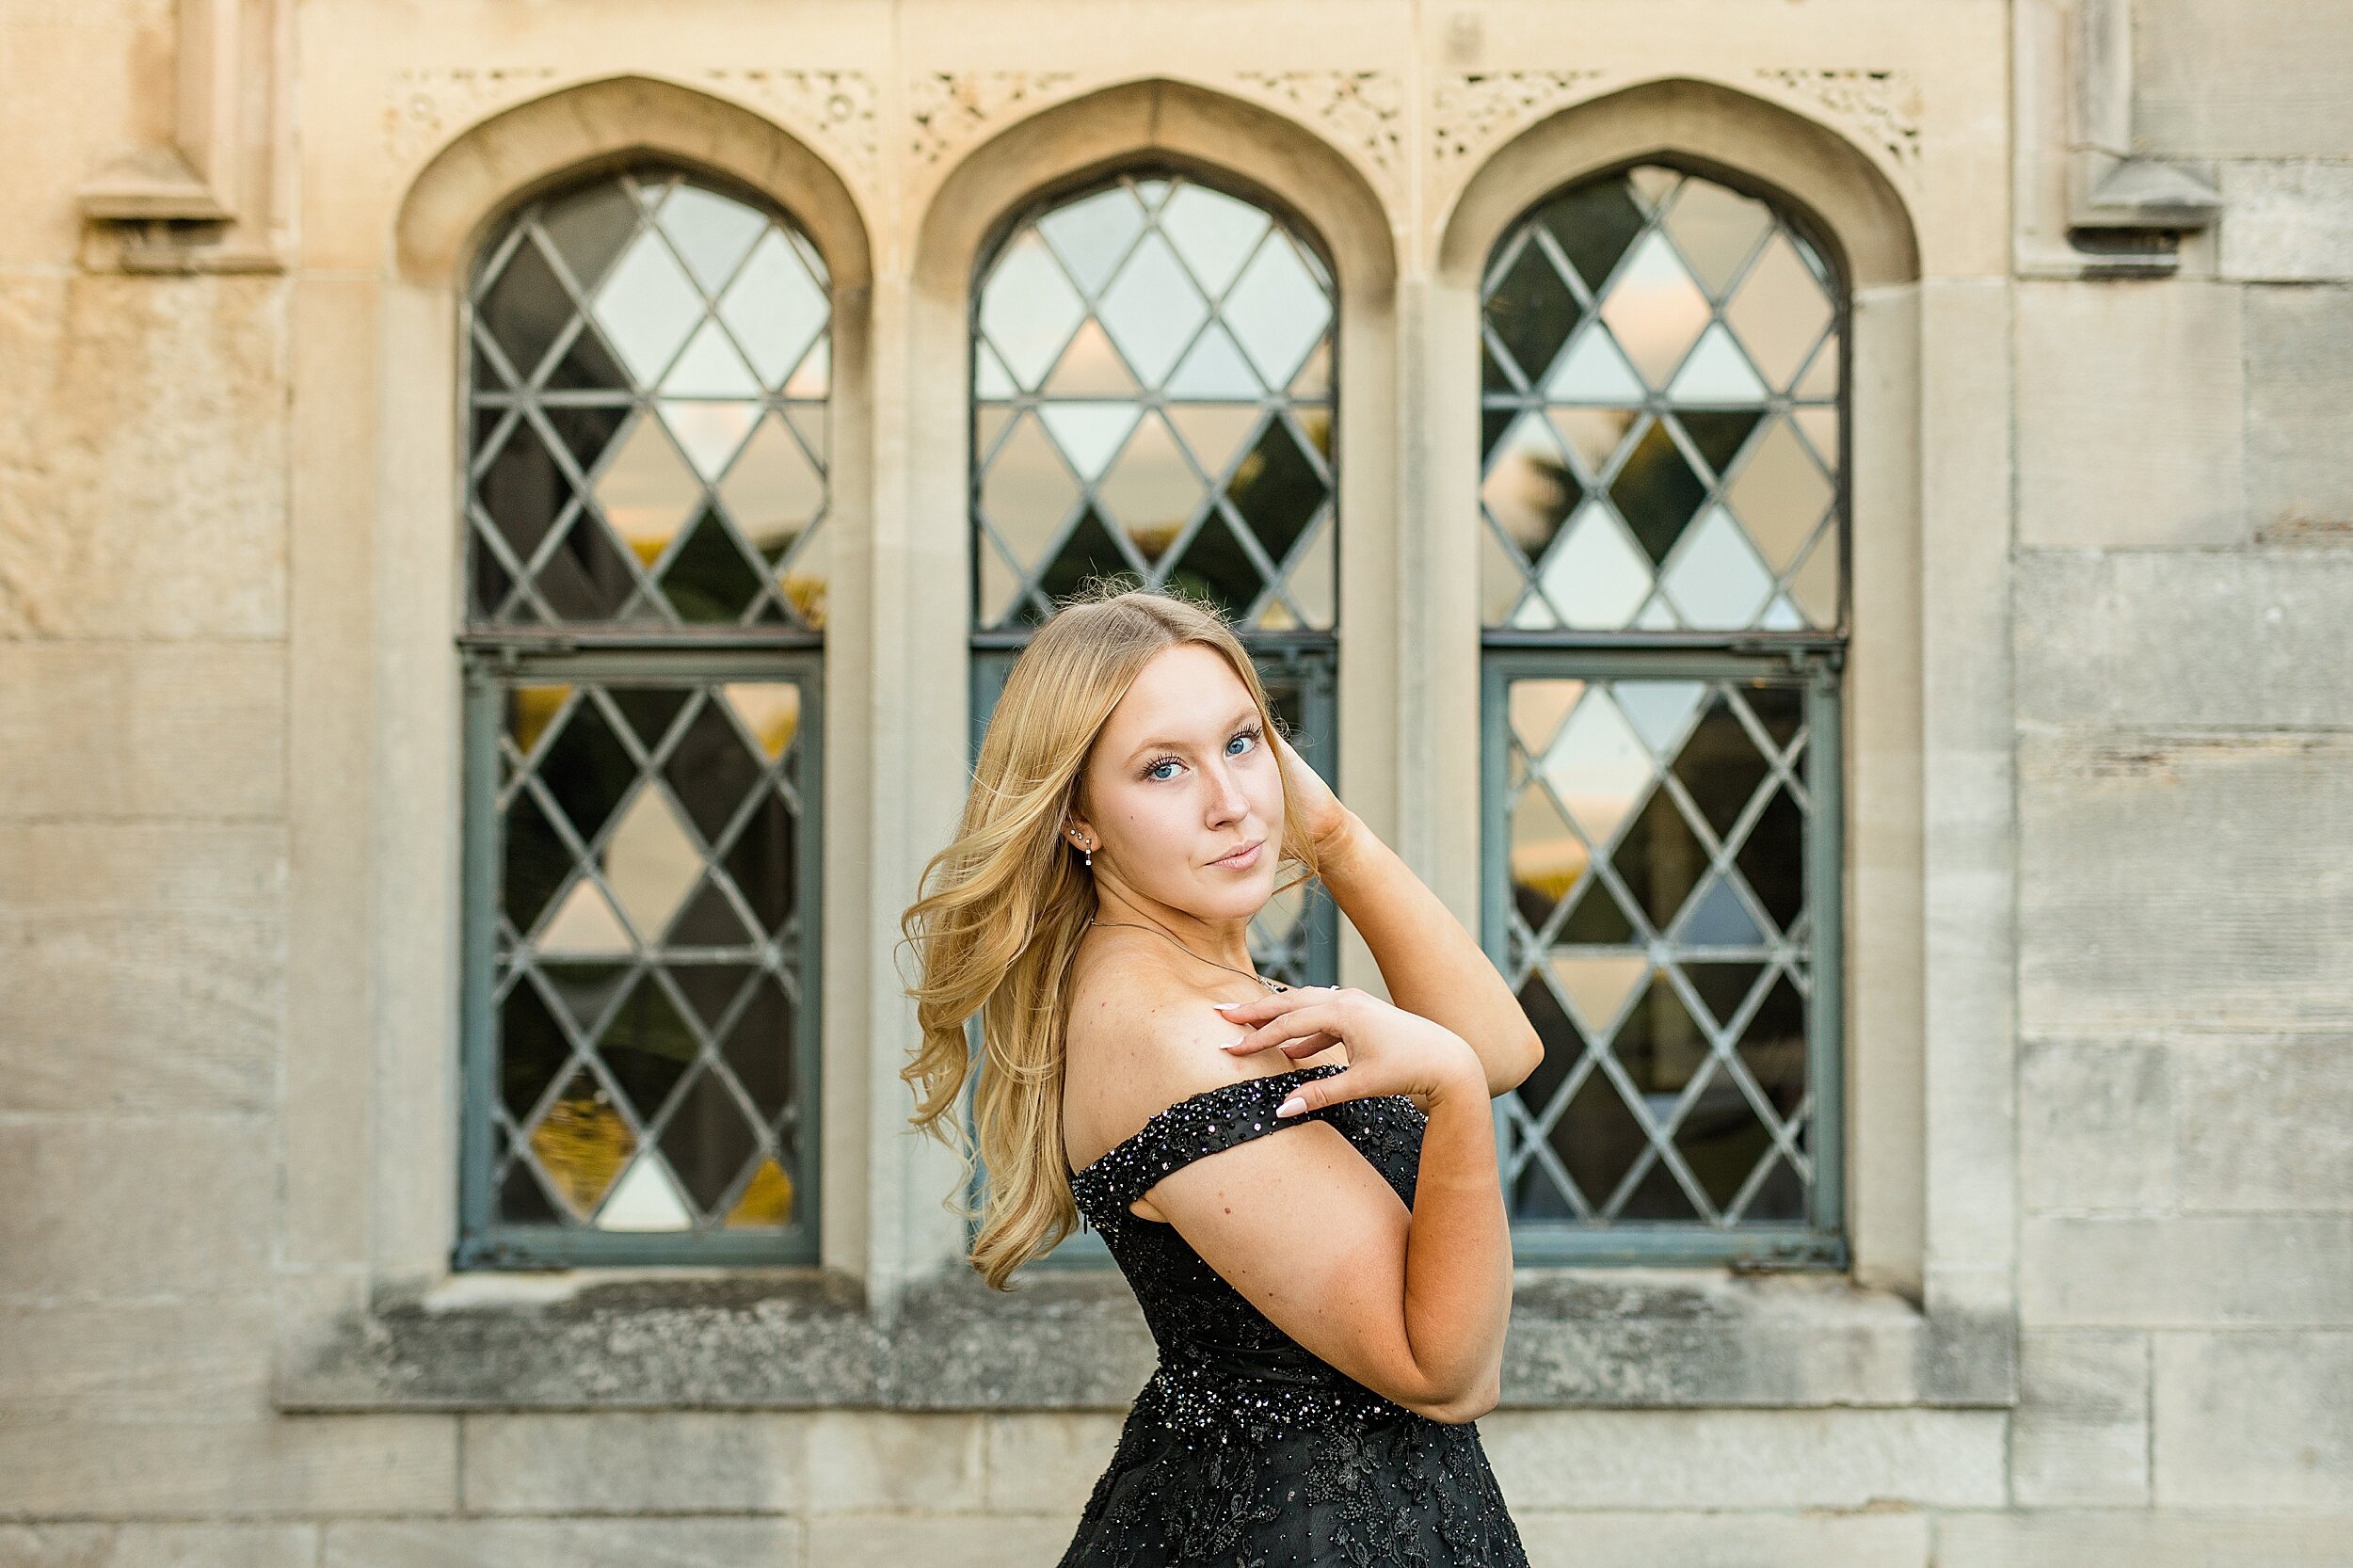
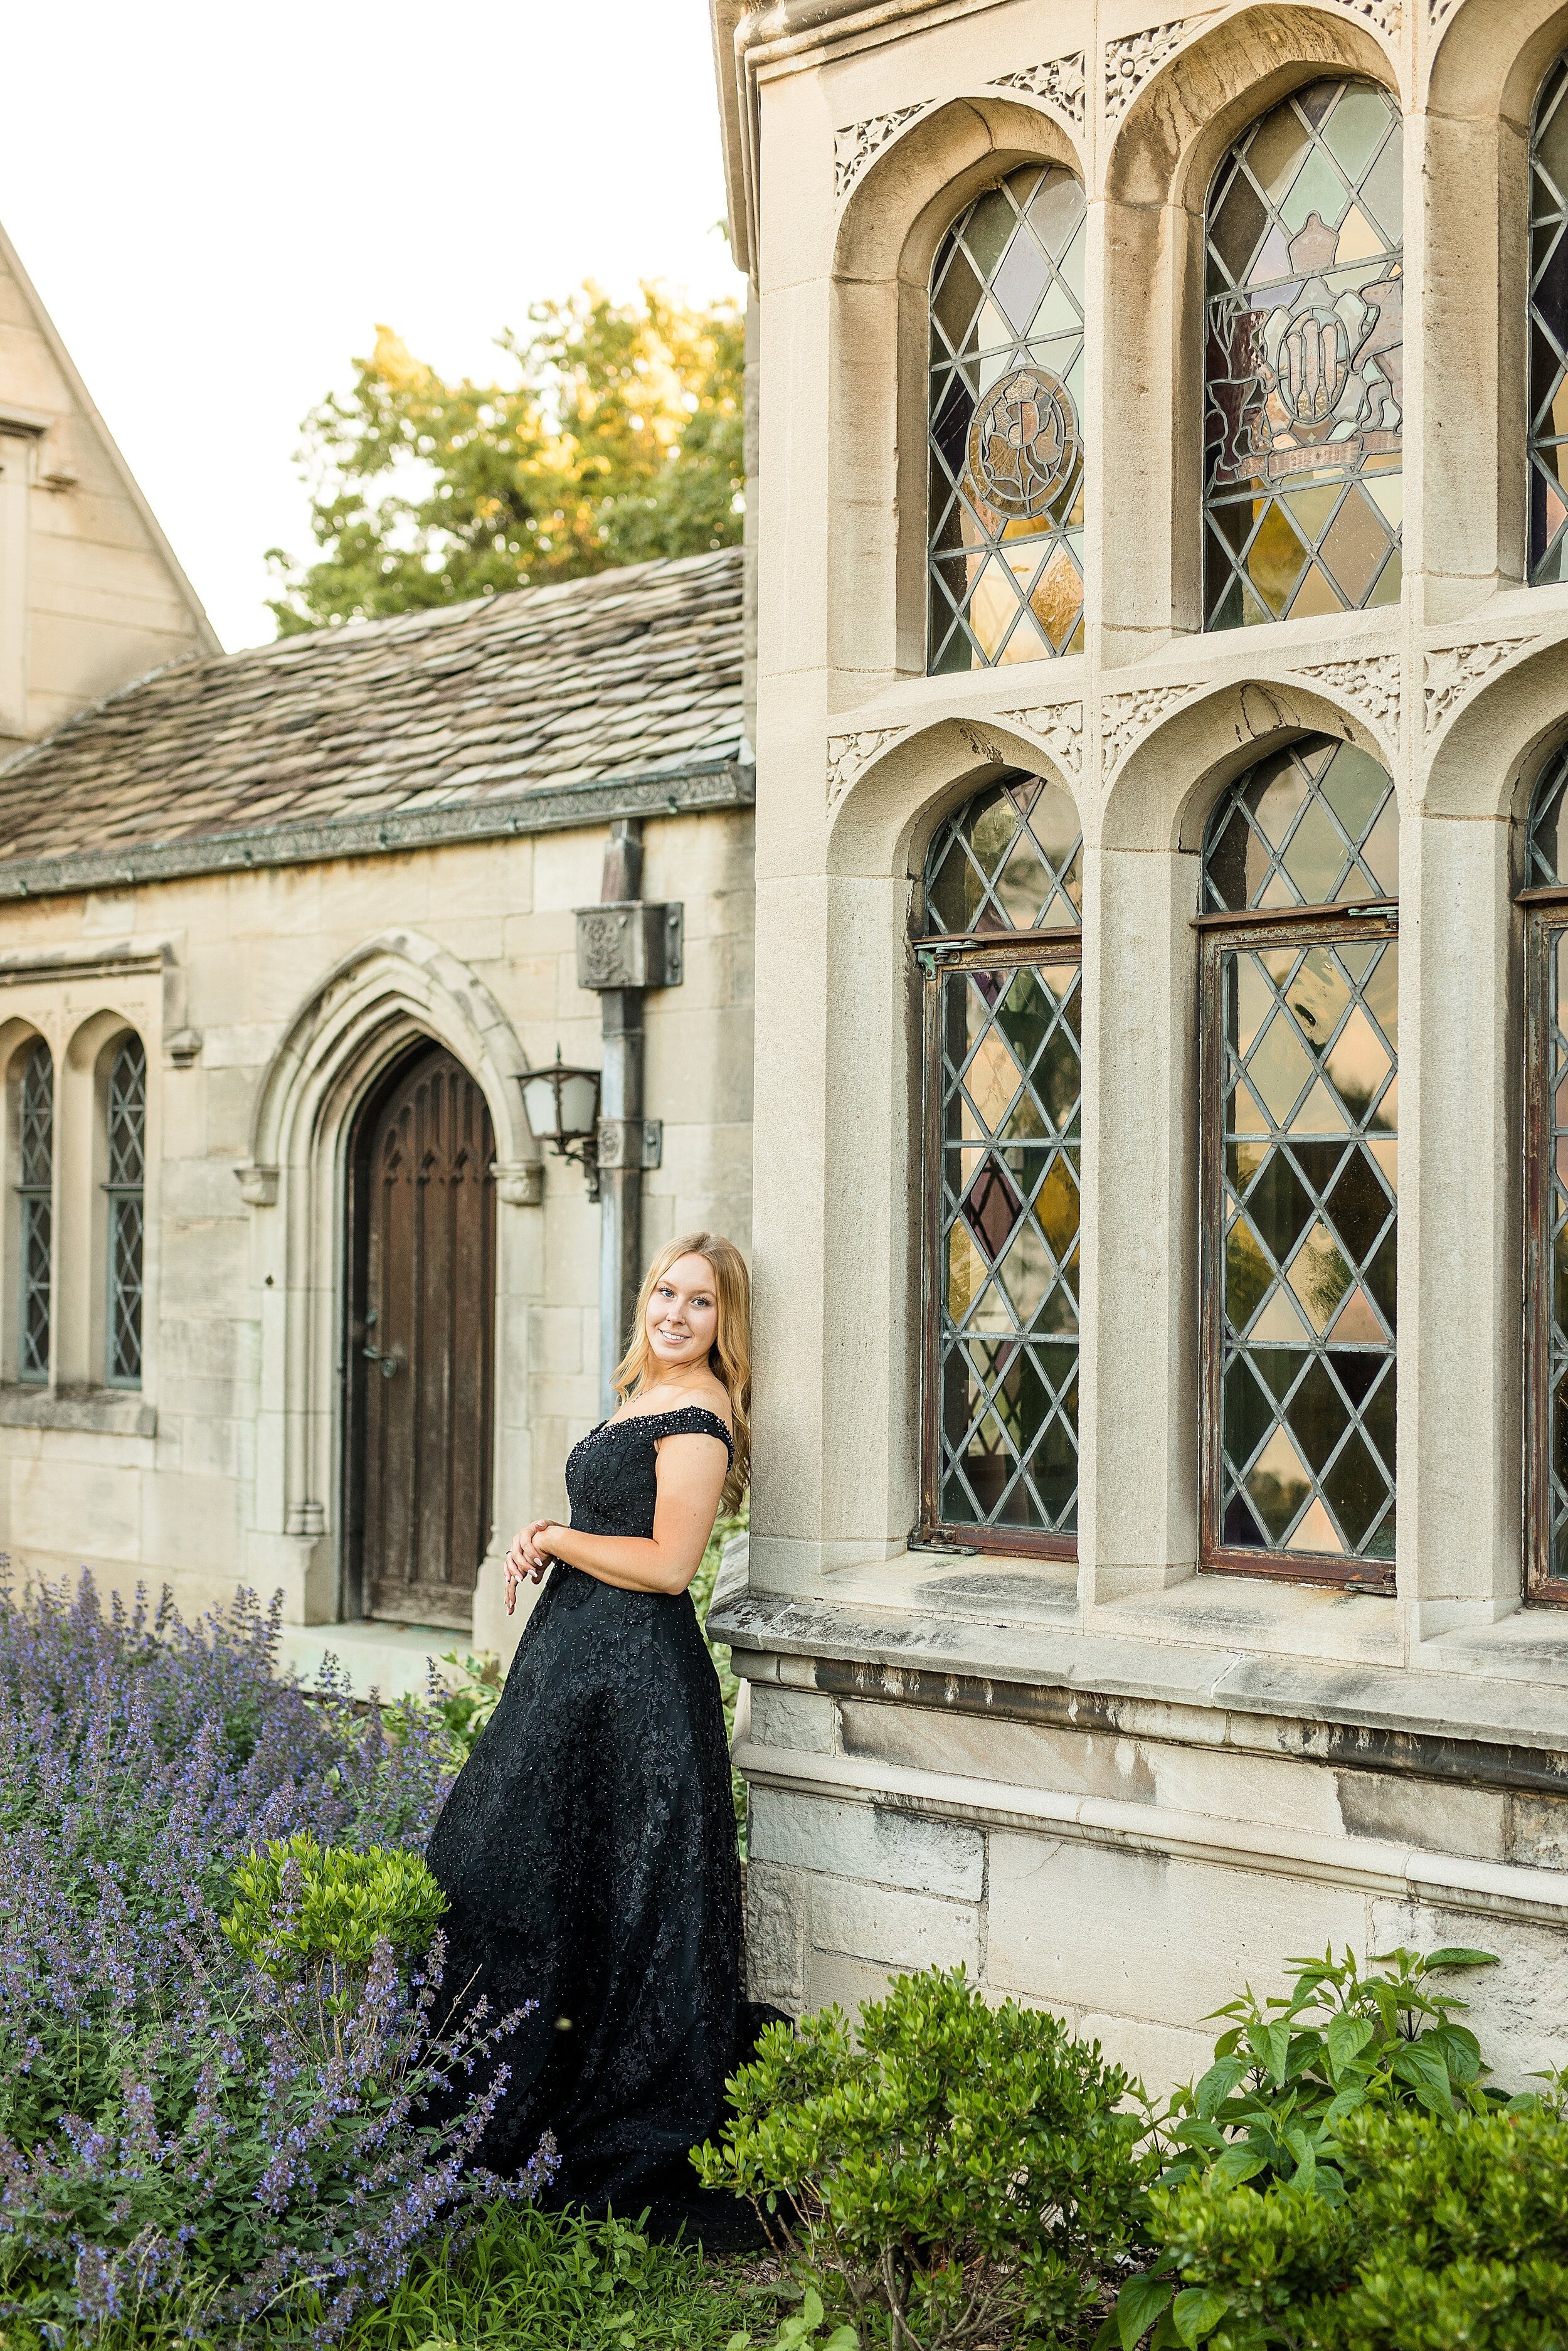
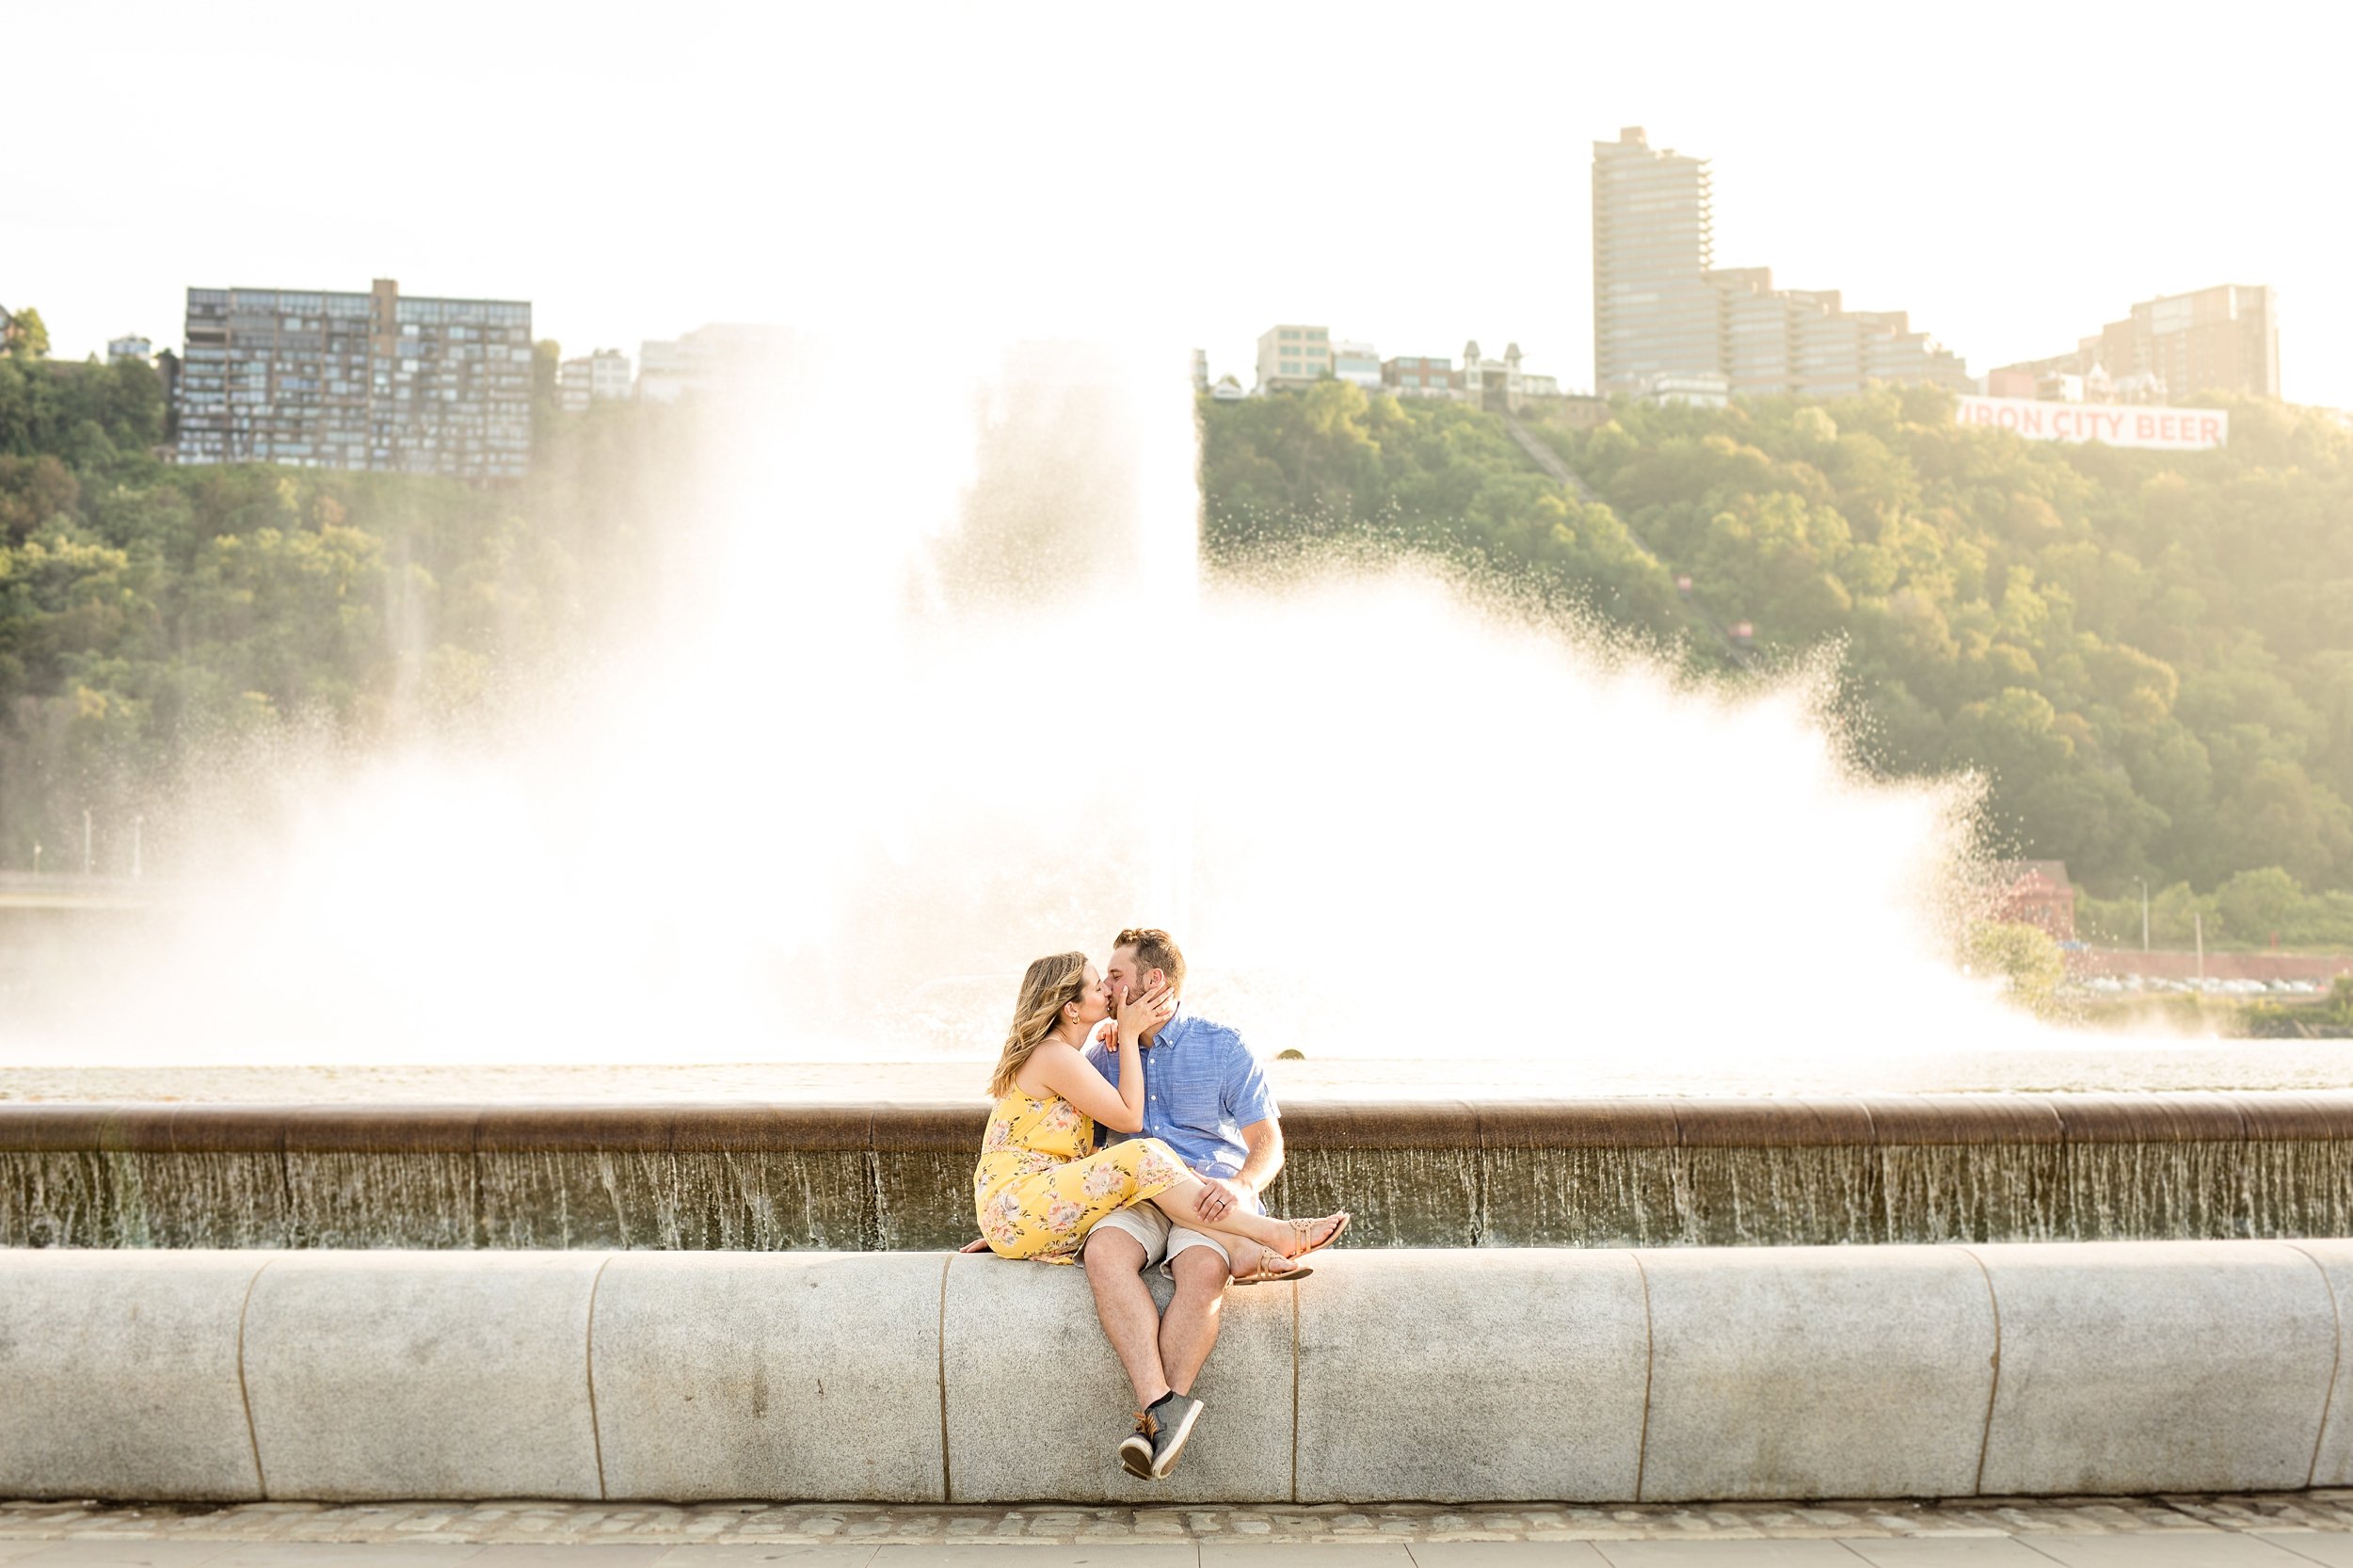
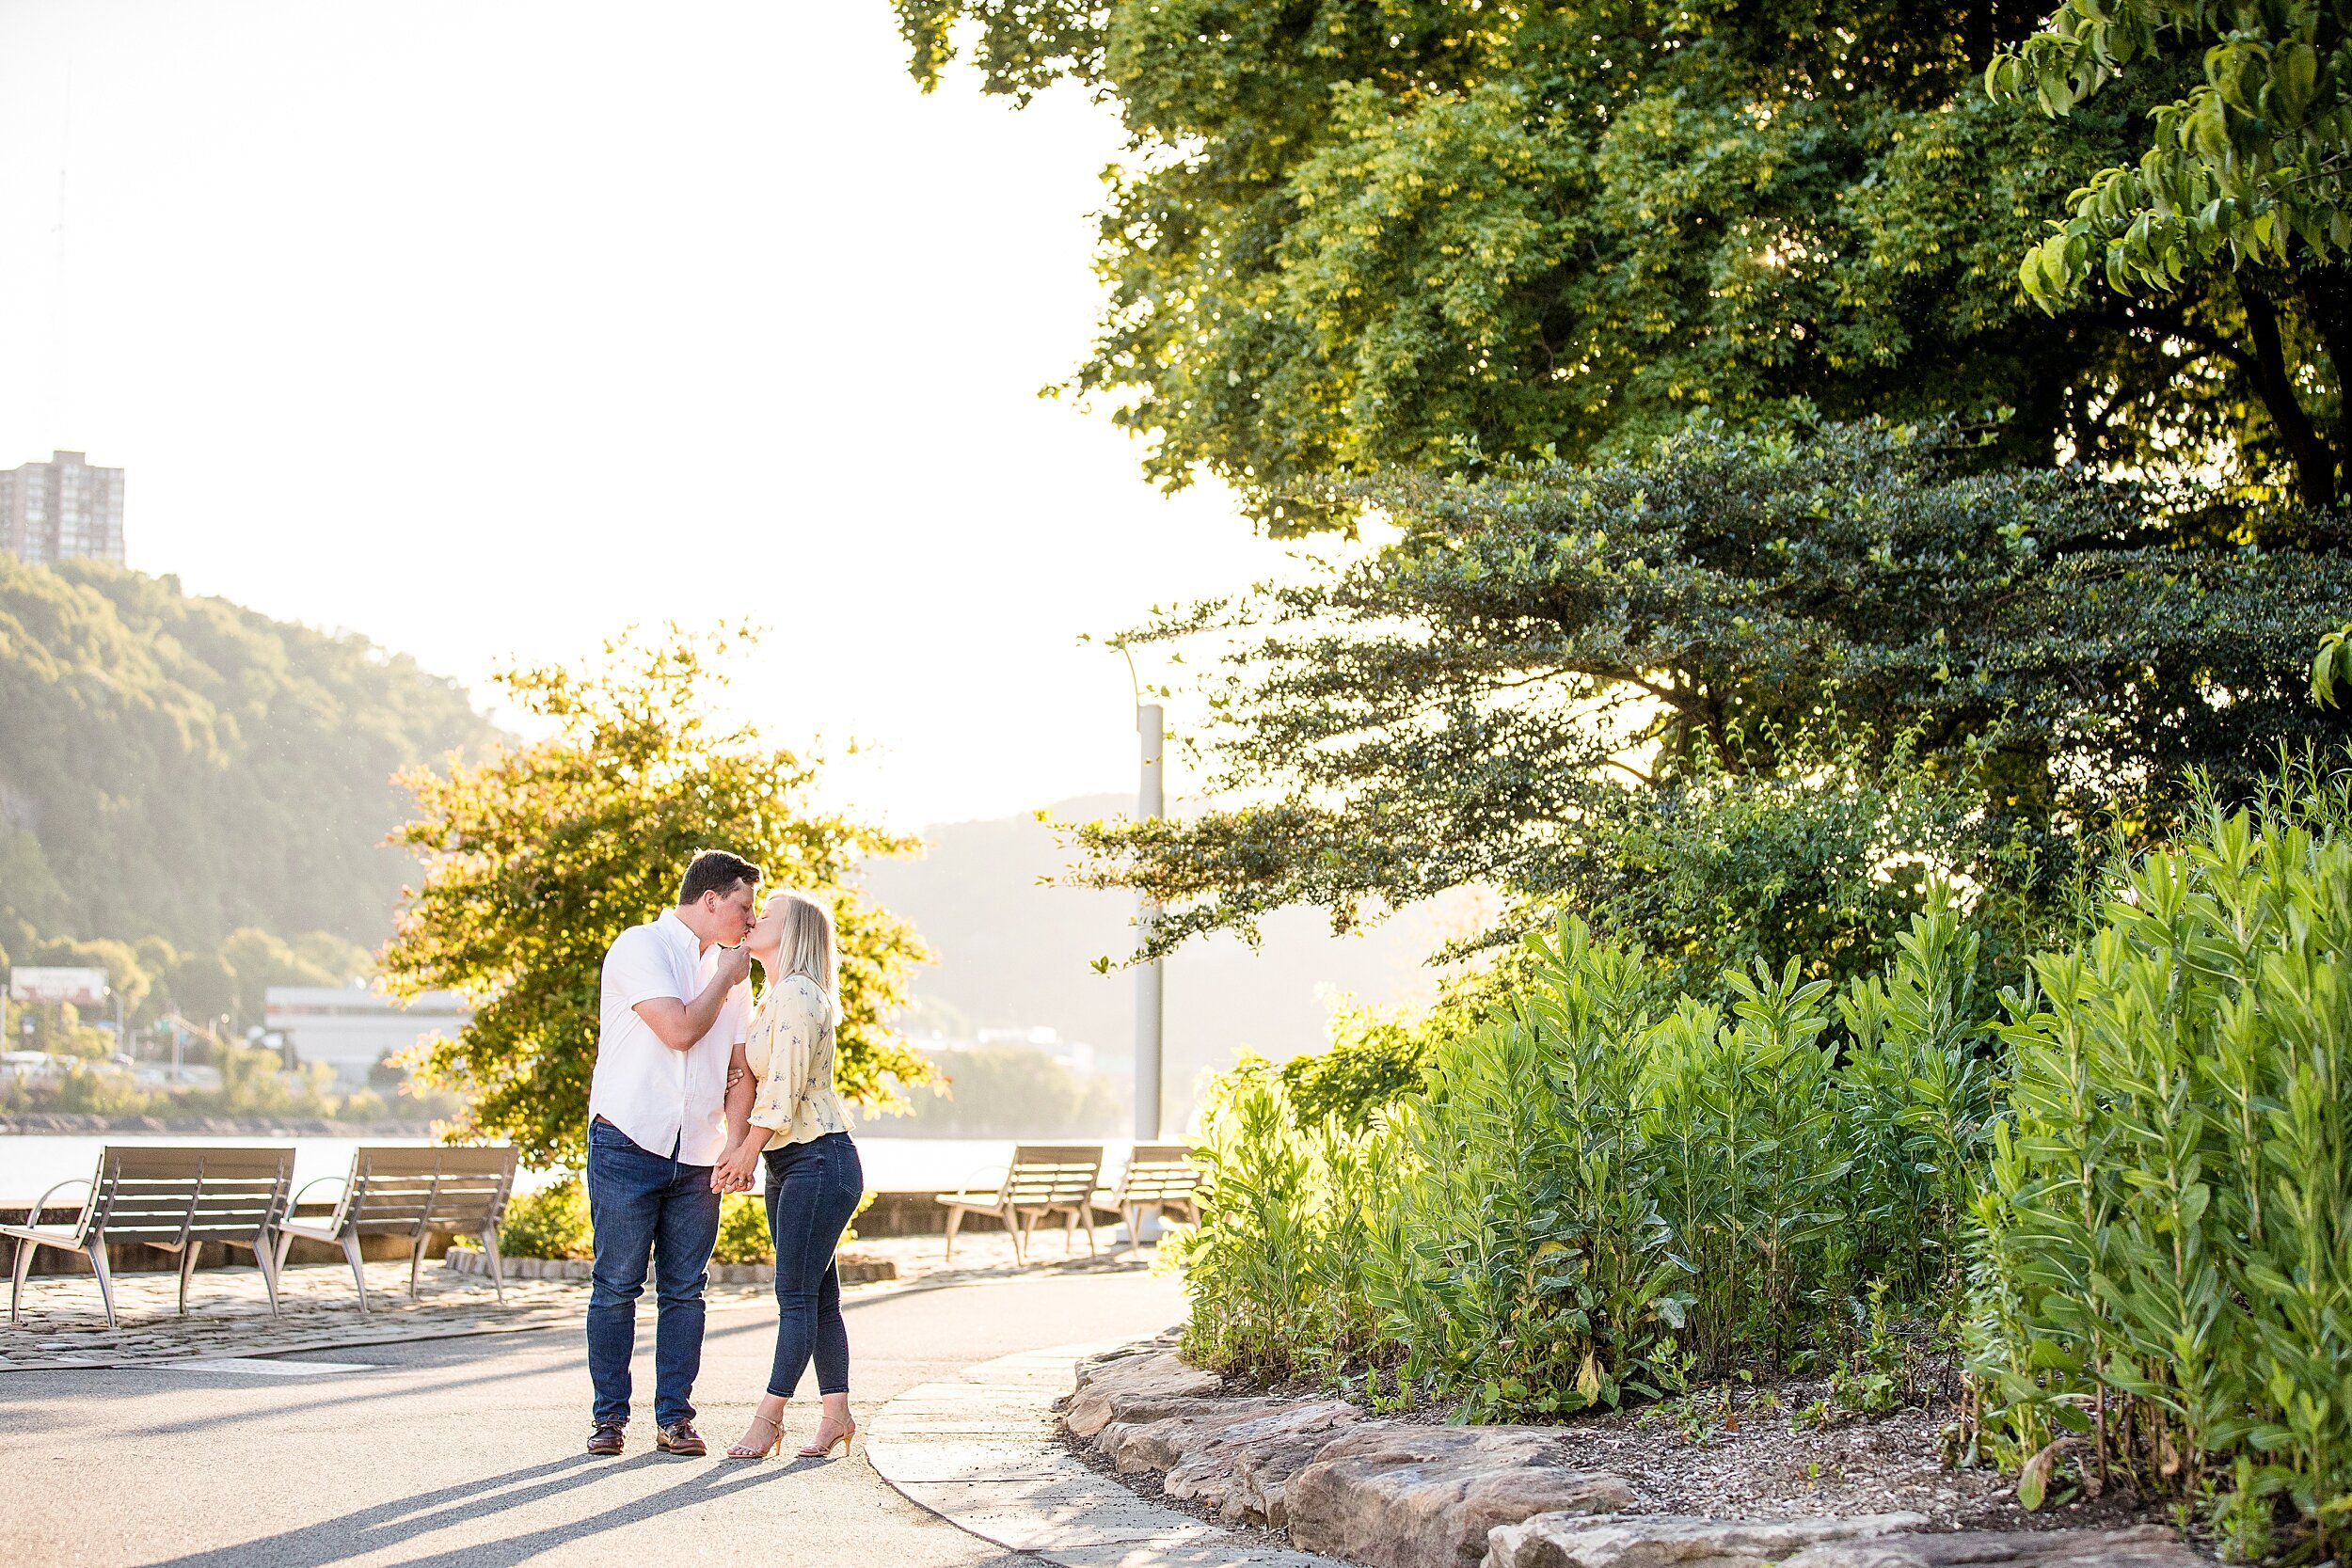
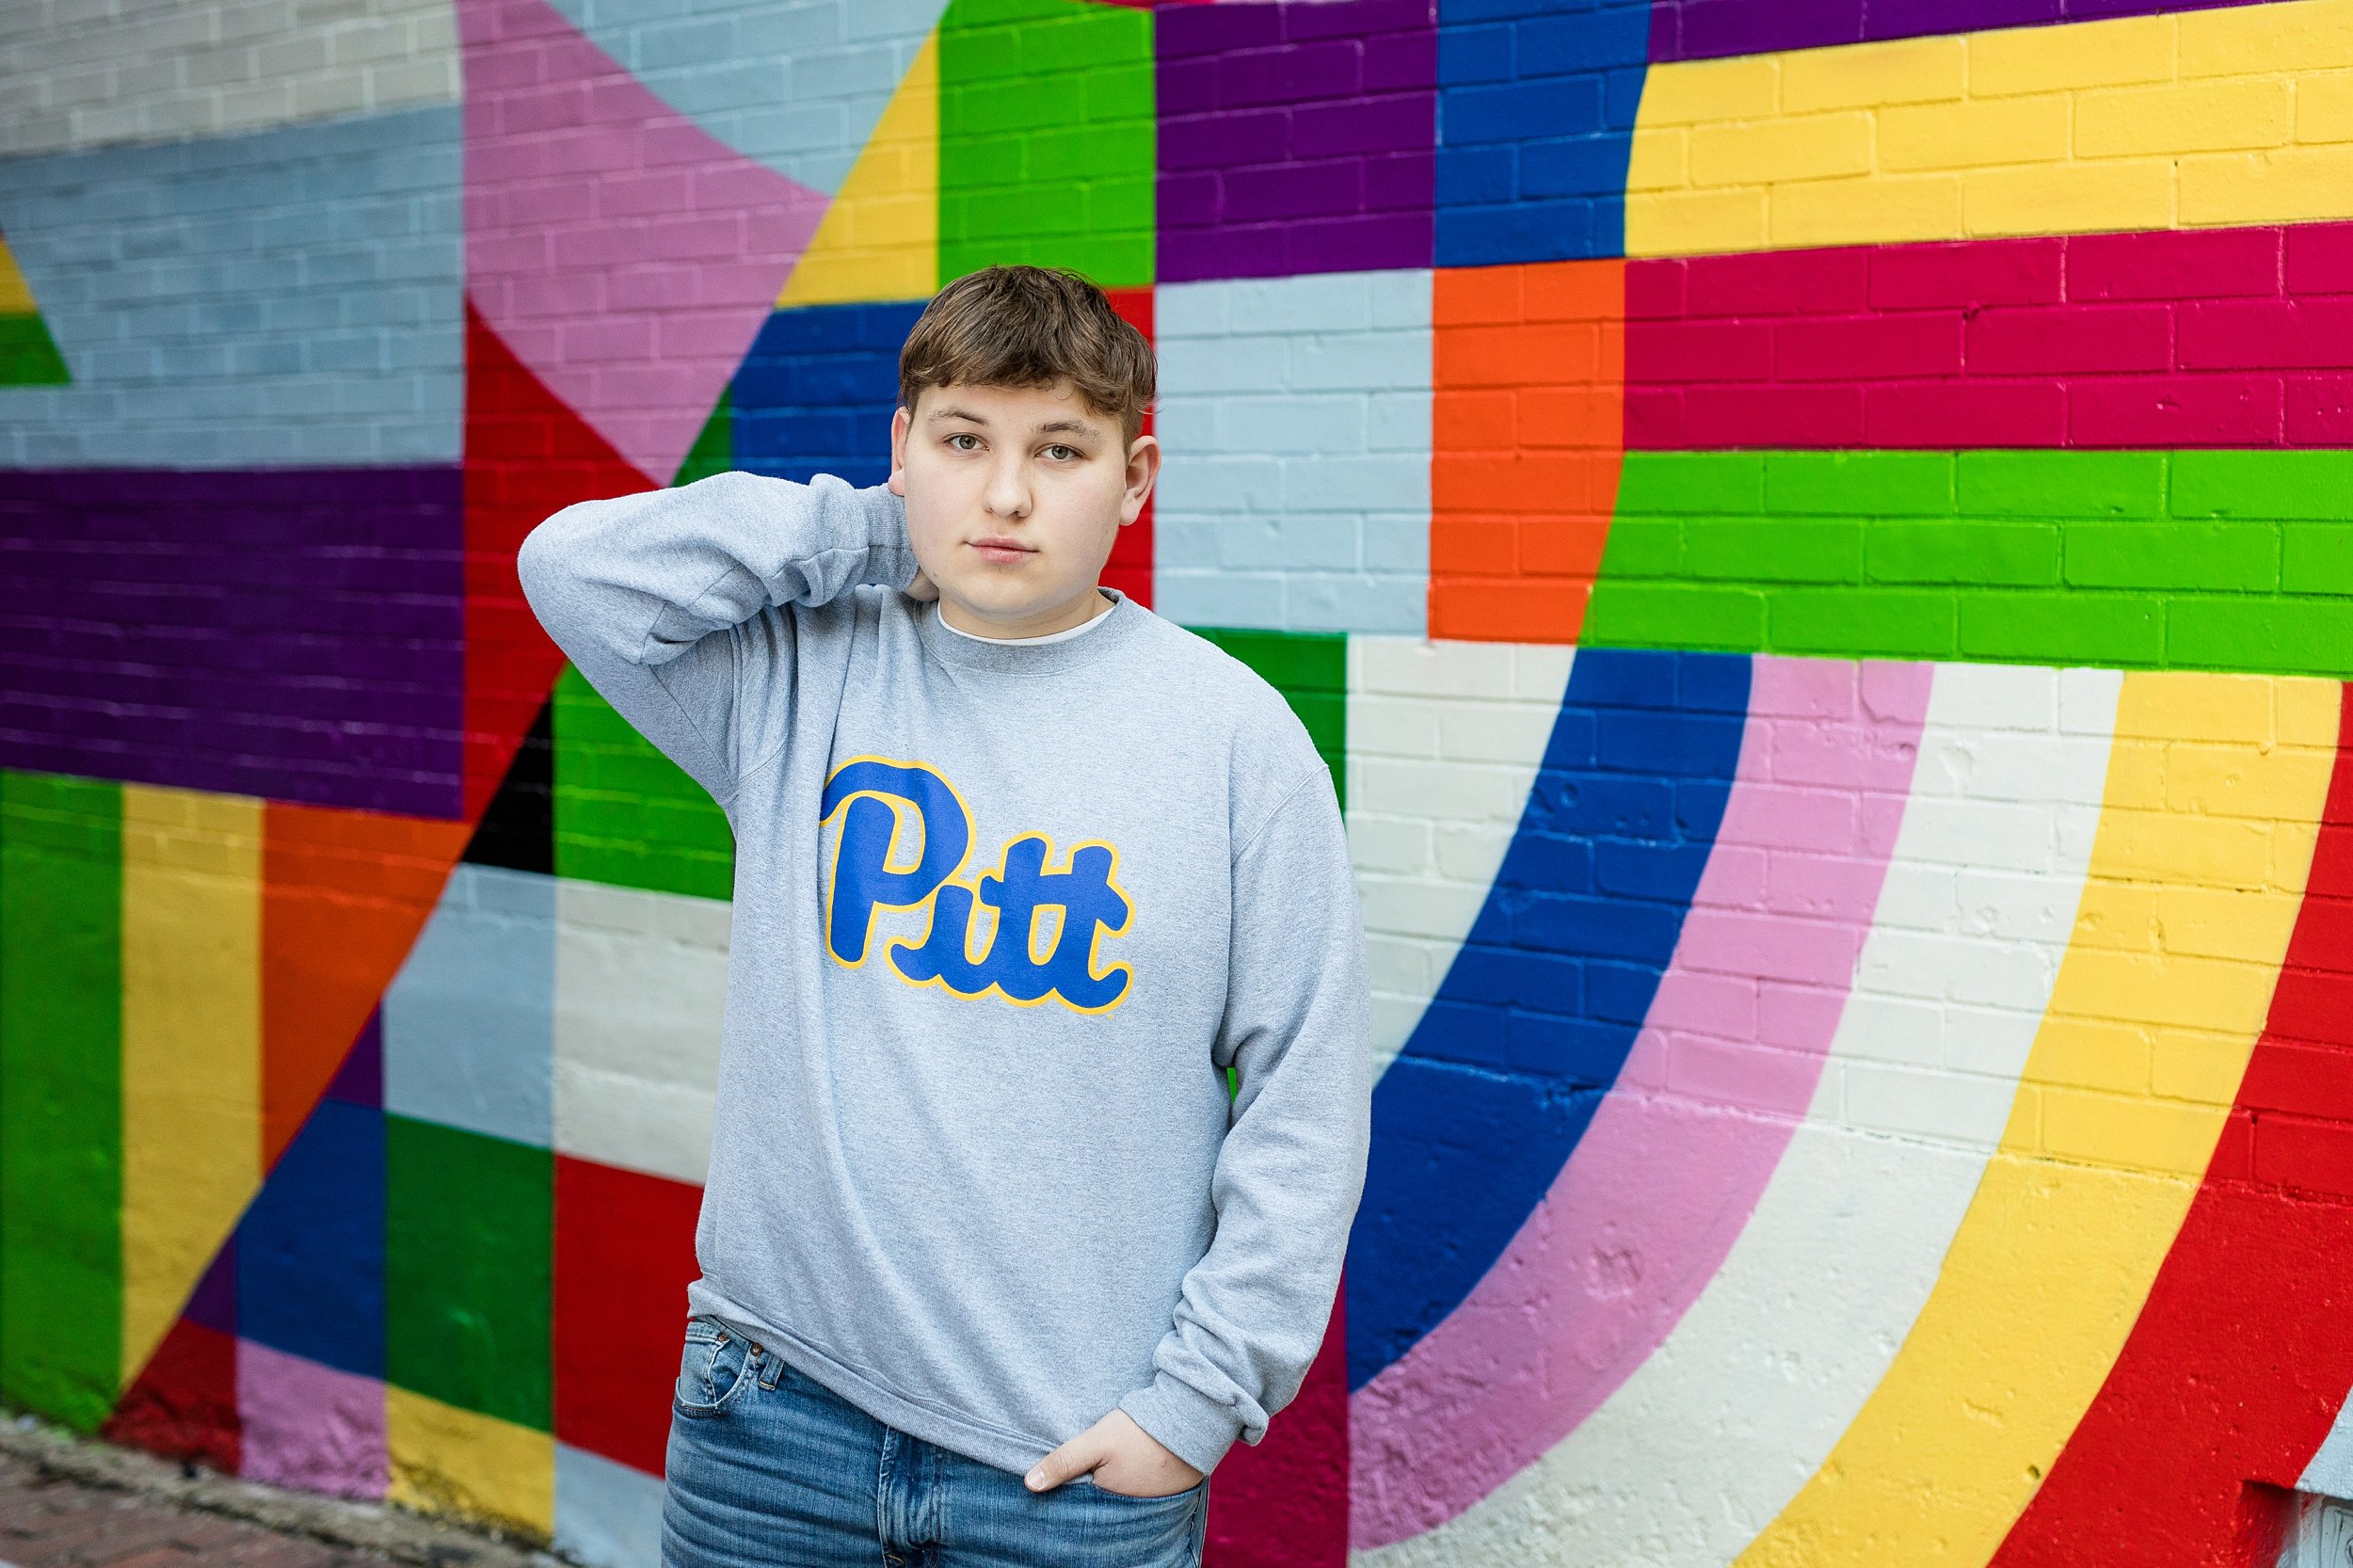
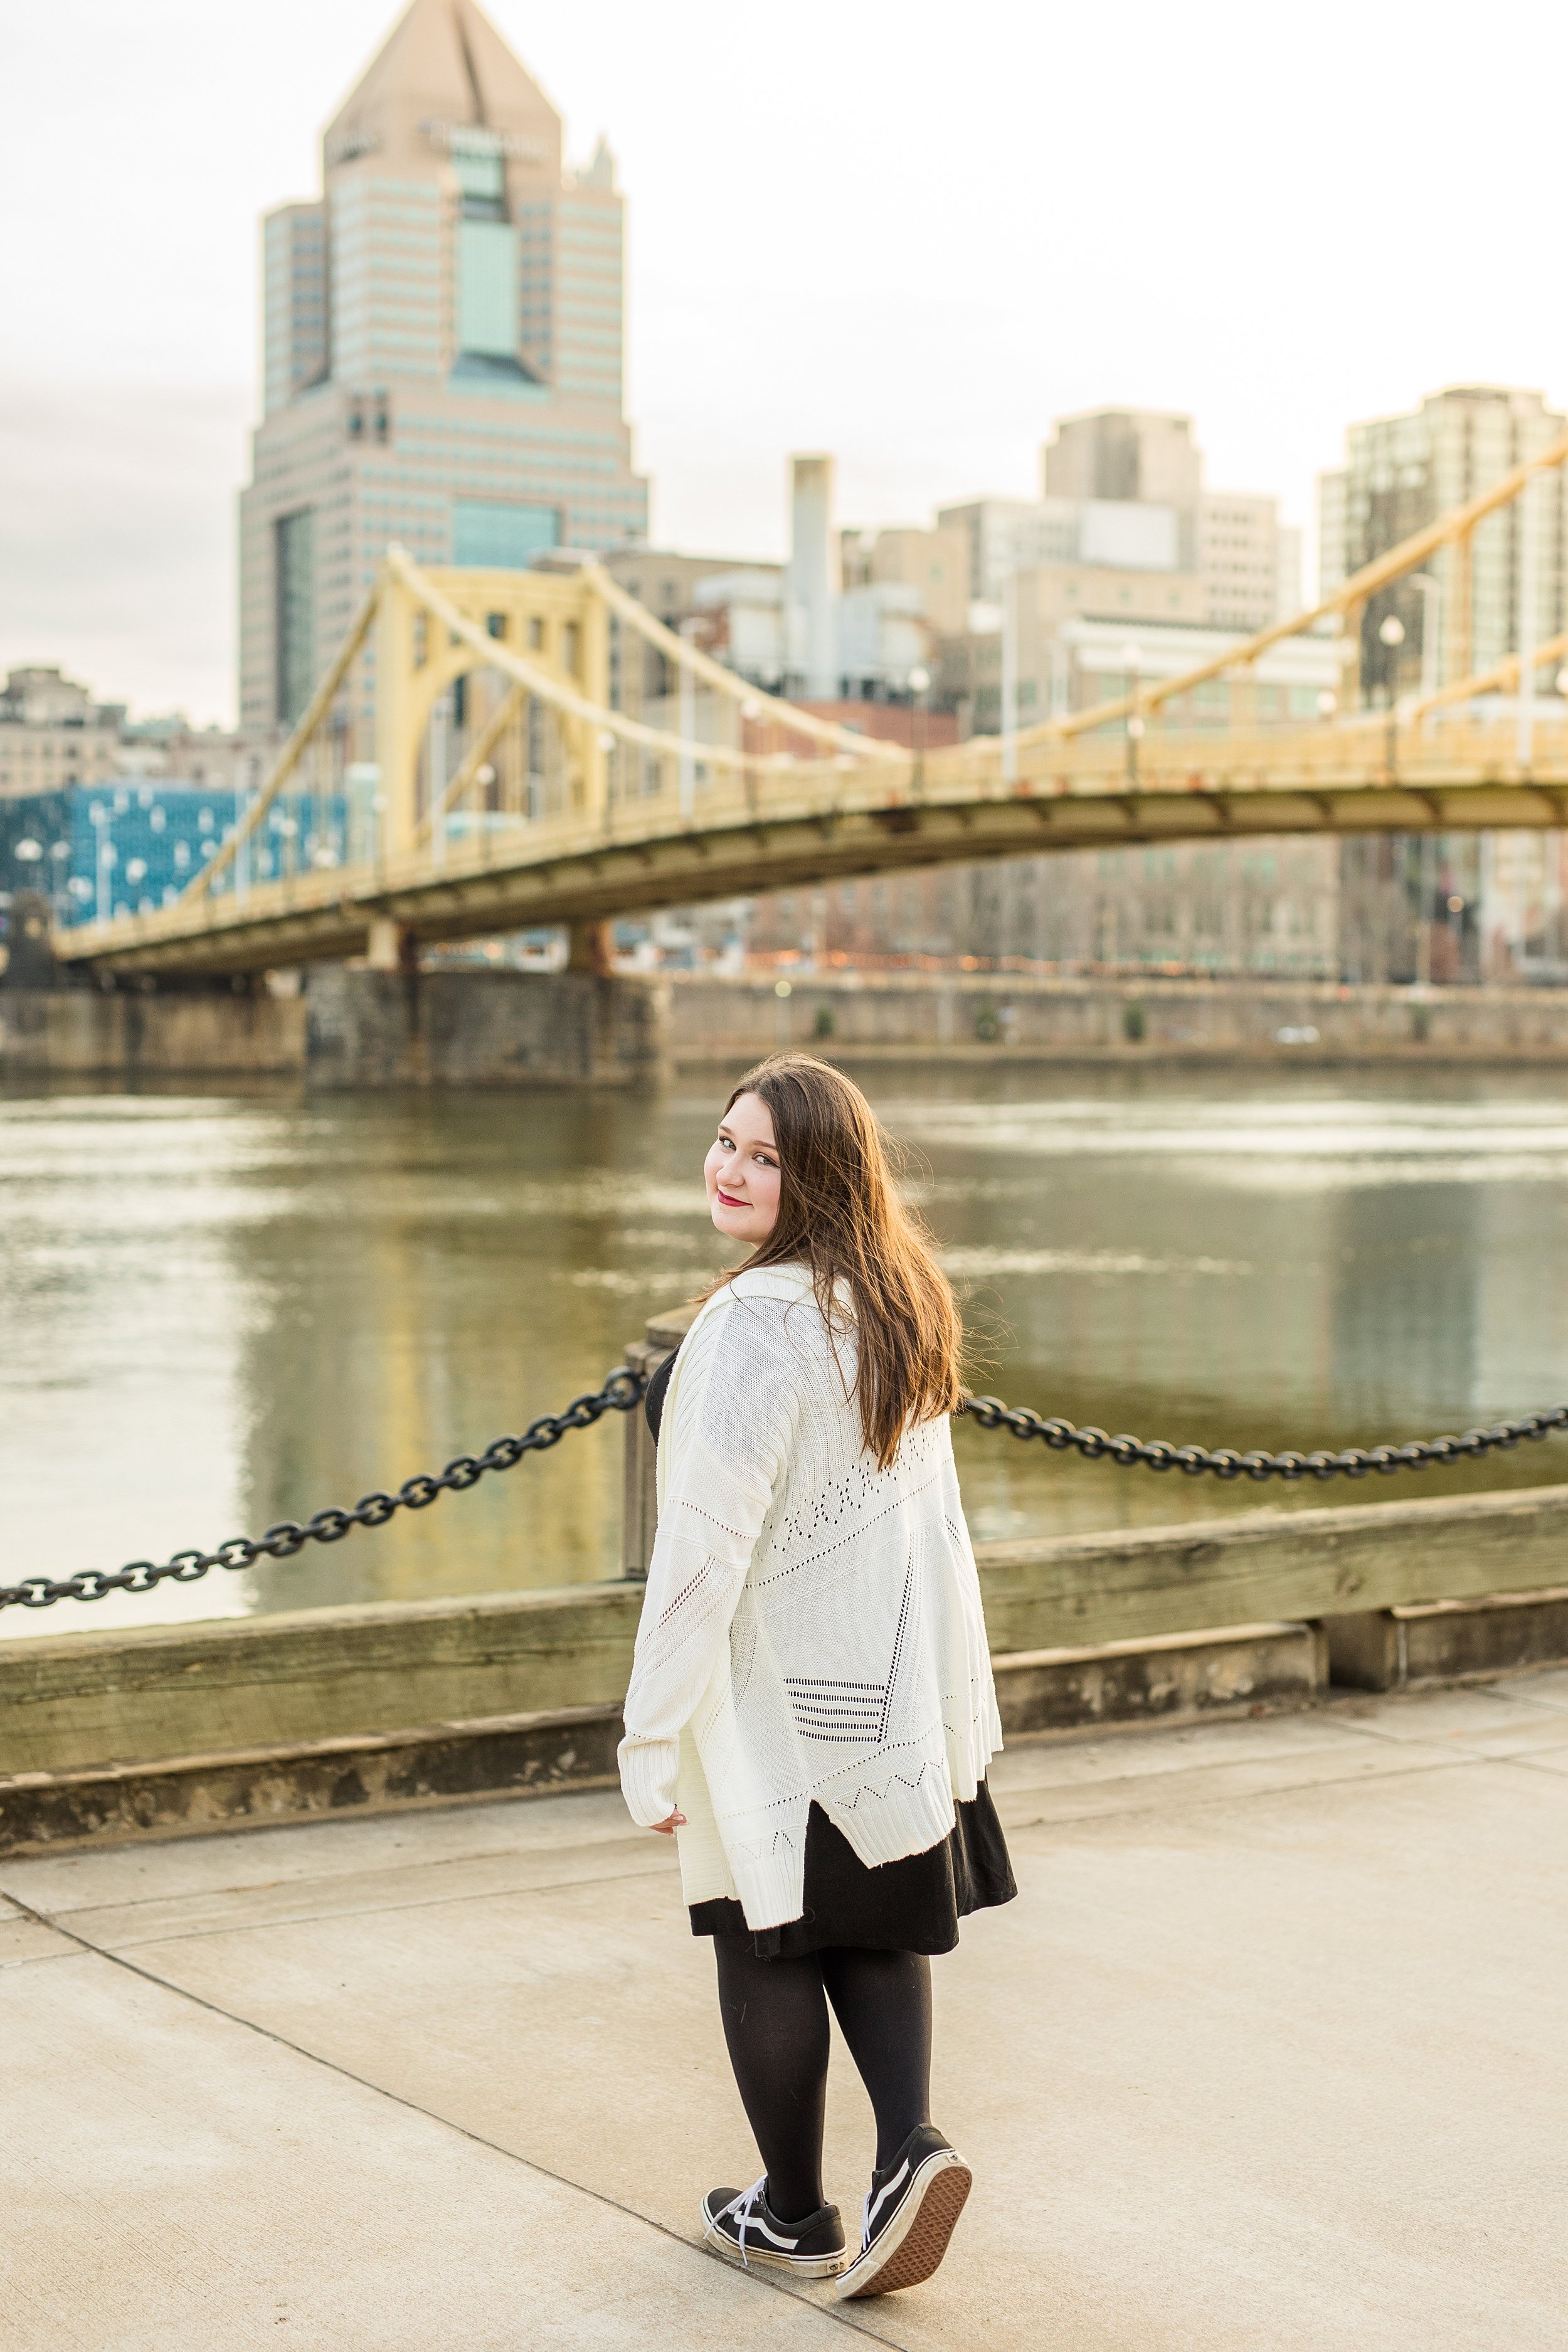
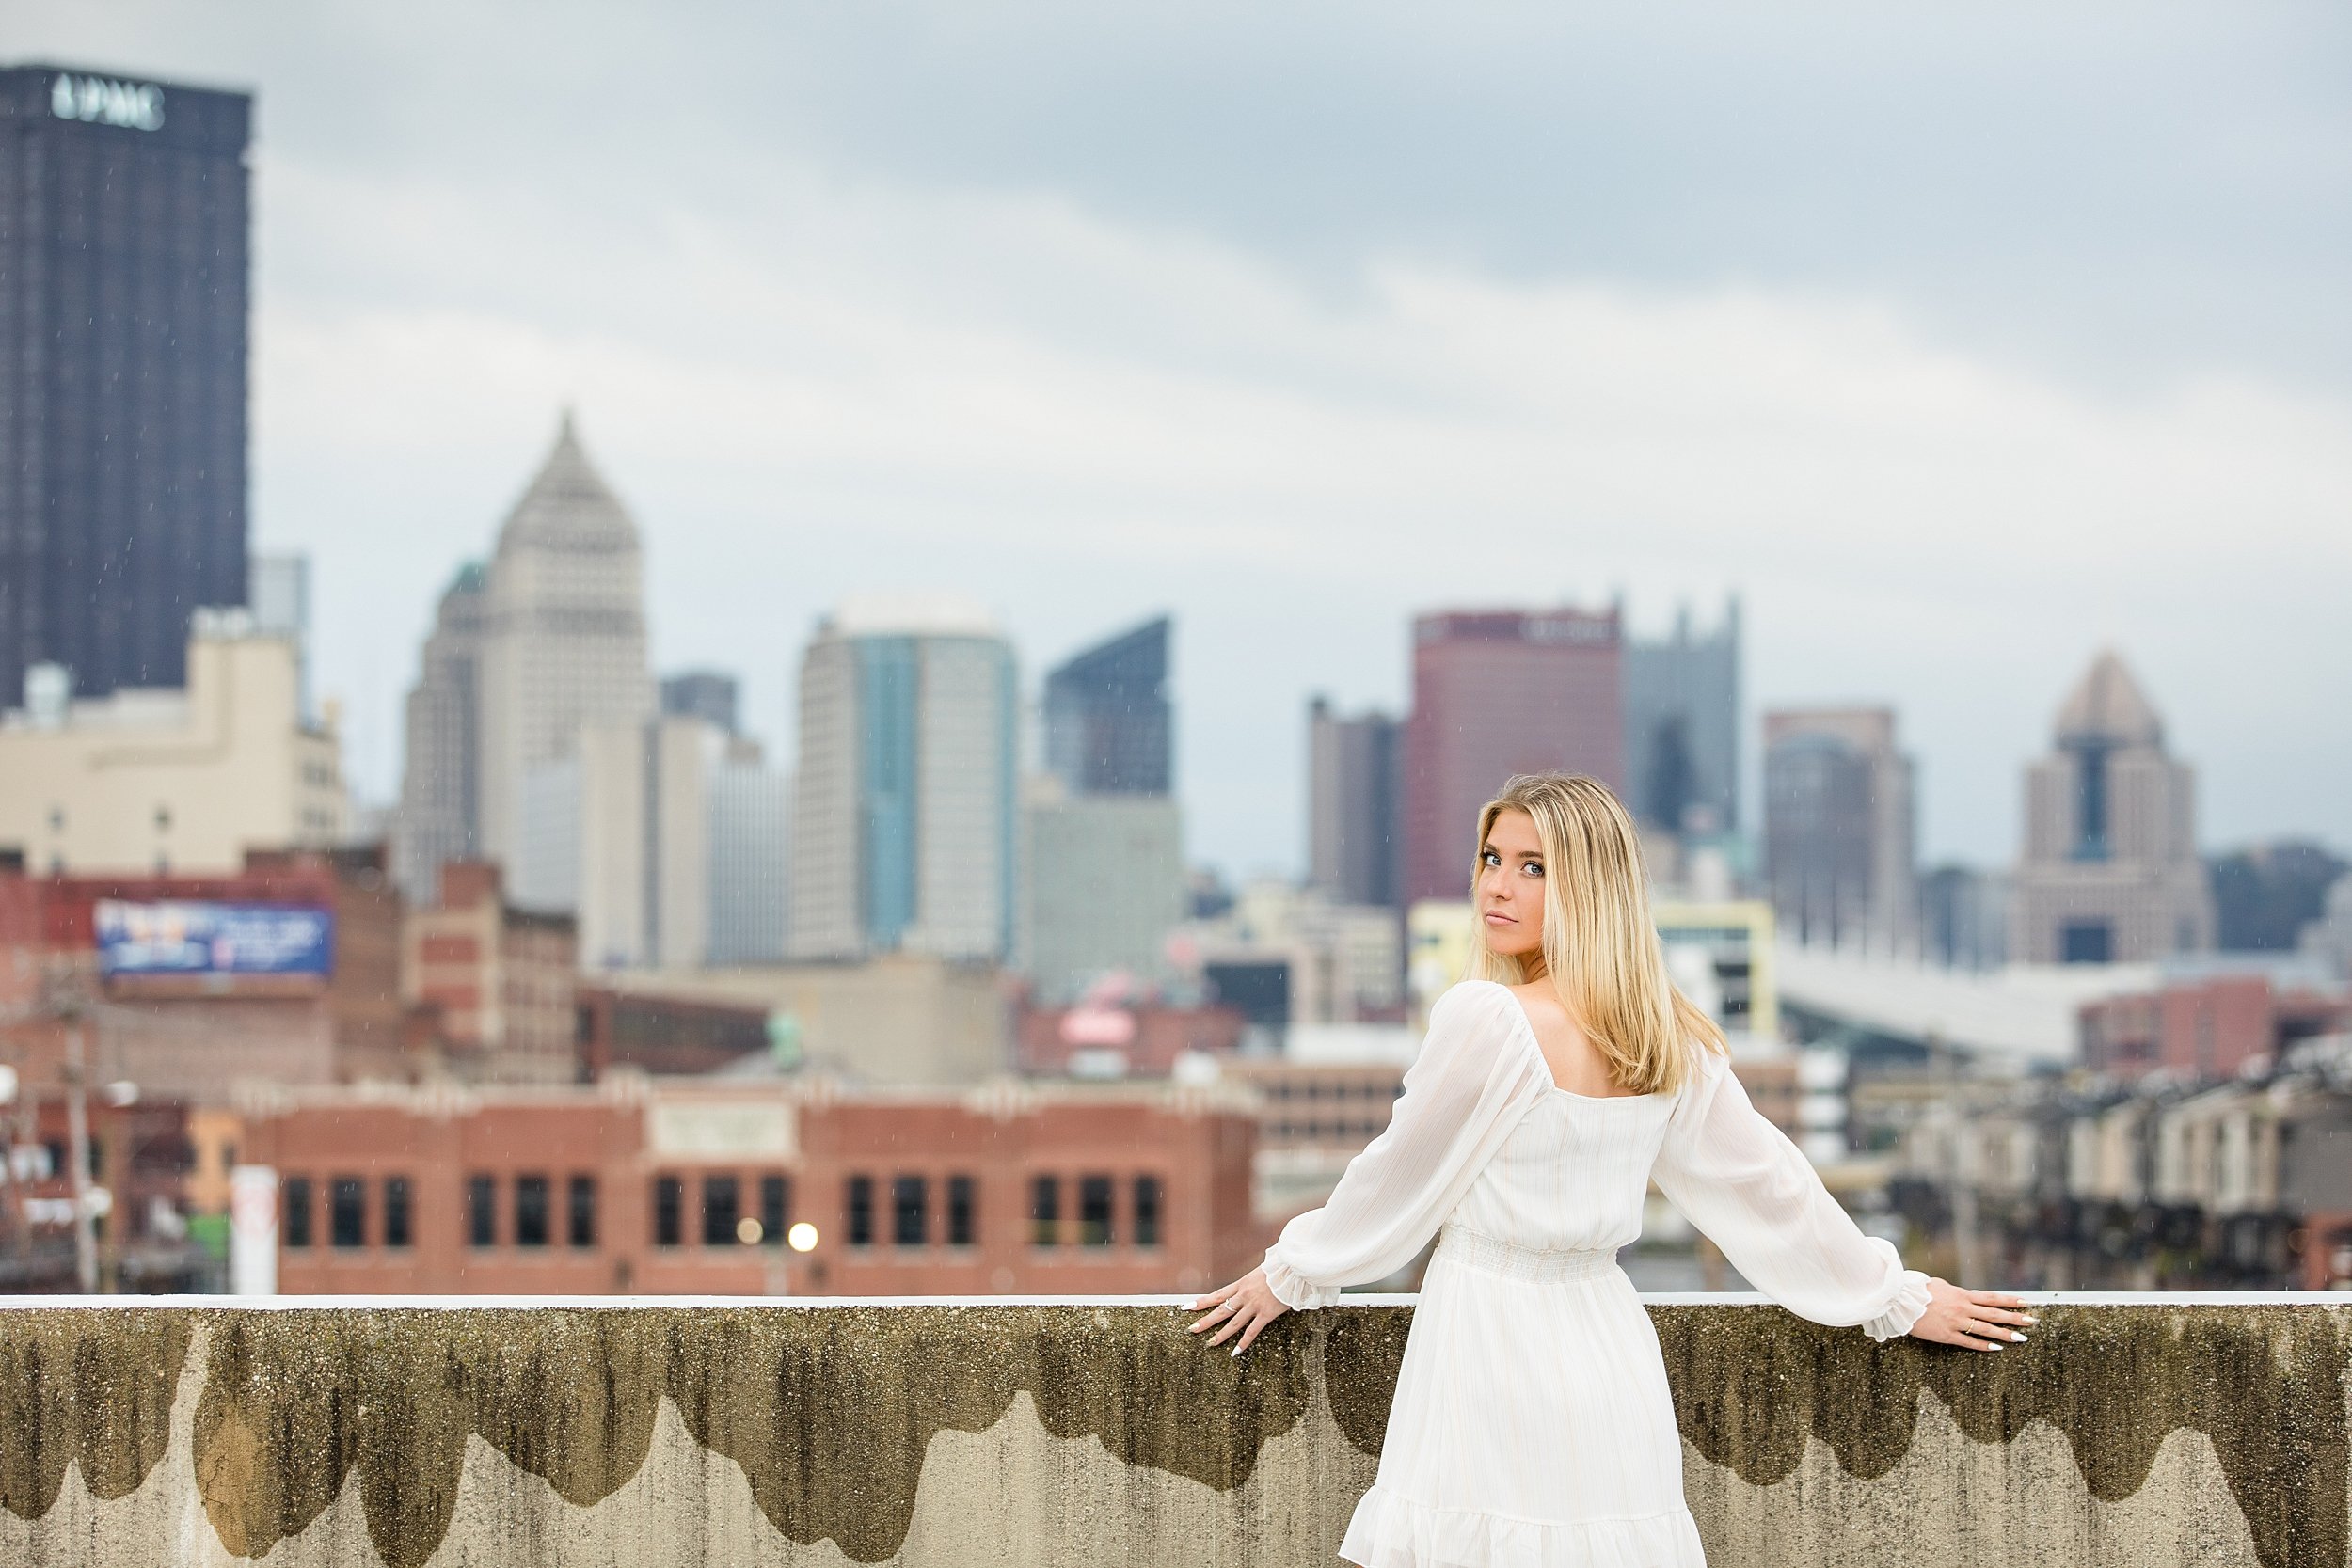
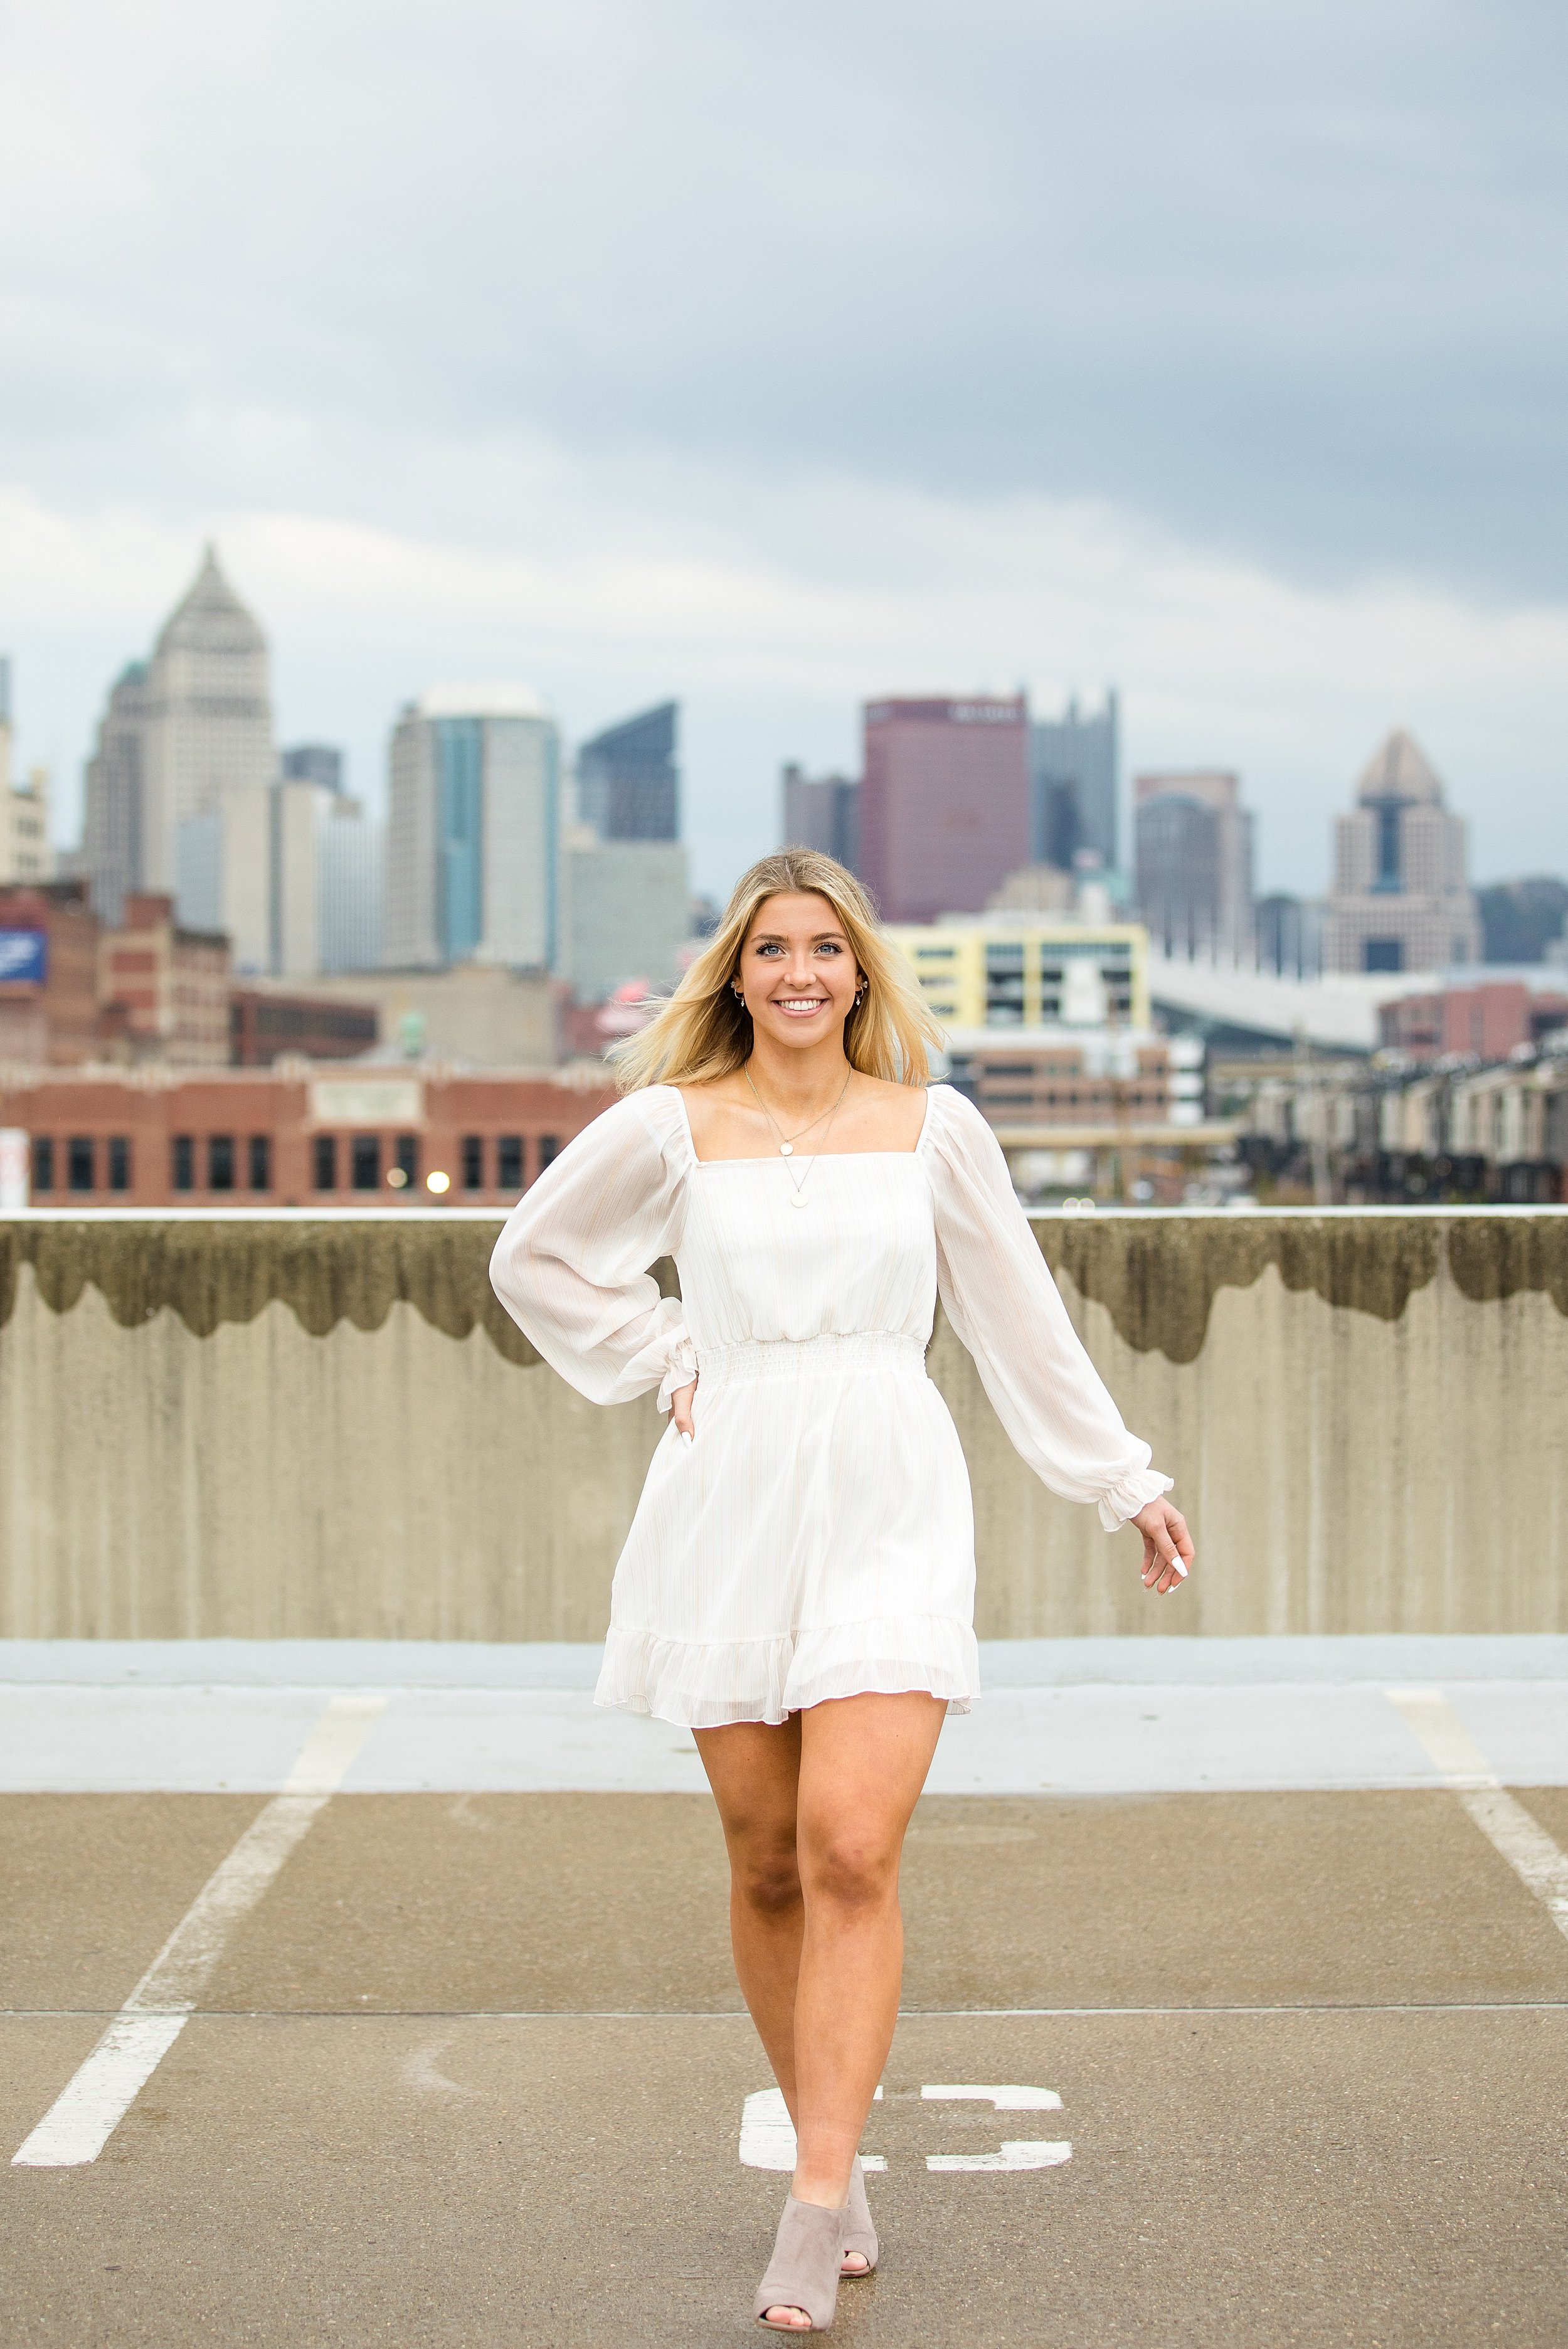
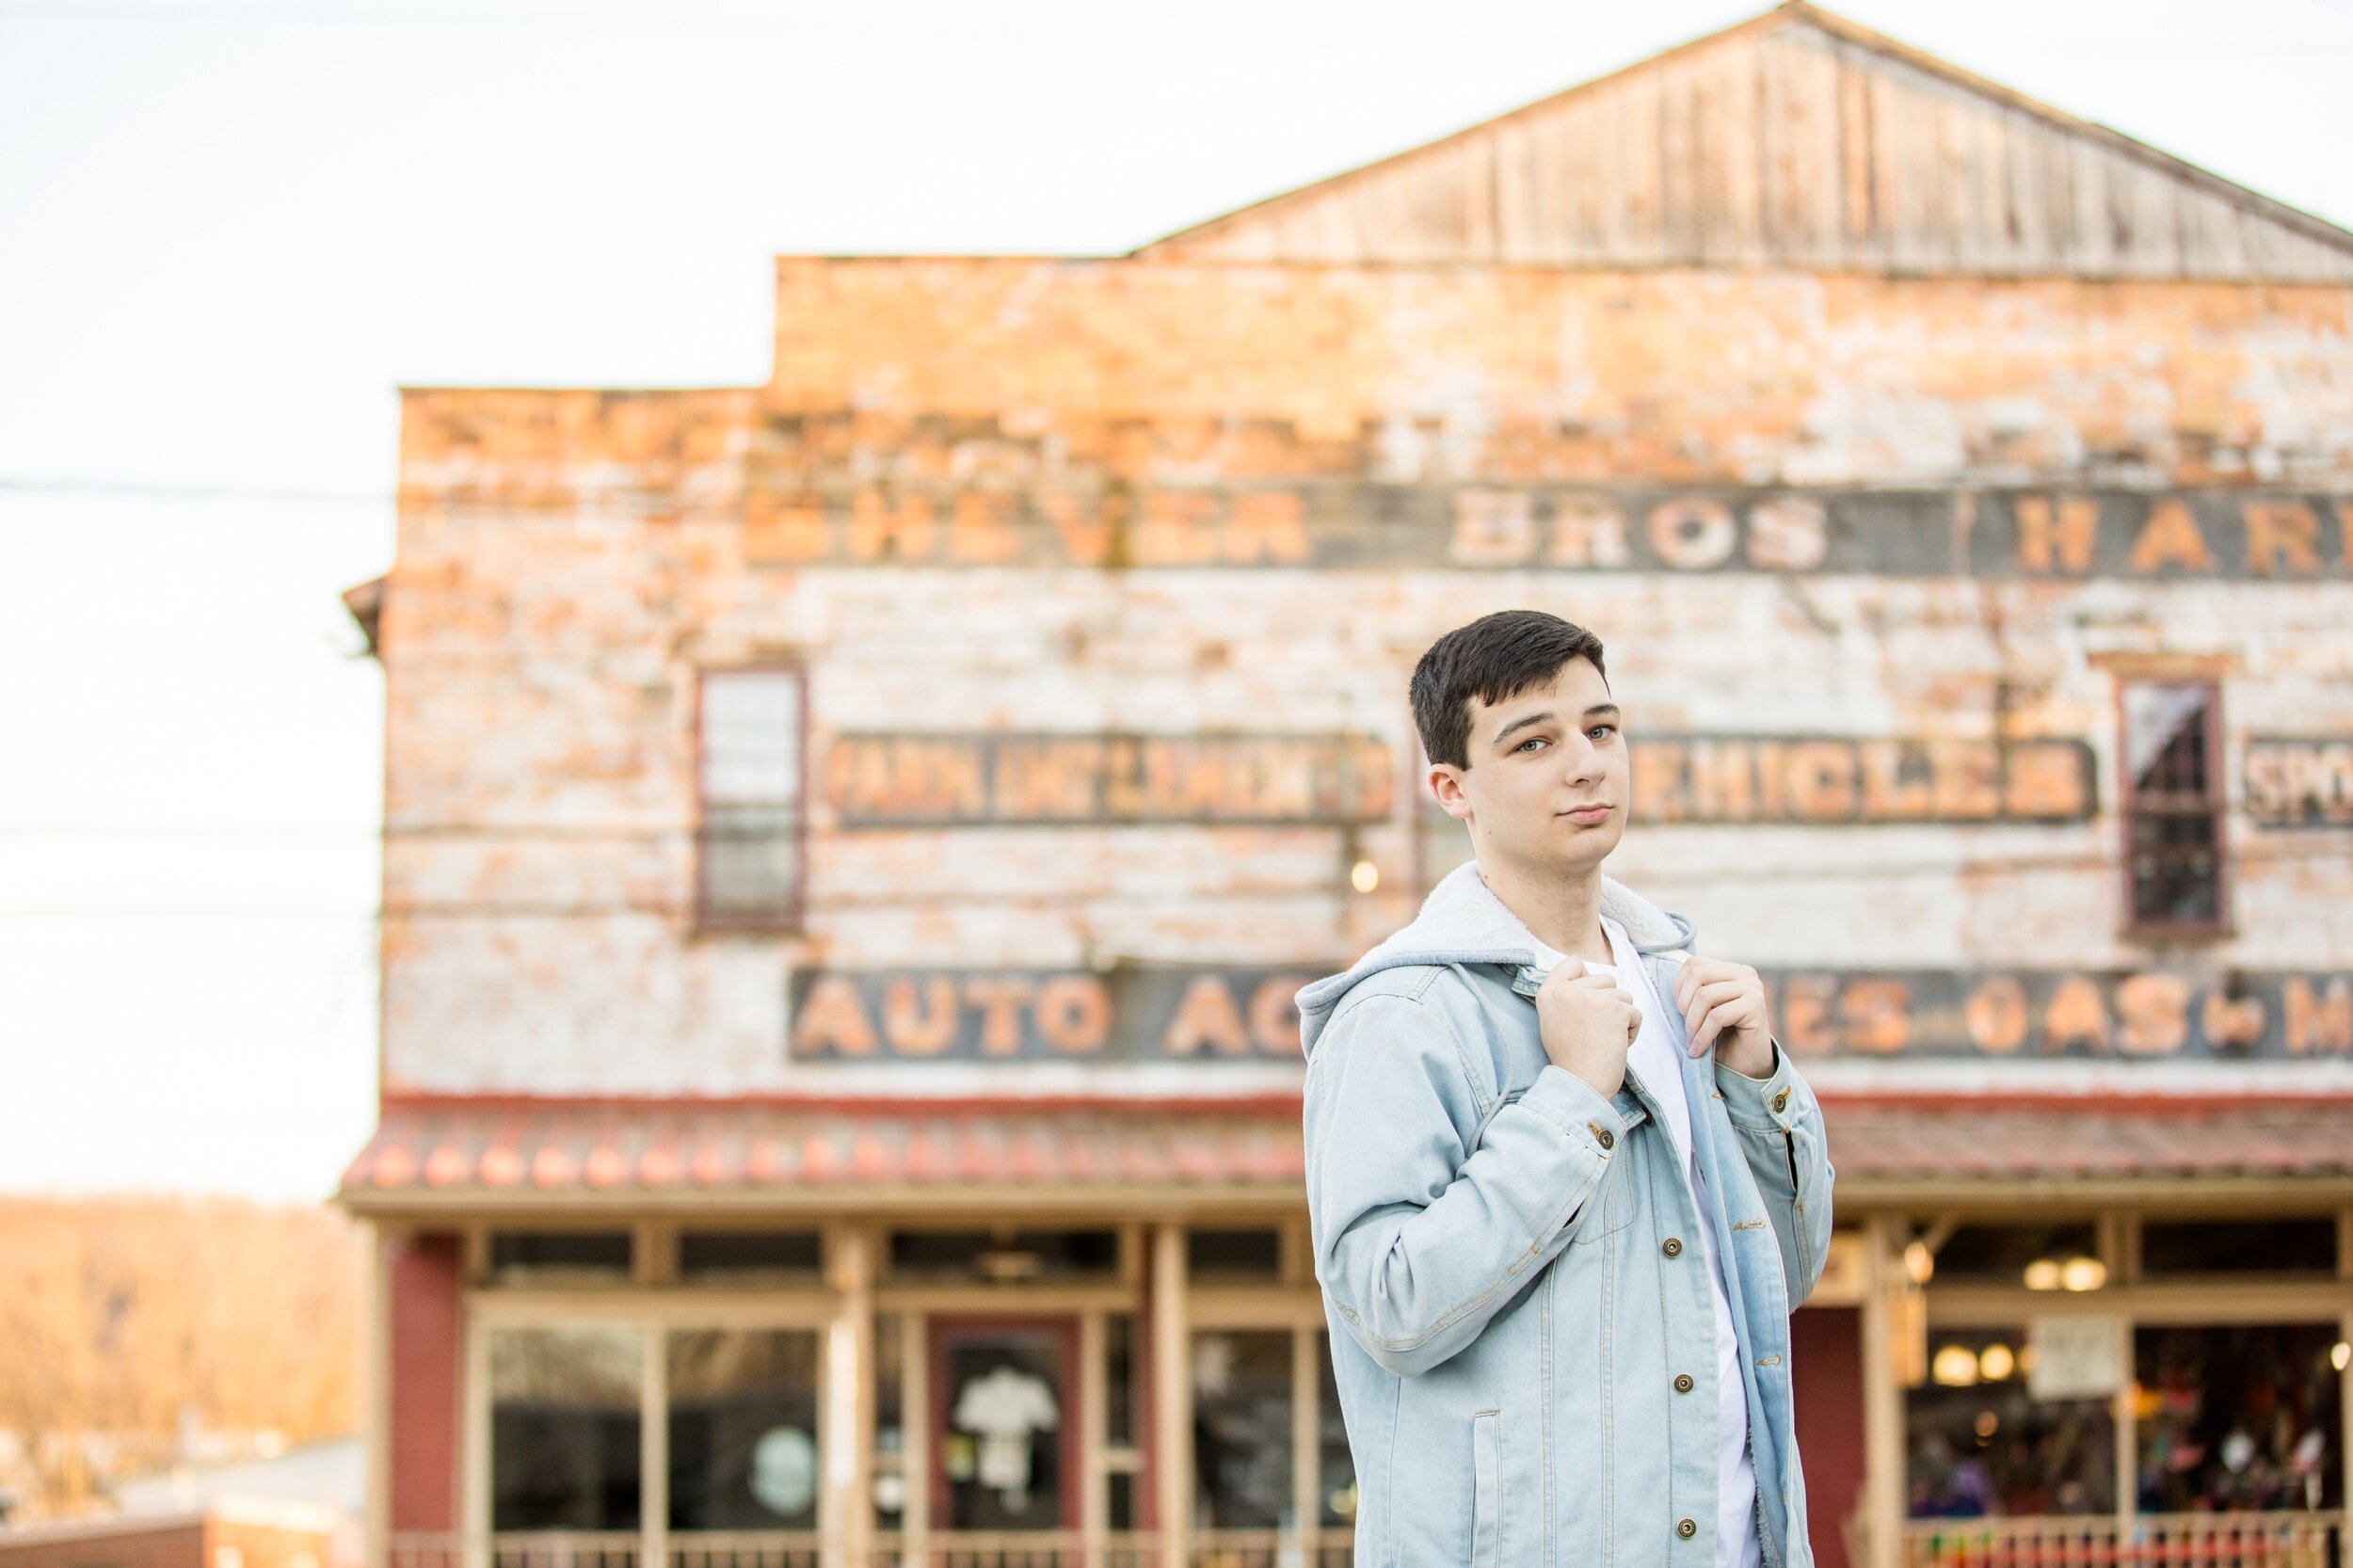
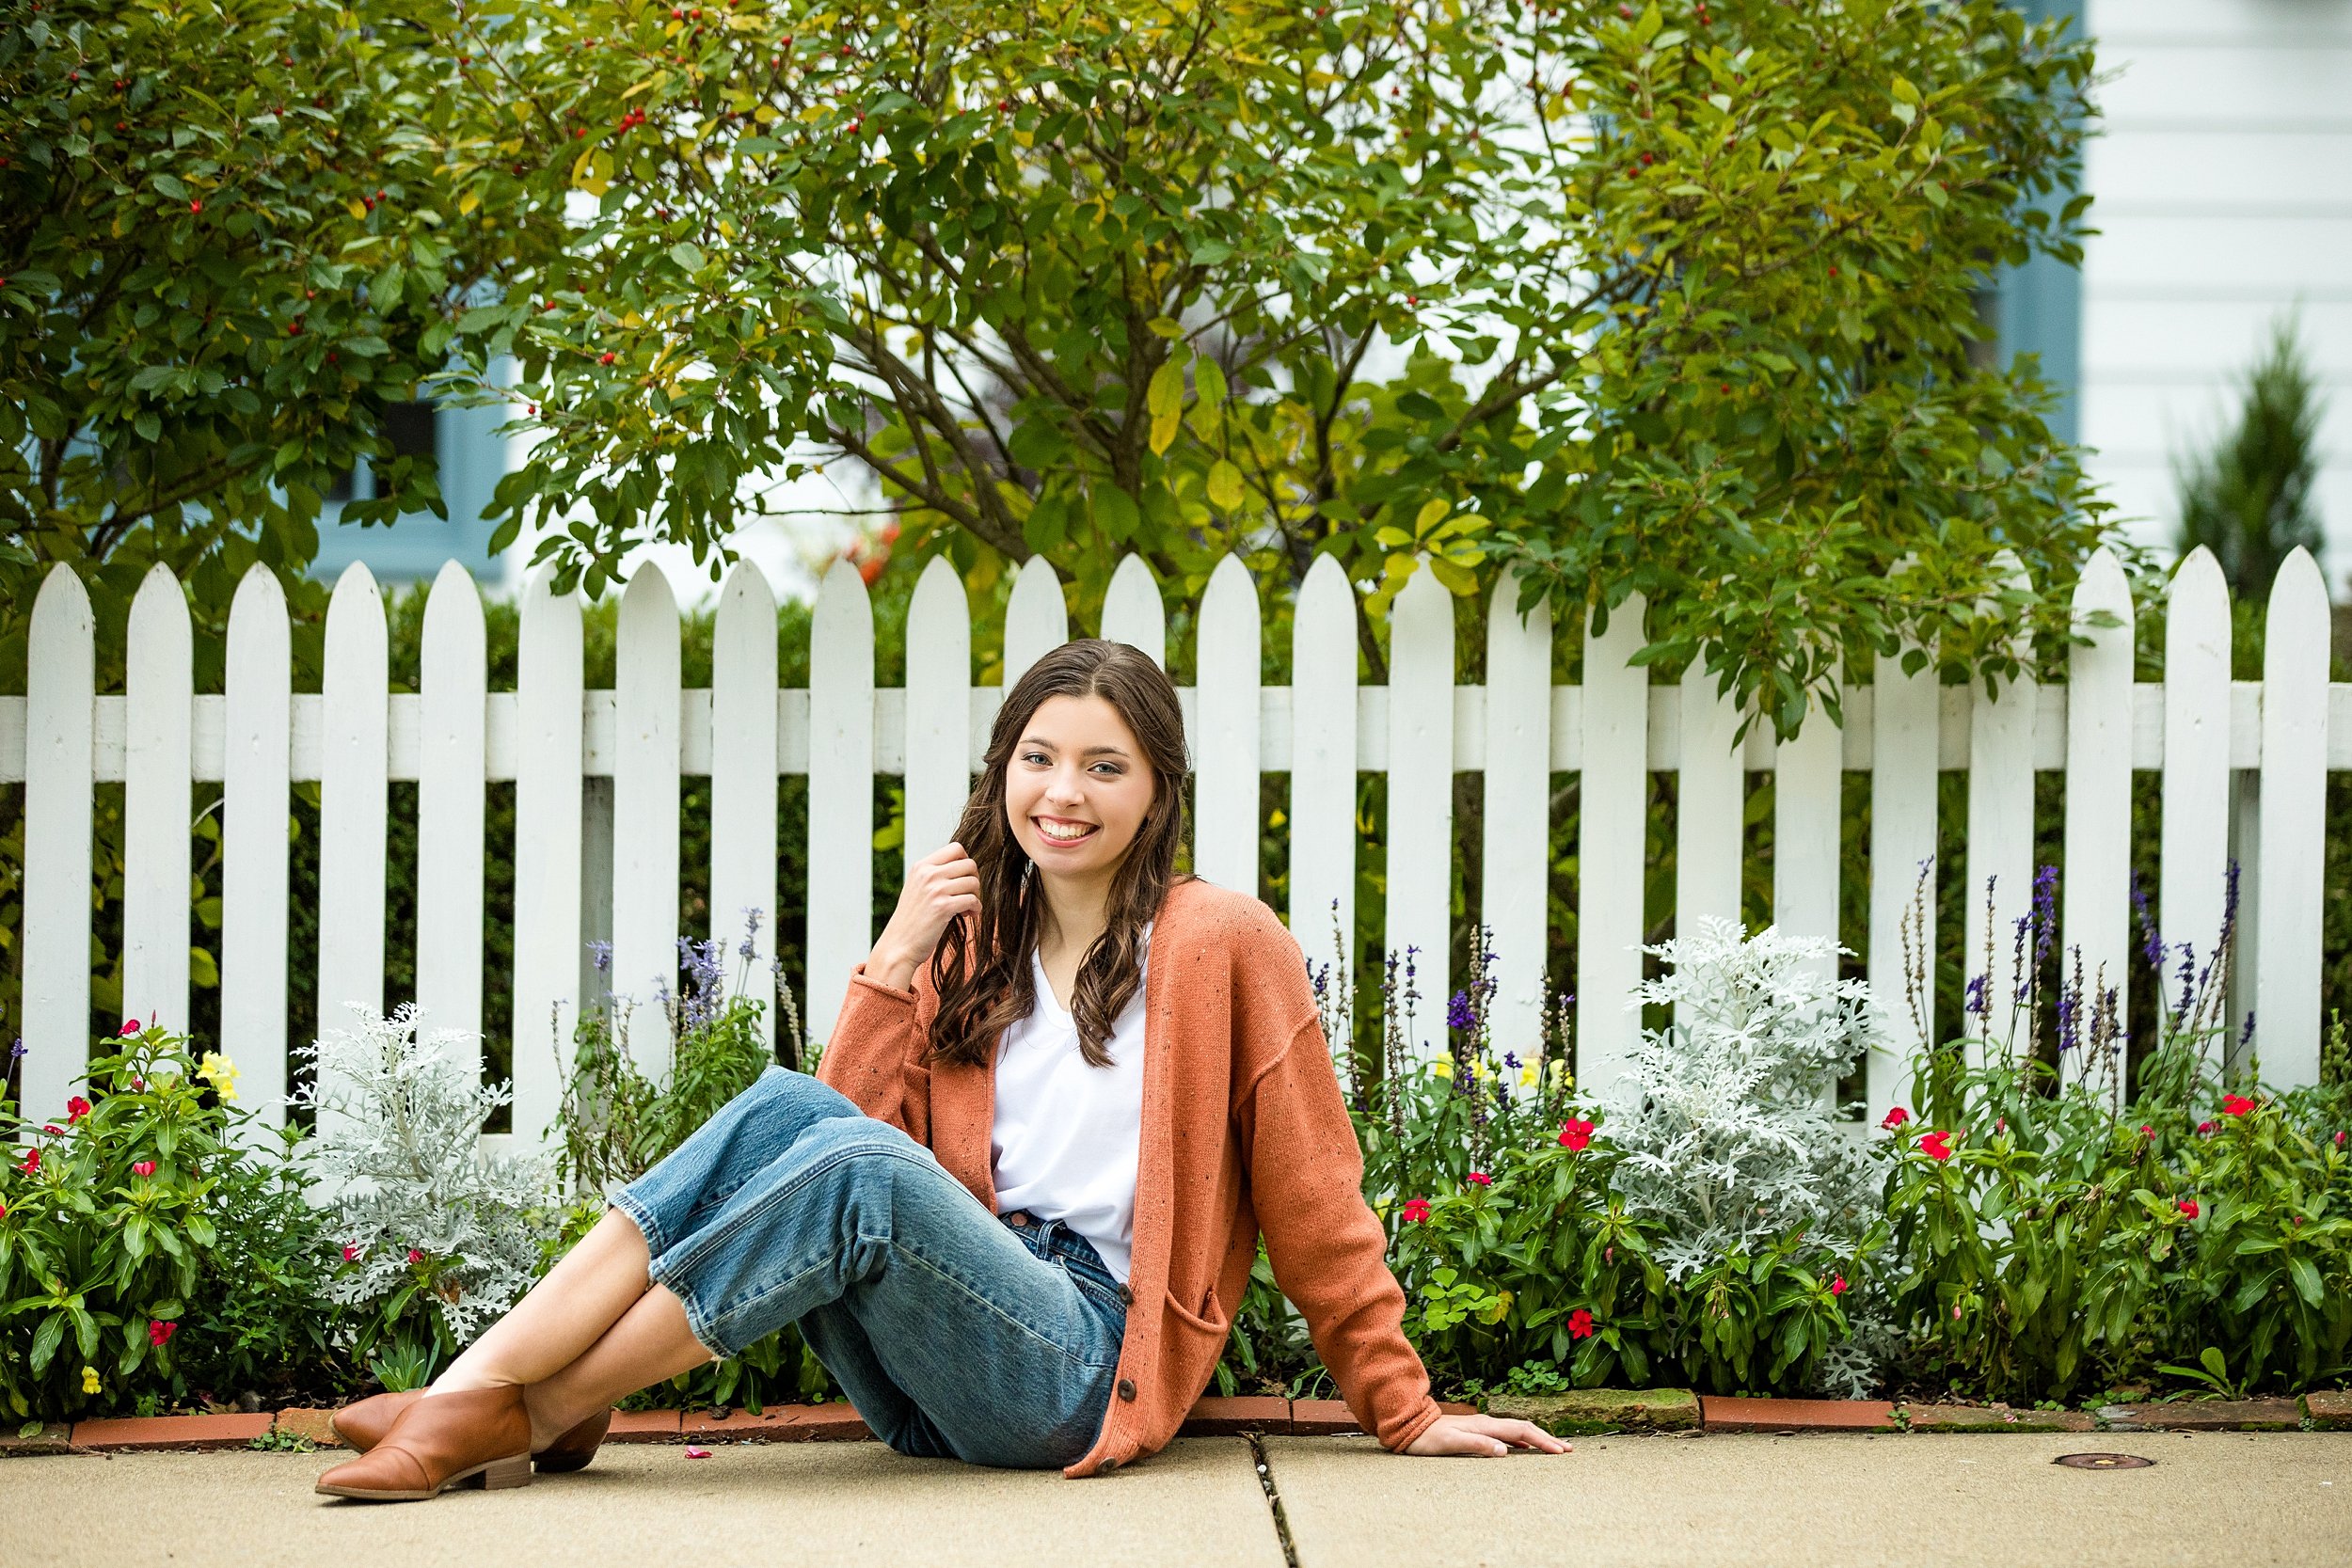
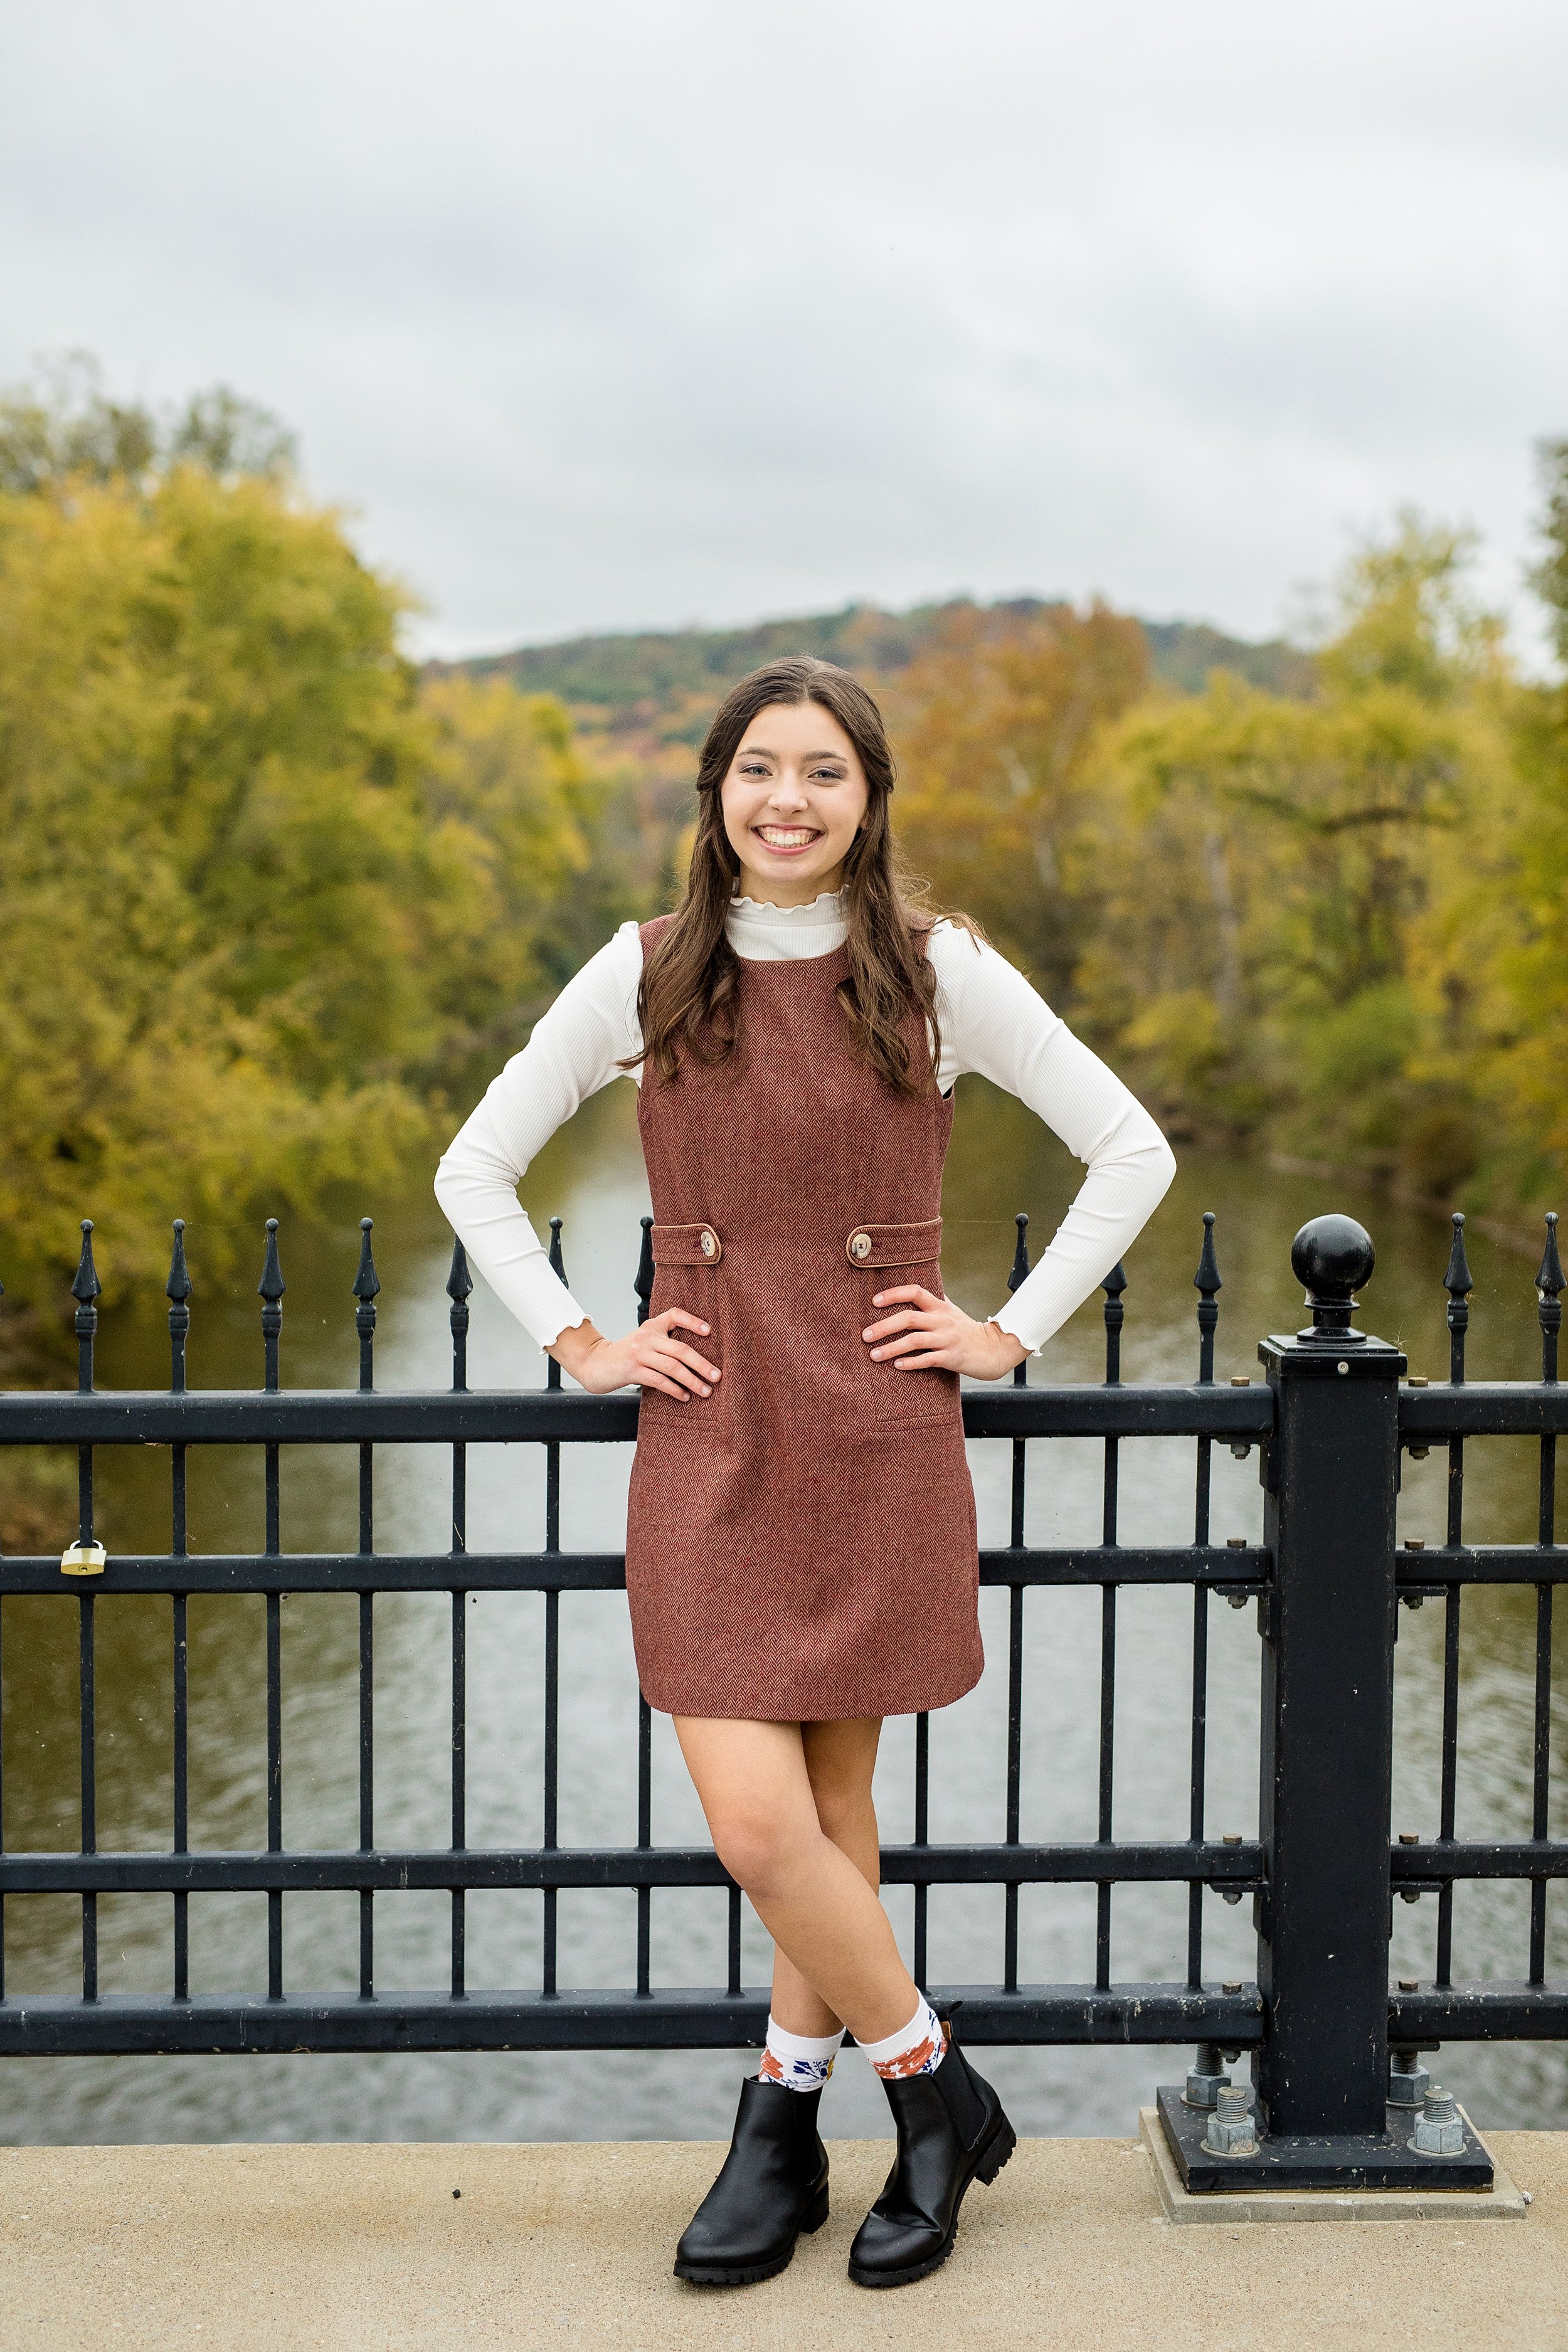
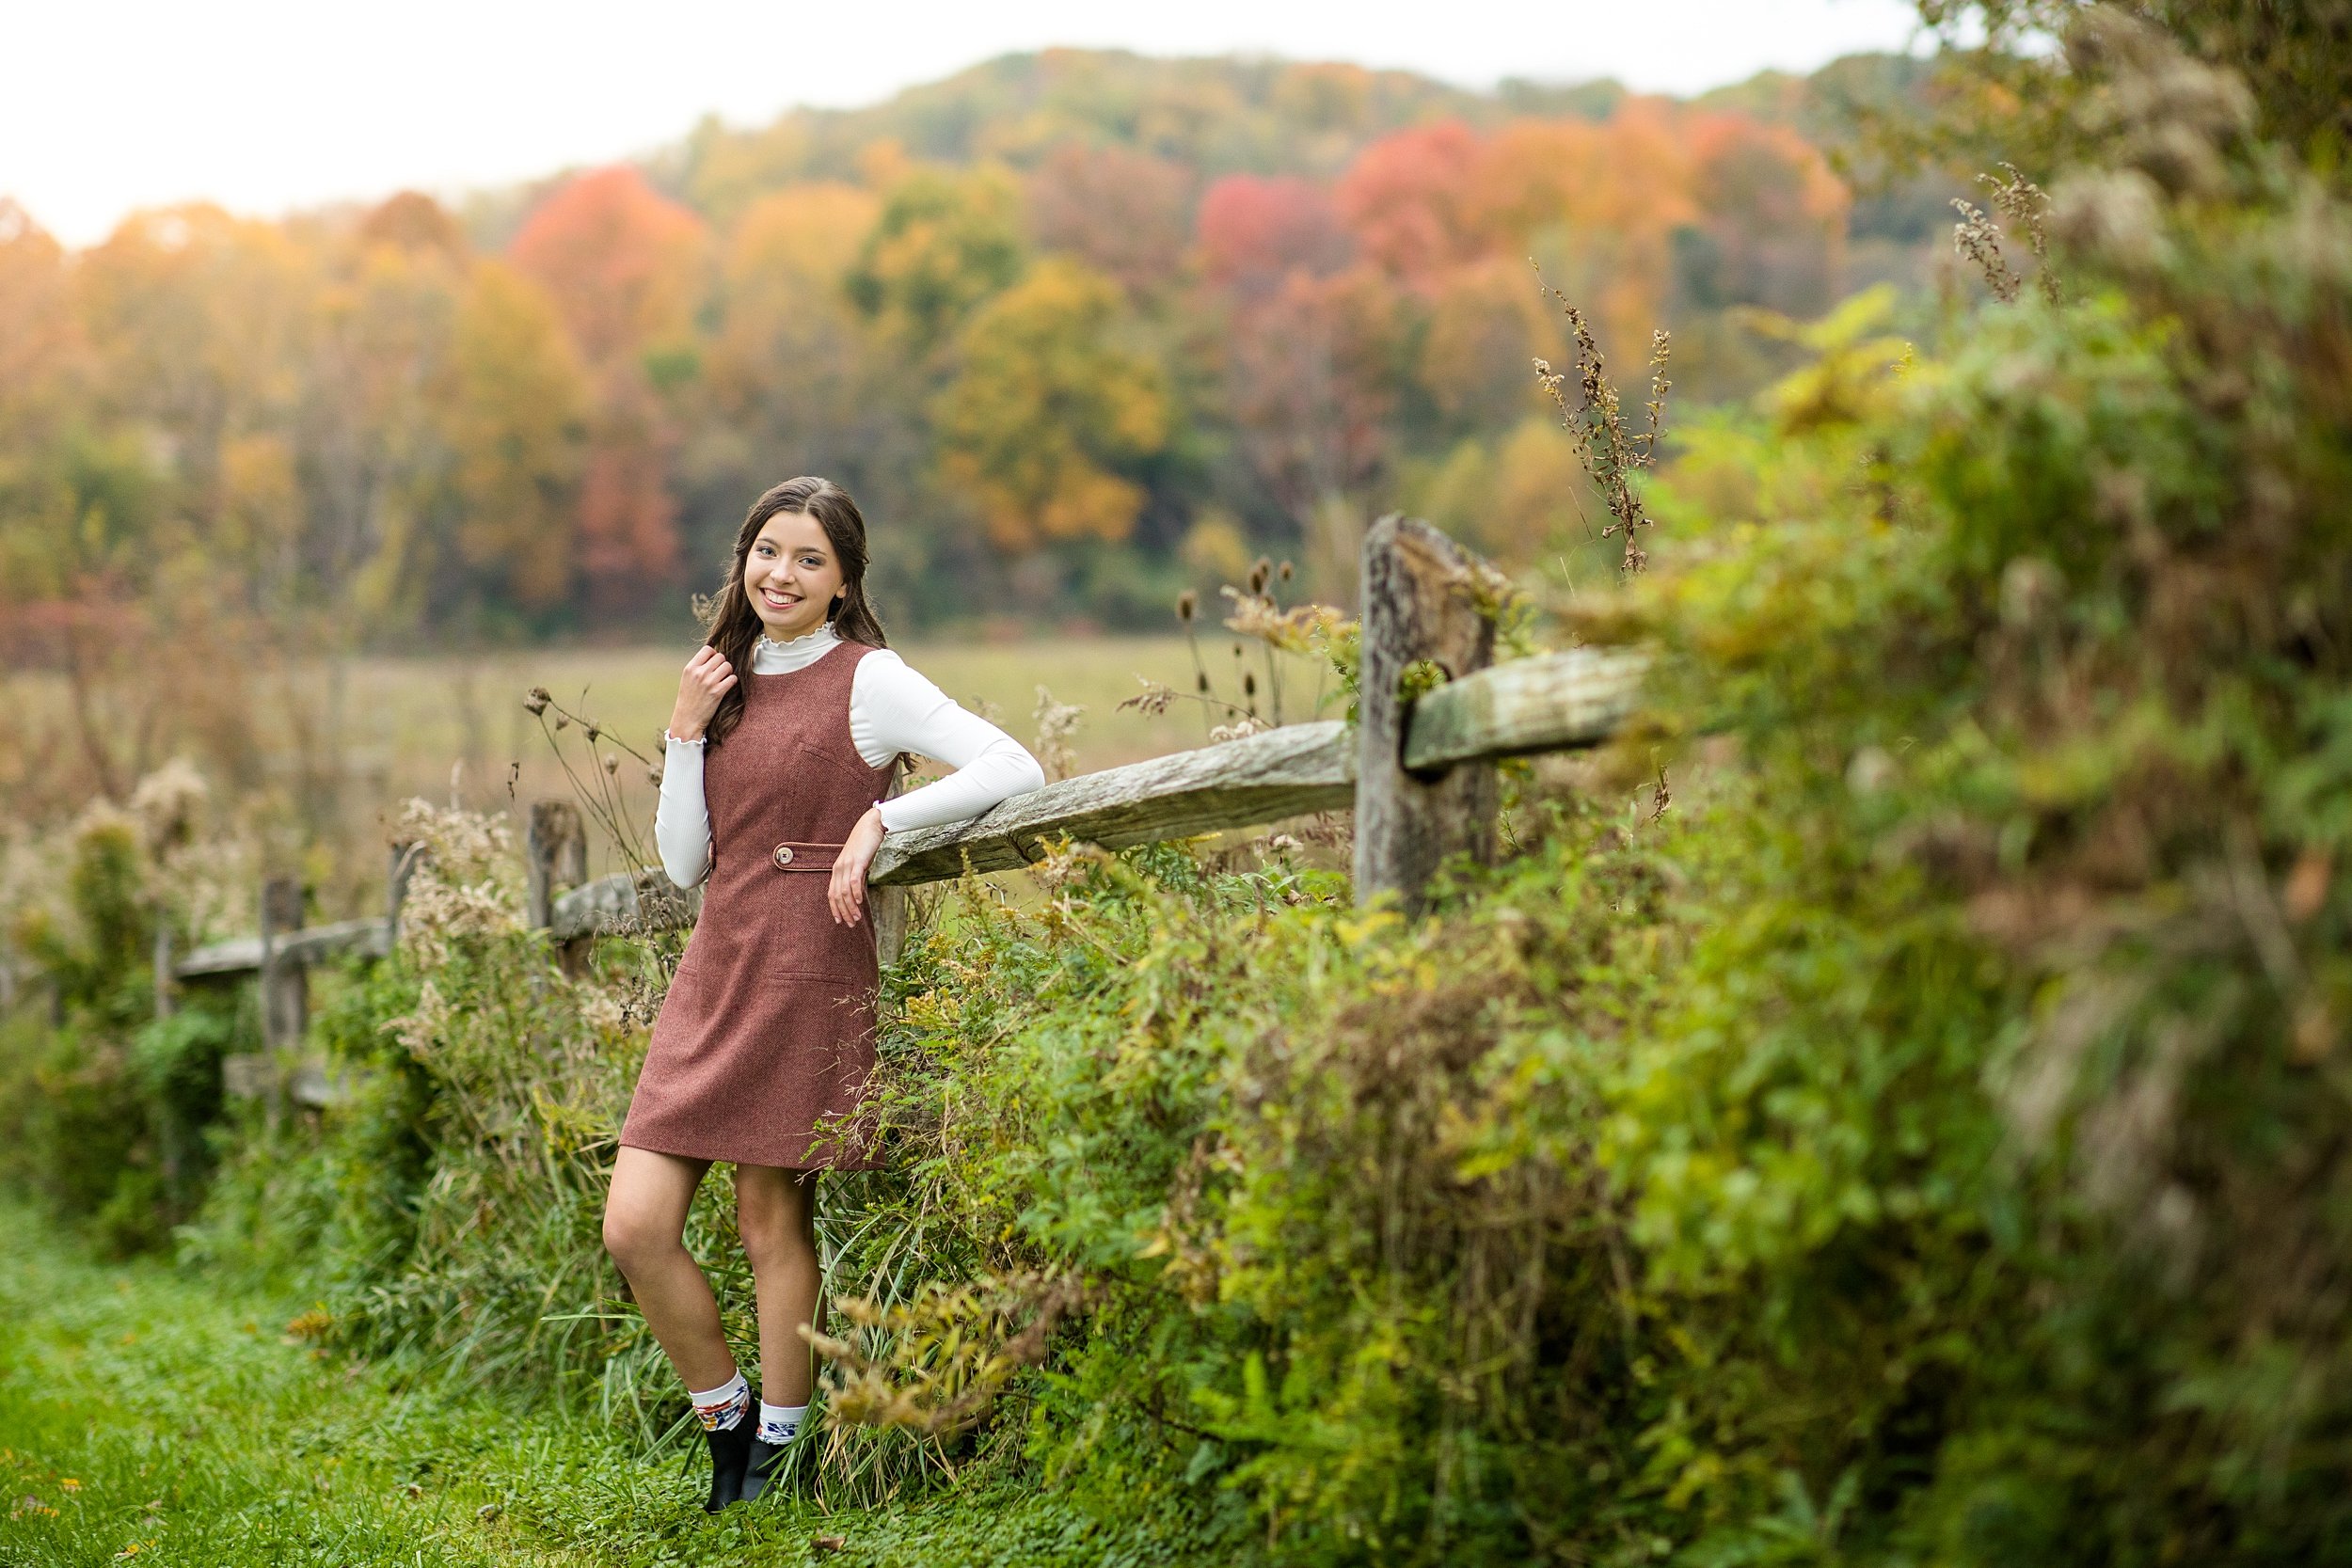
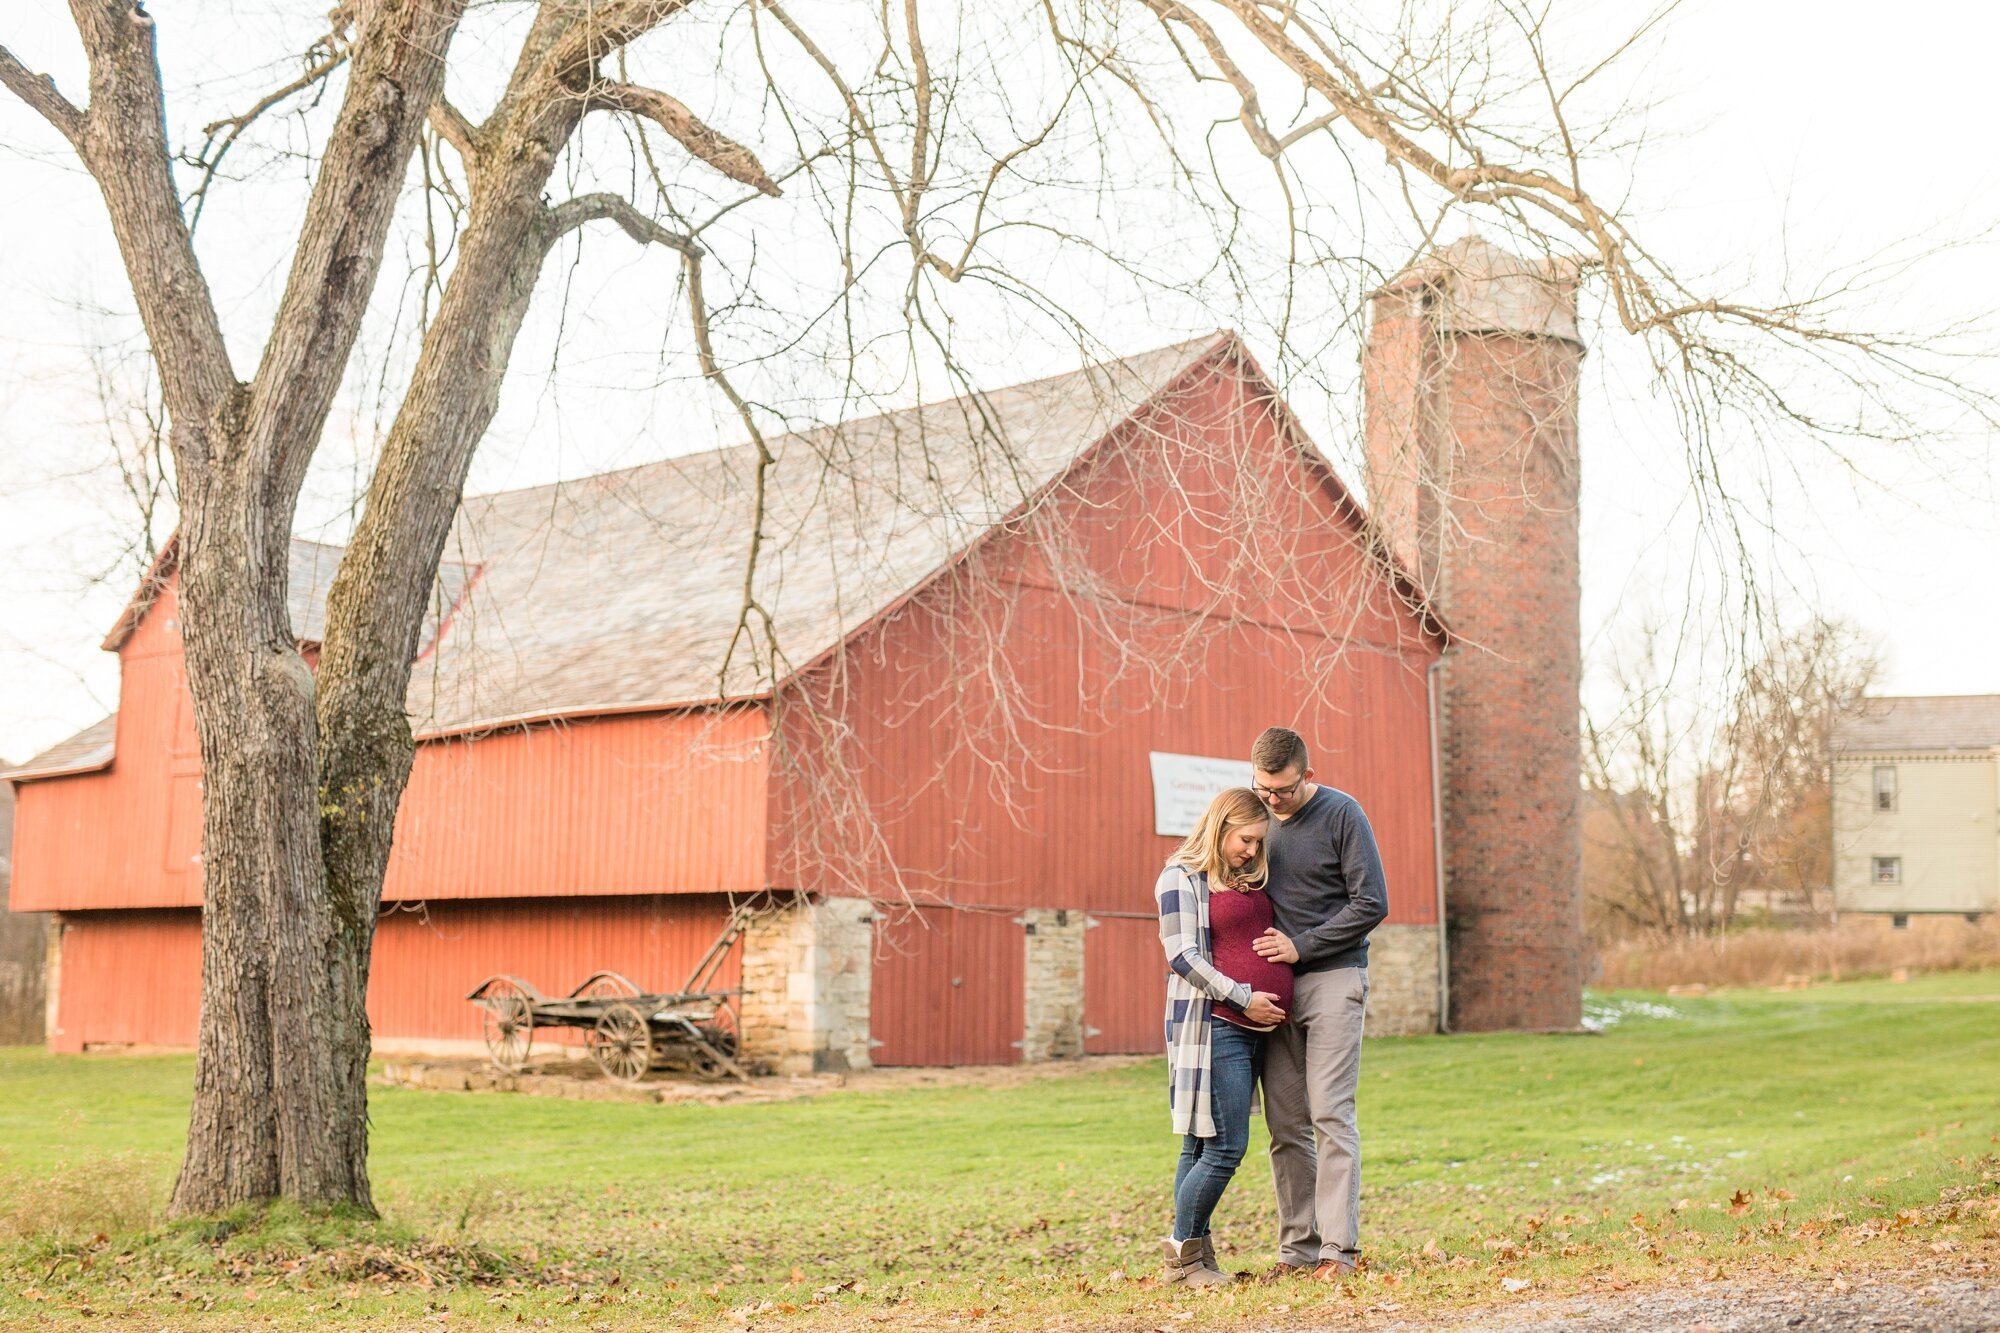
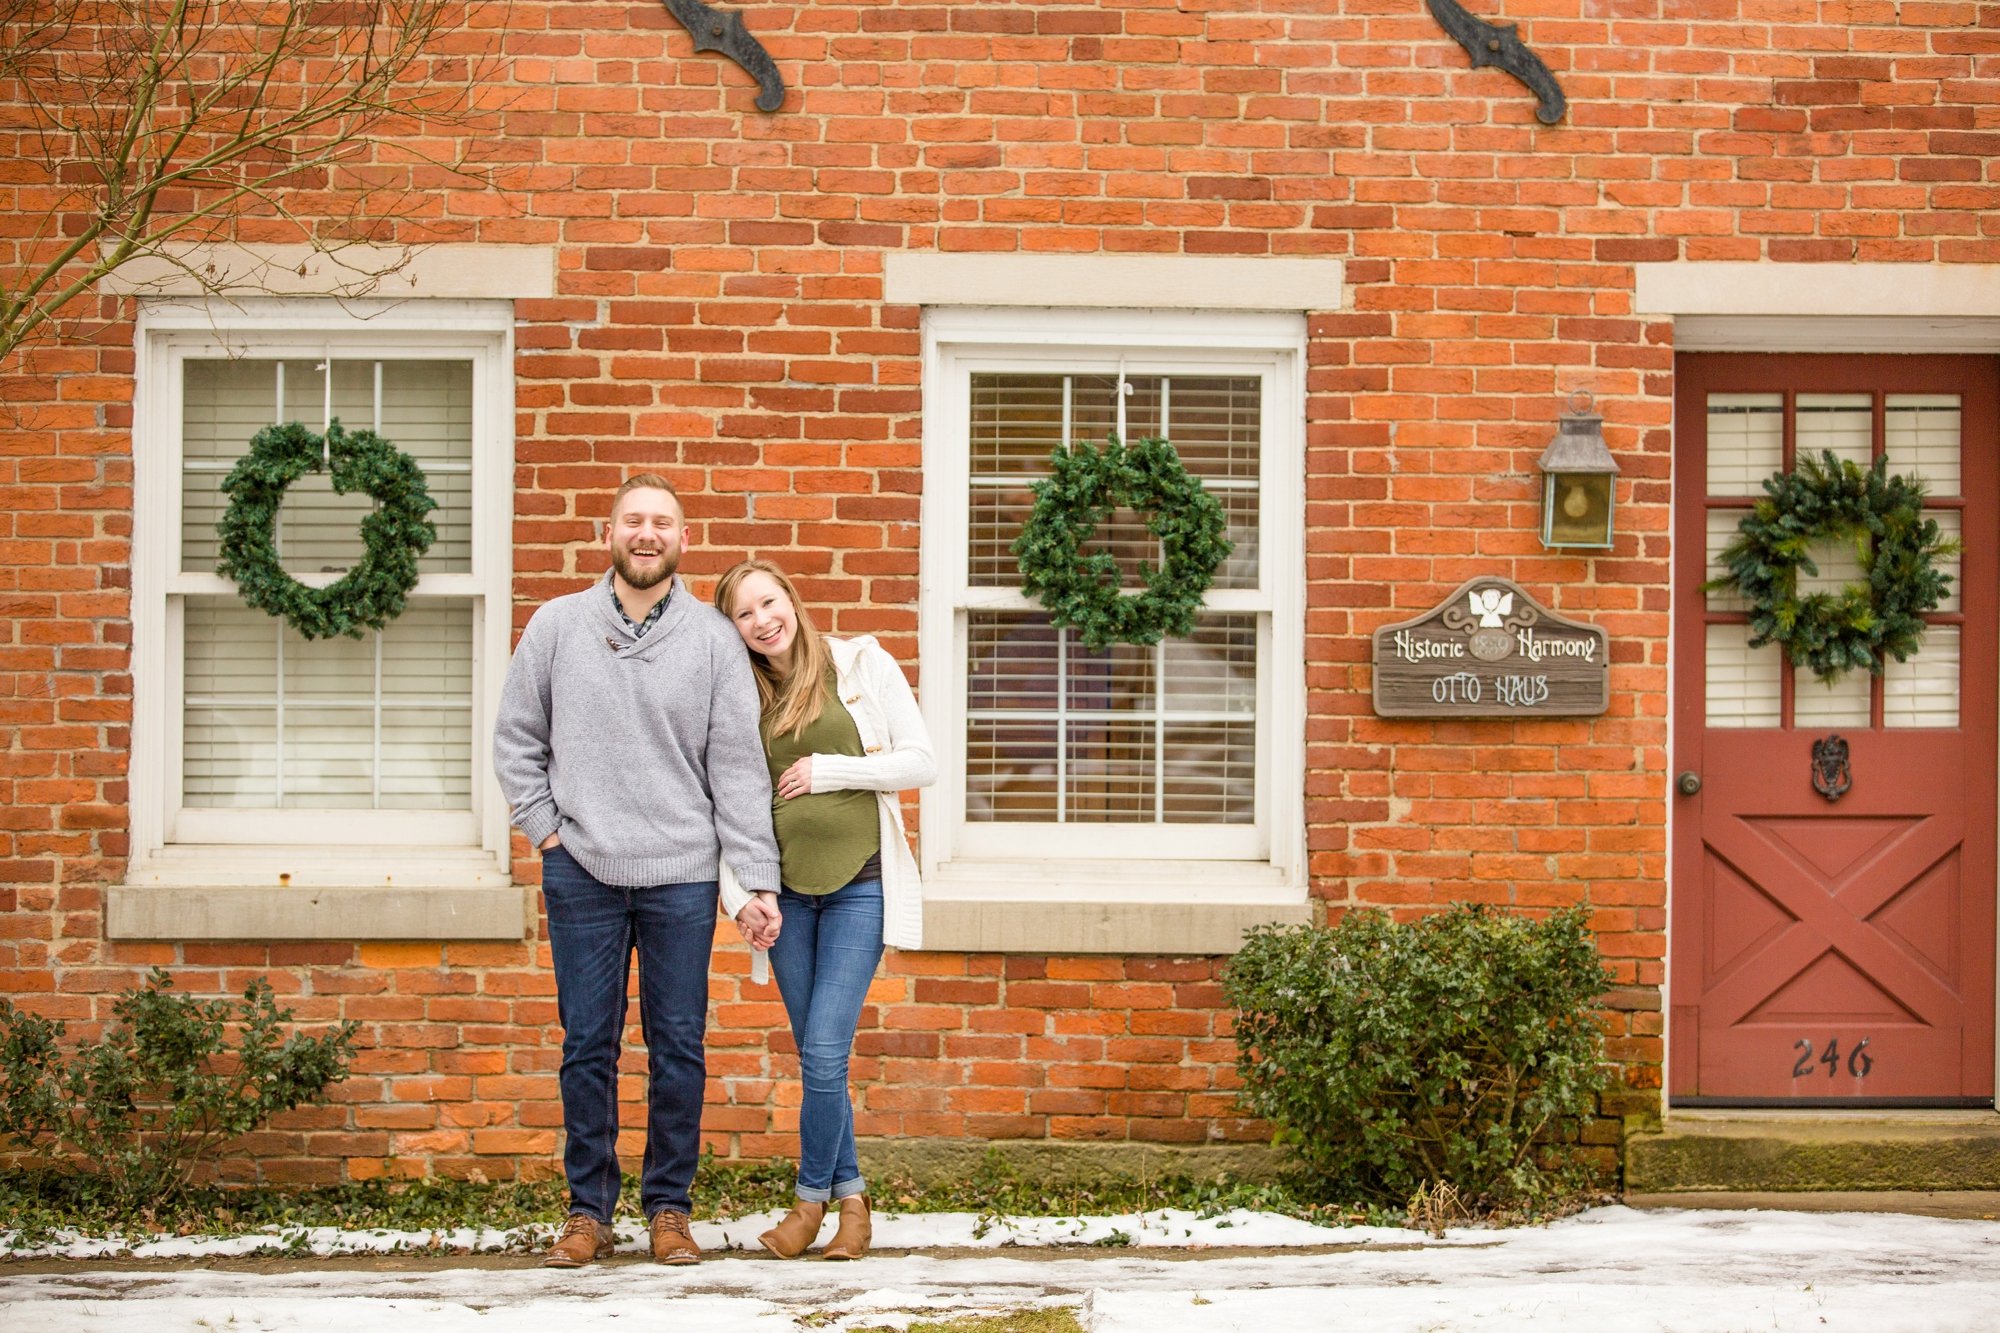
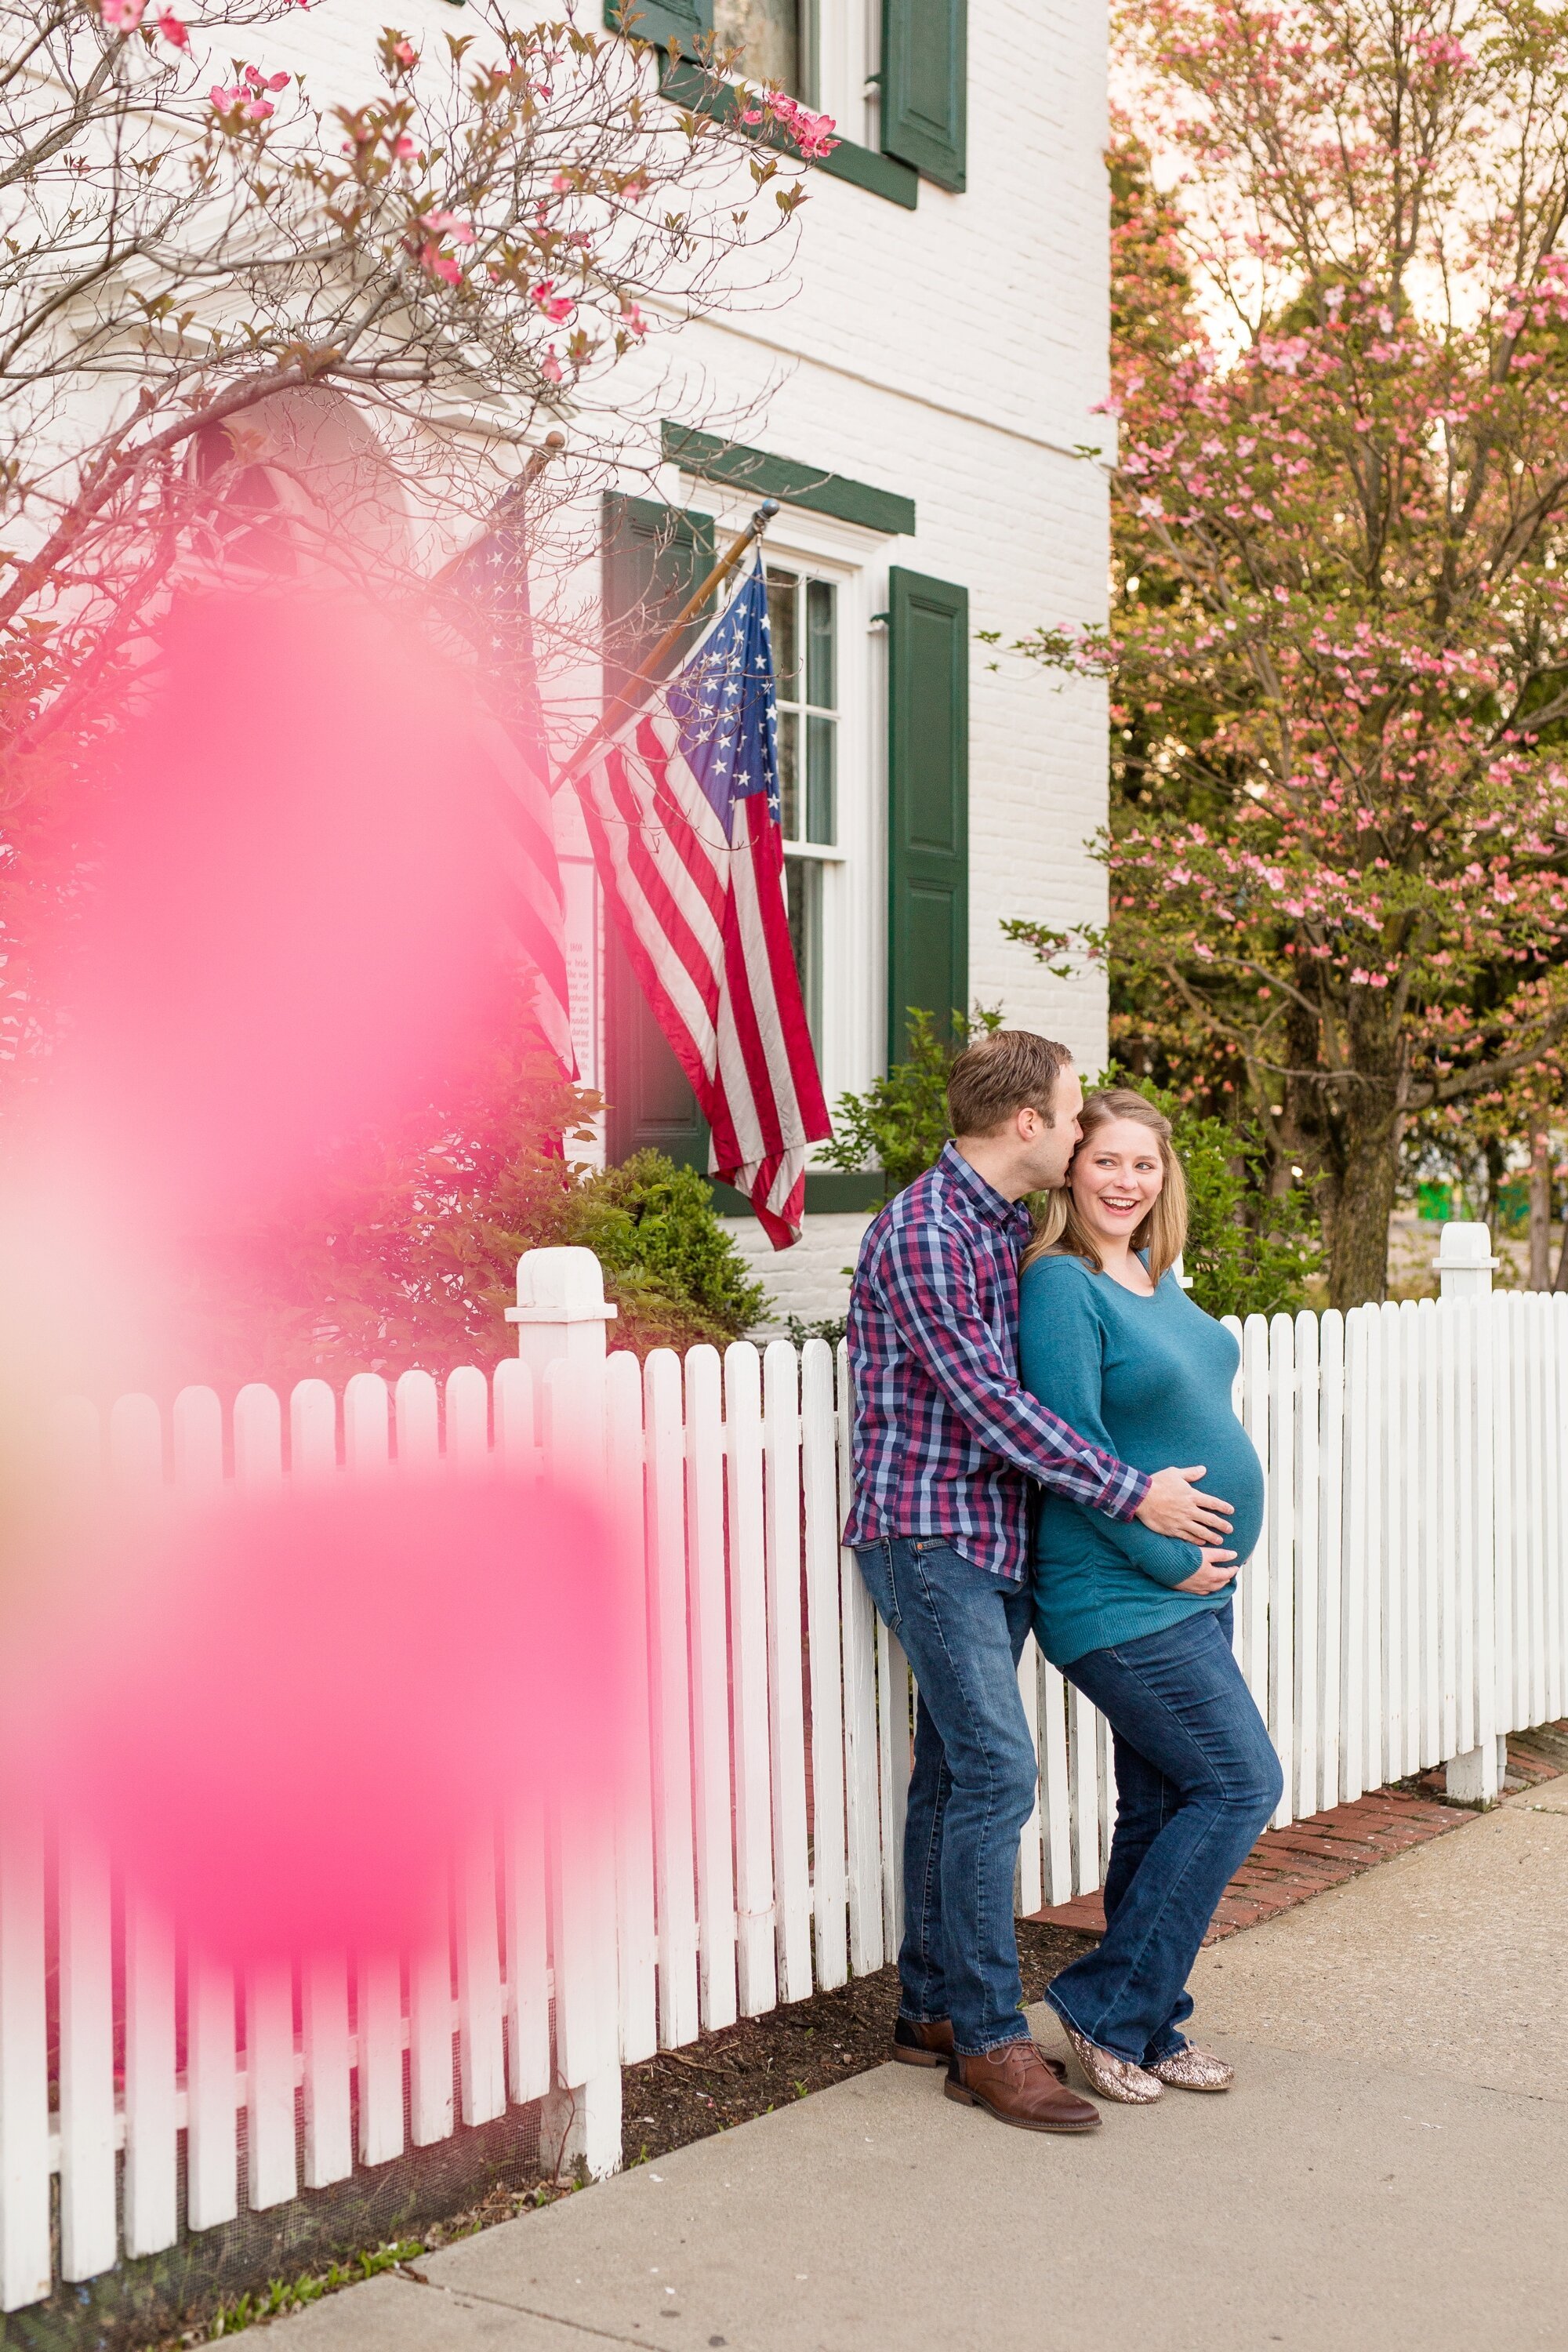
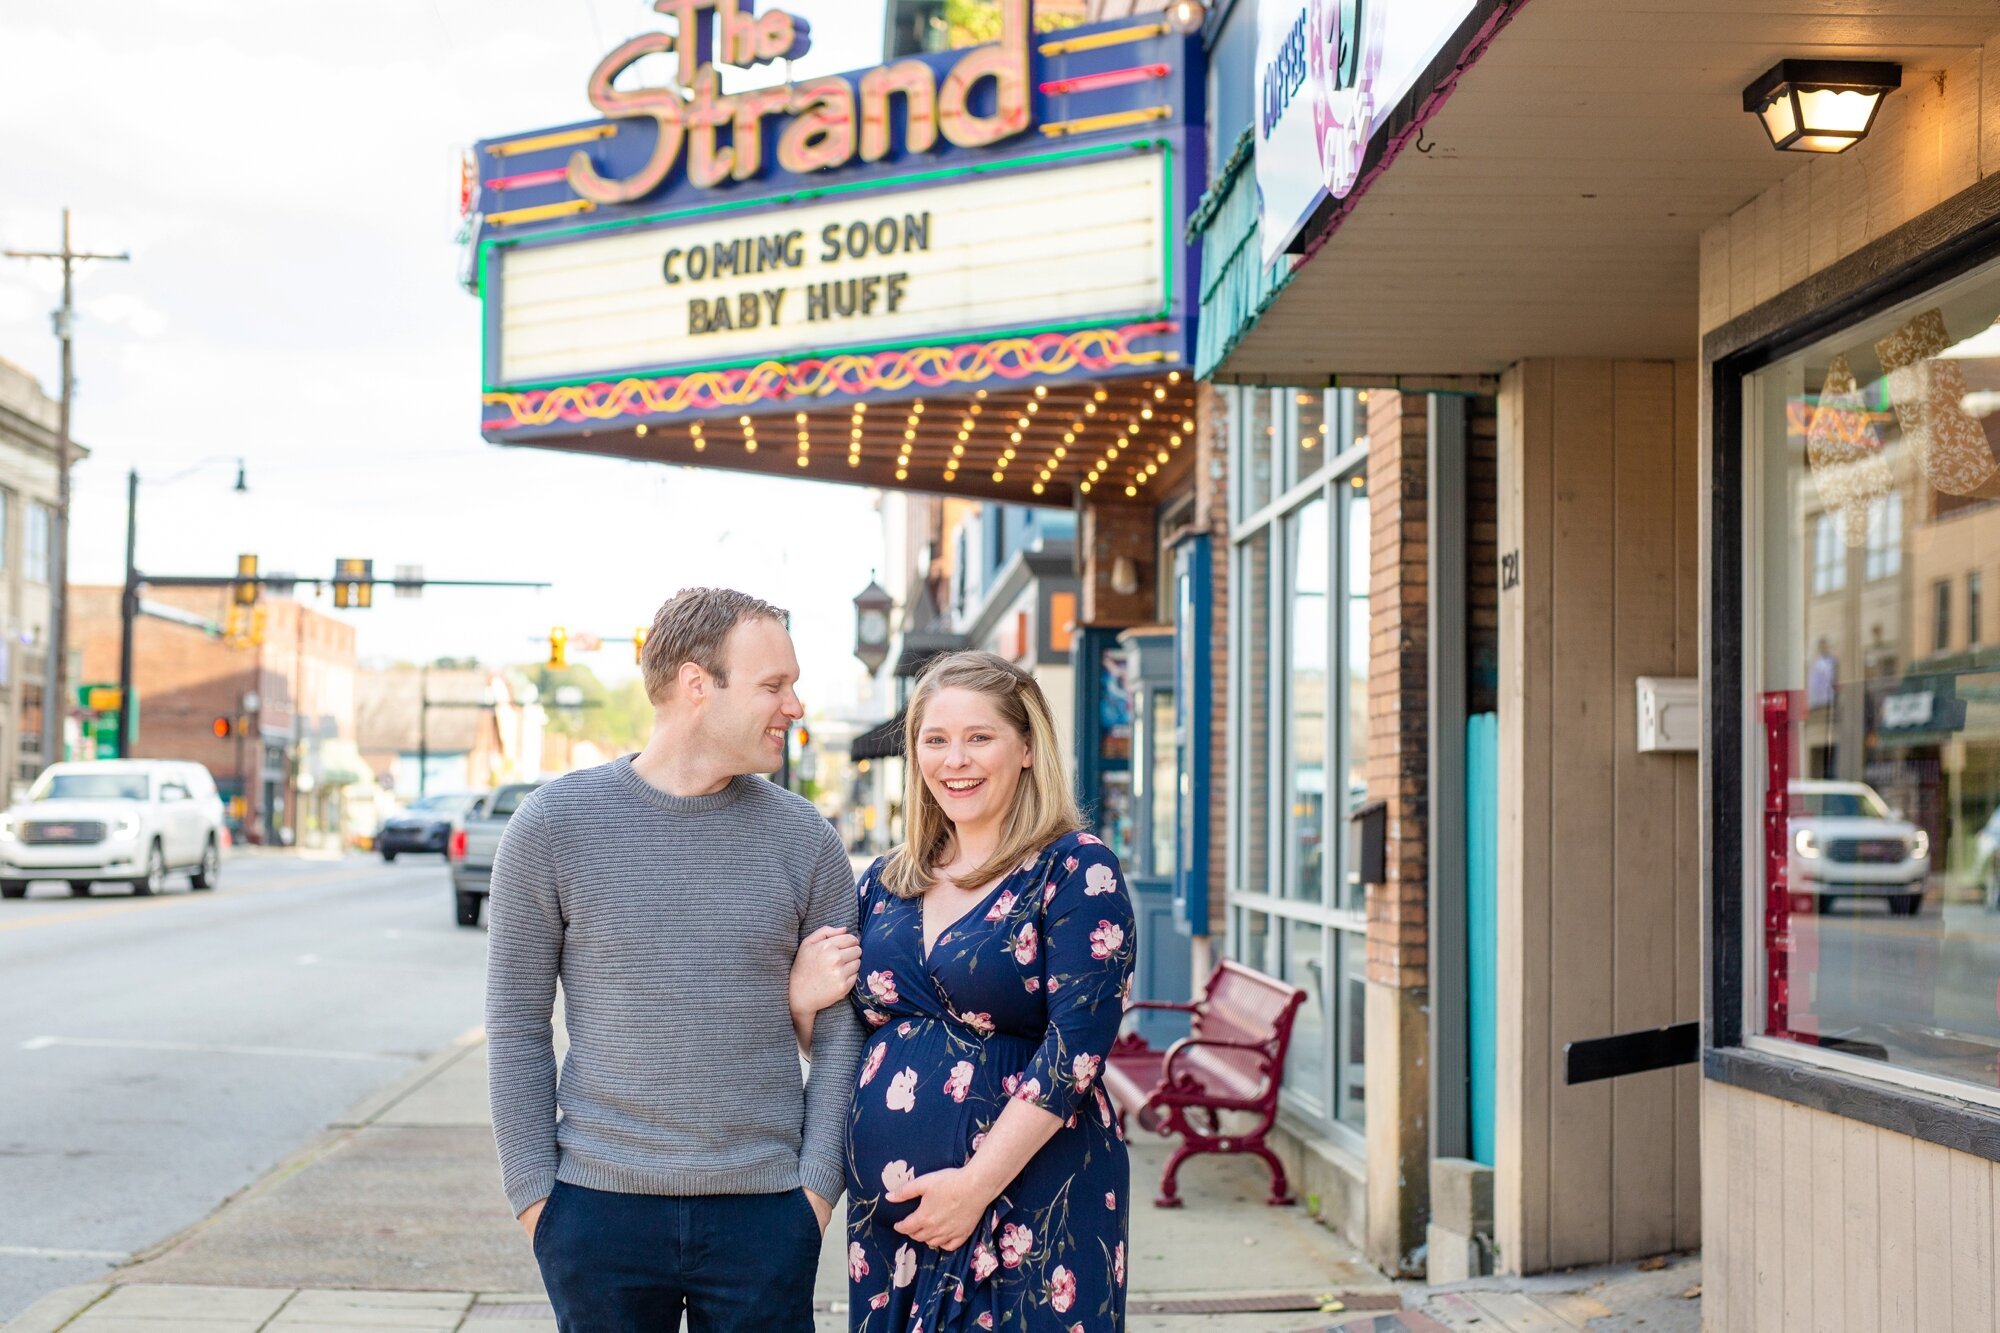
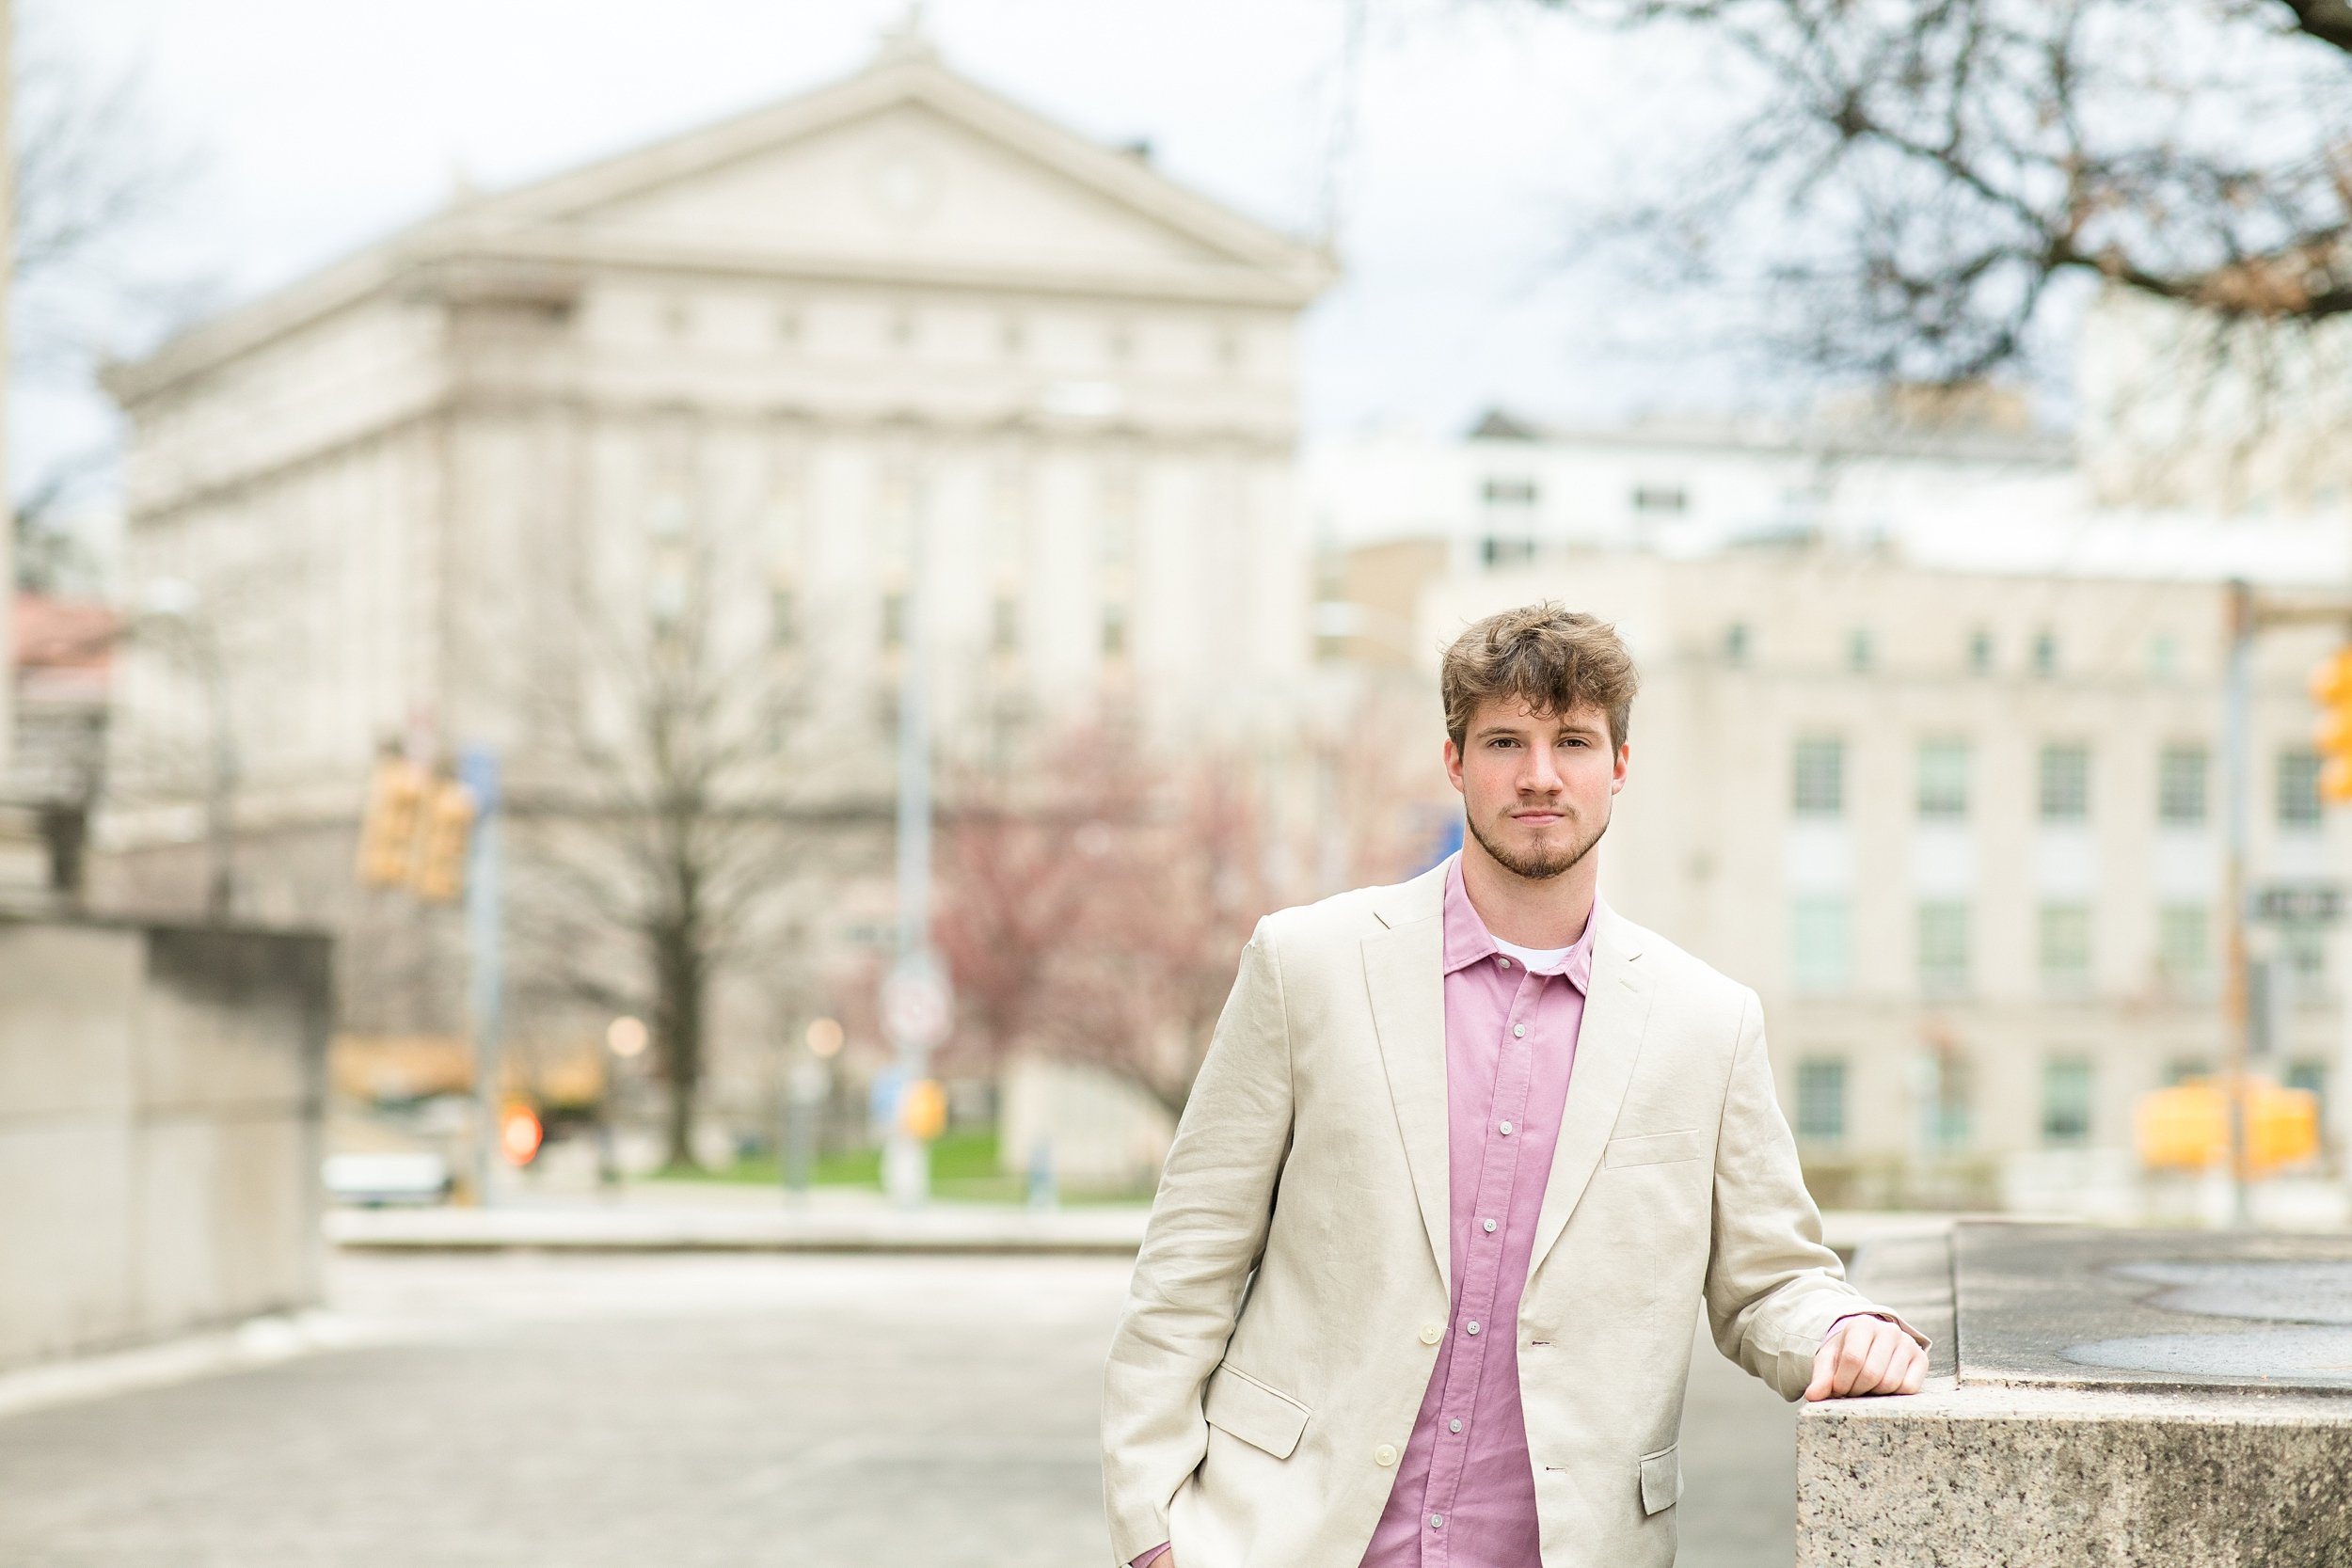
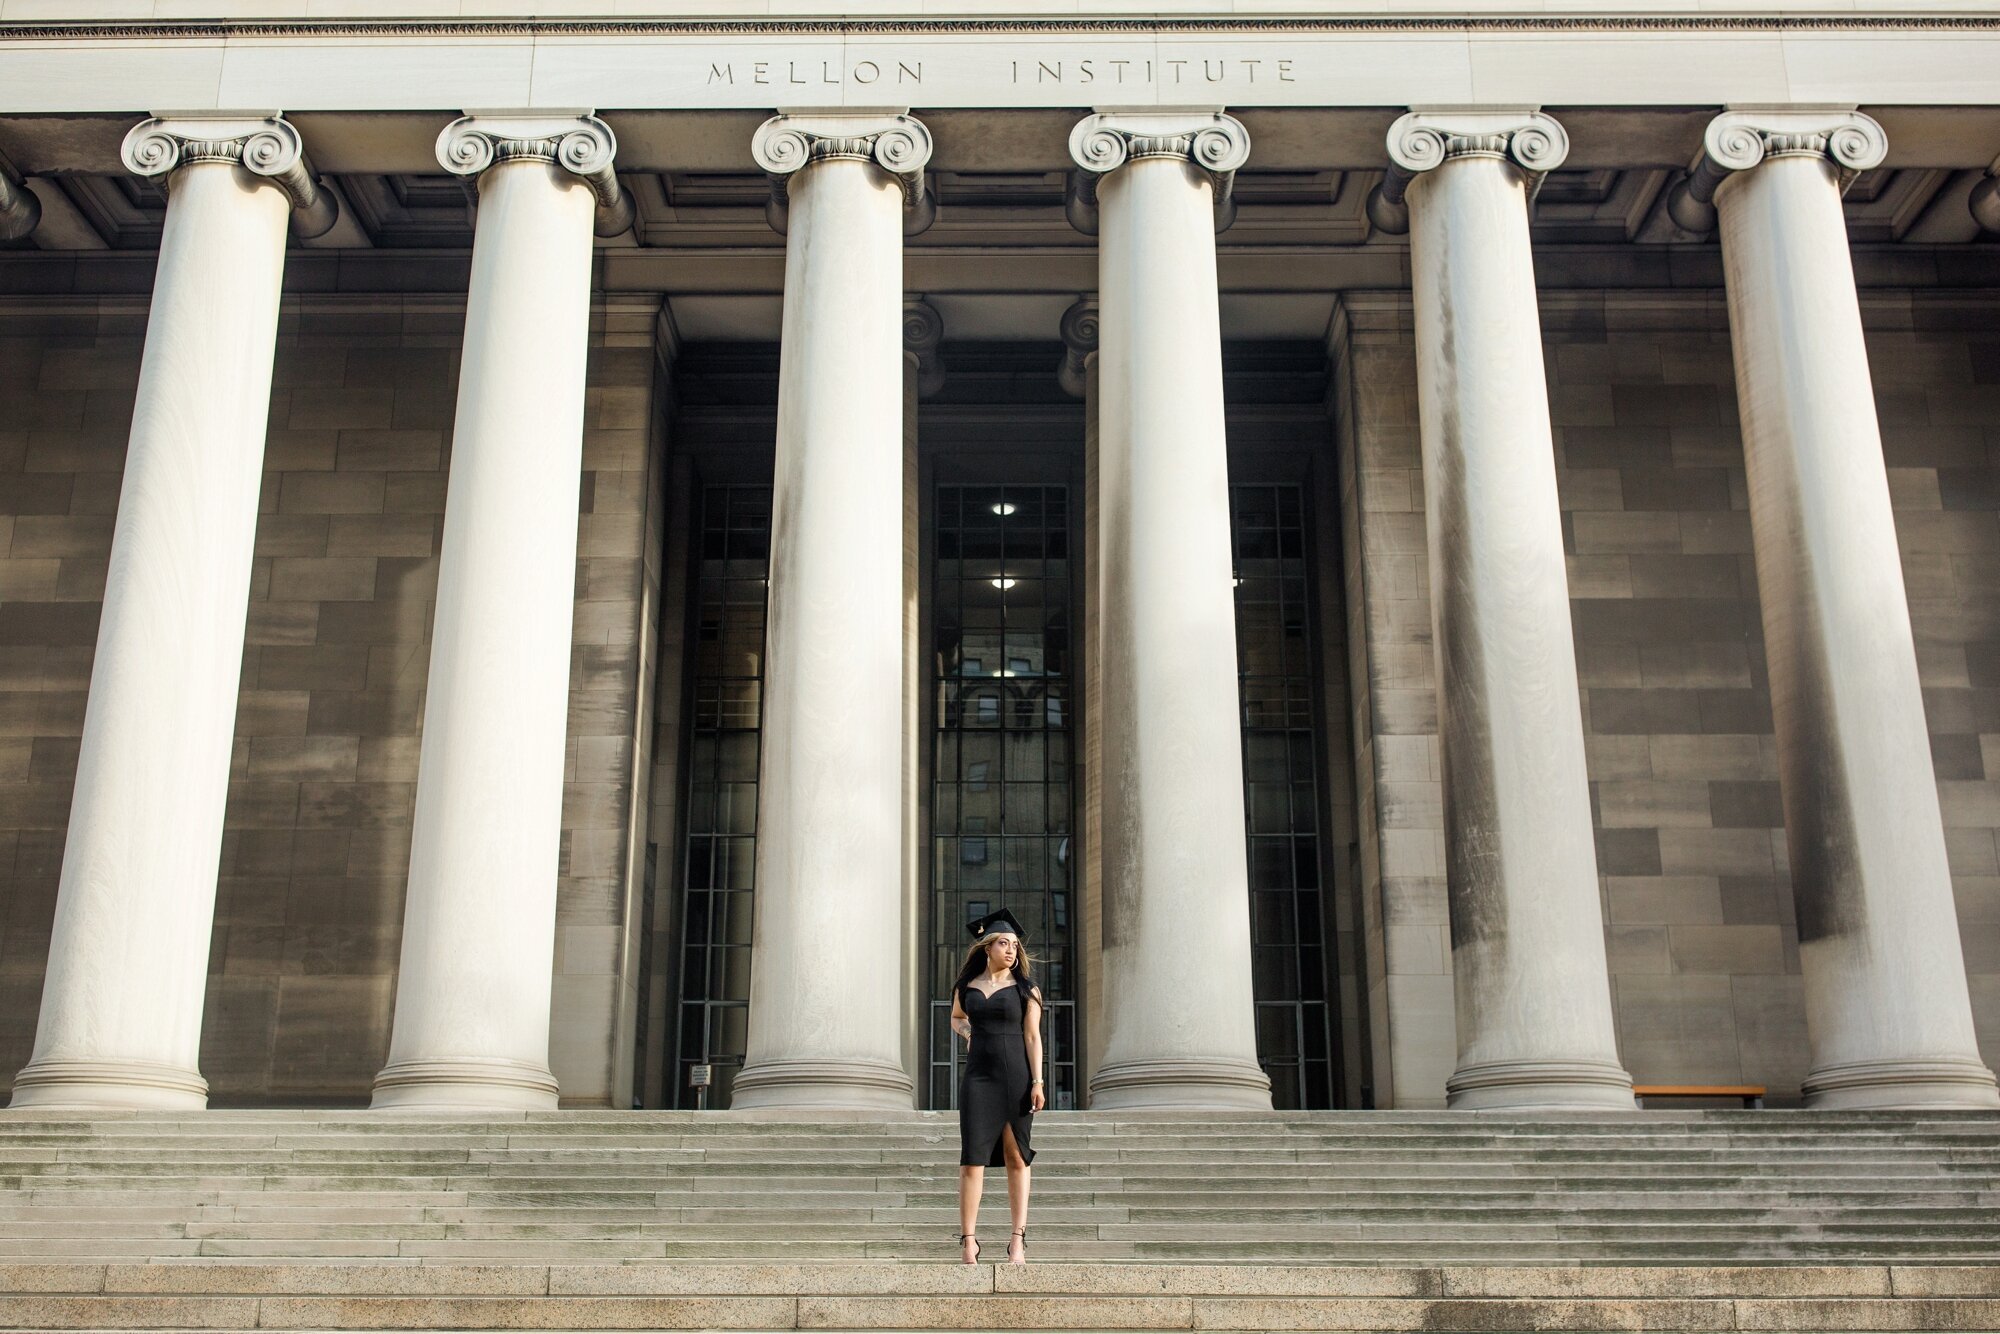
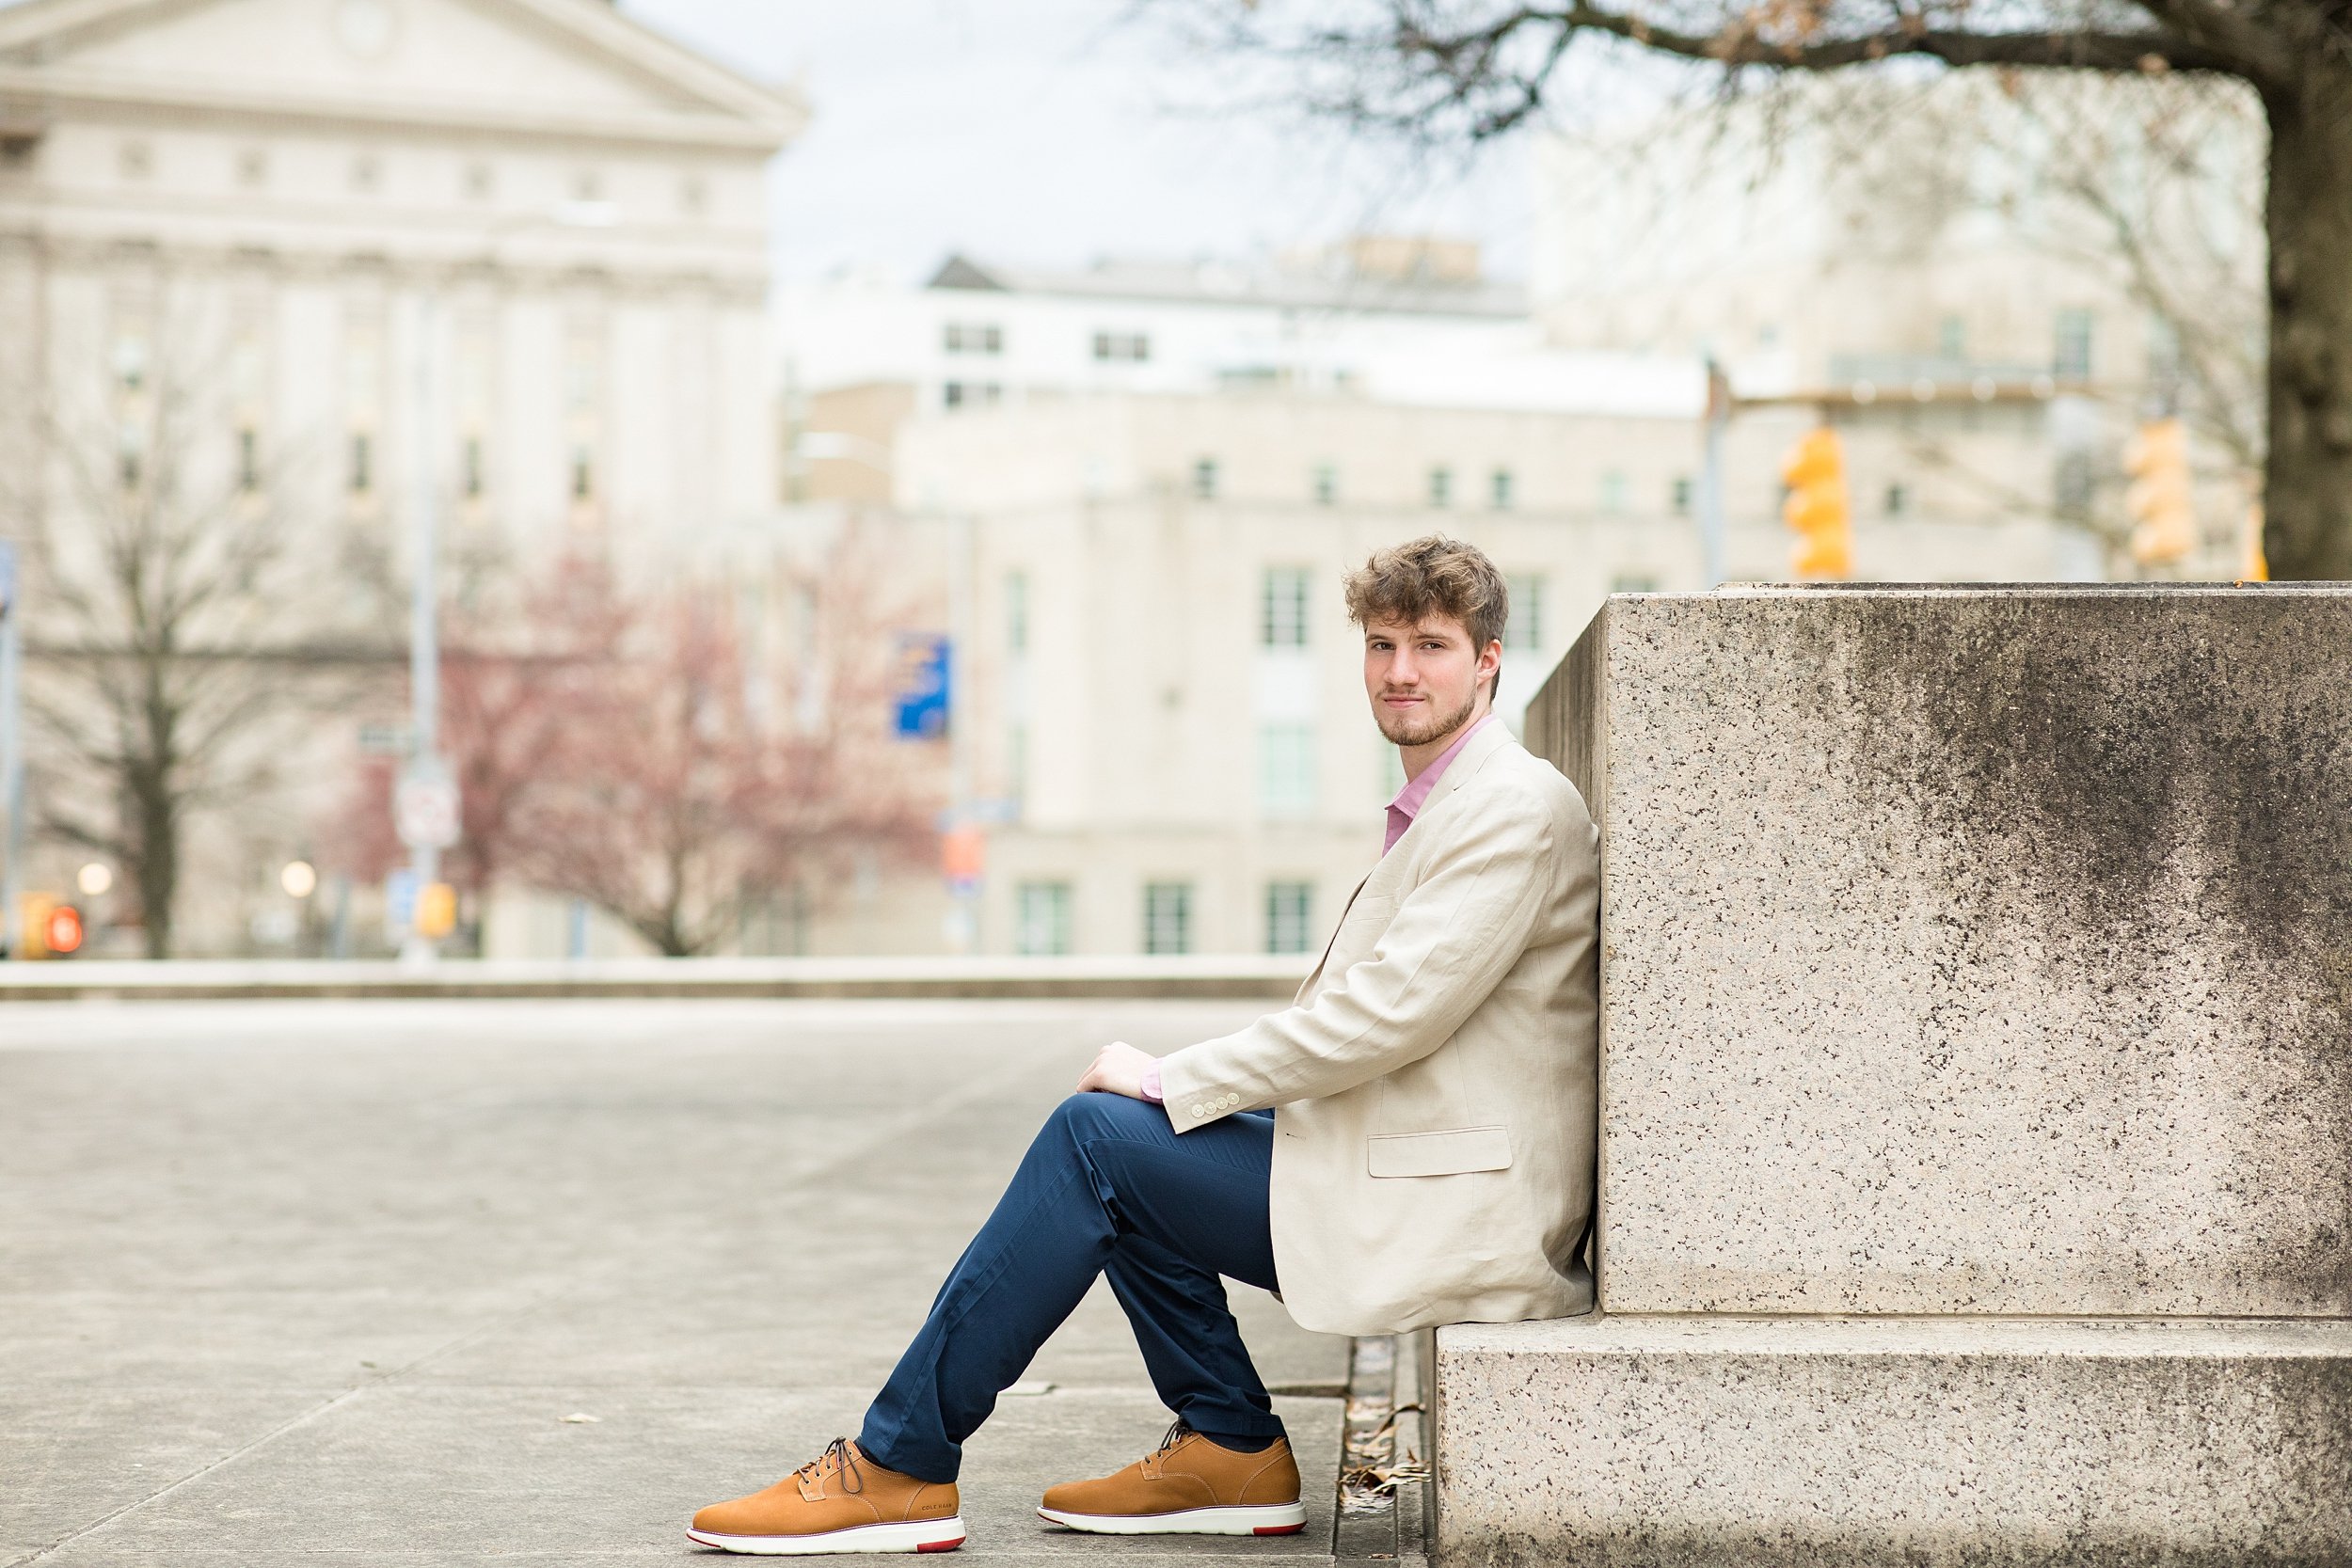
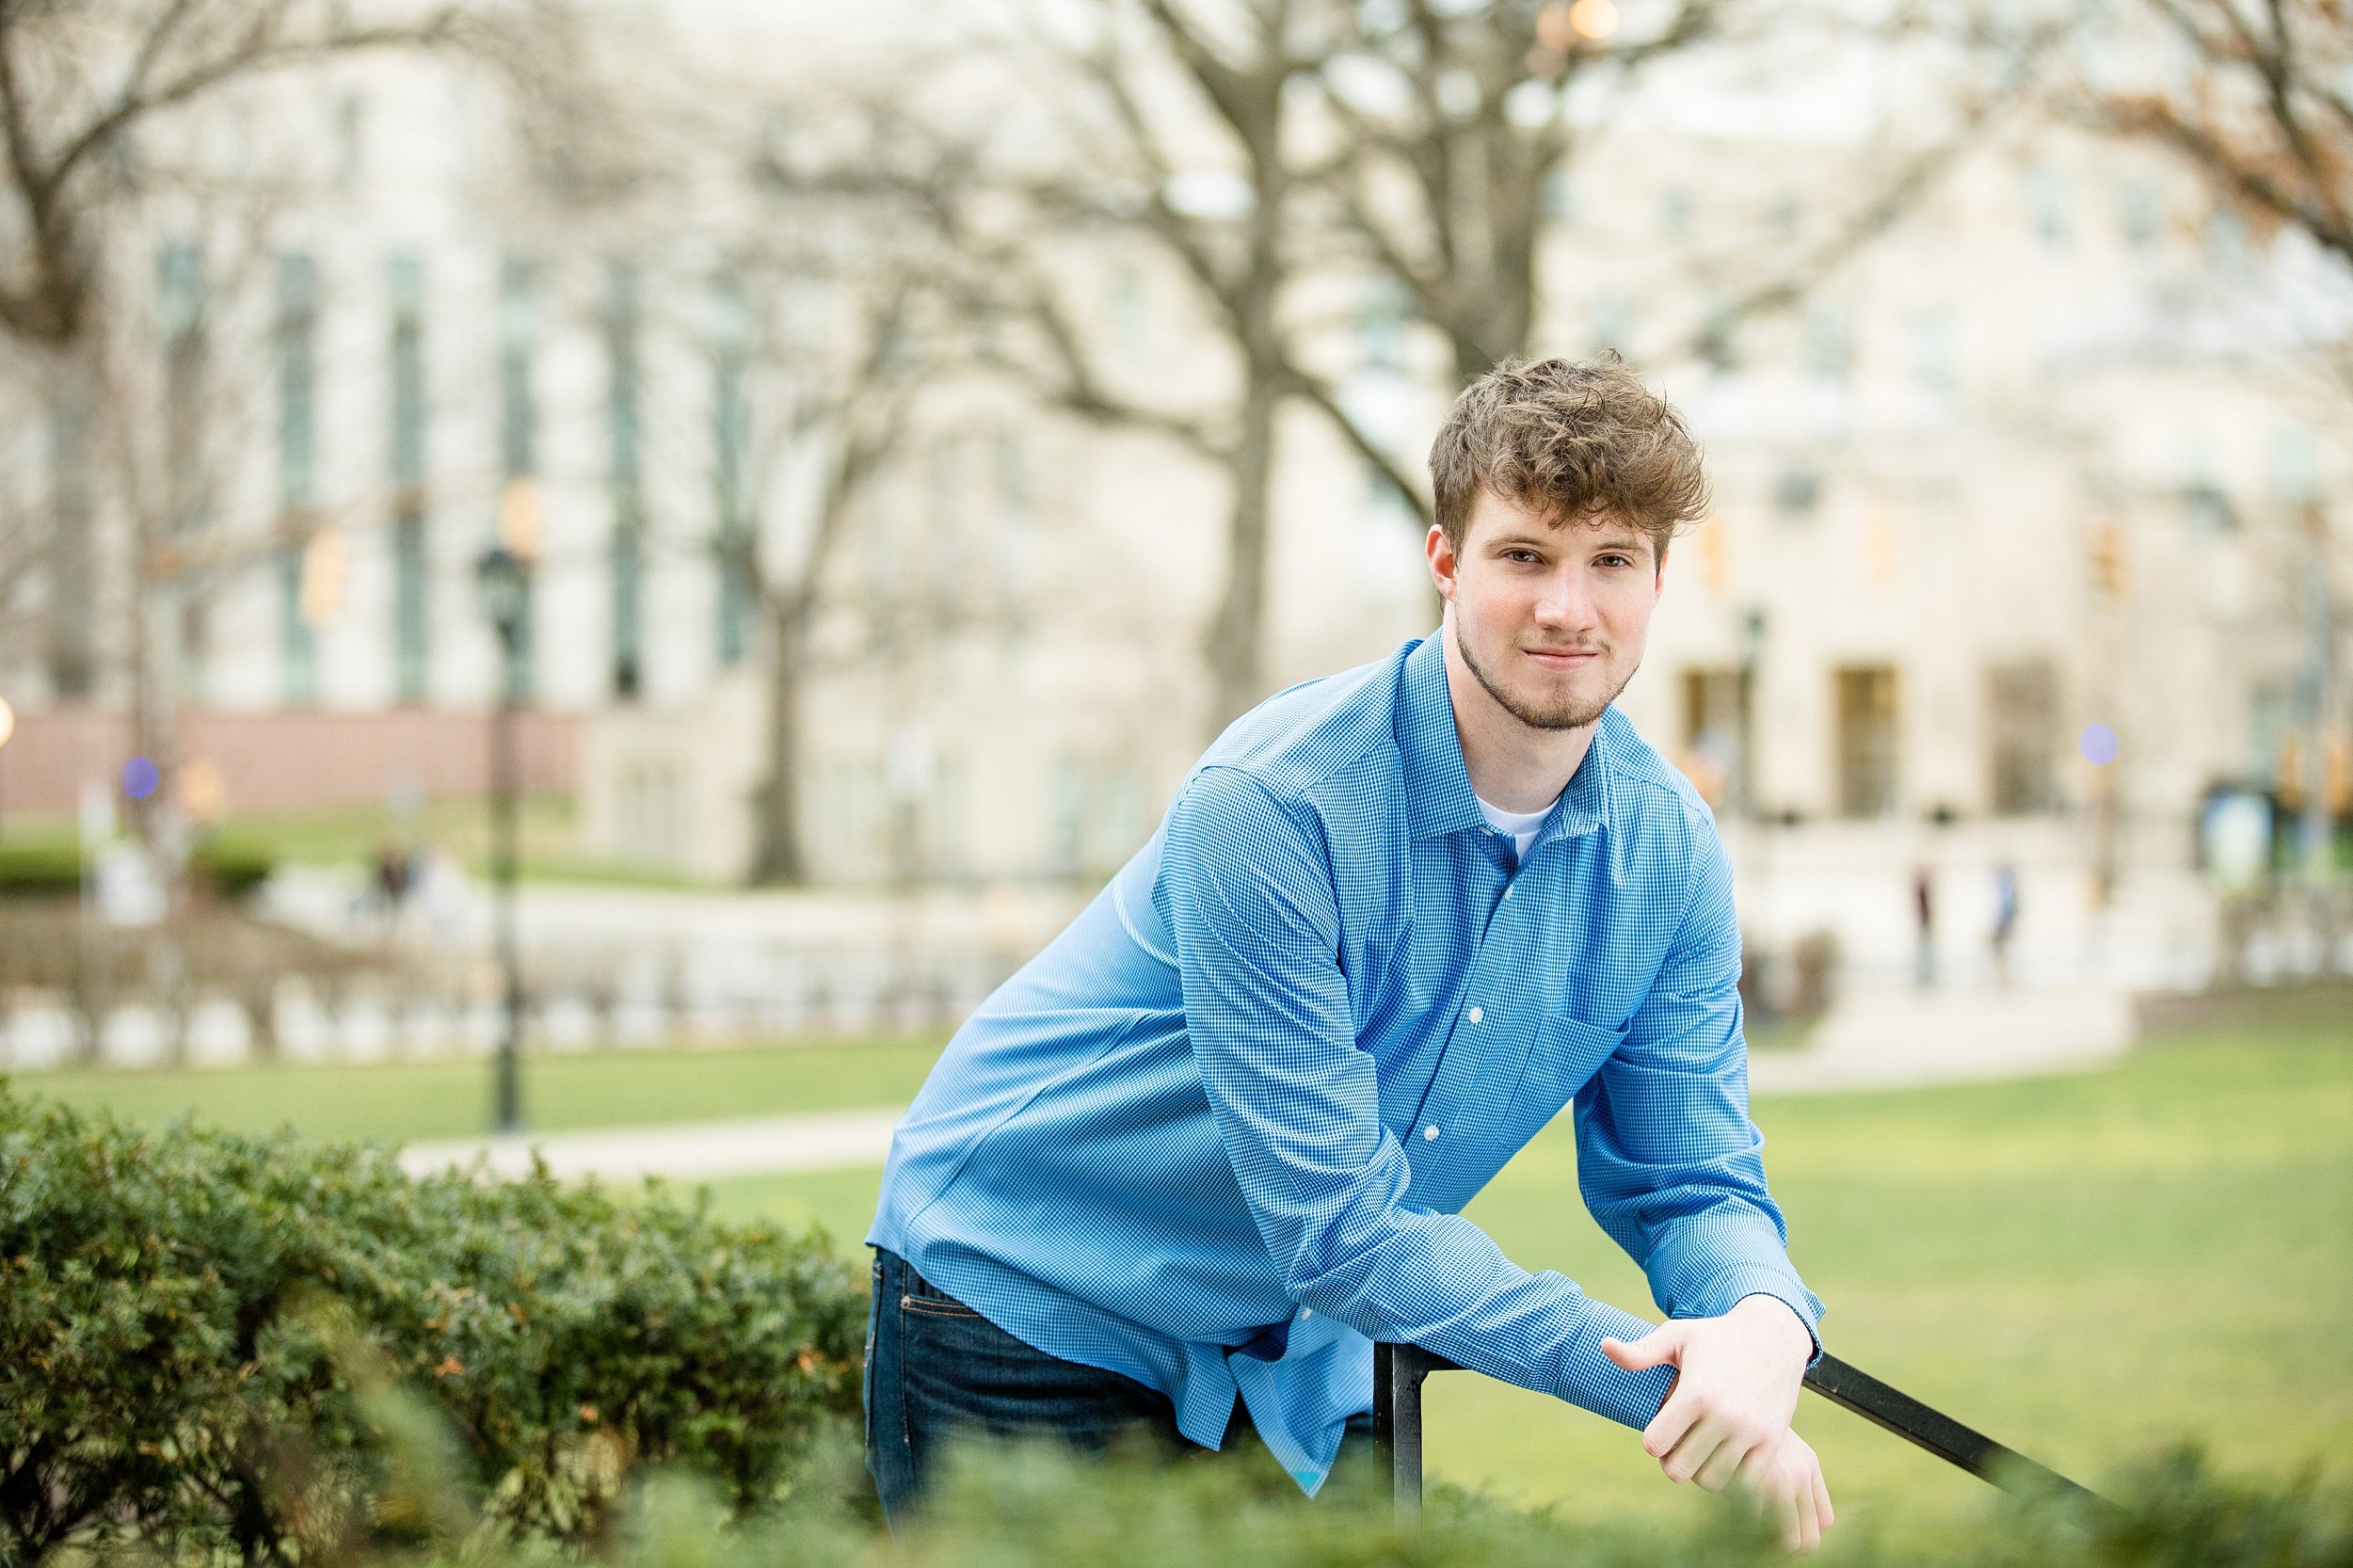
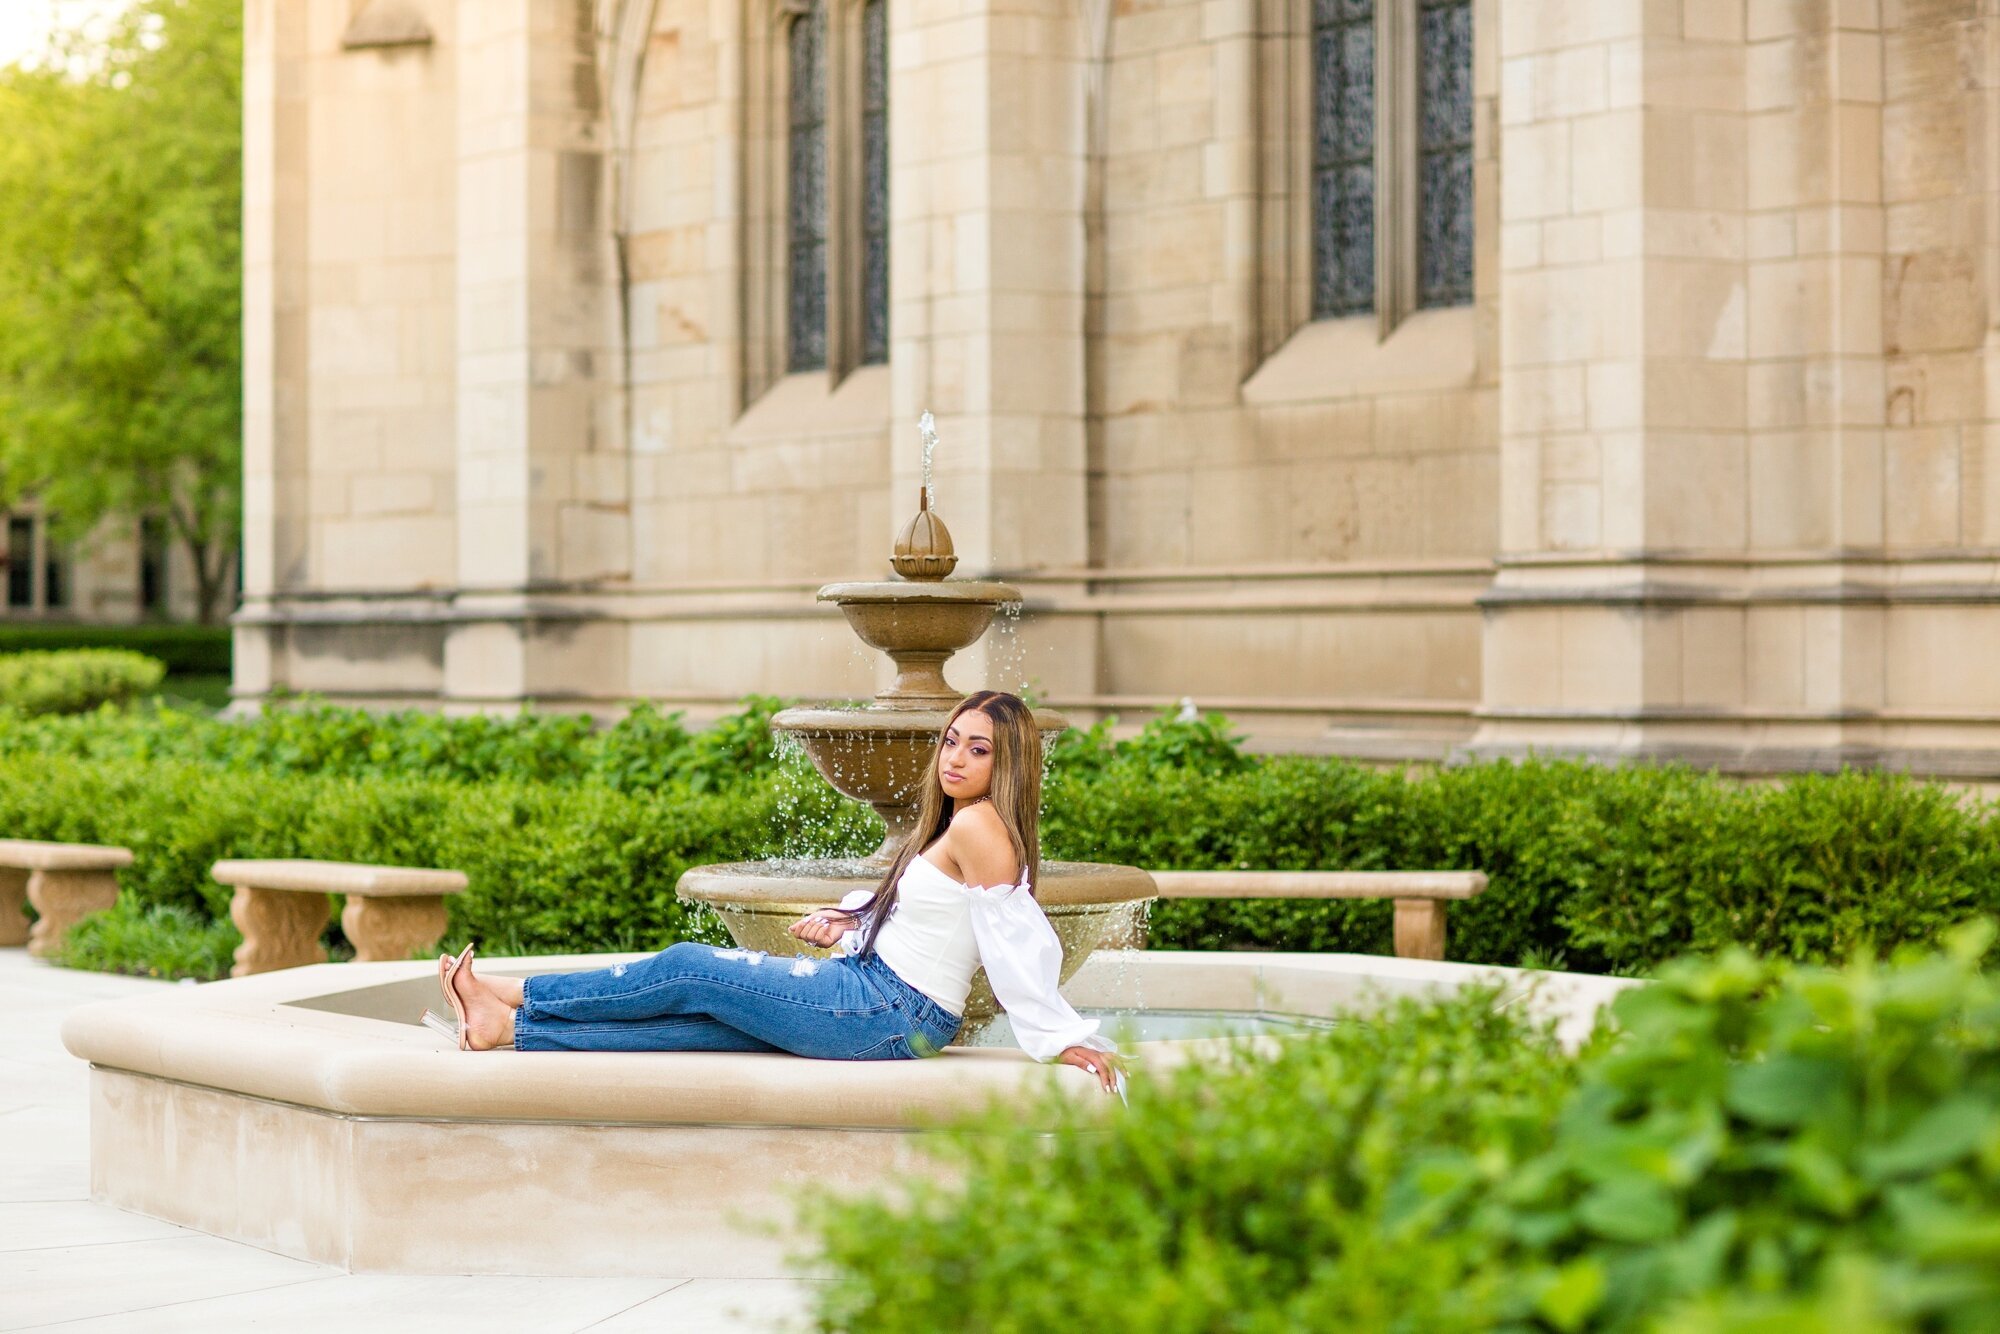
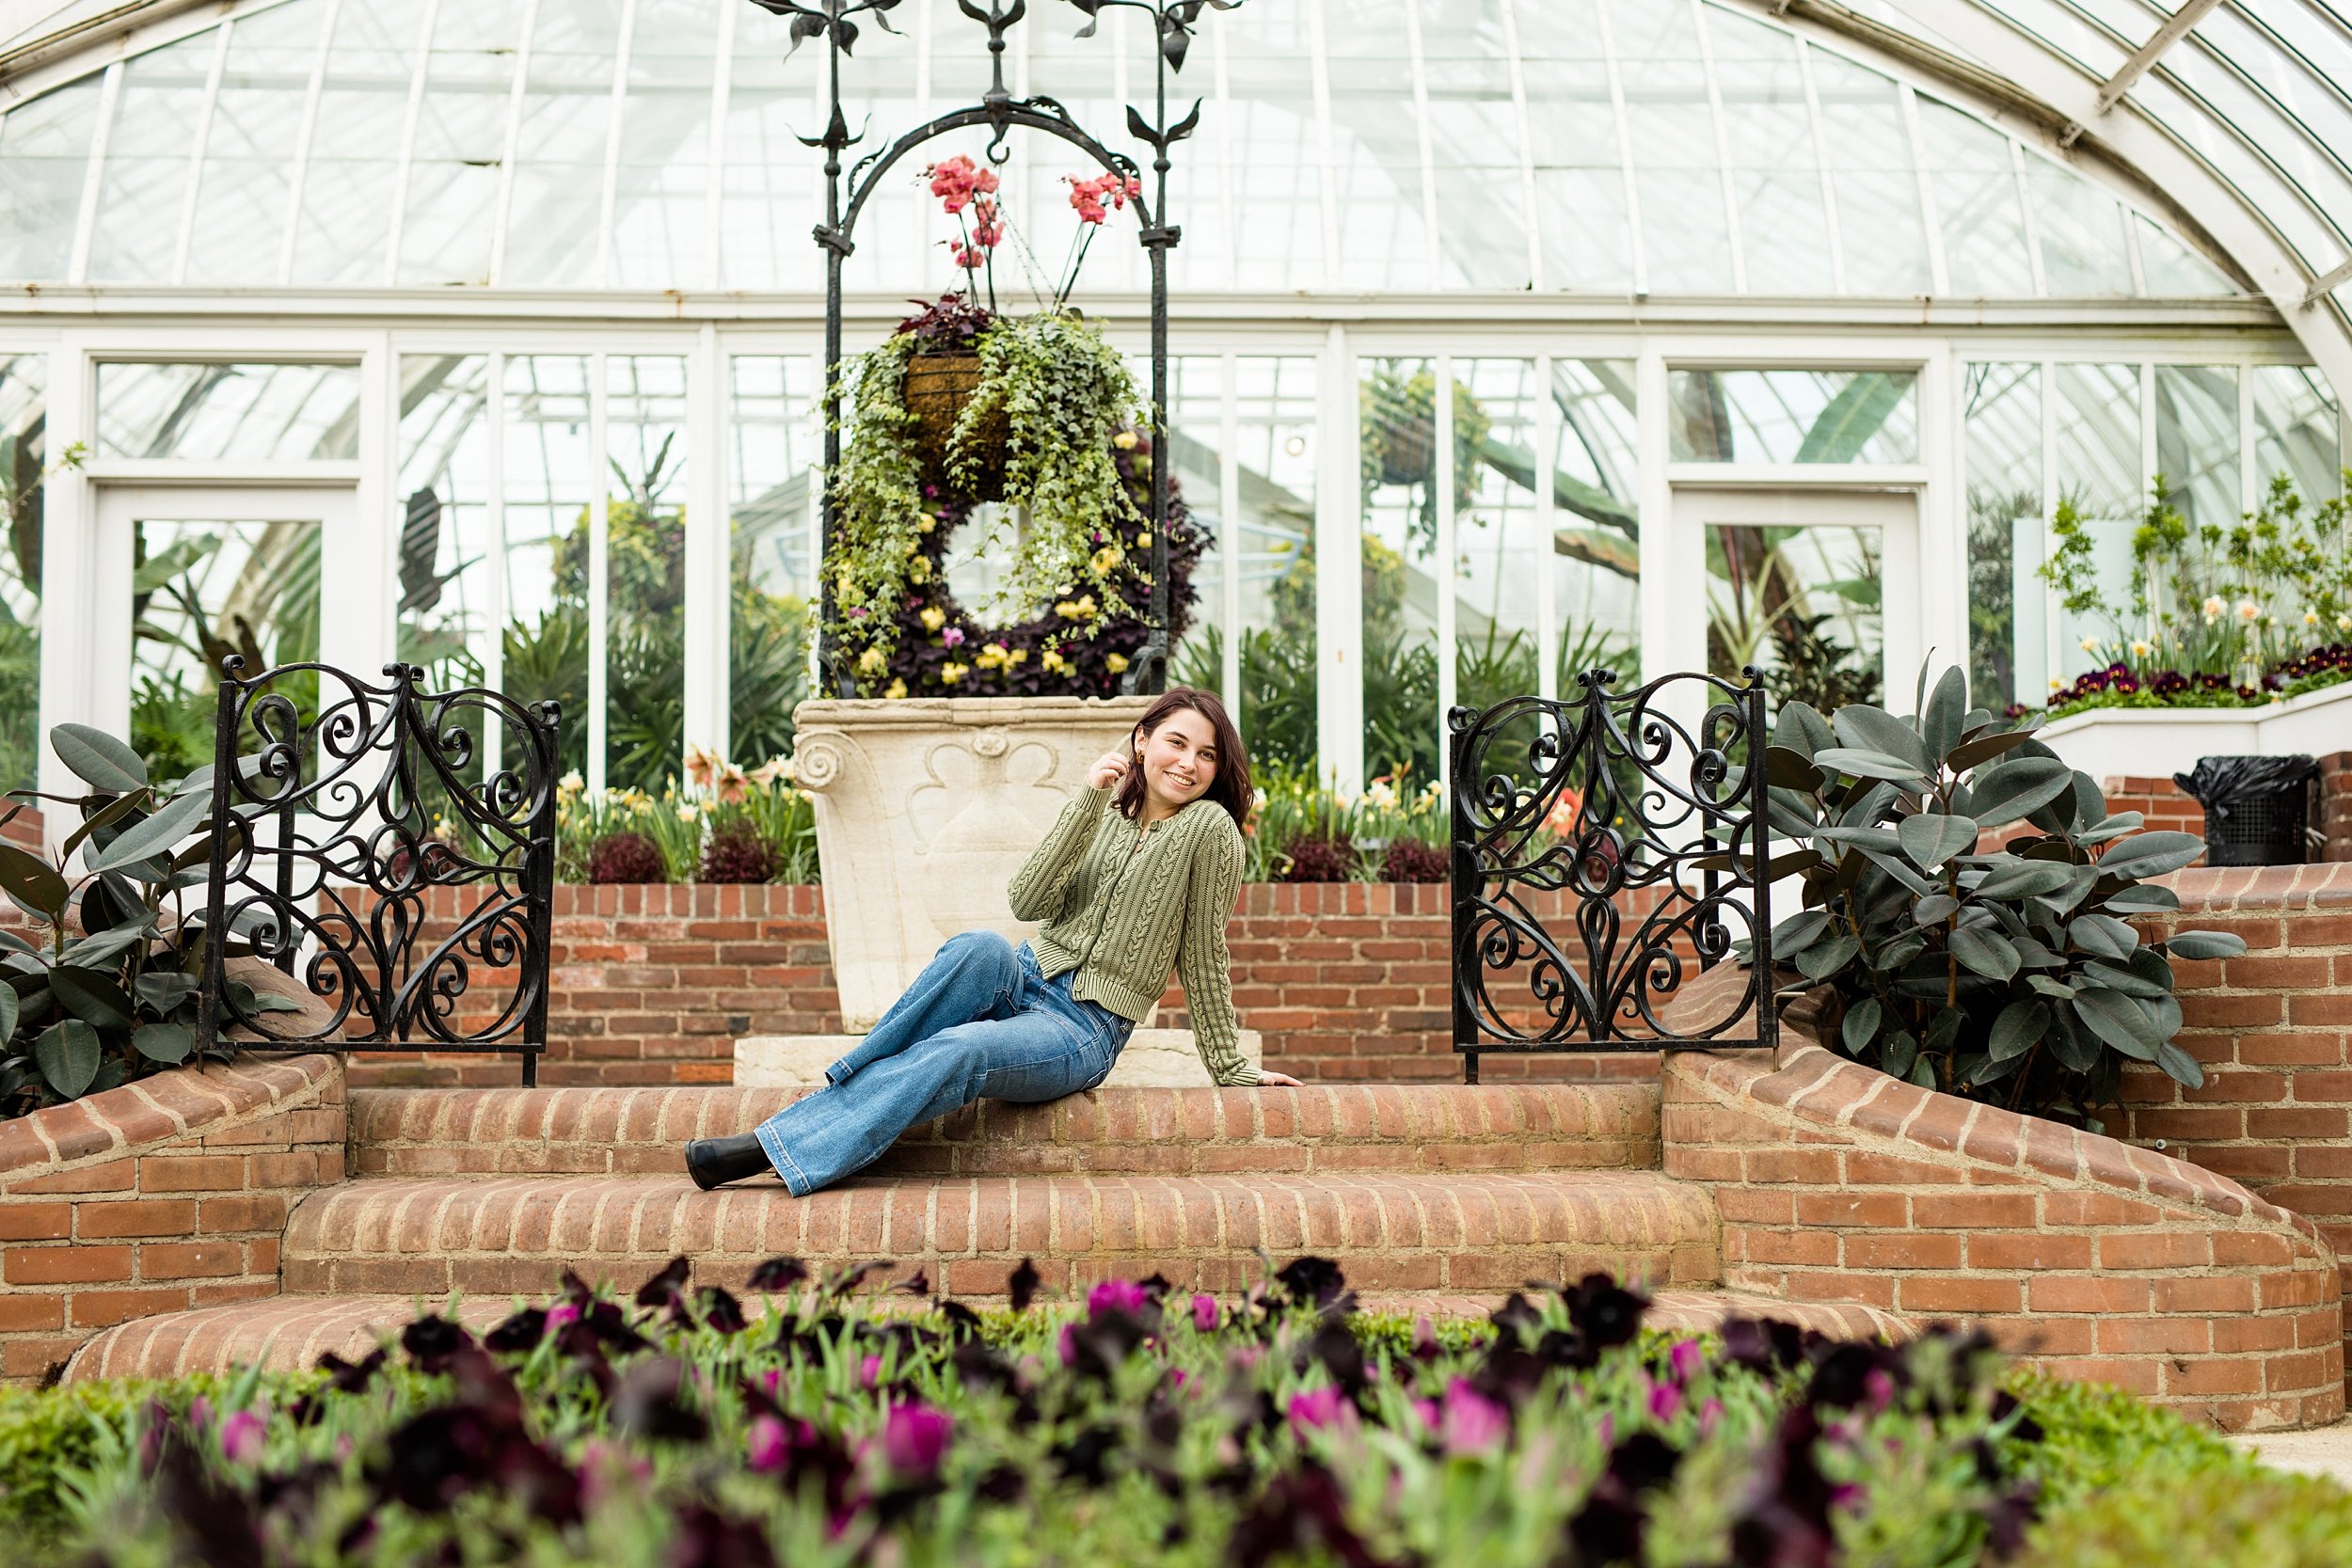
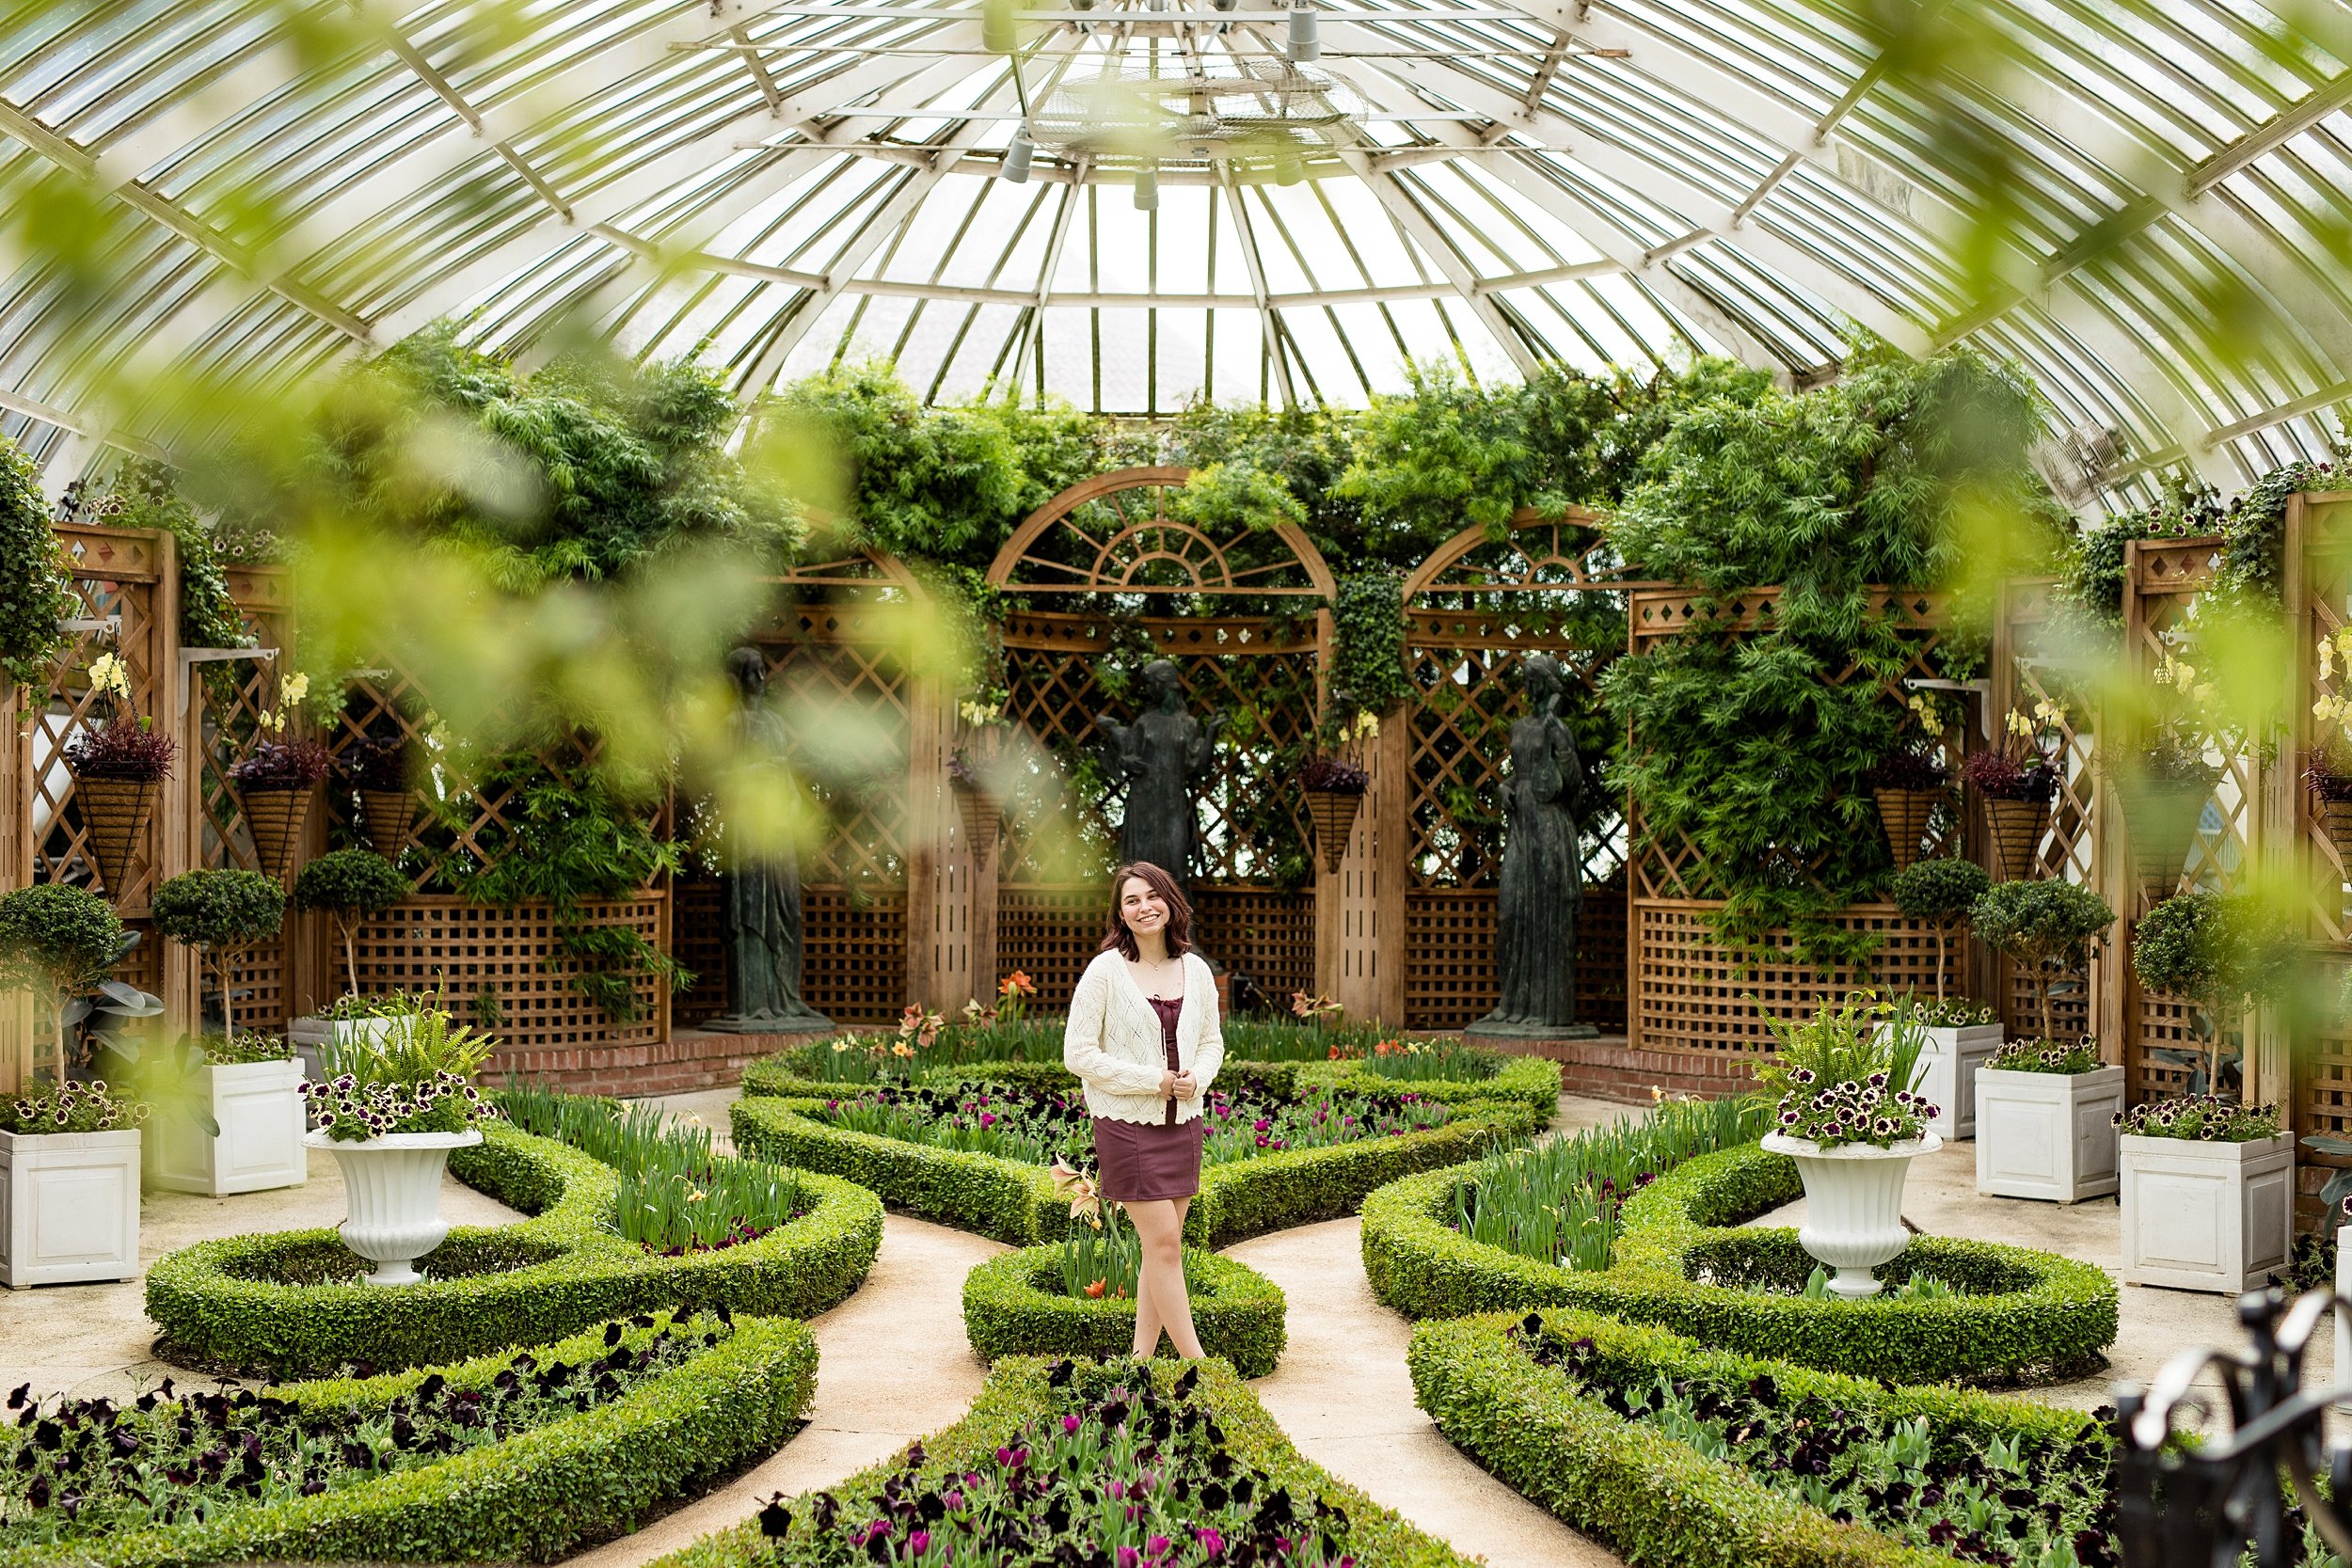
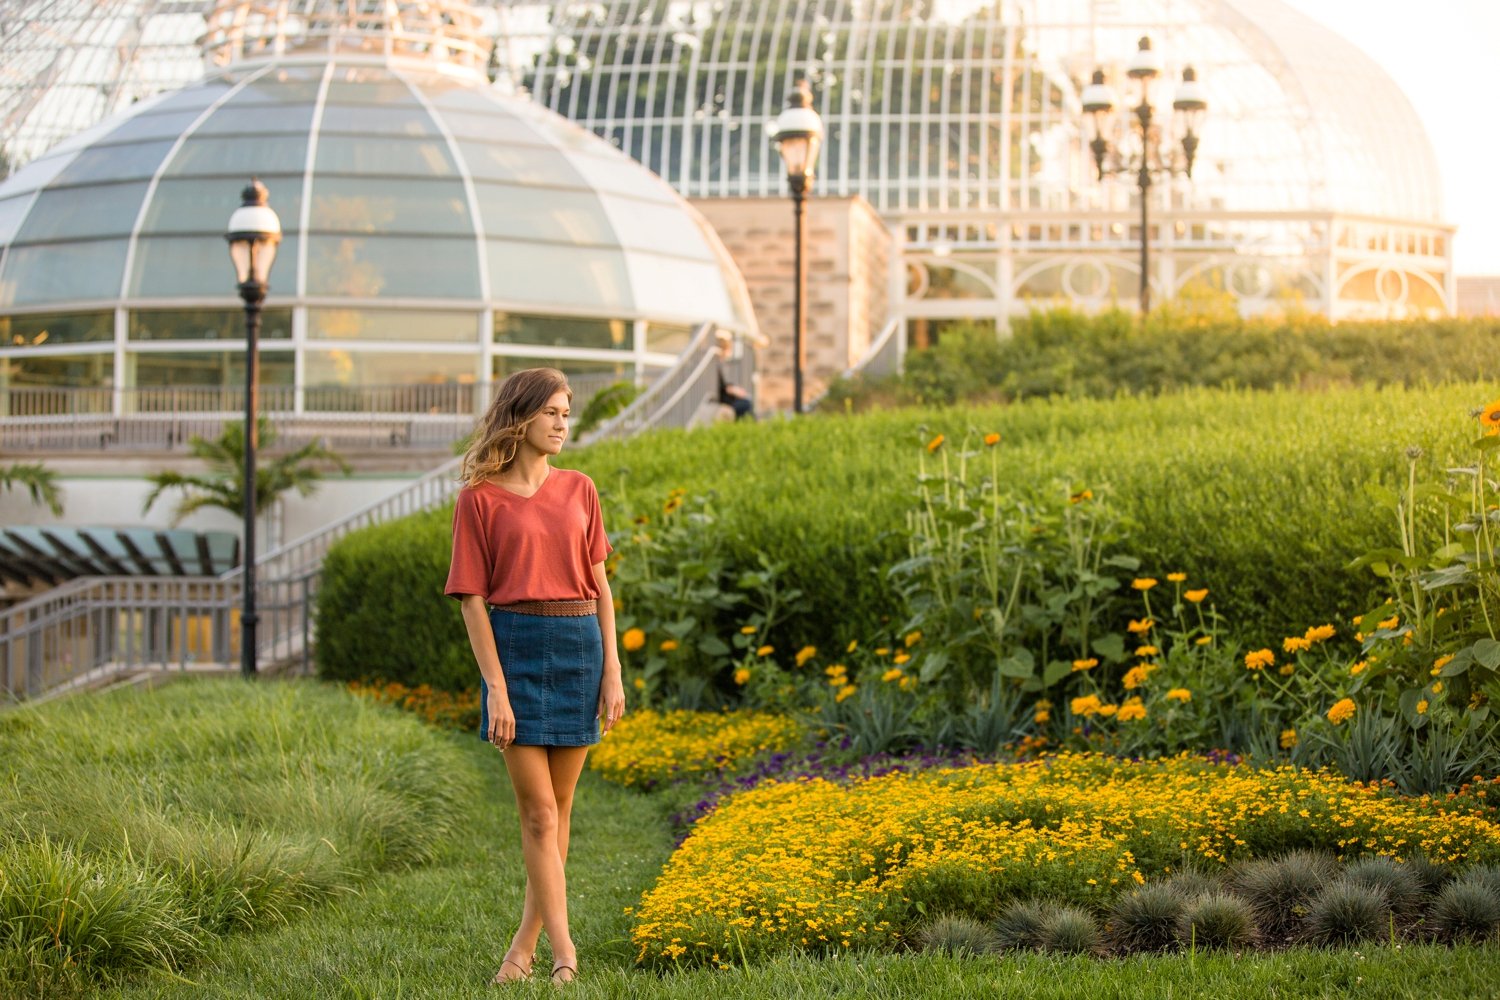
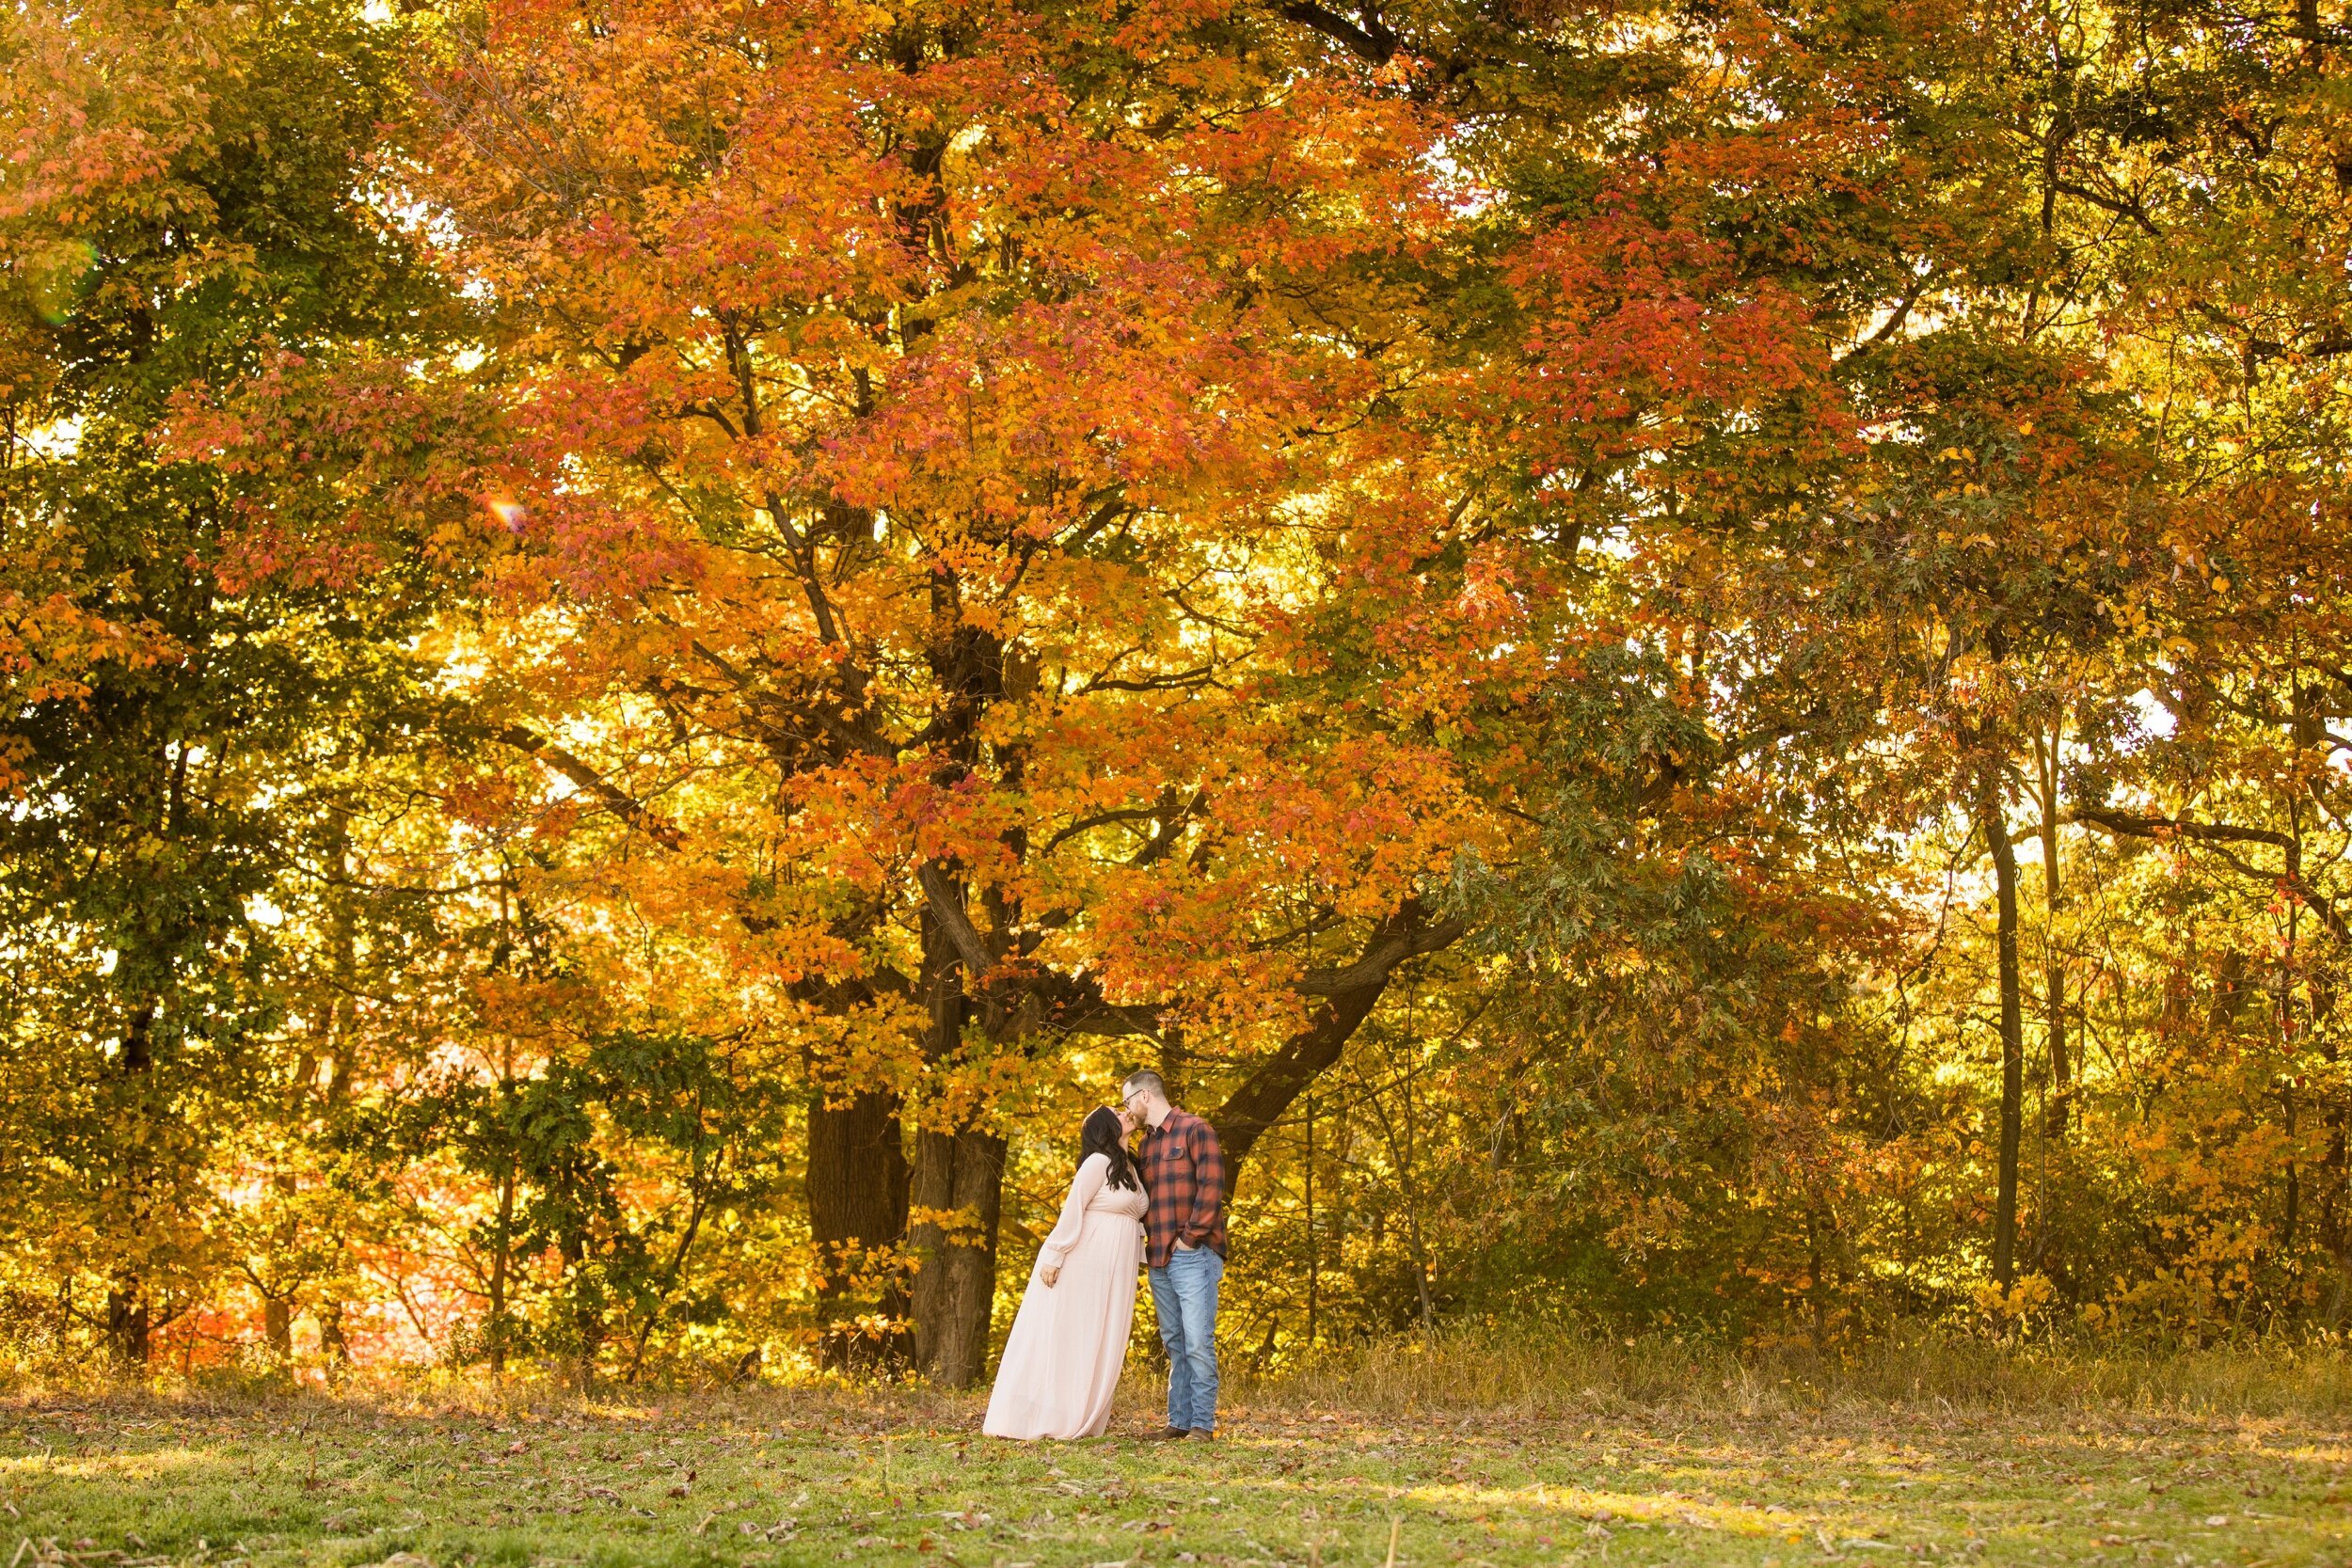
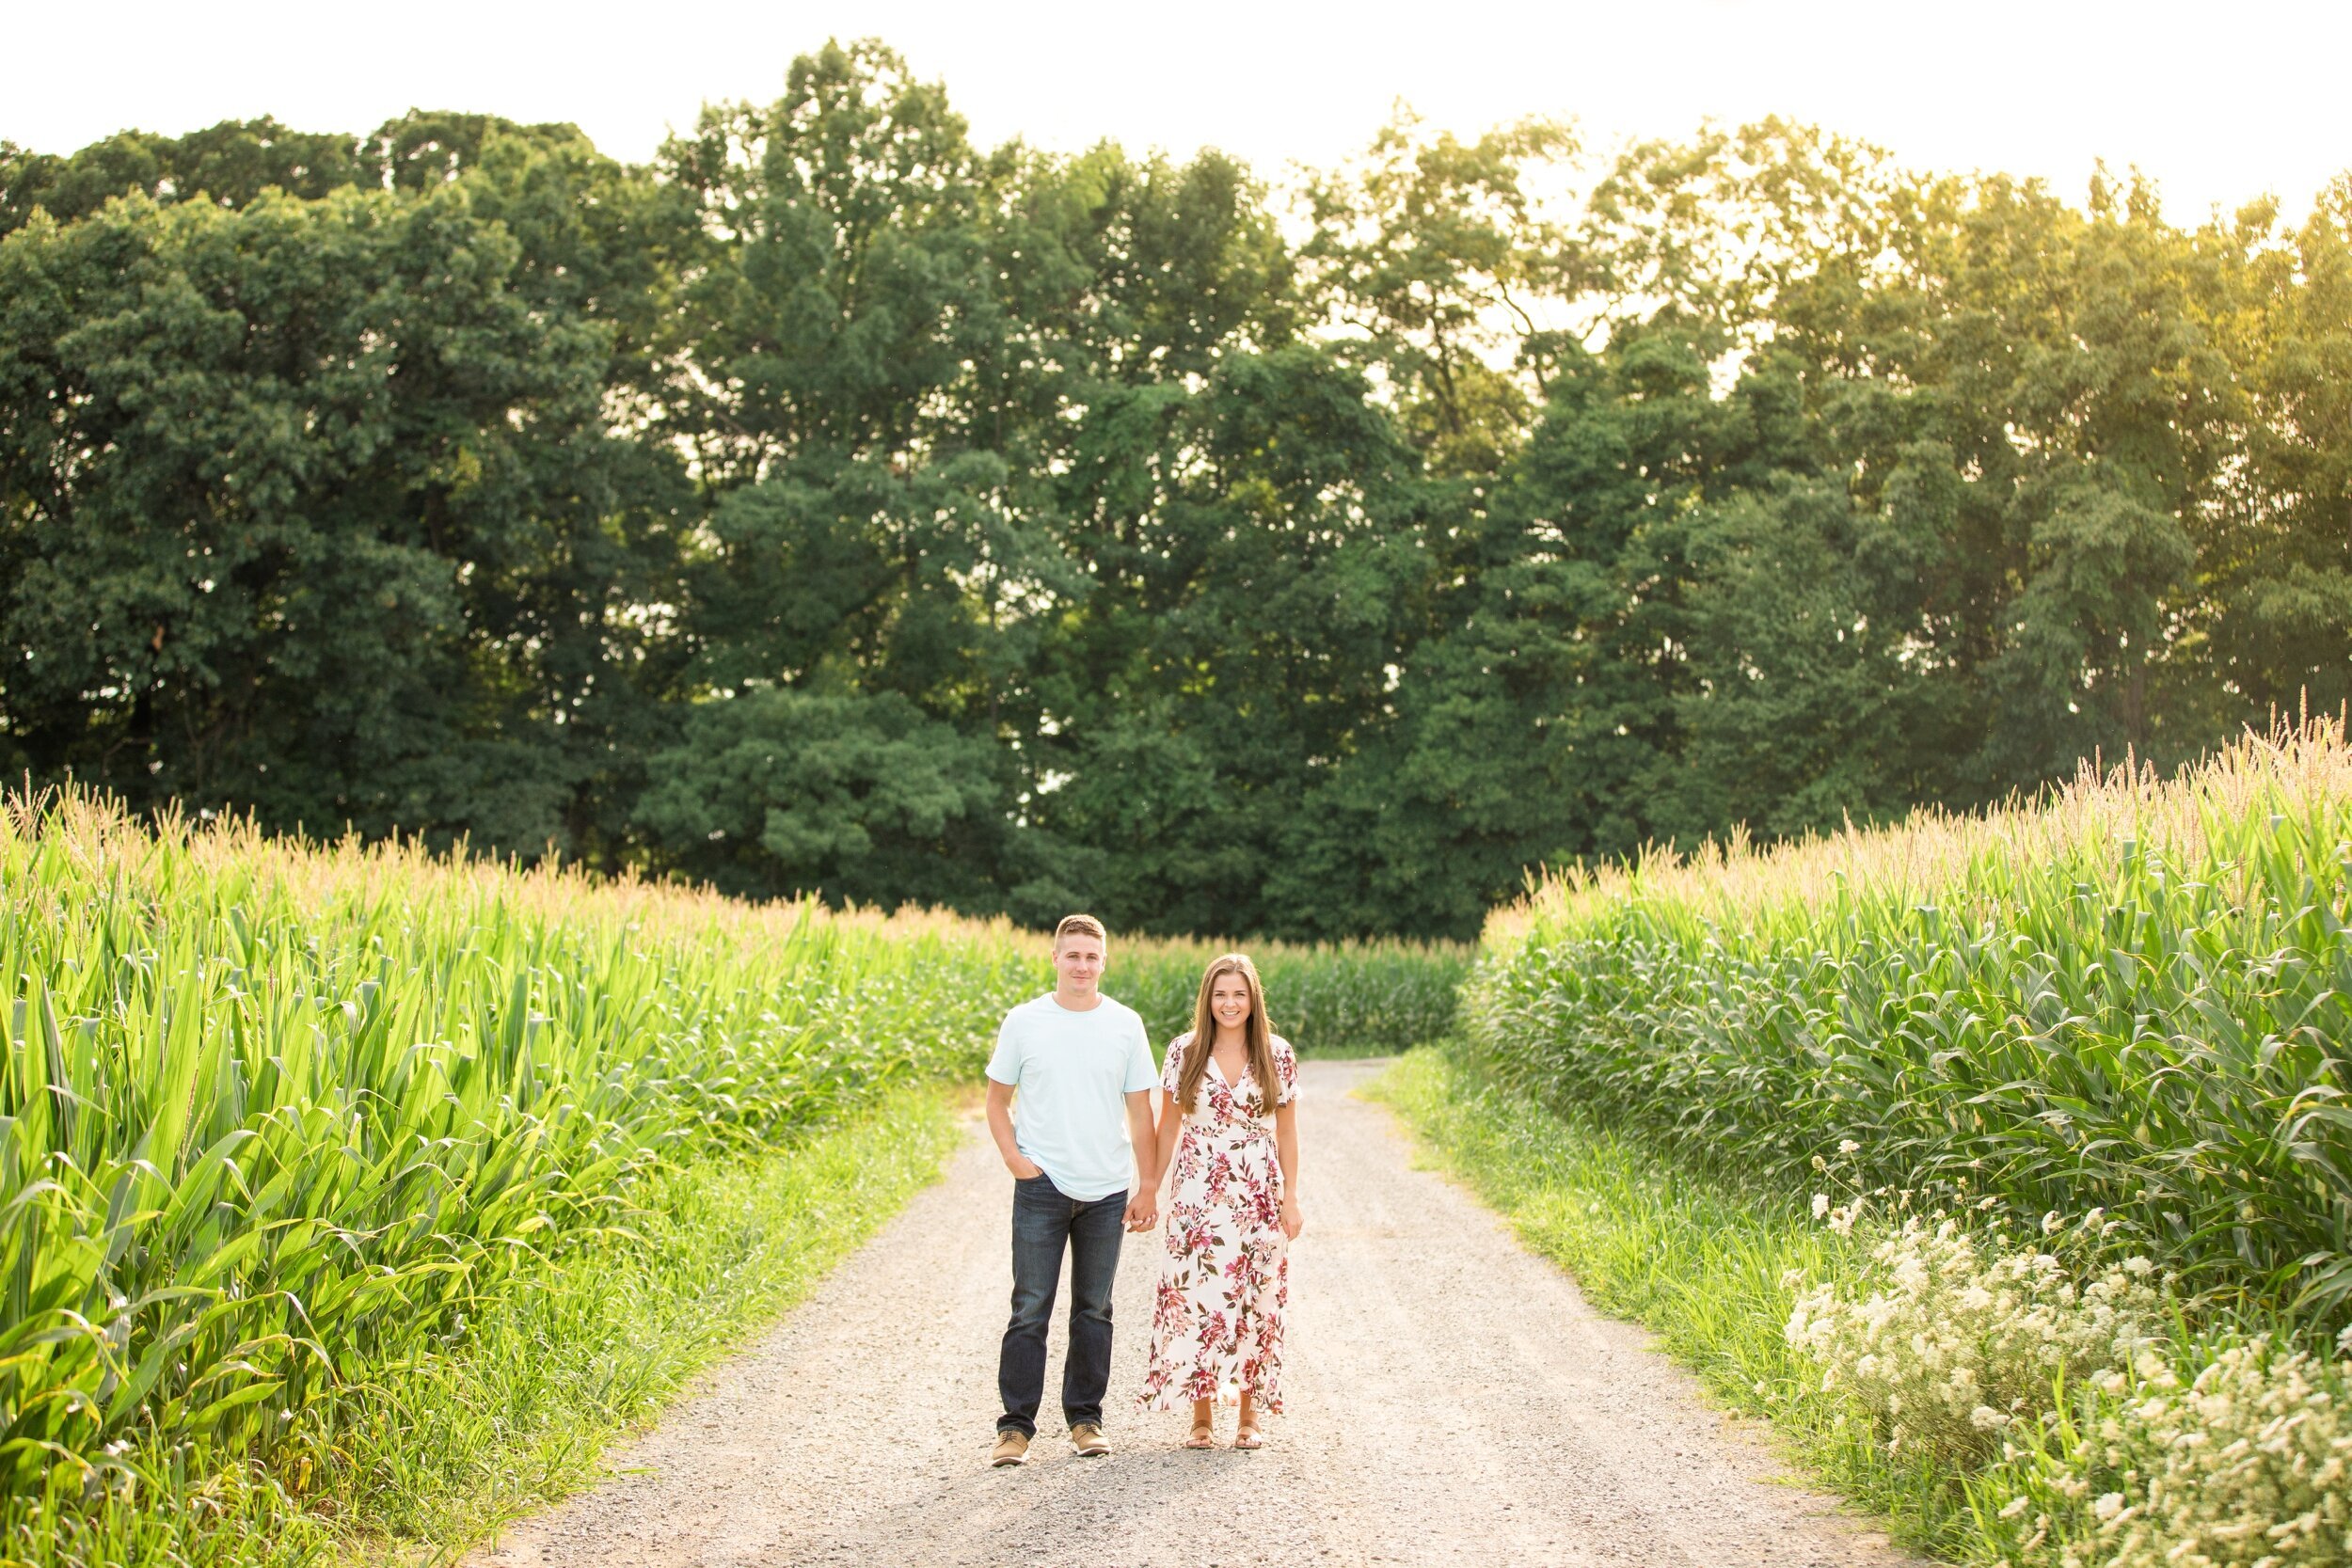
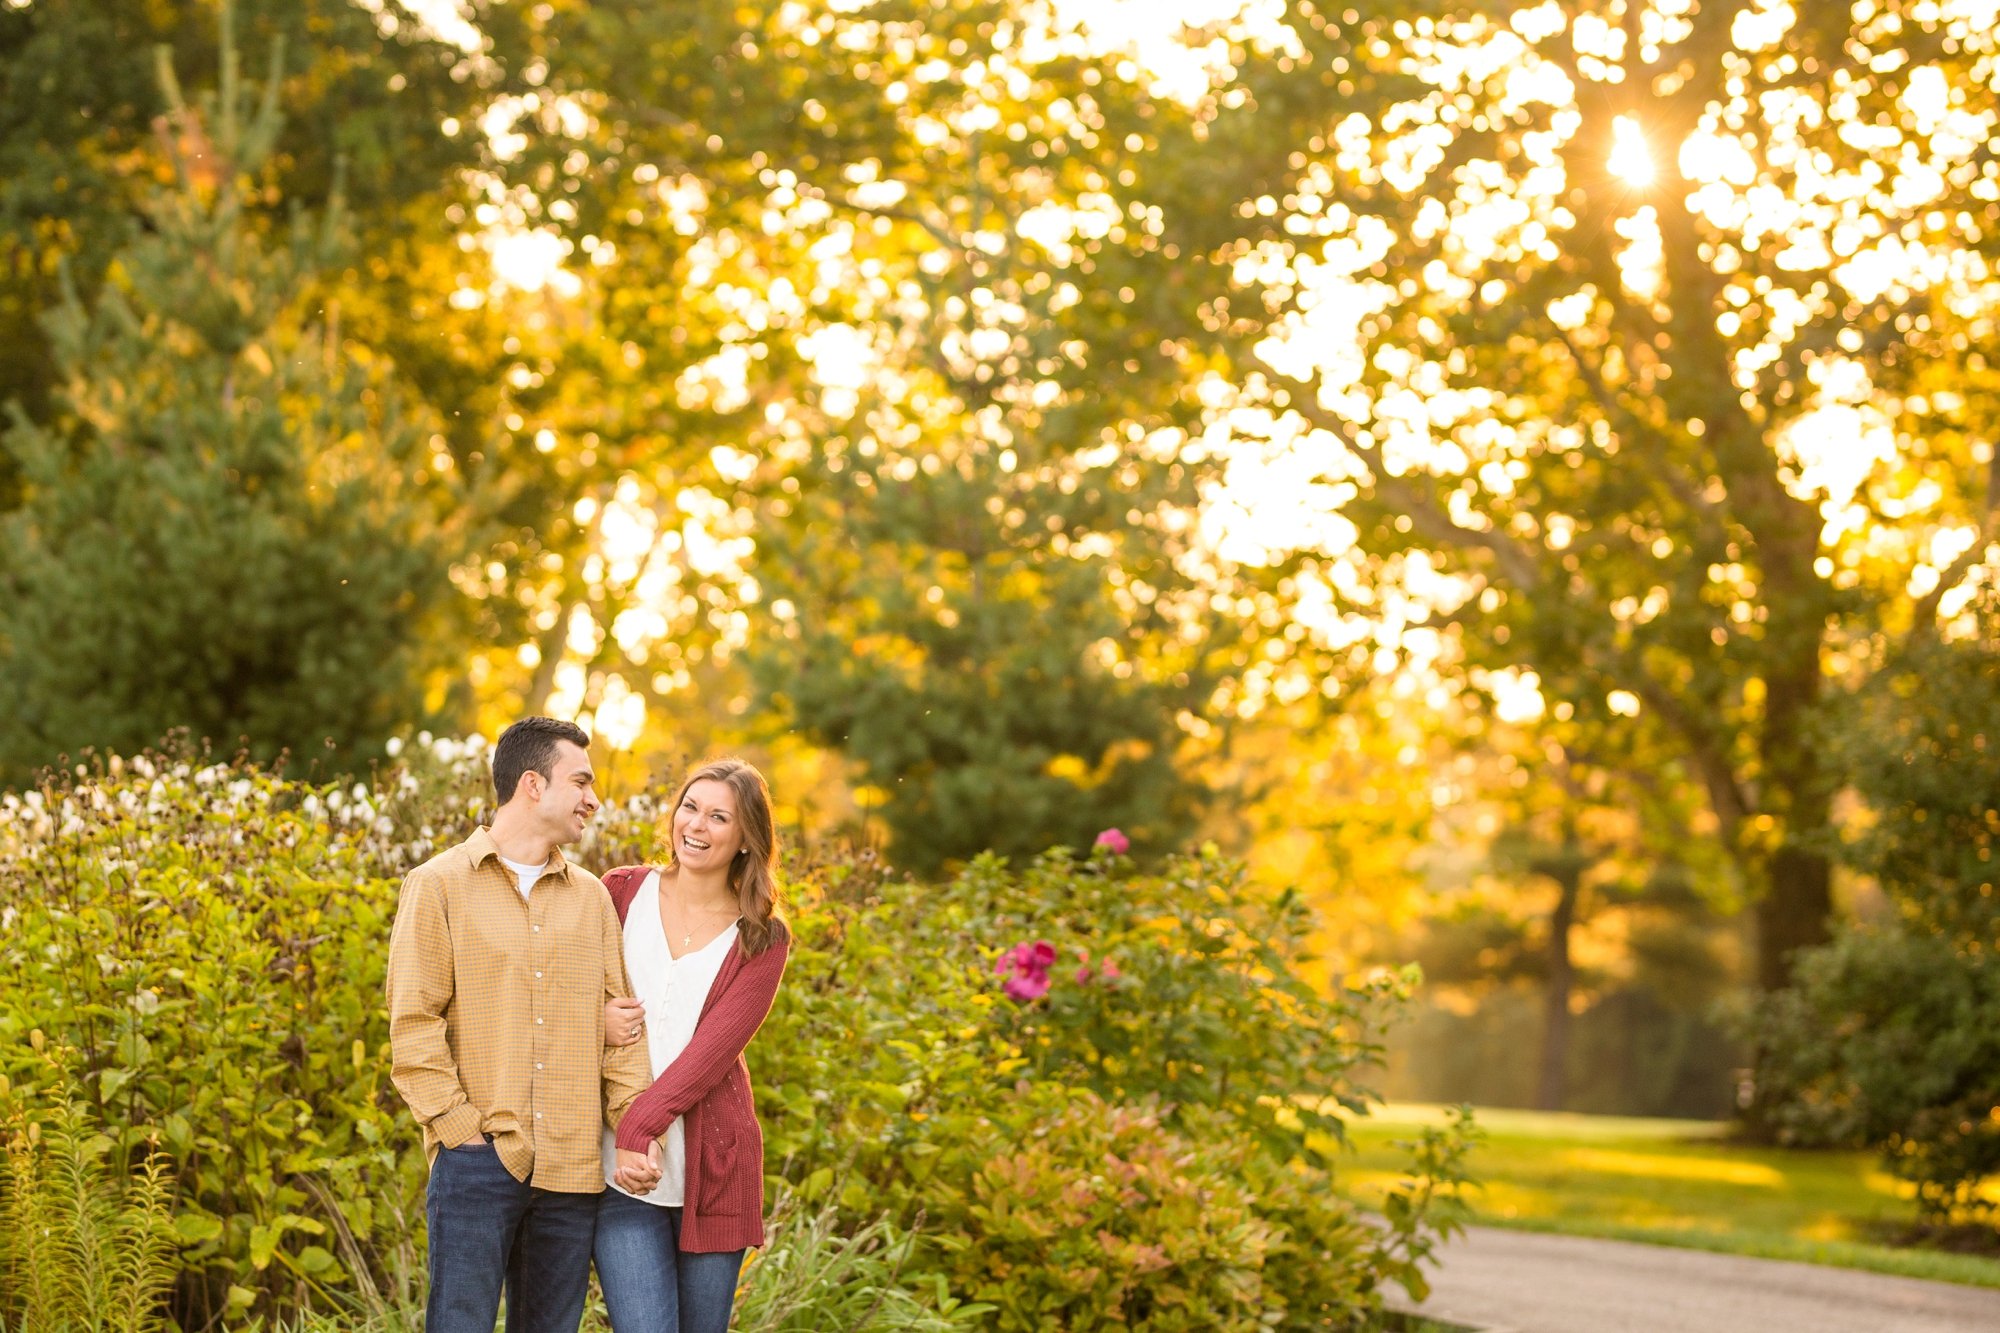
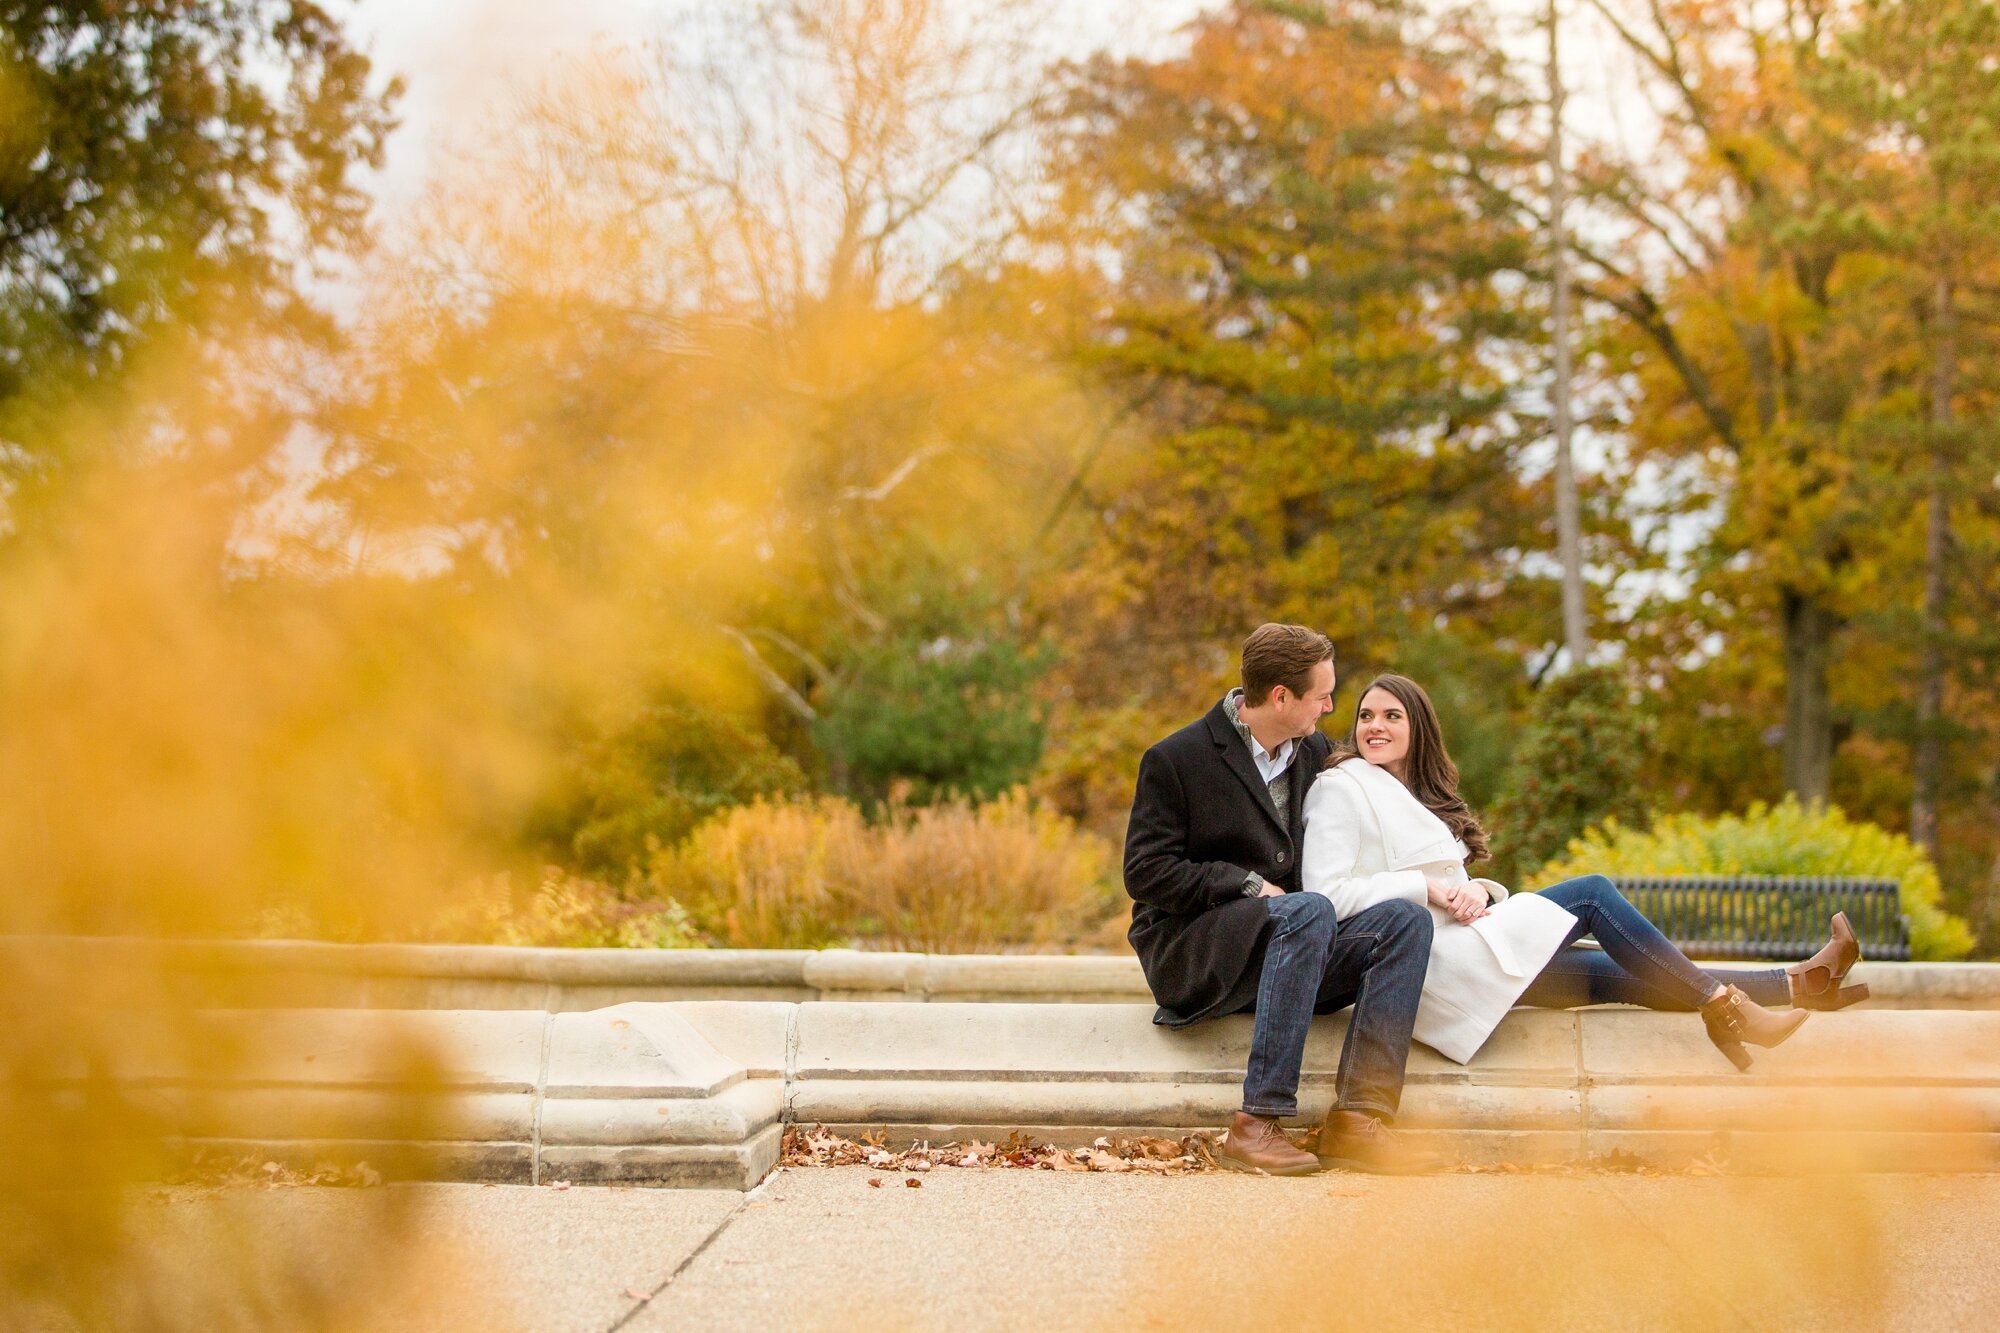
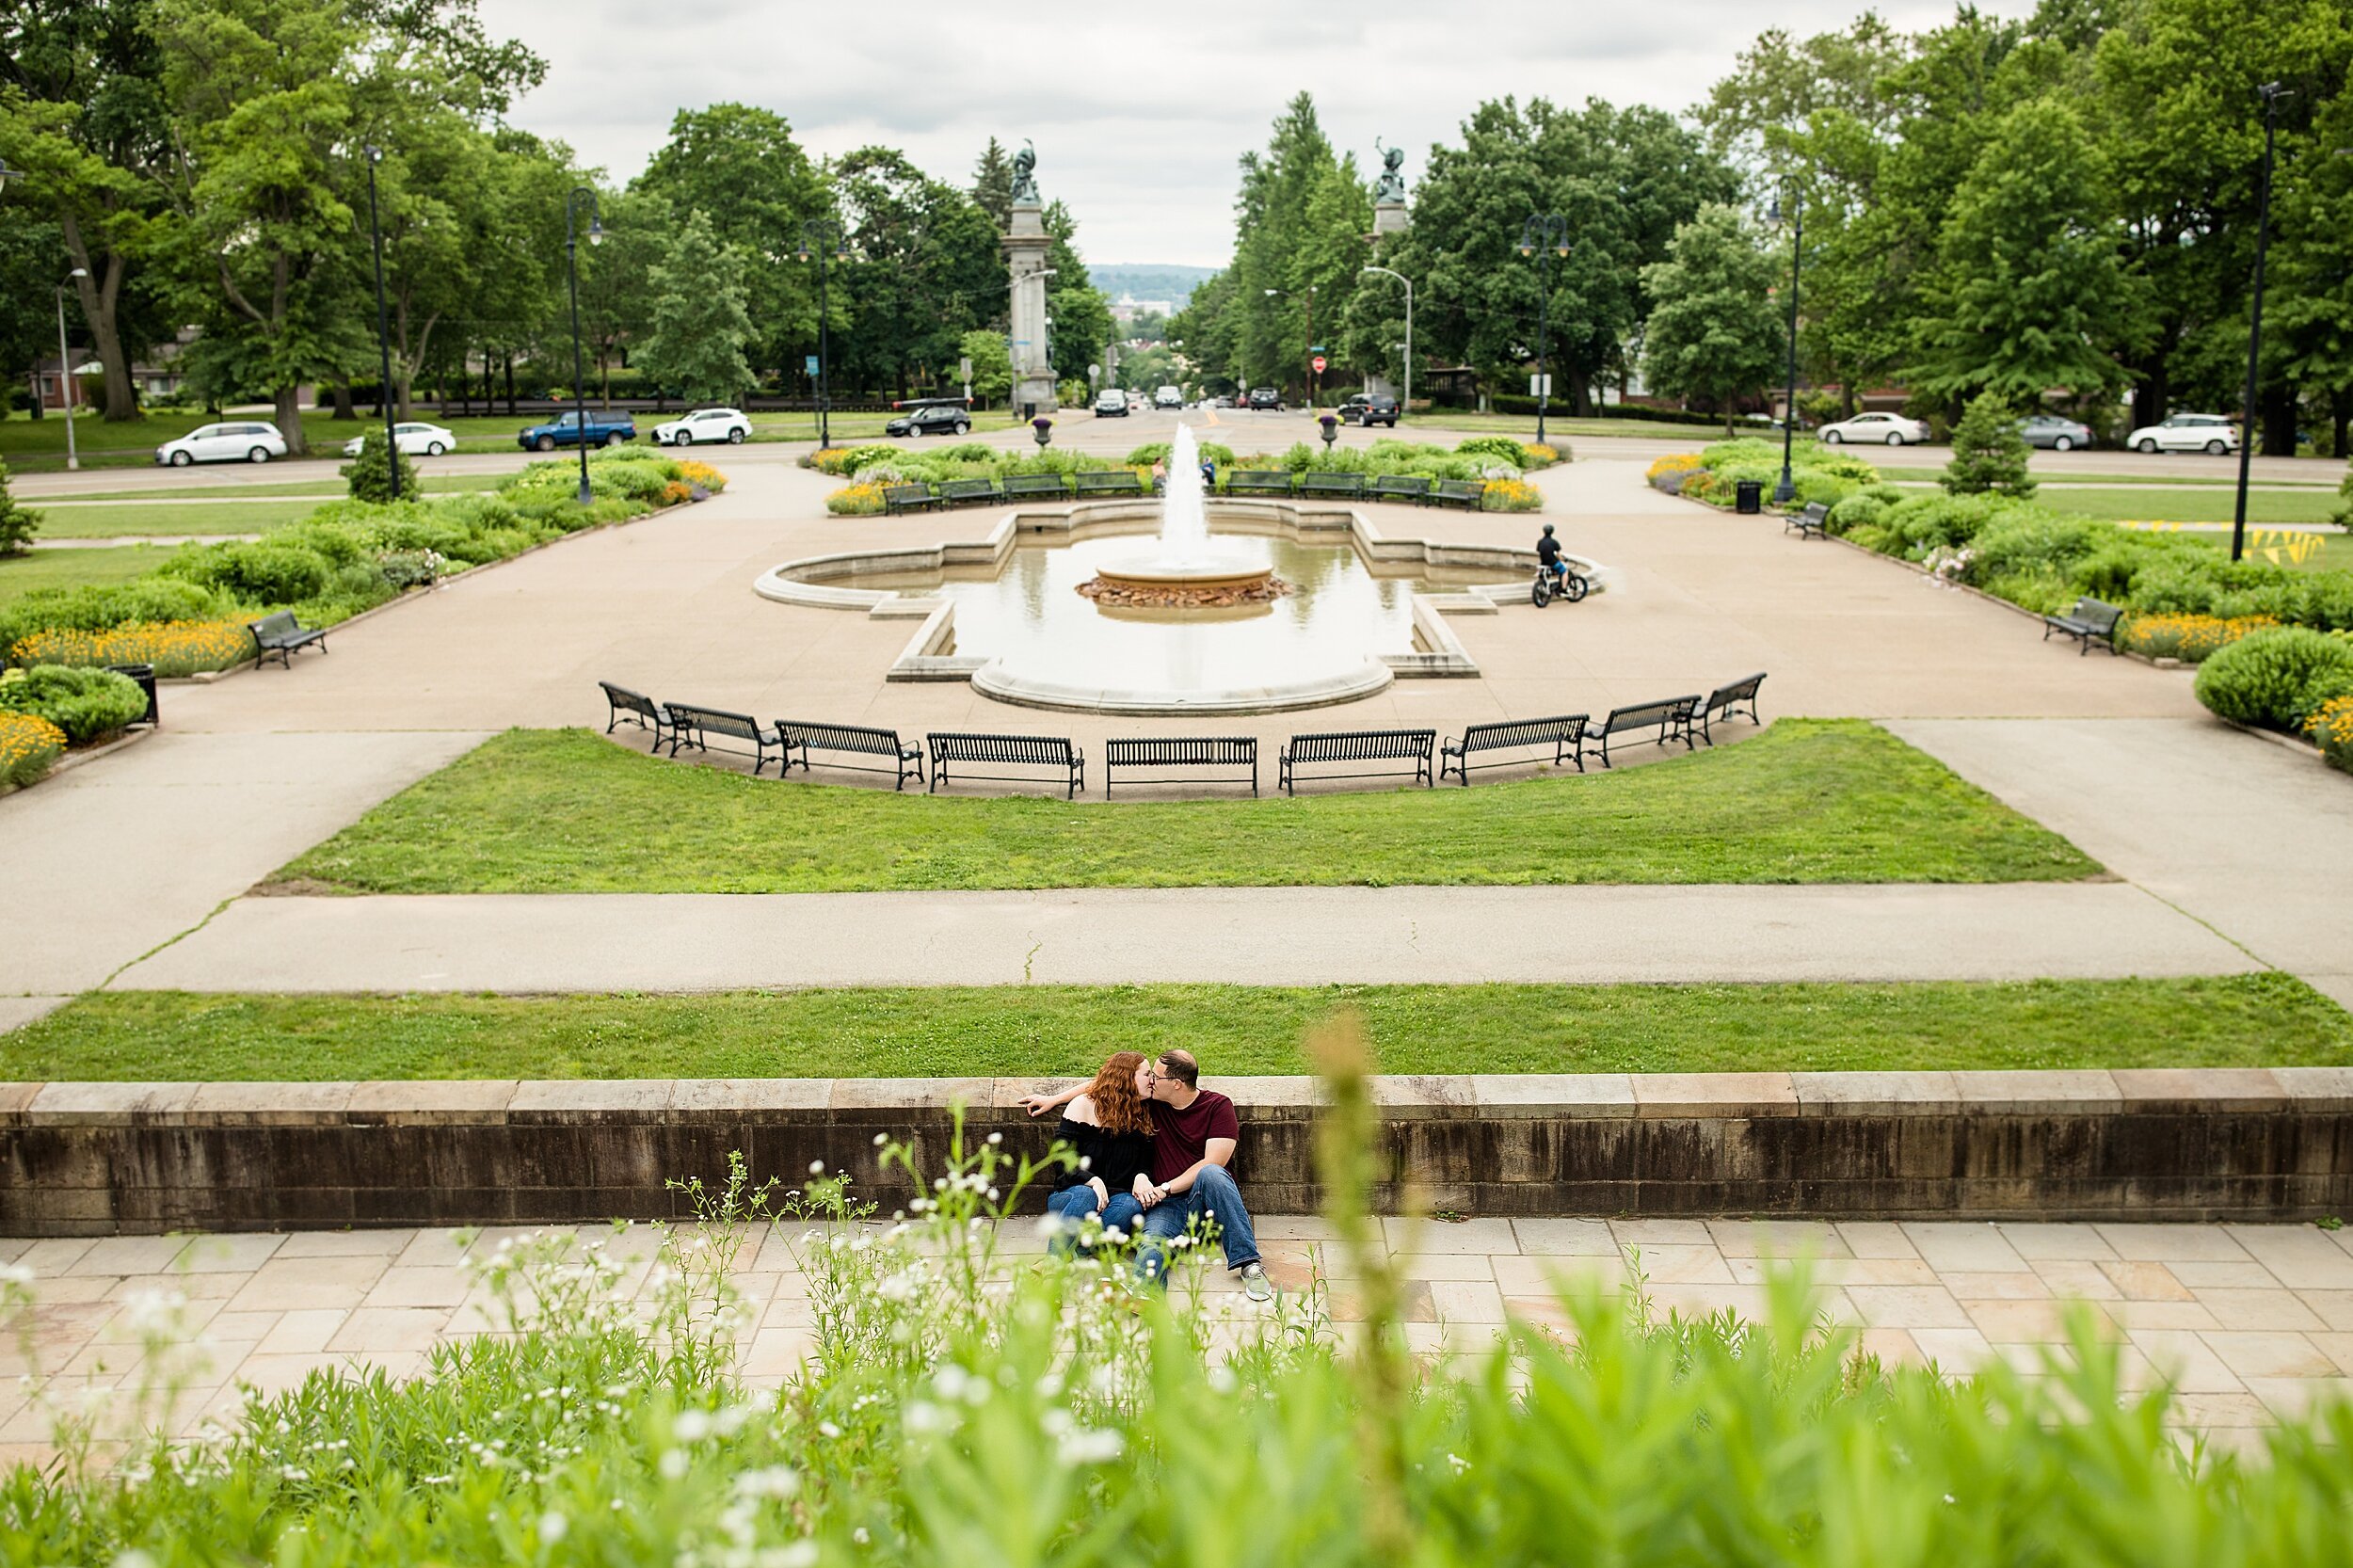
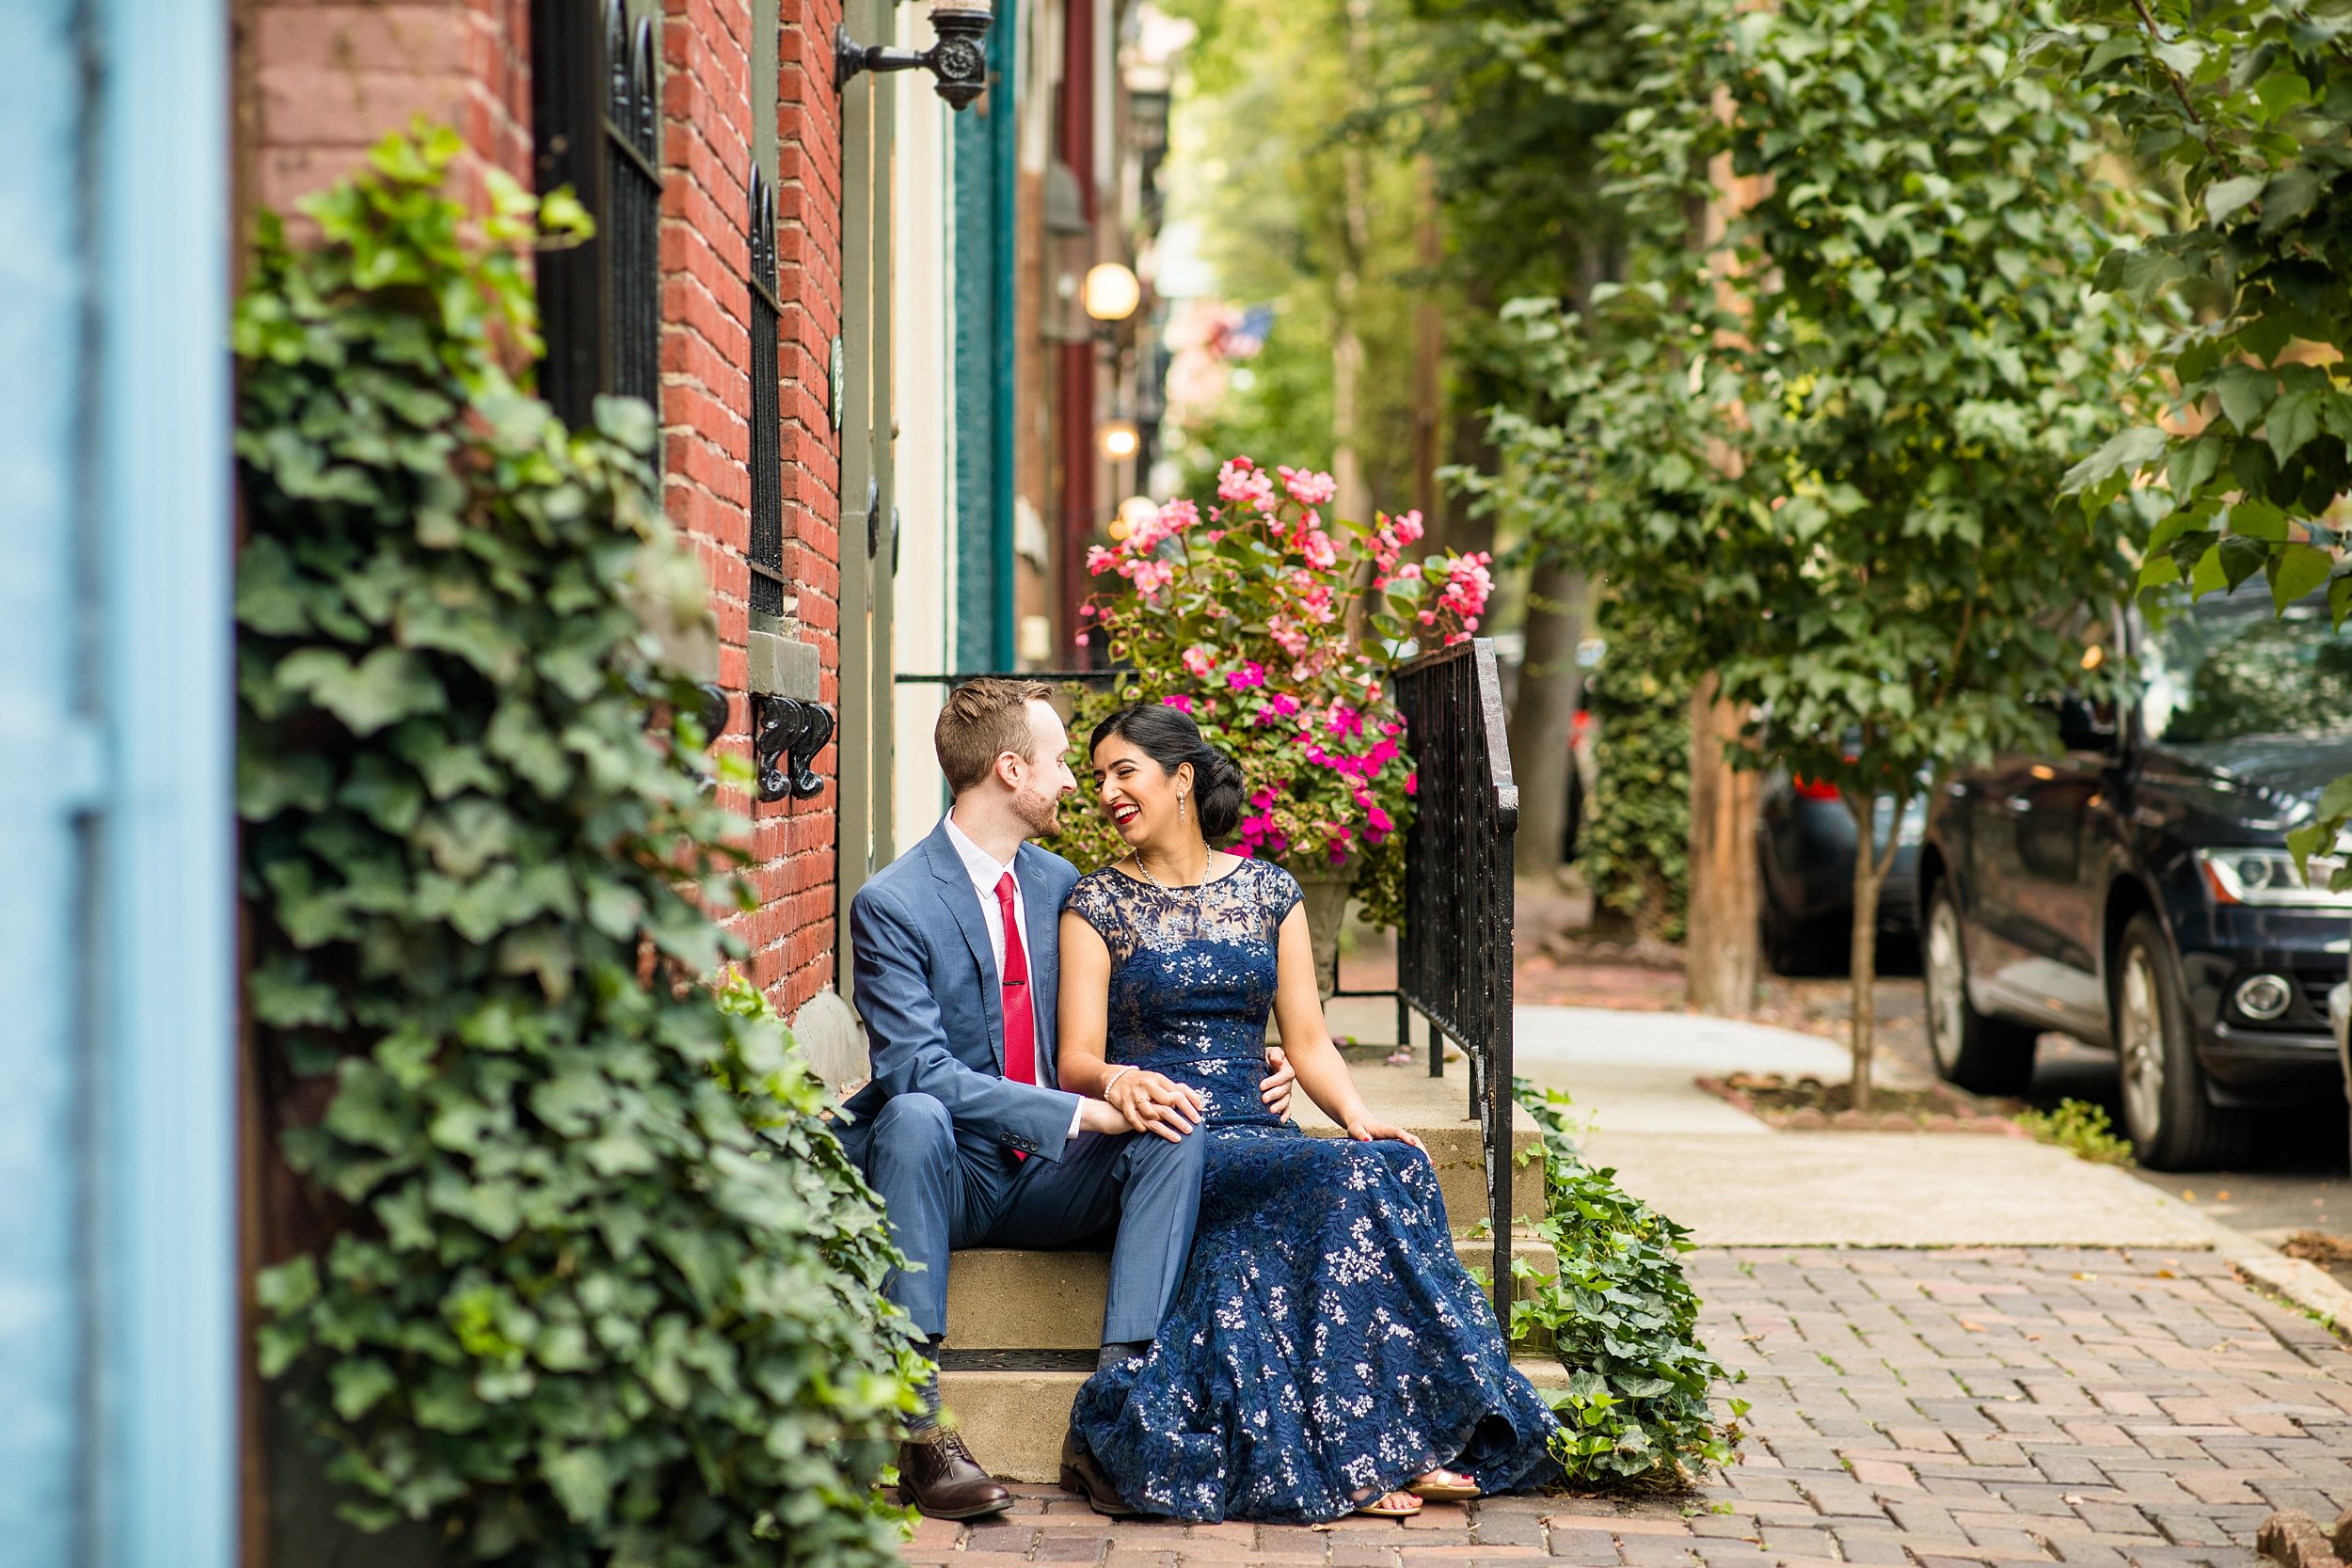
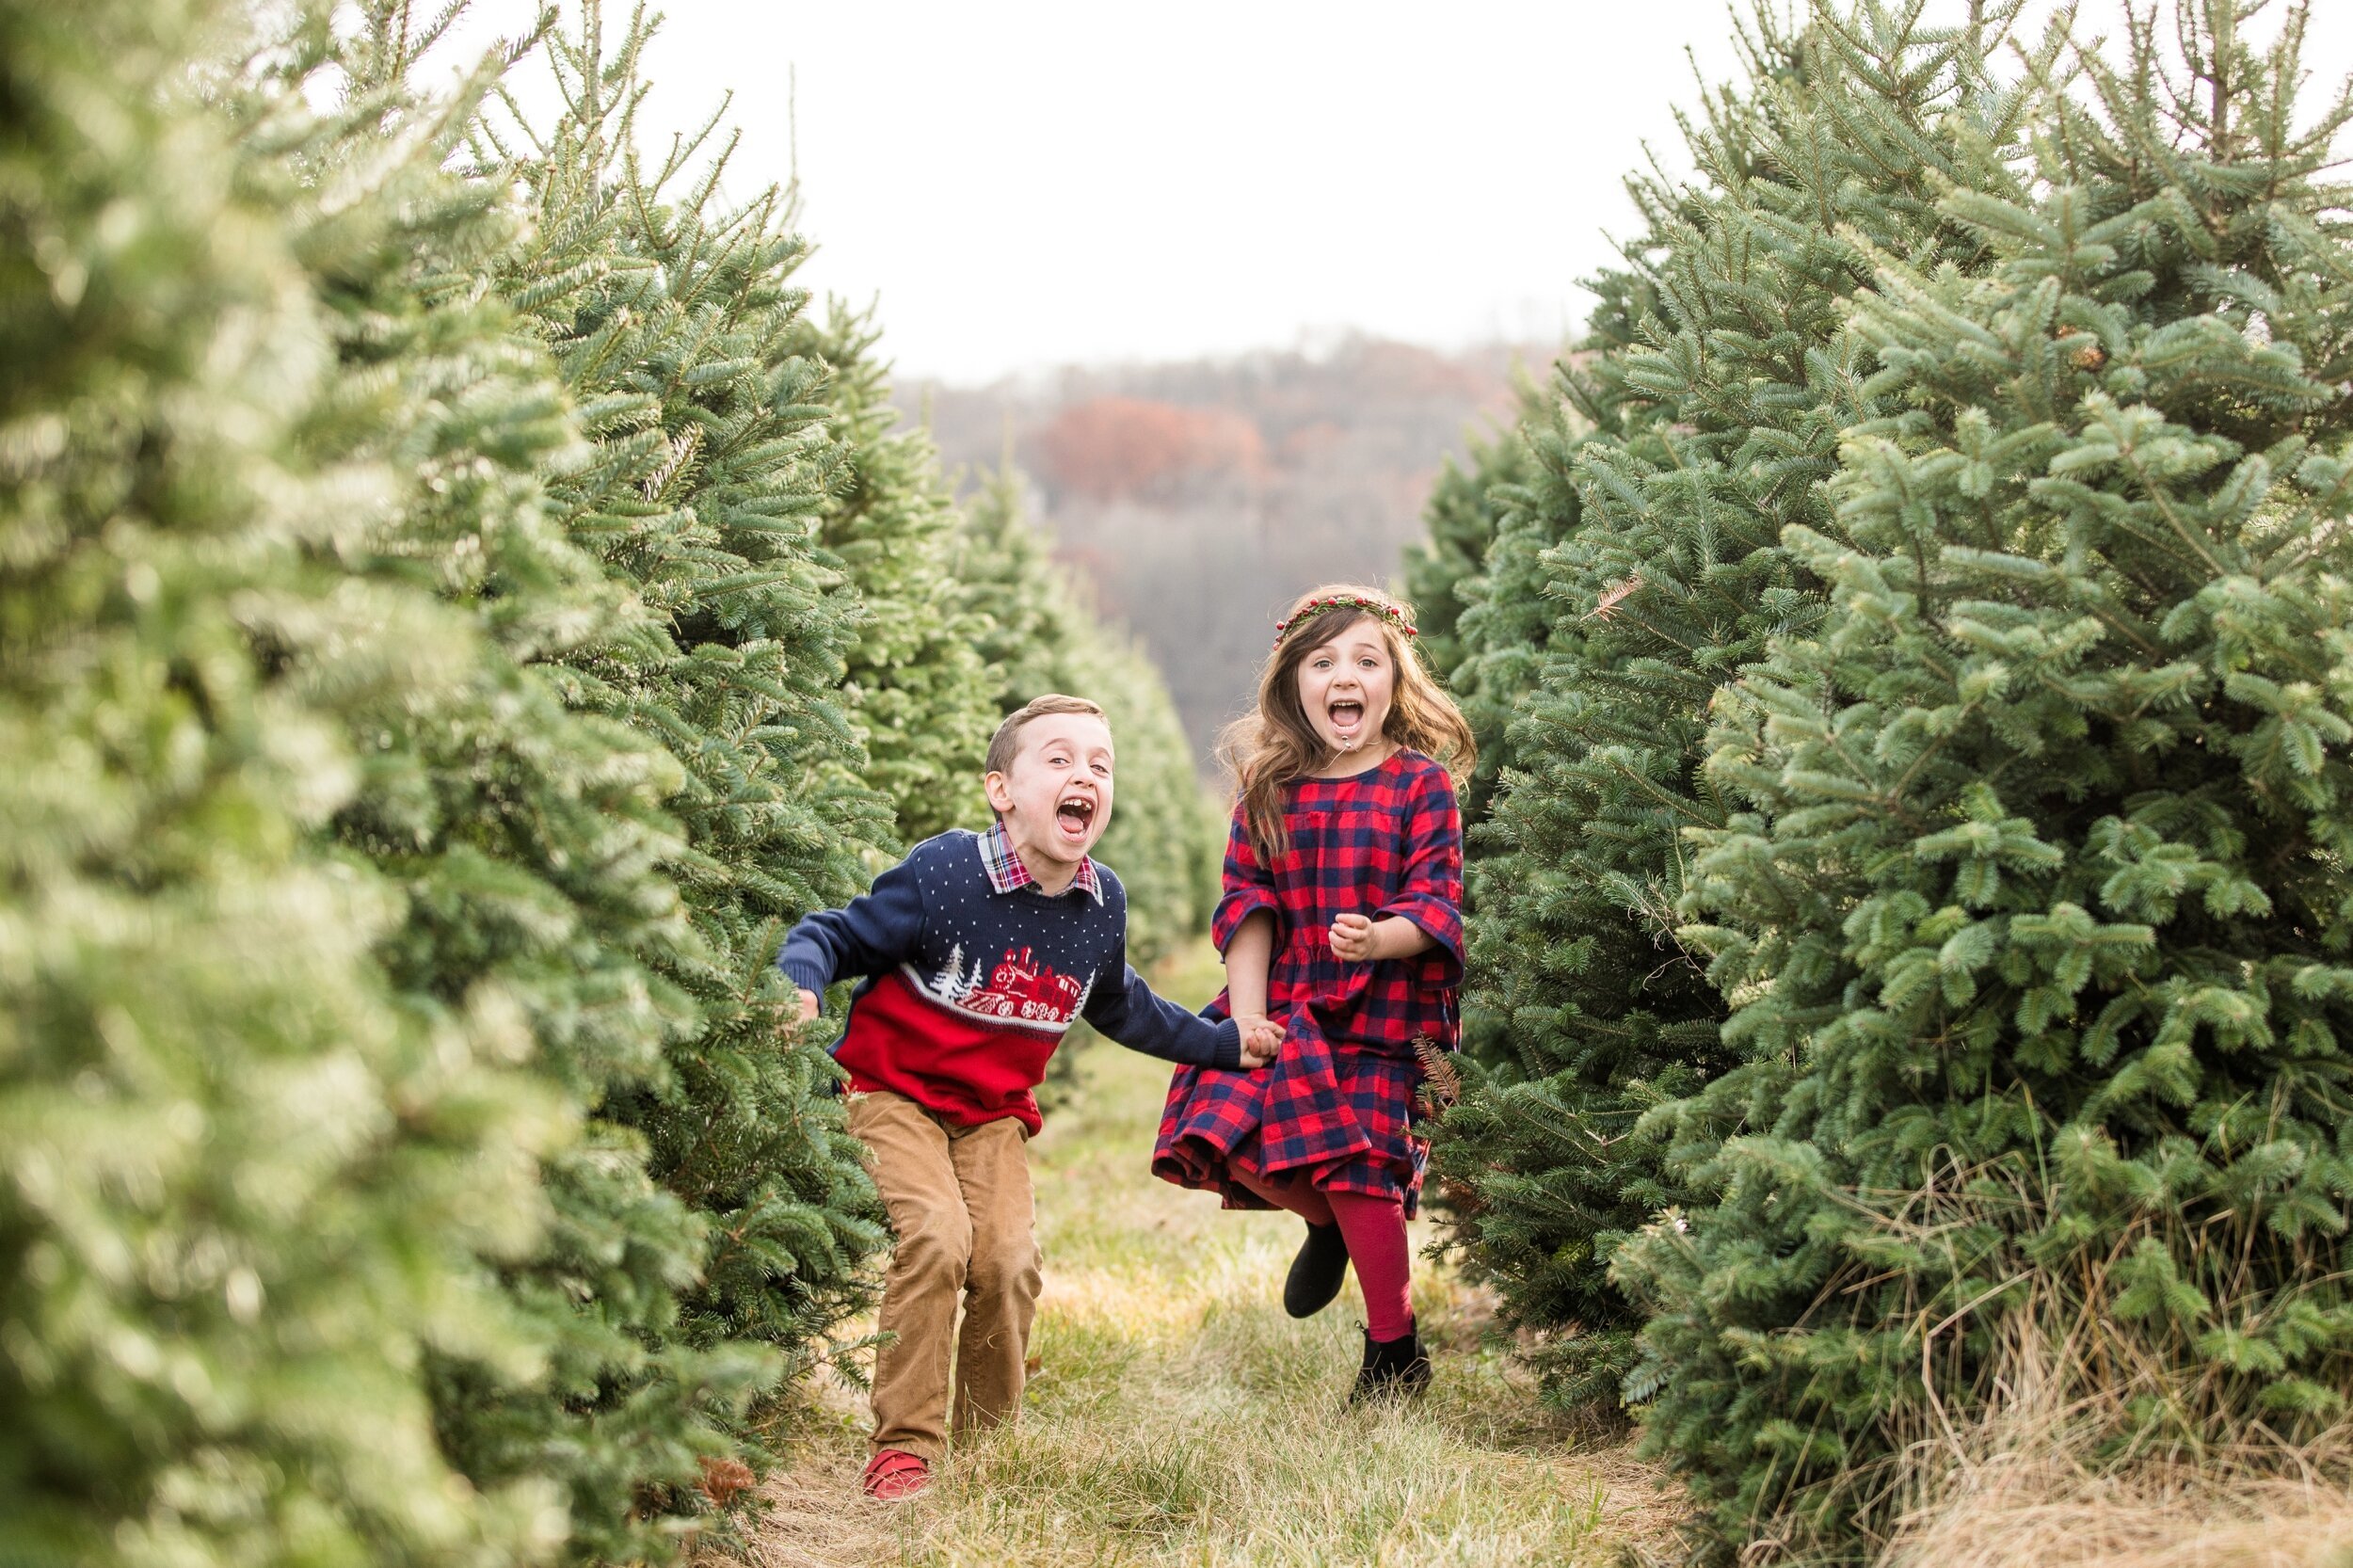
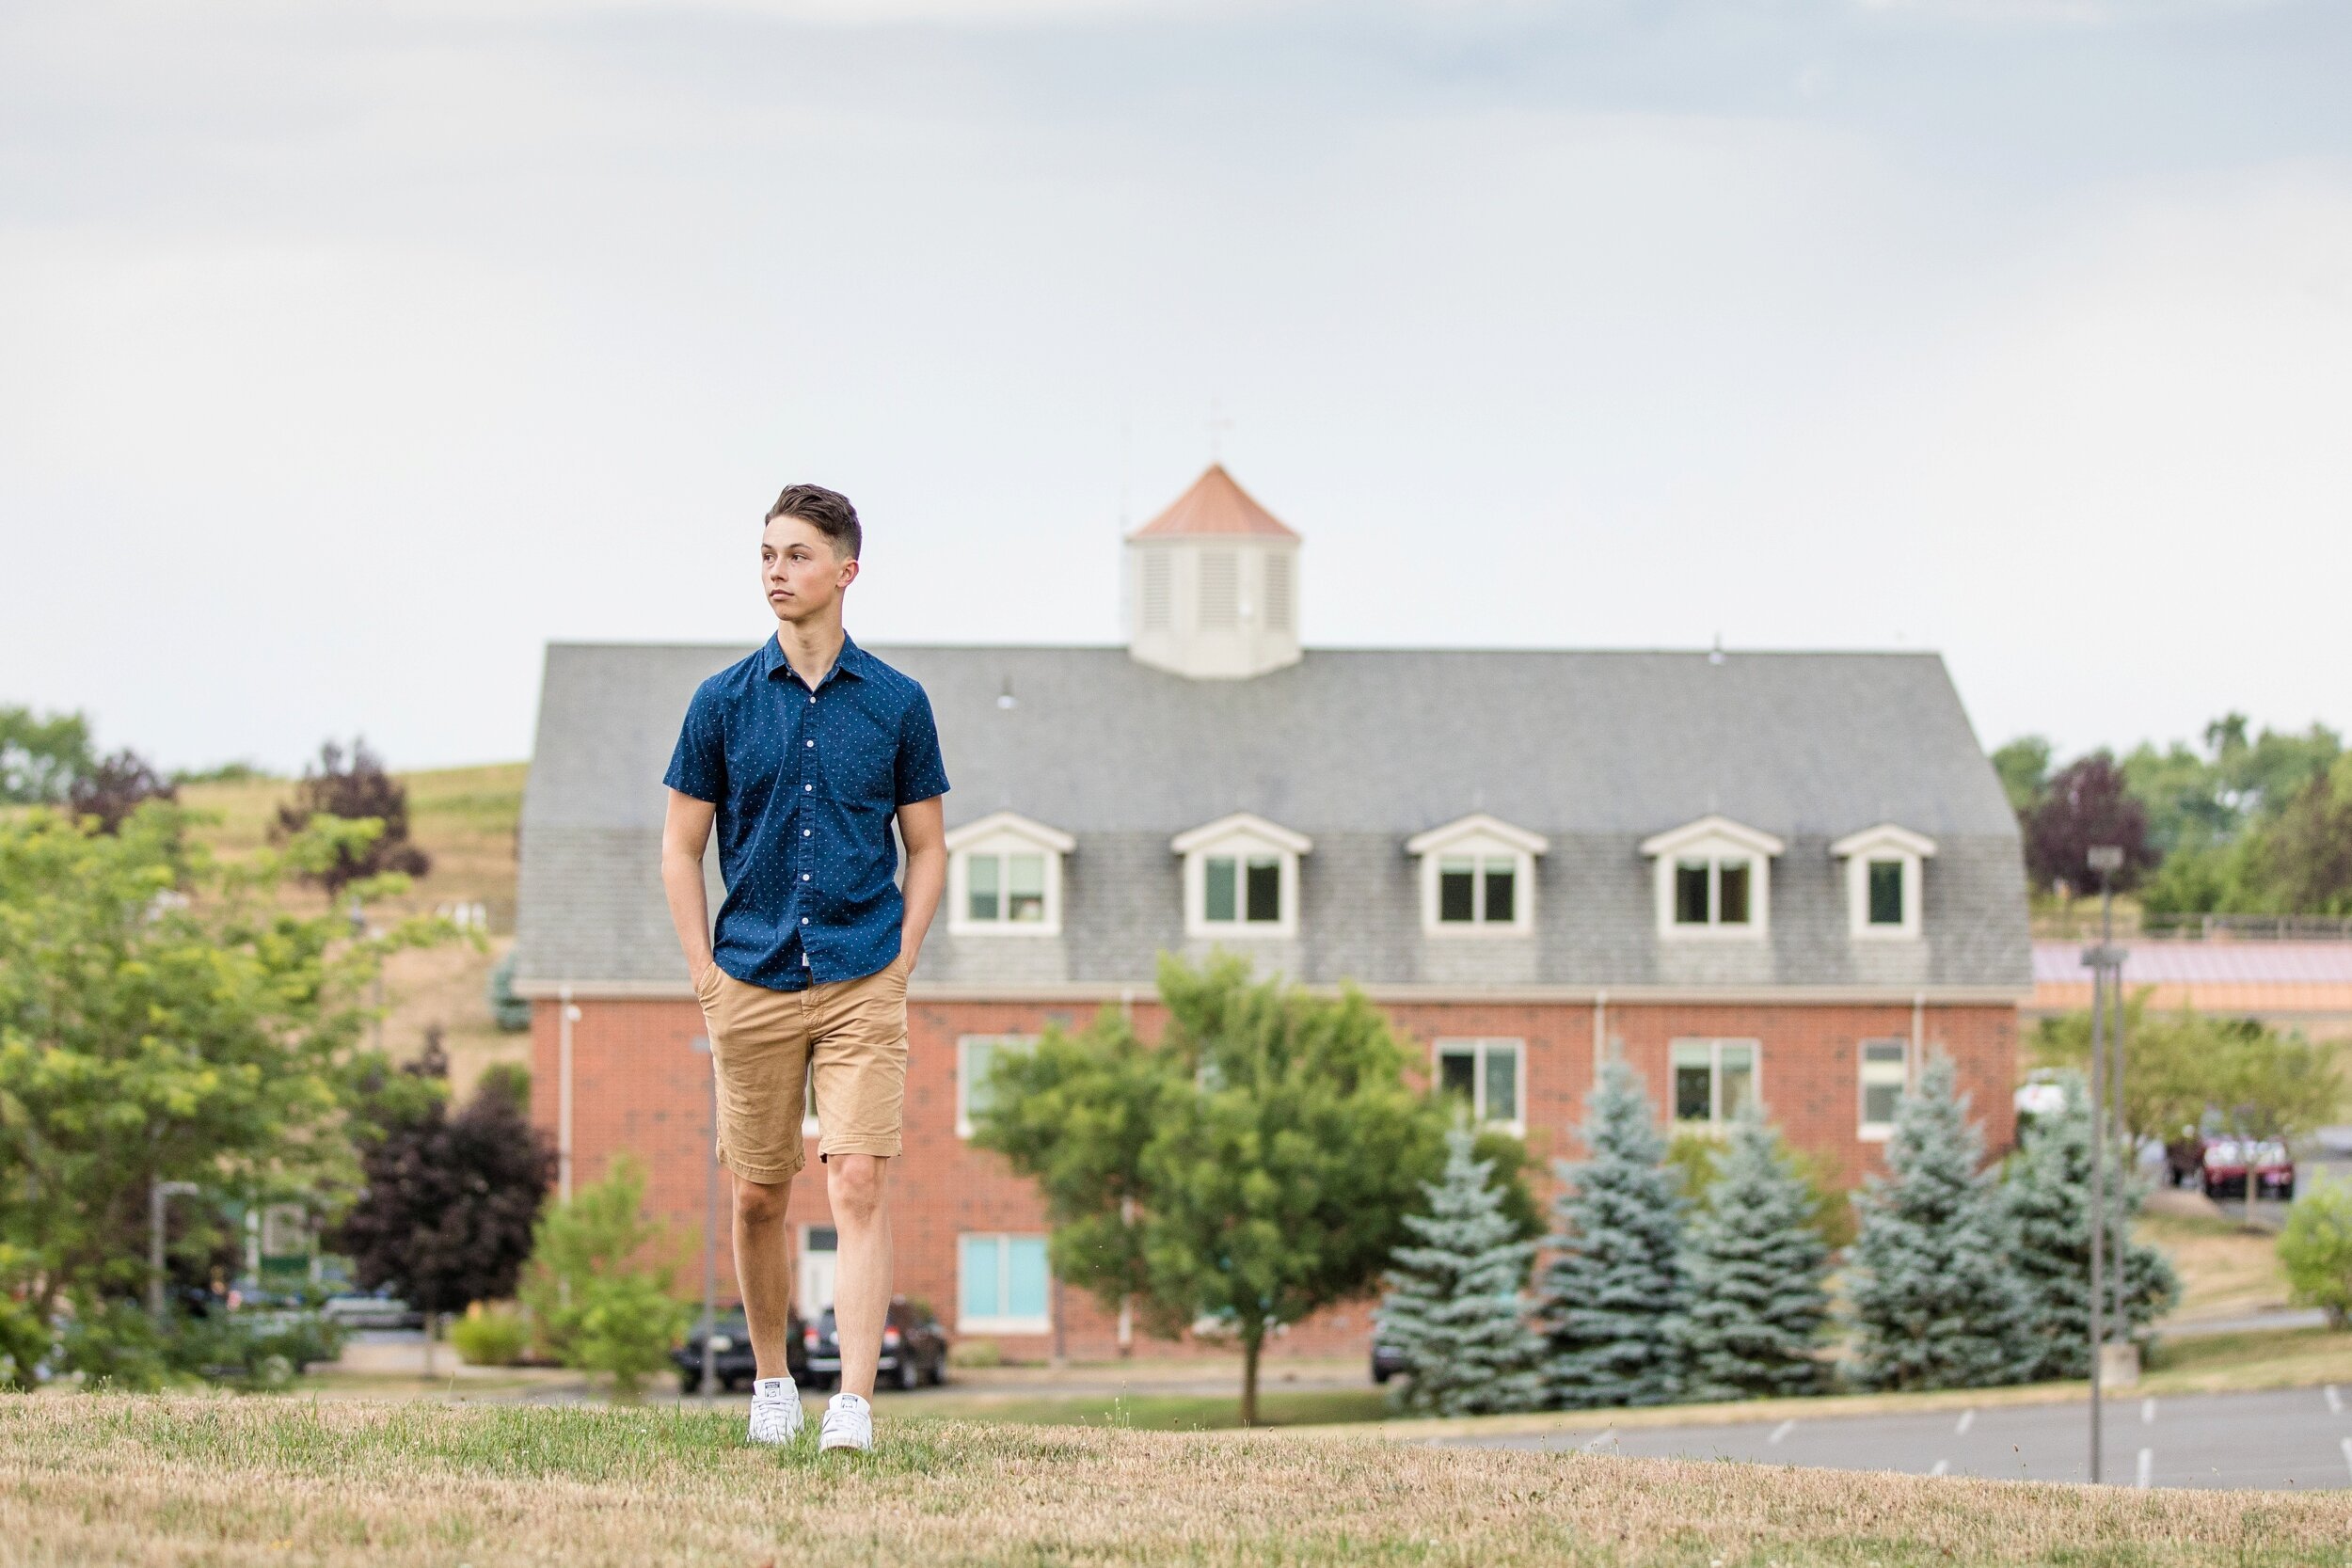
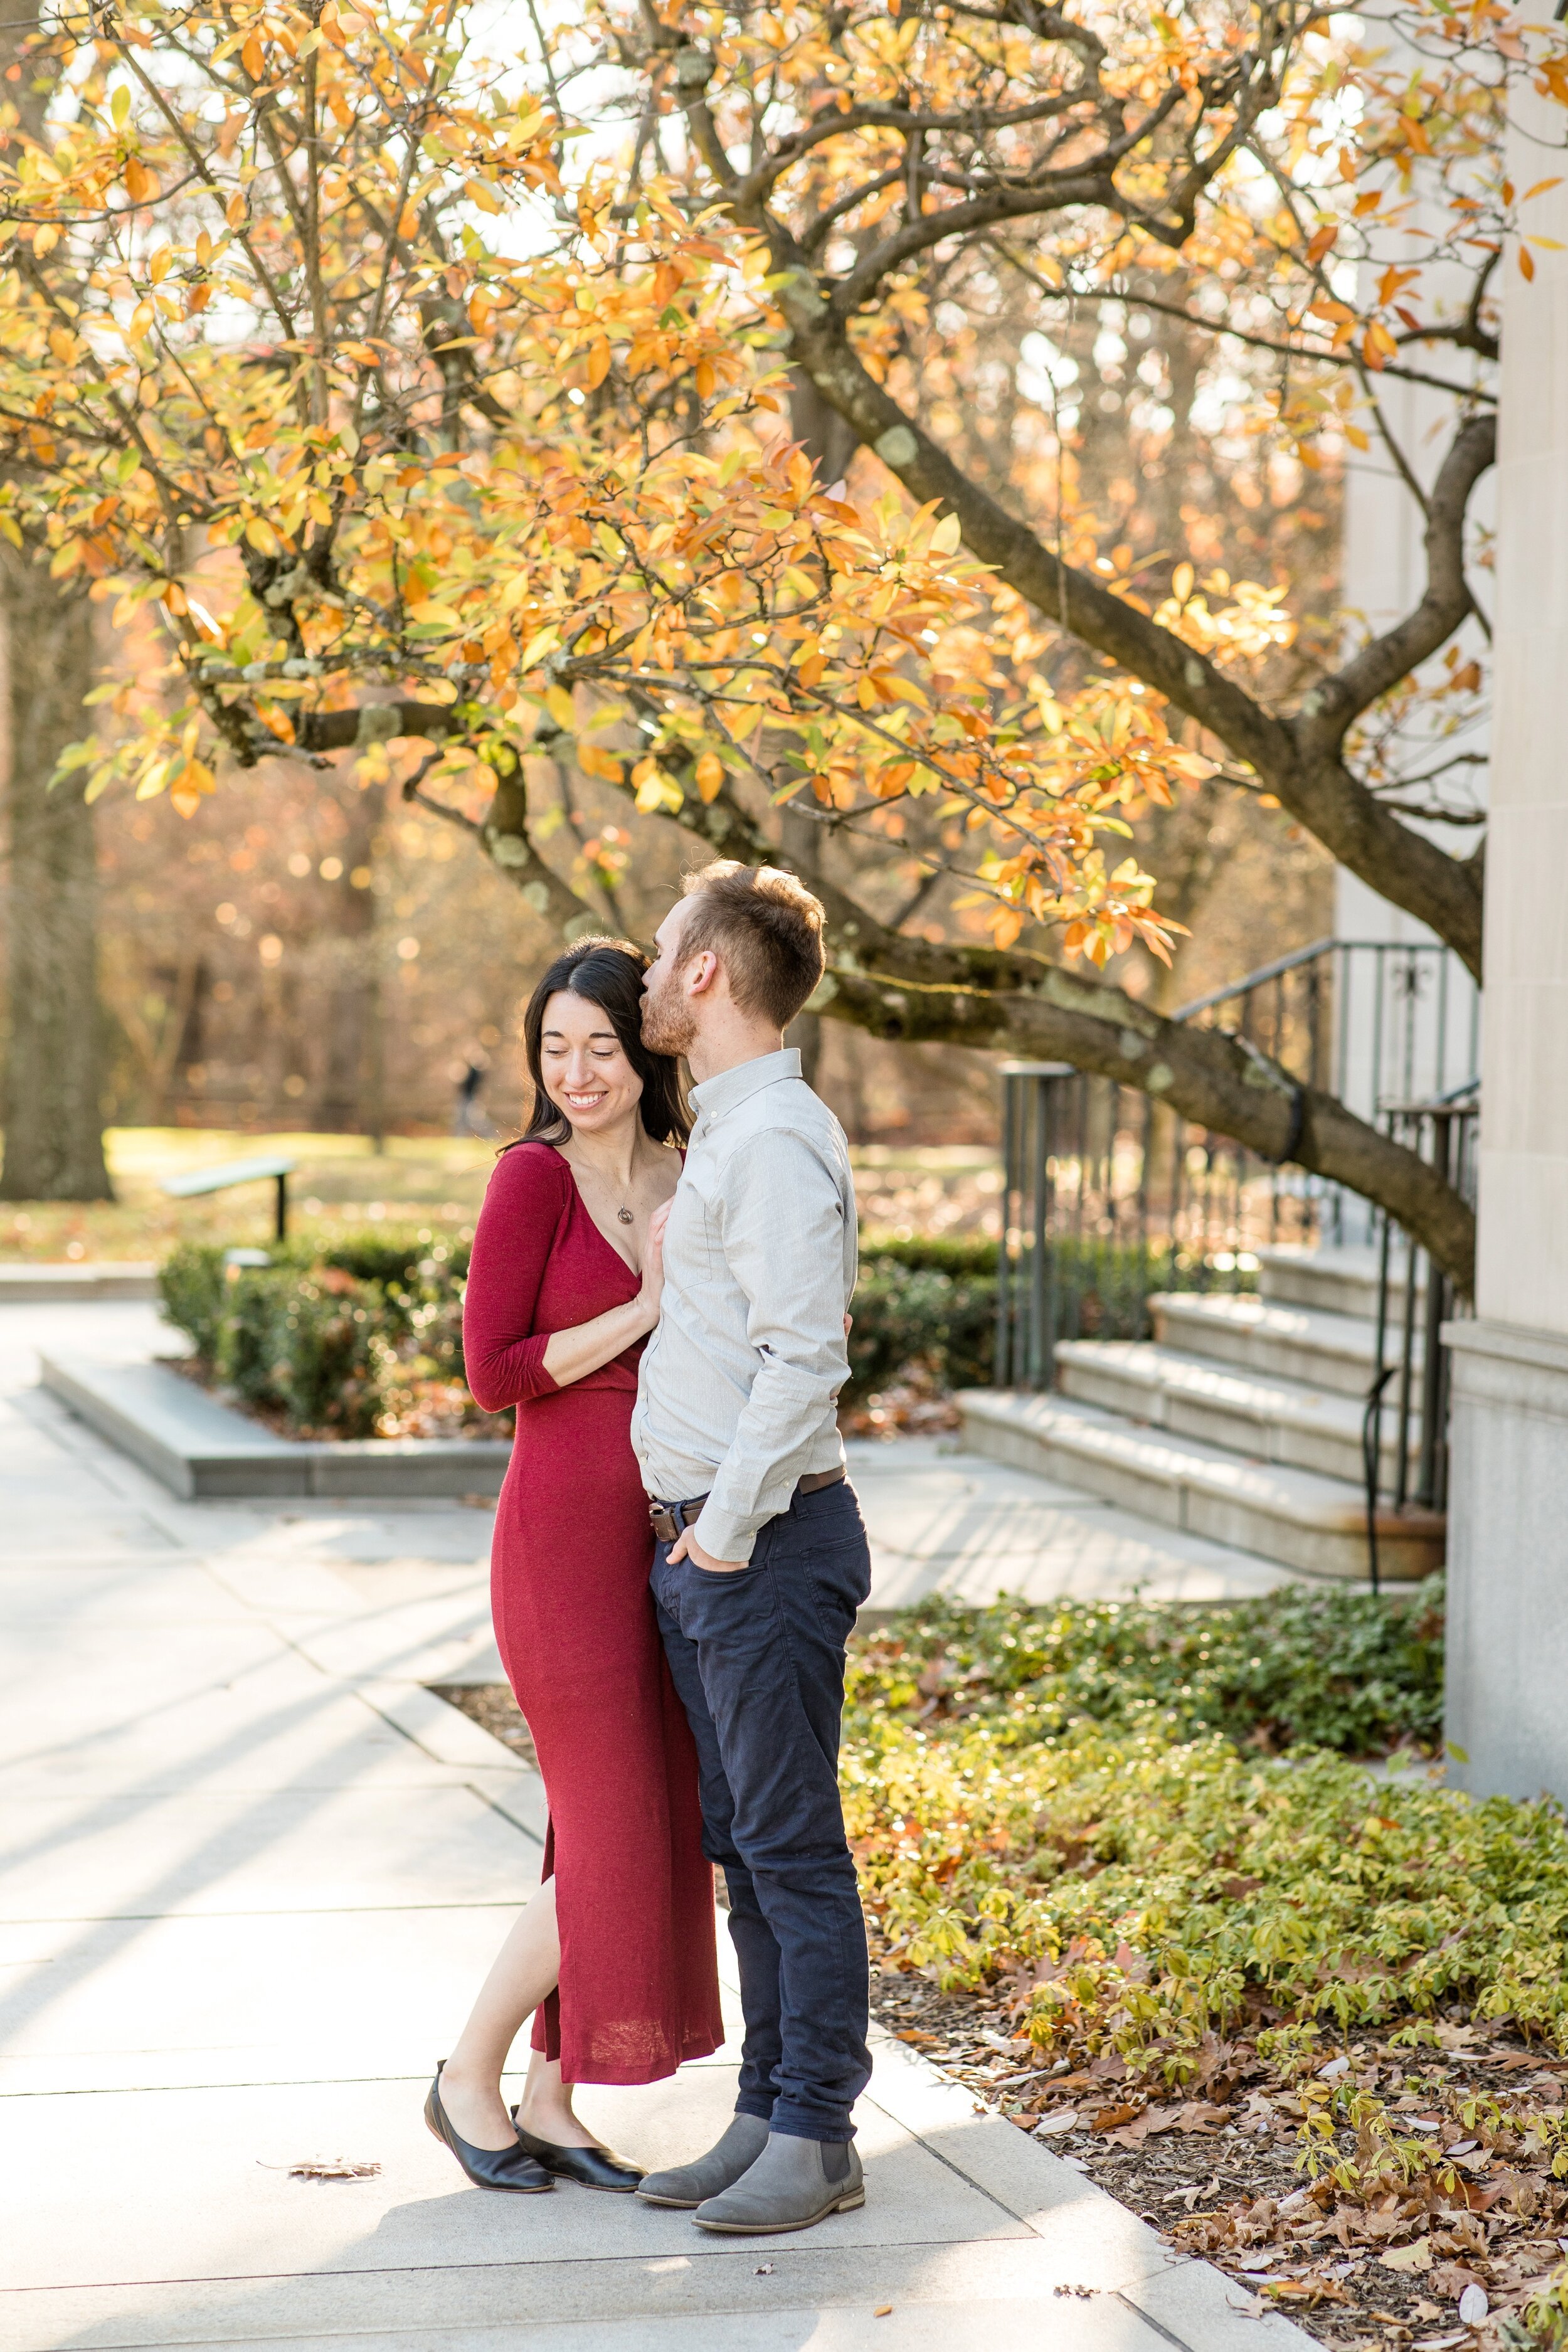
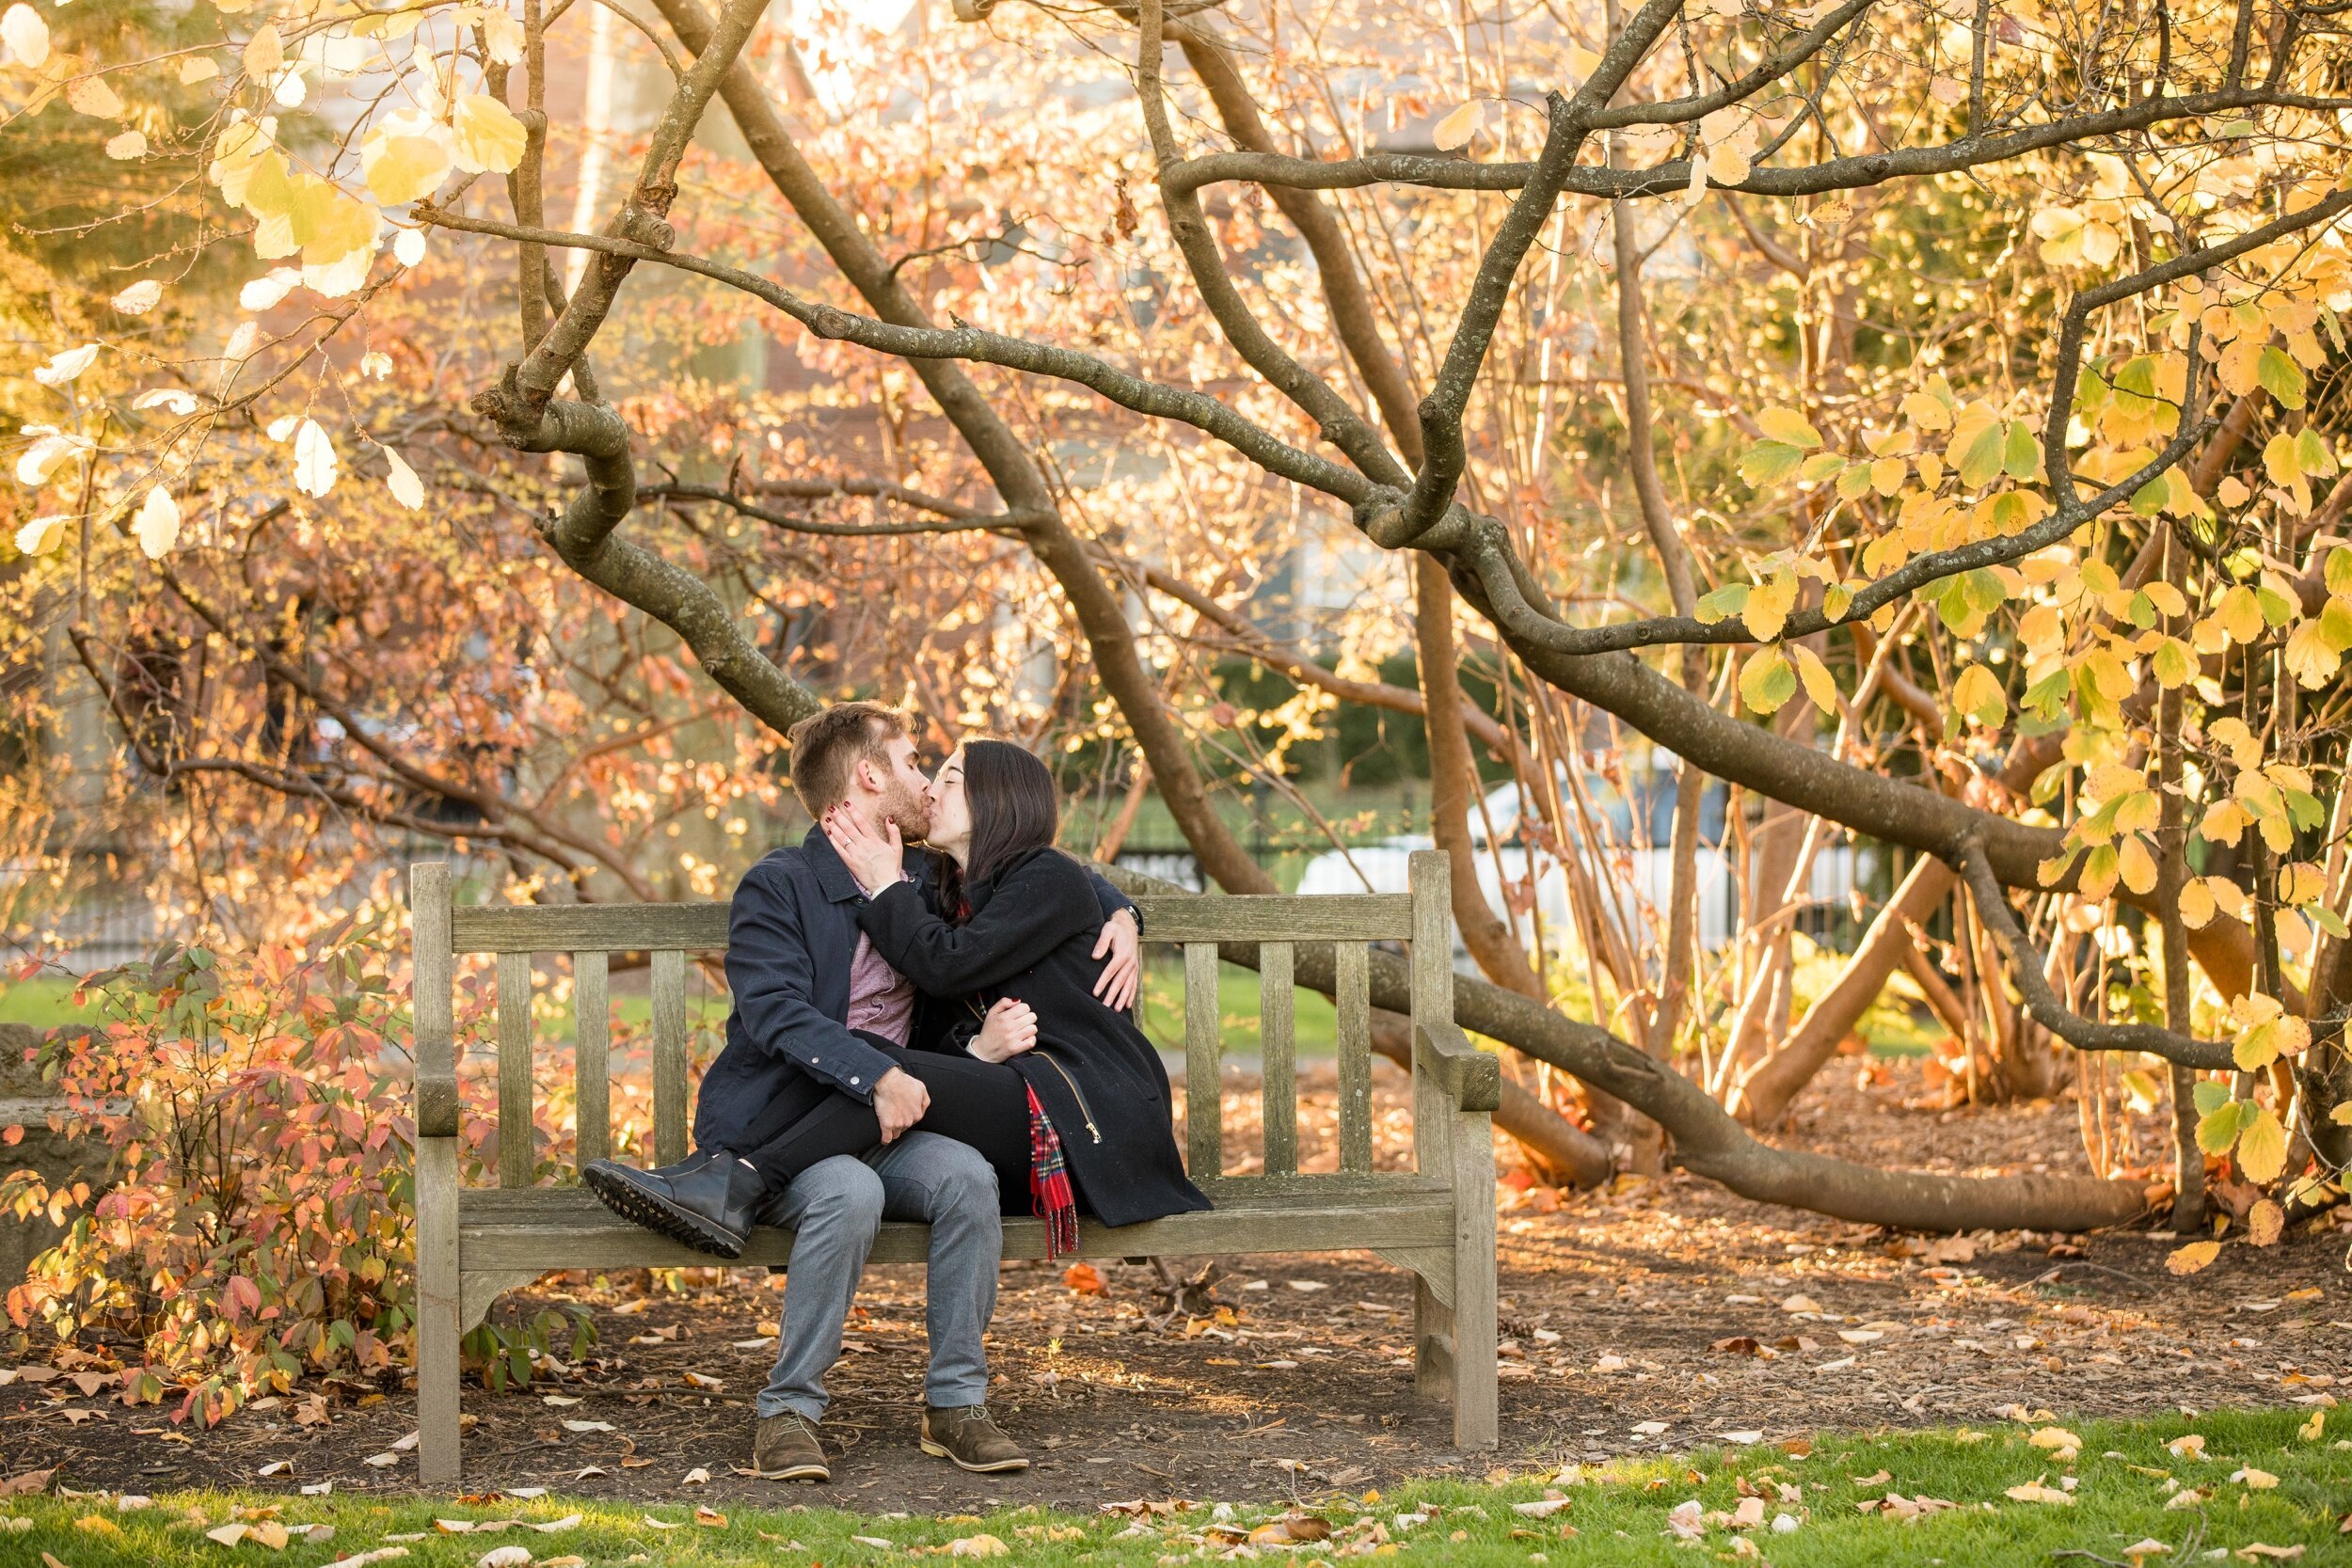
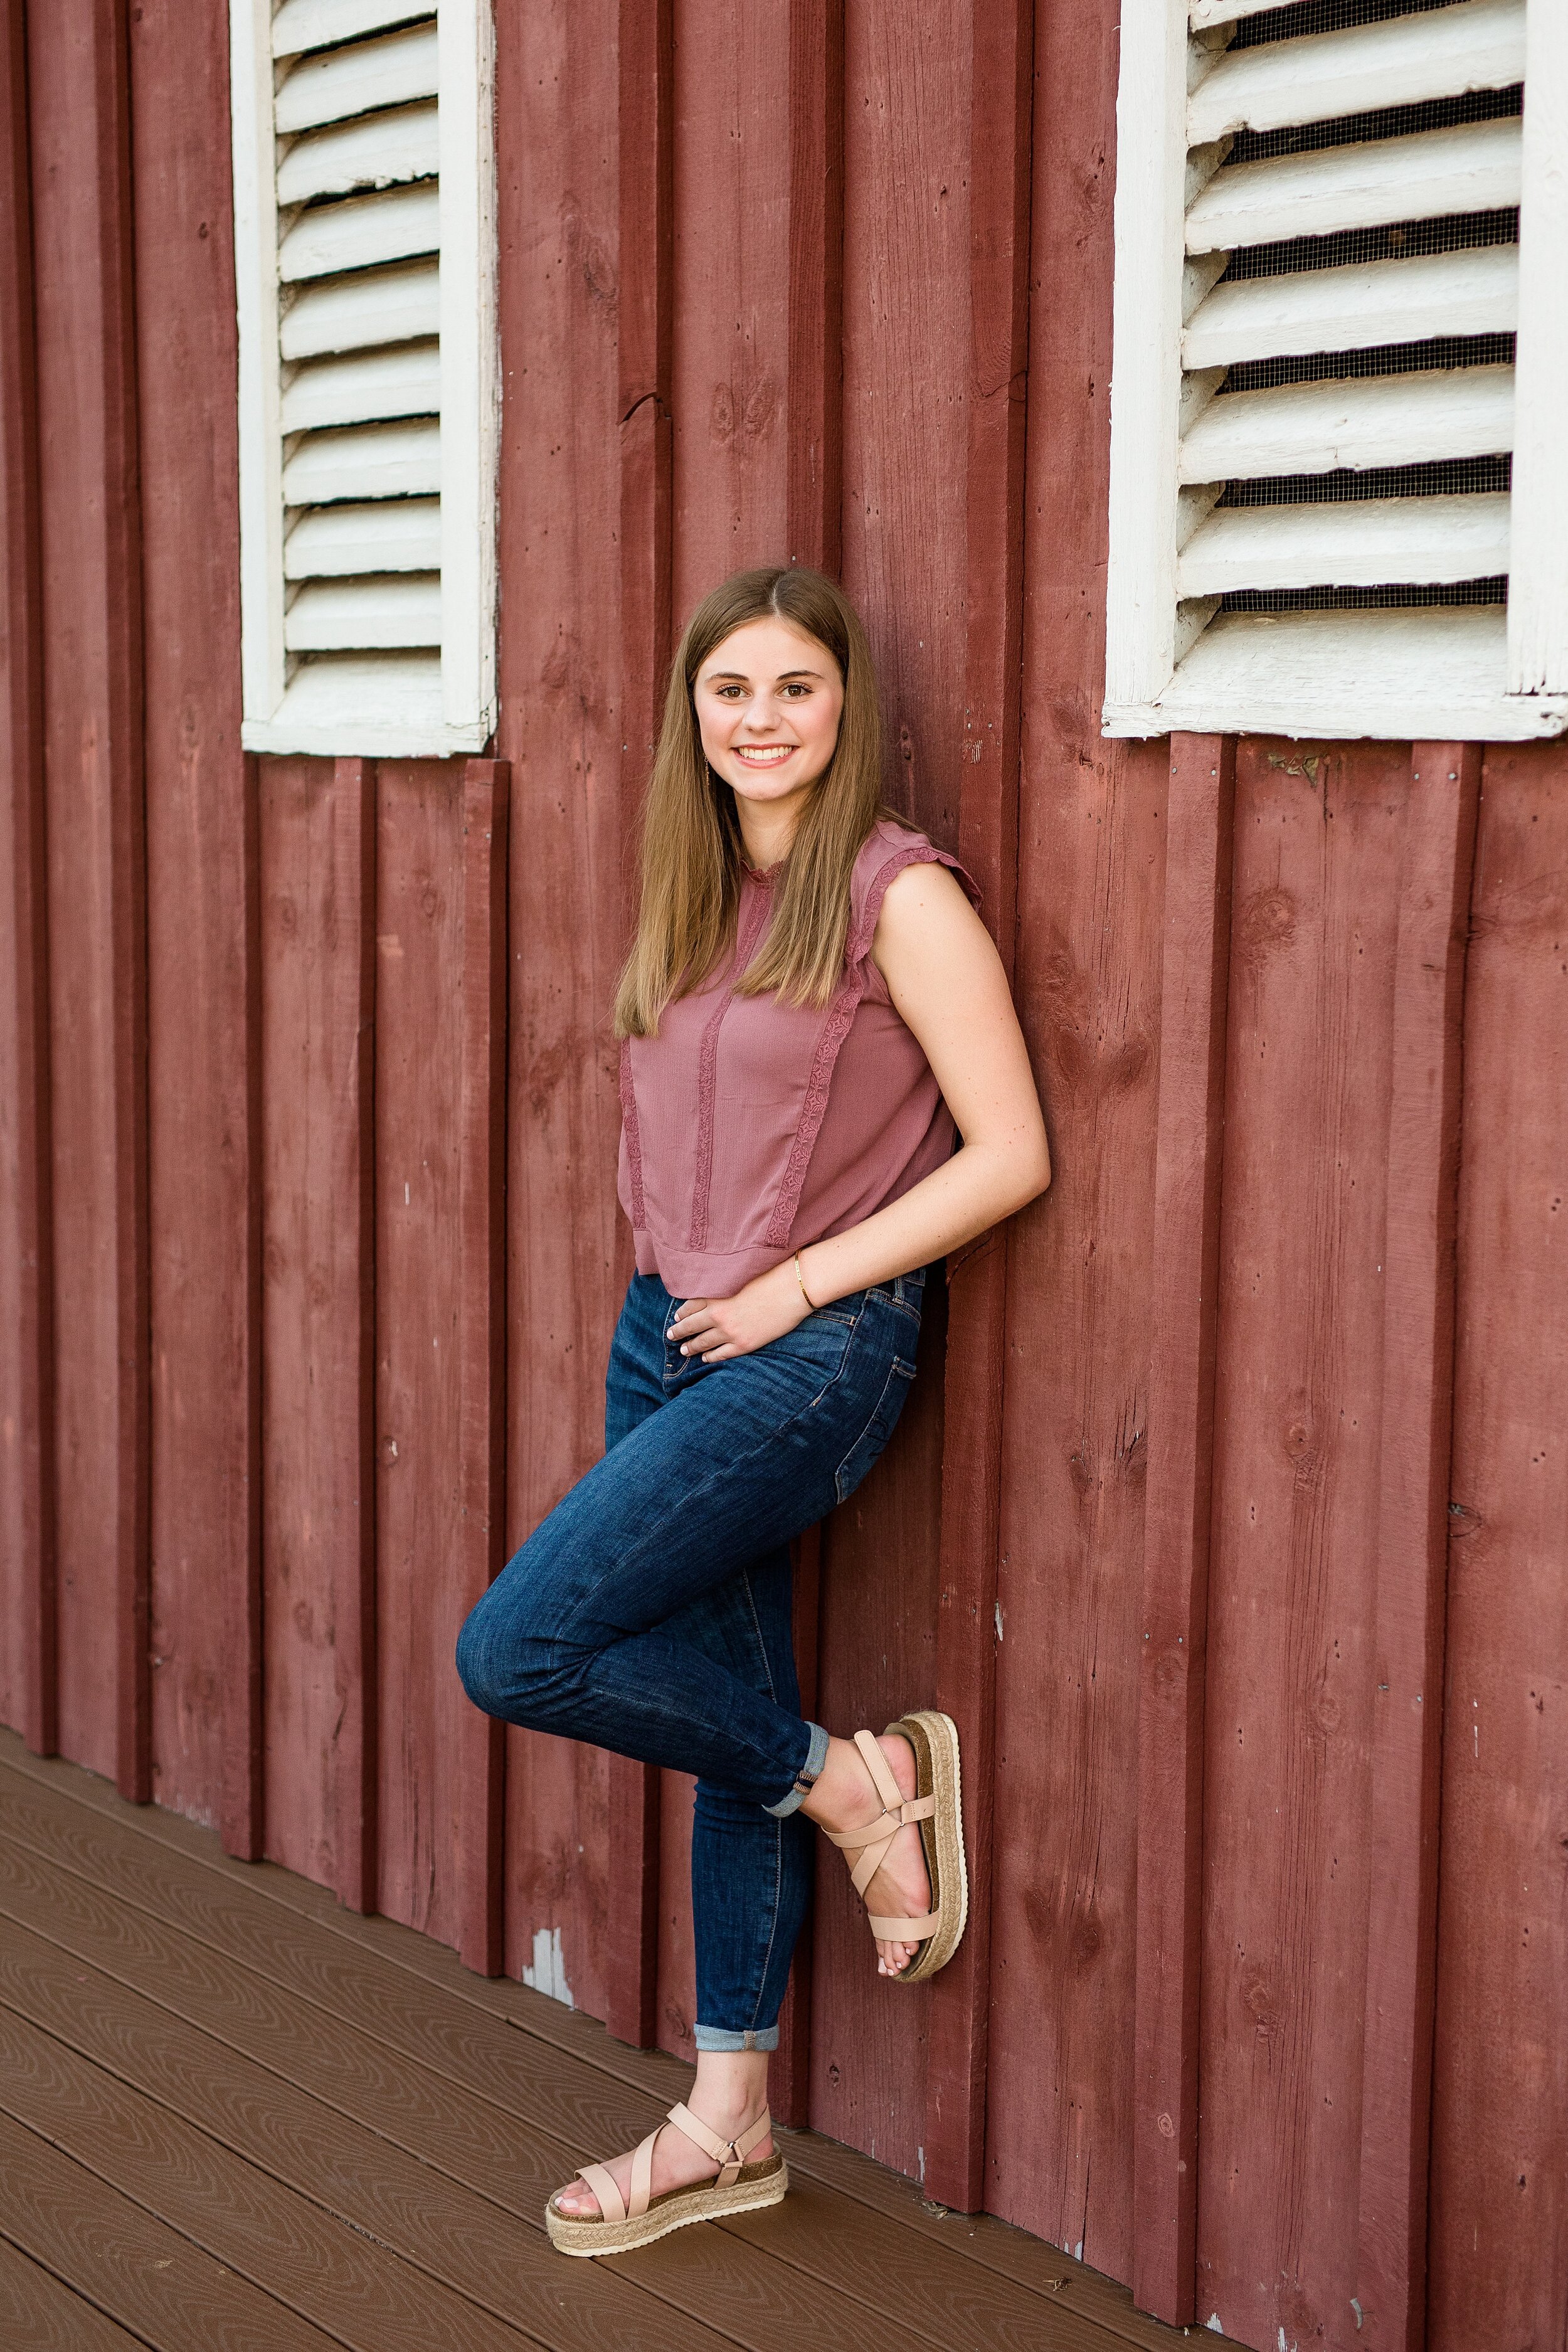
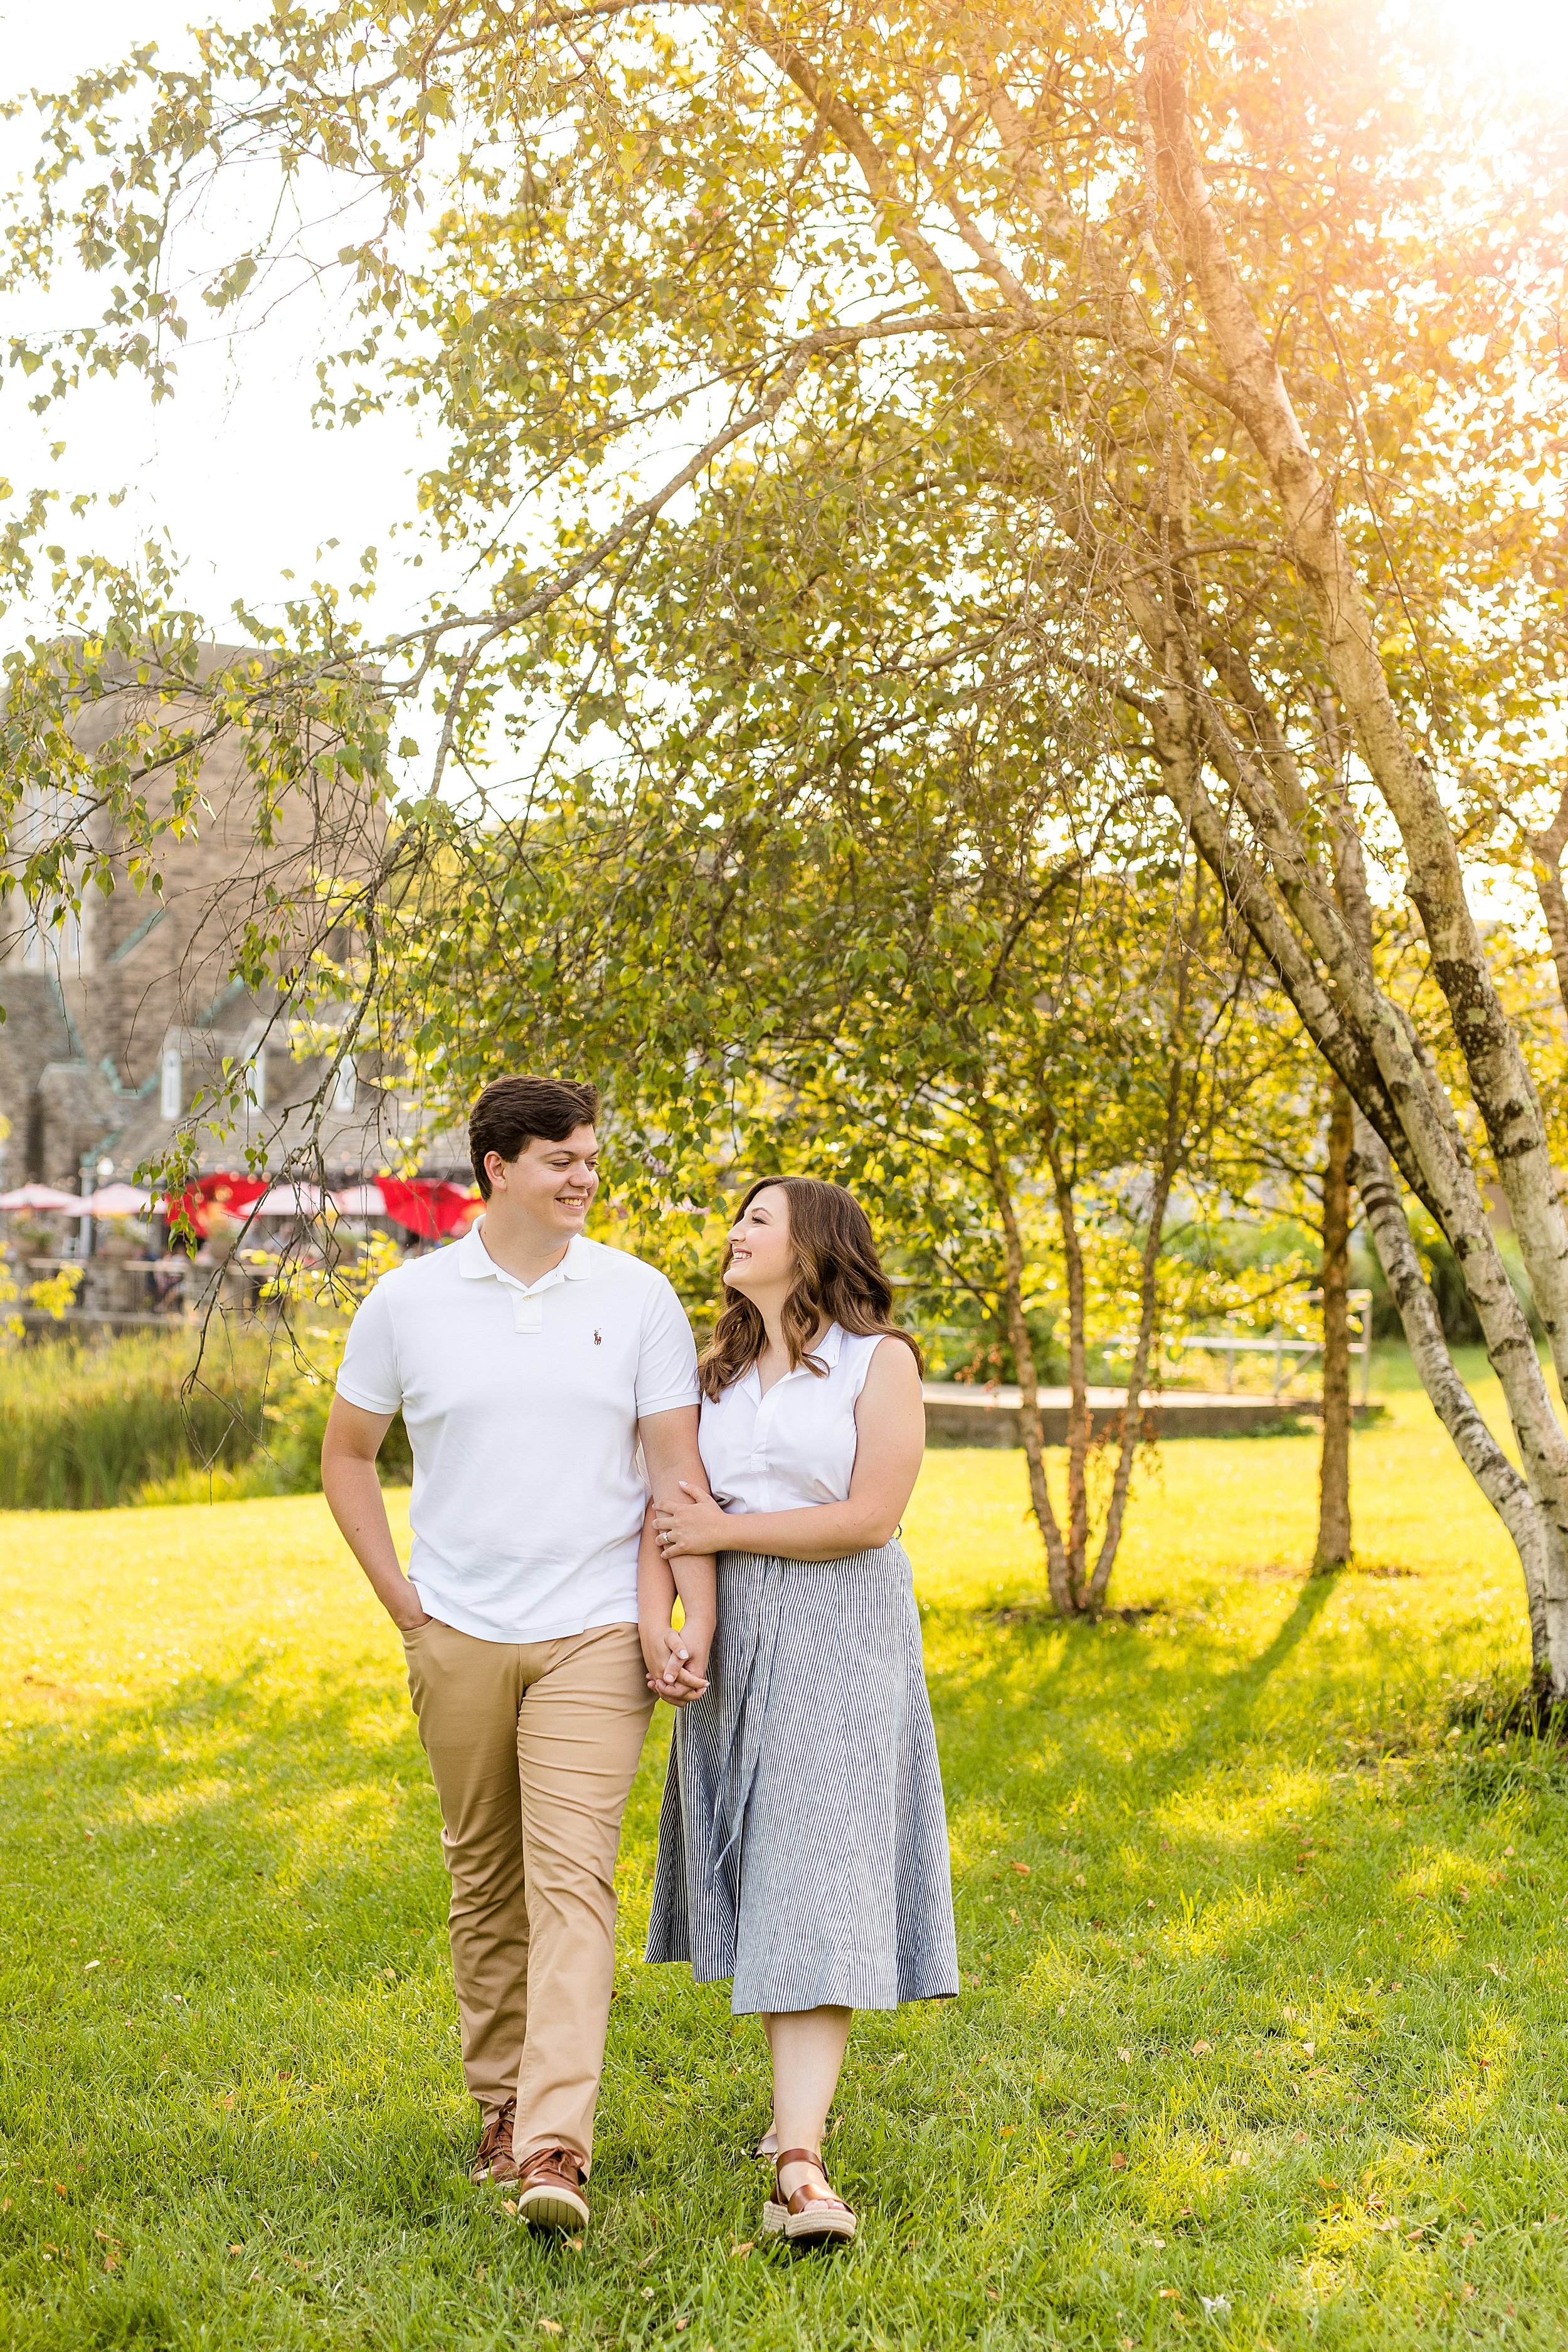
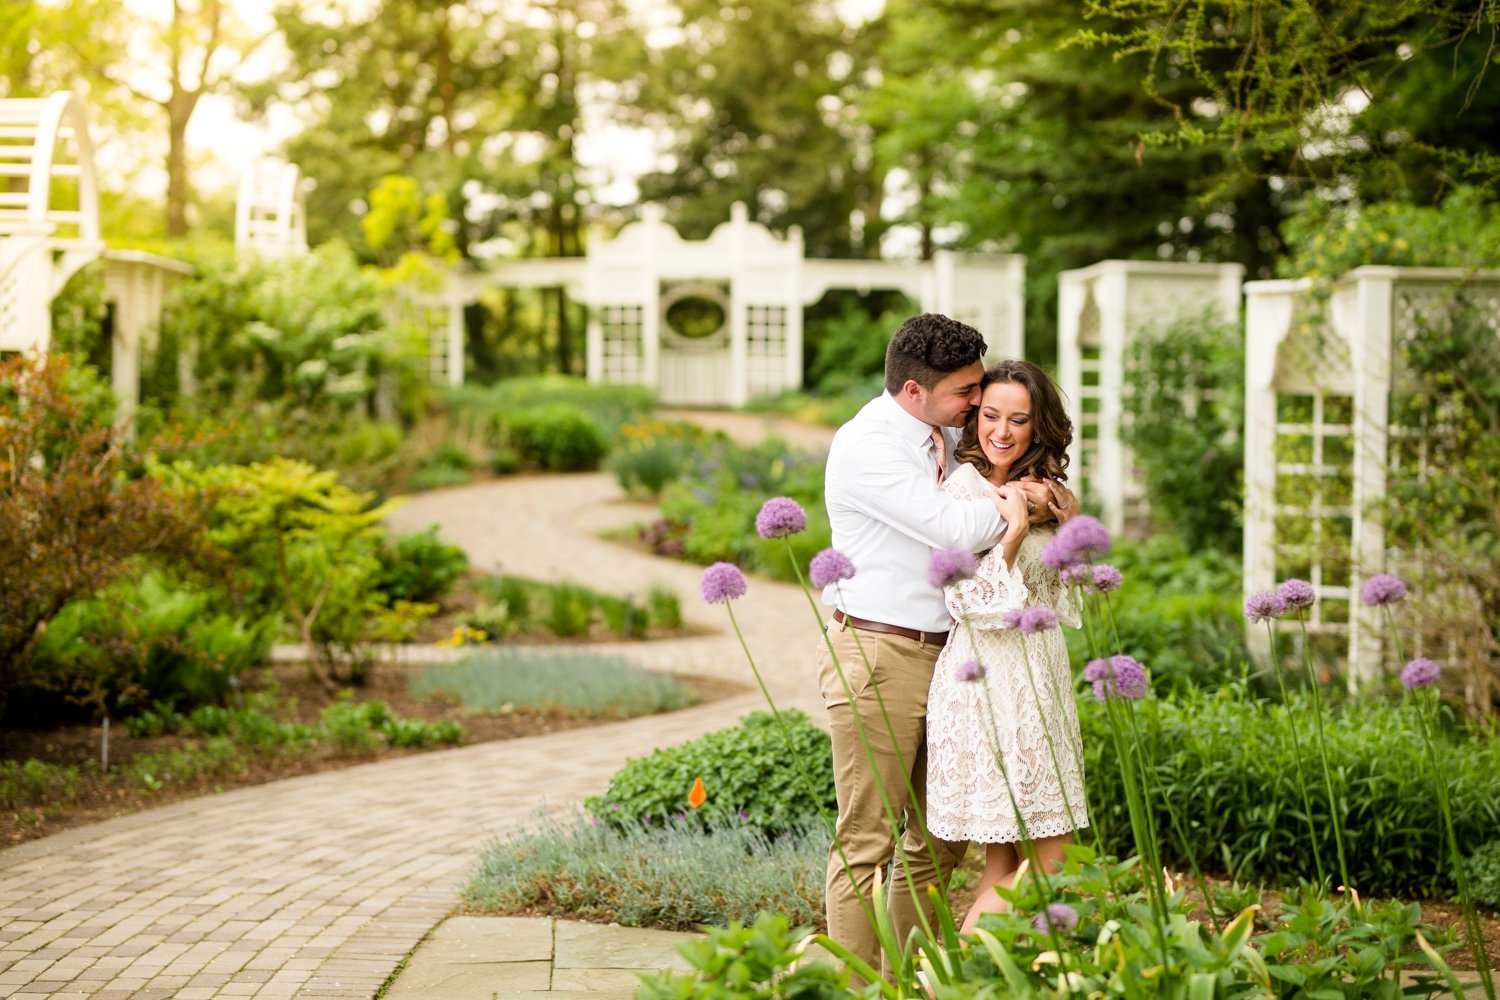
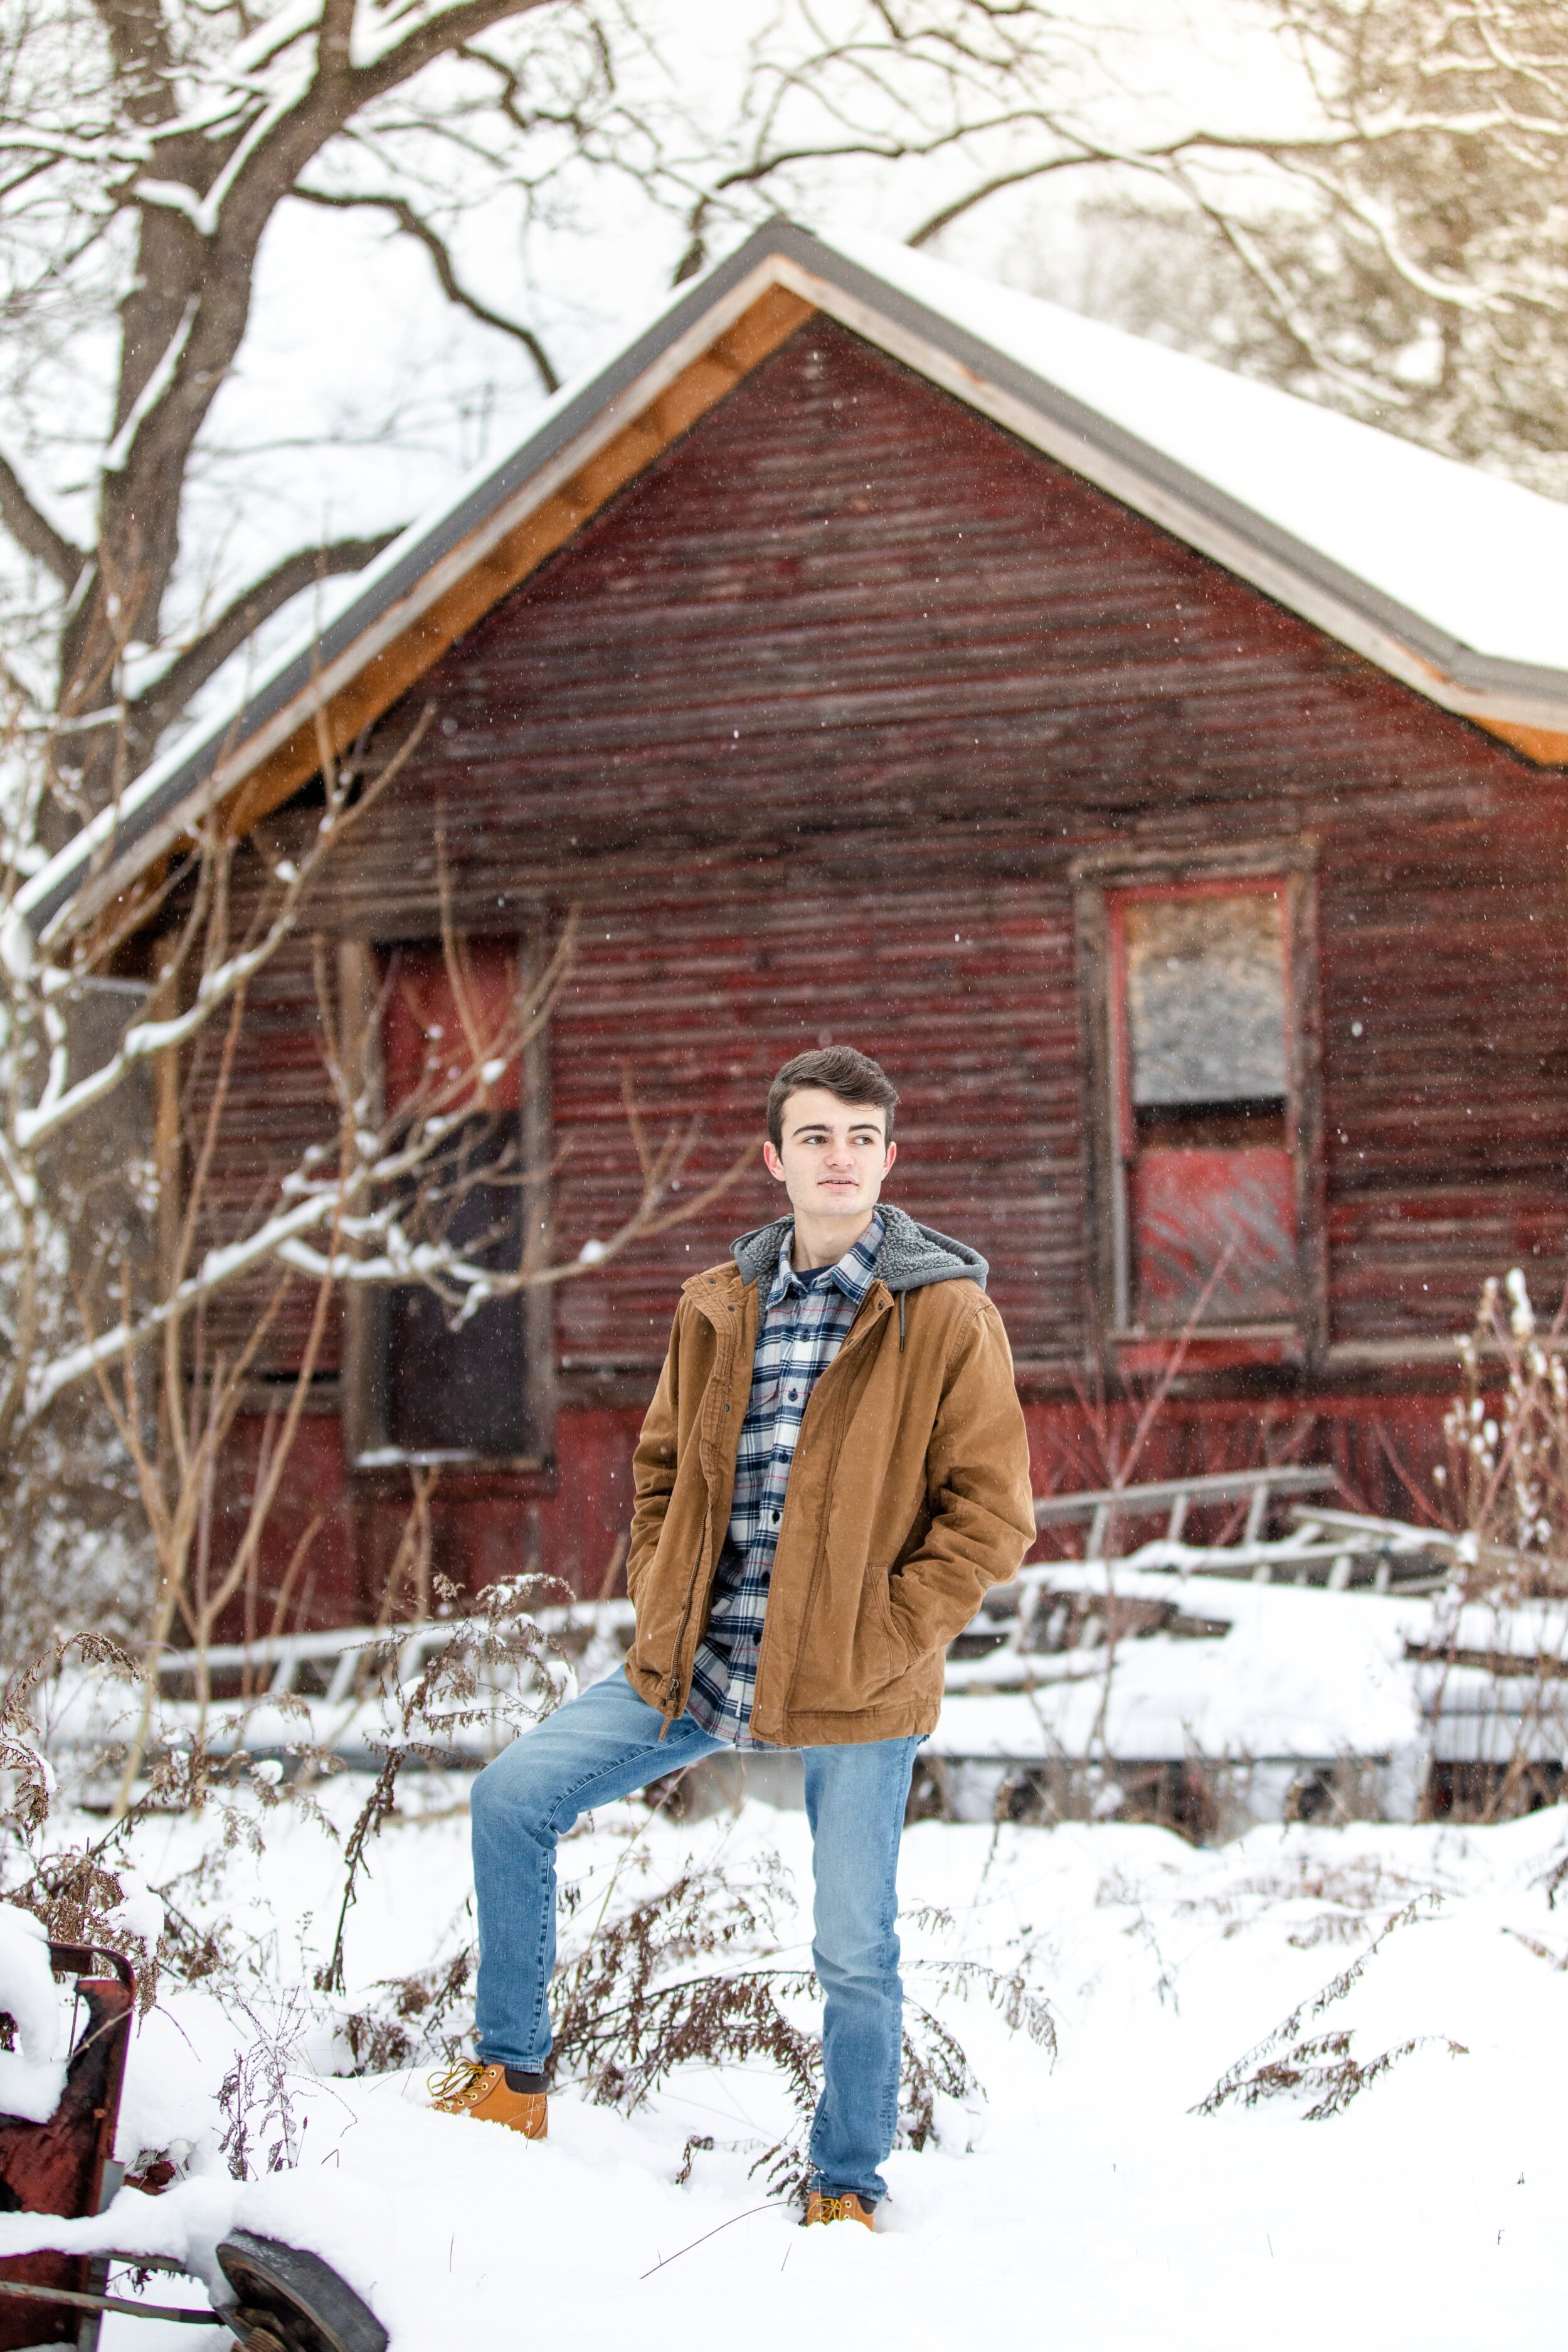
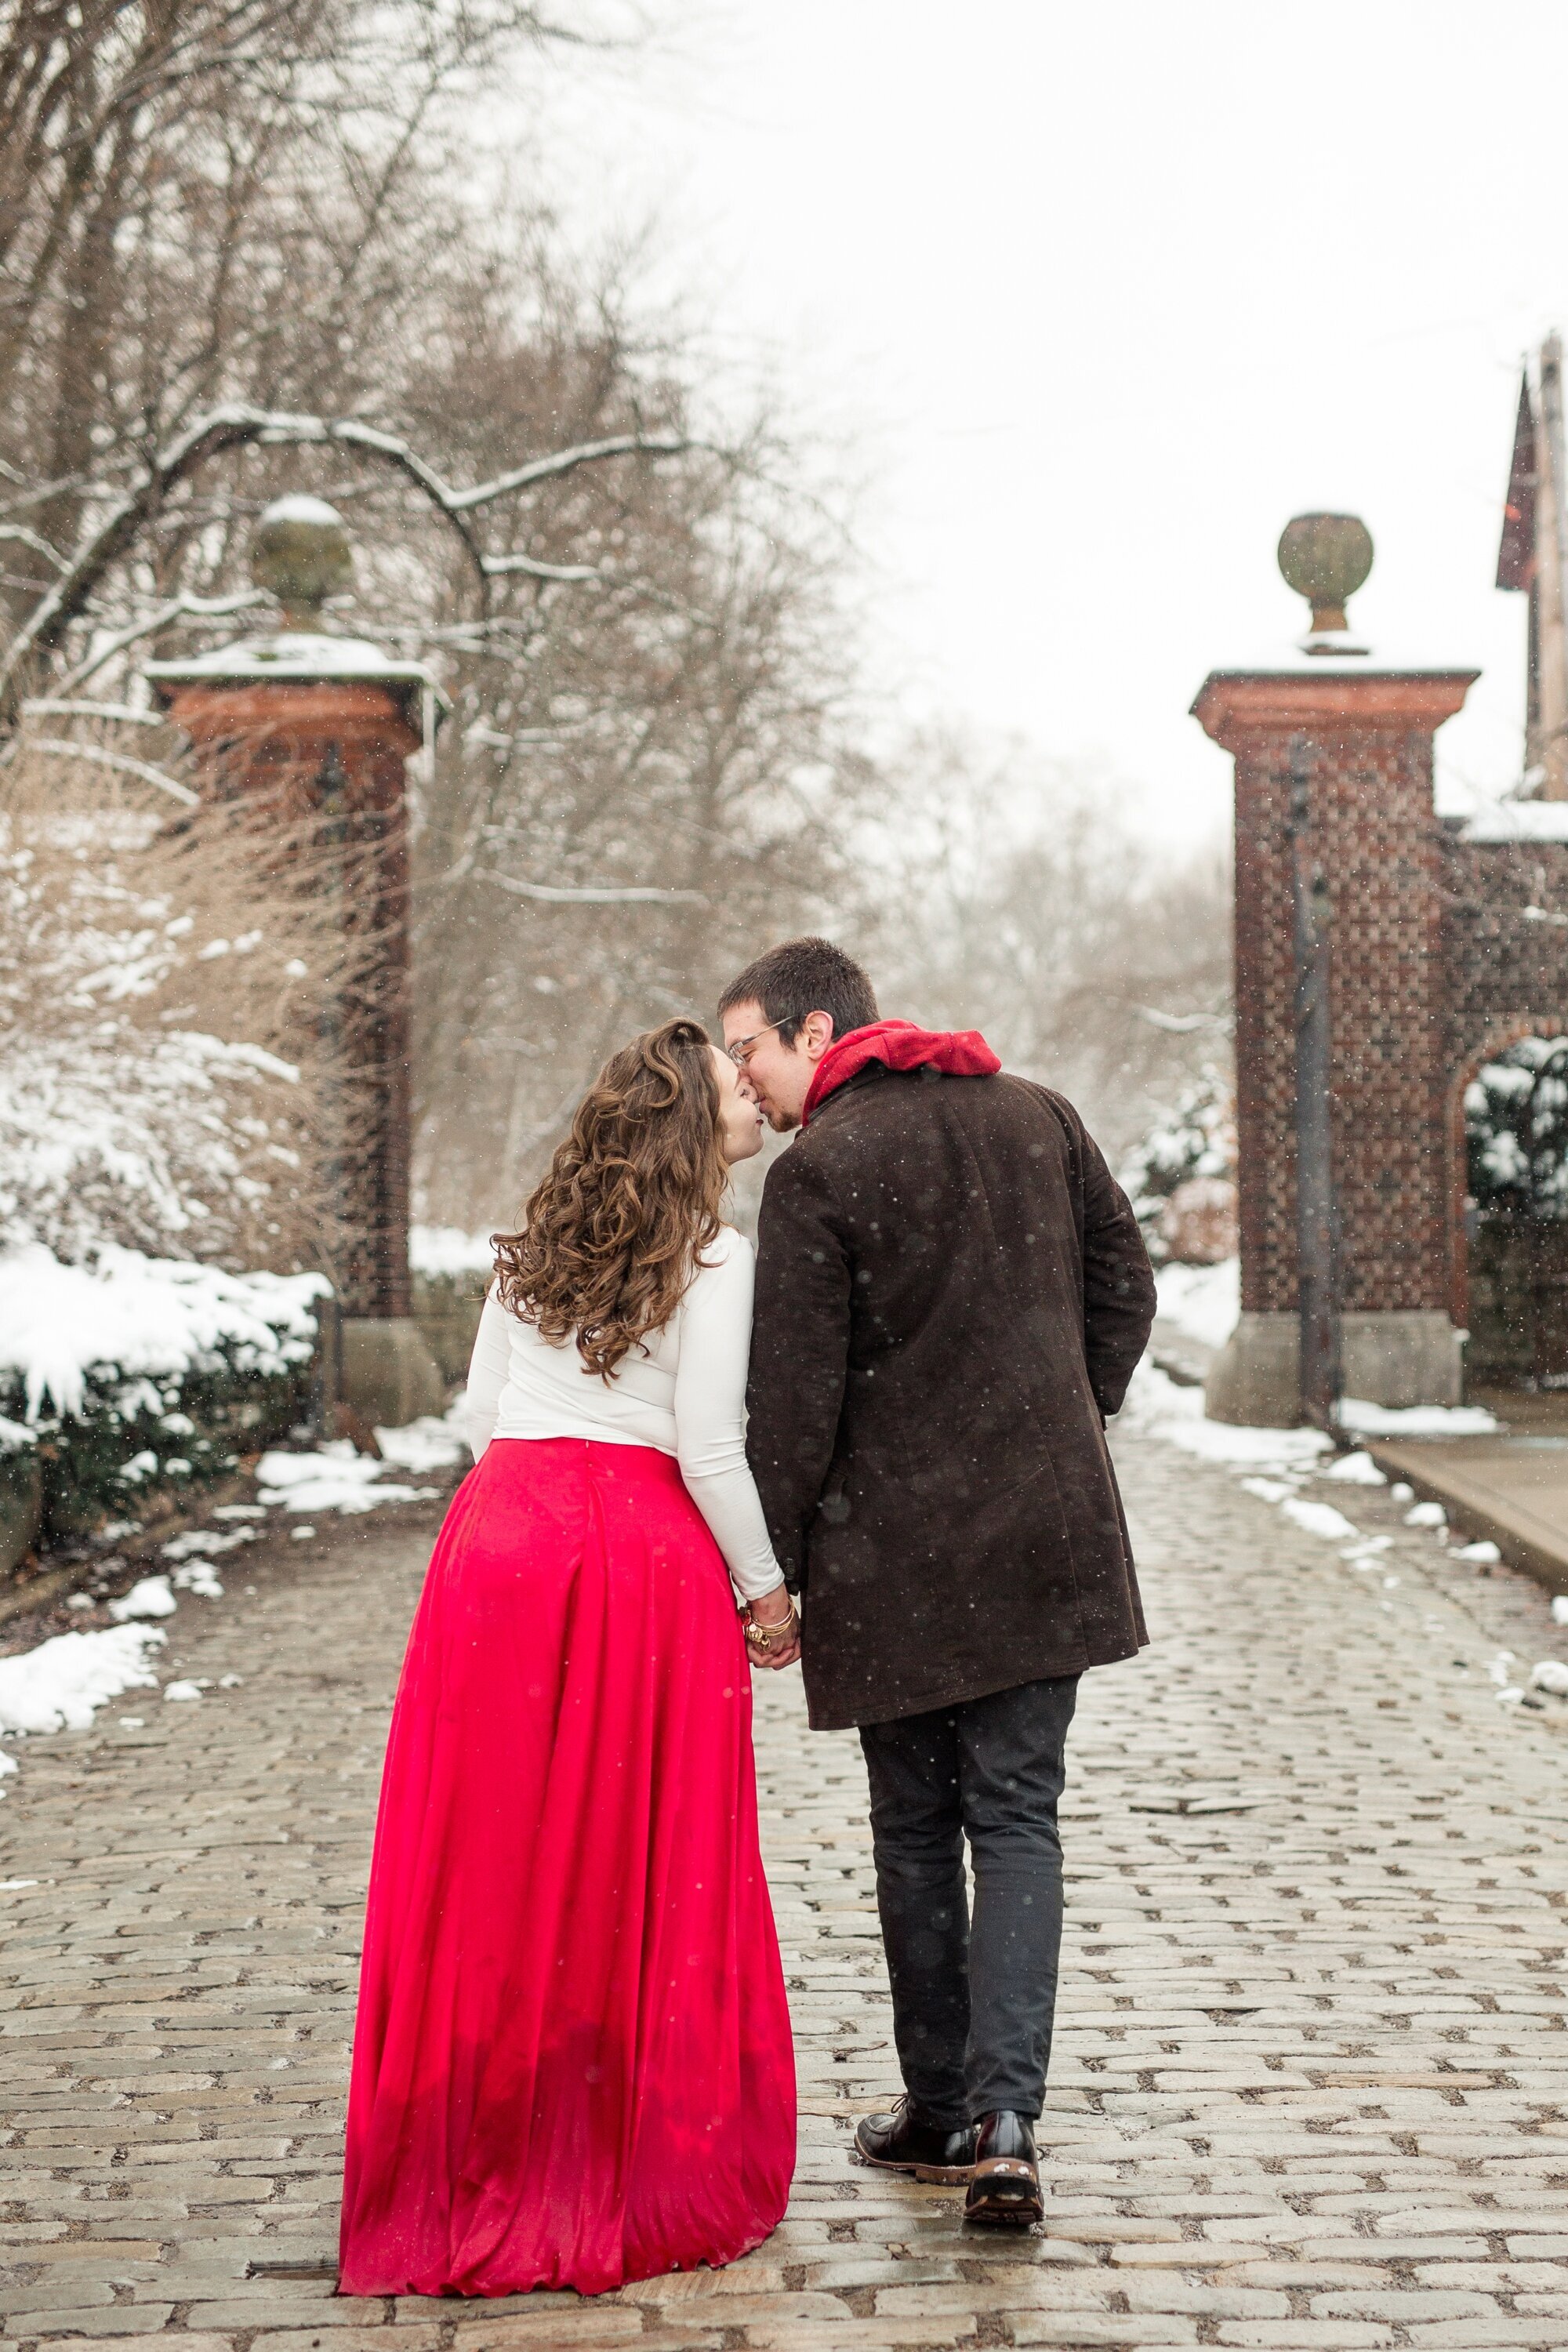
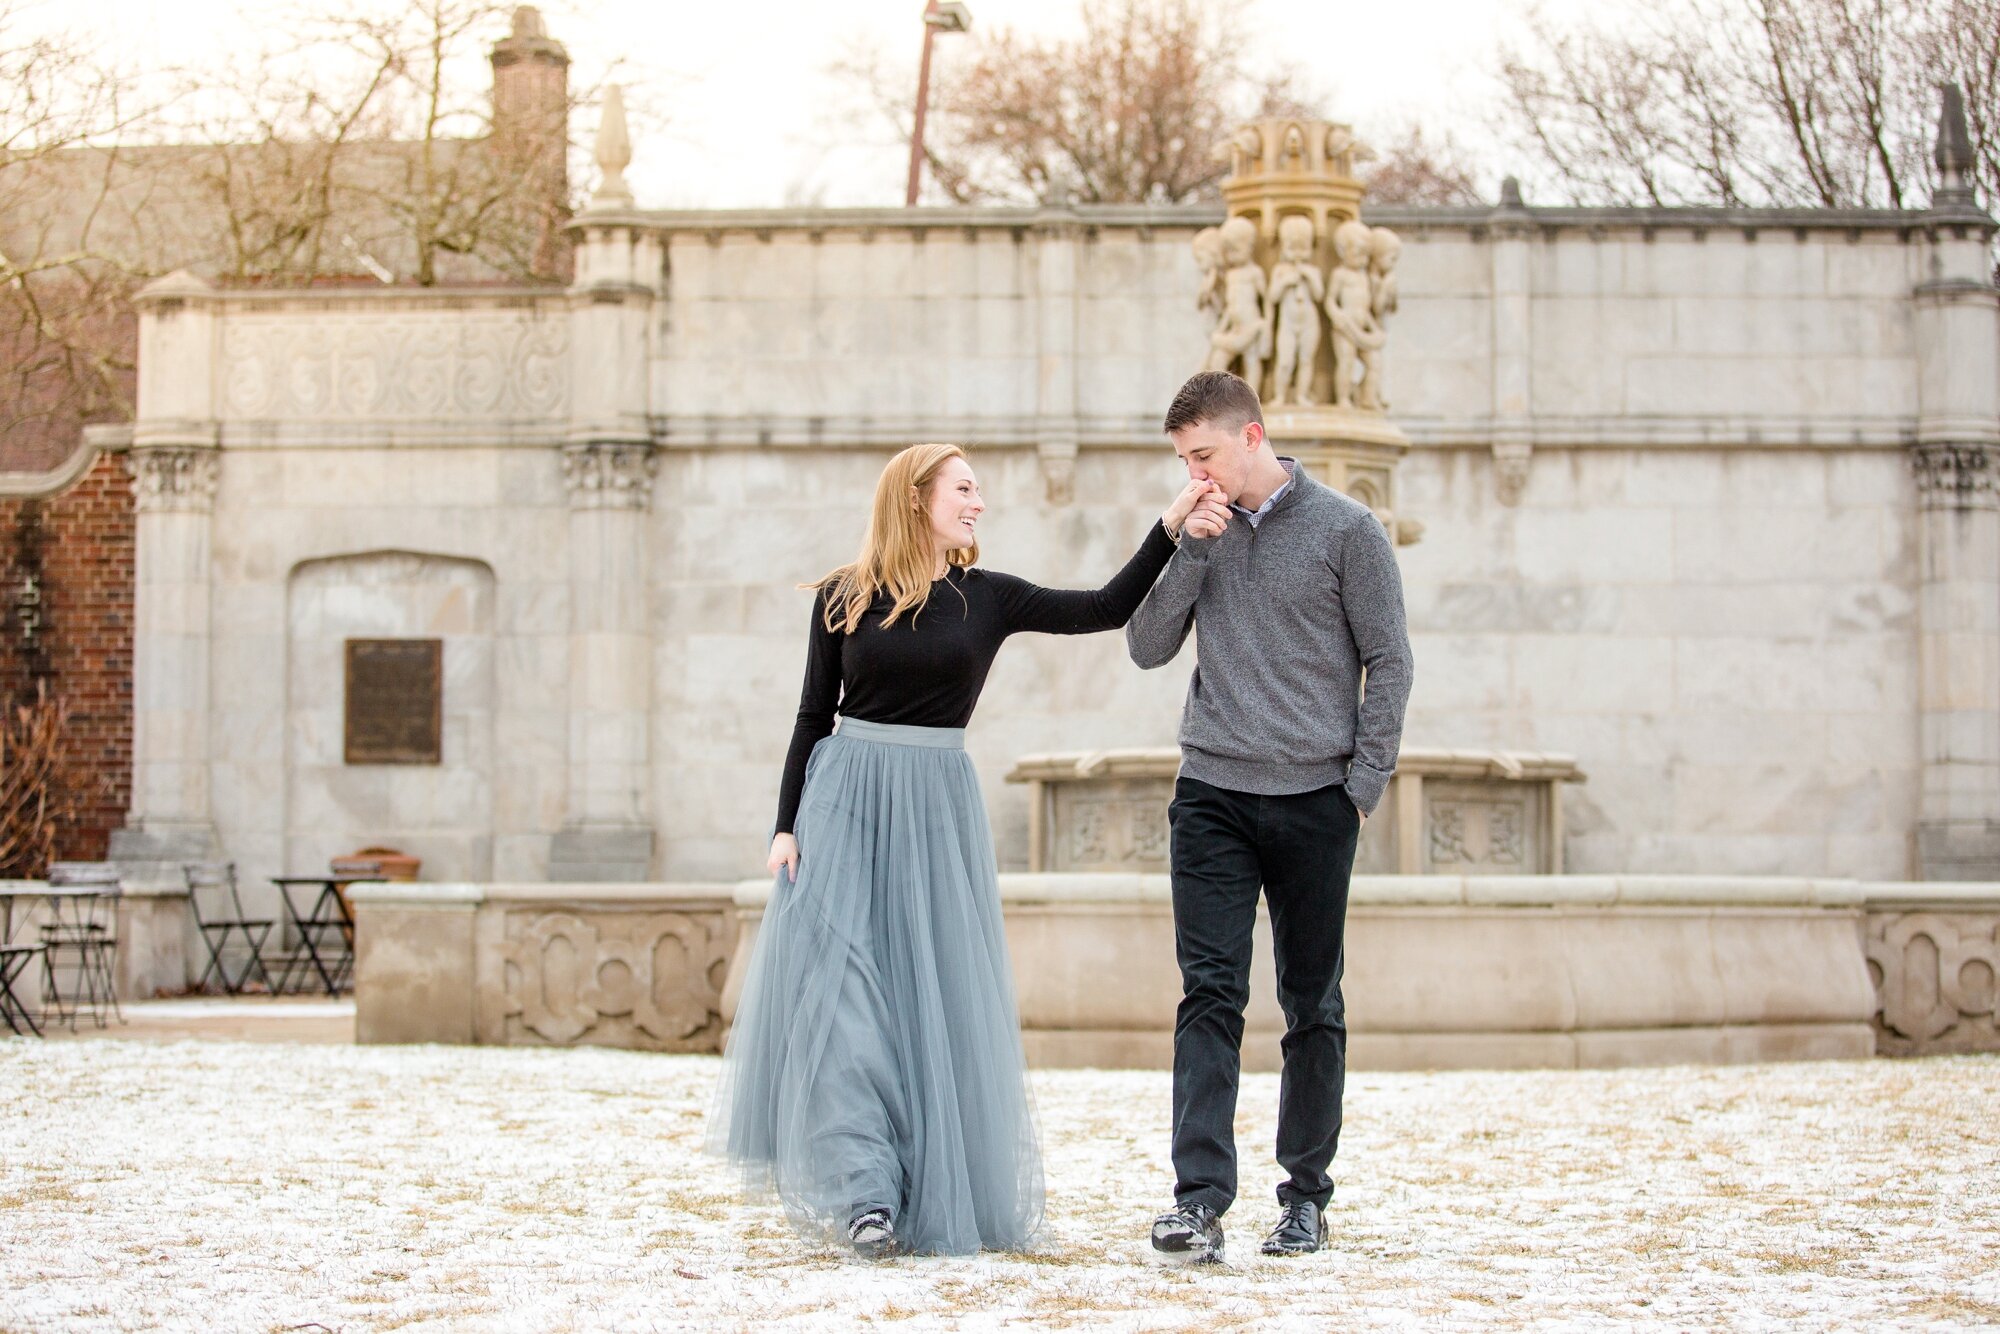
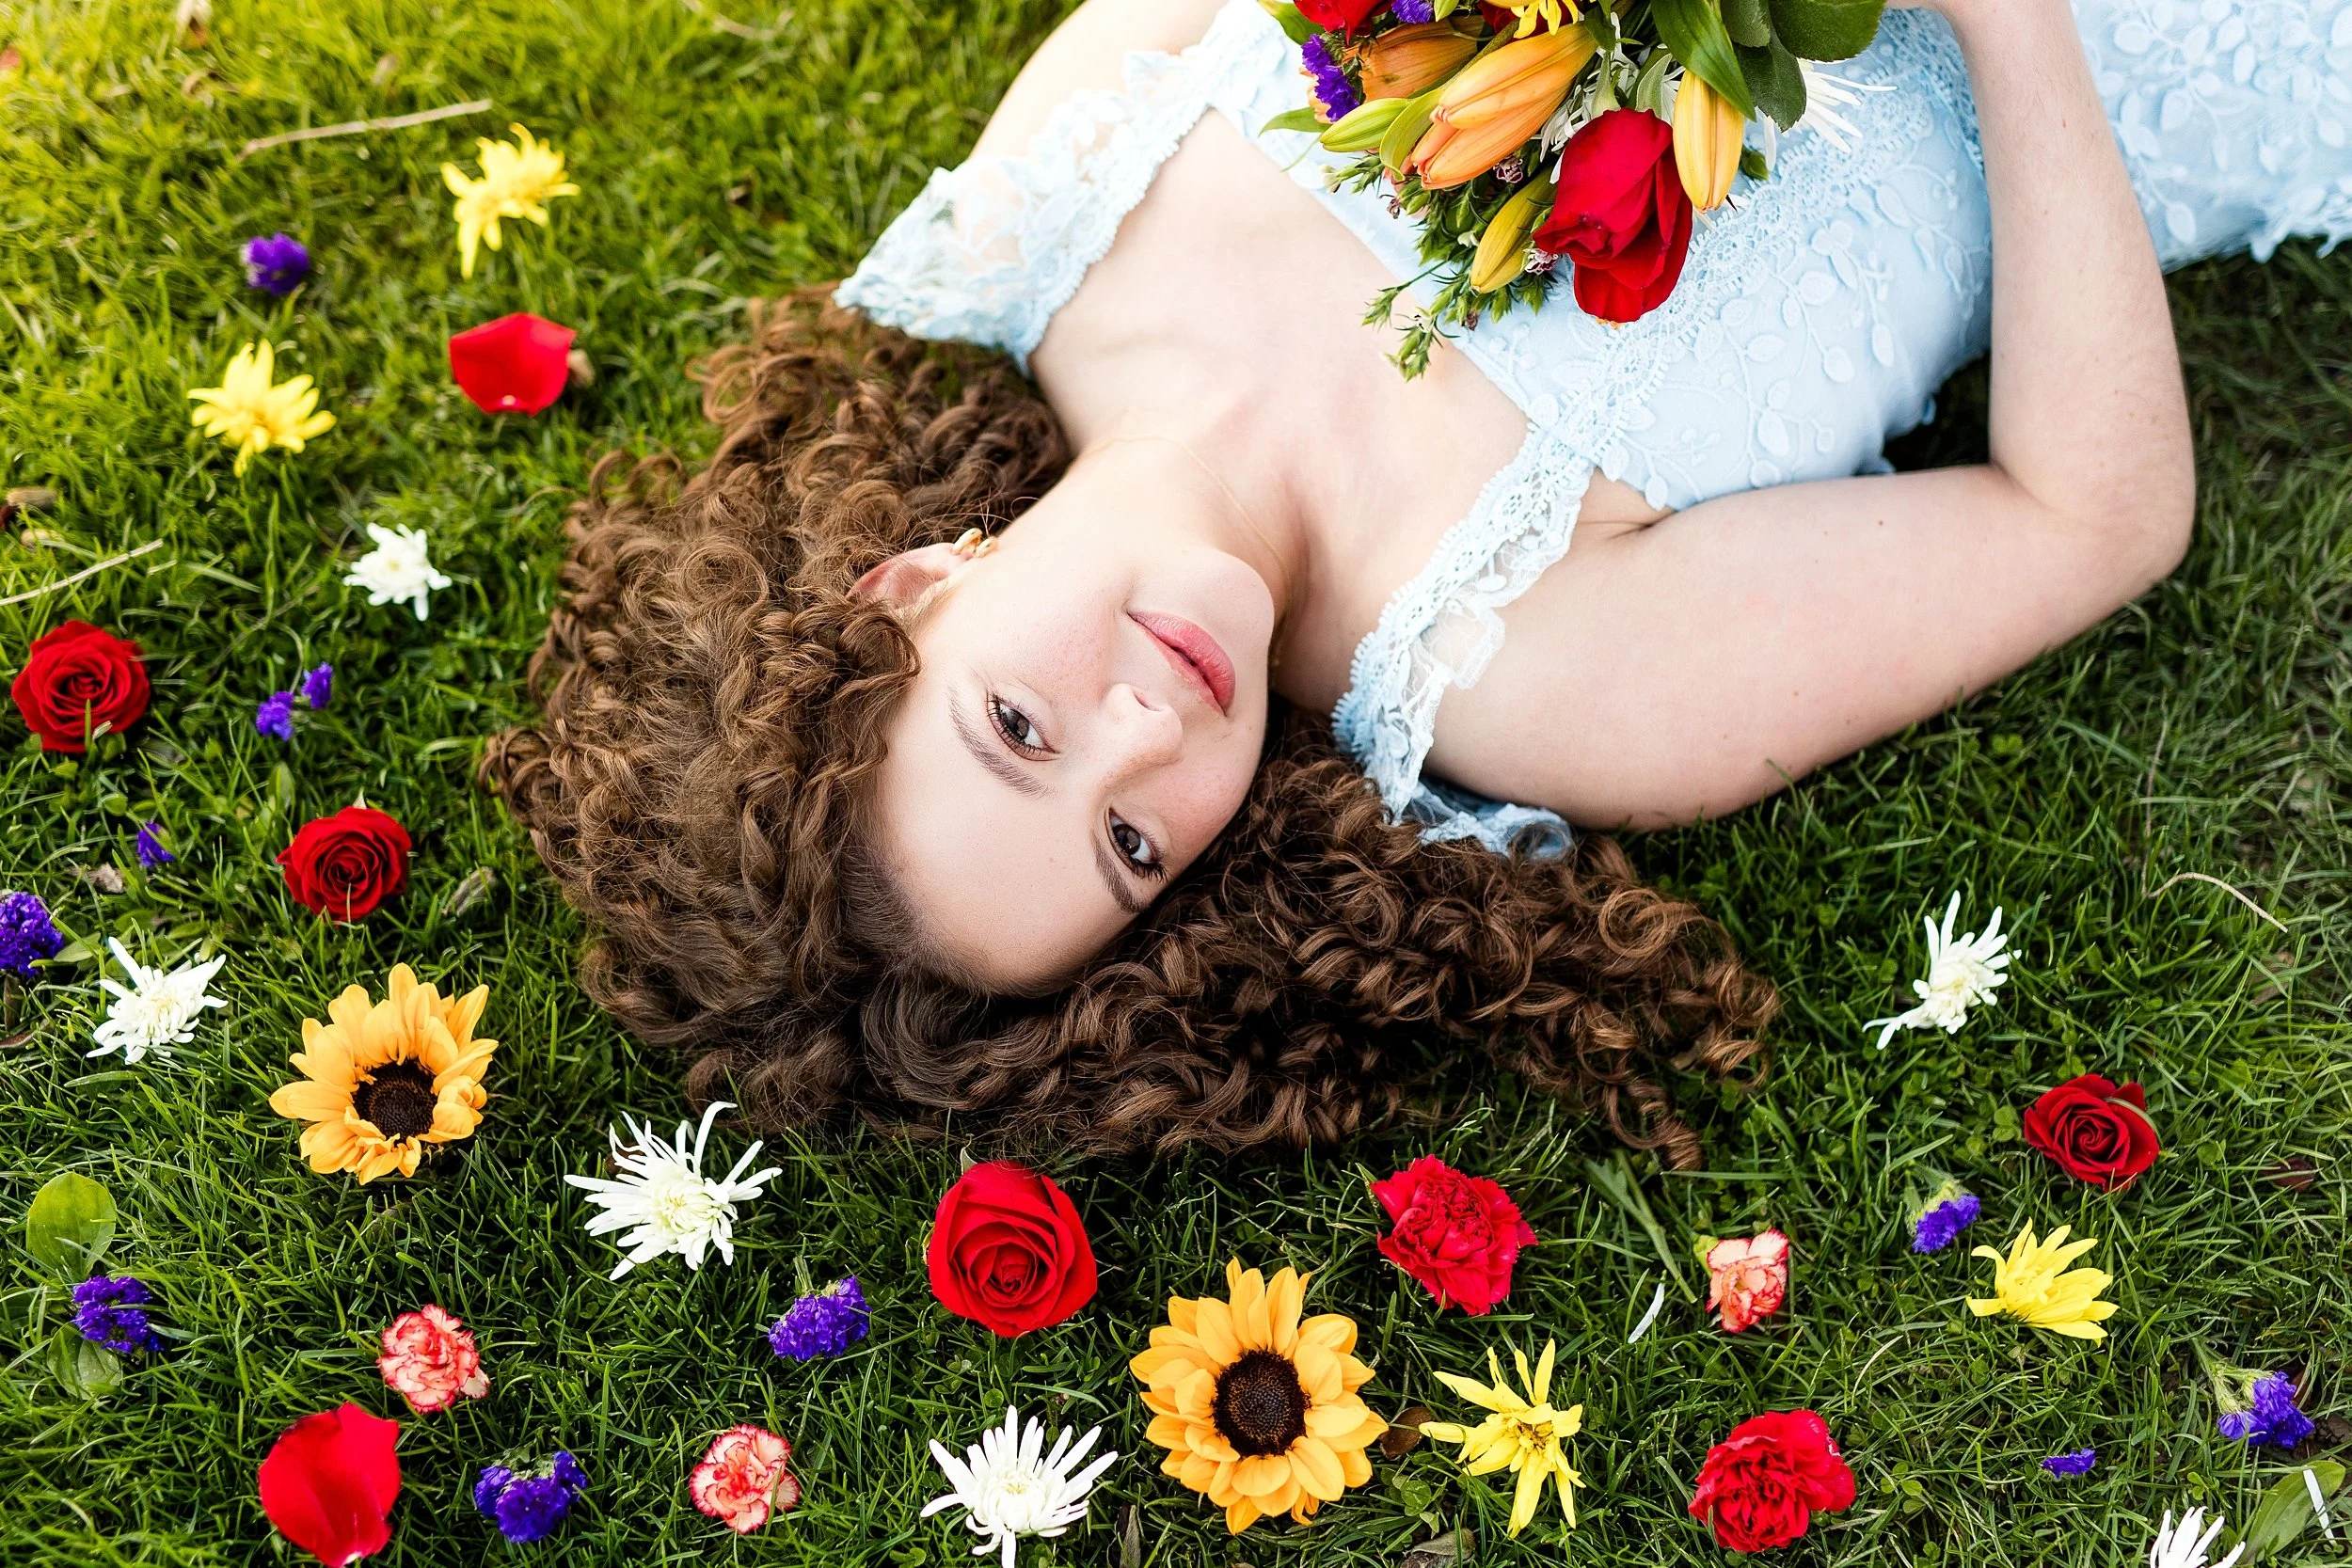
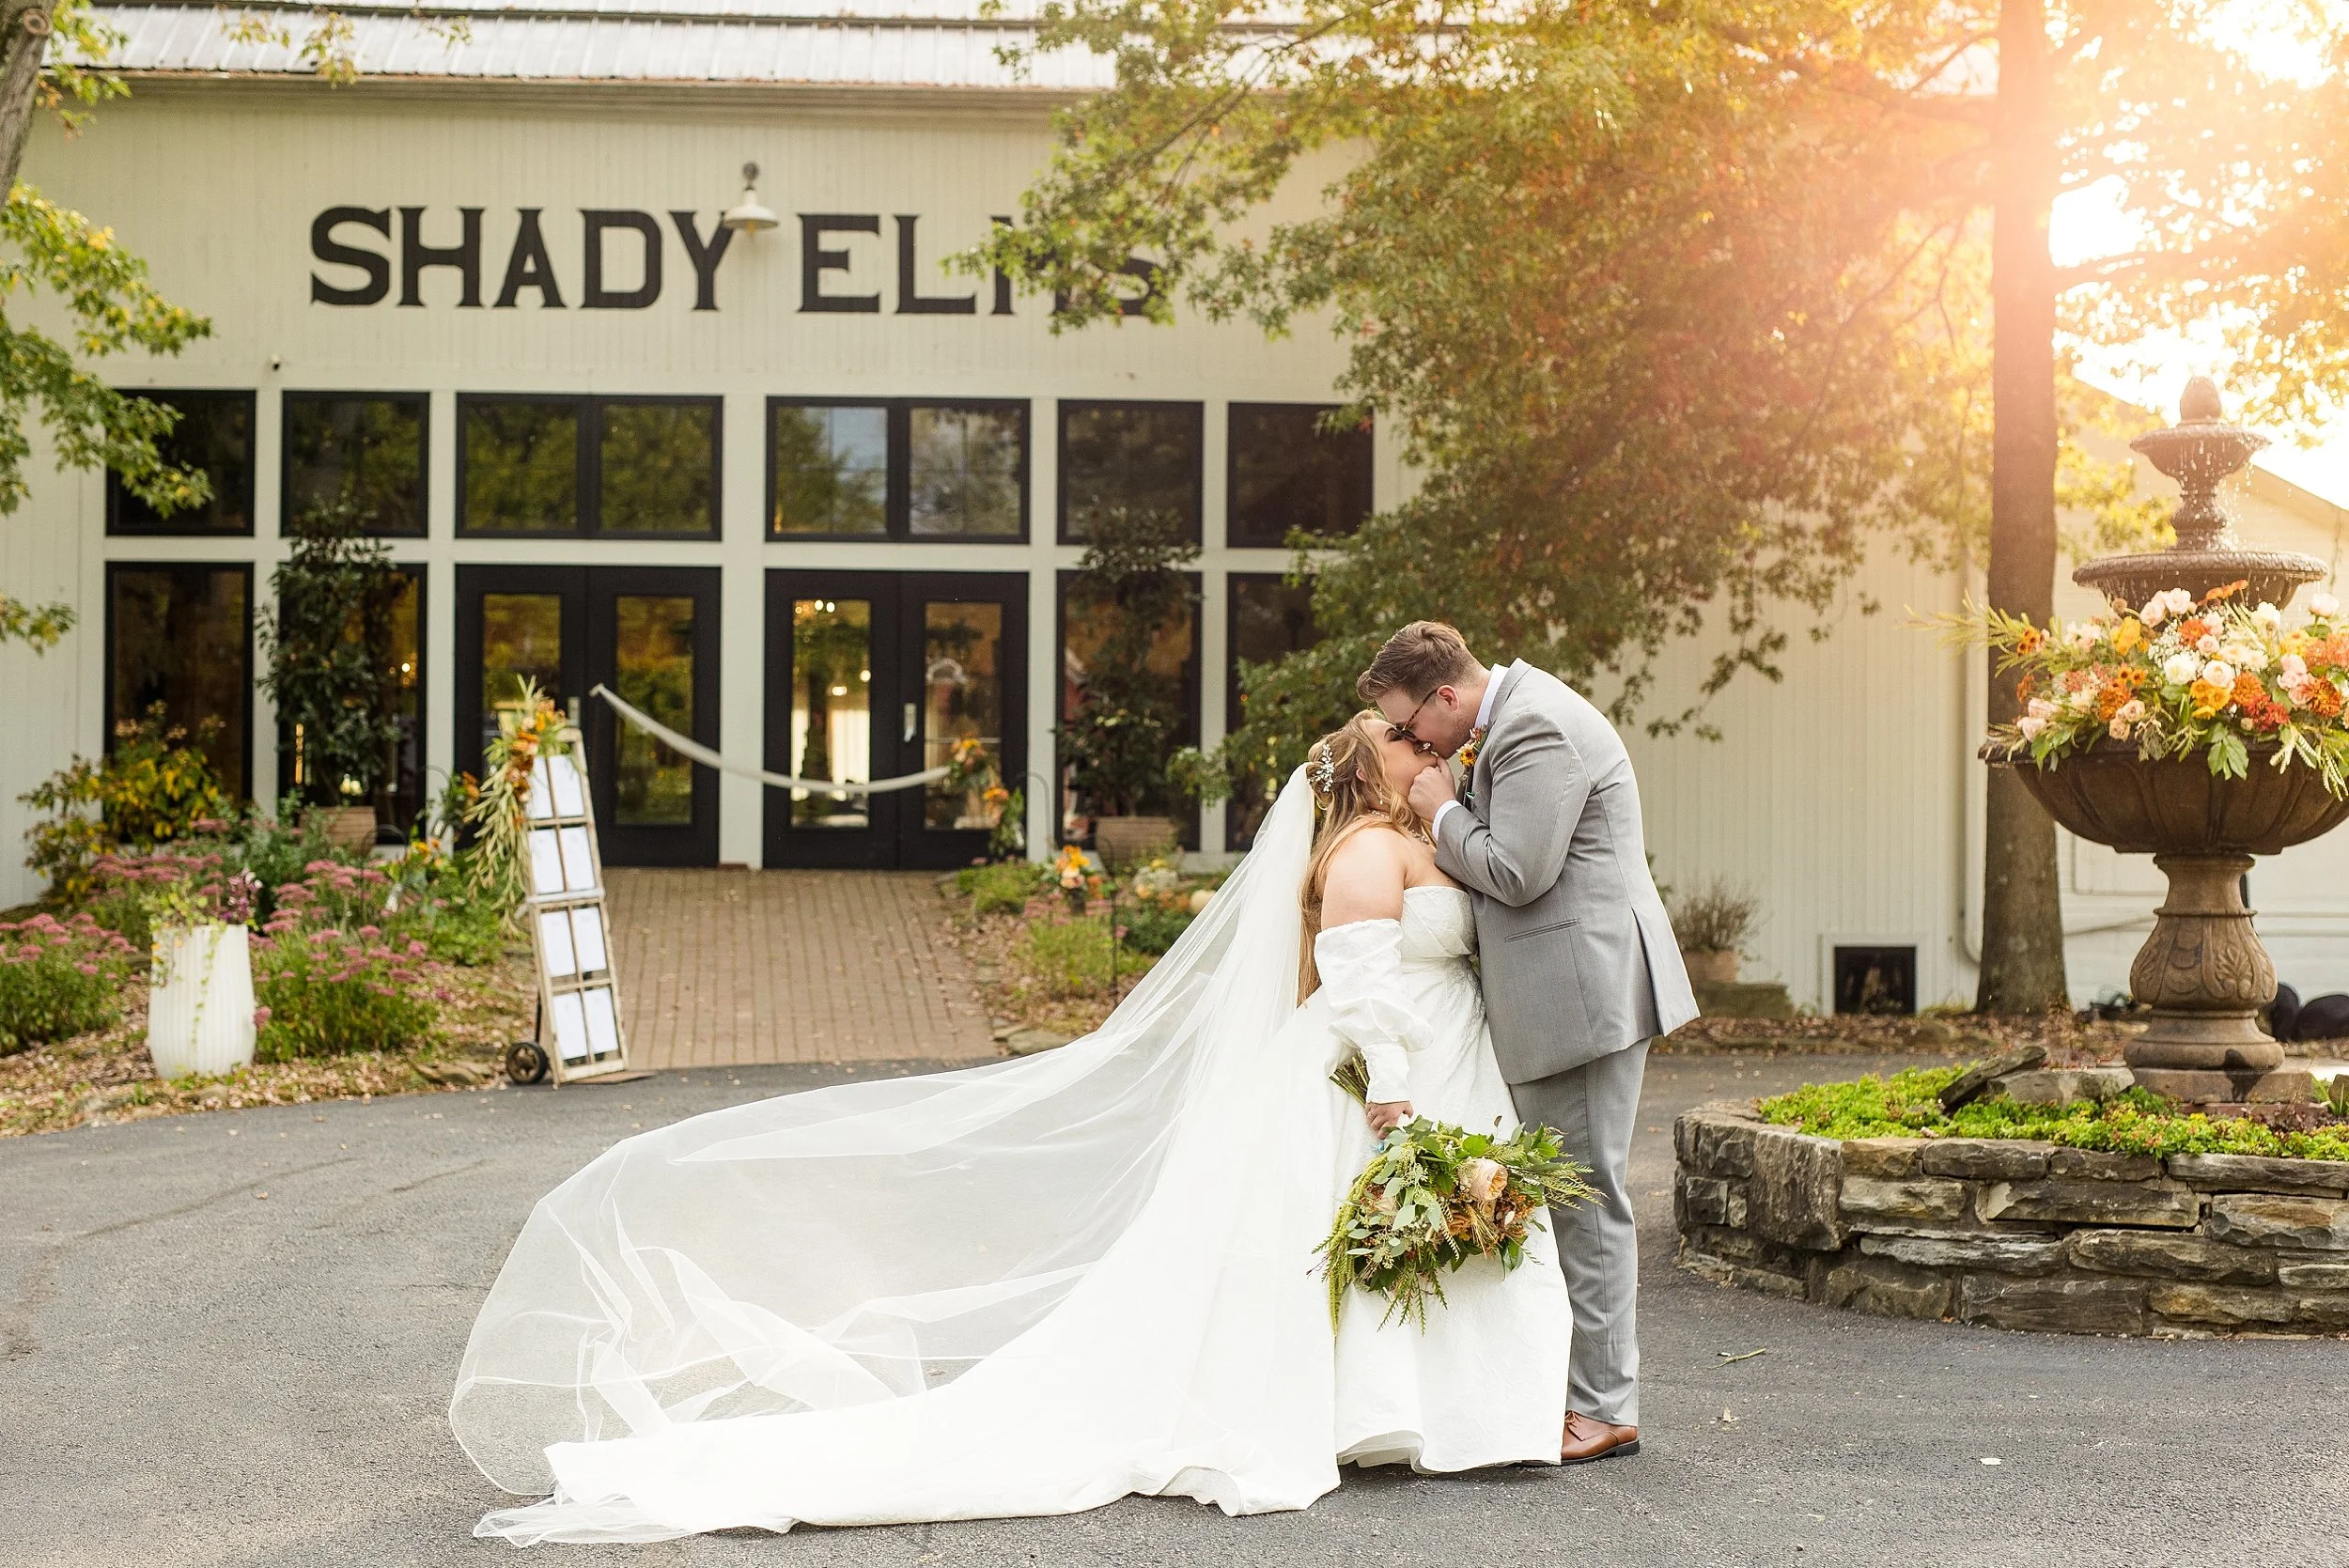
After first and foremost considering the light, then natural reflectors, I finally move on to considering specific backdrops at a location. For me, specifically, I tend to gravitate more towards lighter colored and colorful backdrops. This means looking for light colored architecture, bright flowers, white cobblestone pathways, trees with lighter green shrubbery, and the like. It’s easiest for me to achieve the “look” of bright, vibrant, and colorful when I choose backdrops that coincide with the style that I am to consistently achieve.

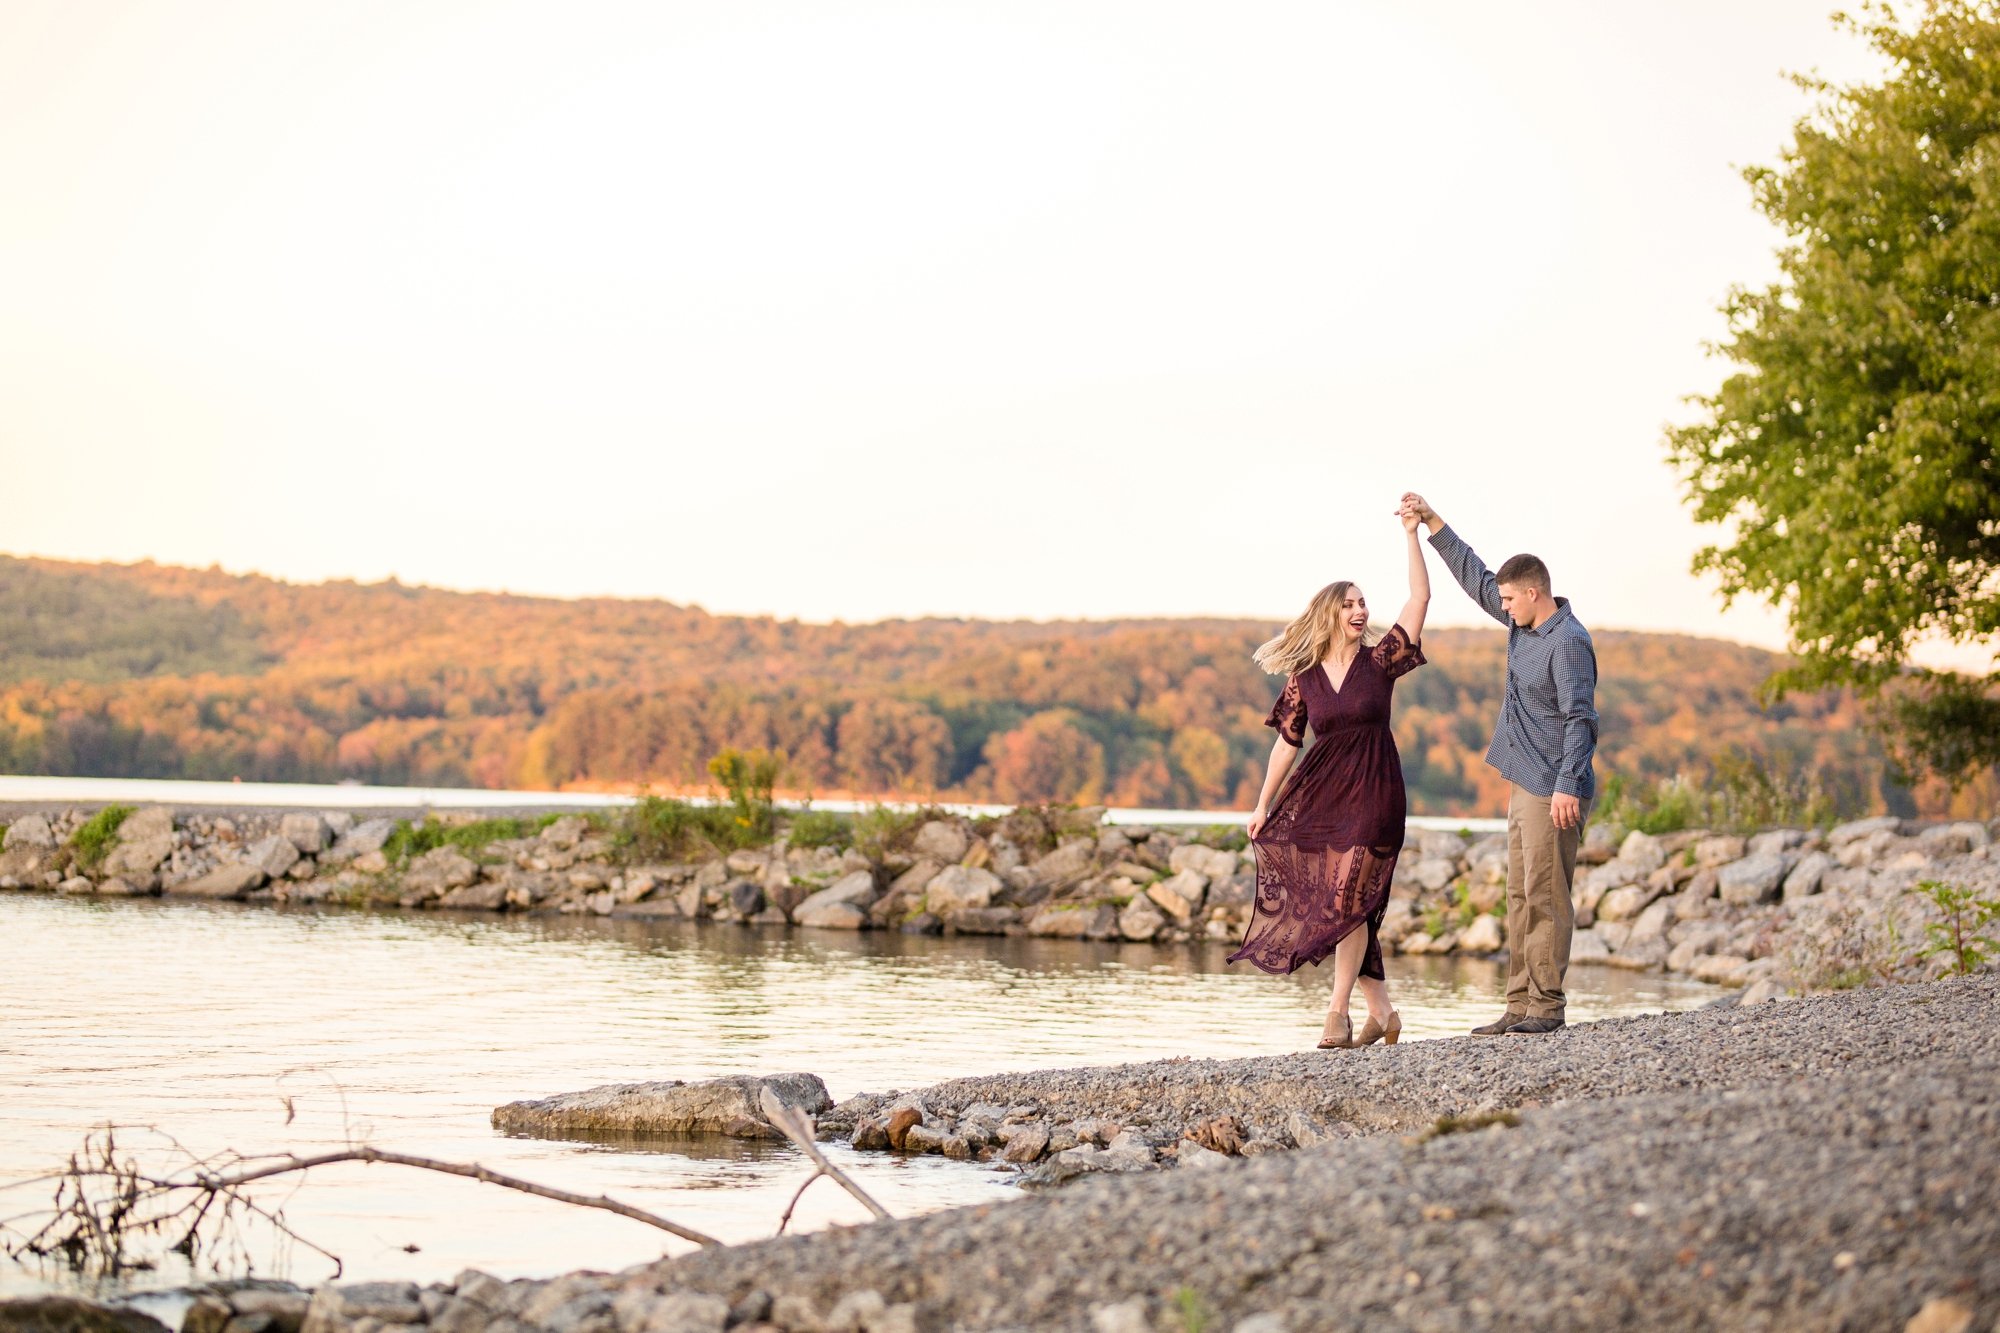
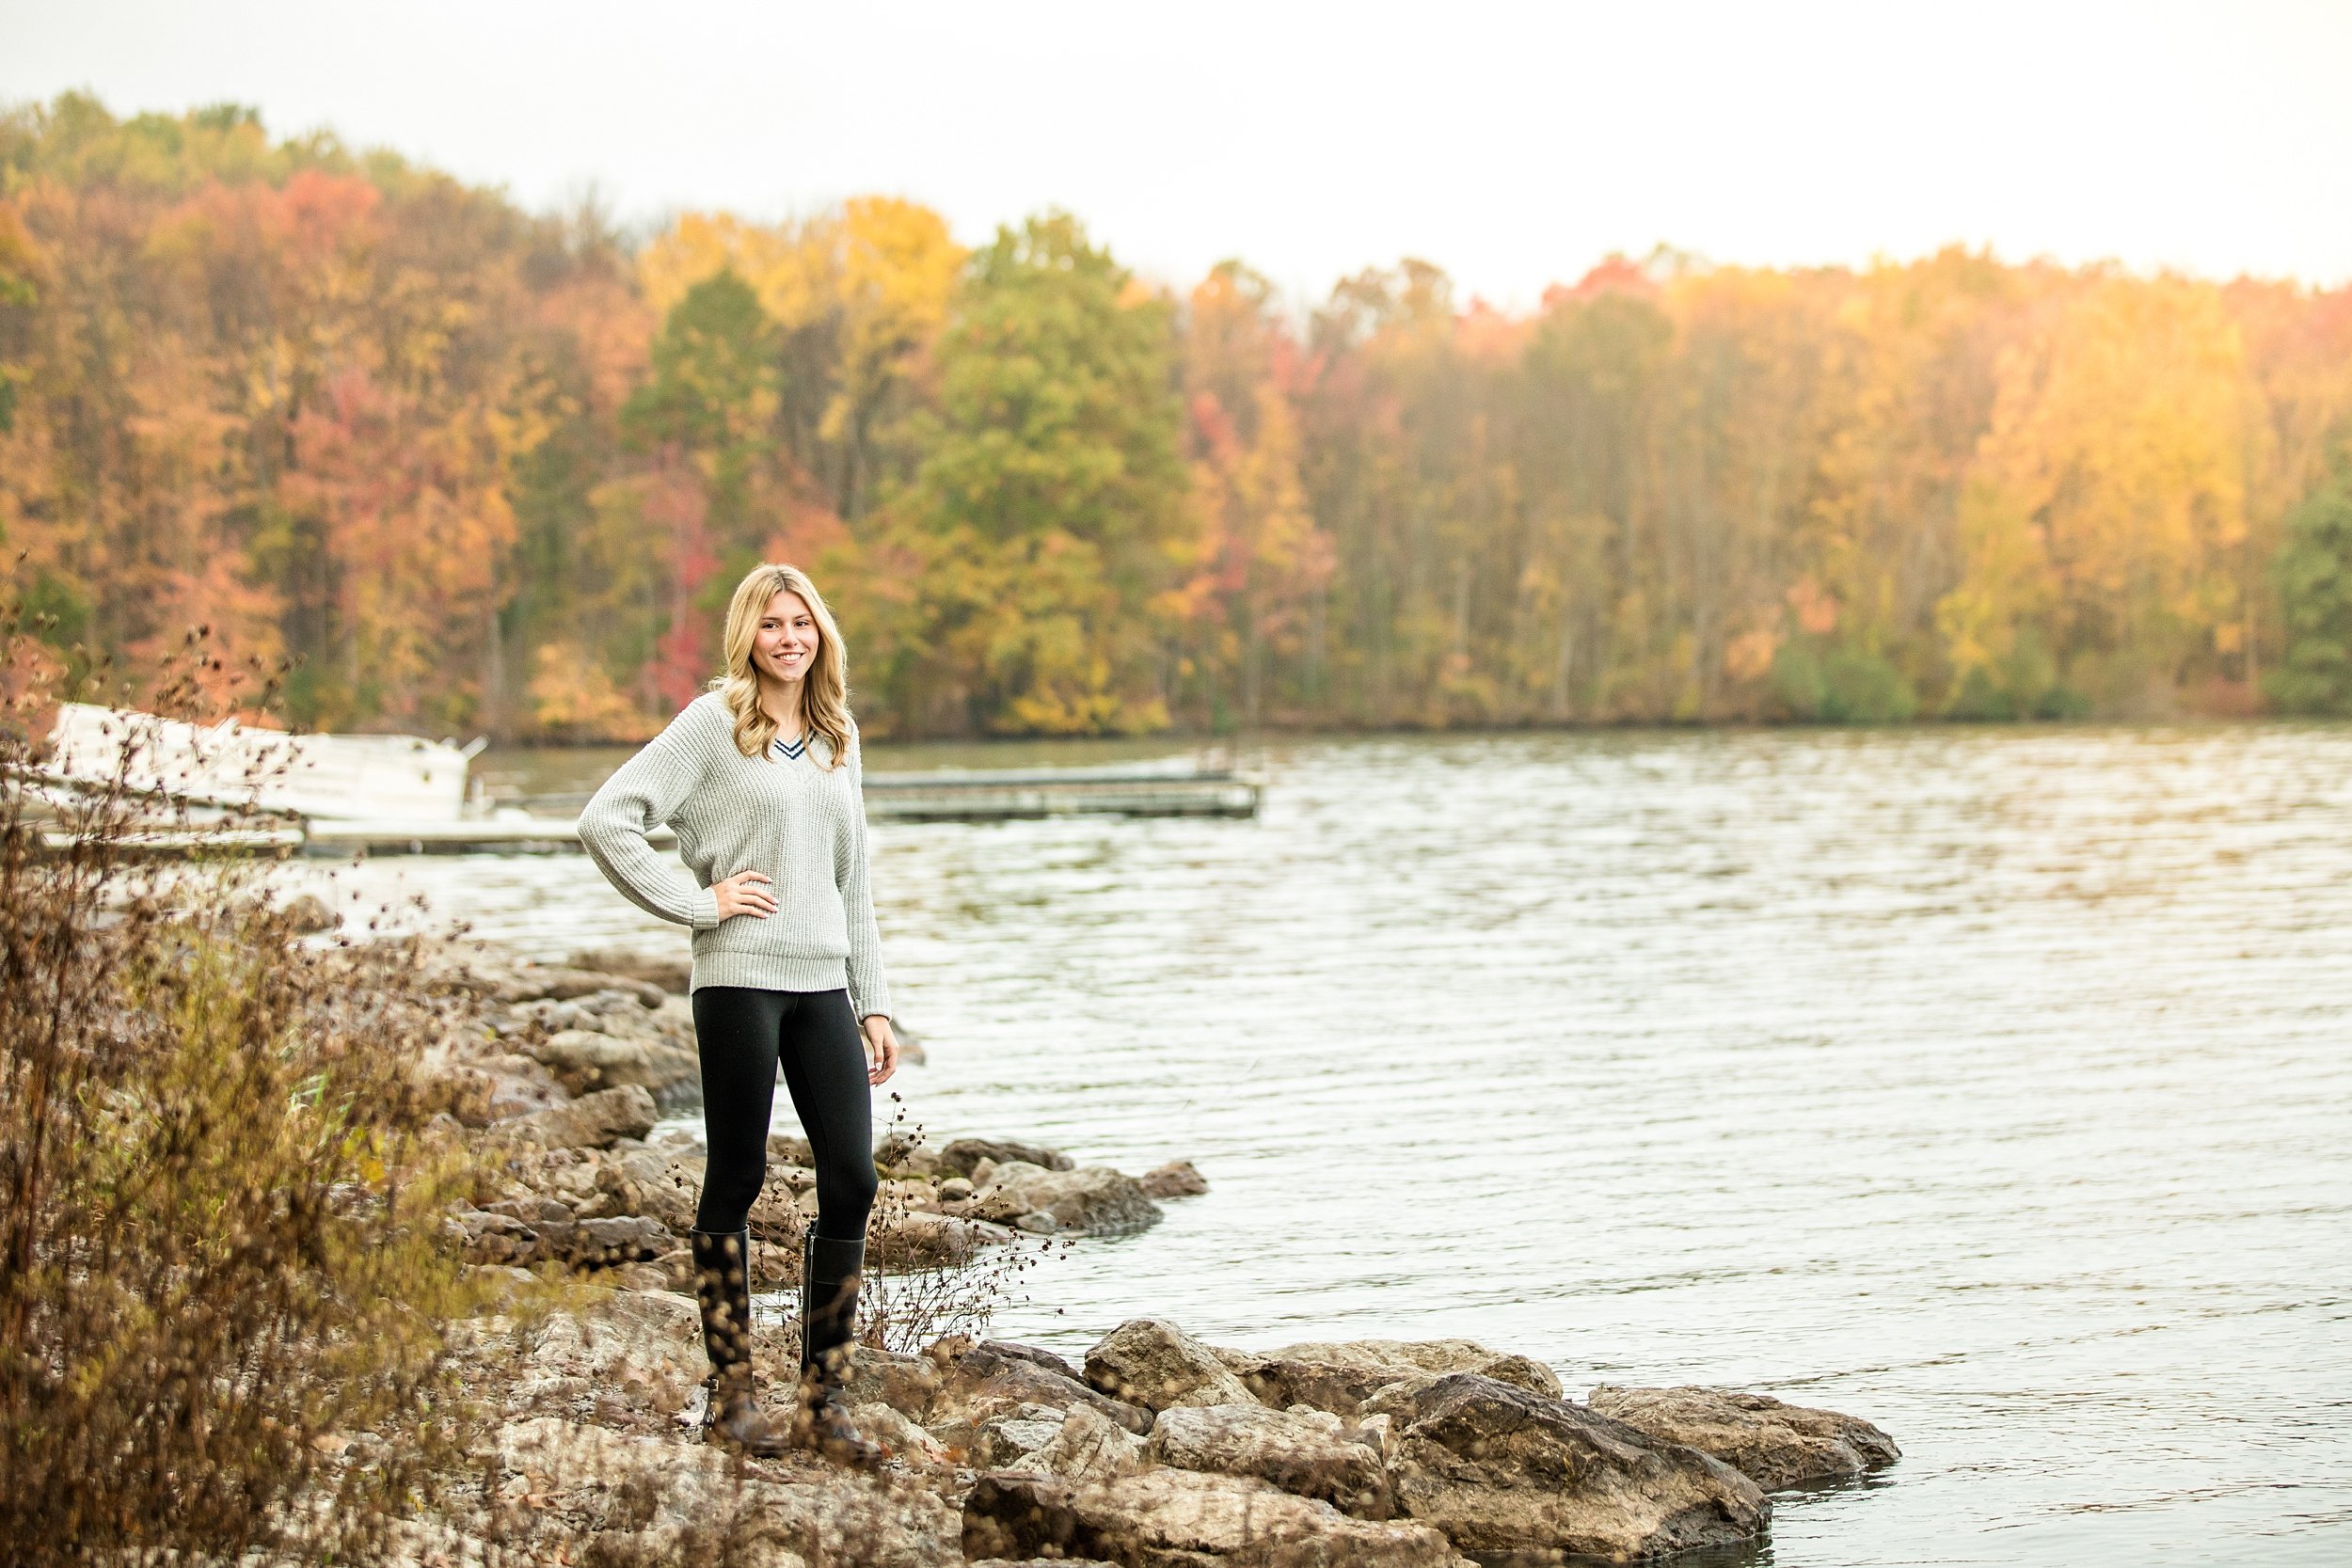
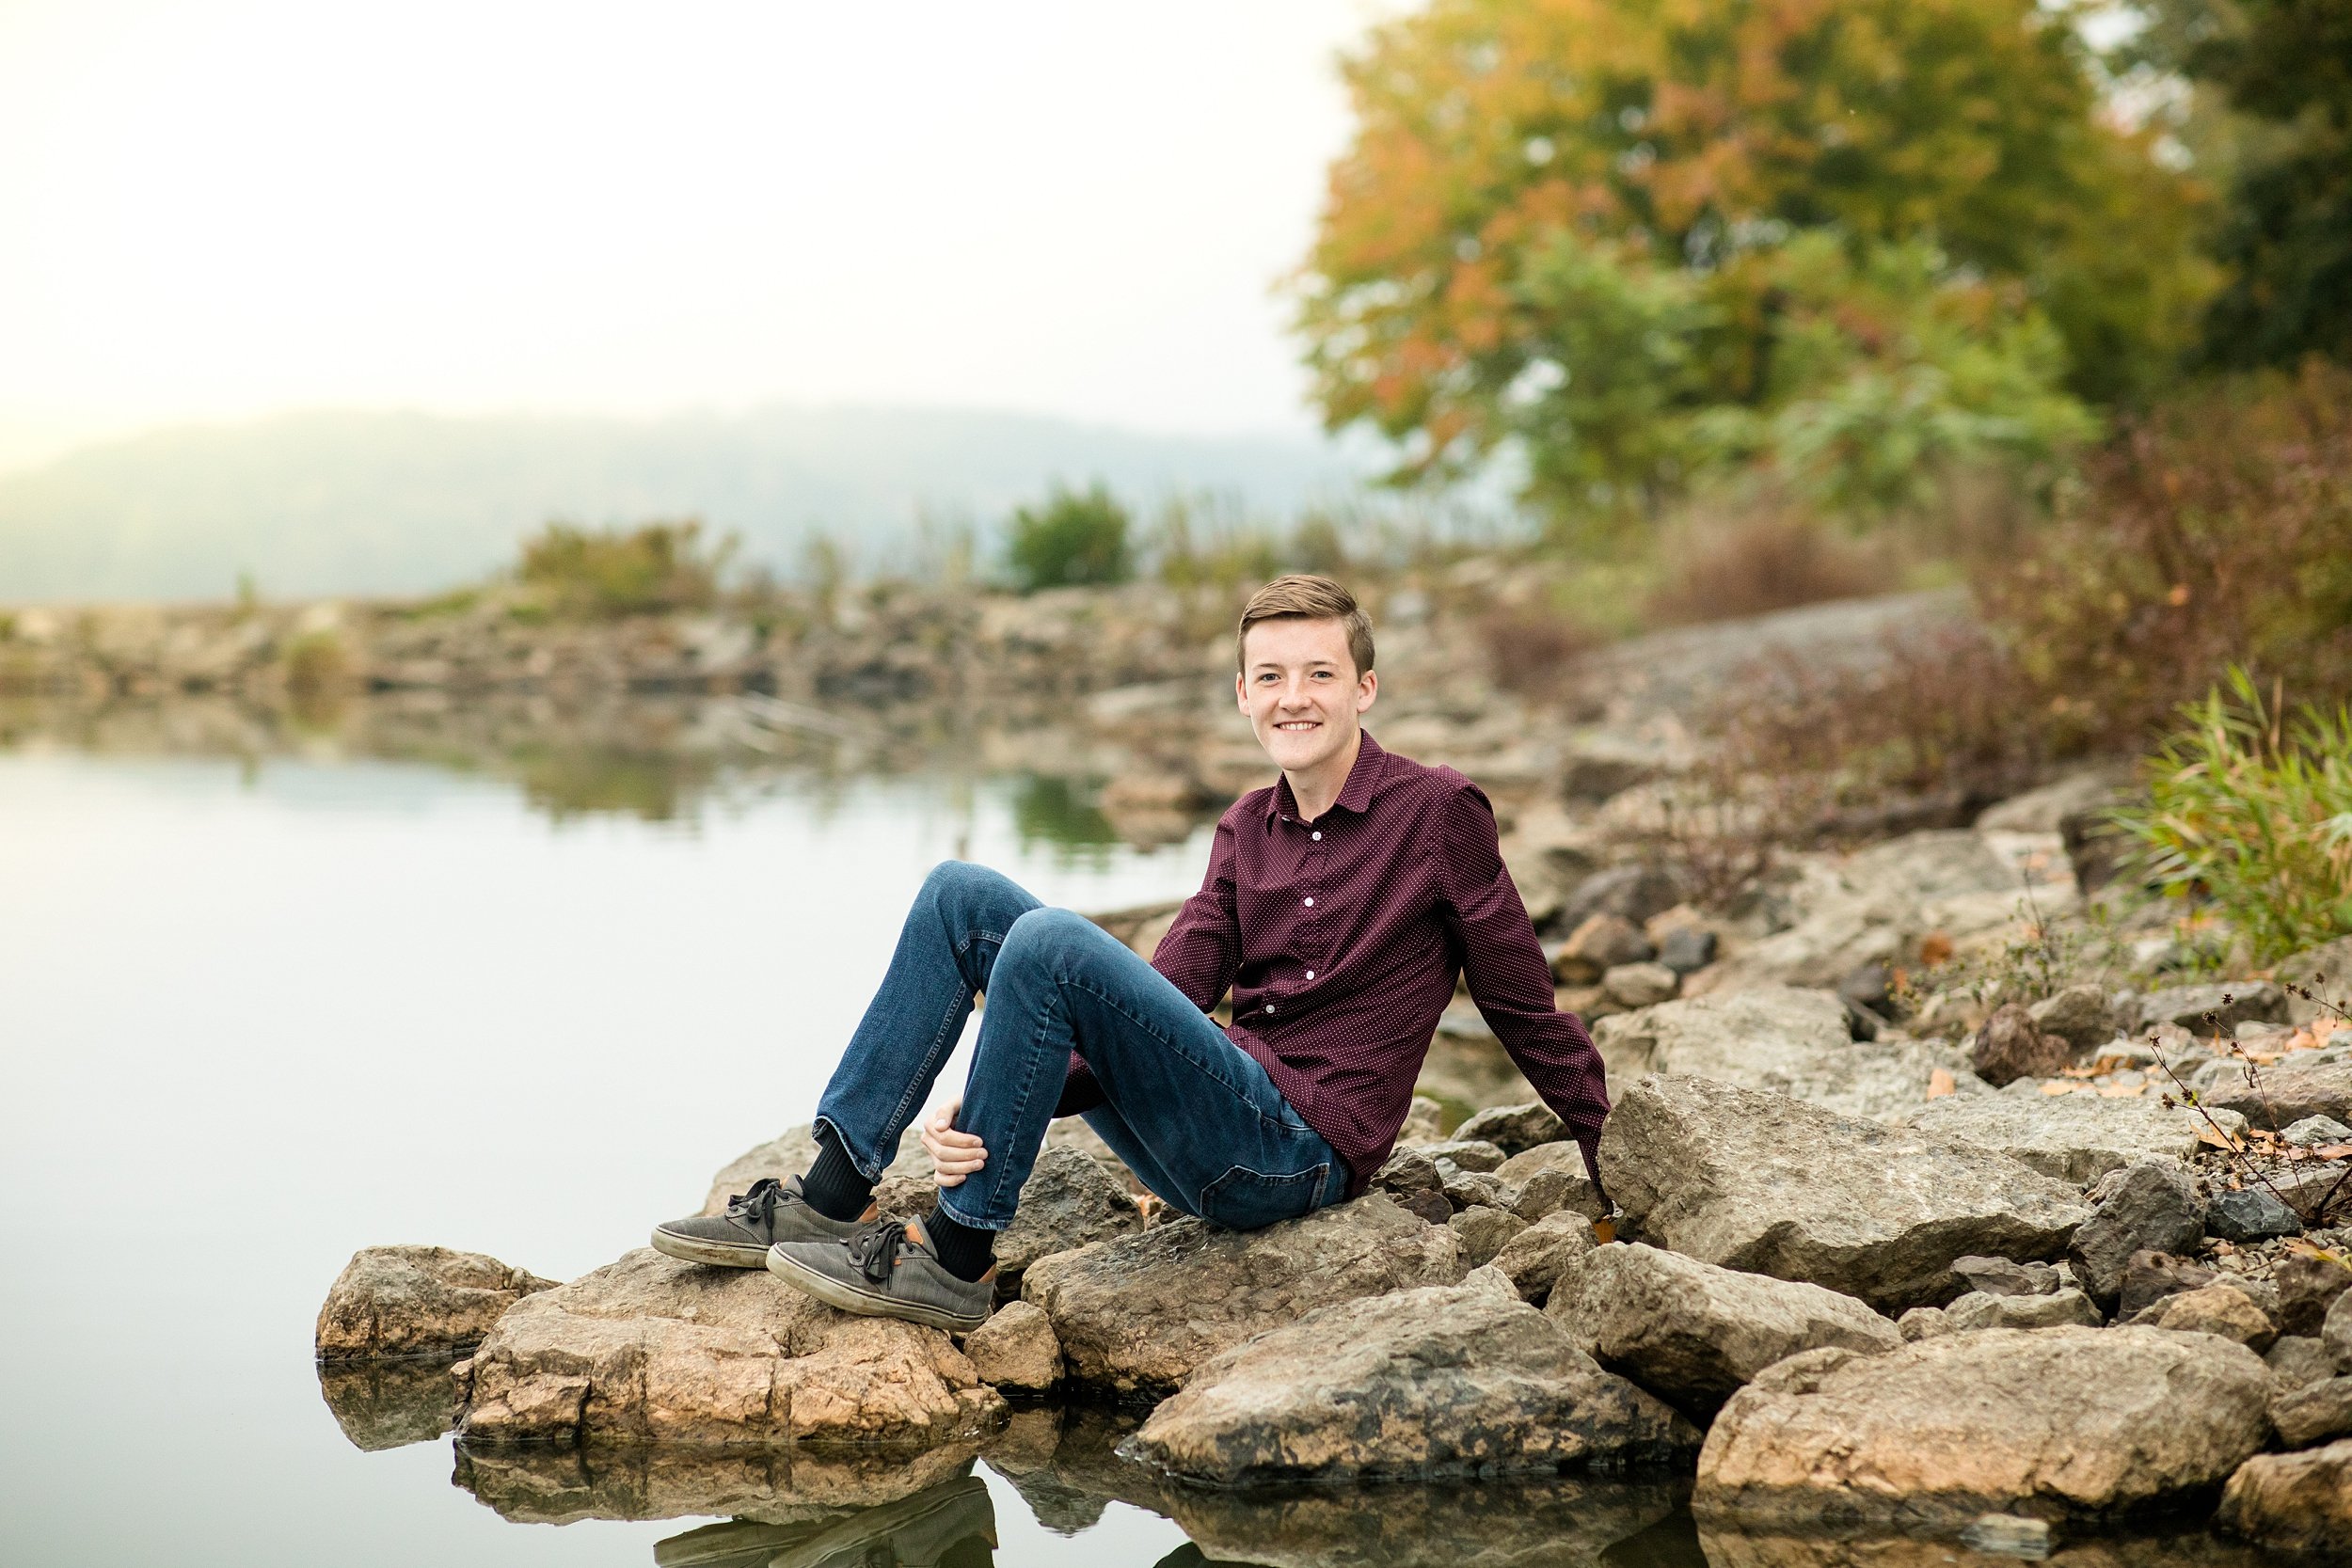
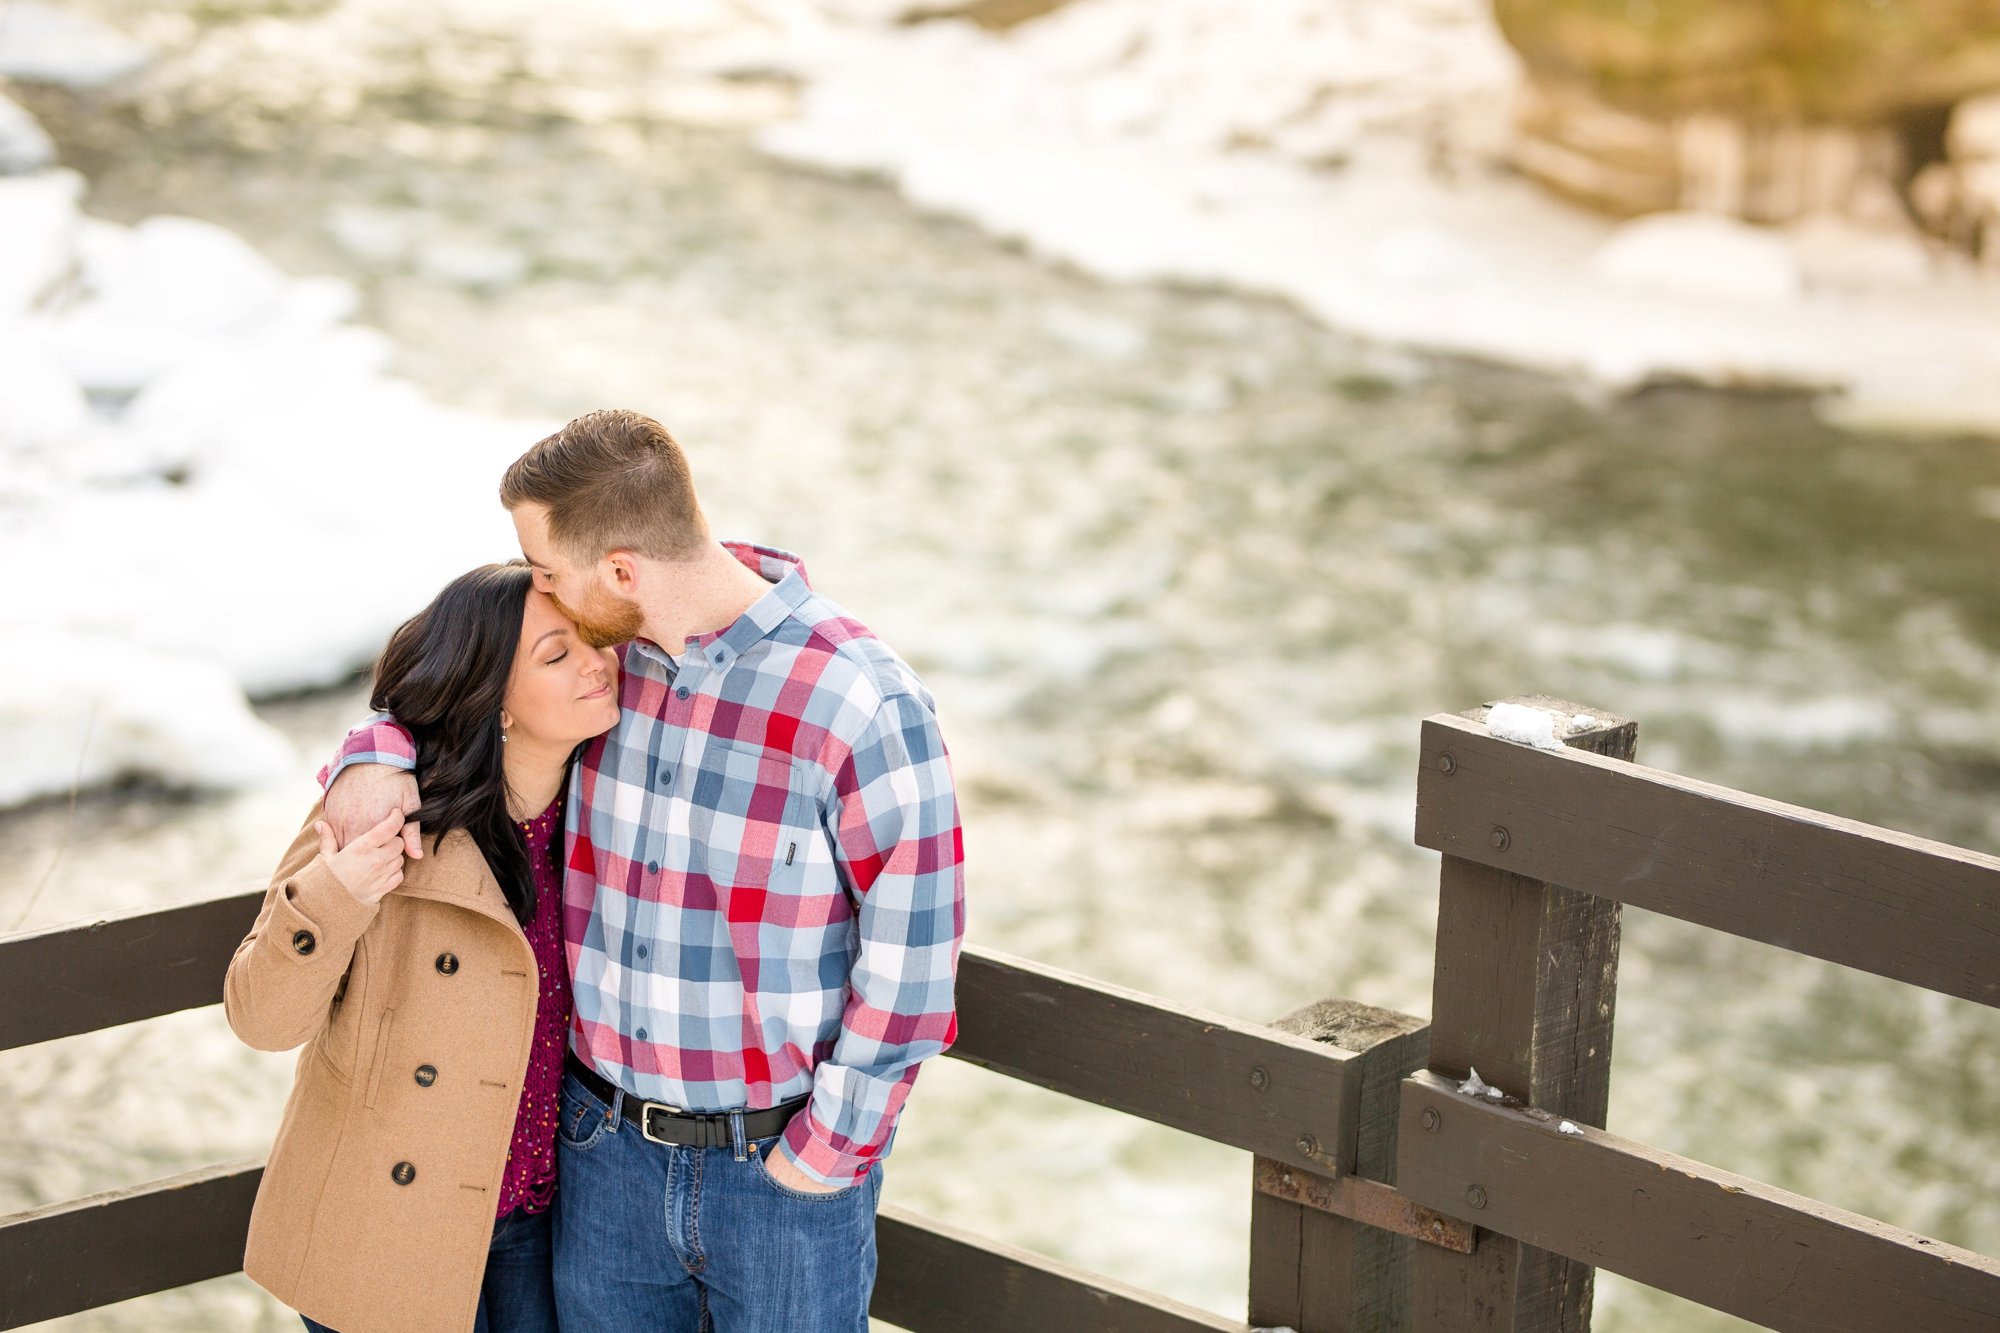
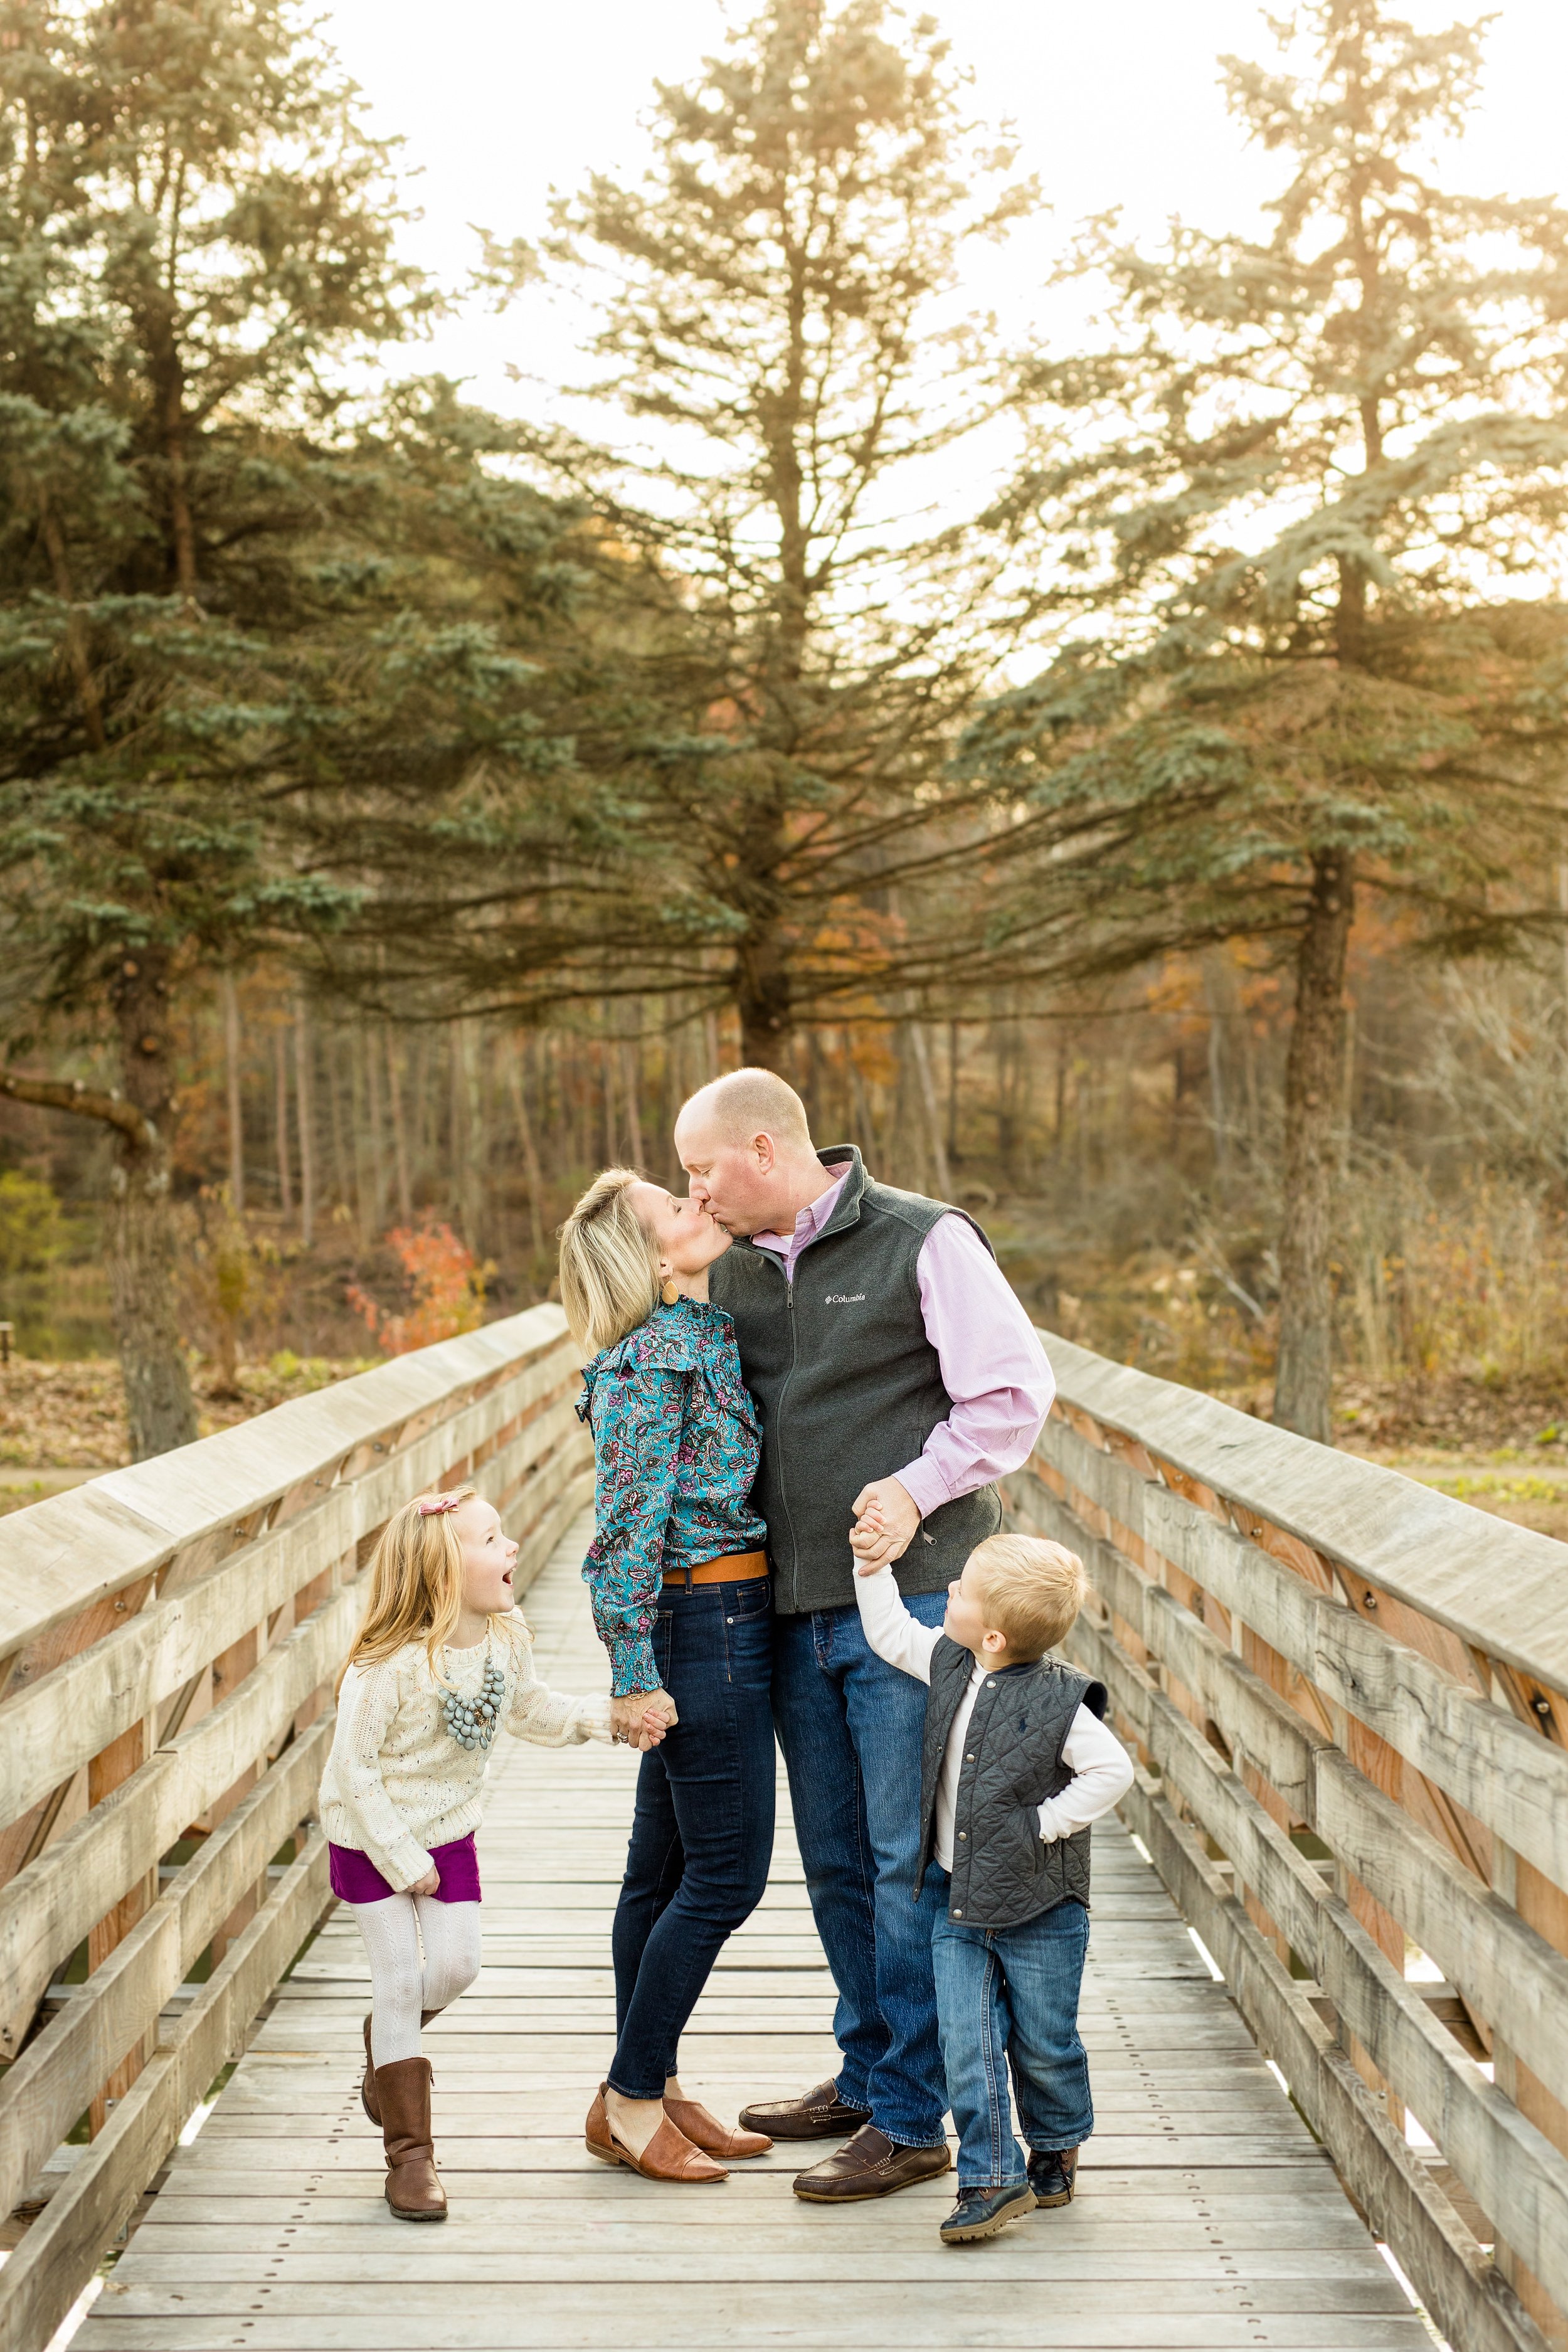
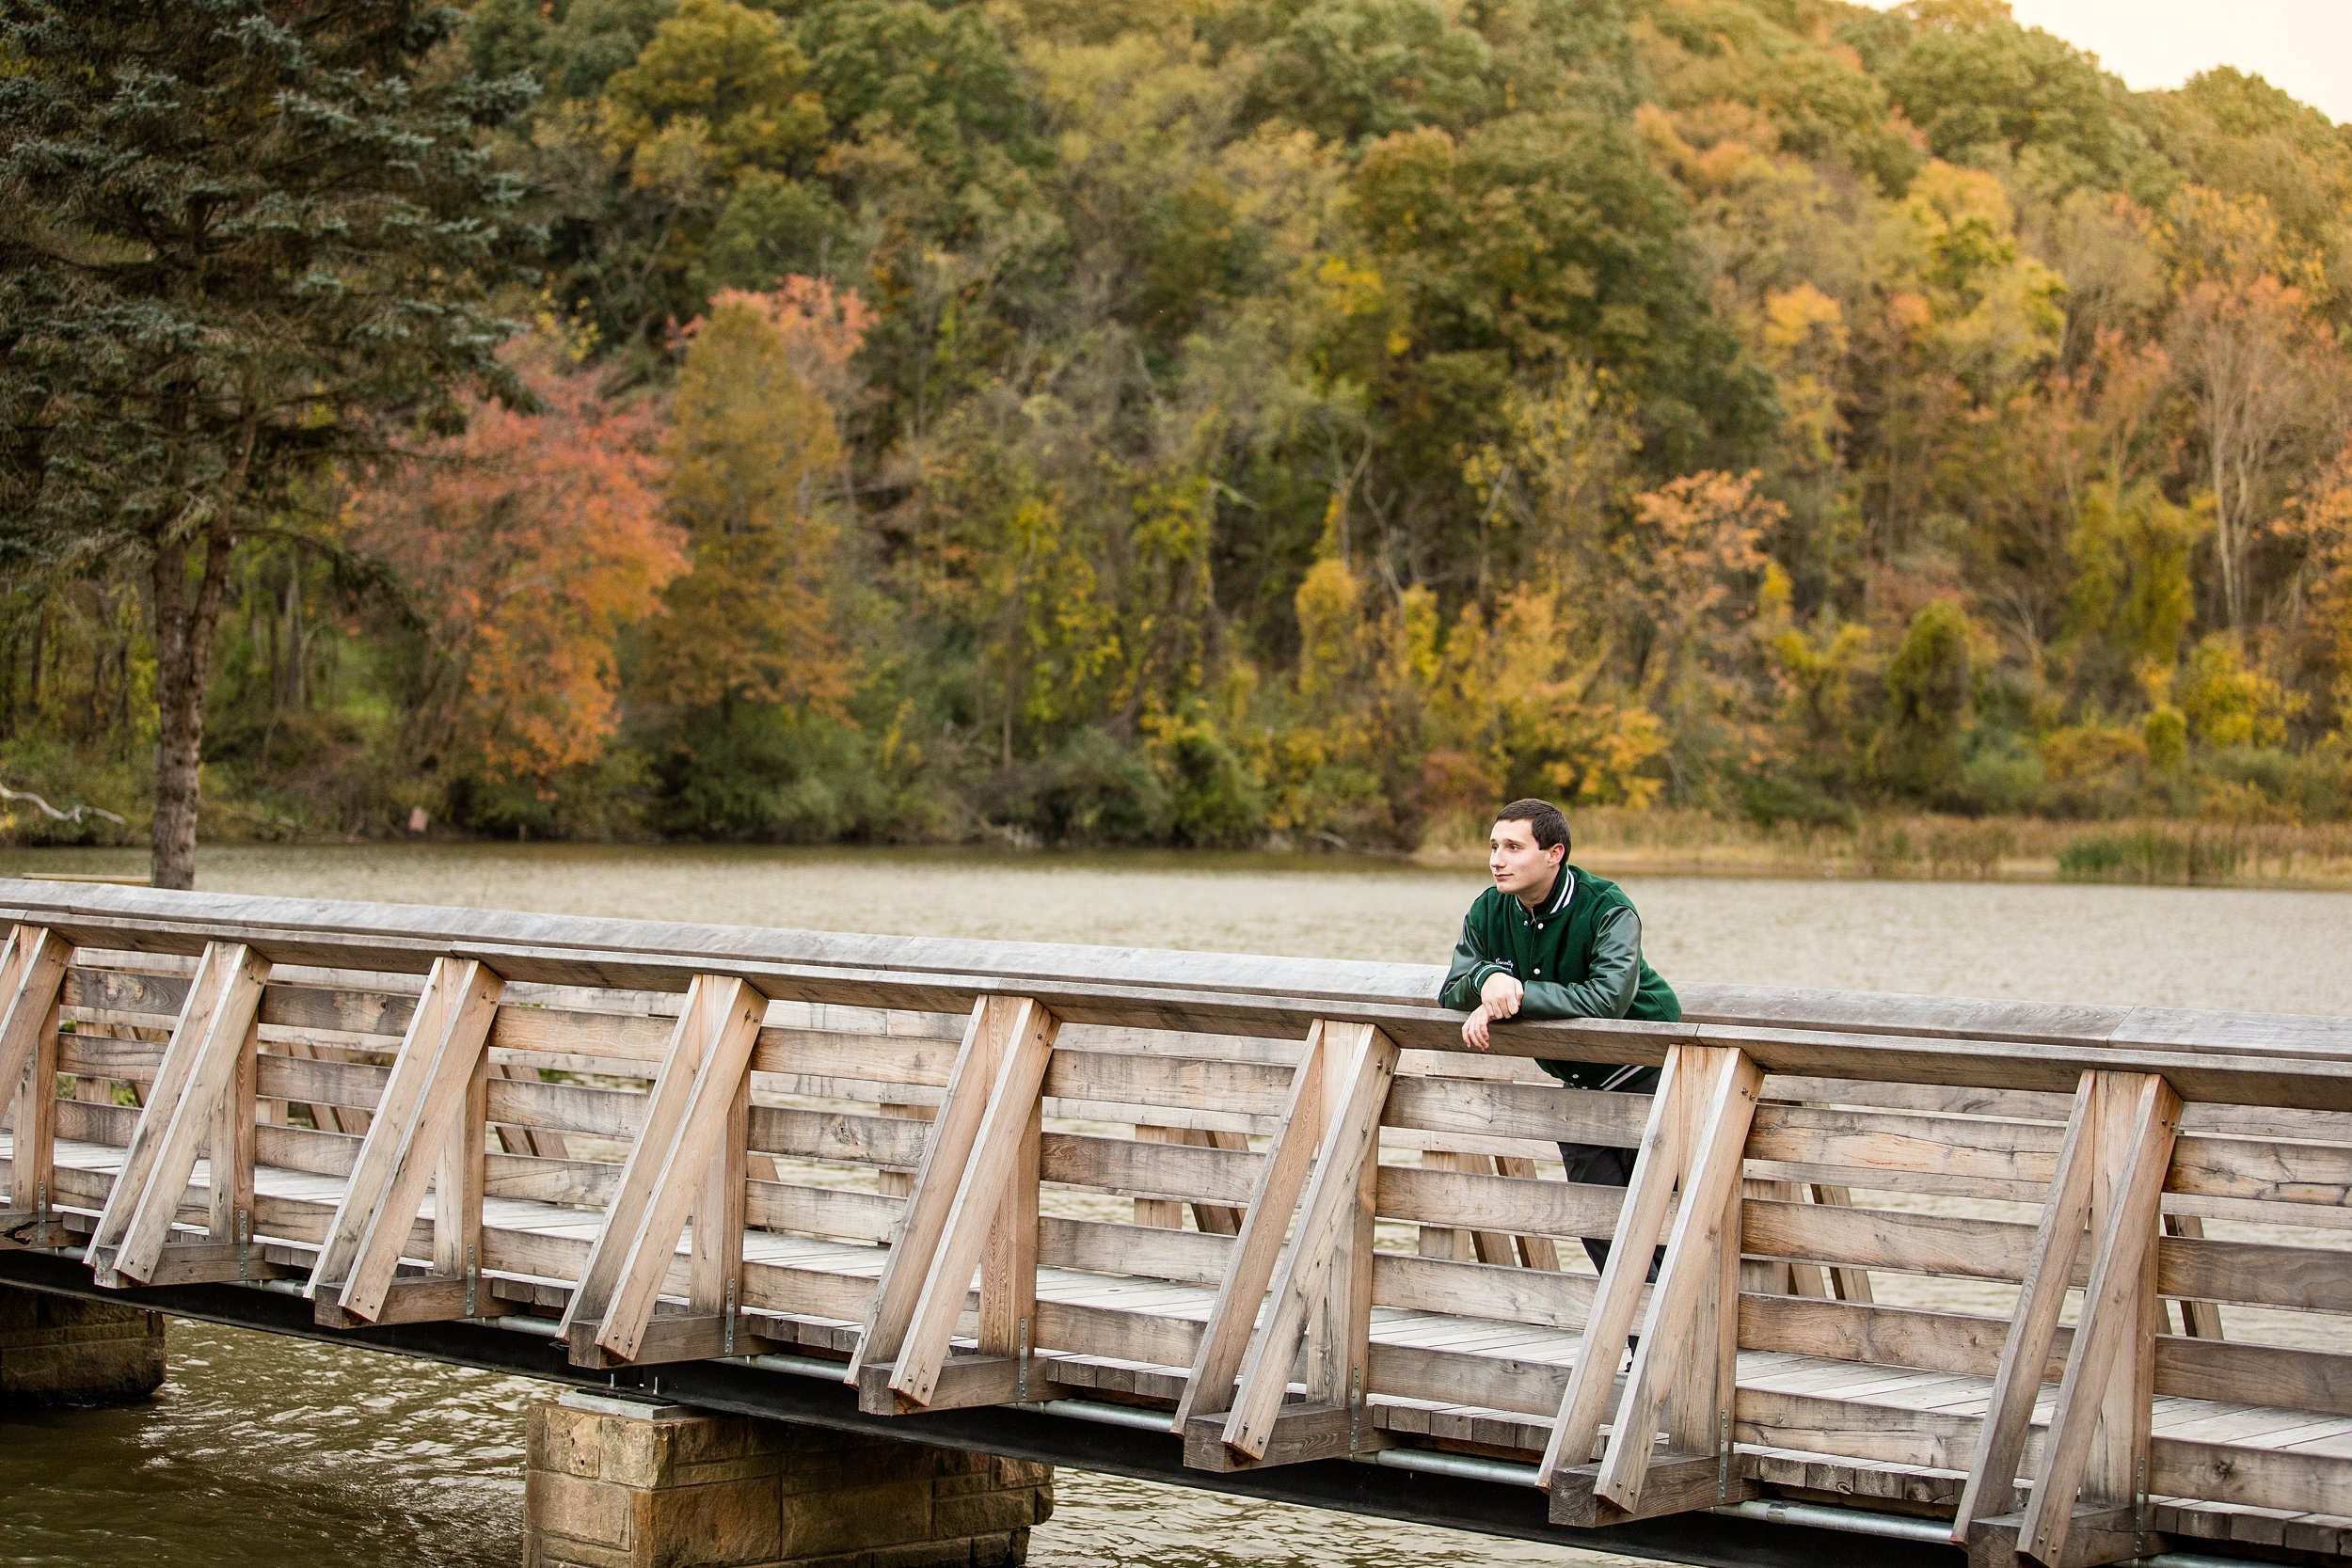
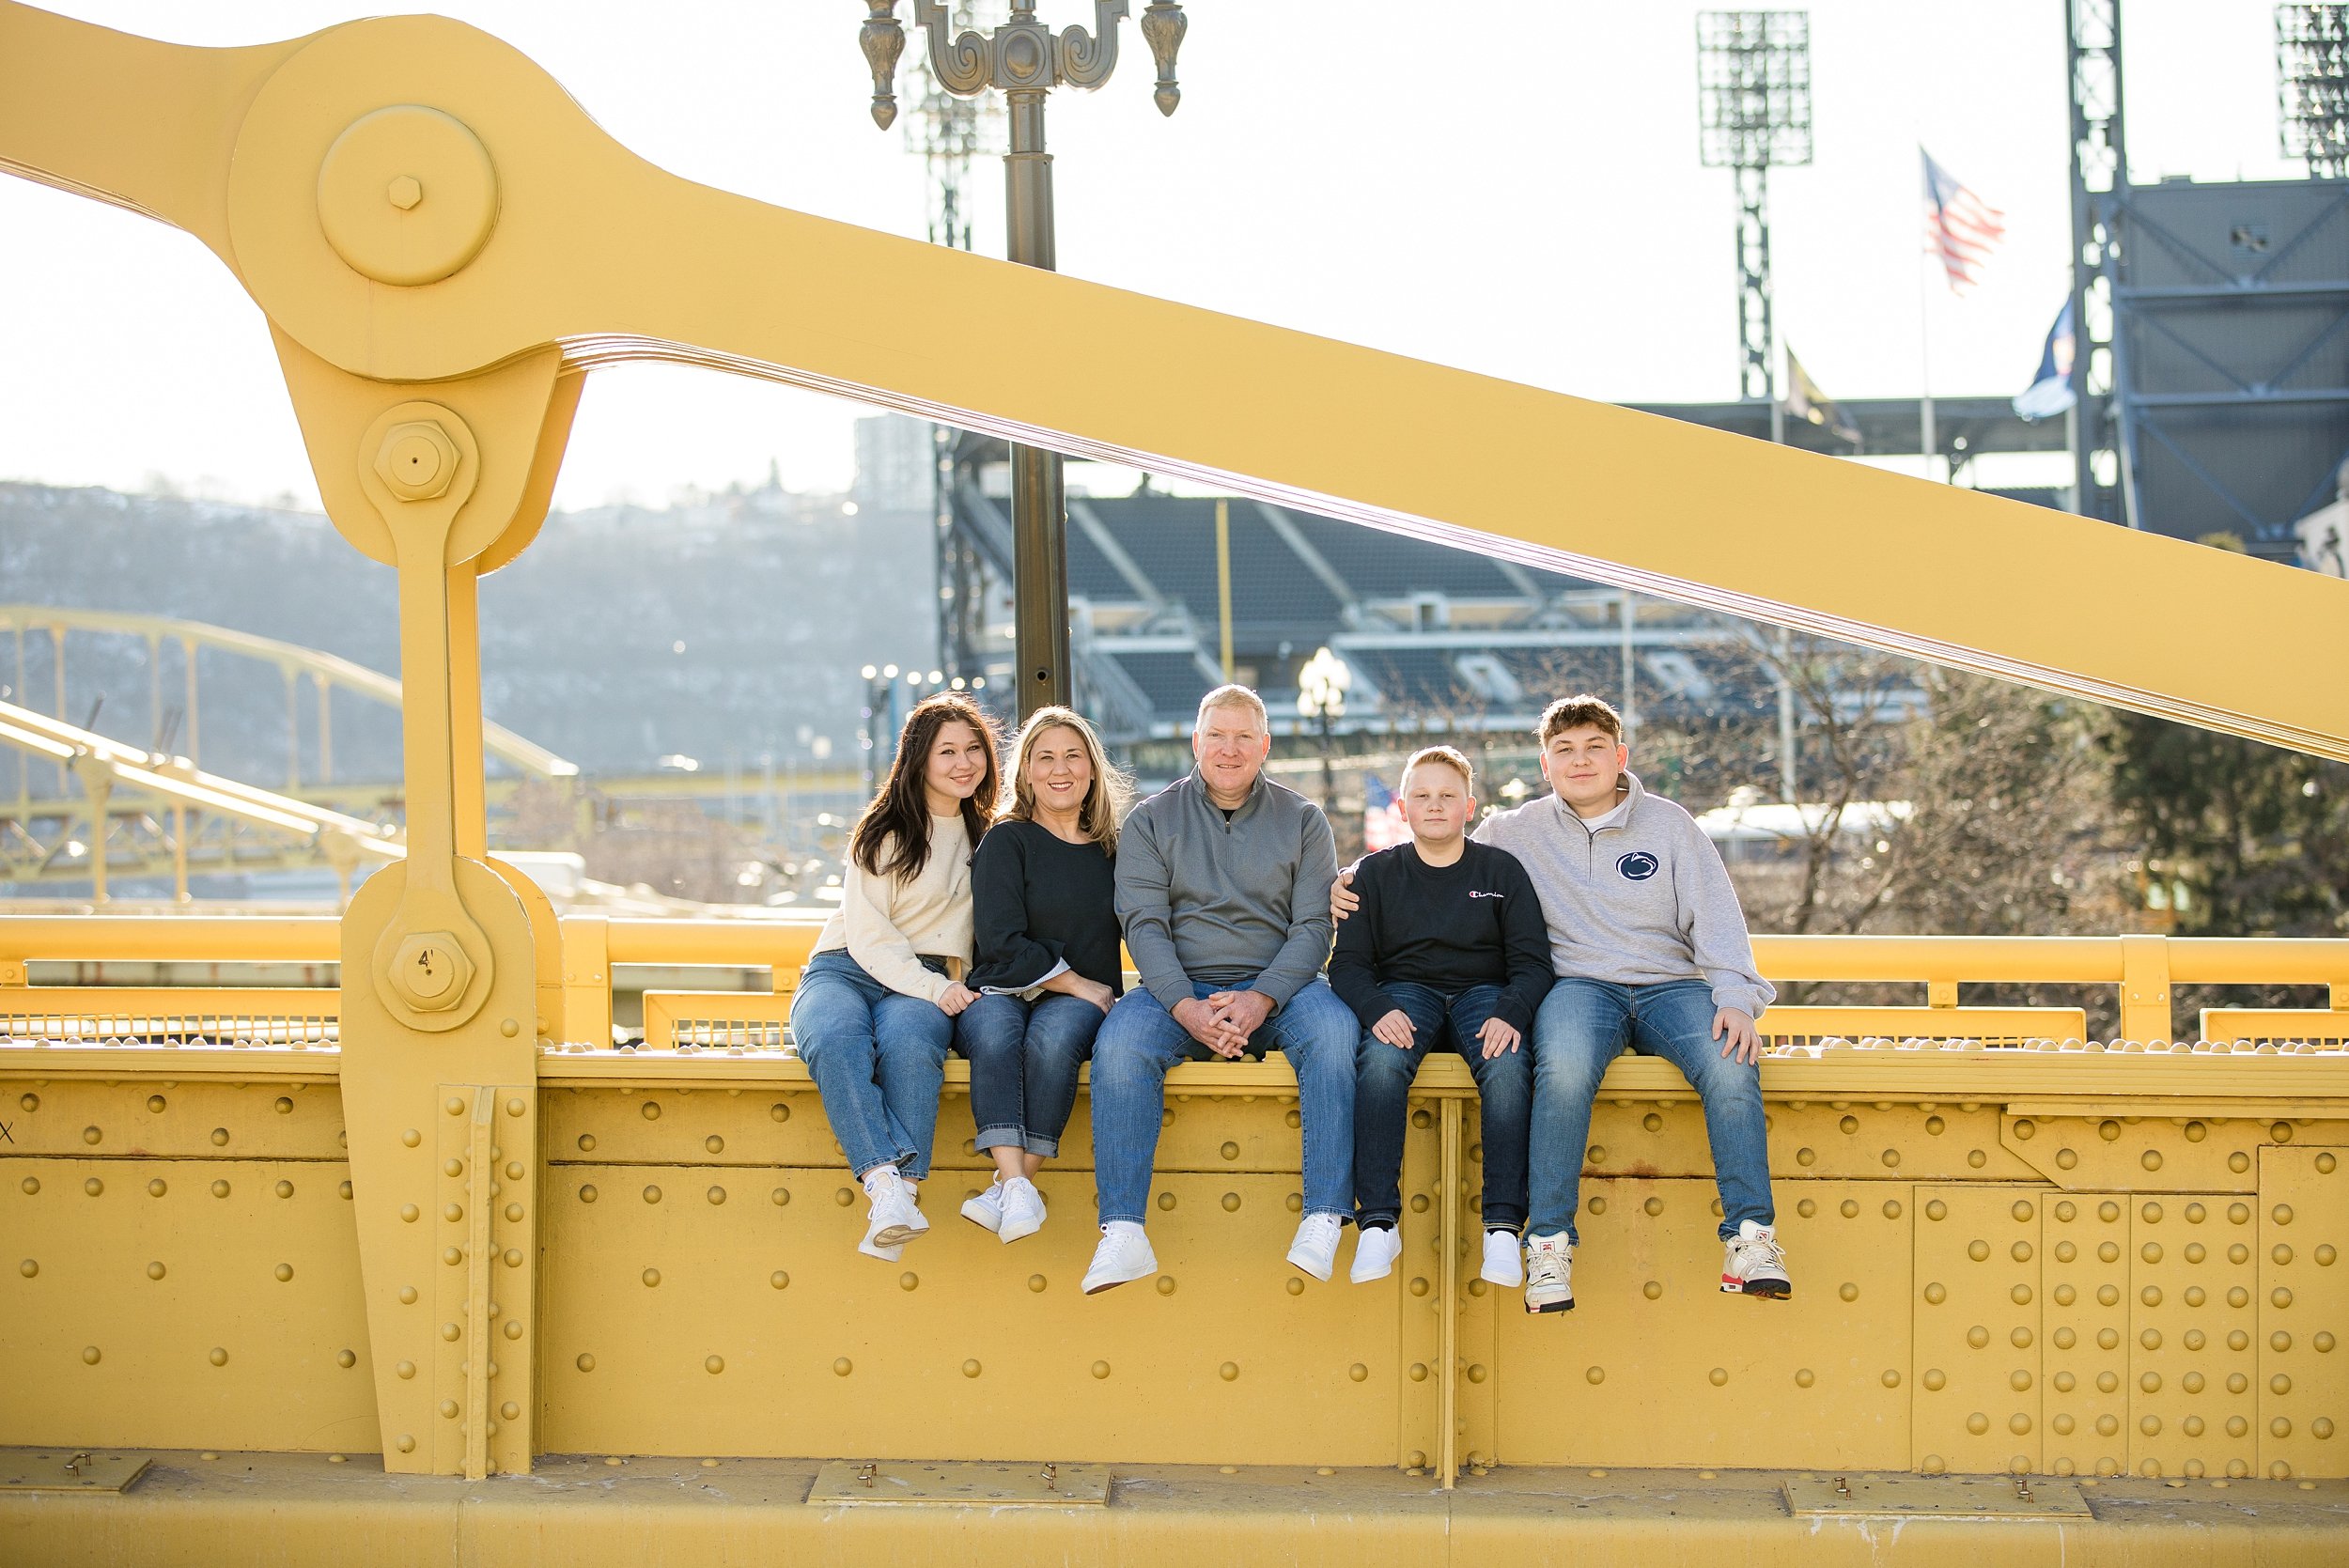
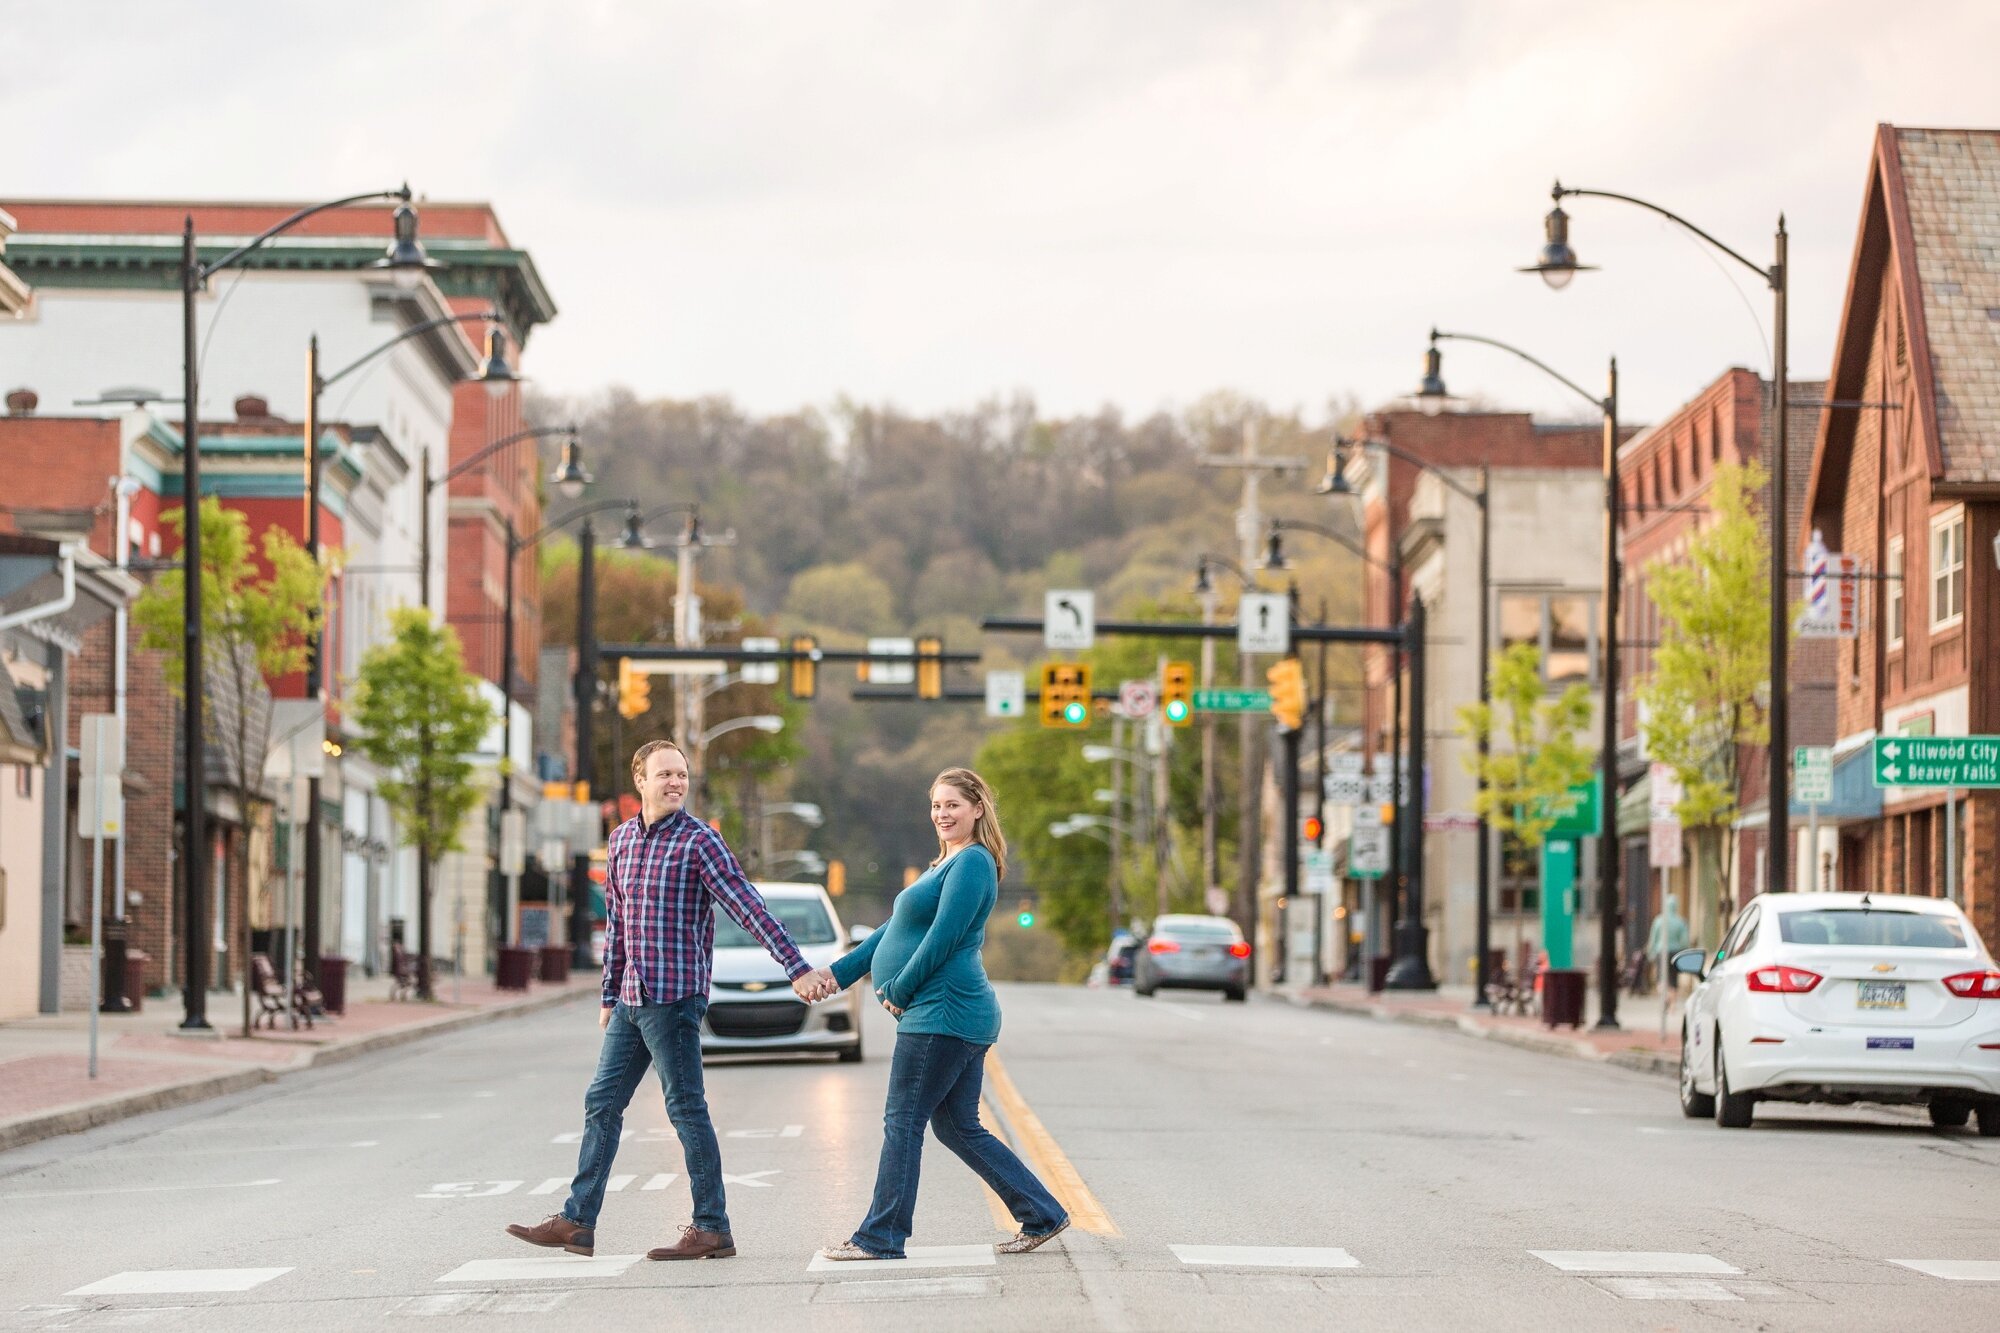
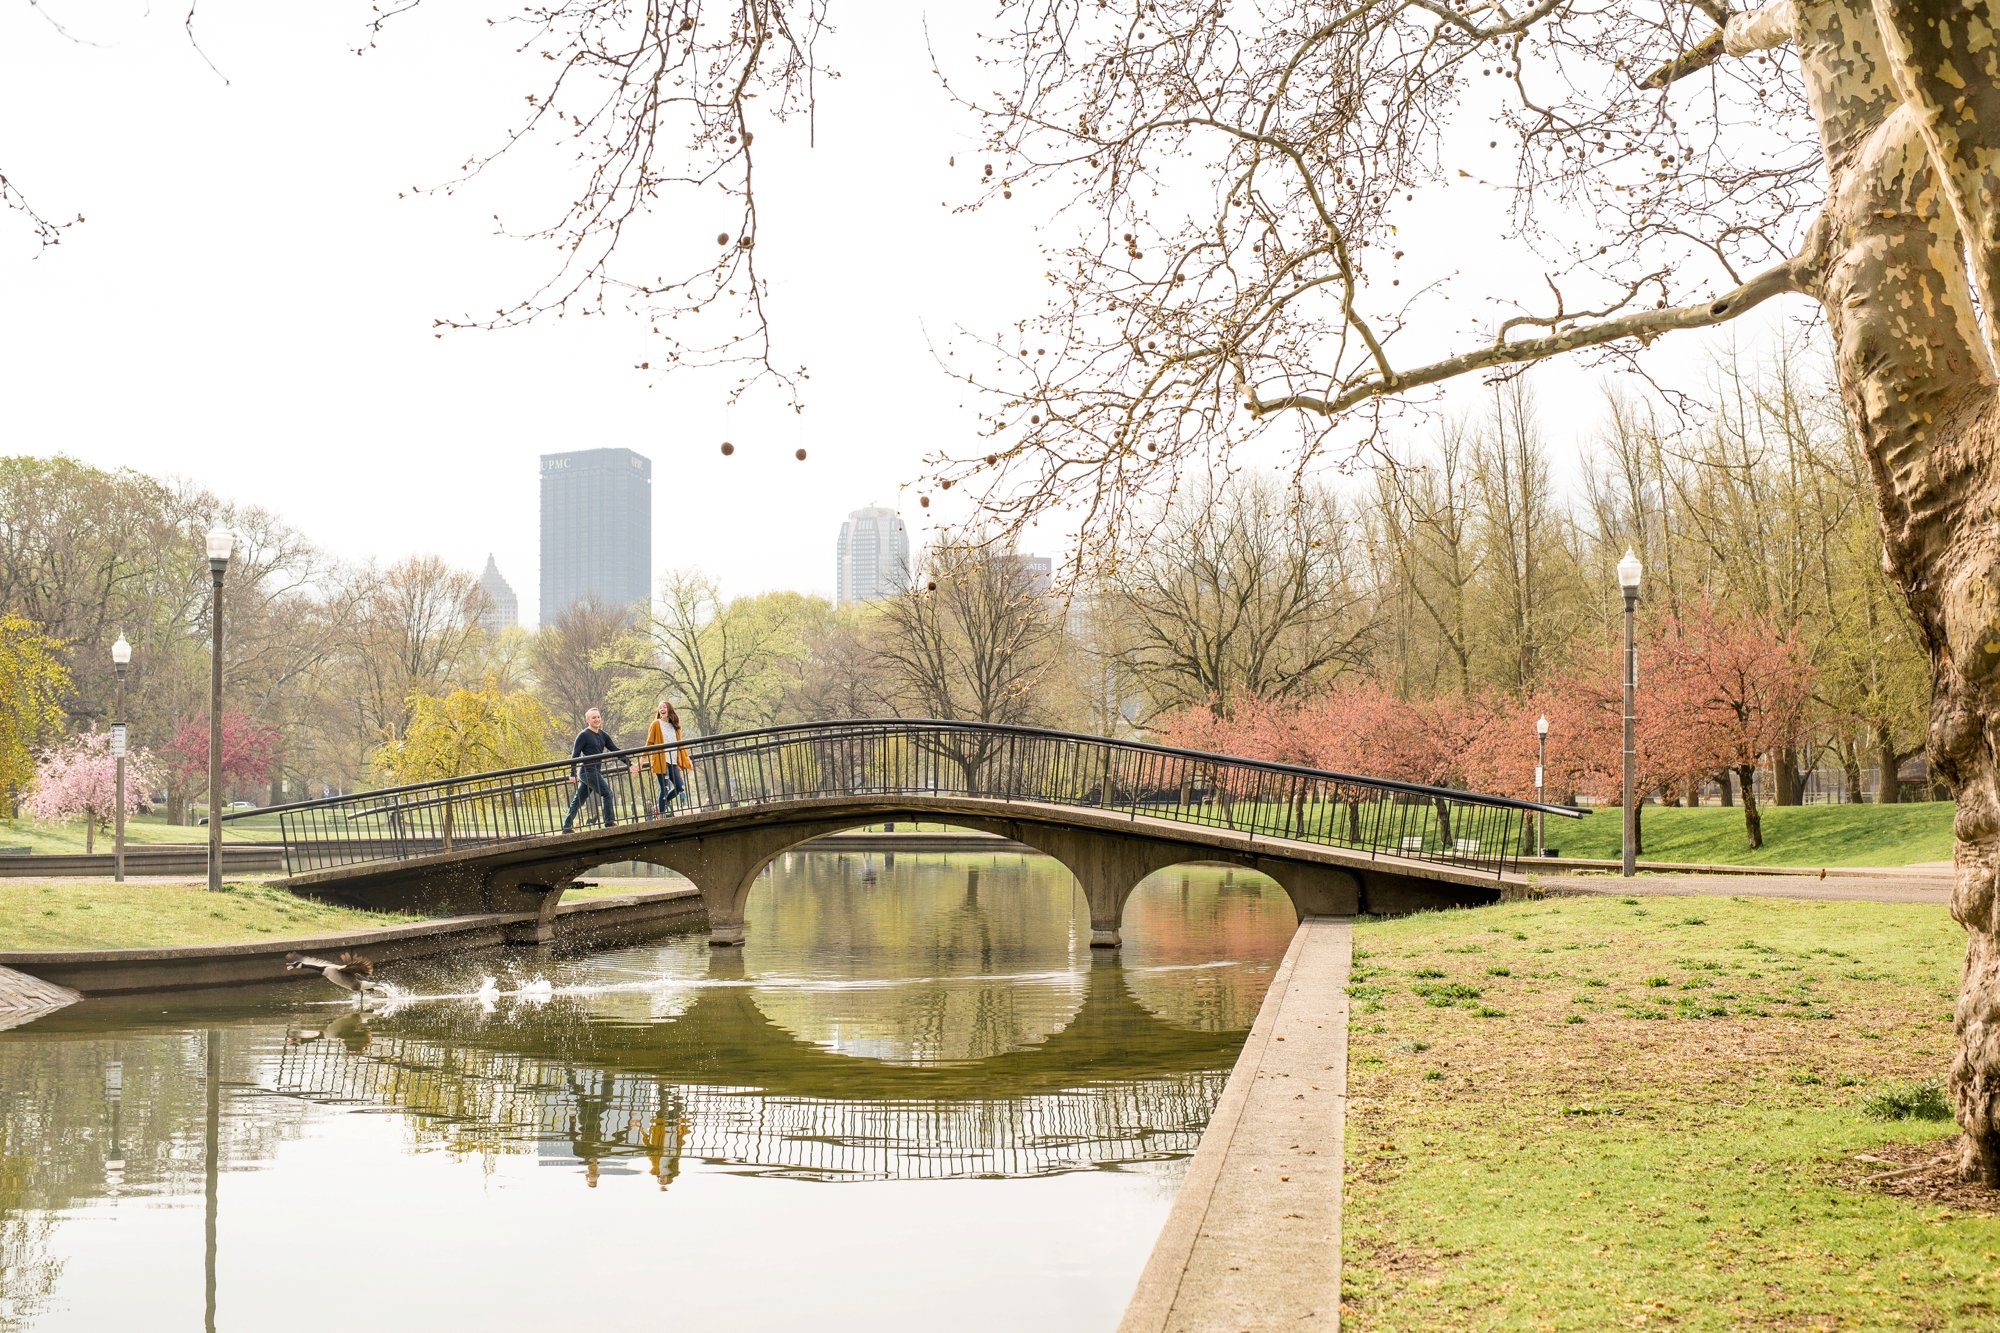
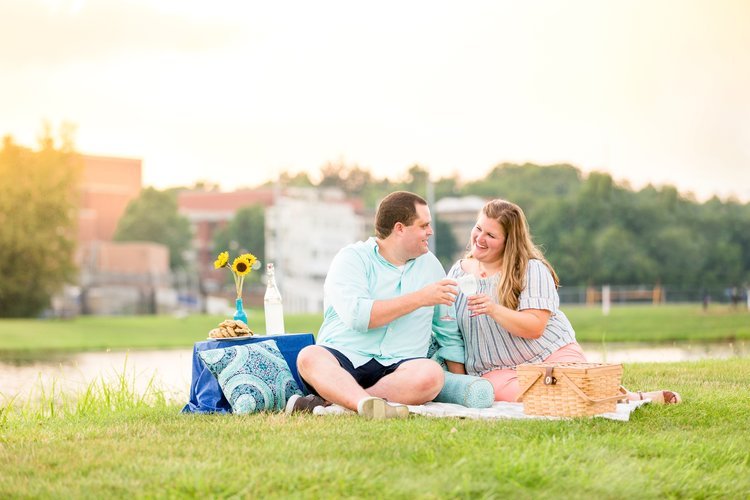
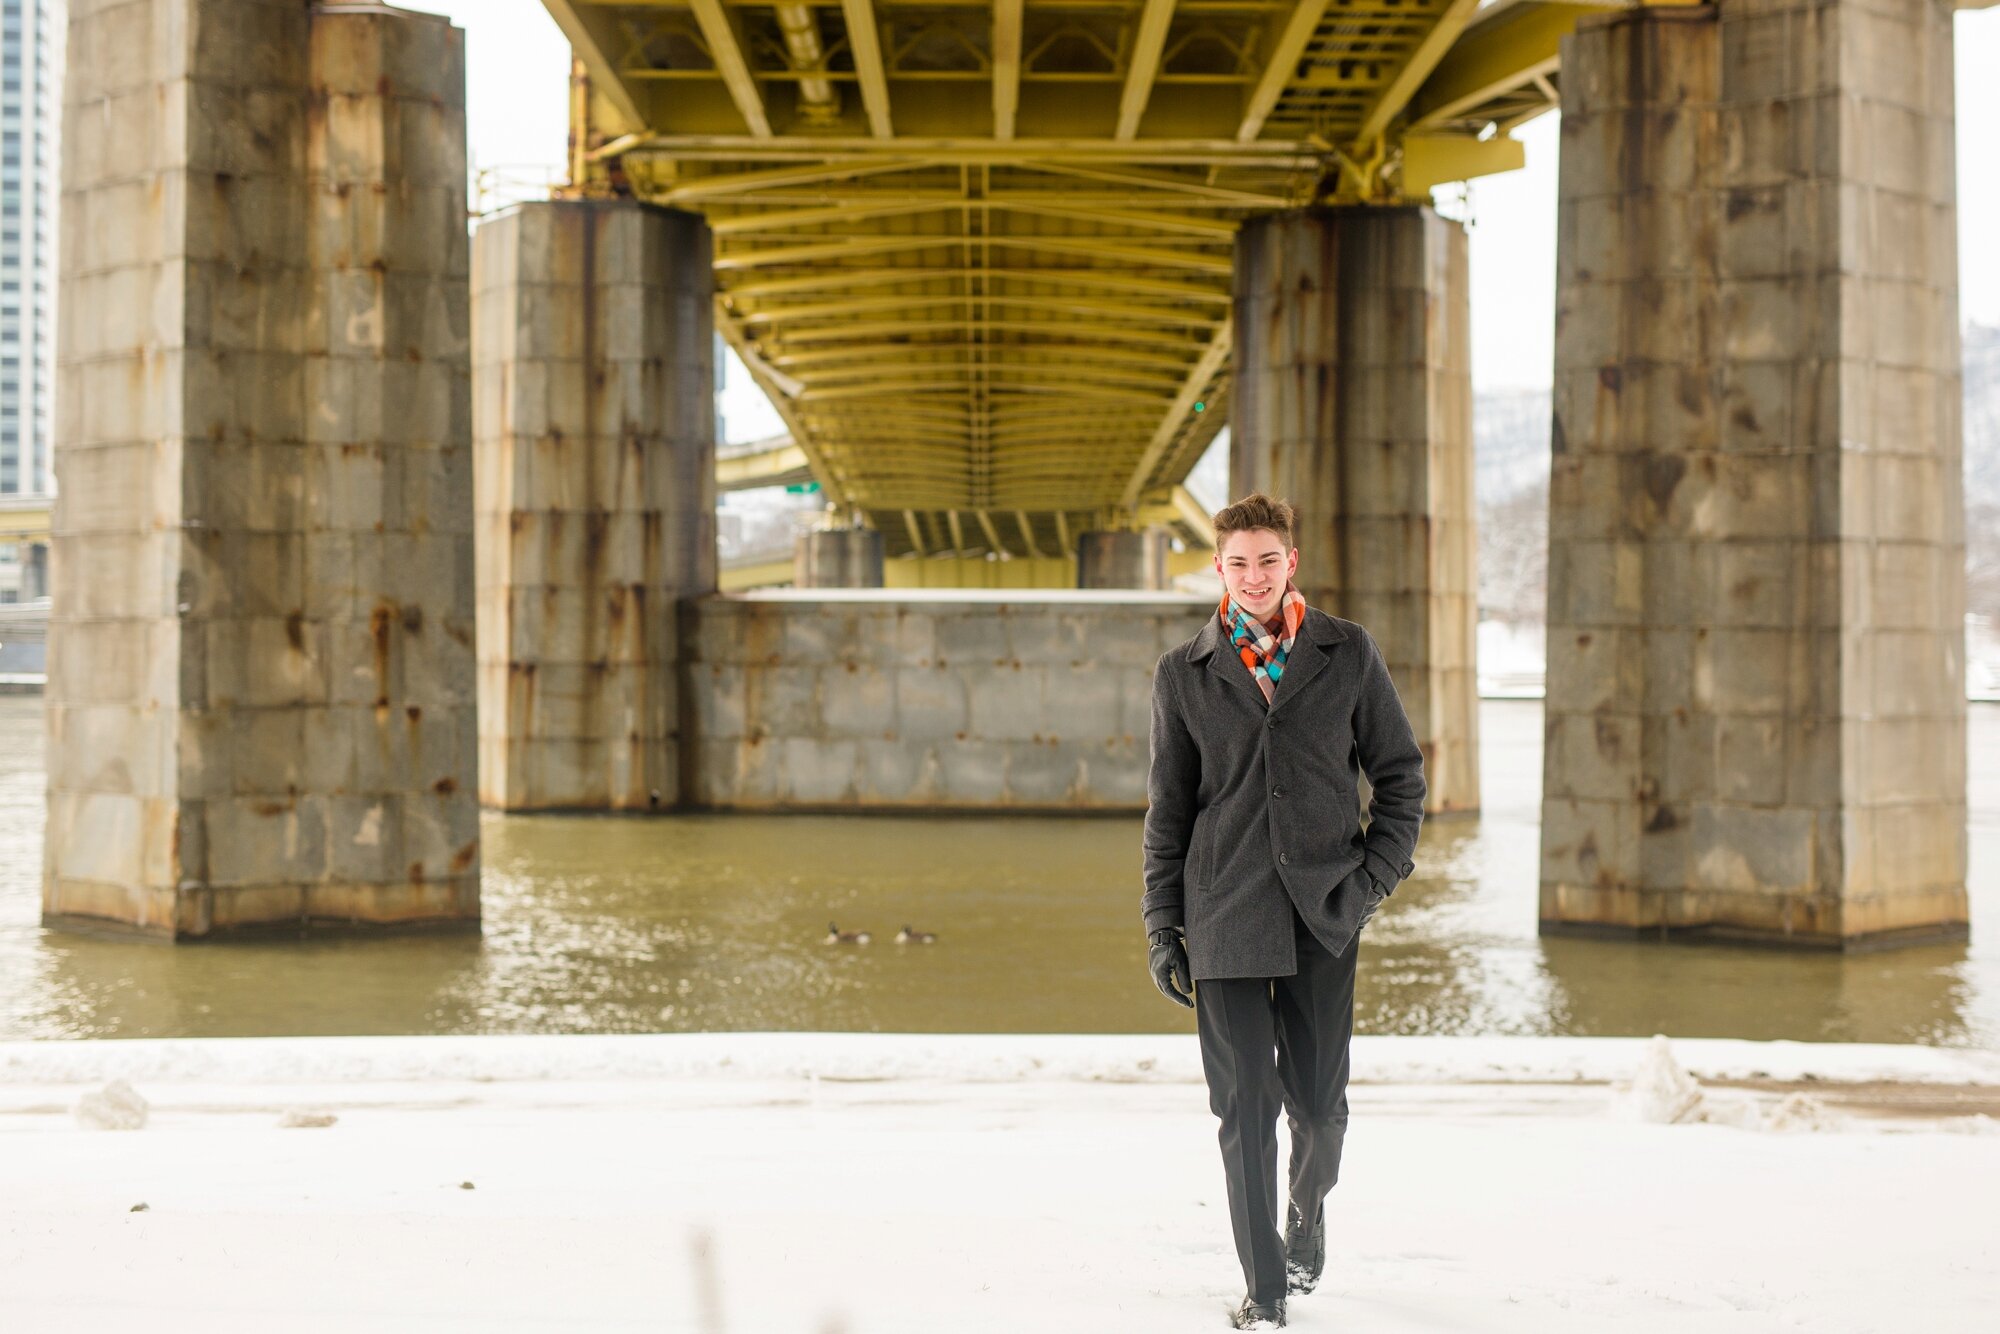
Some locations have more potential for getting an increased amount of different “looks” than others. If you choose a simple park for your senior session, most of your photos might look very similar - trees, grass, maybe a bench, maybe some flowers. But if you choose something more dynamic - say, a park that has some additional features to it, such as a dock, a field, a lake, etc. - you will get more variety in your overall gallery!

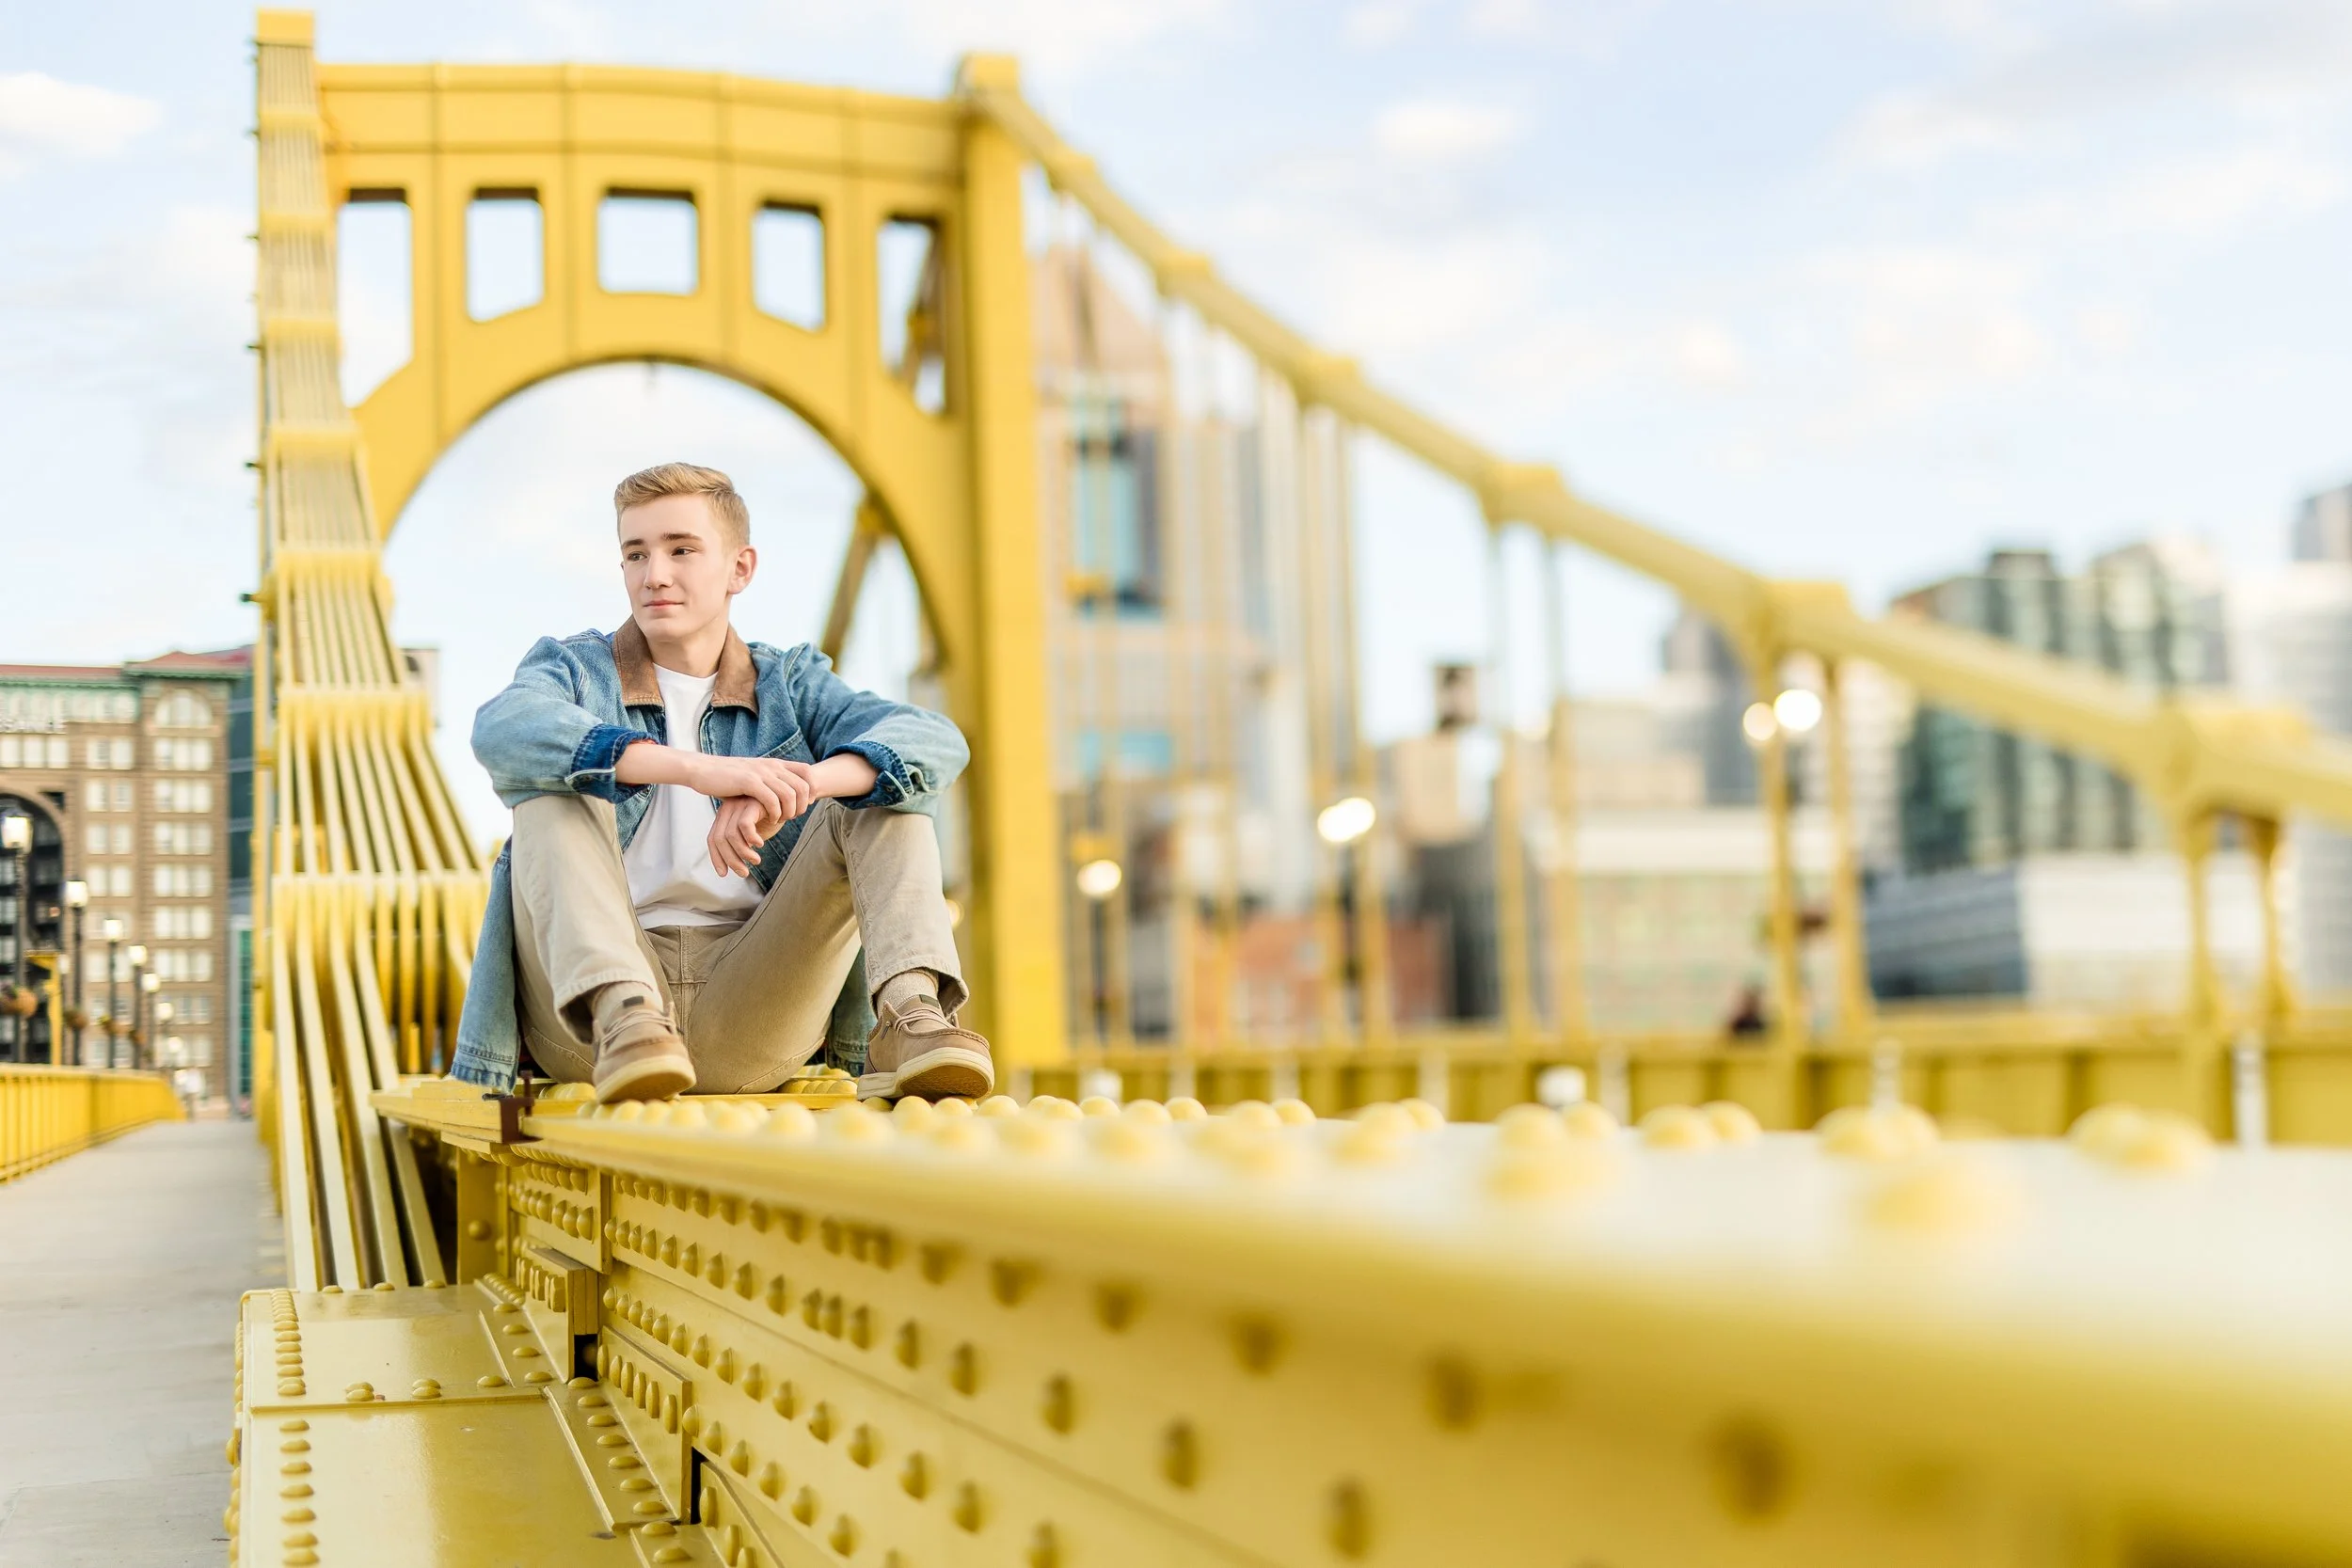
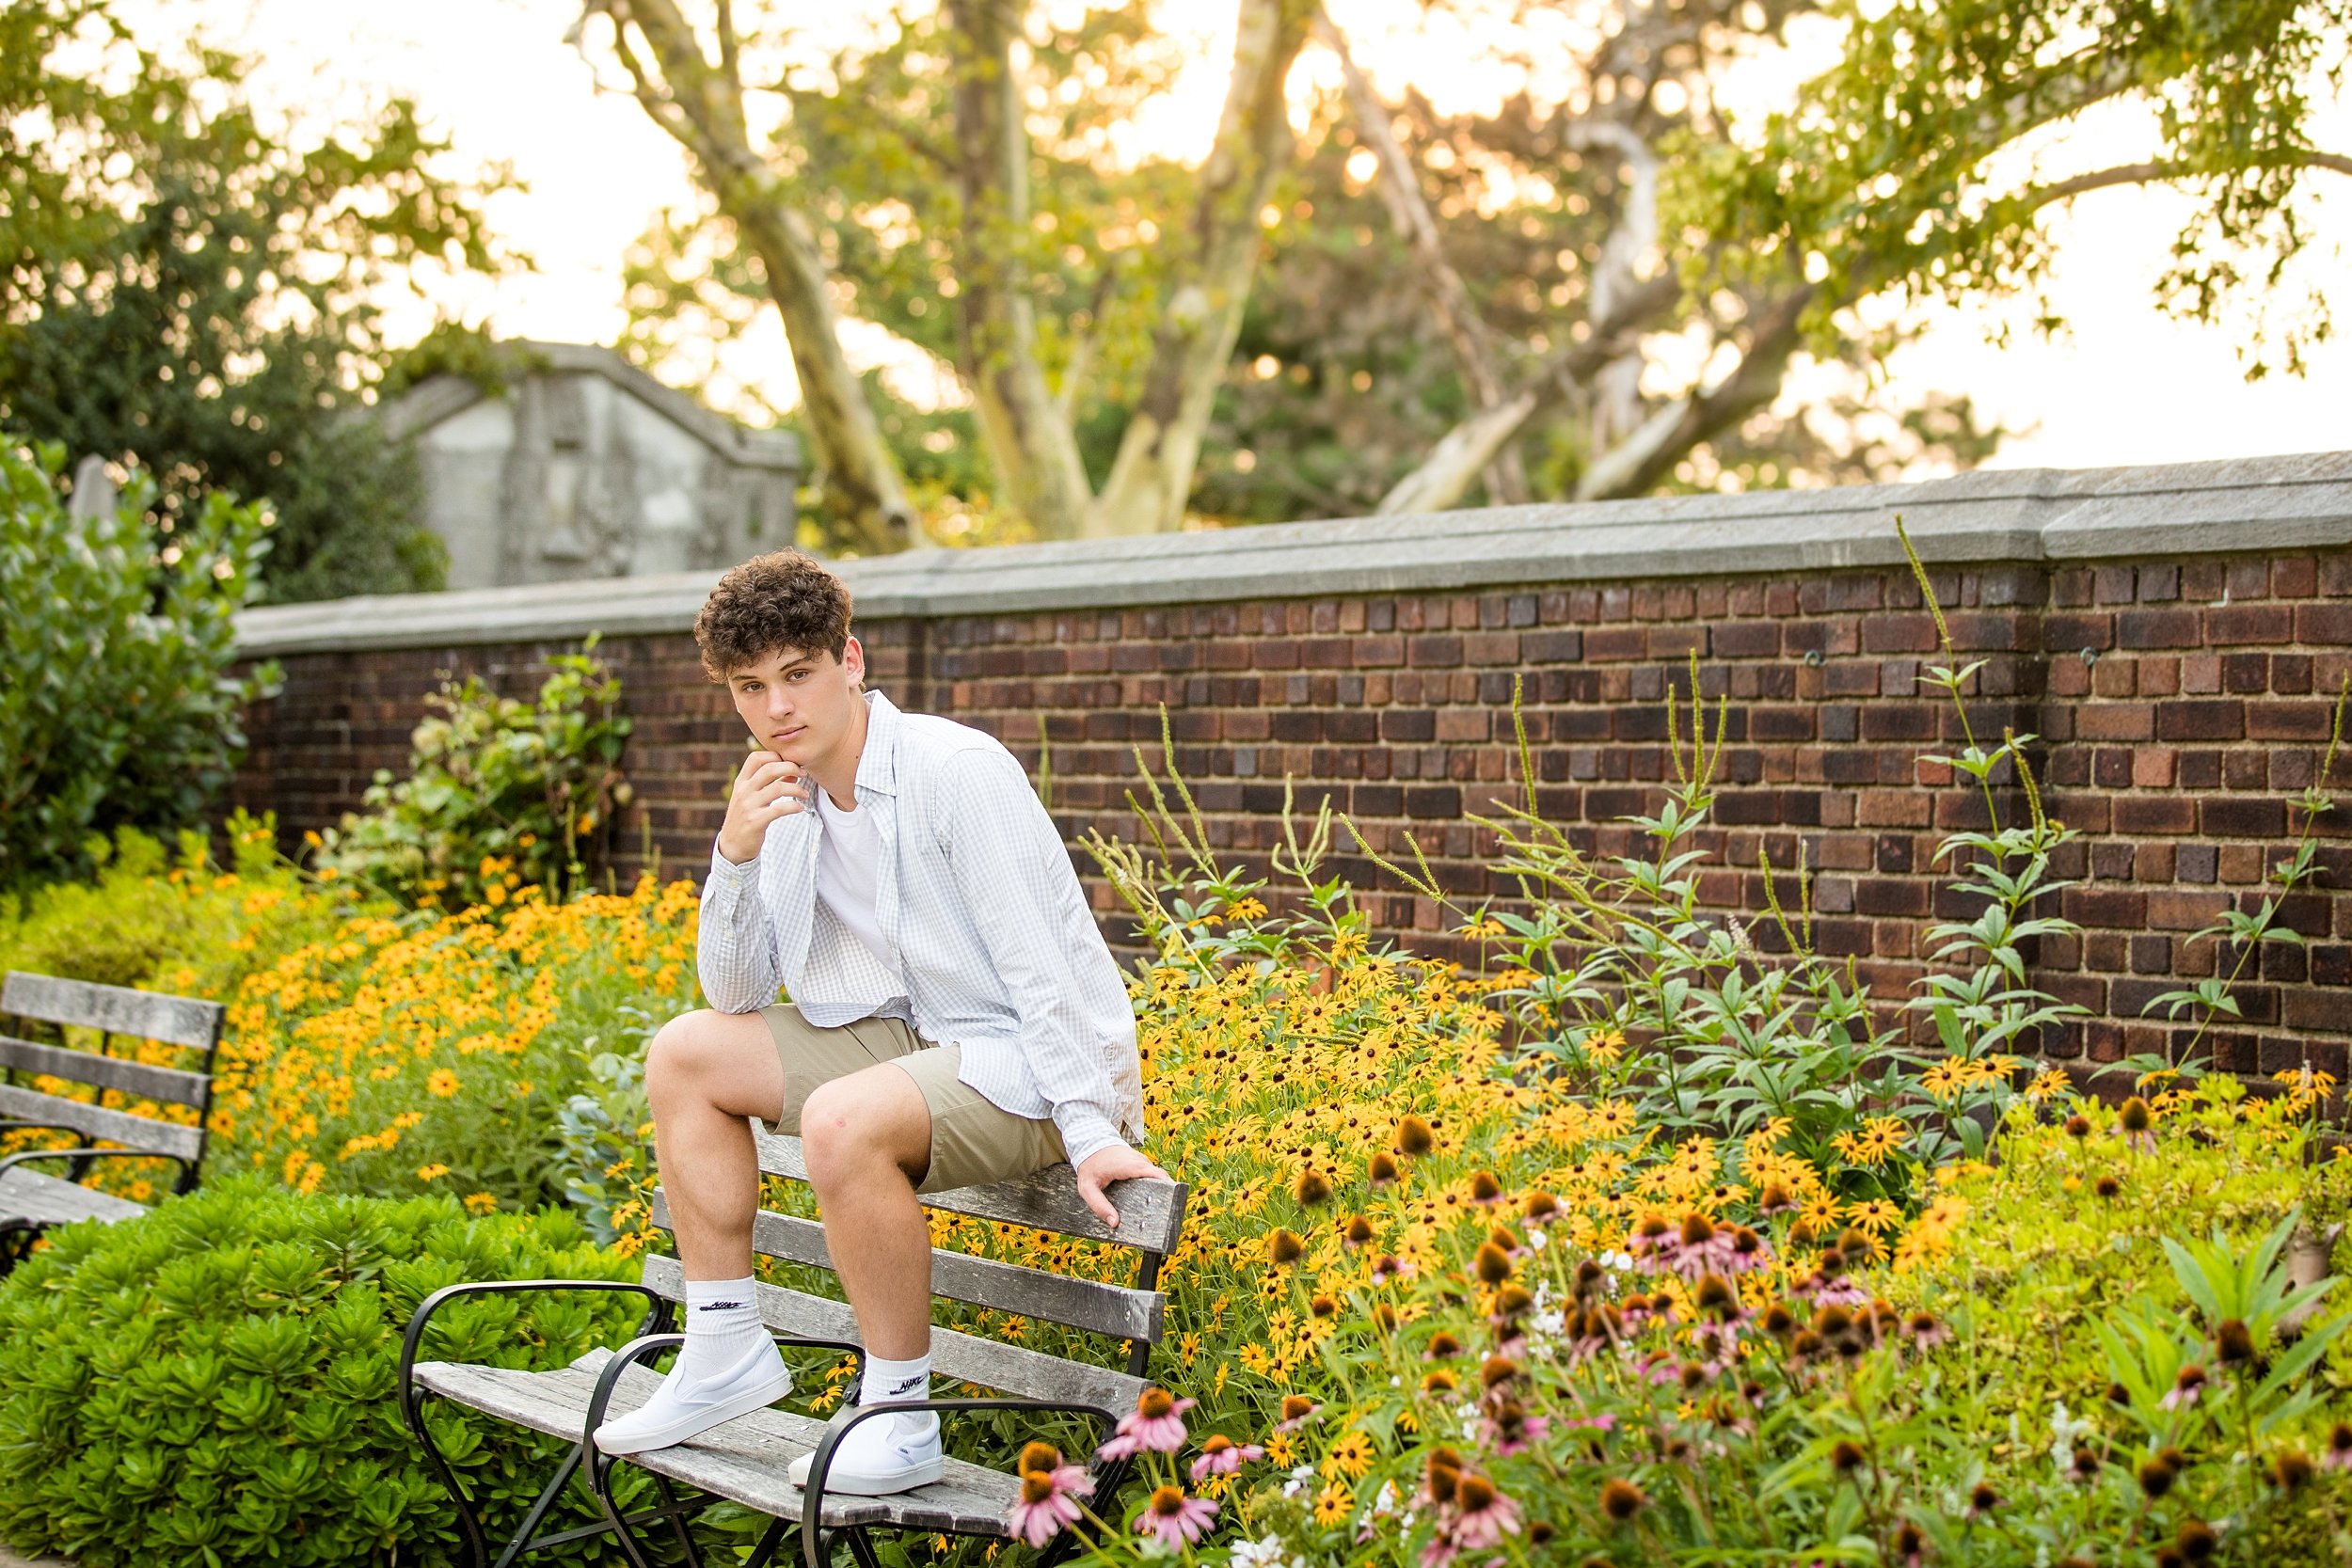
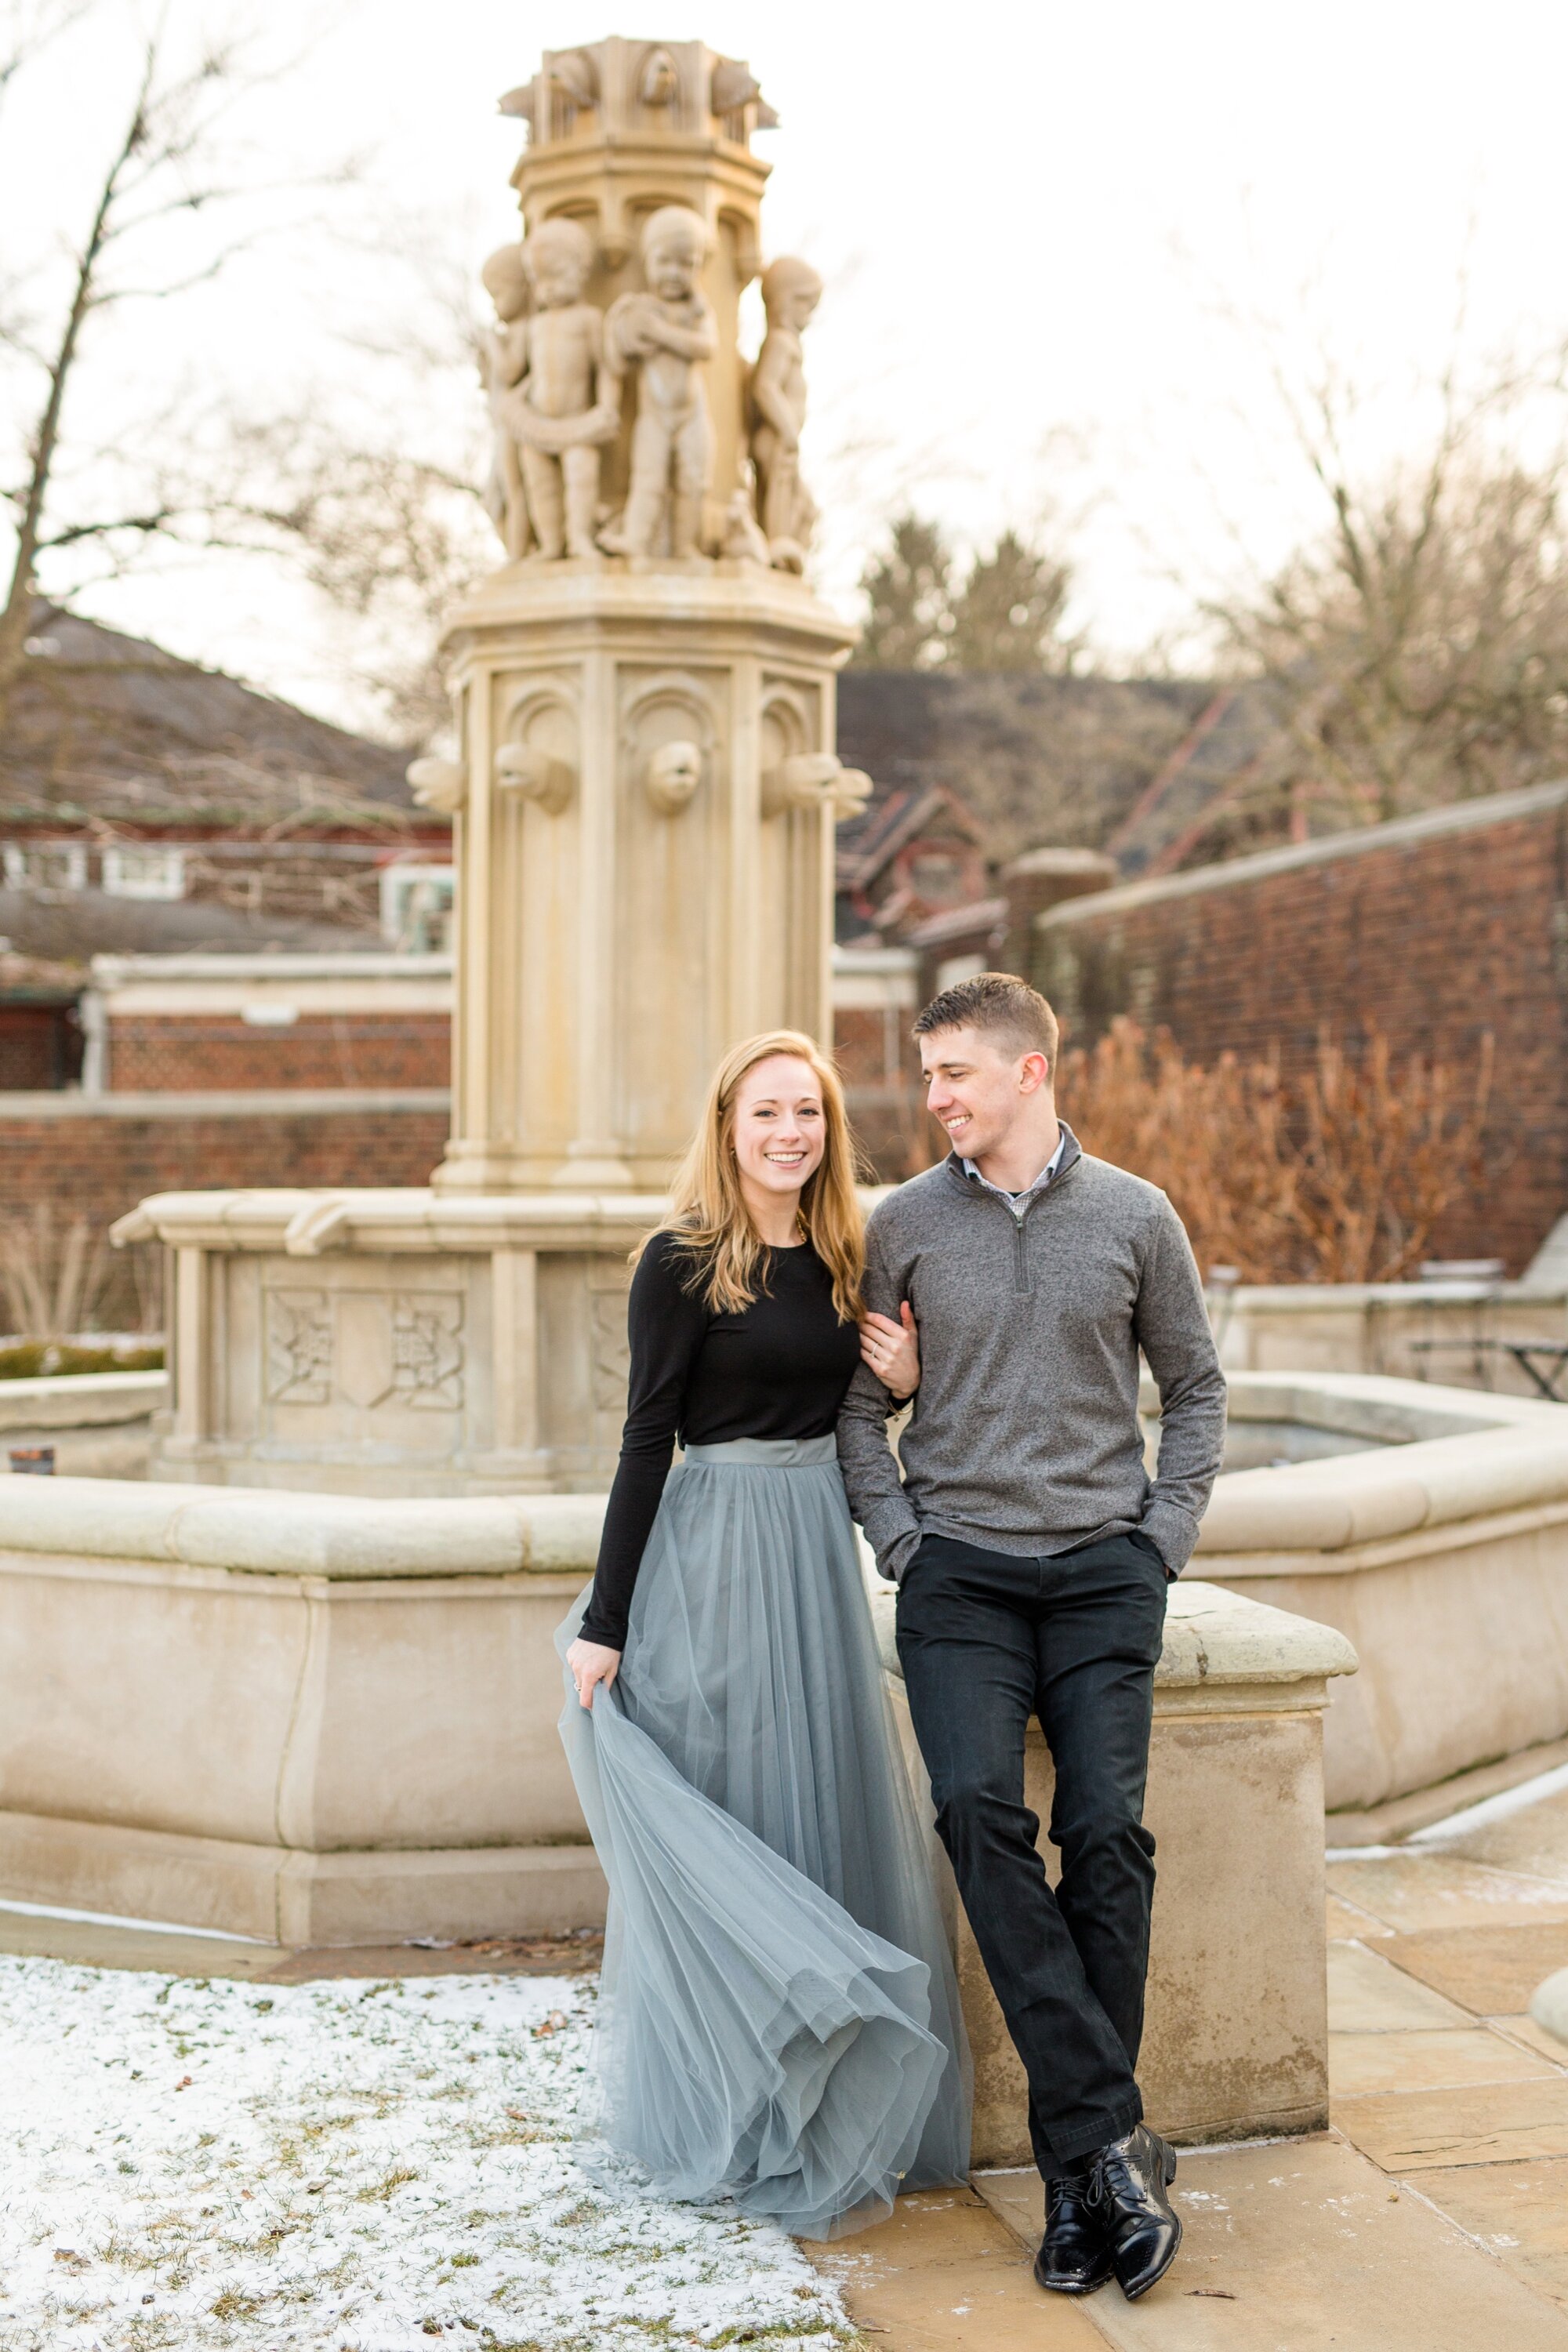
Some of my favorite spots to shoot are locations that combine nature with architecture - locations in Pittsburgh like Mellon Park & Hartwood Acres come to mind first, because they have so much more than just grass and trees to work with!

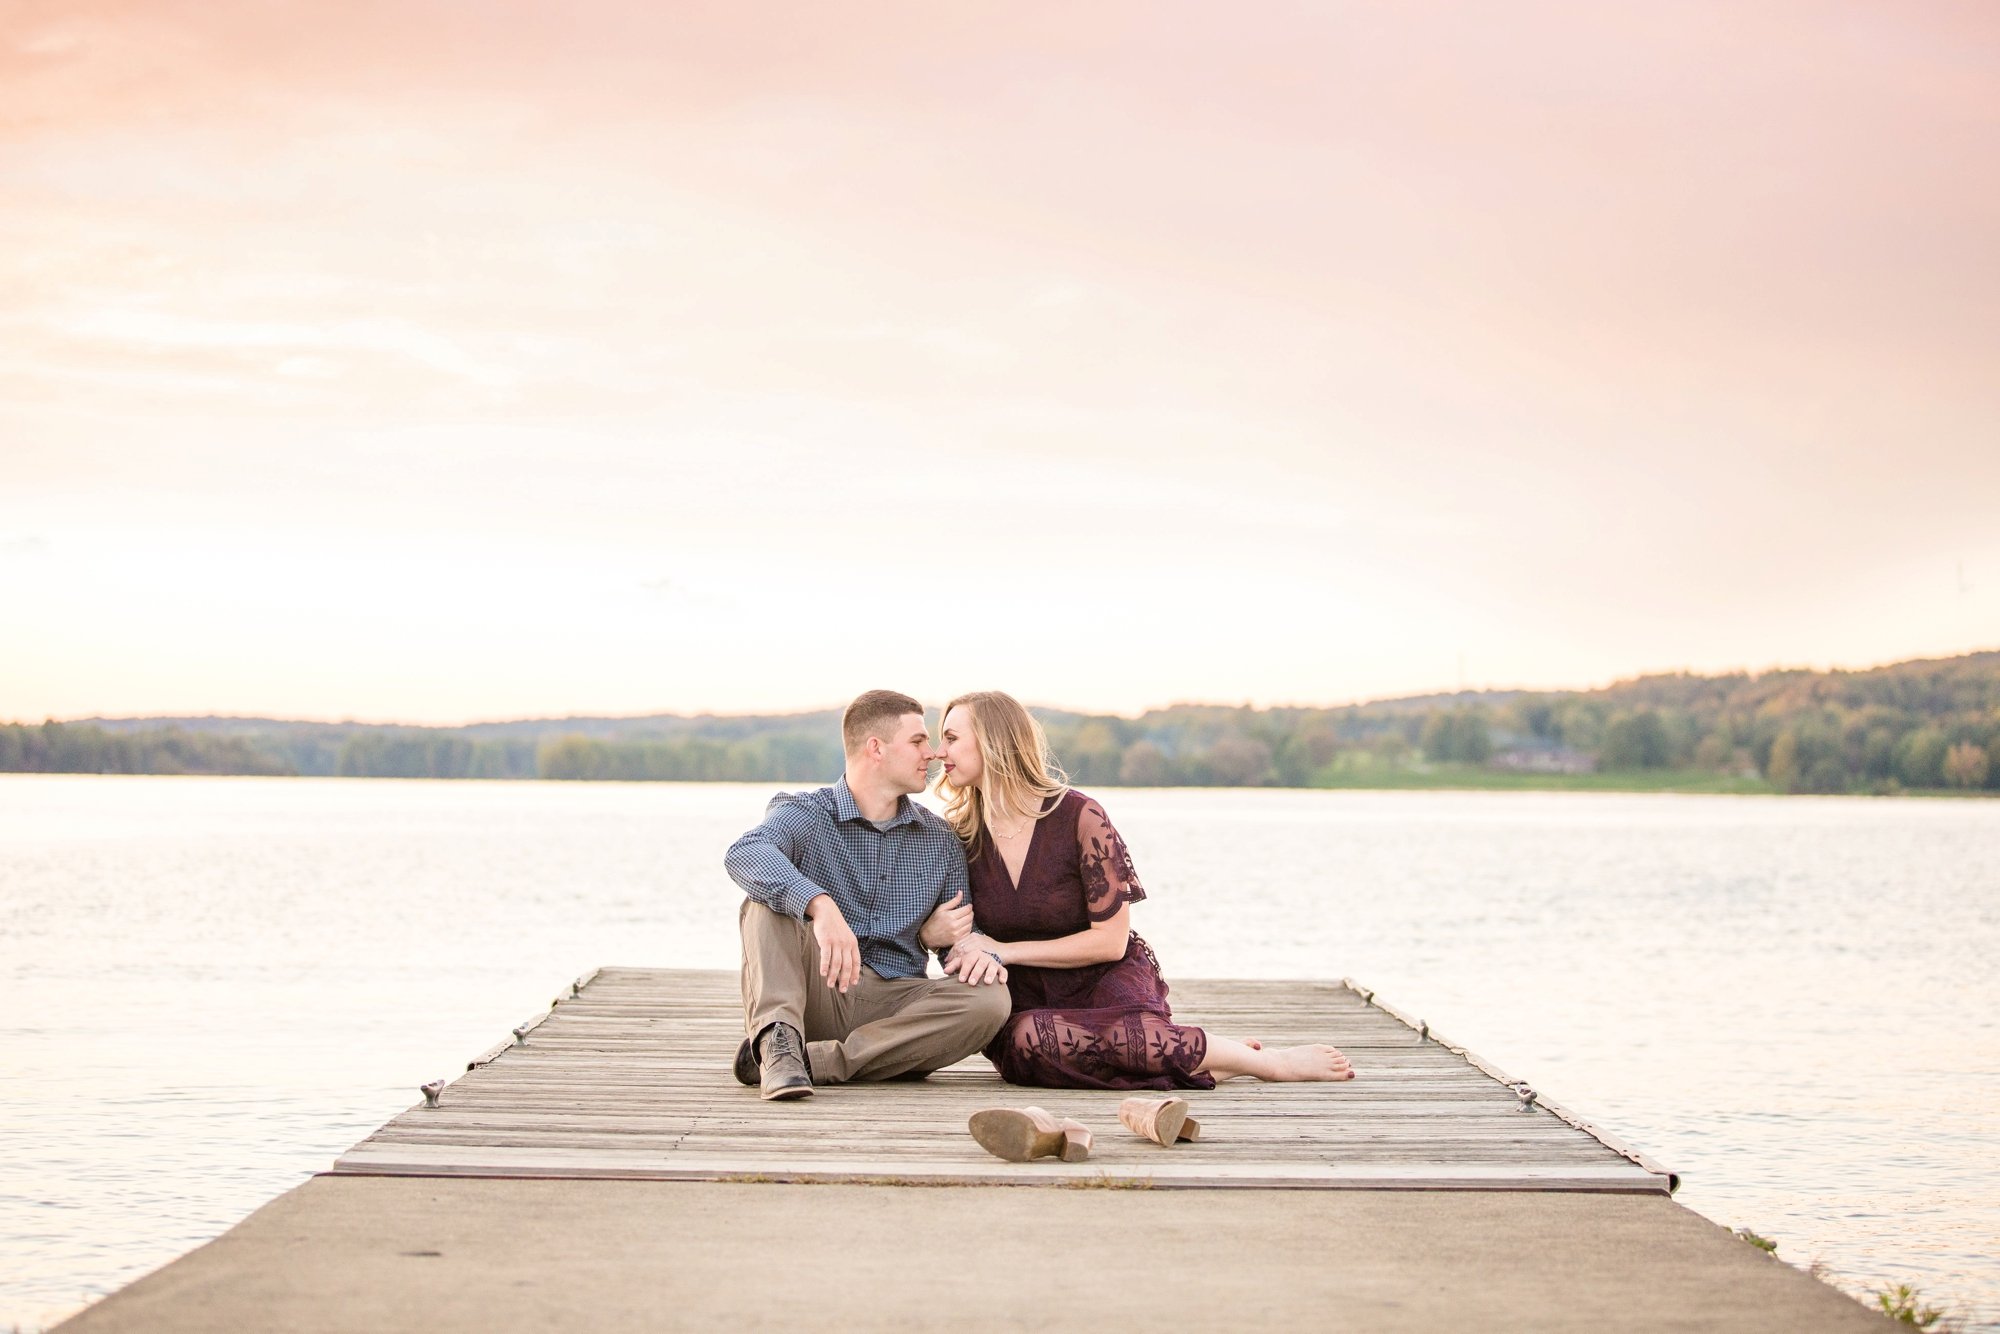
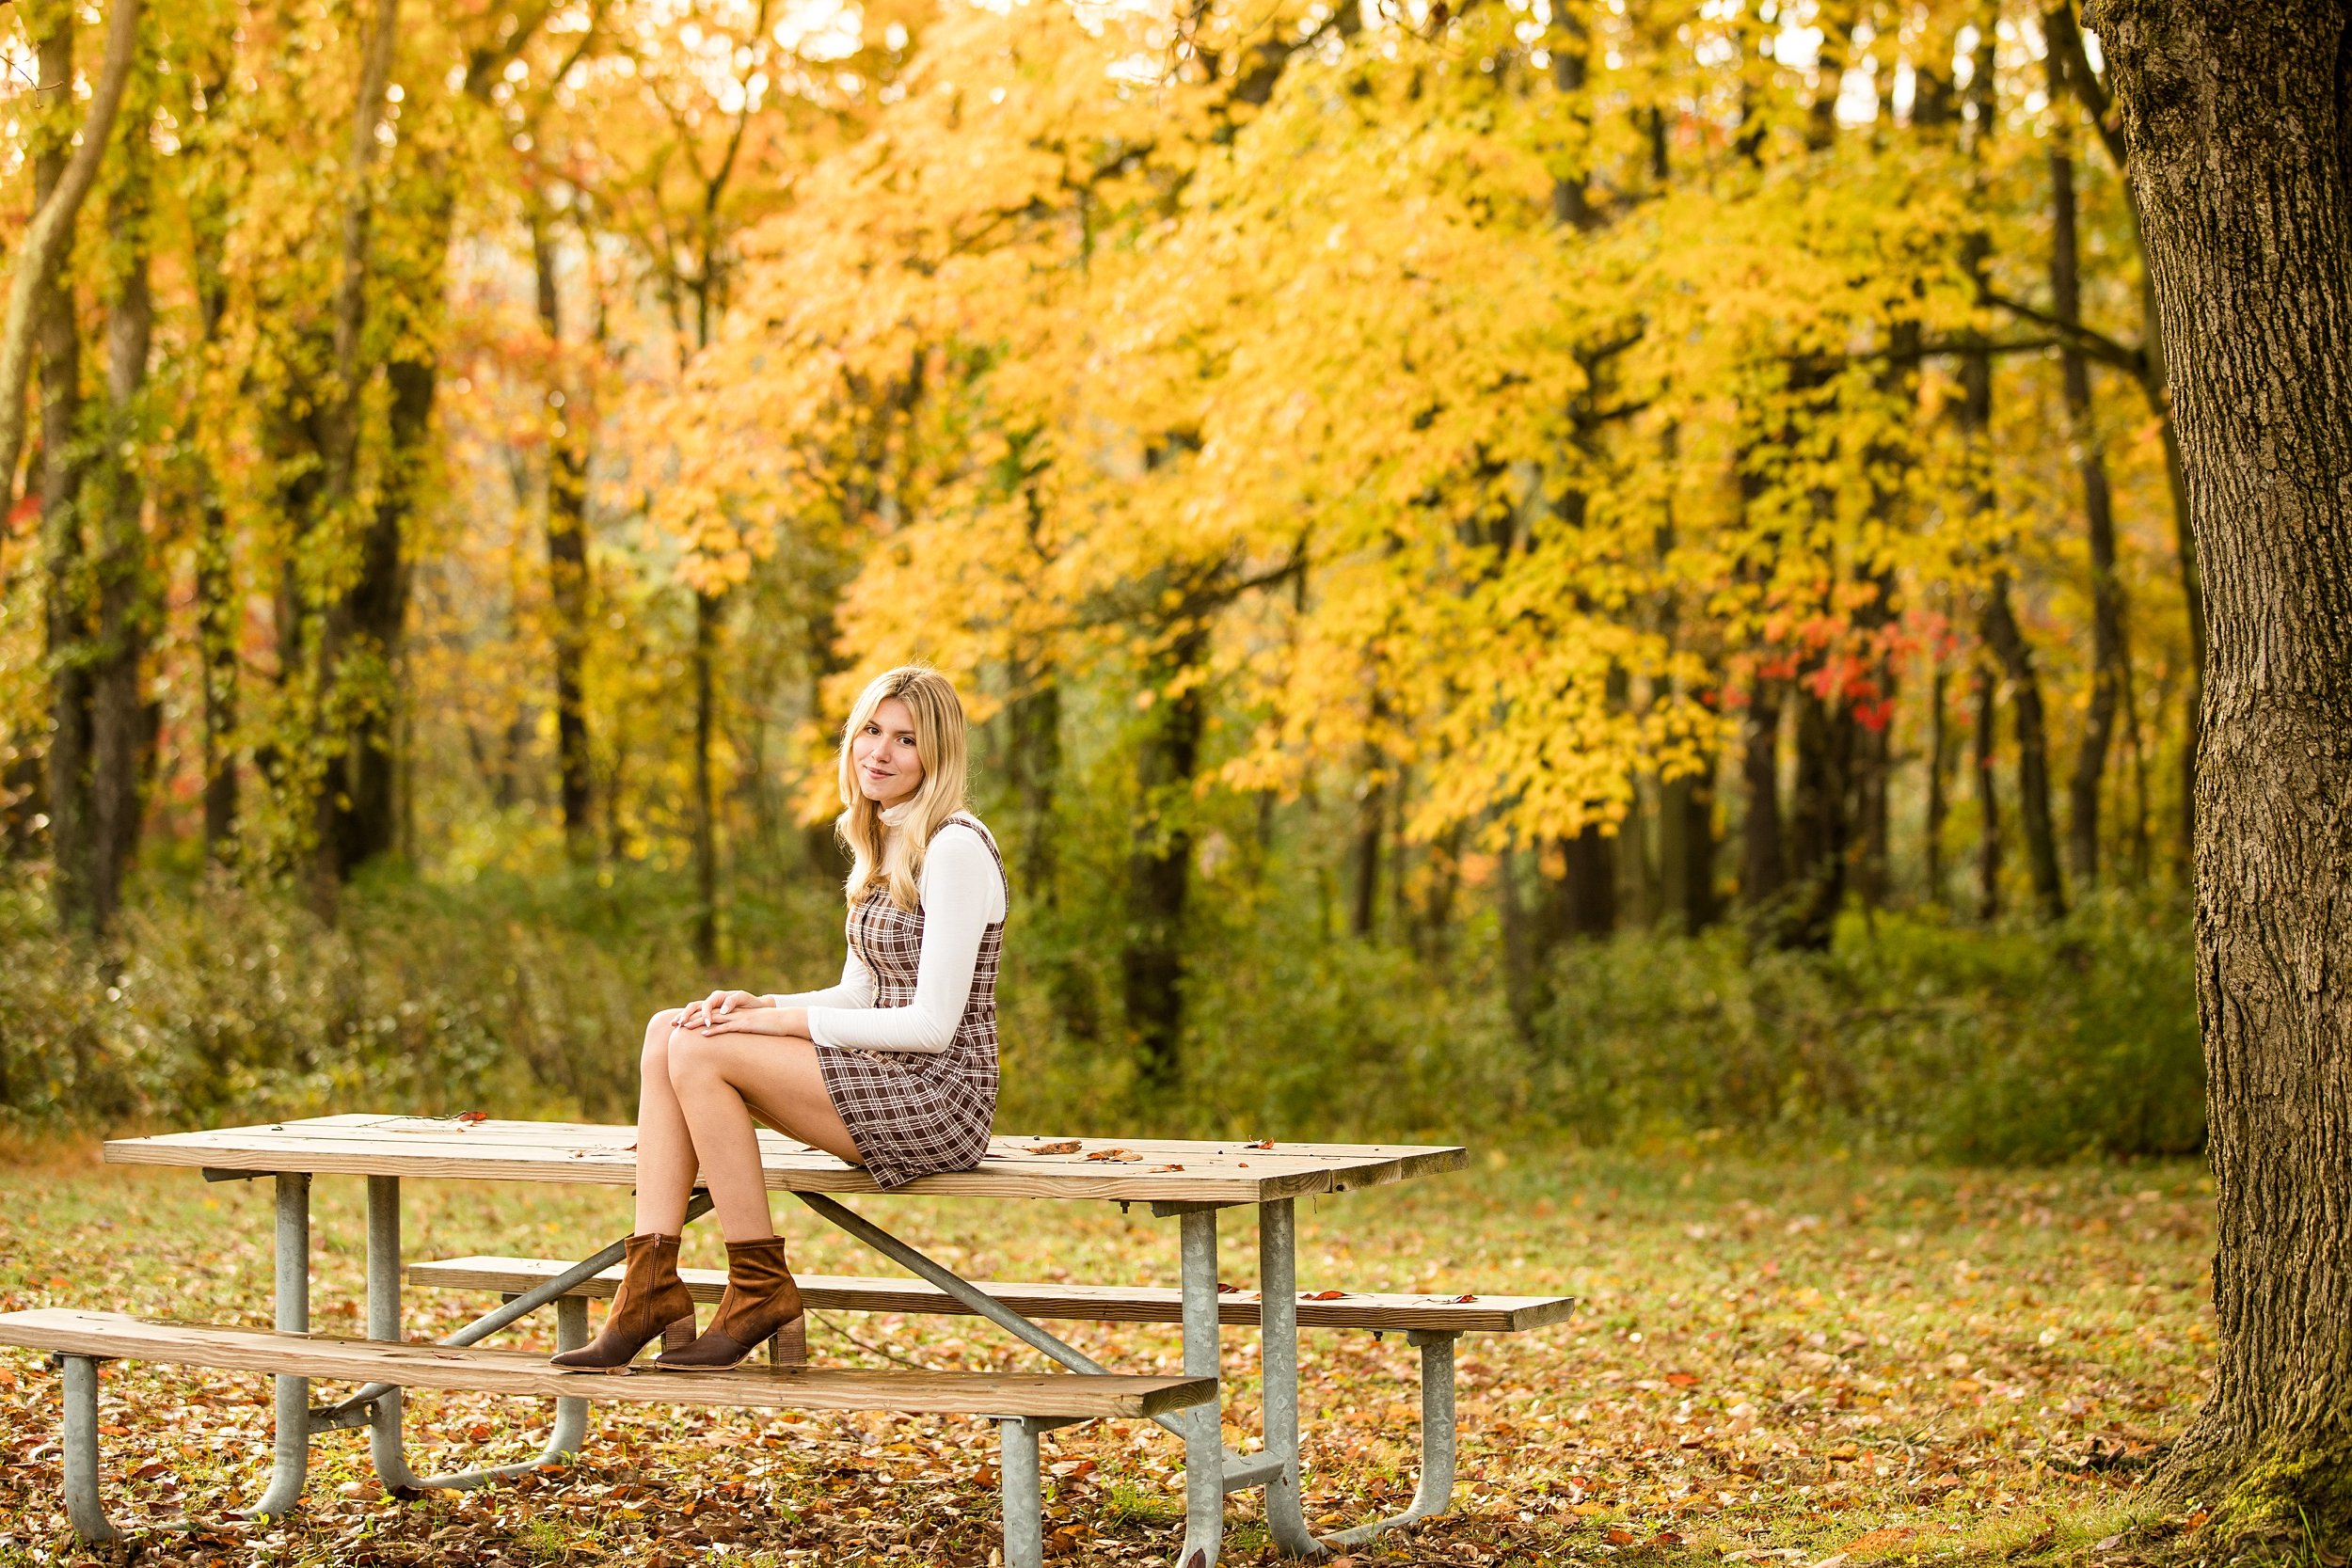
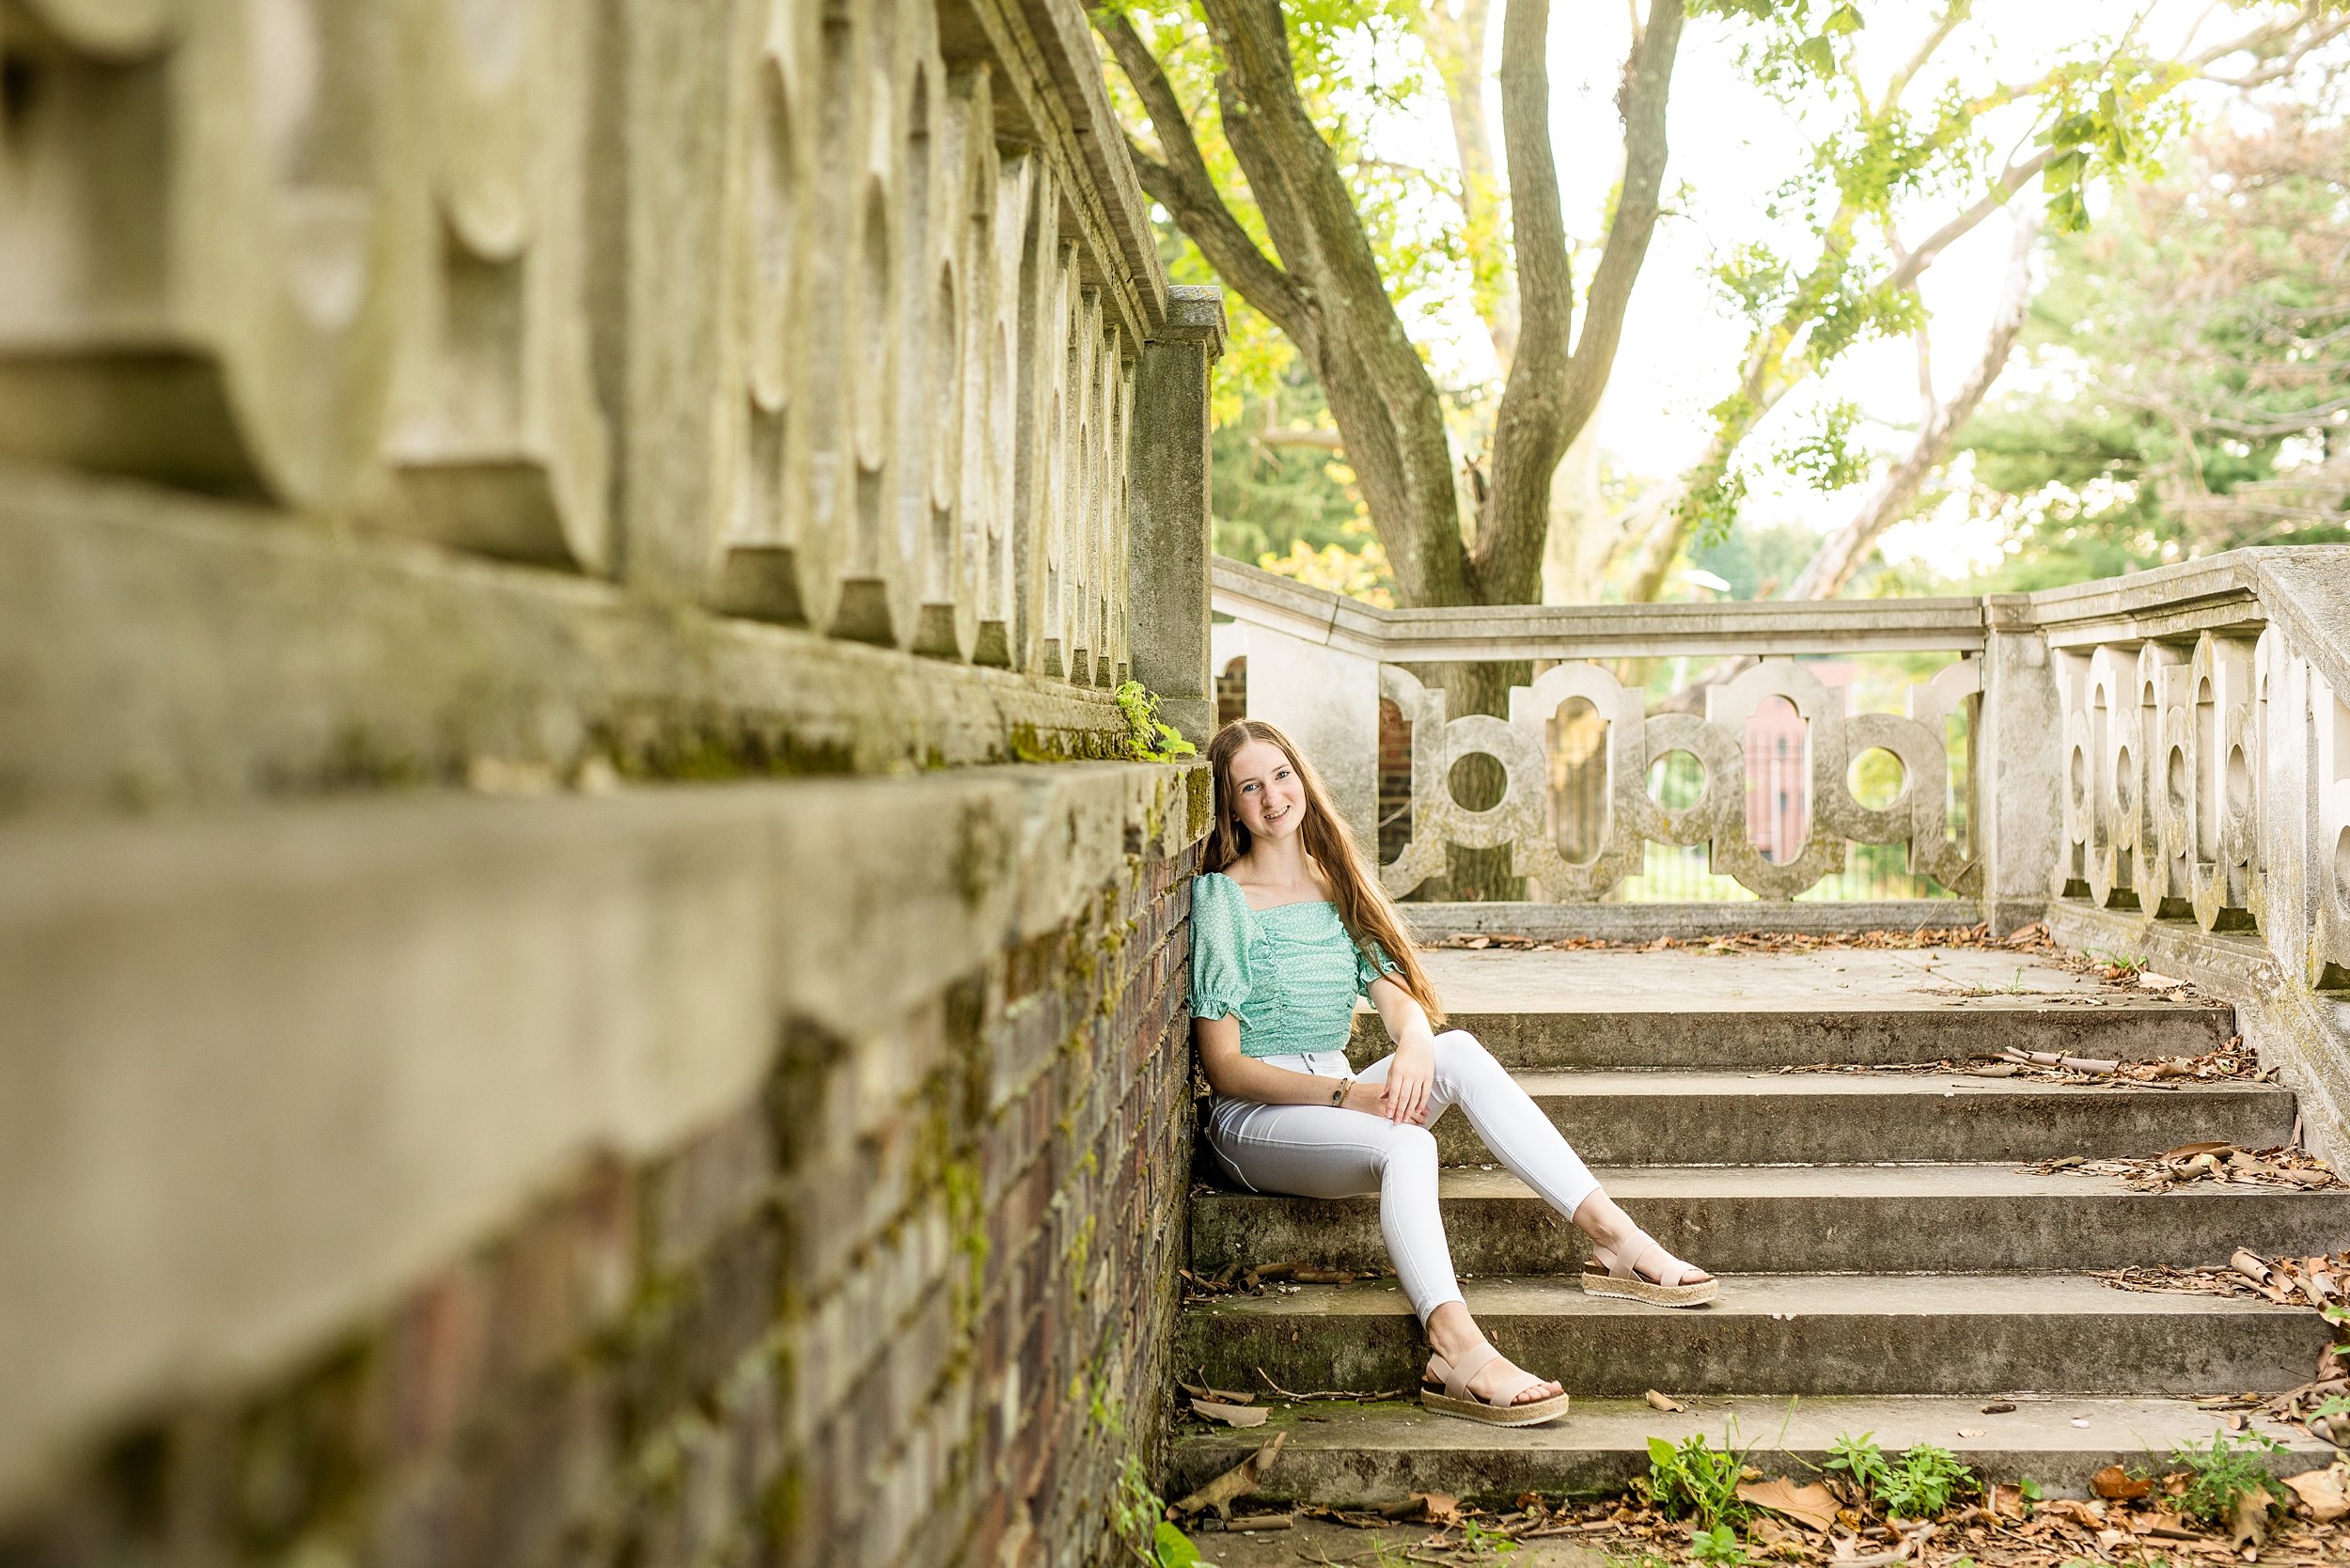
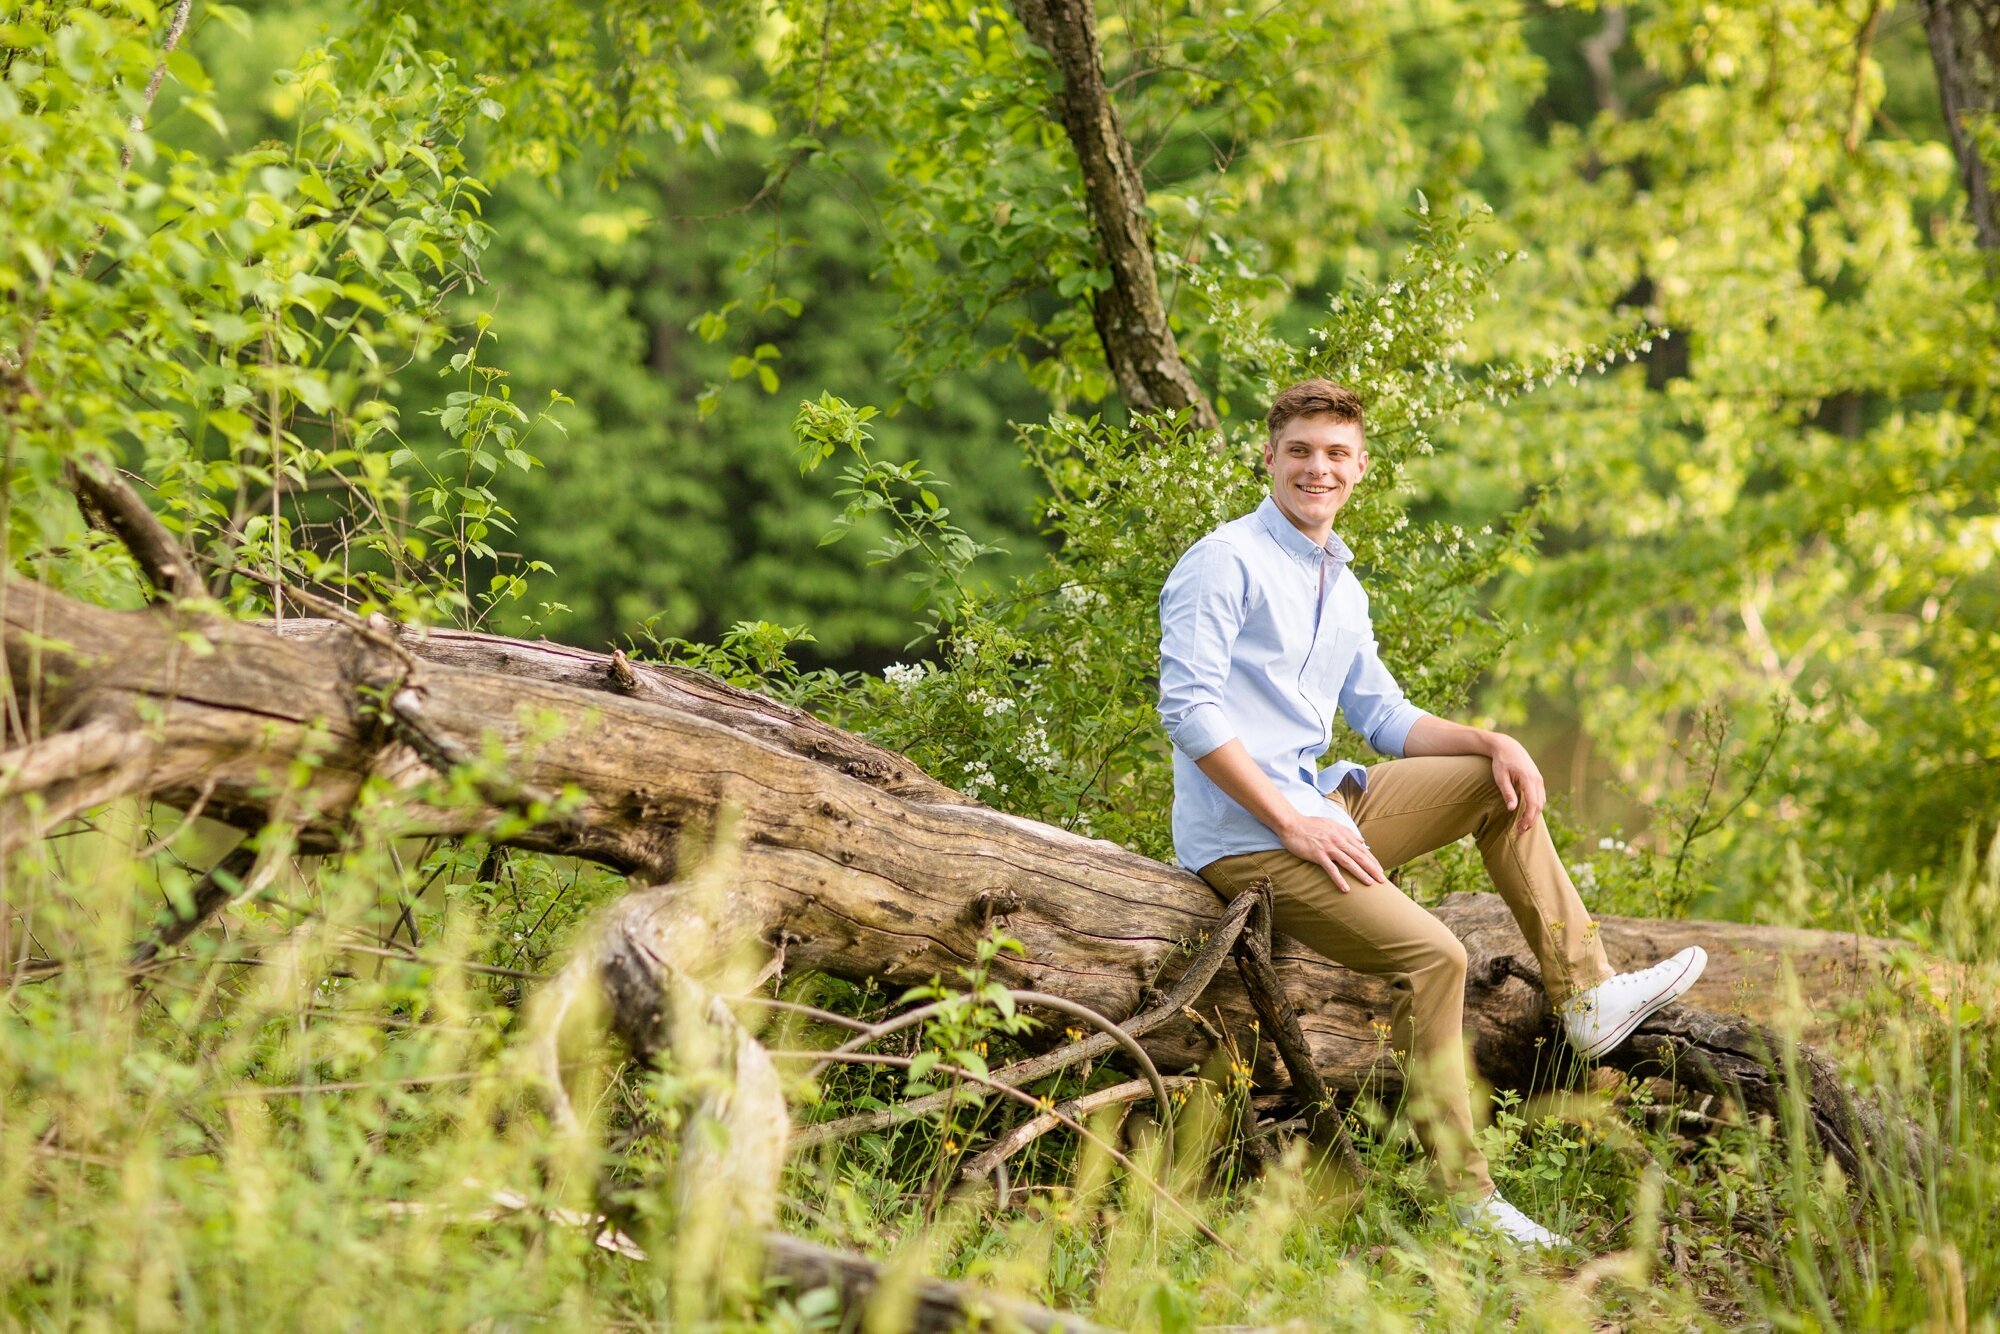
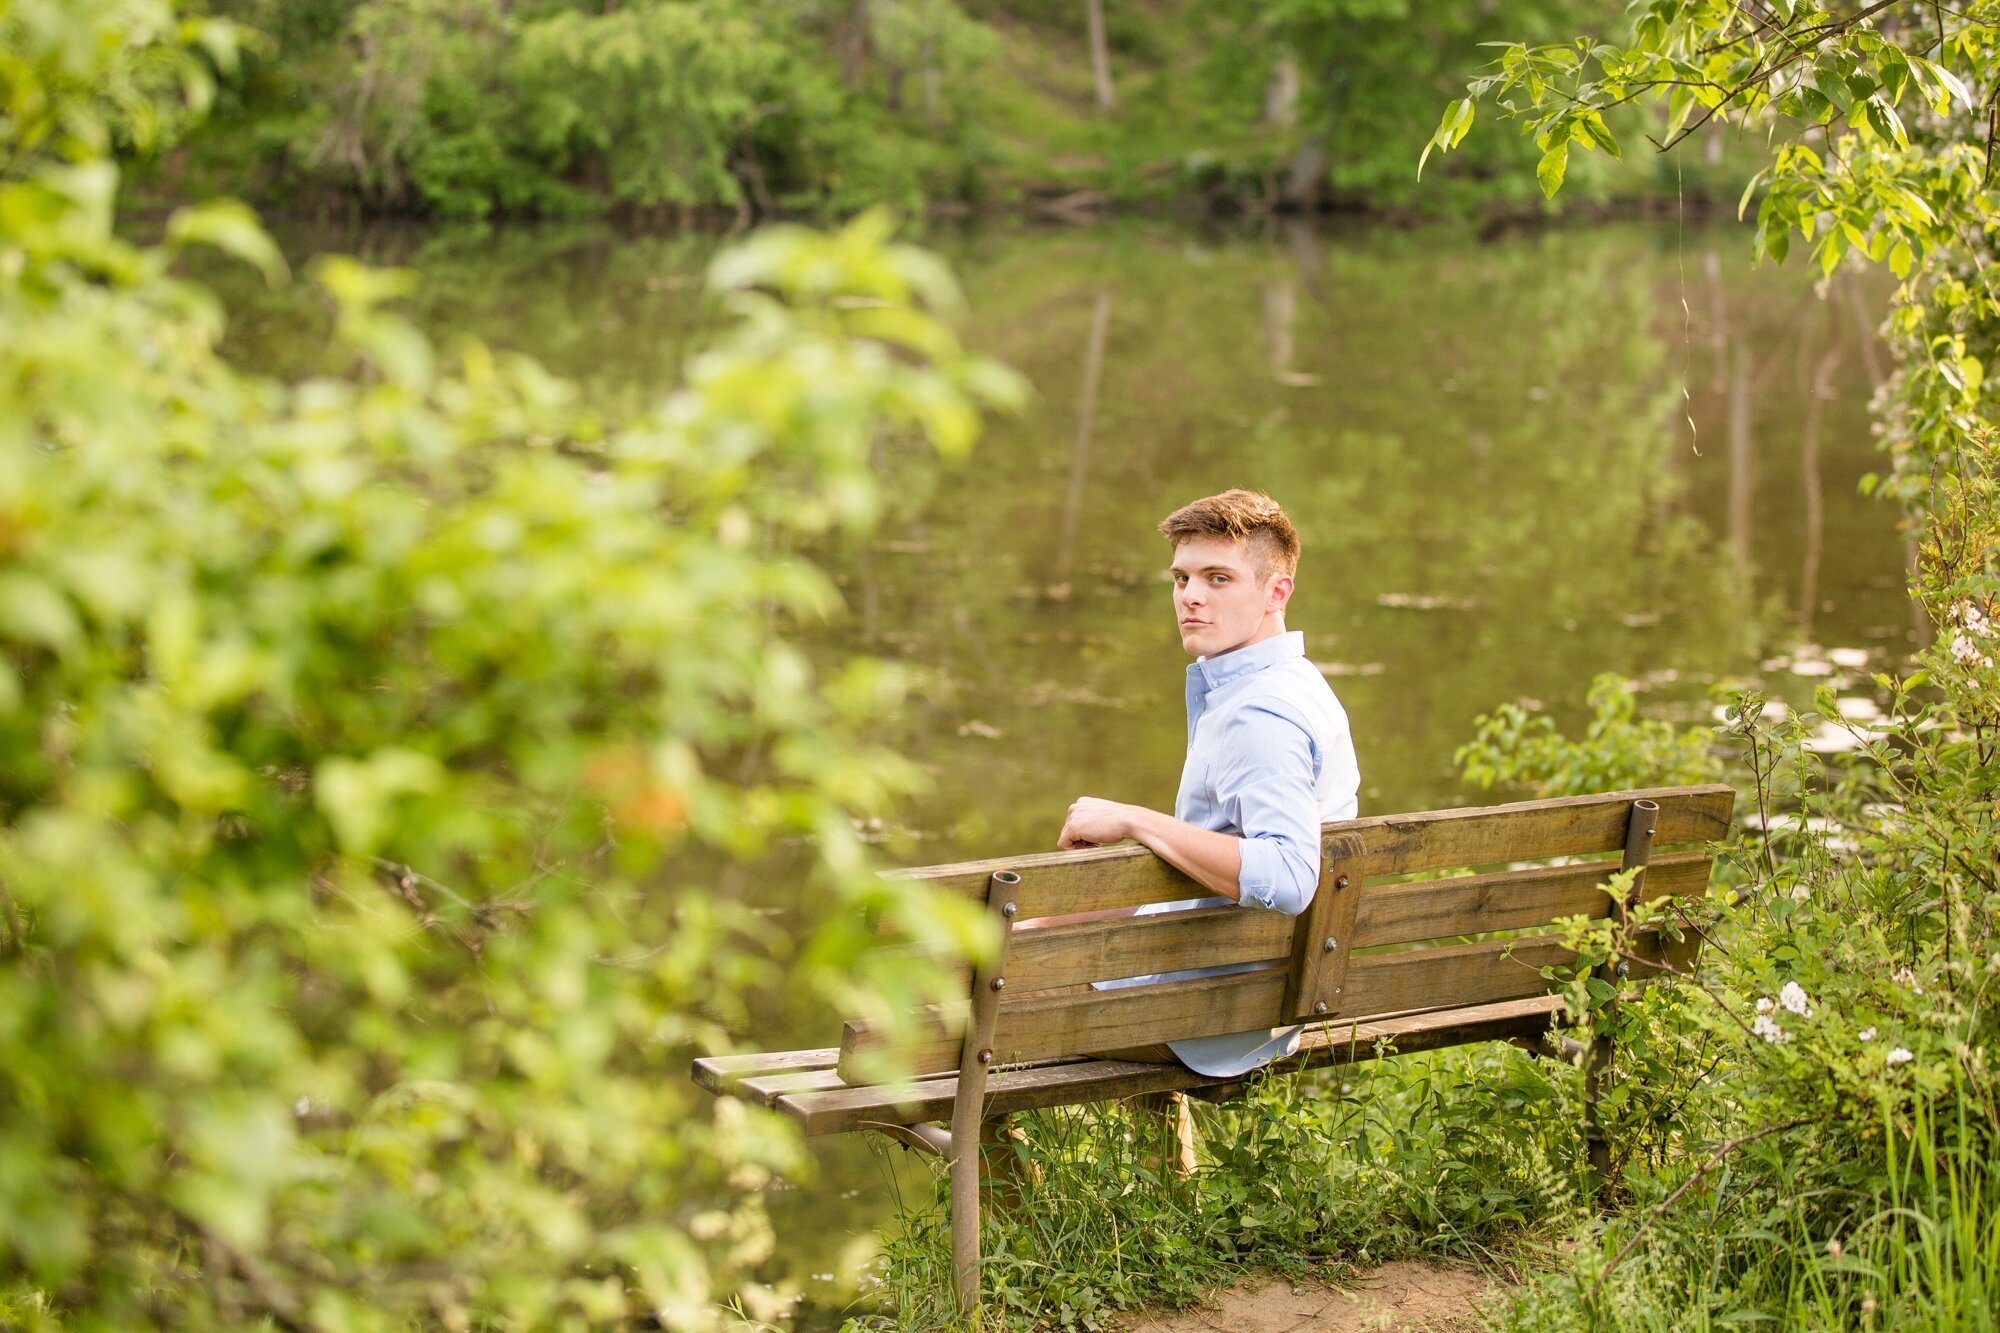
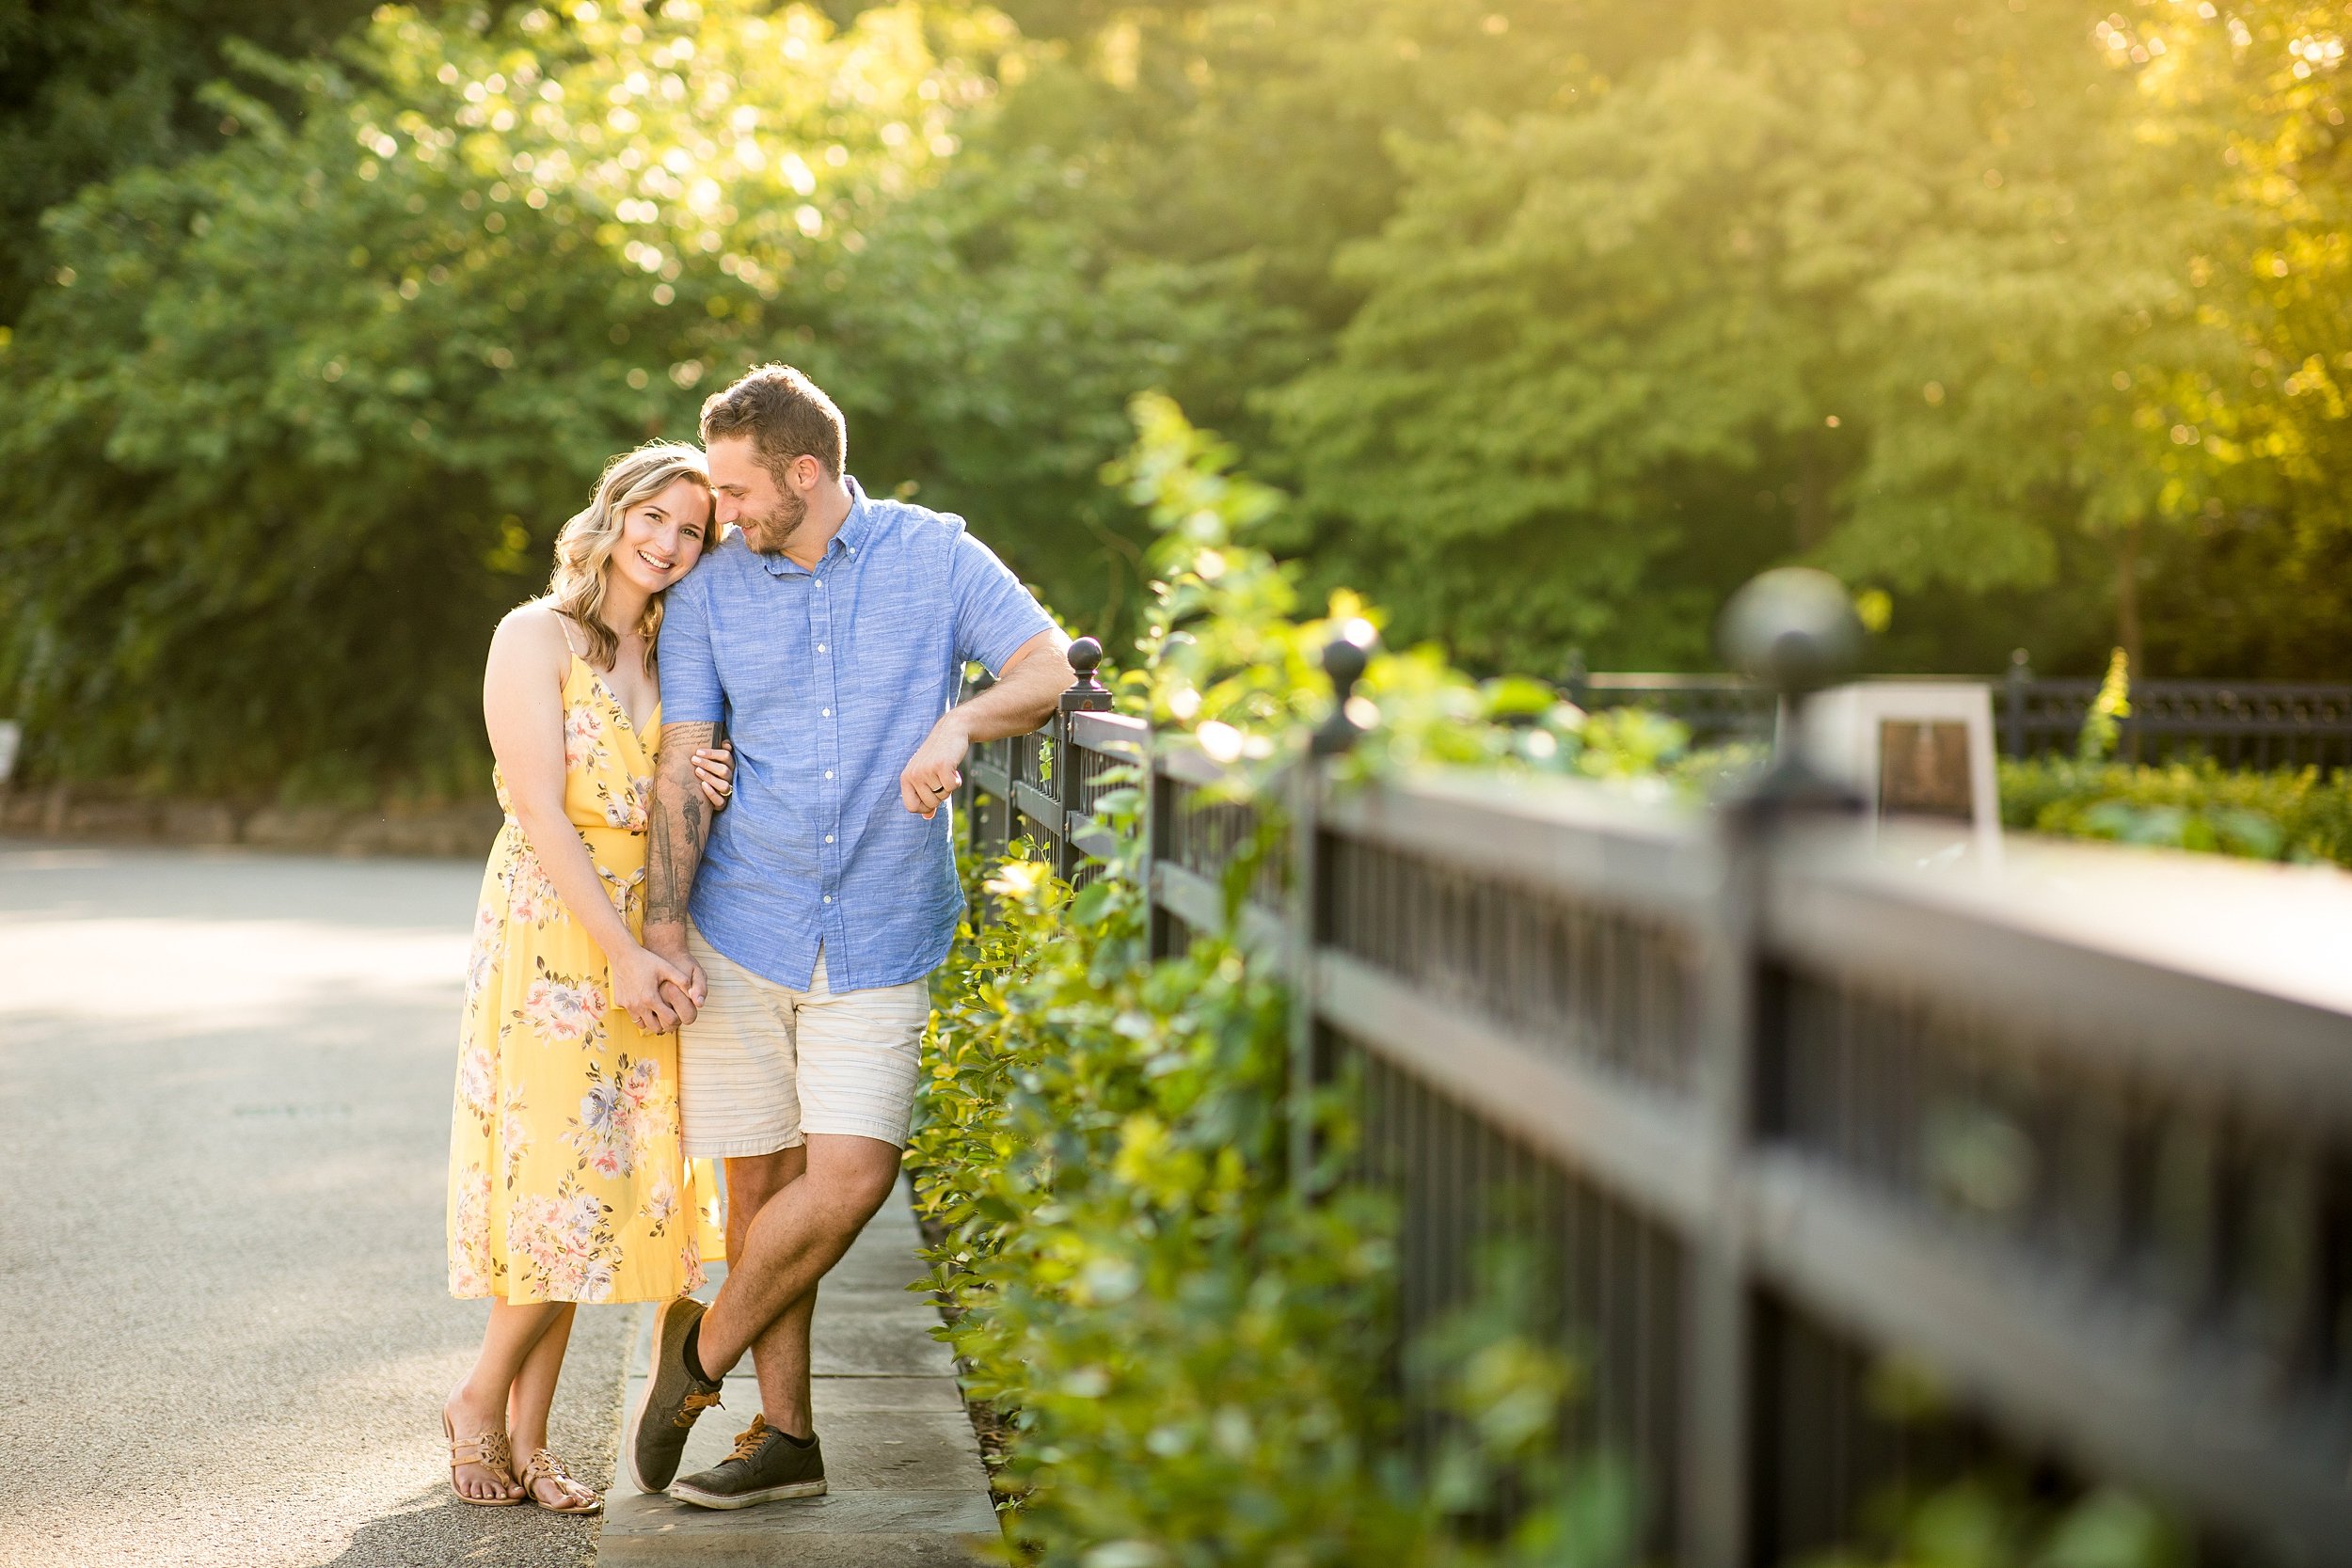
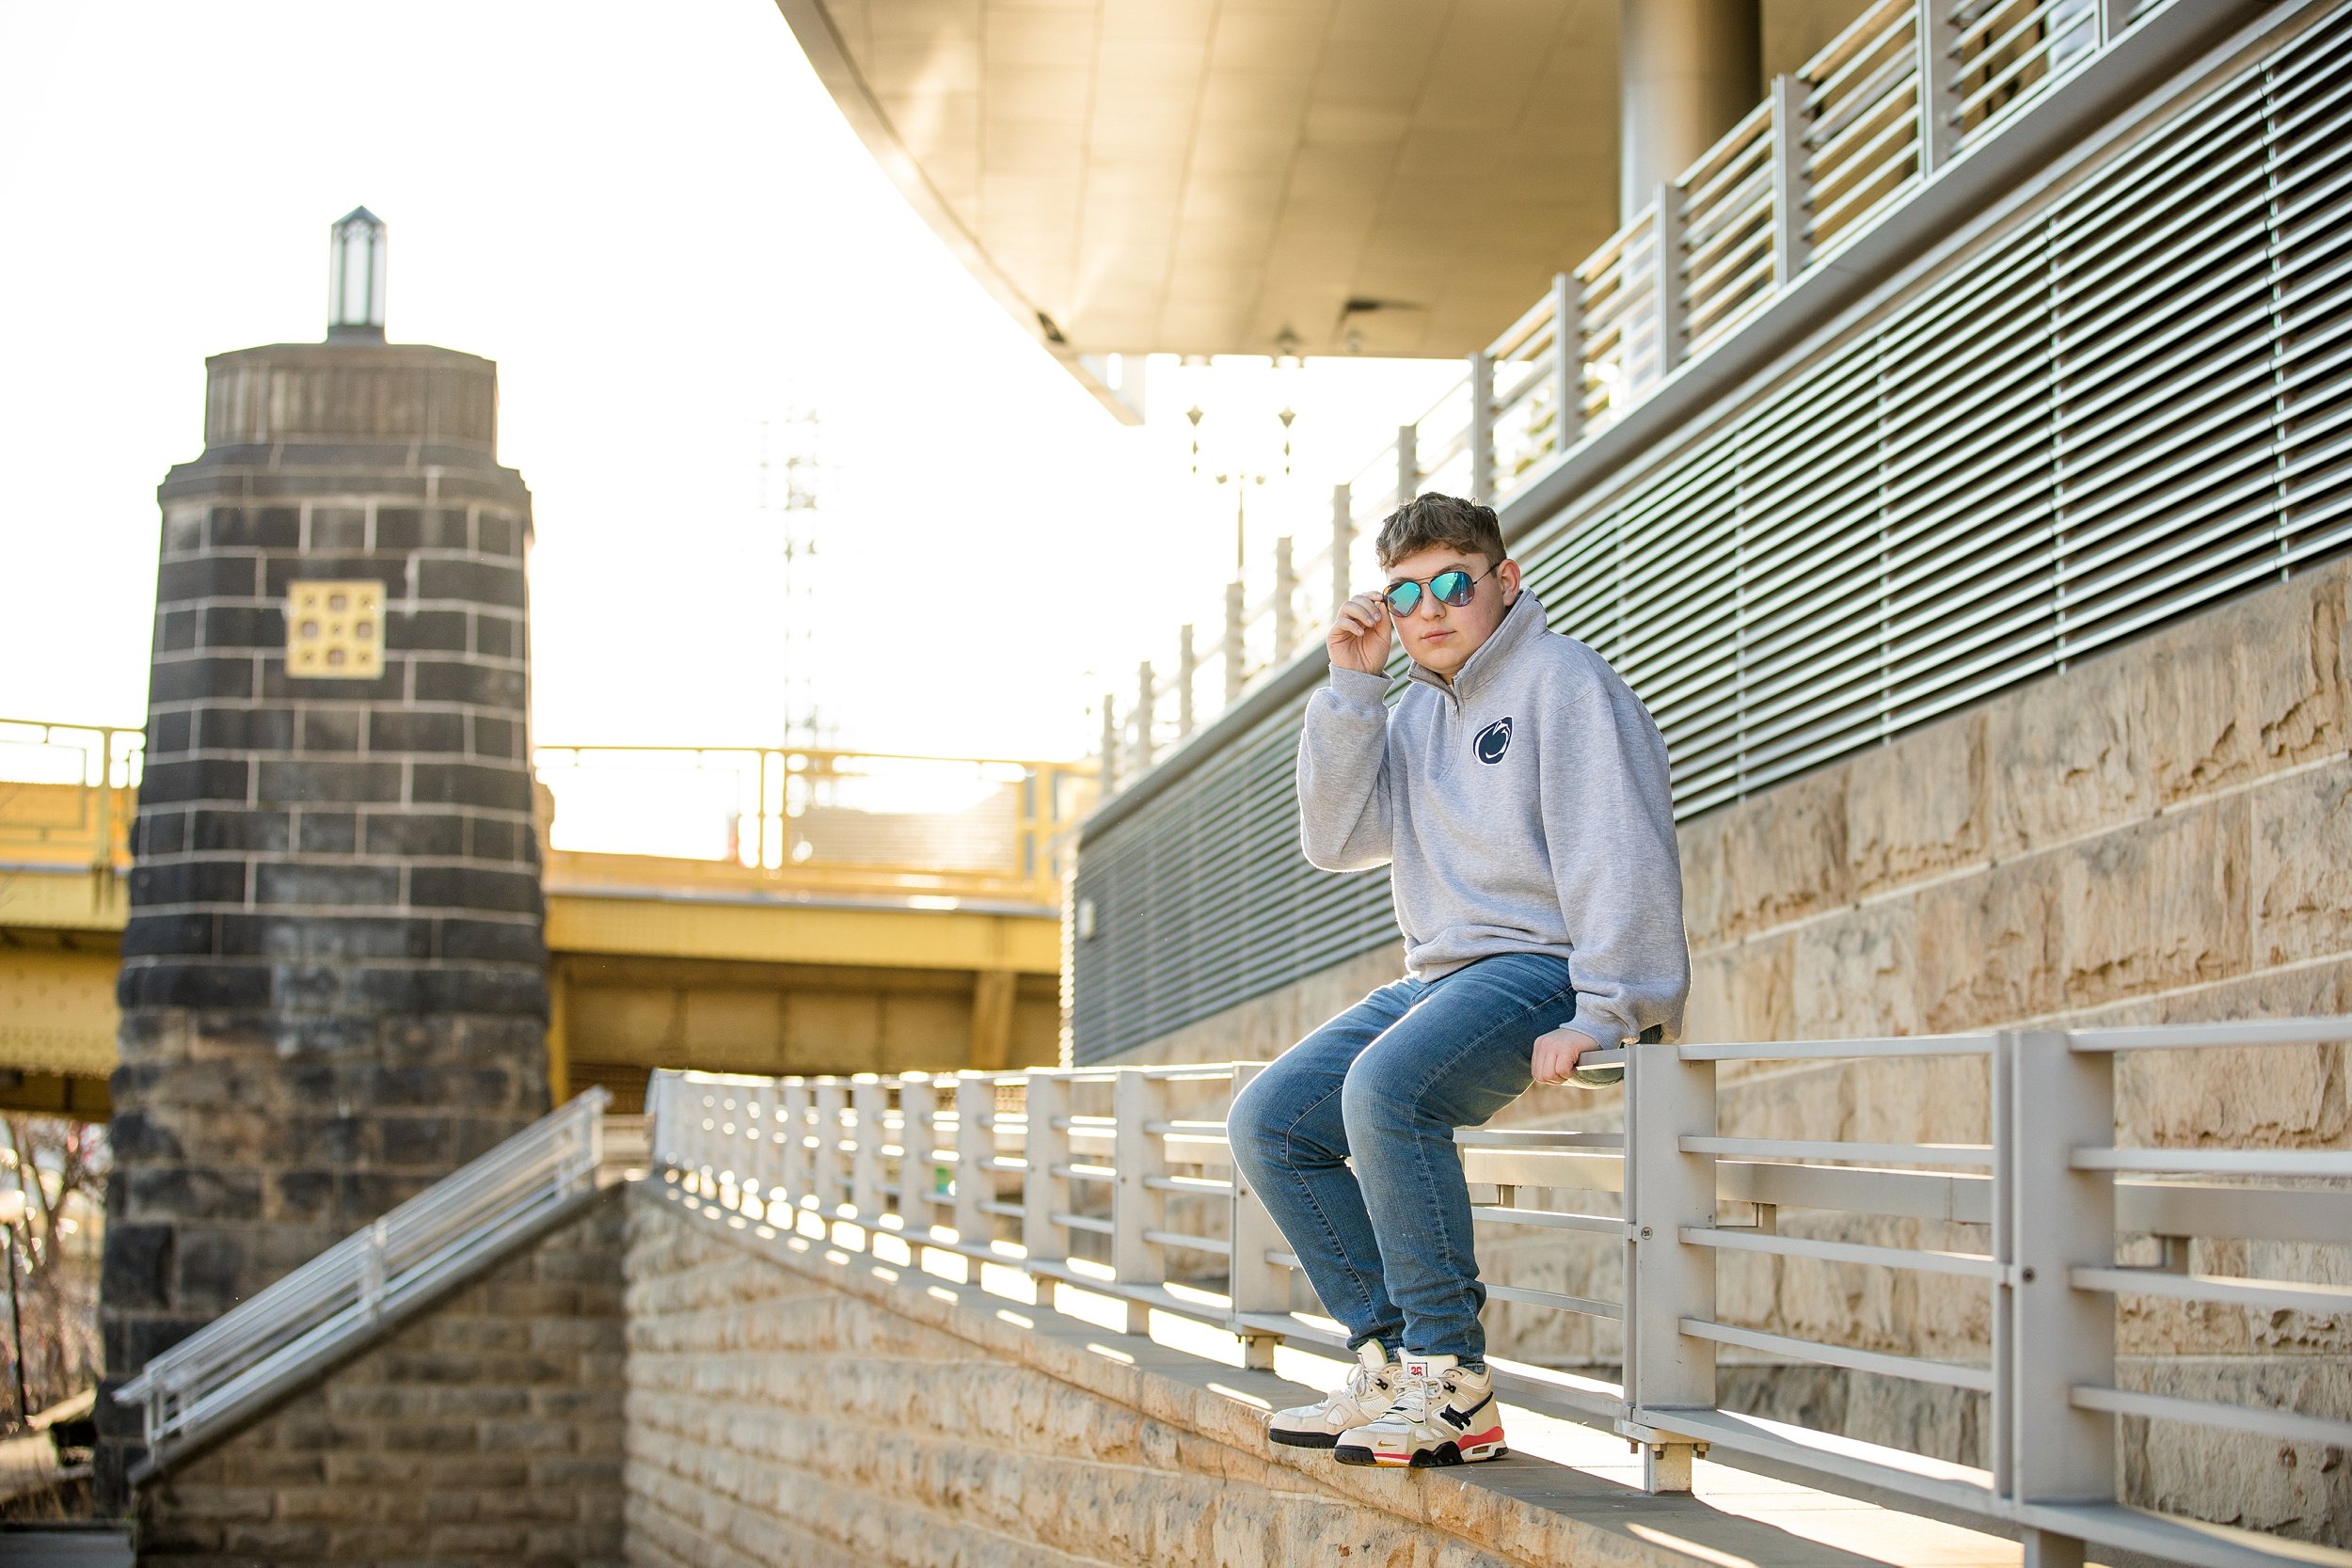
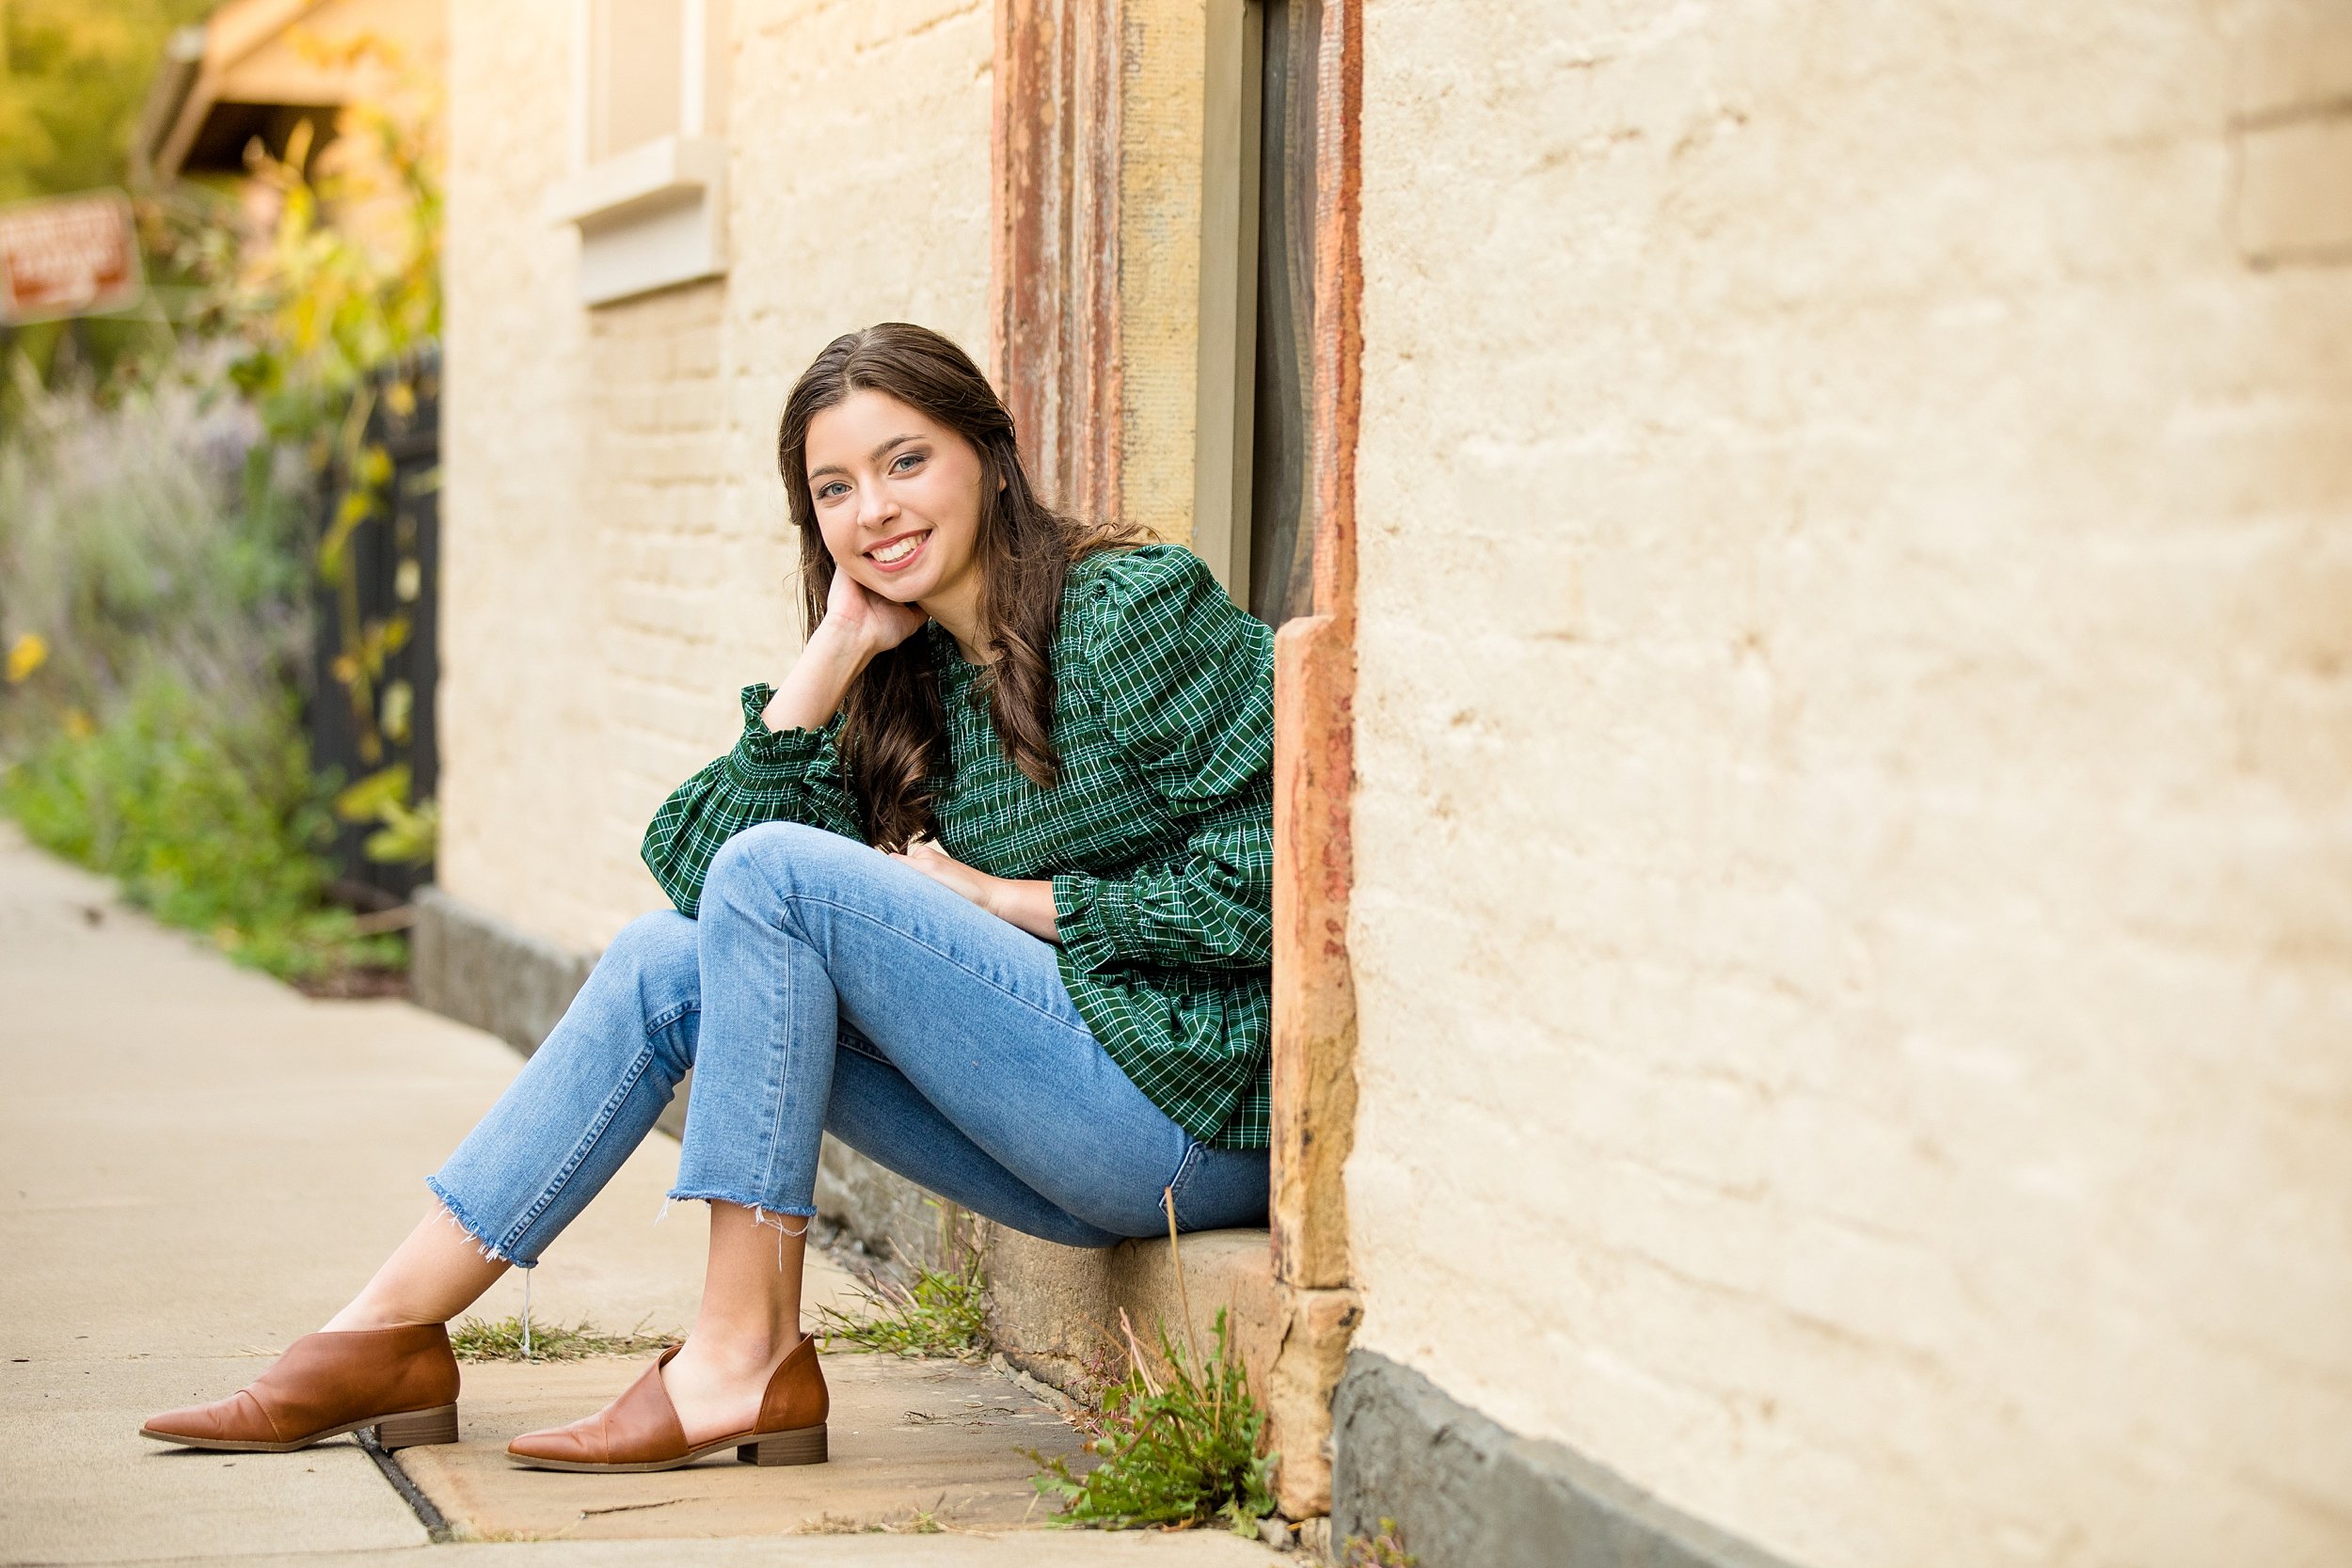
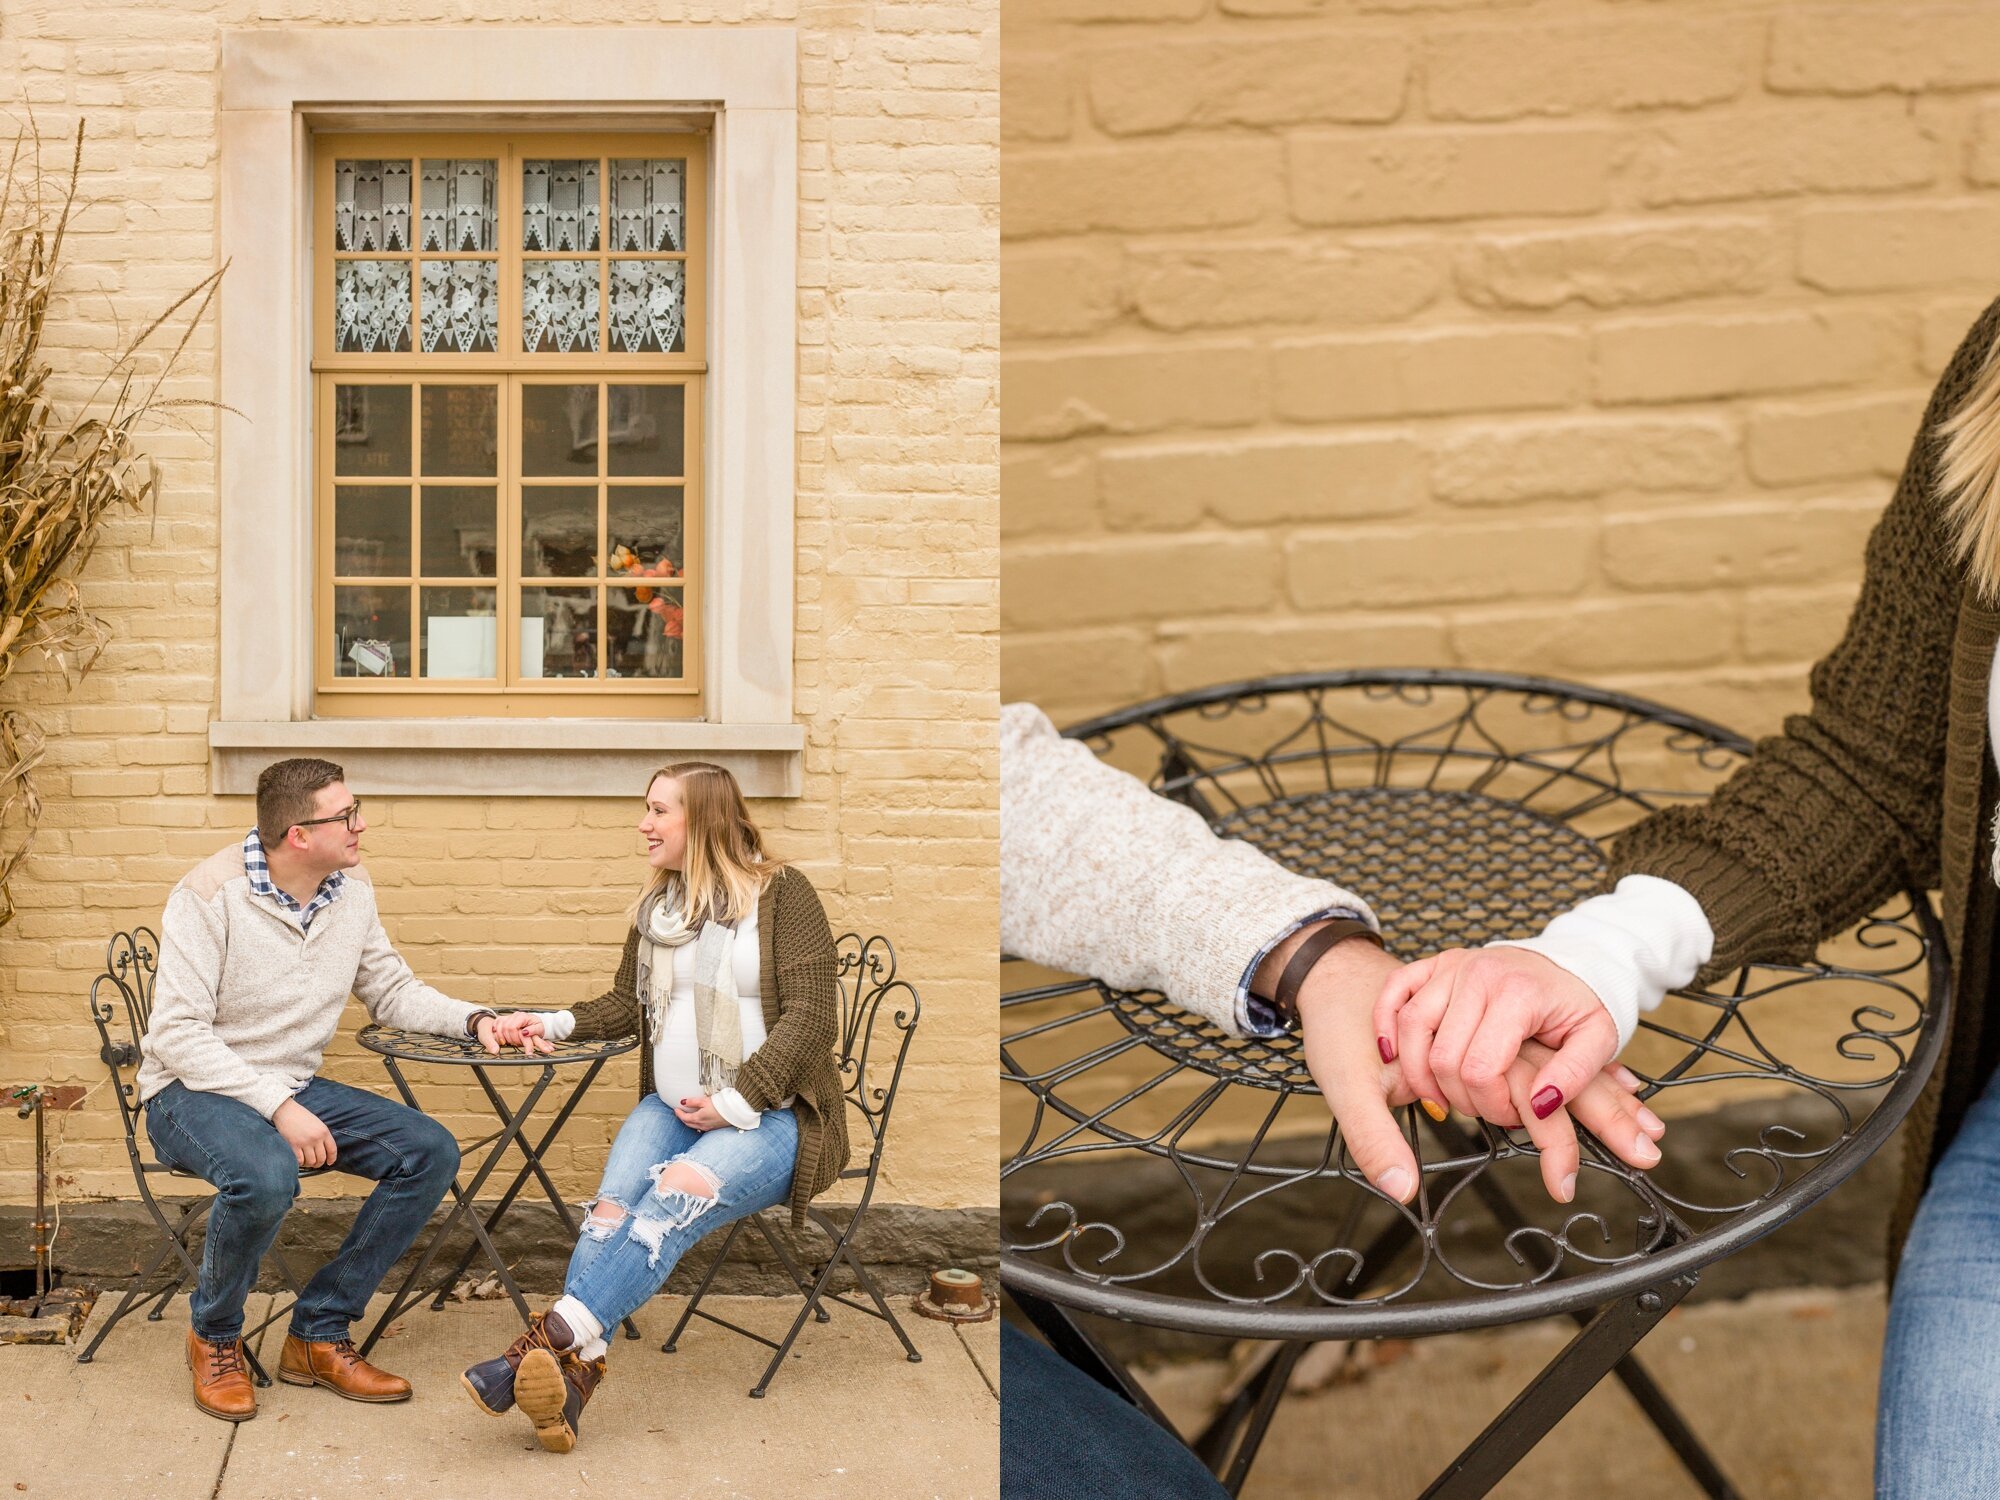
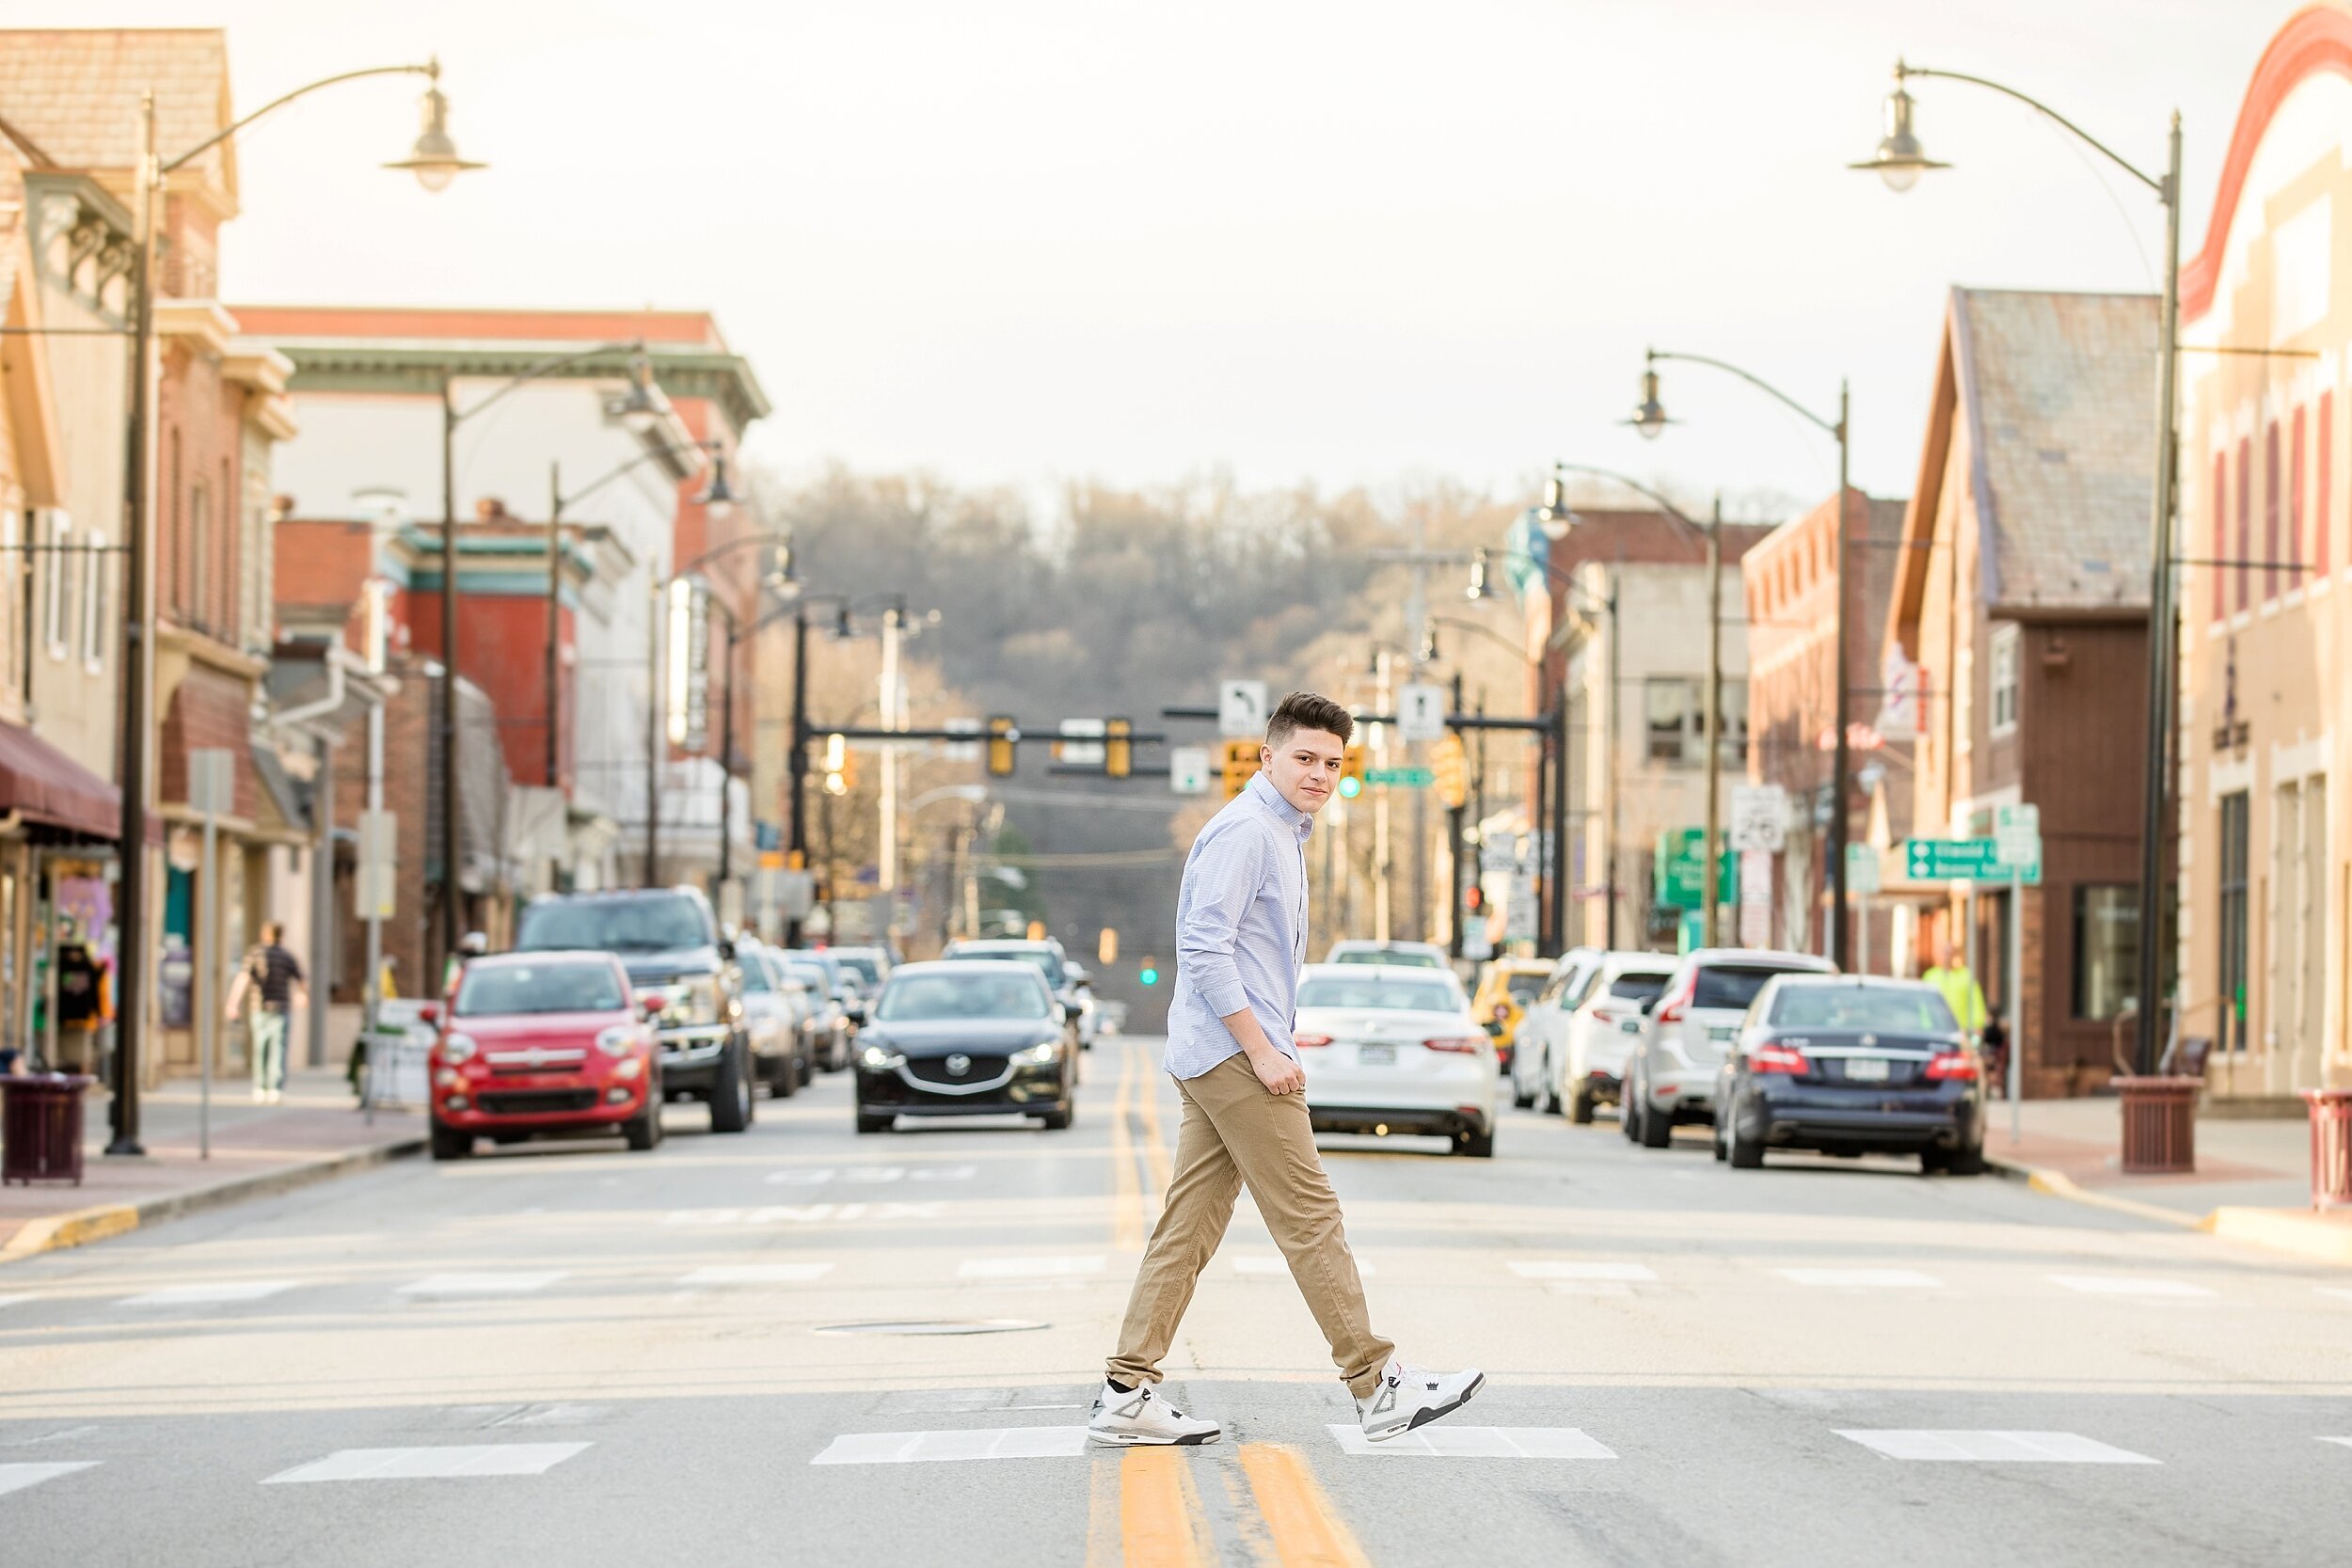
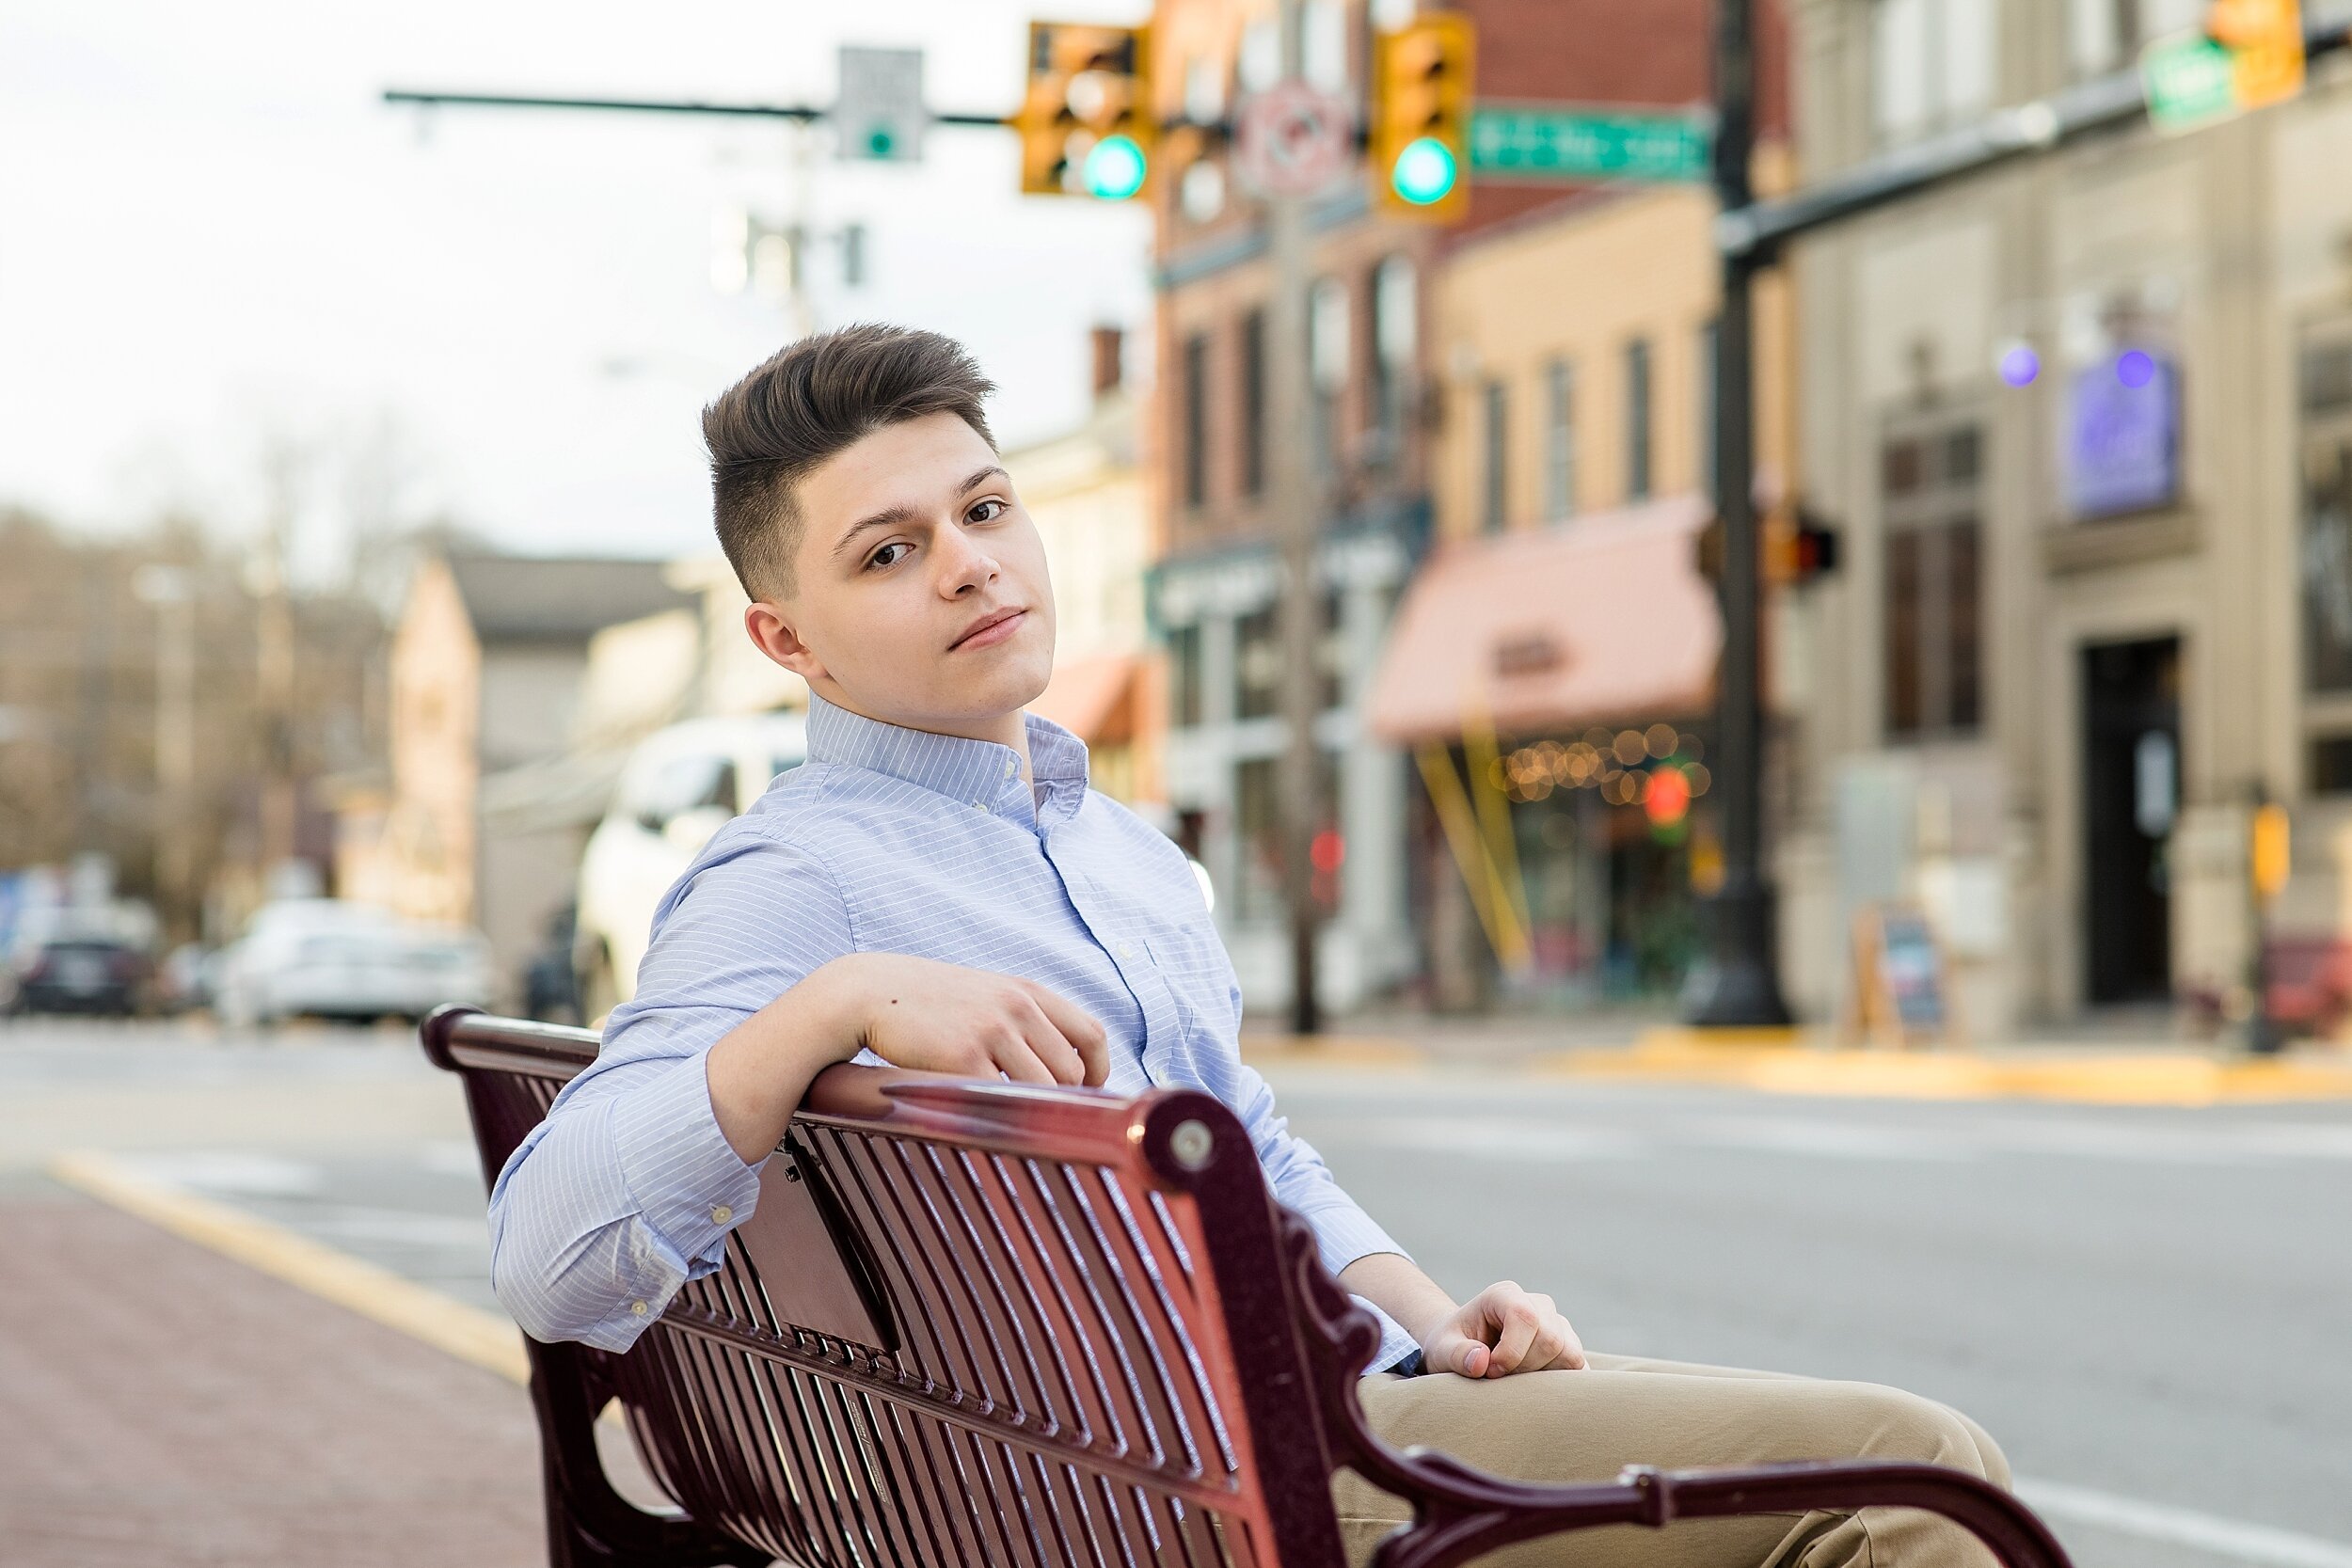
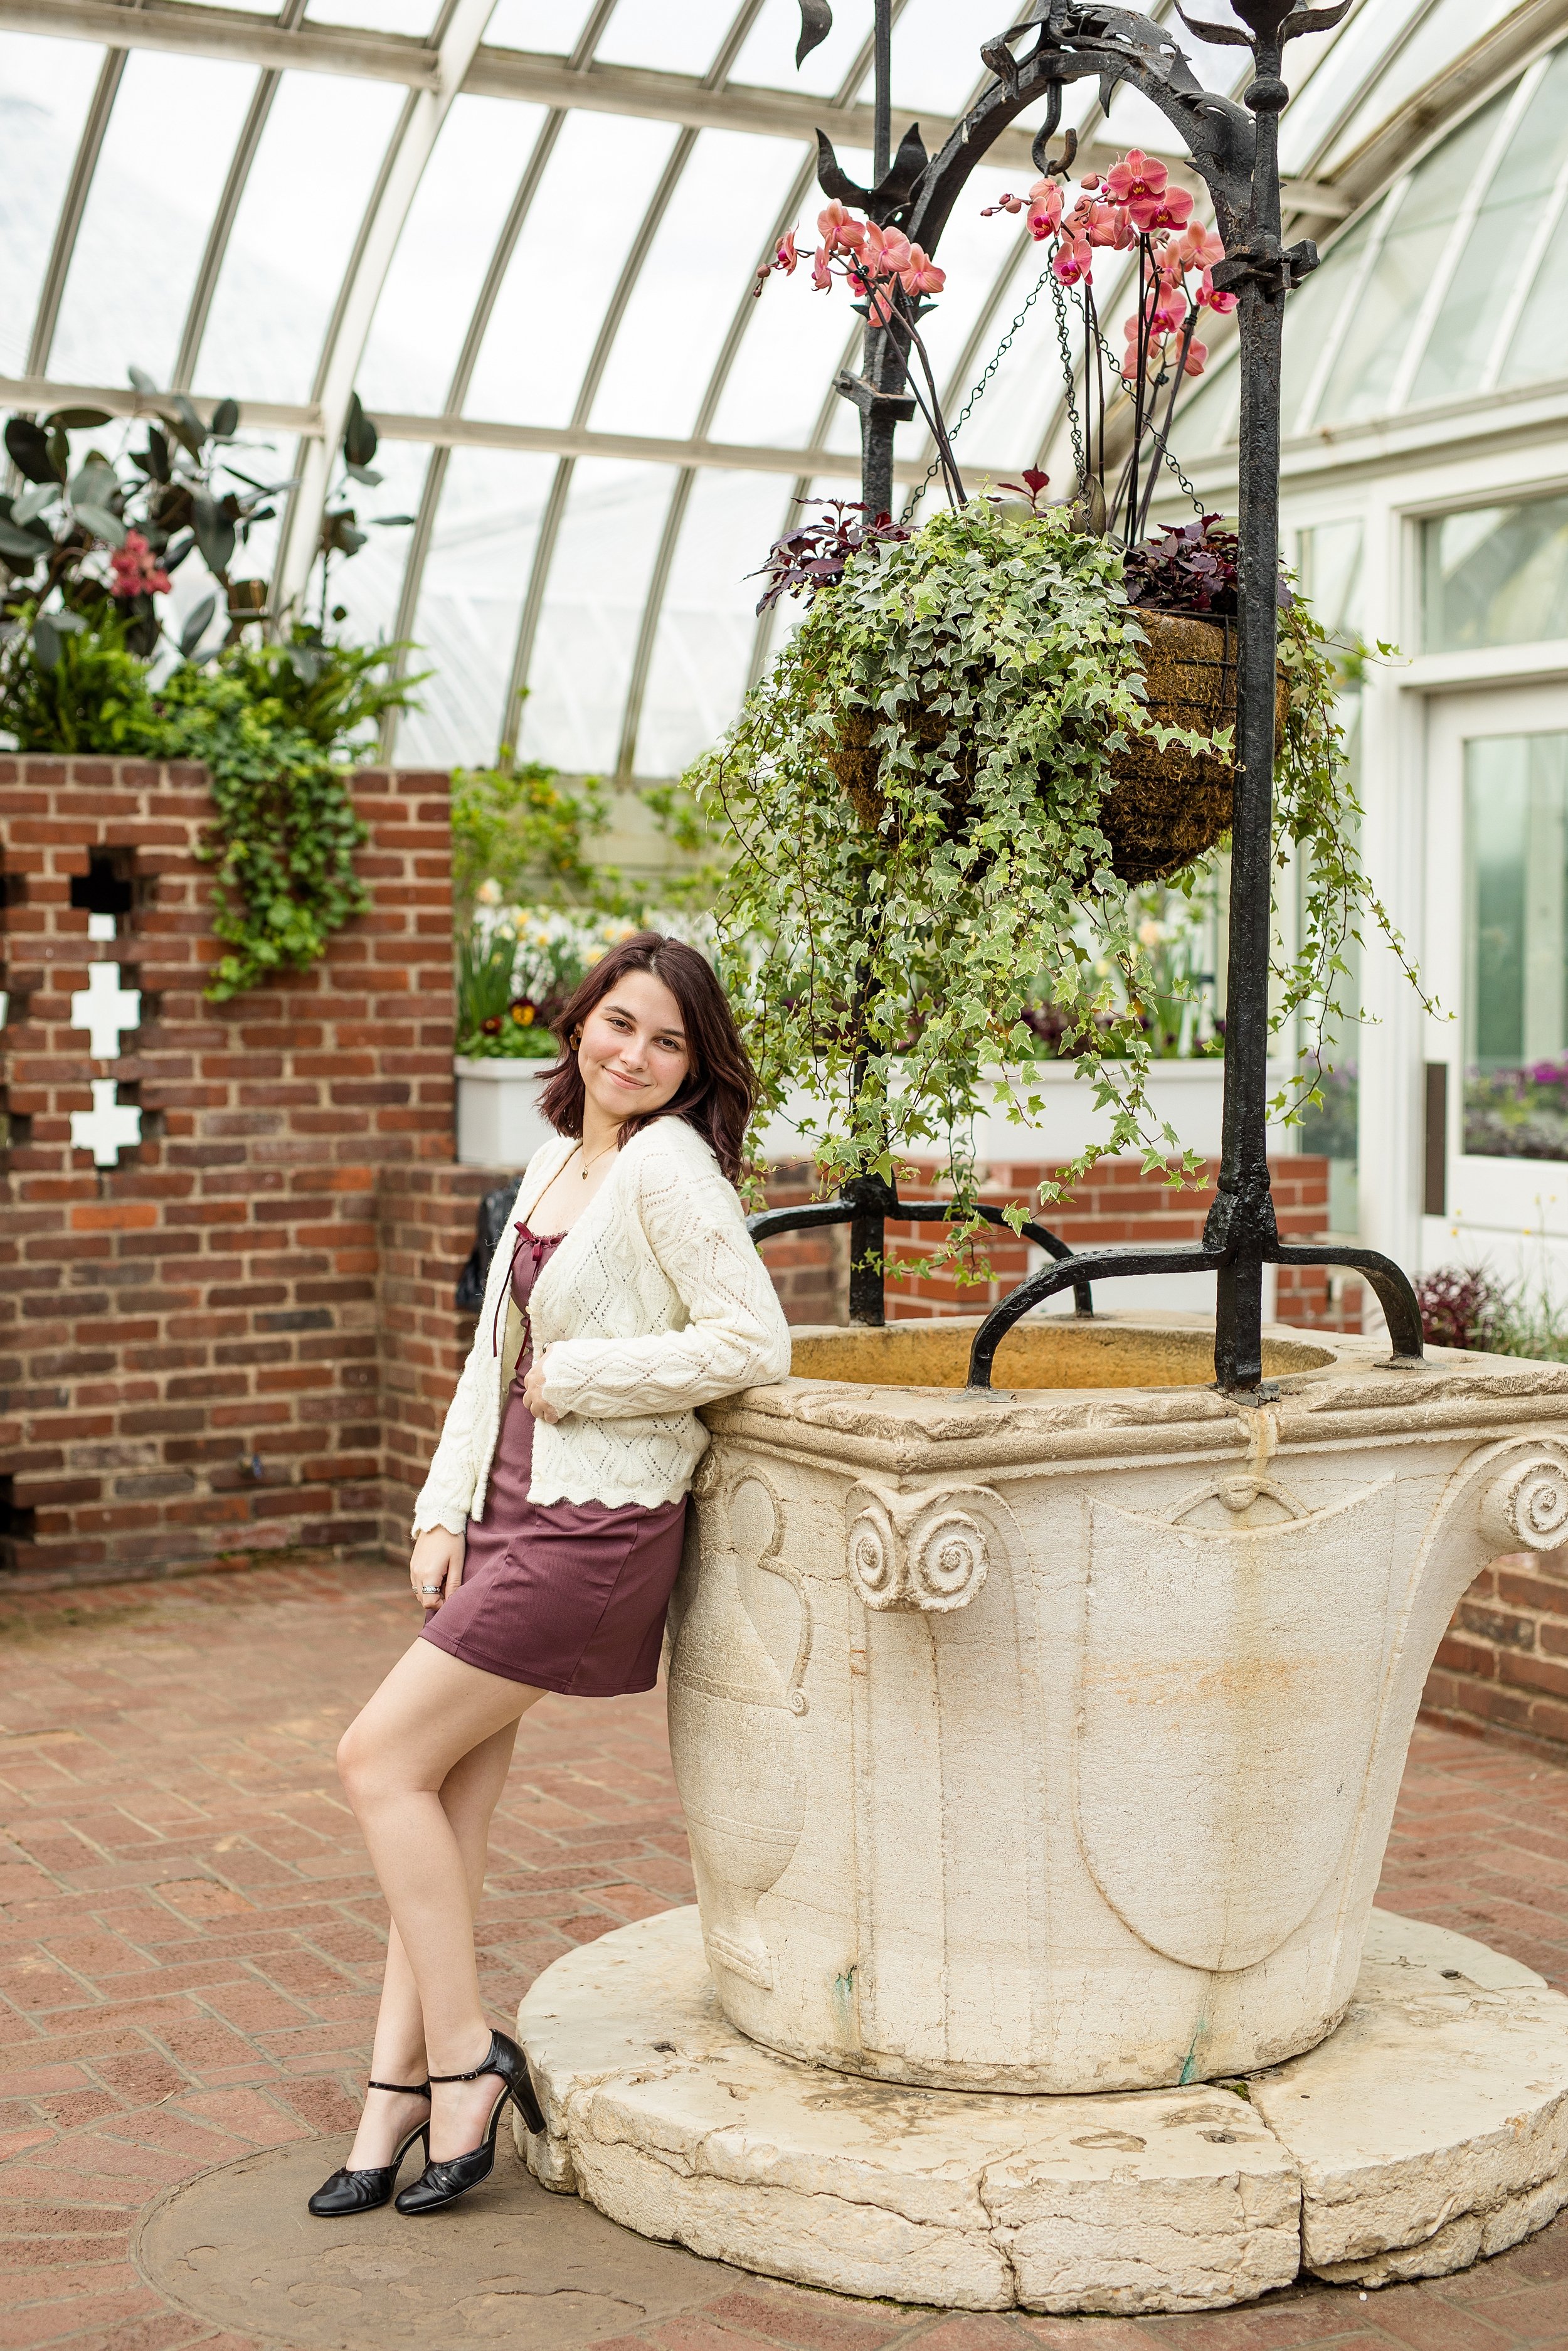
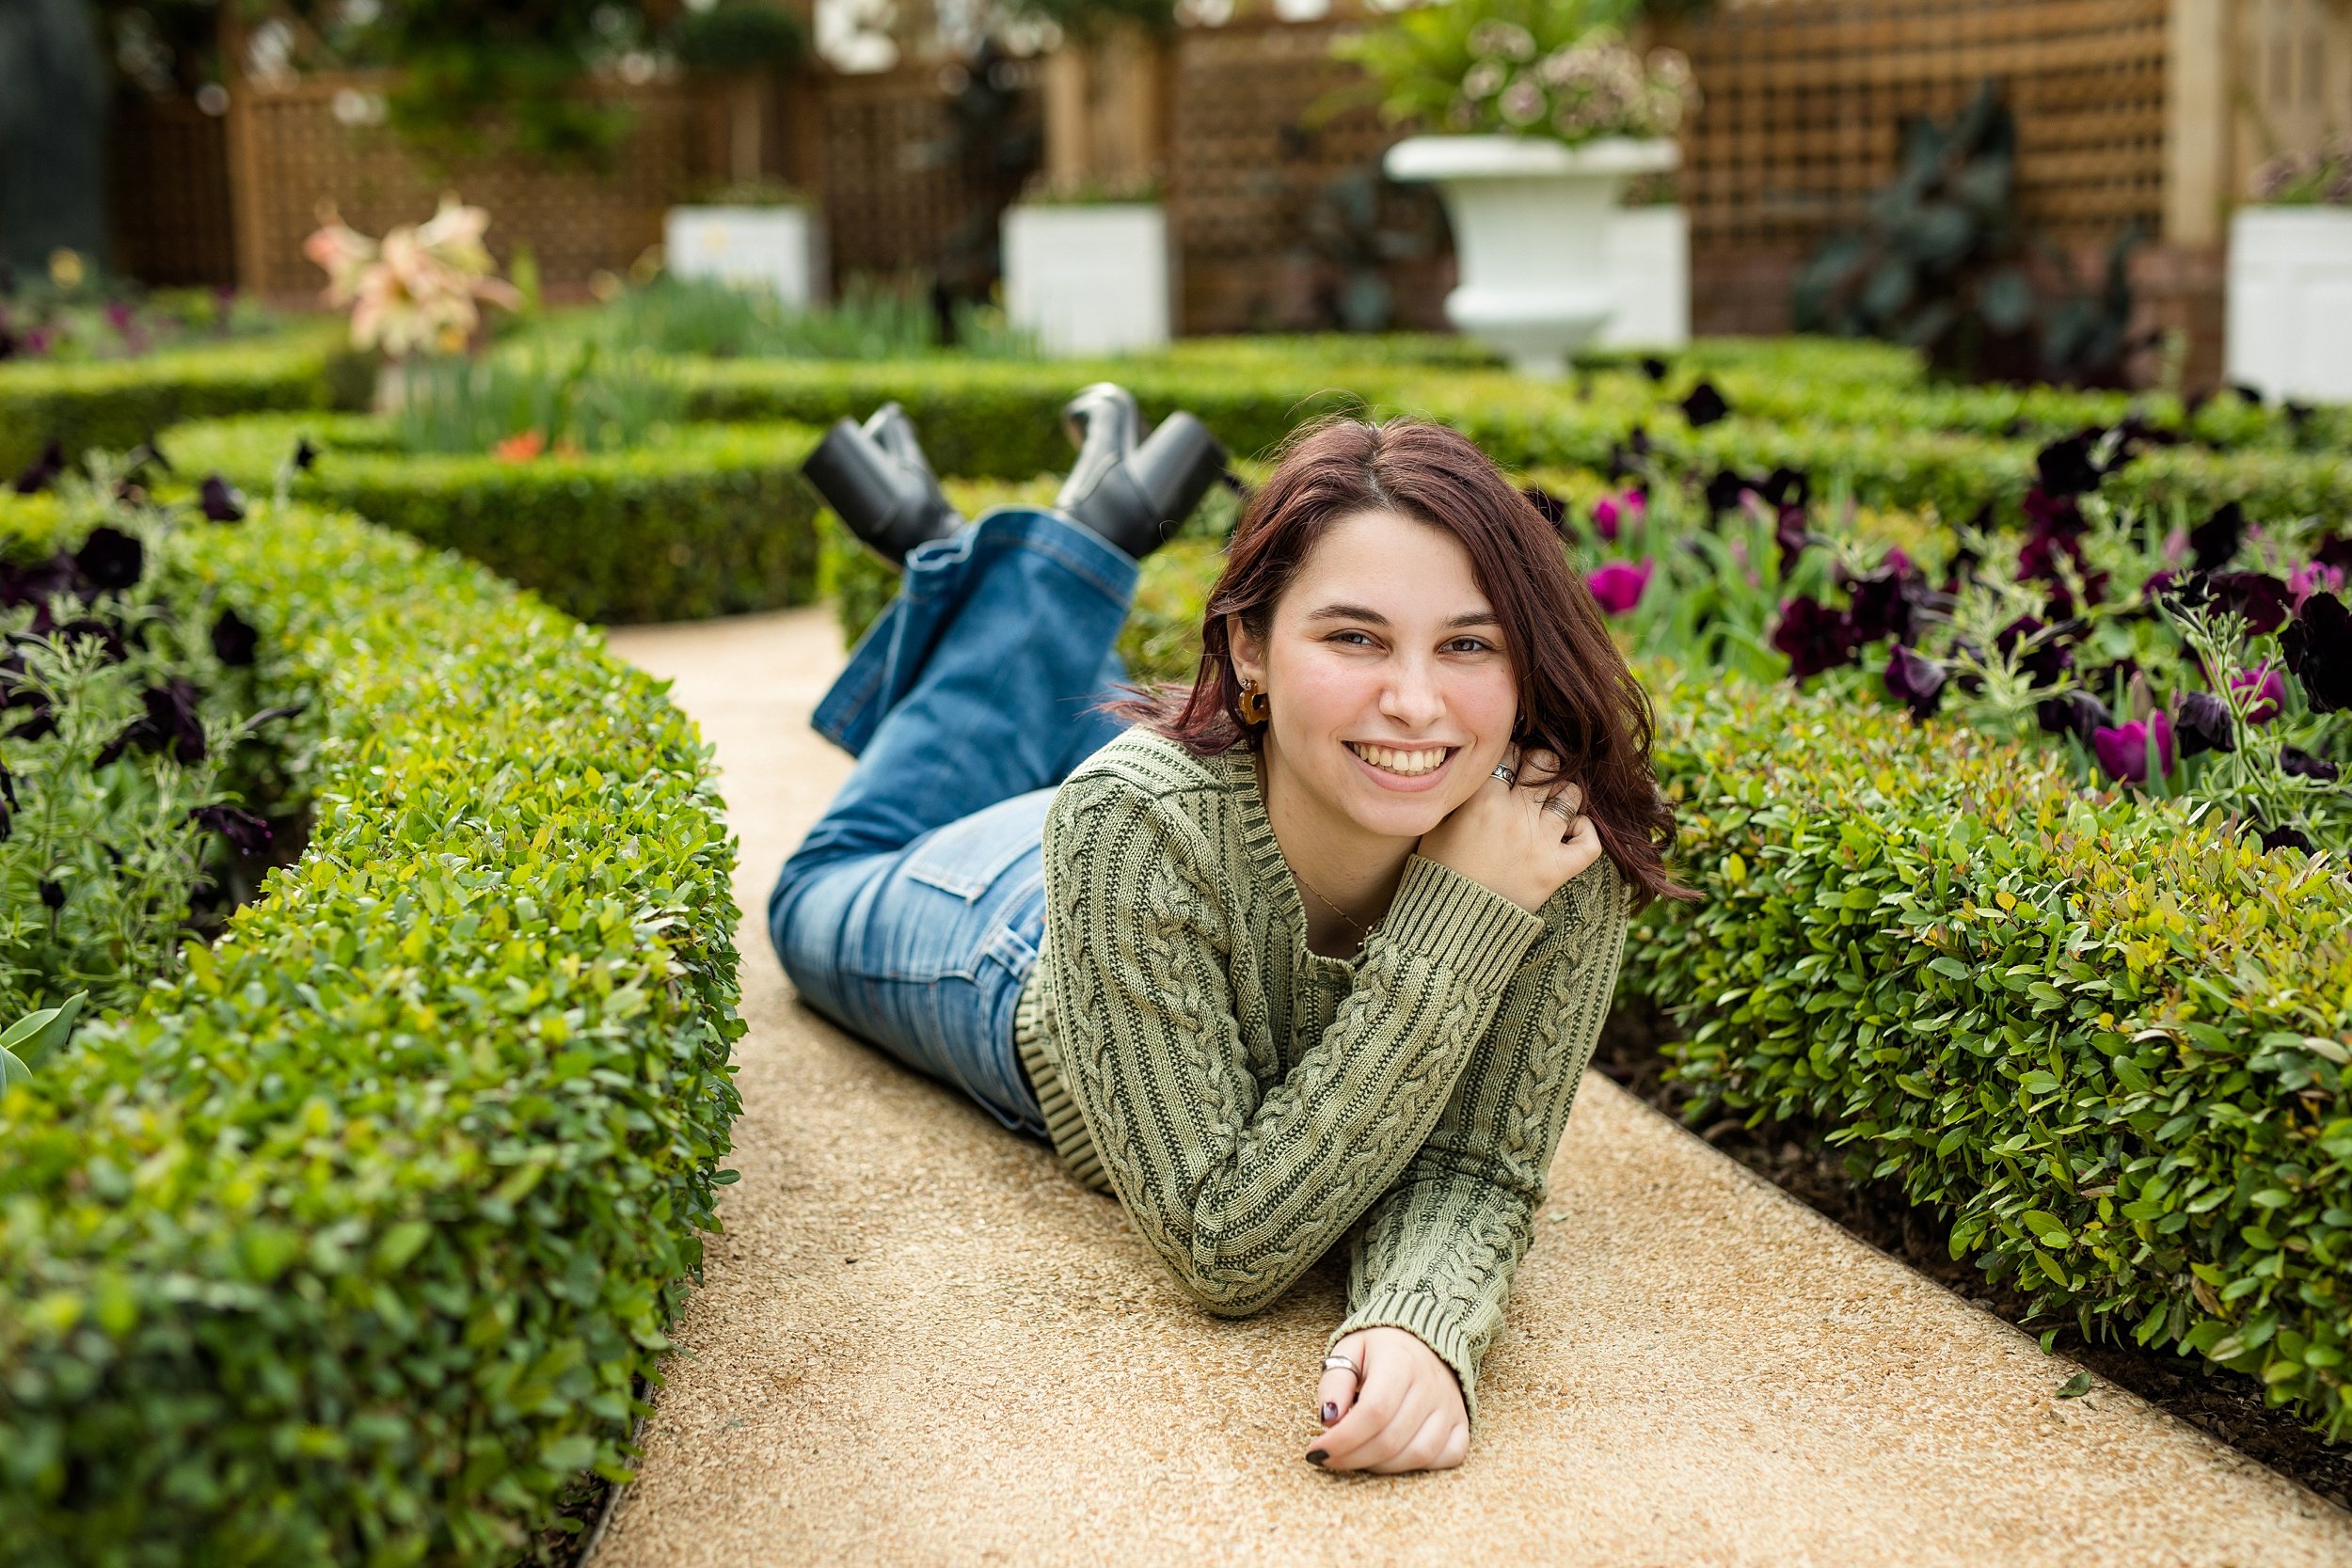
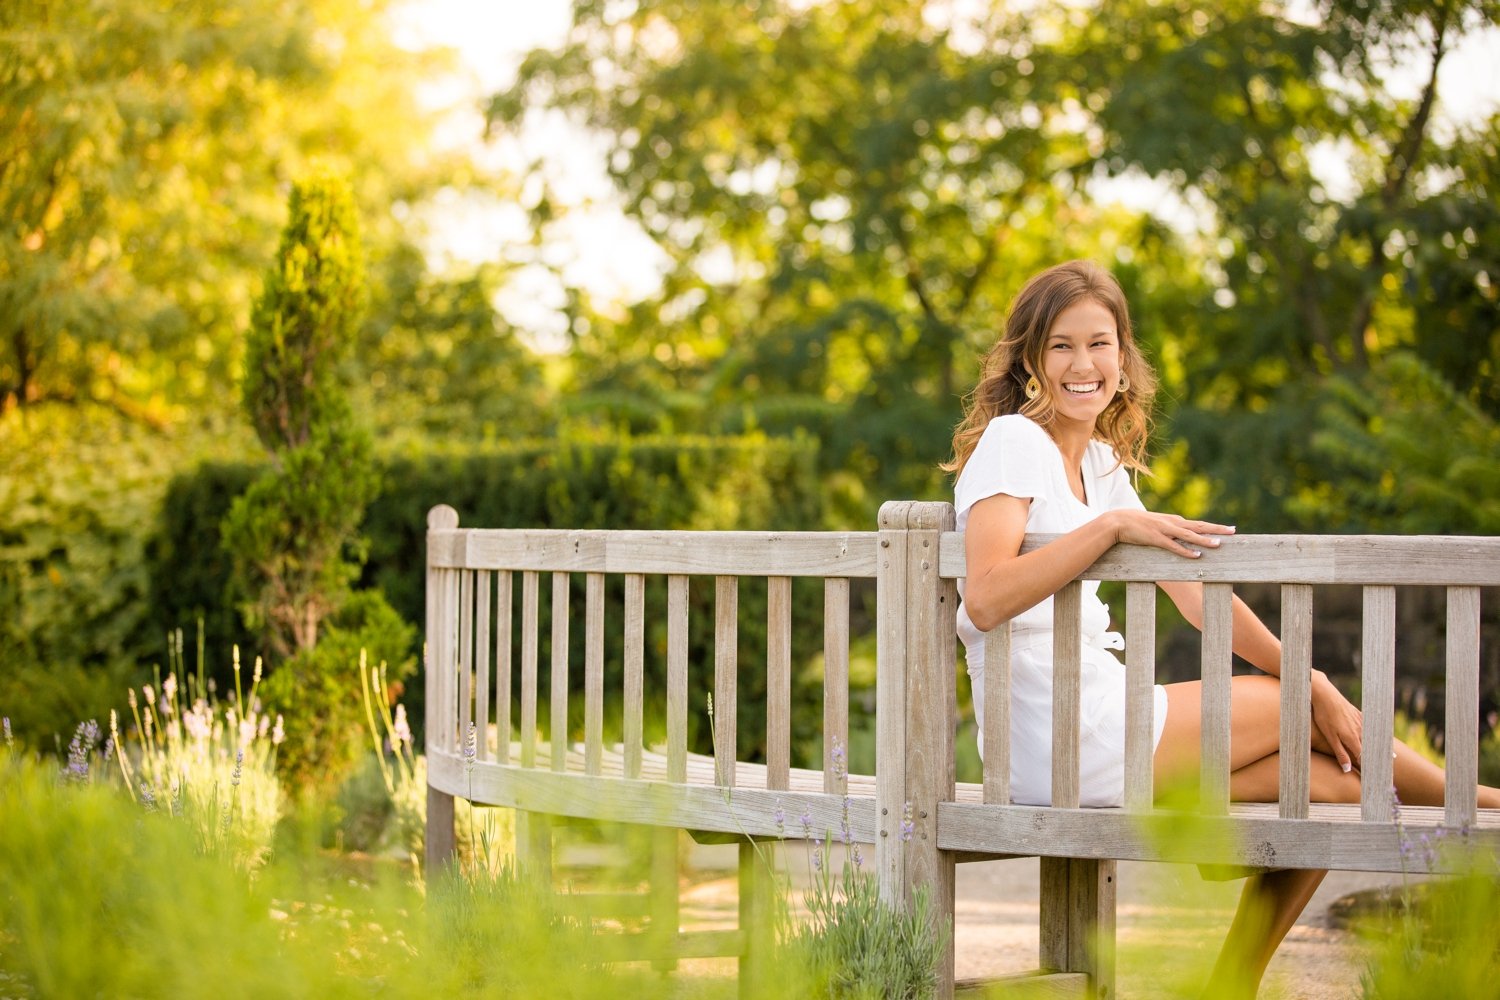
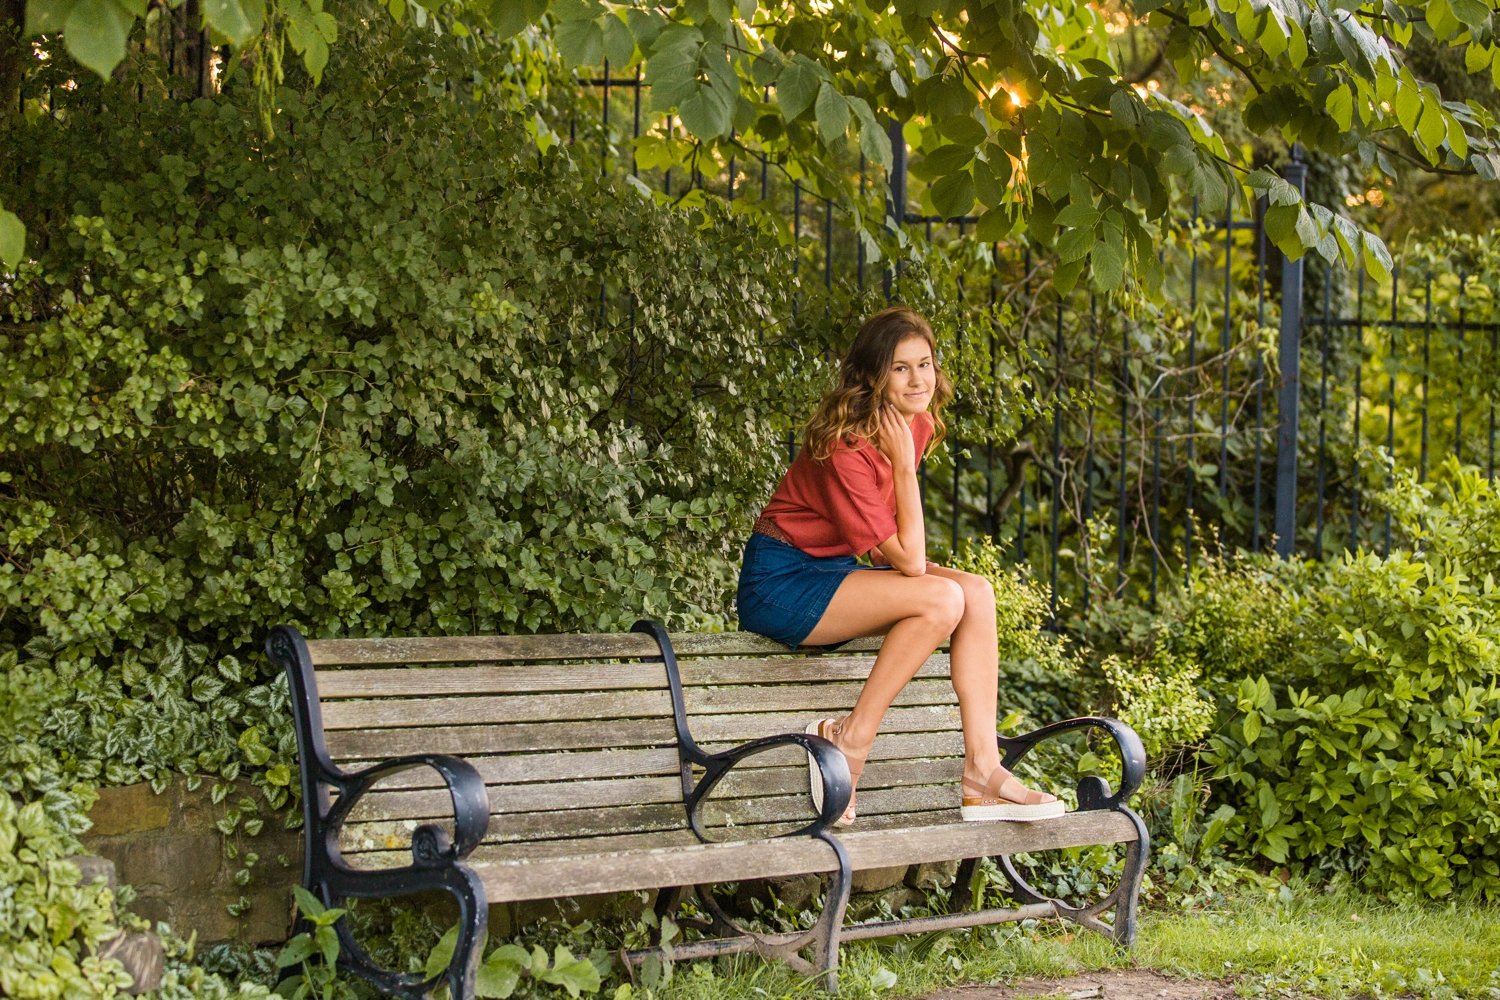
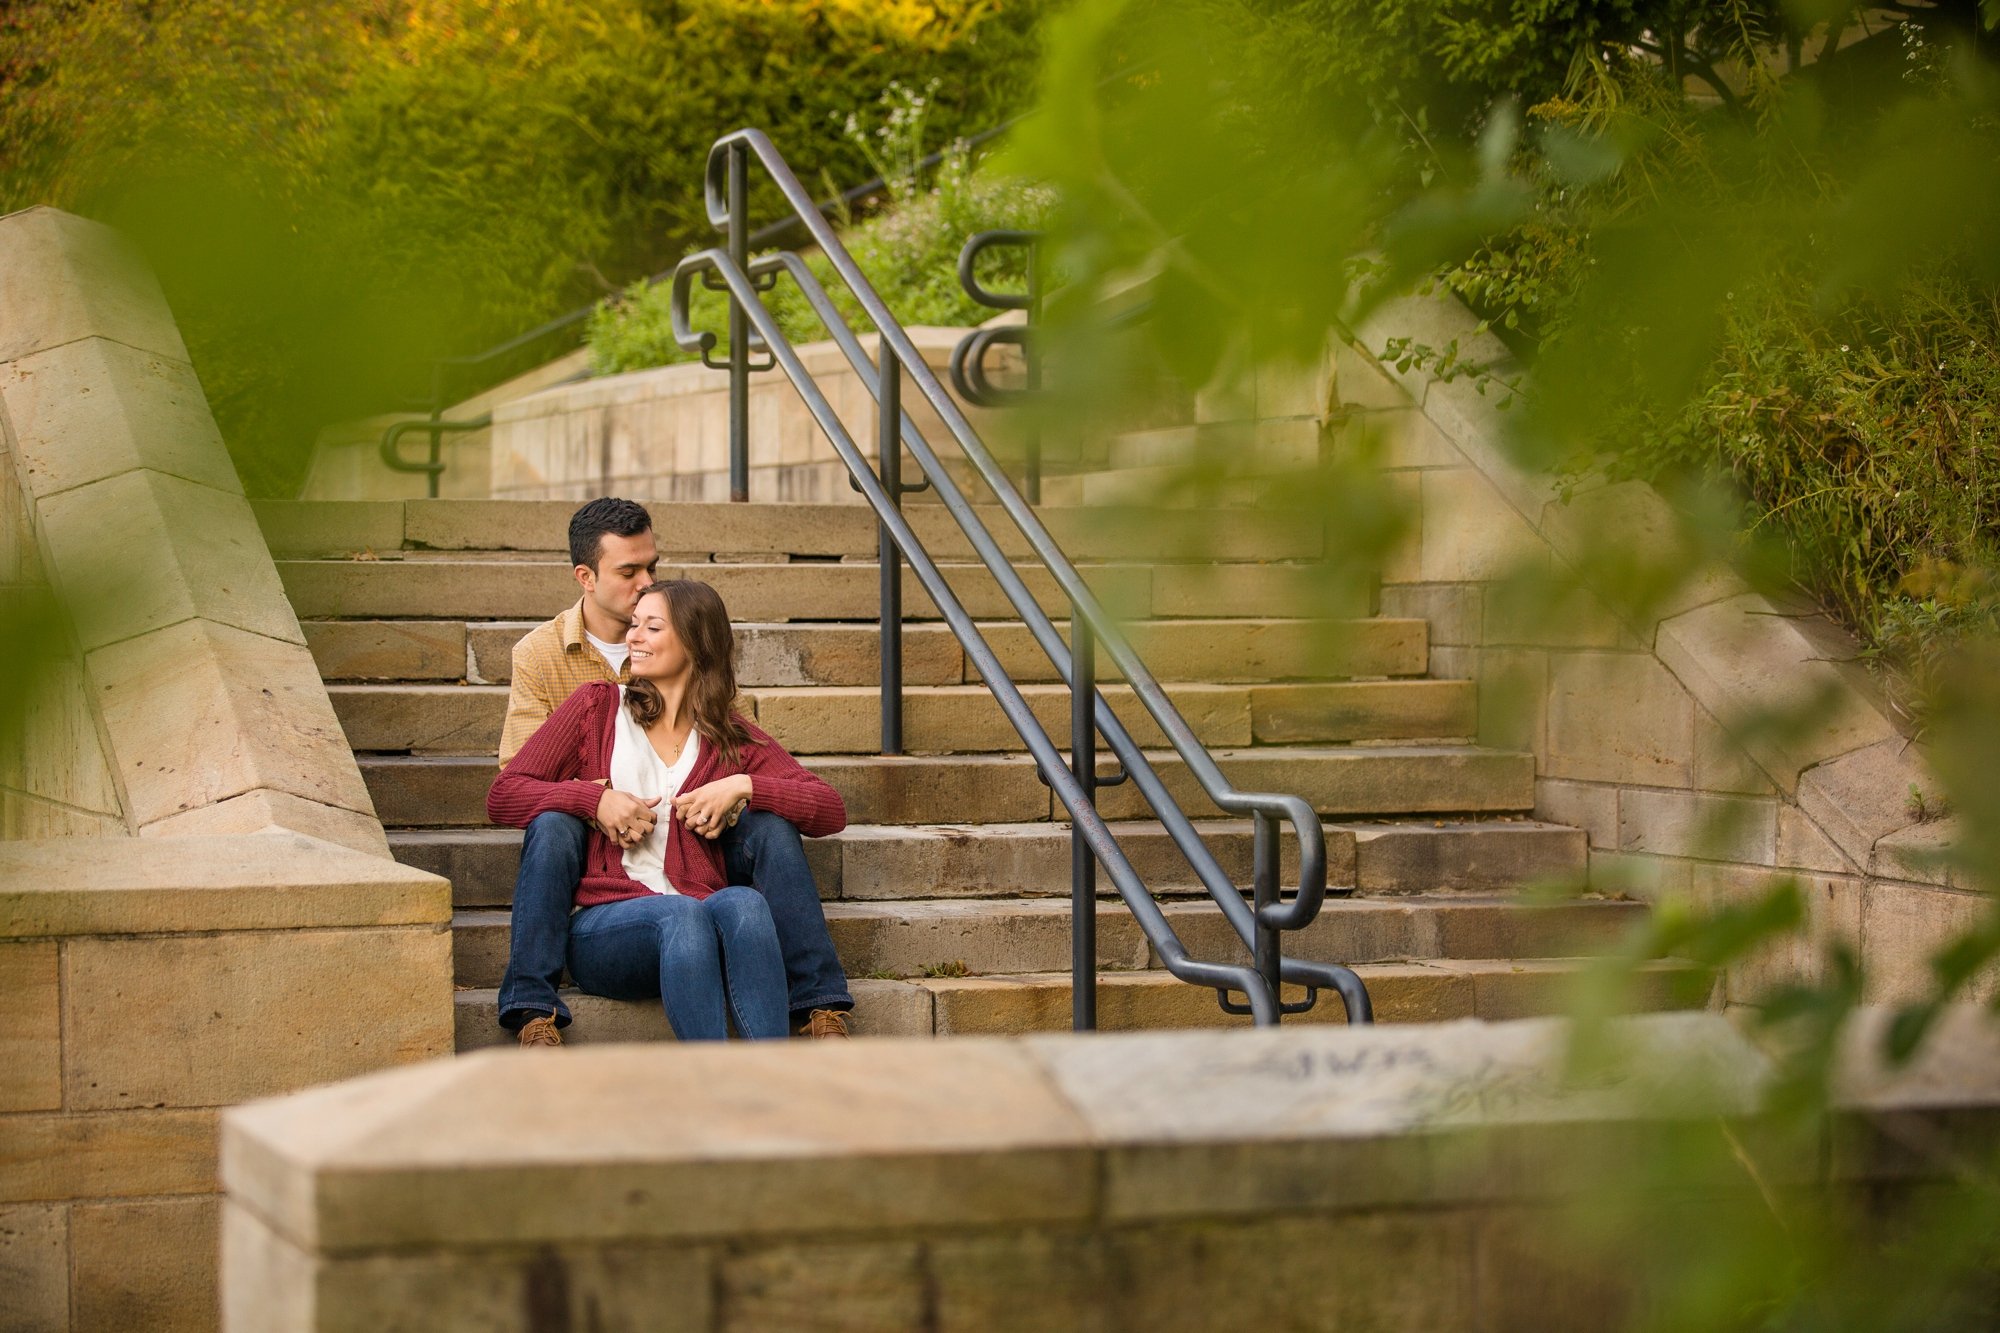
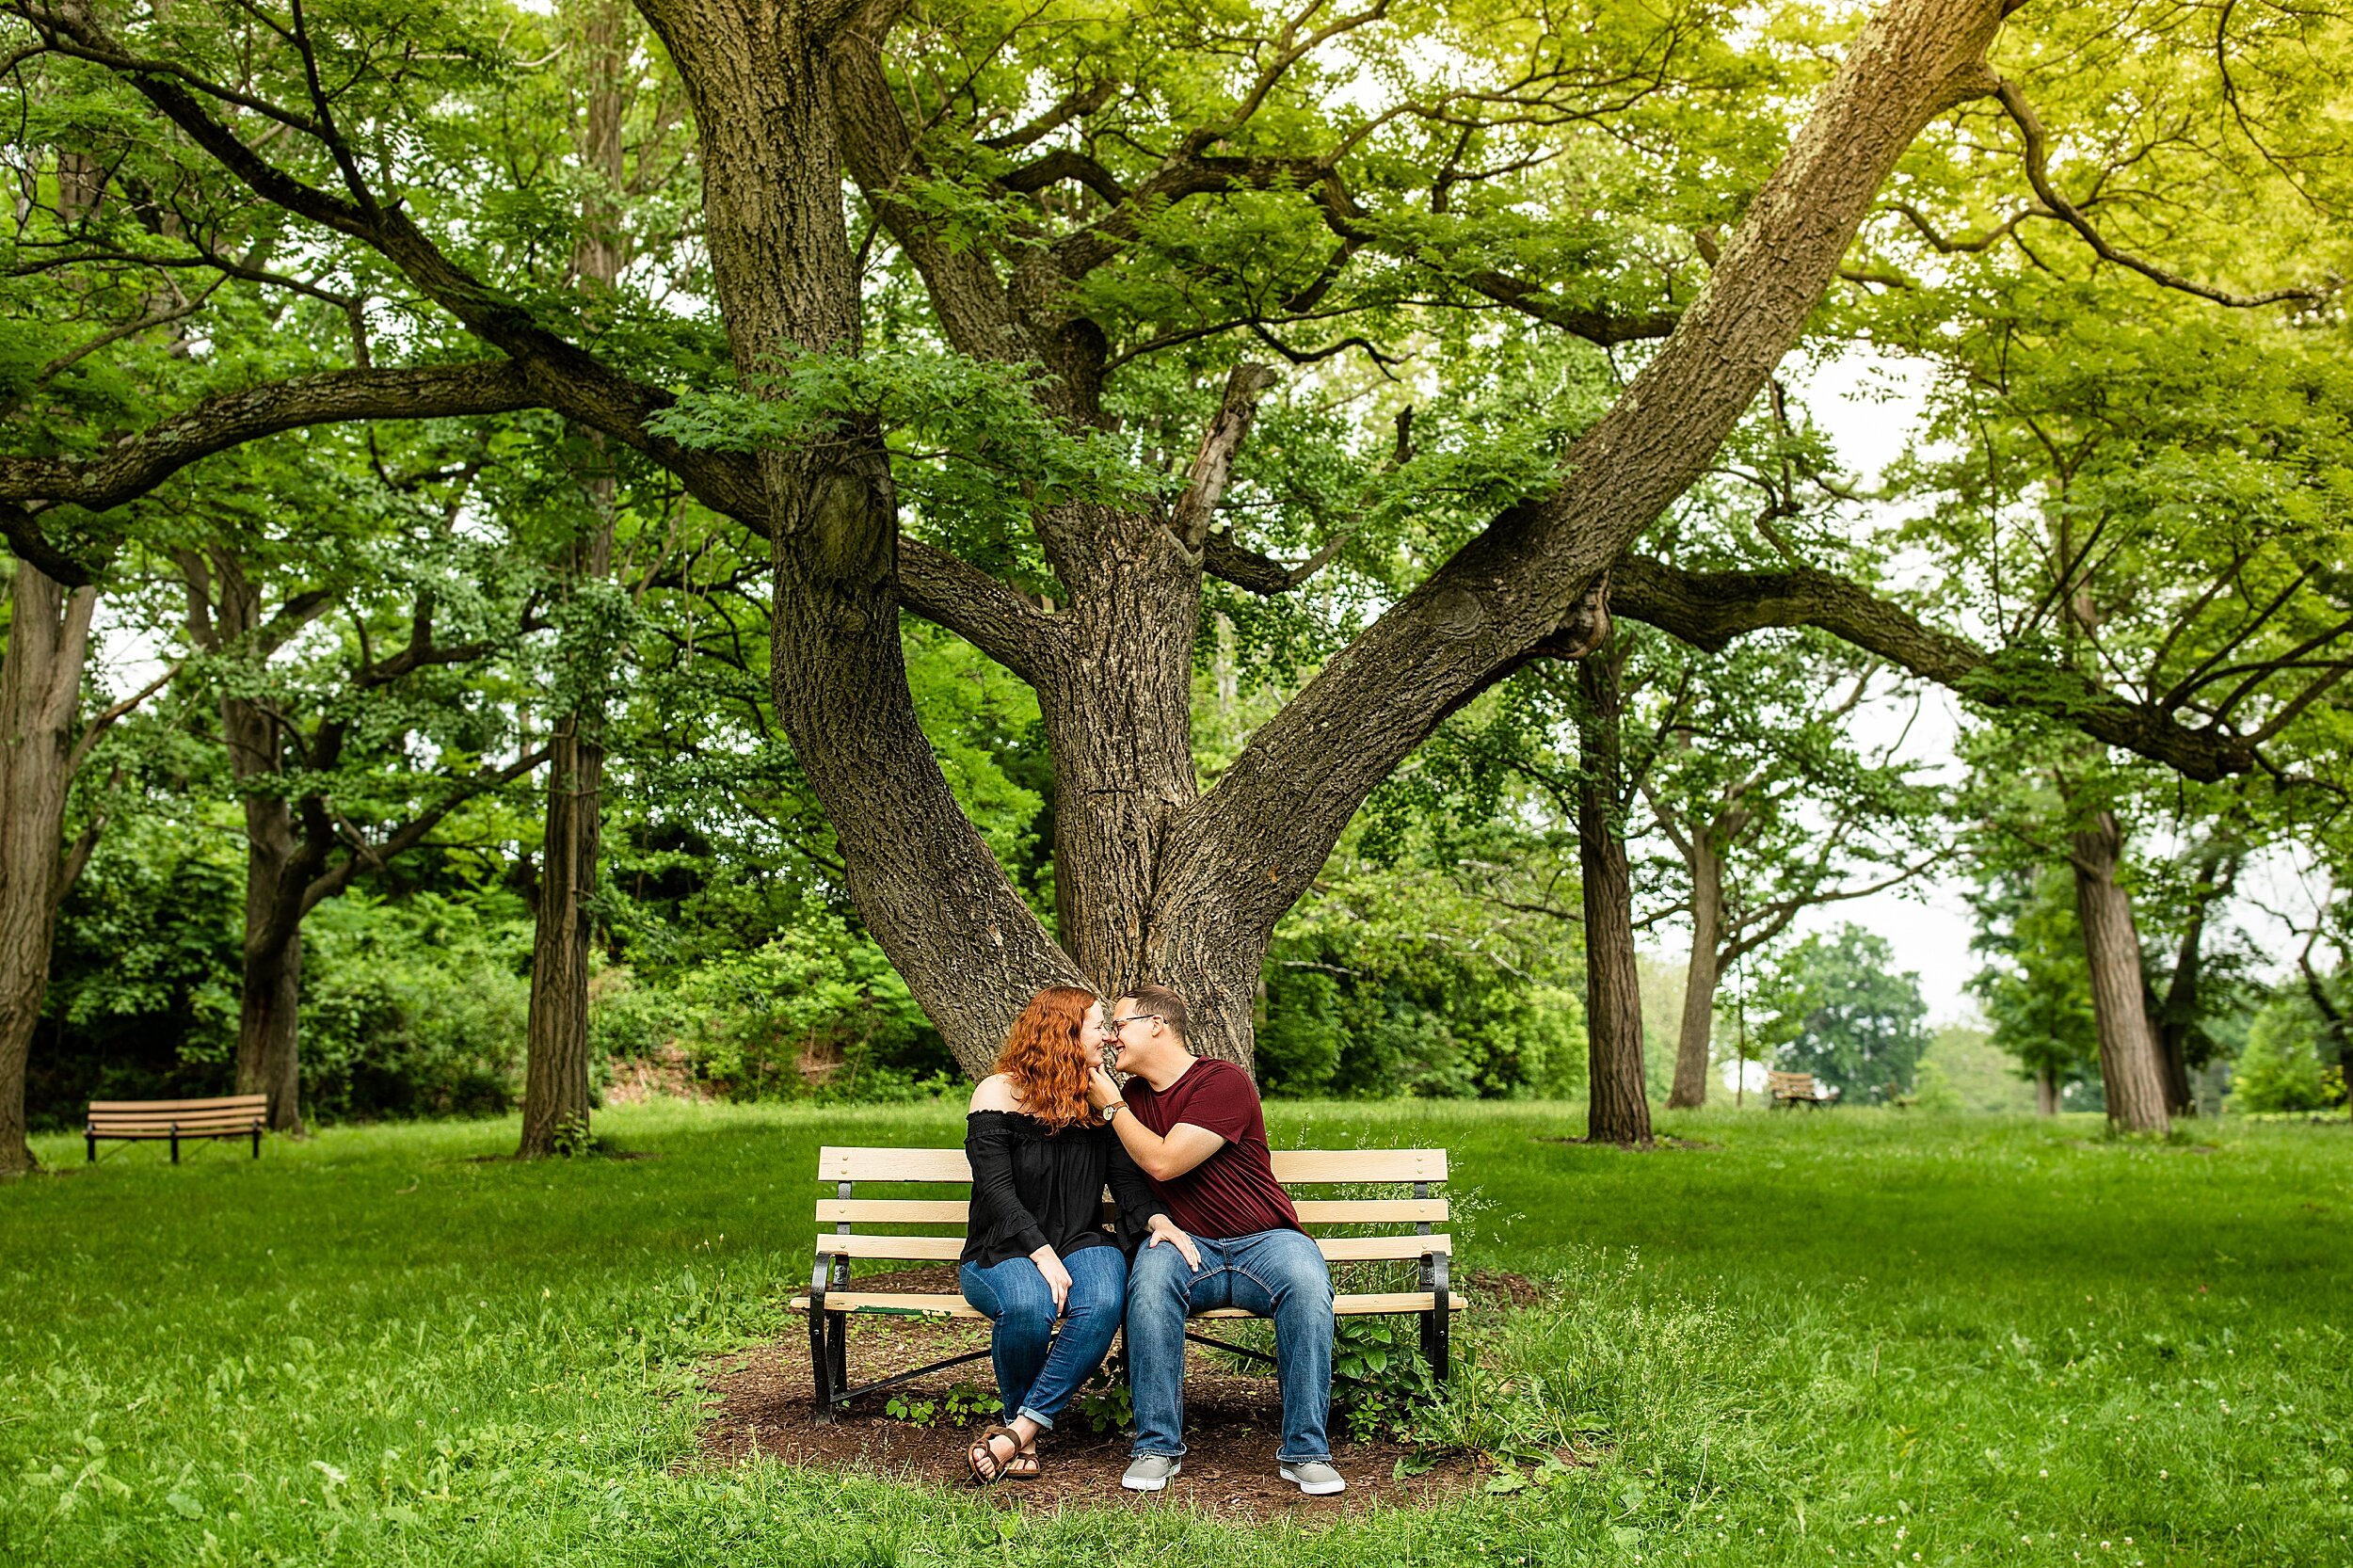
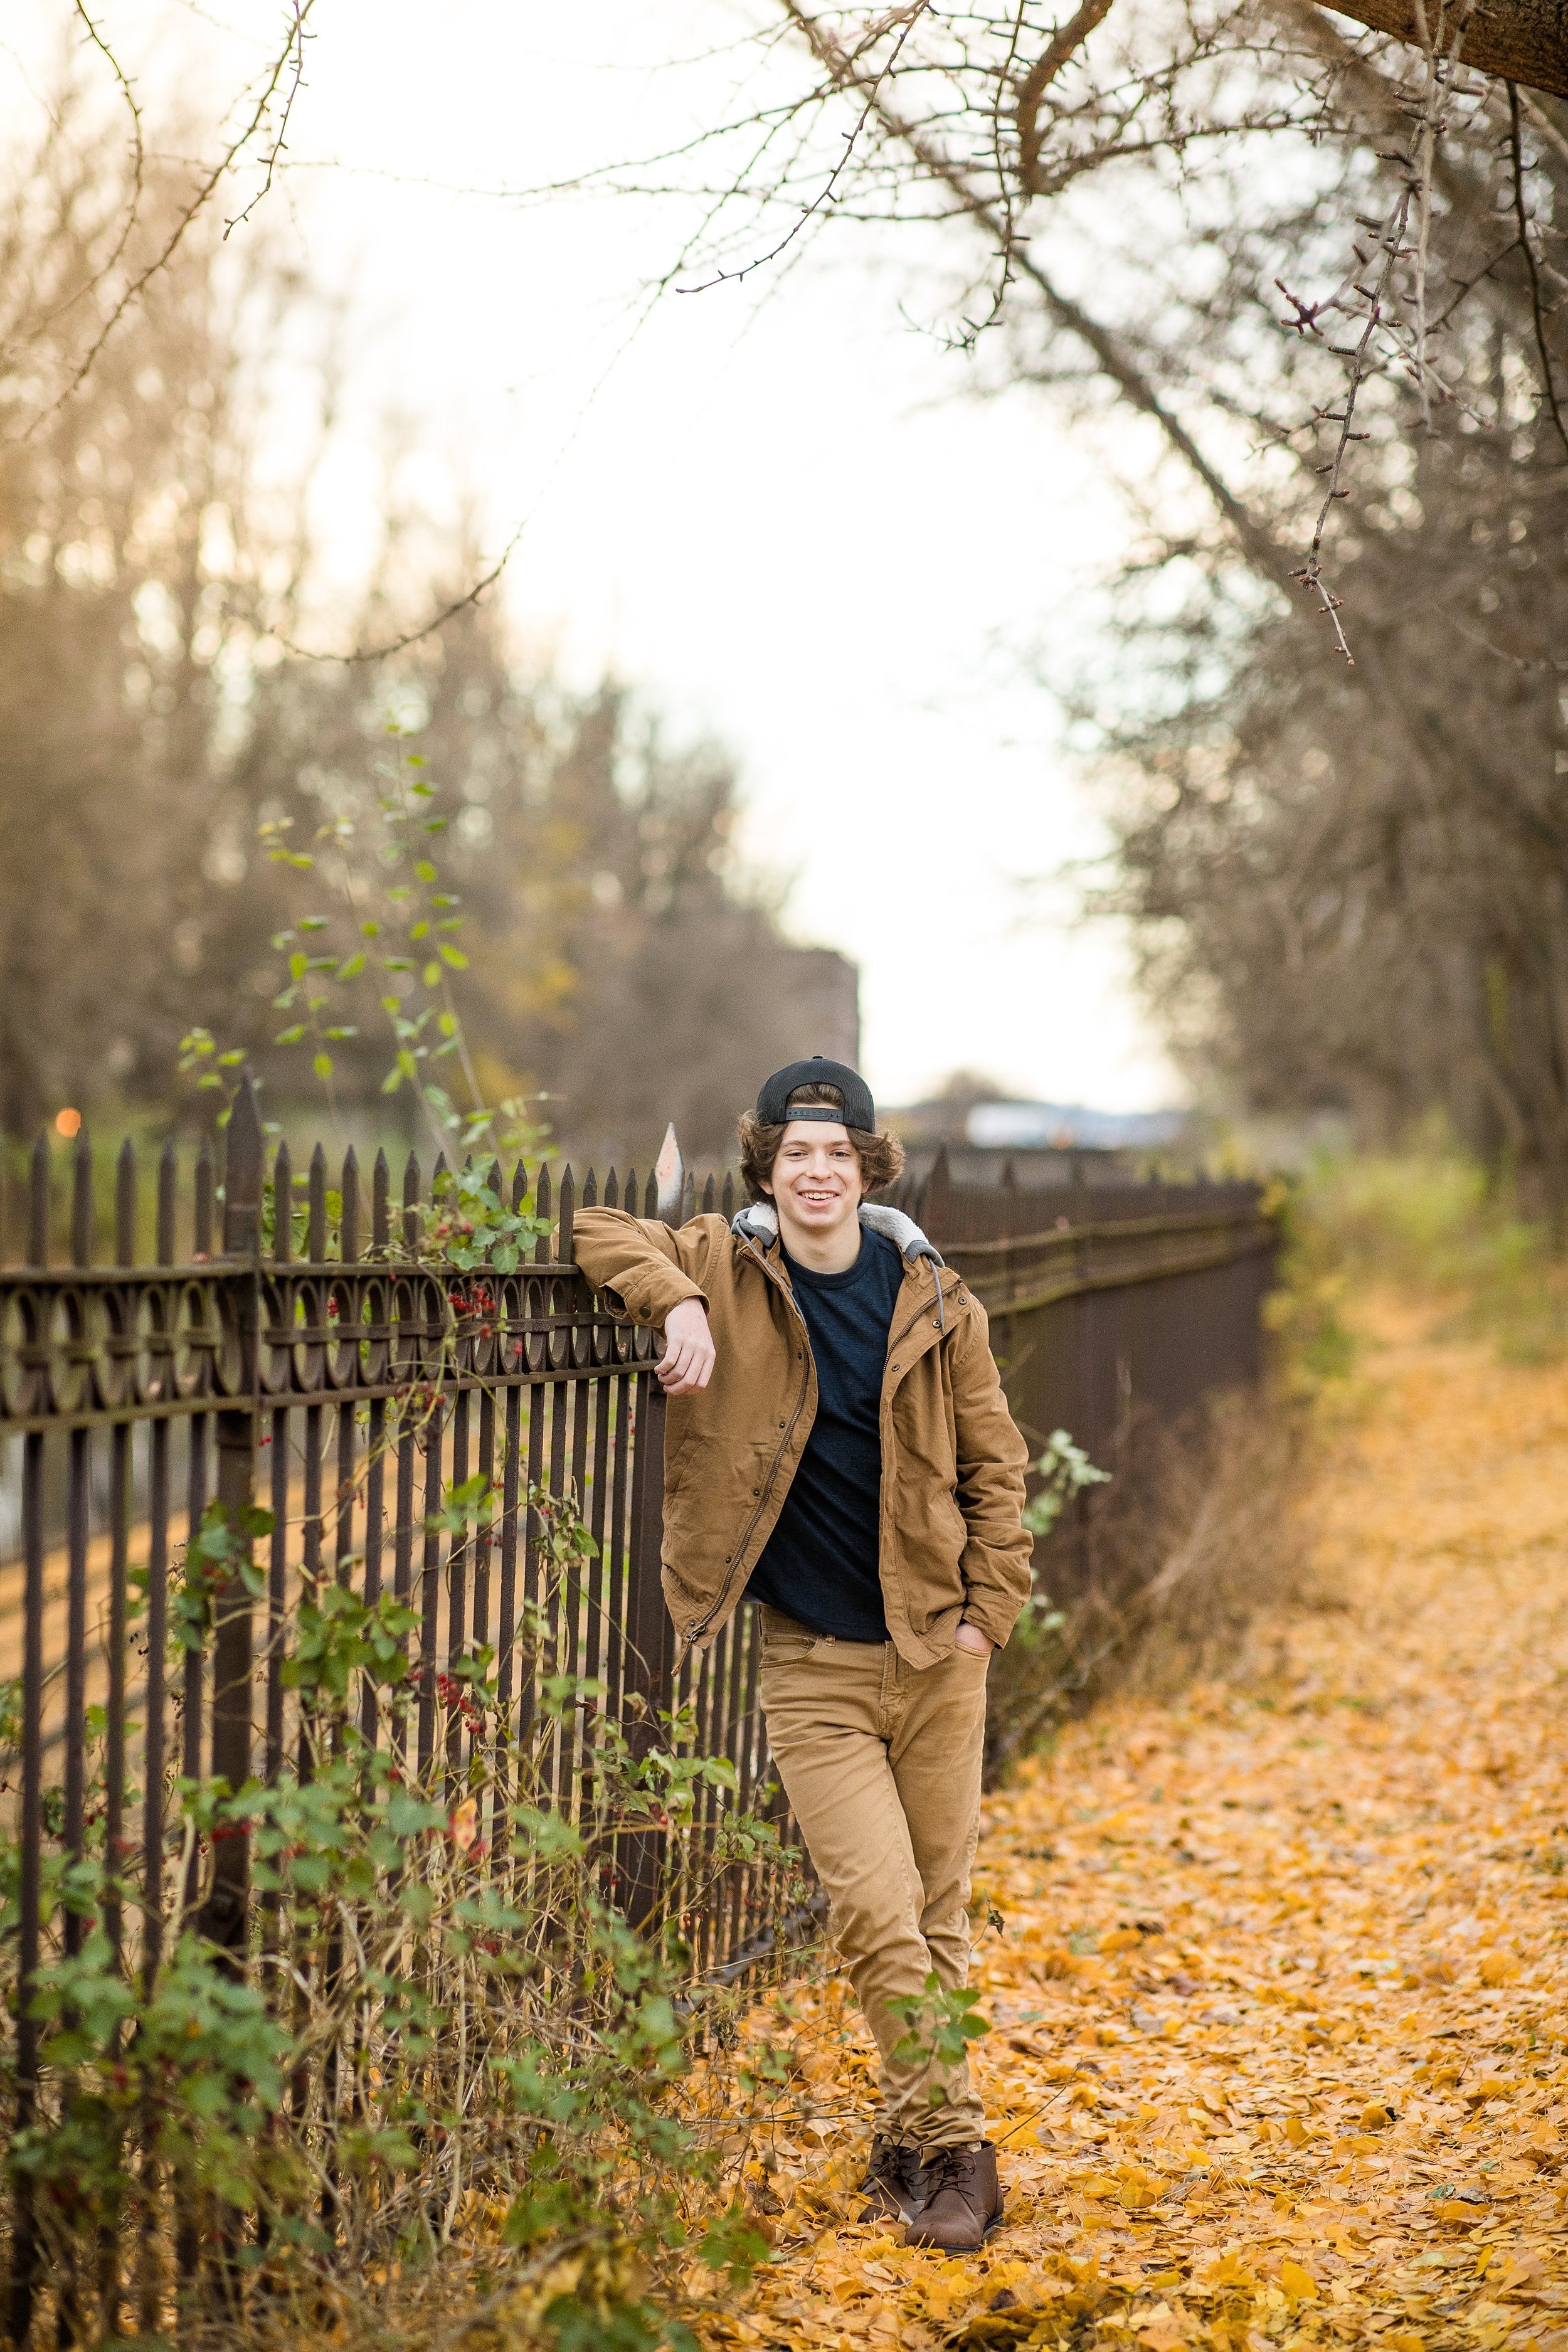
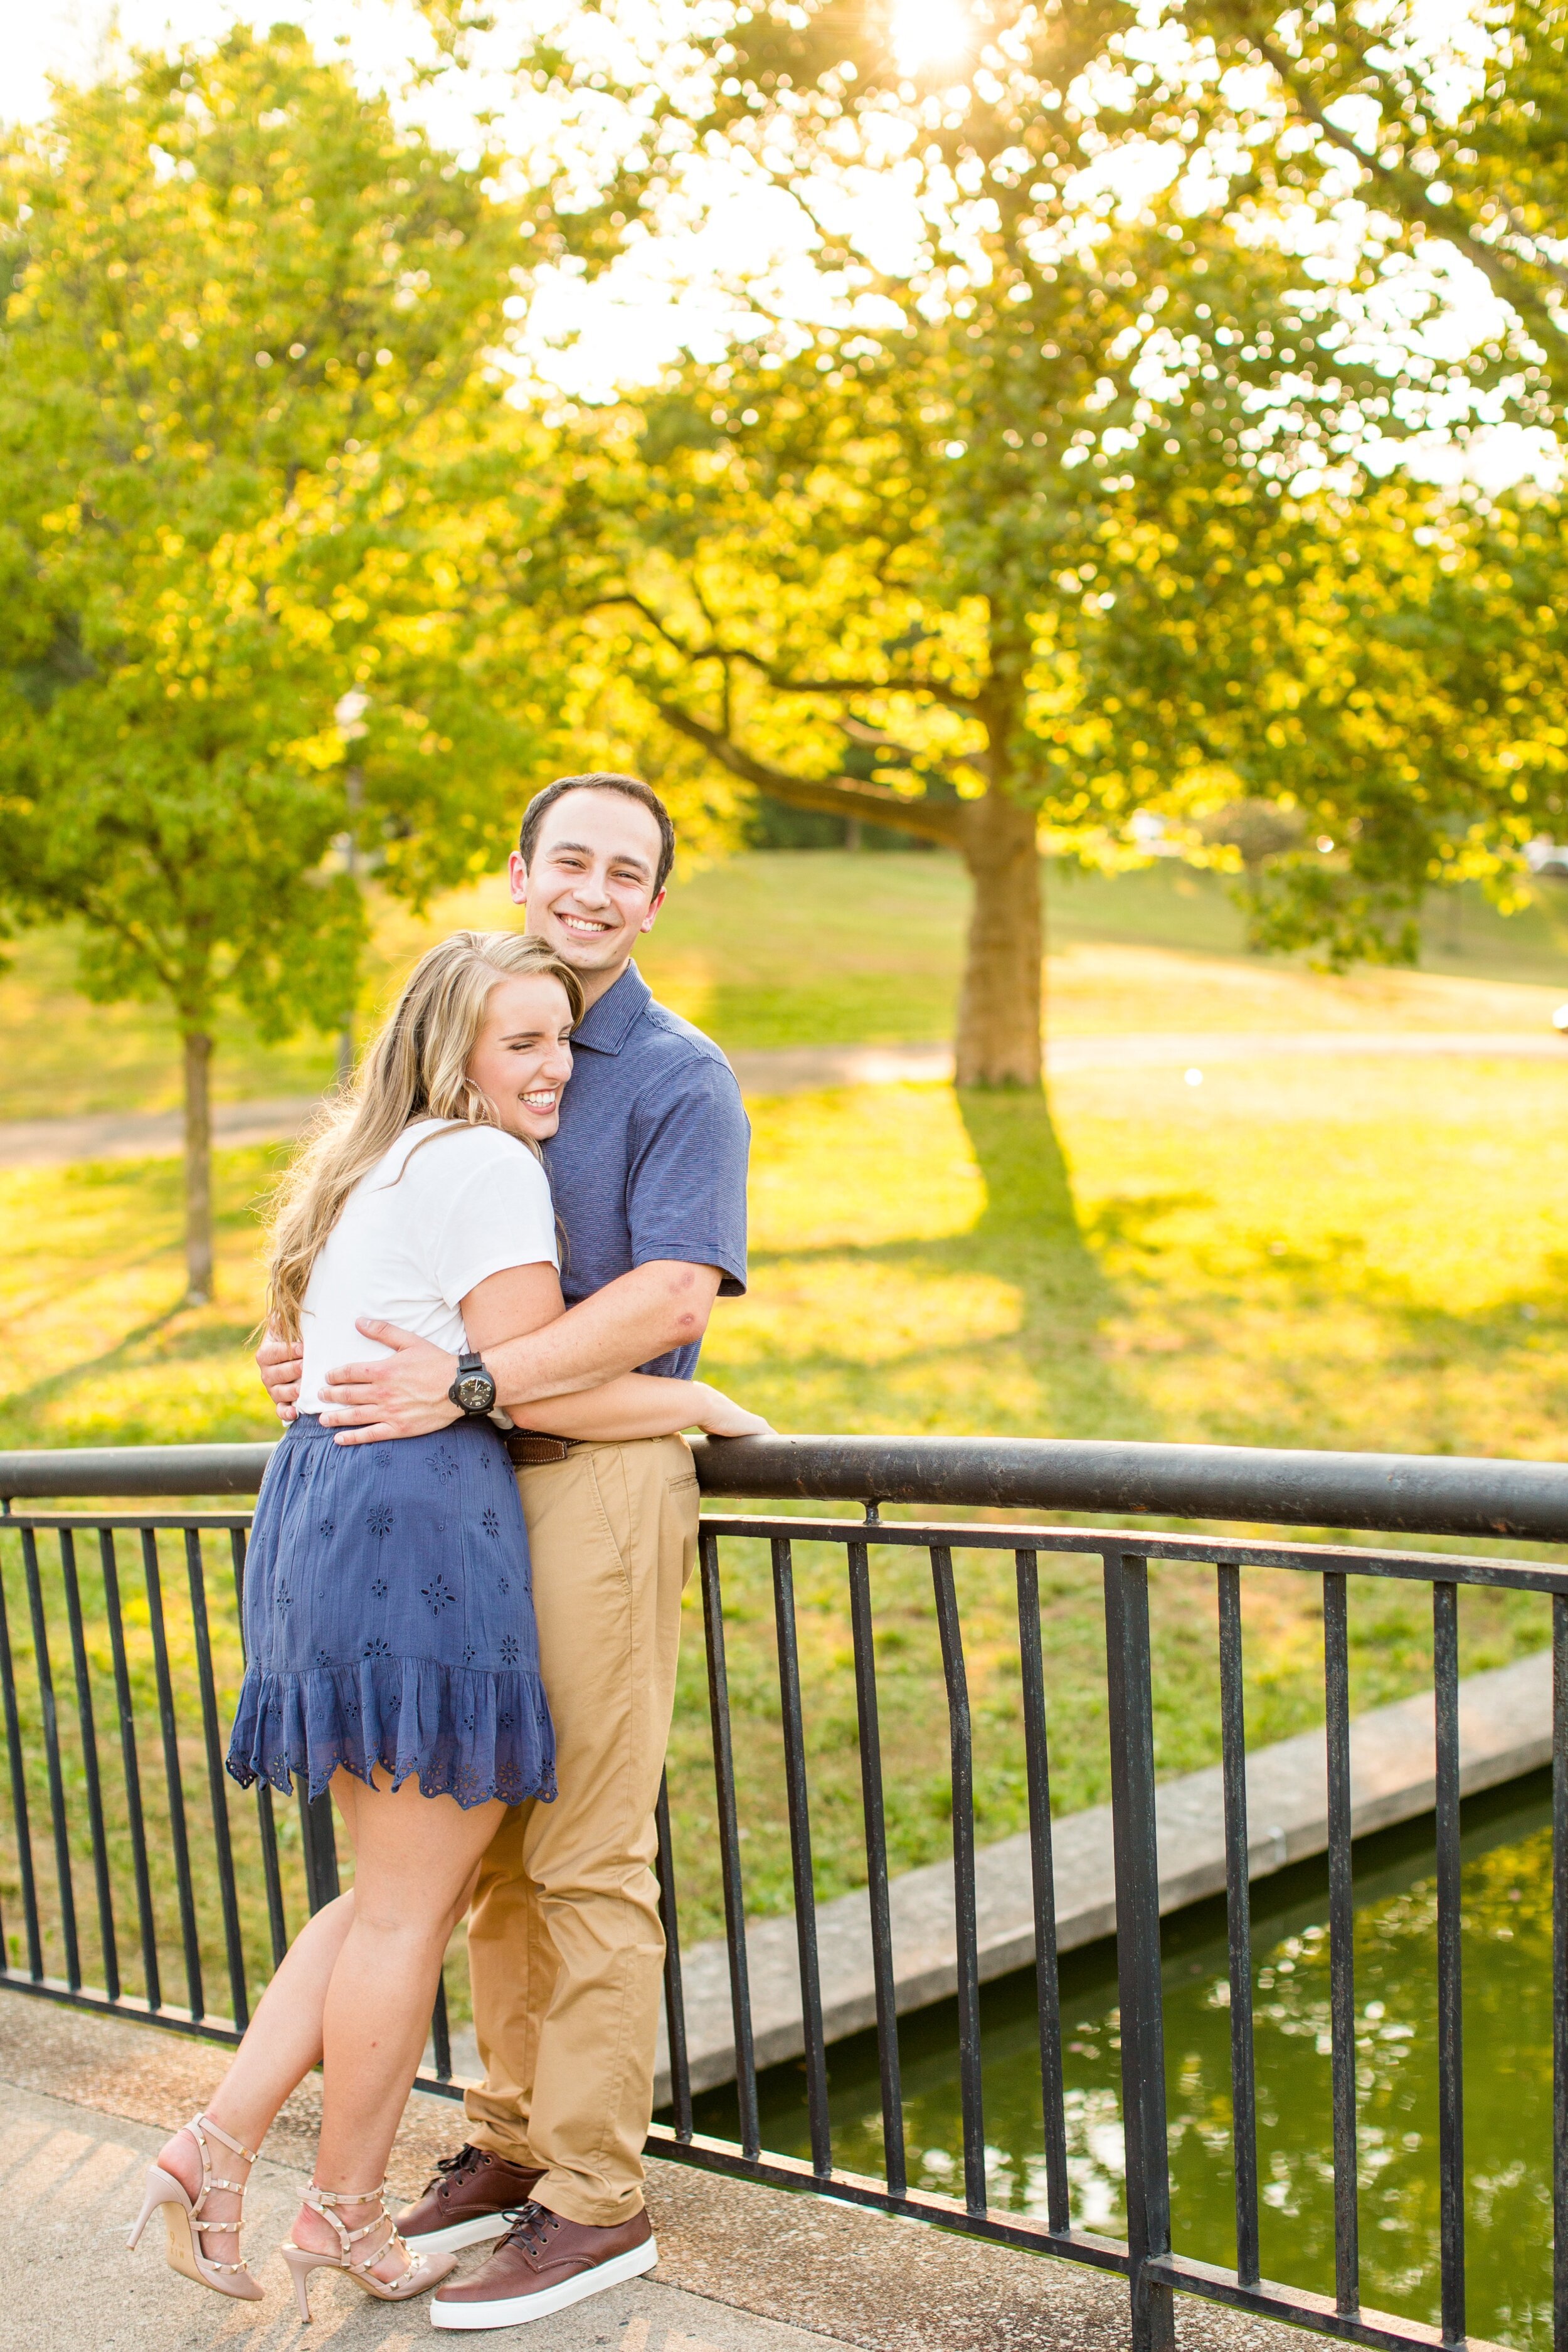
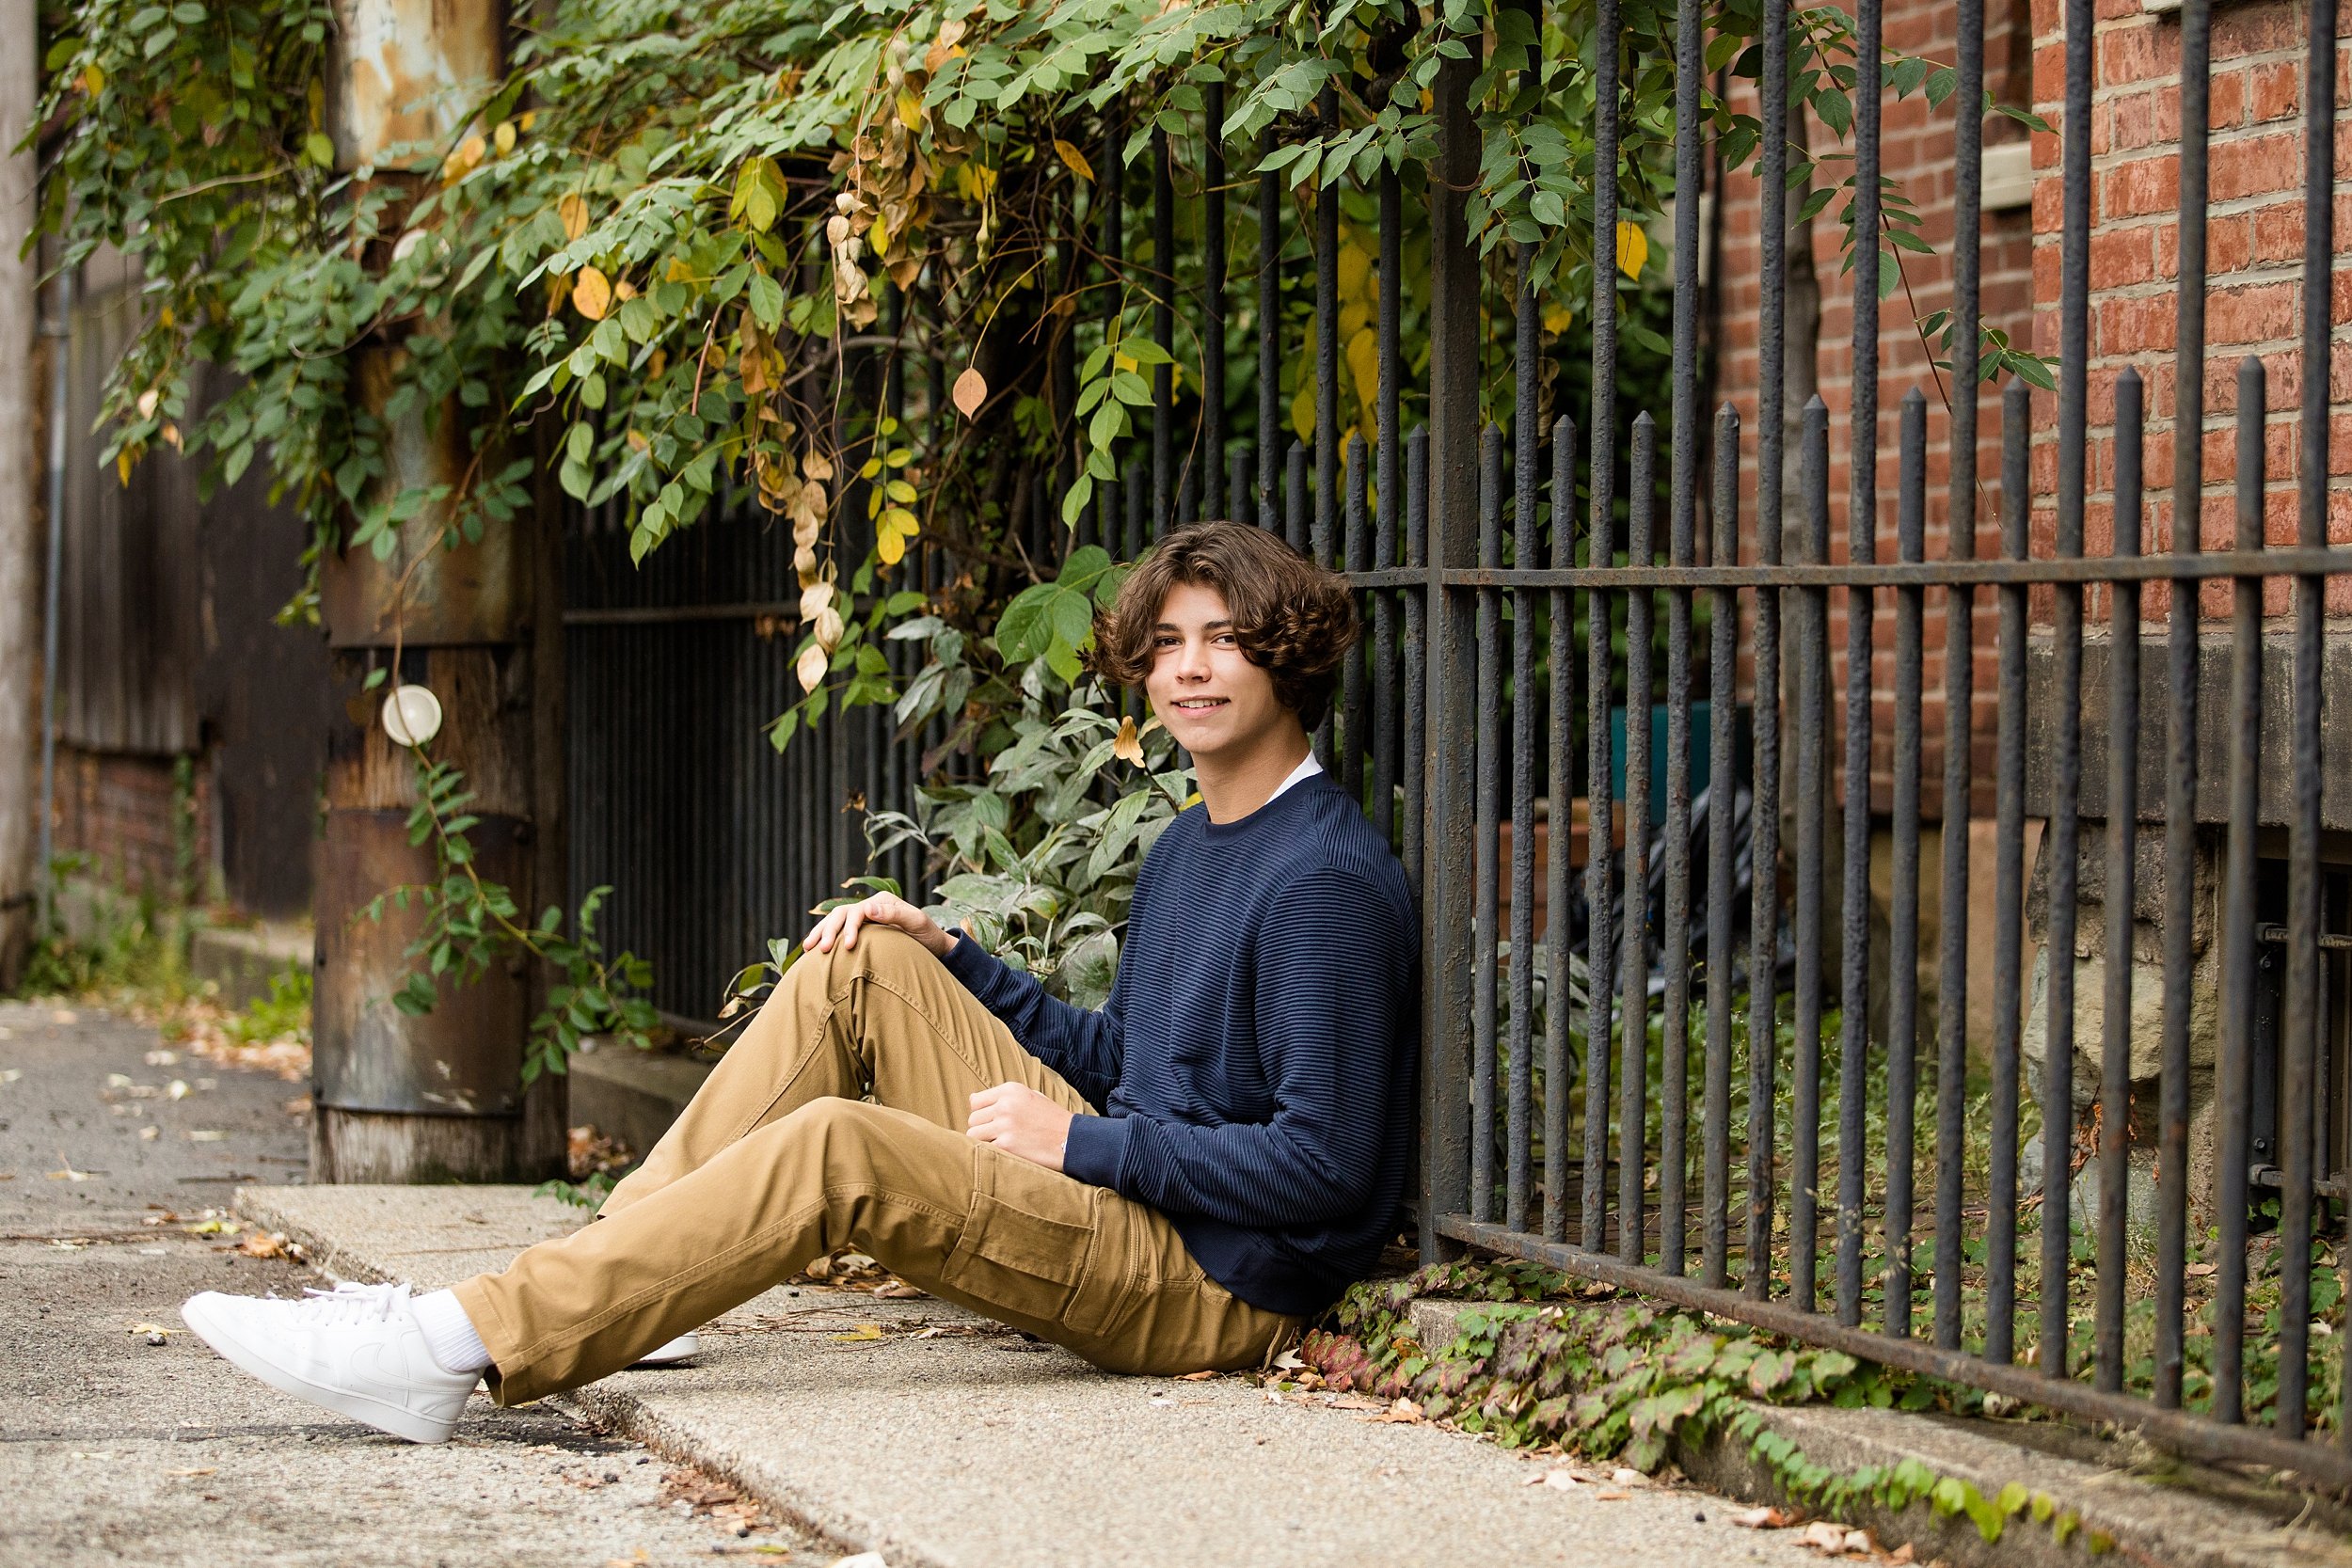
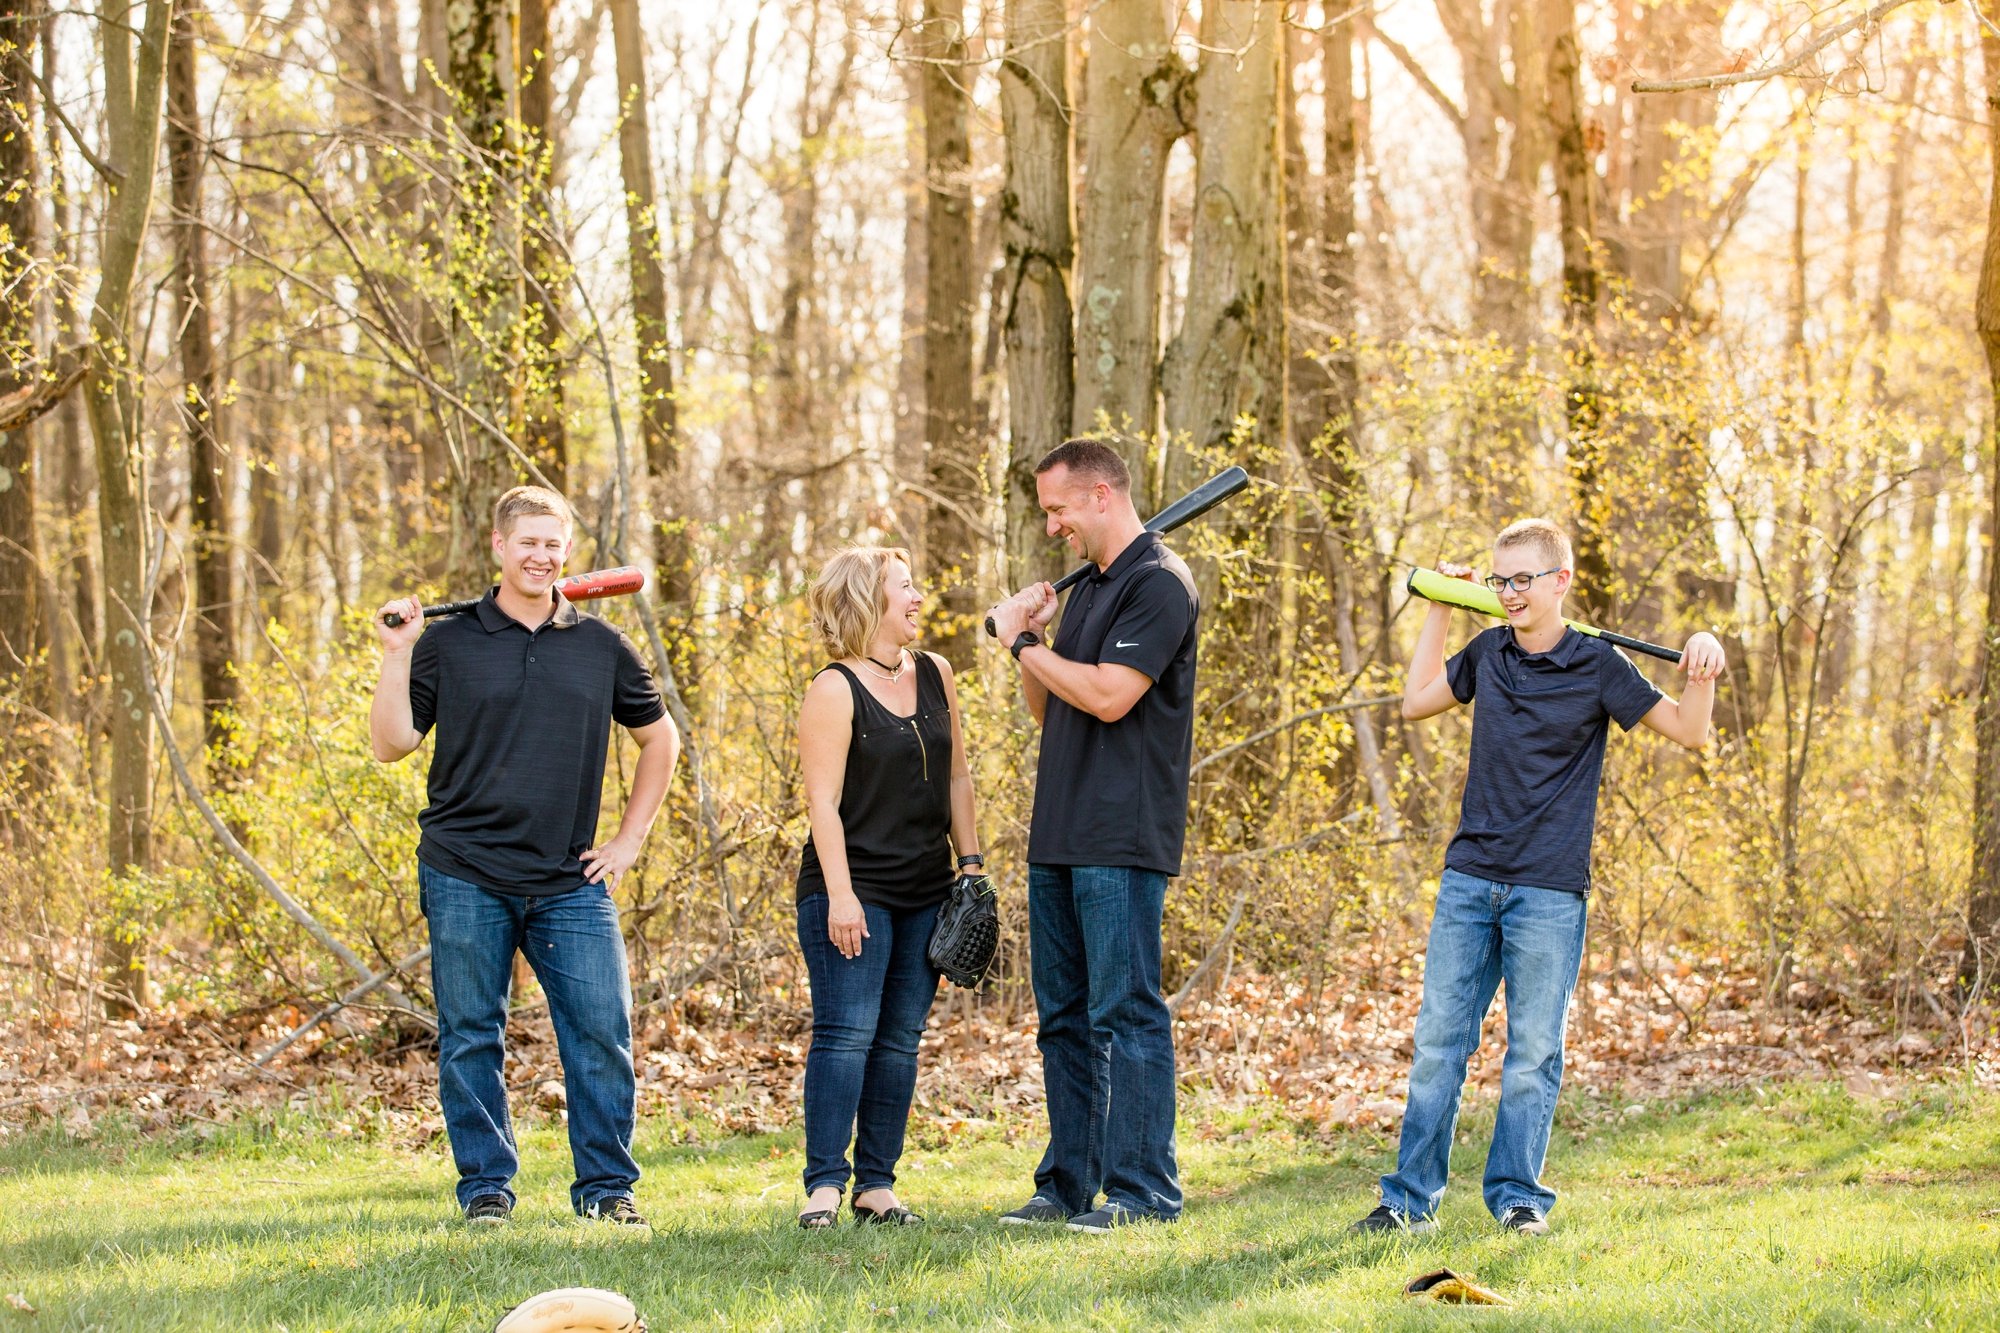
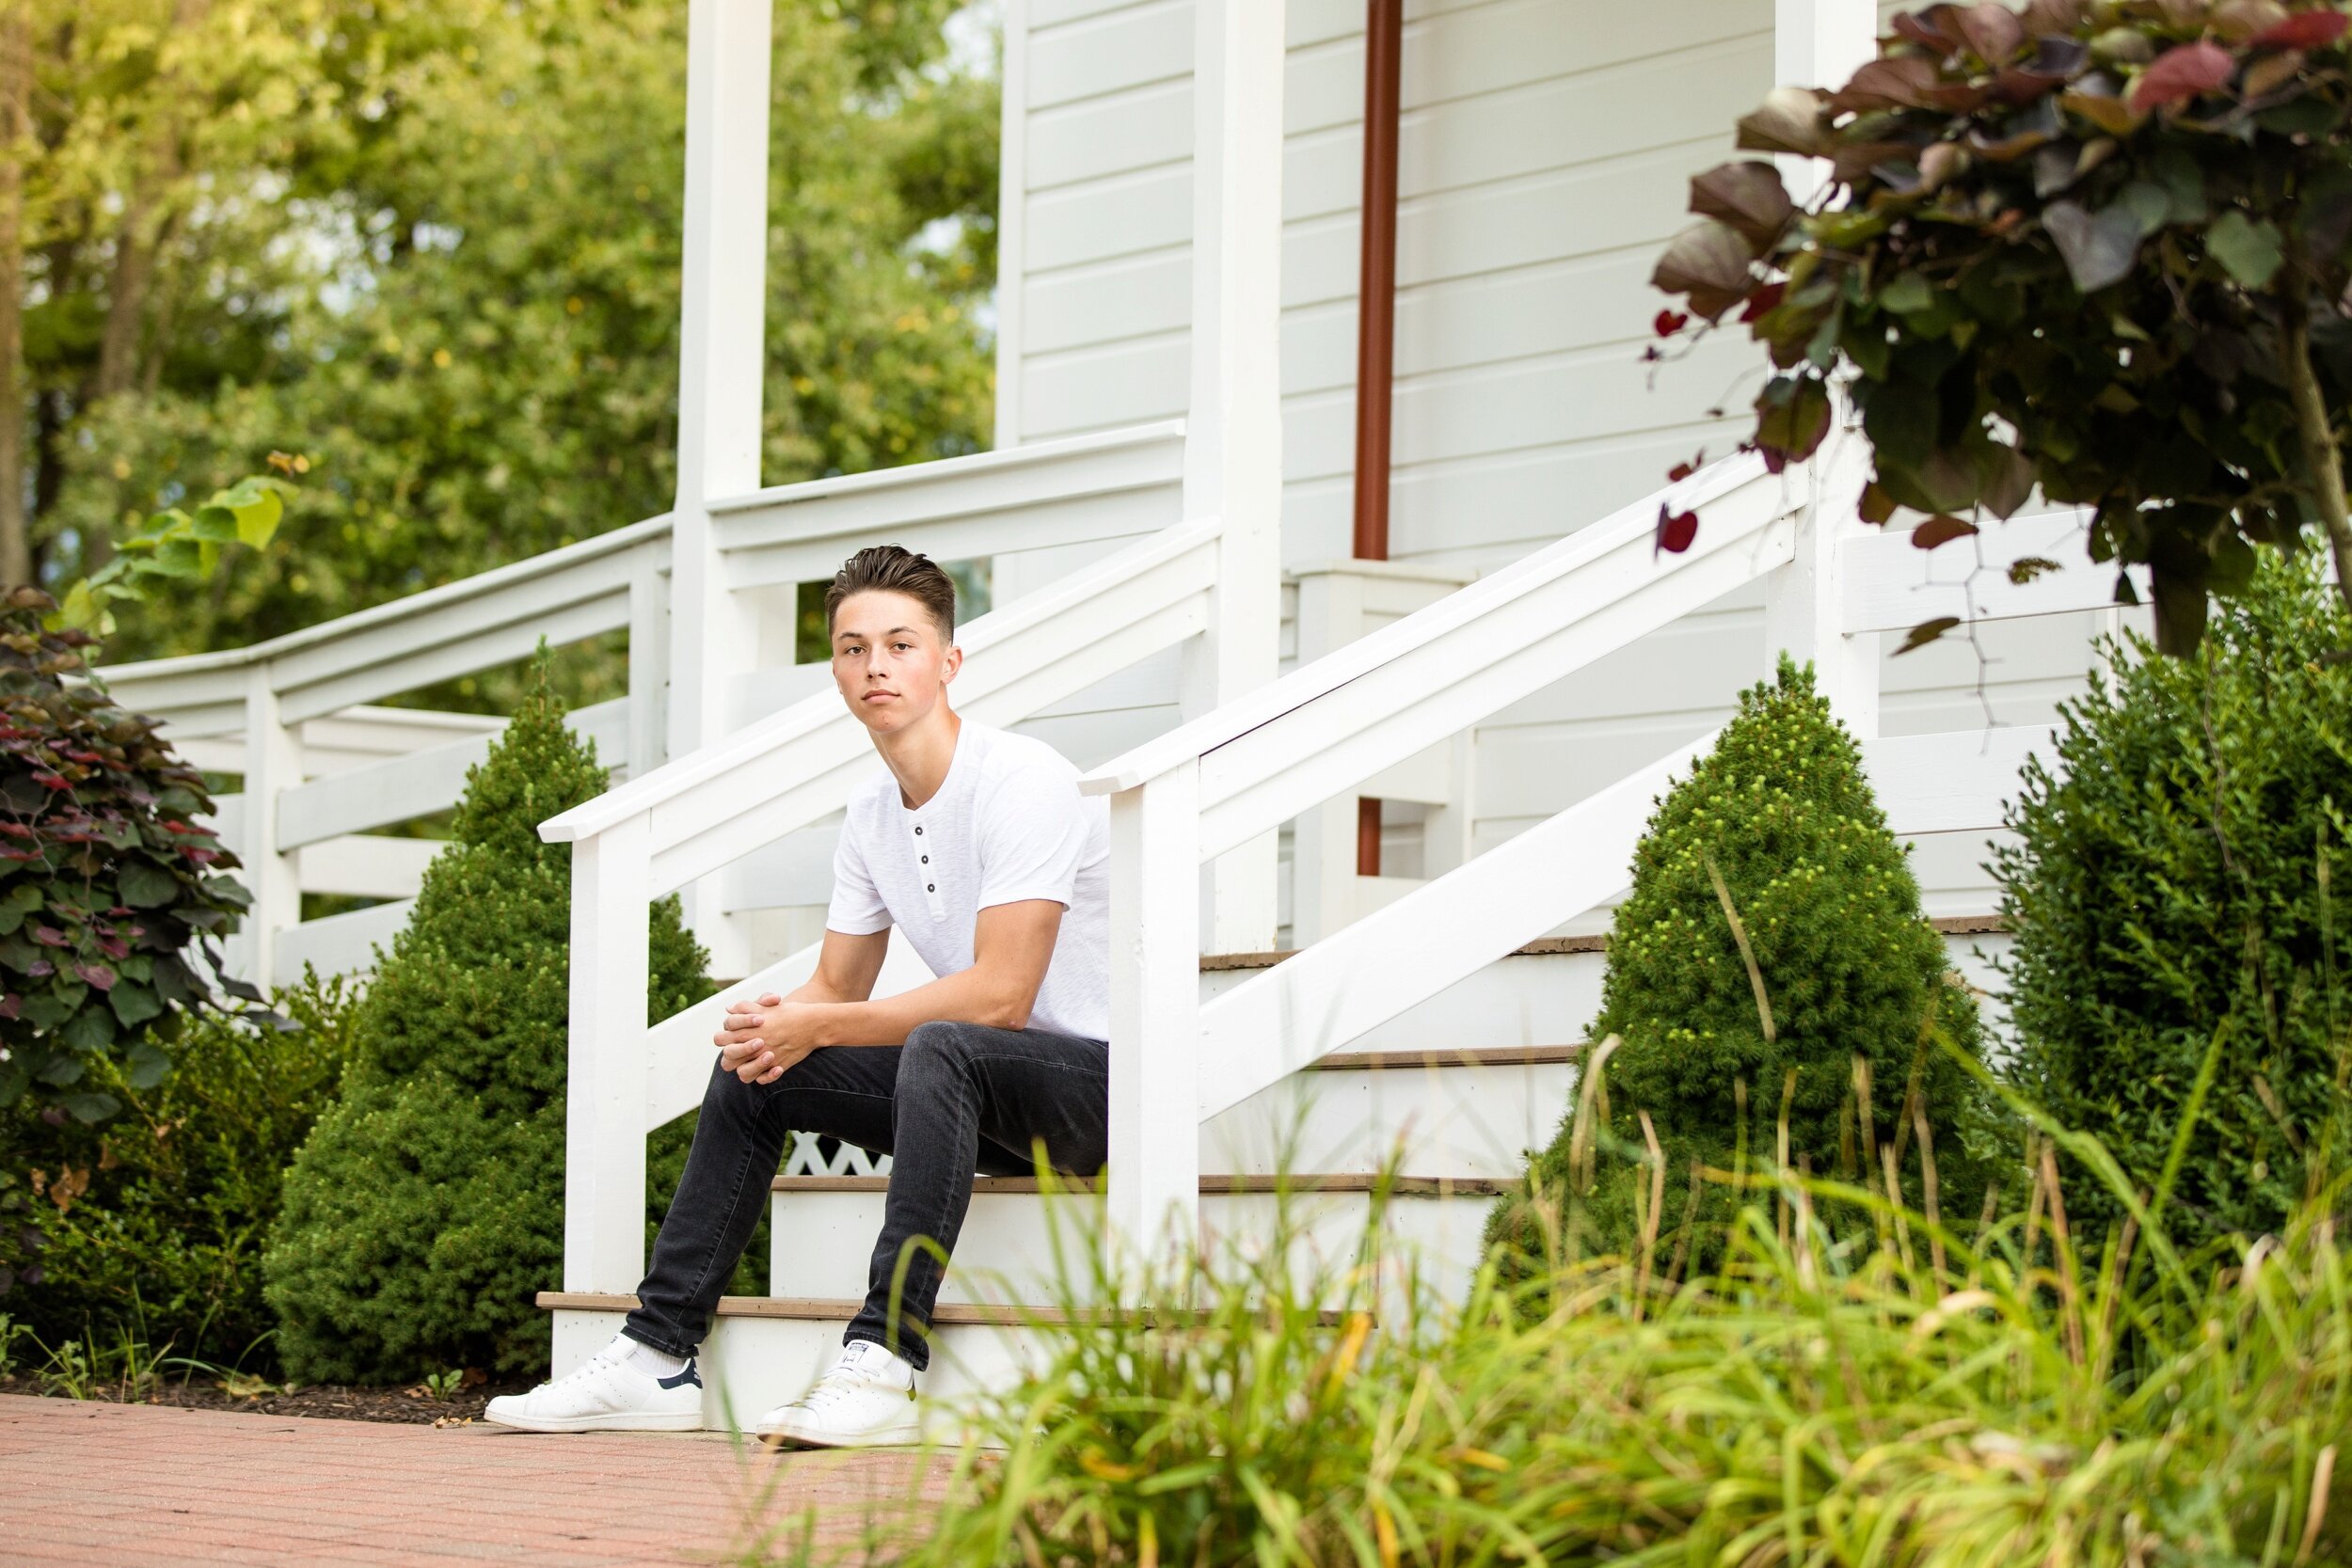
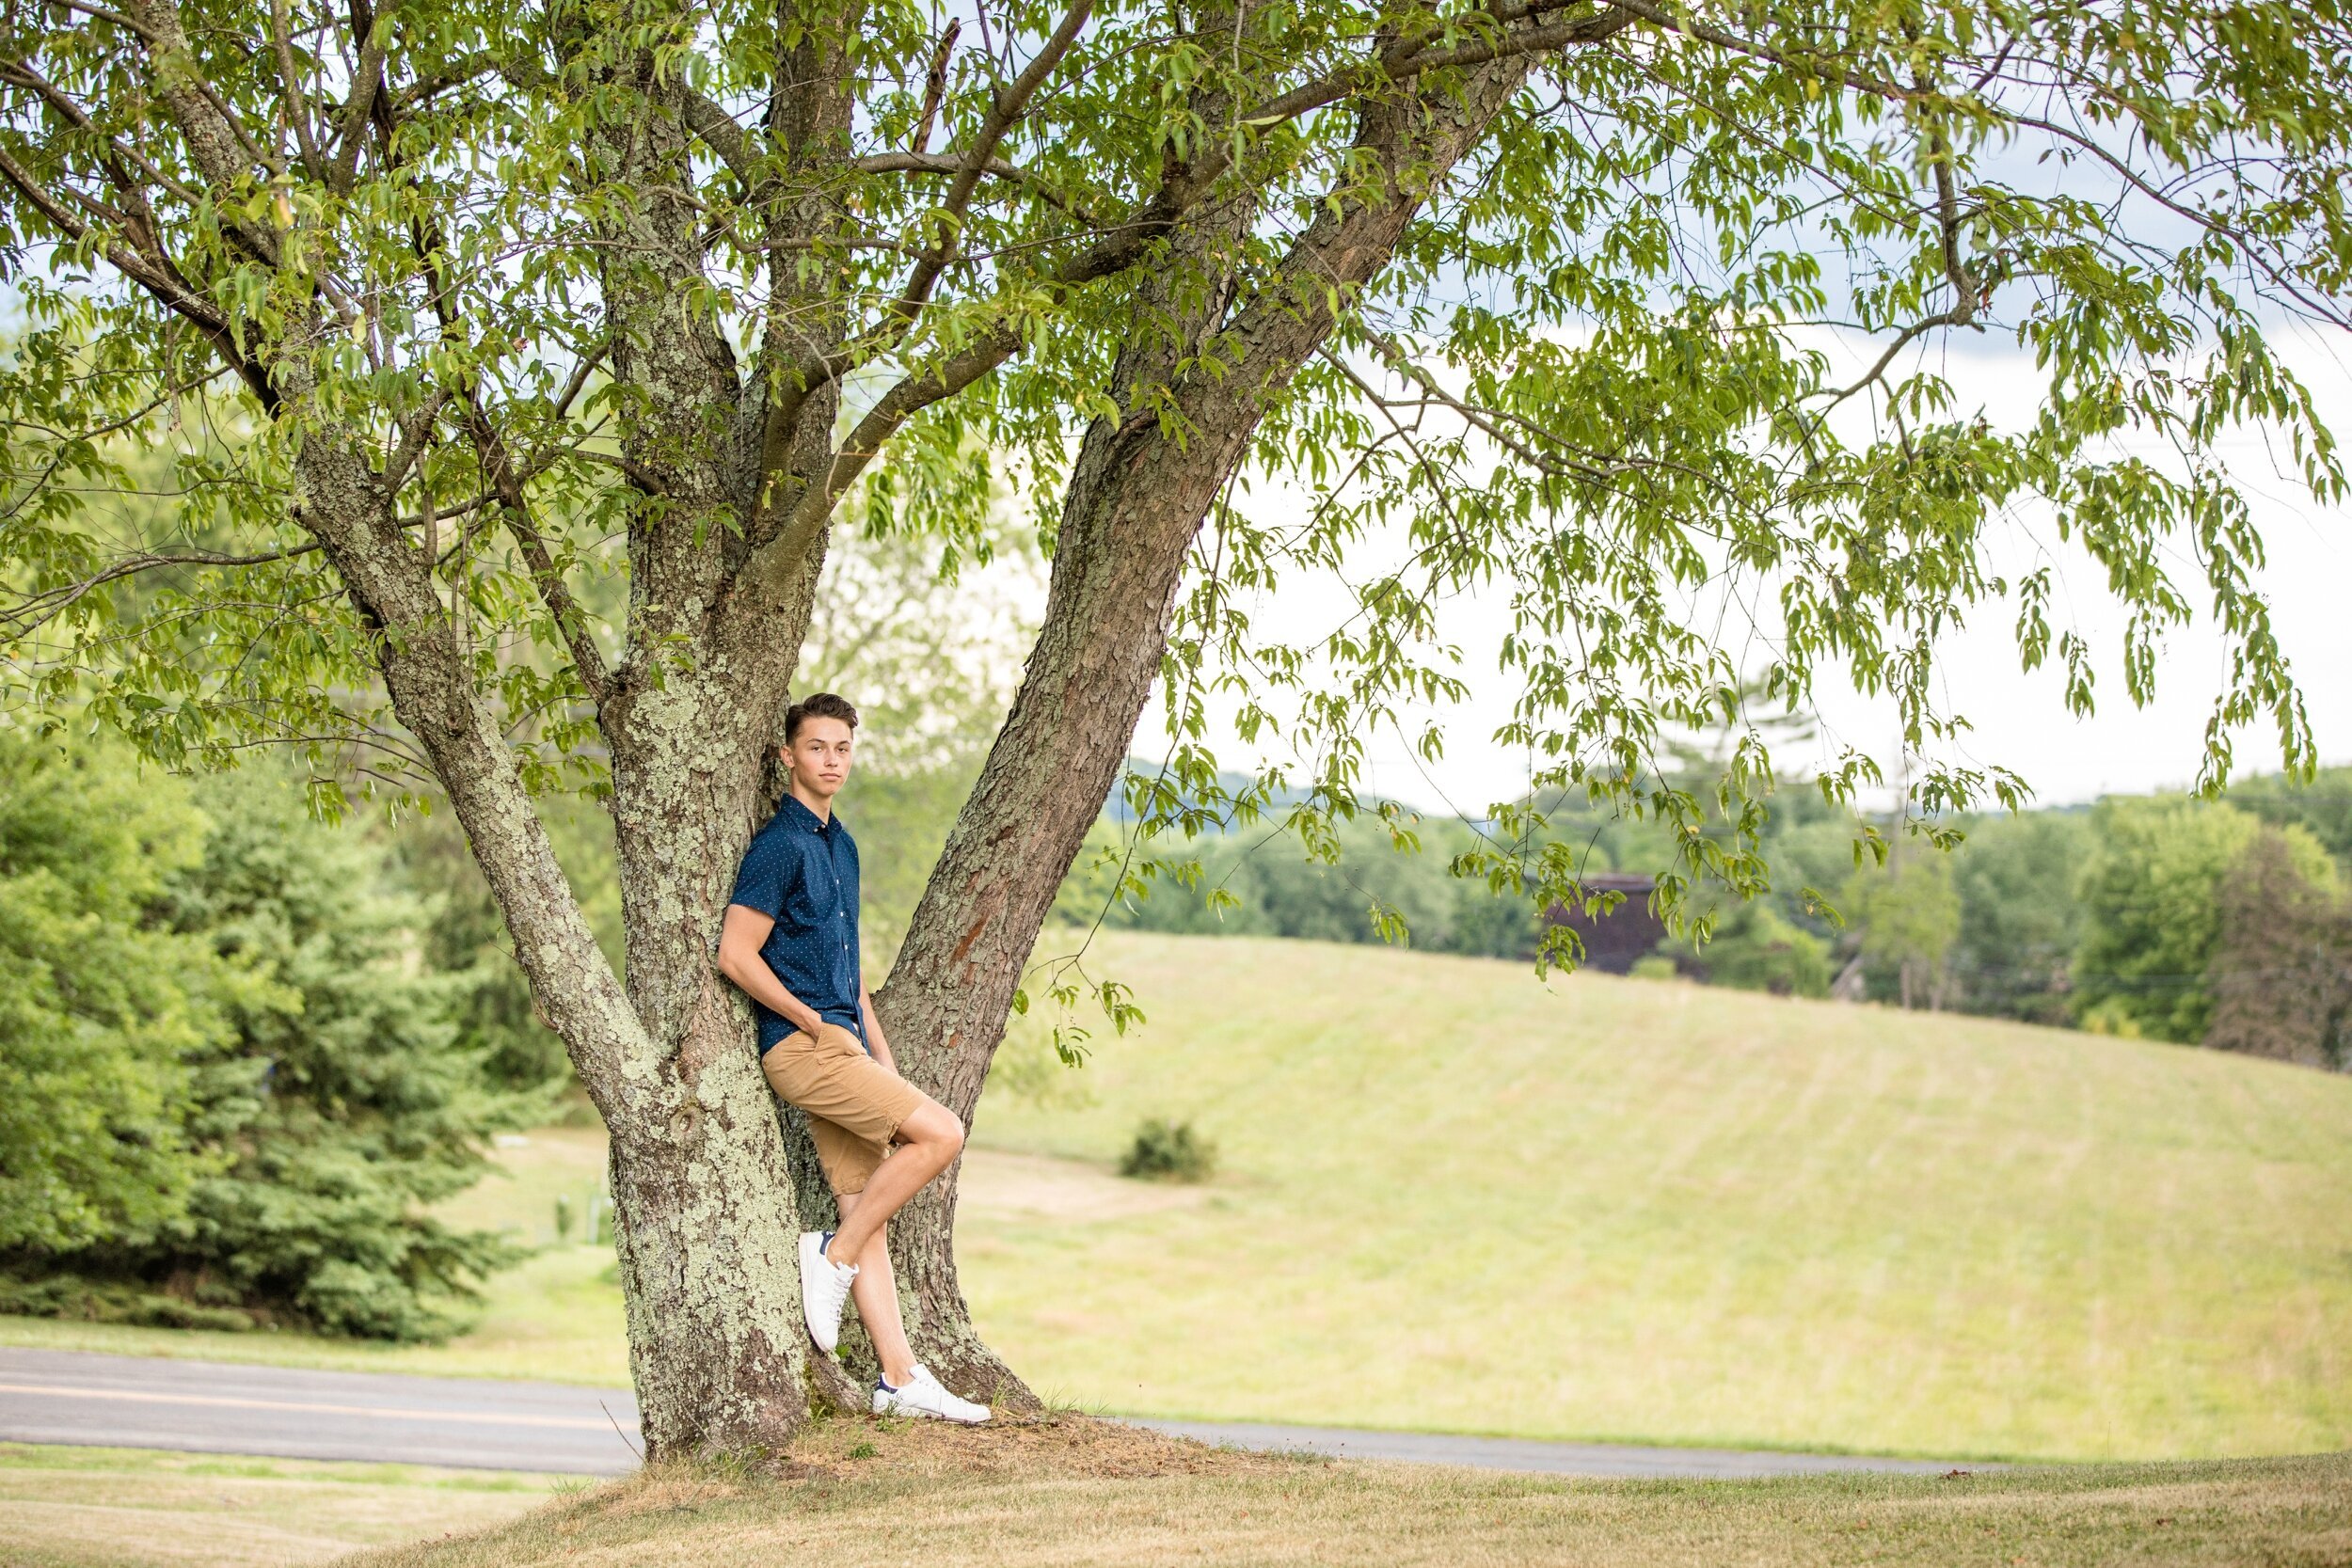
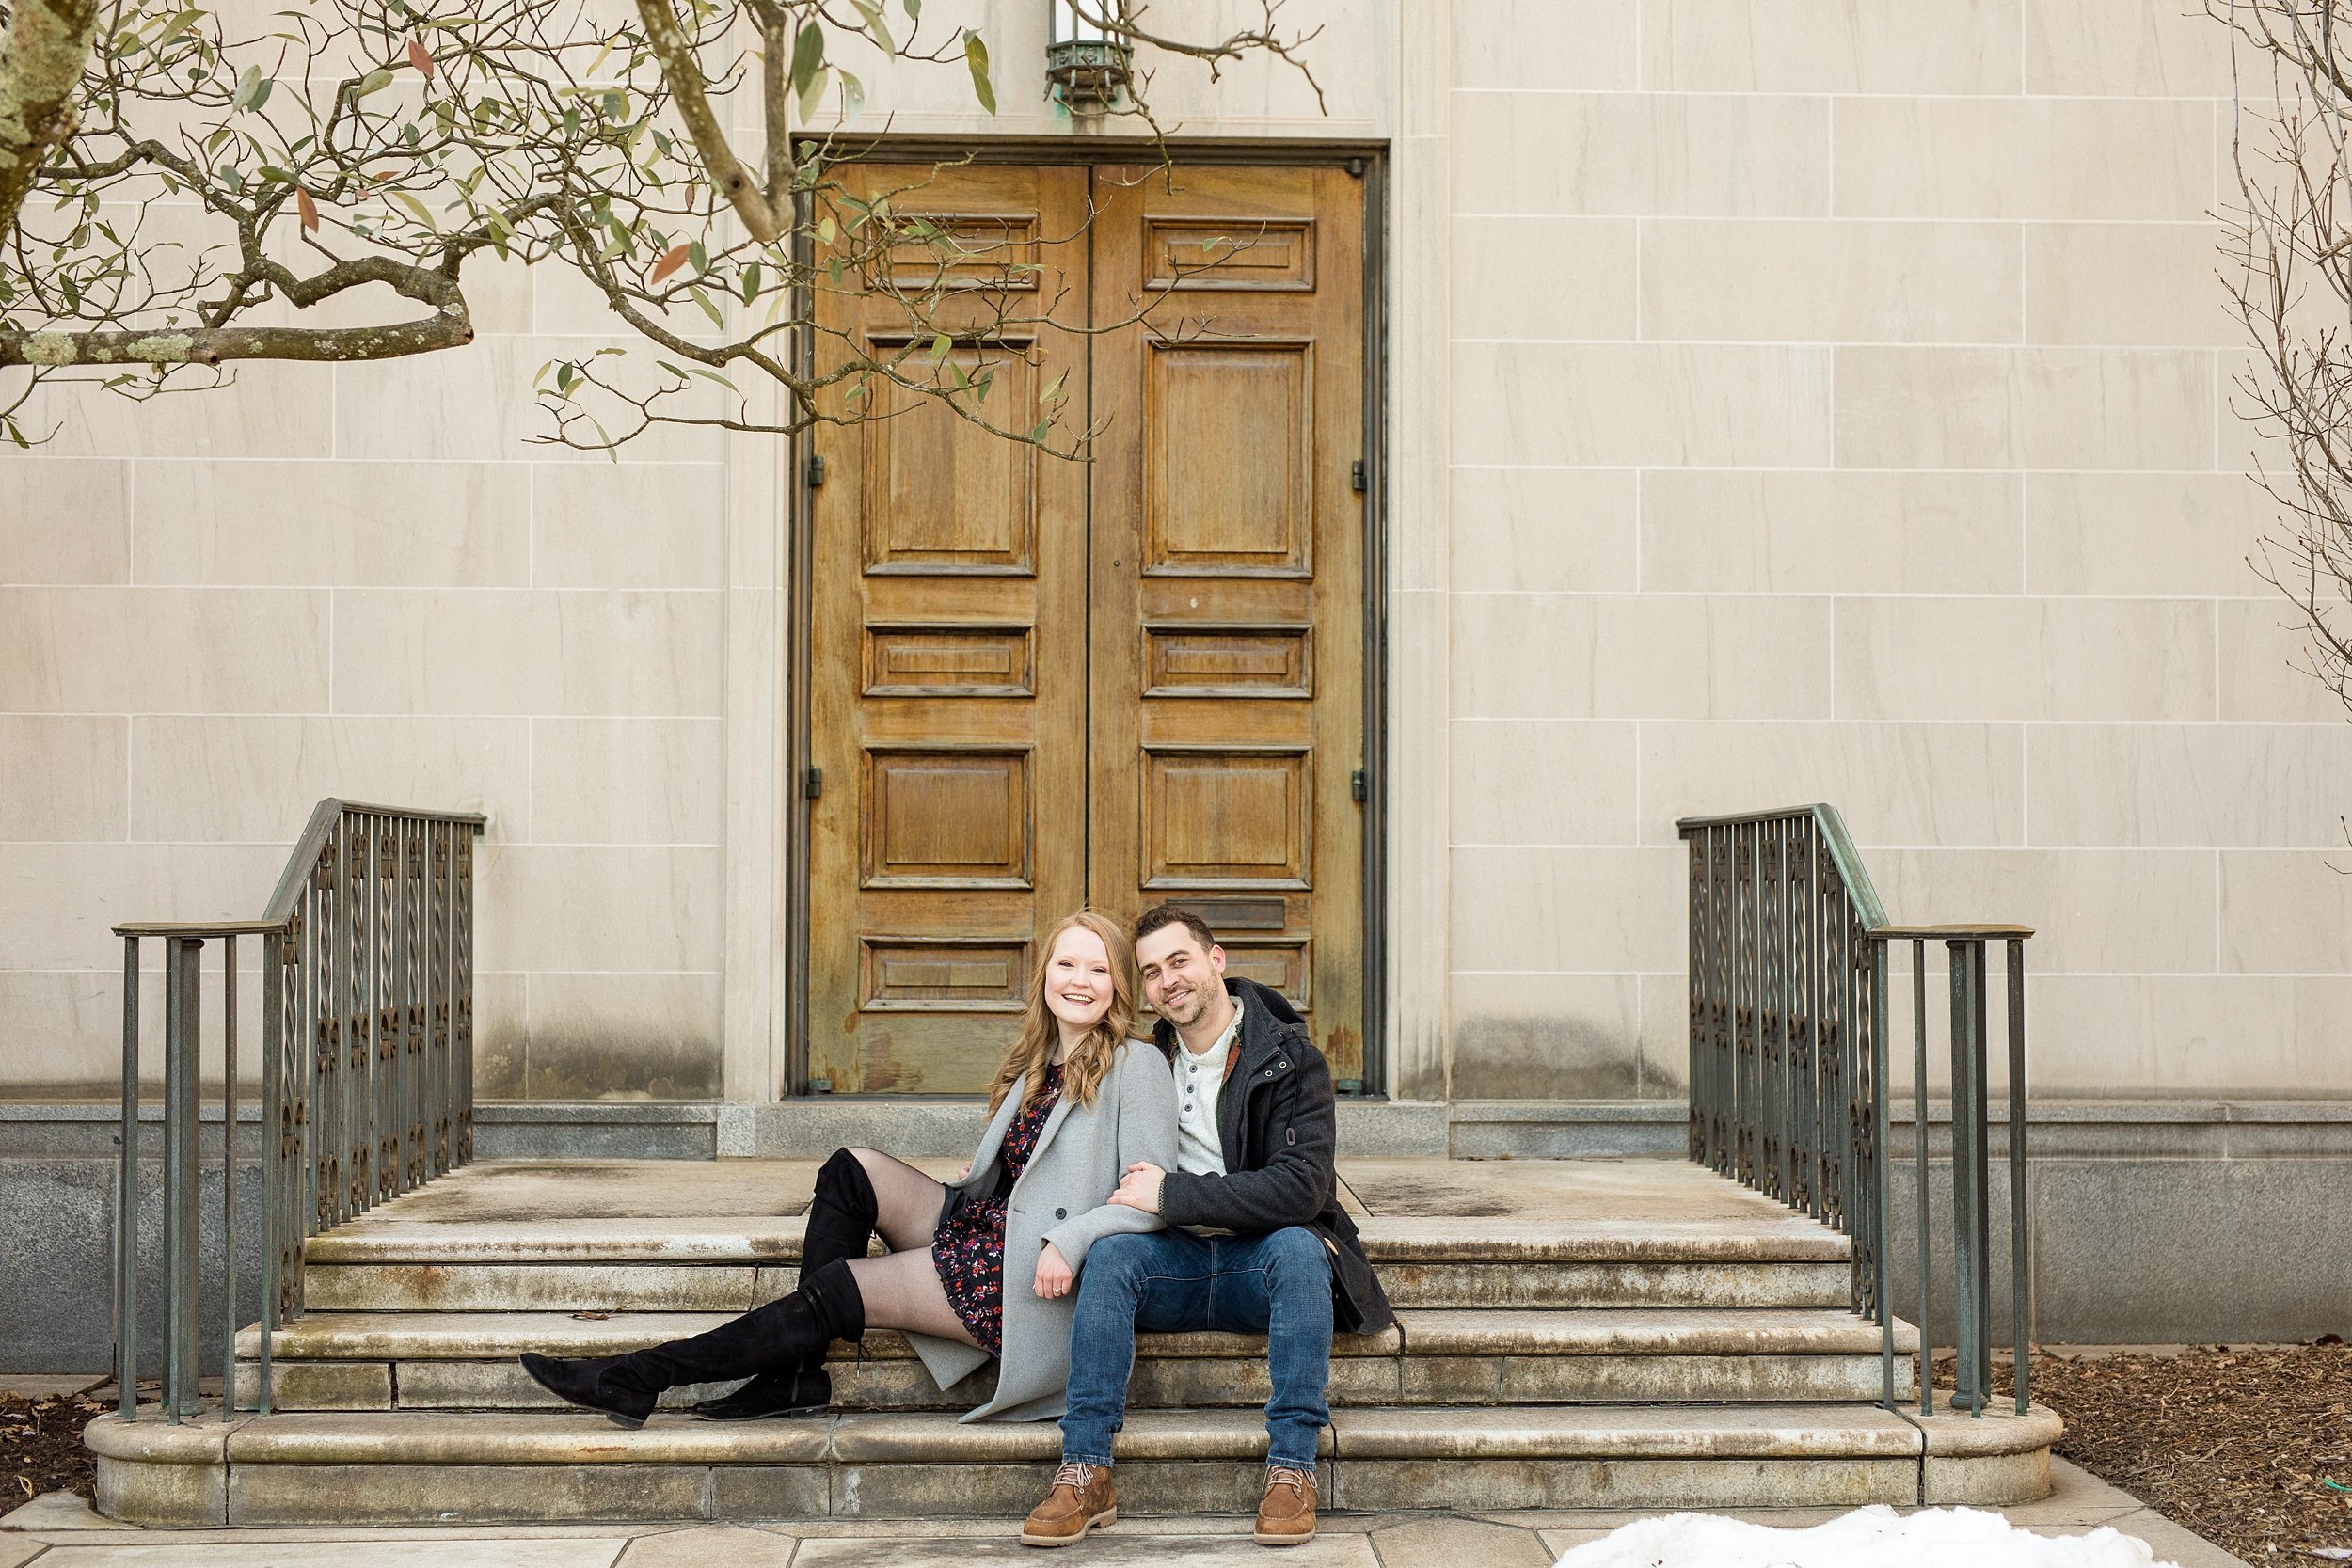
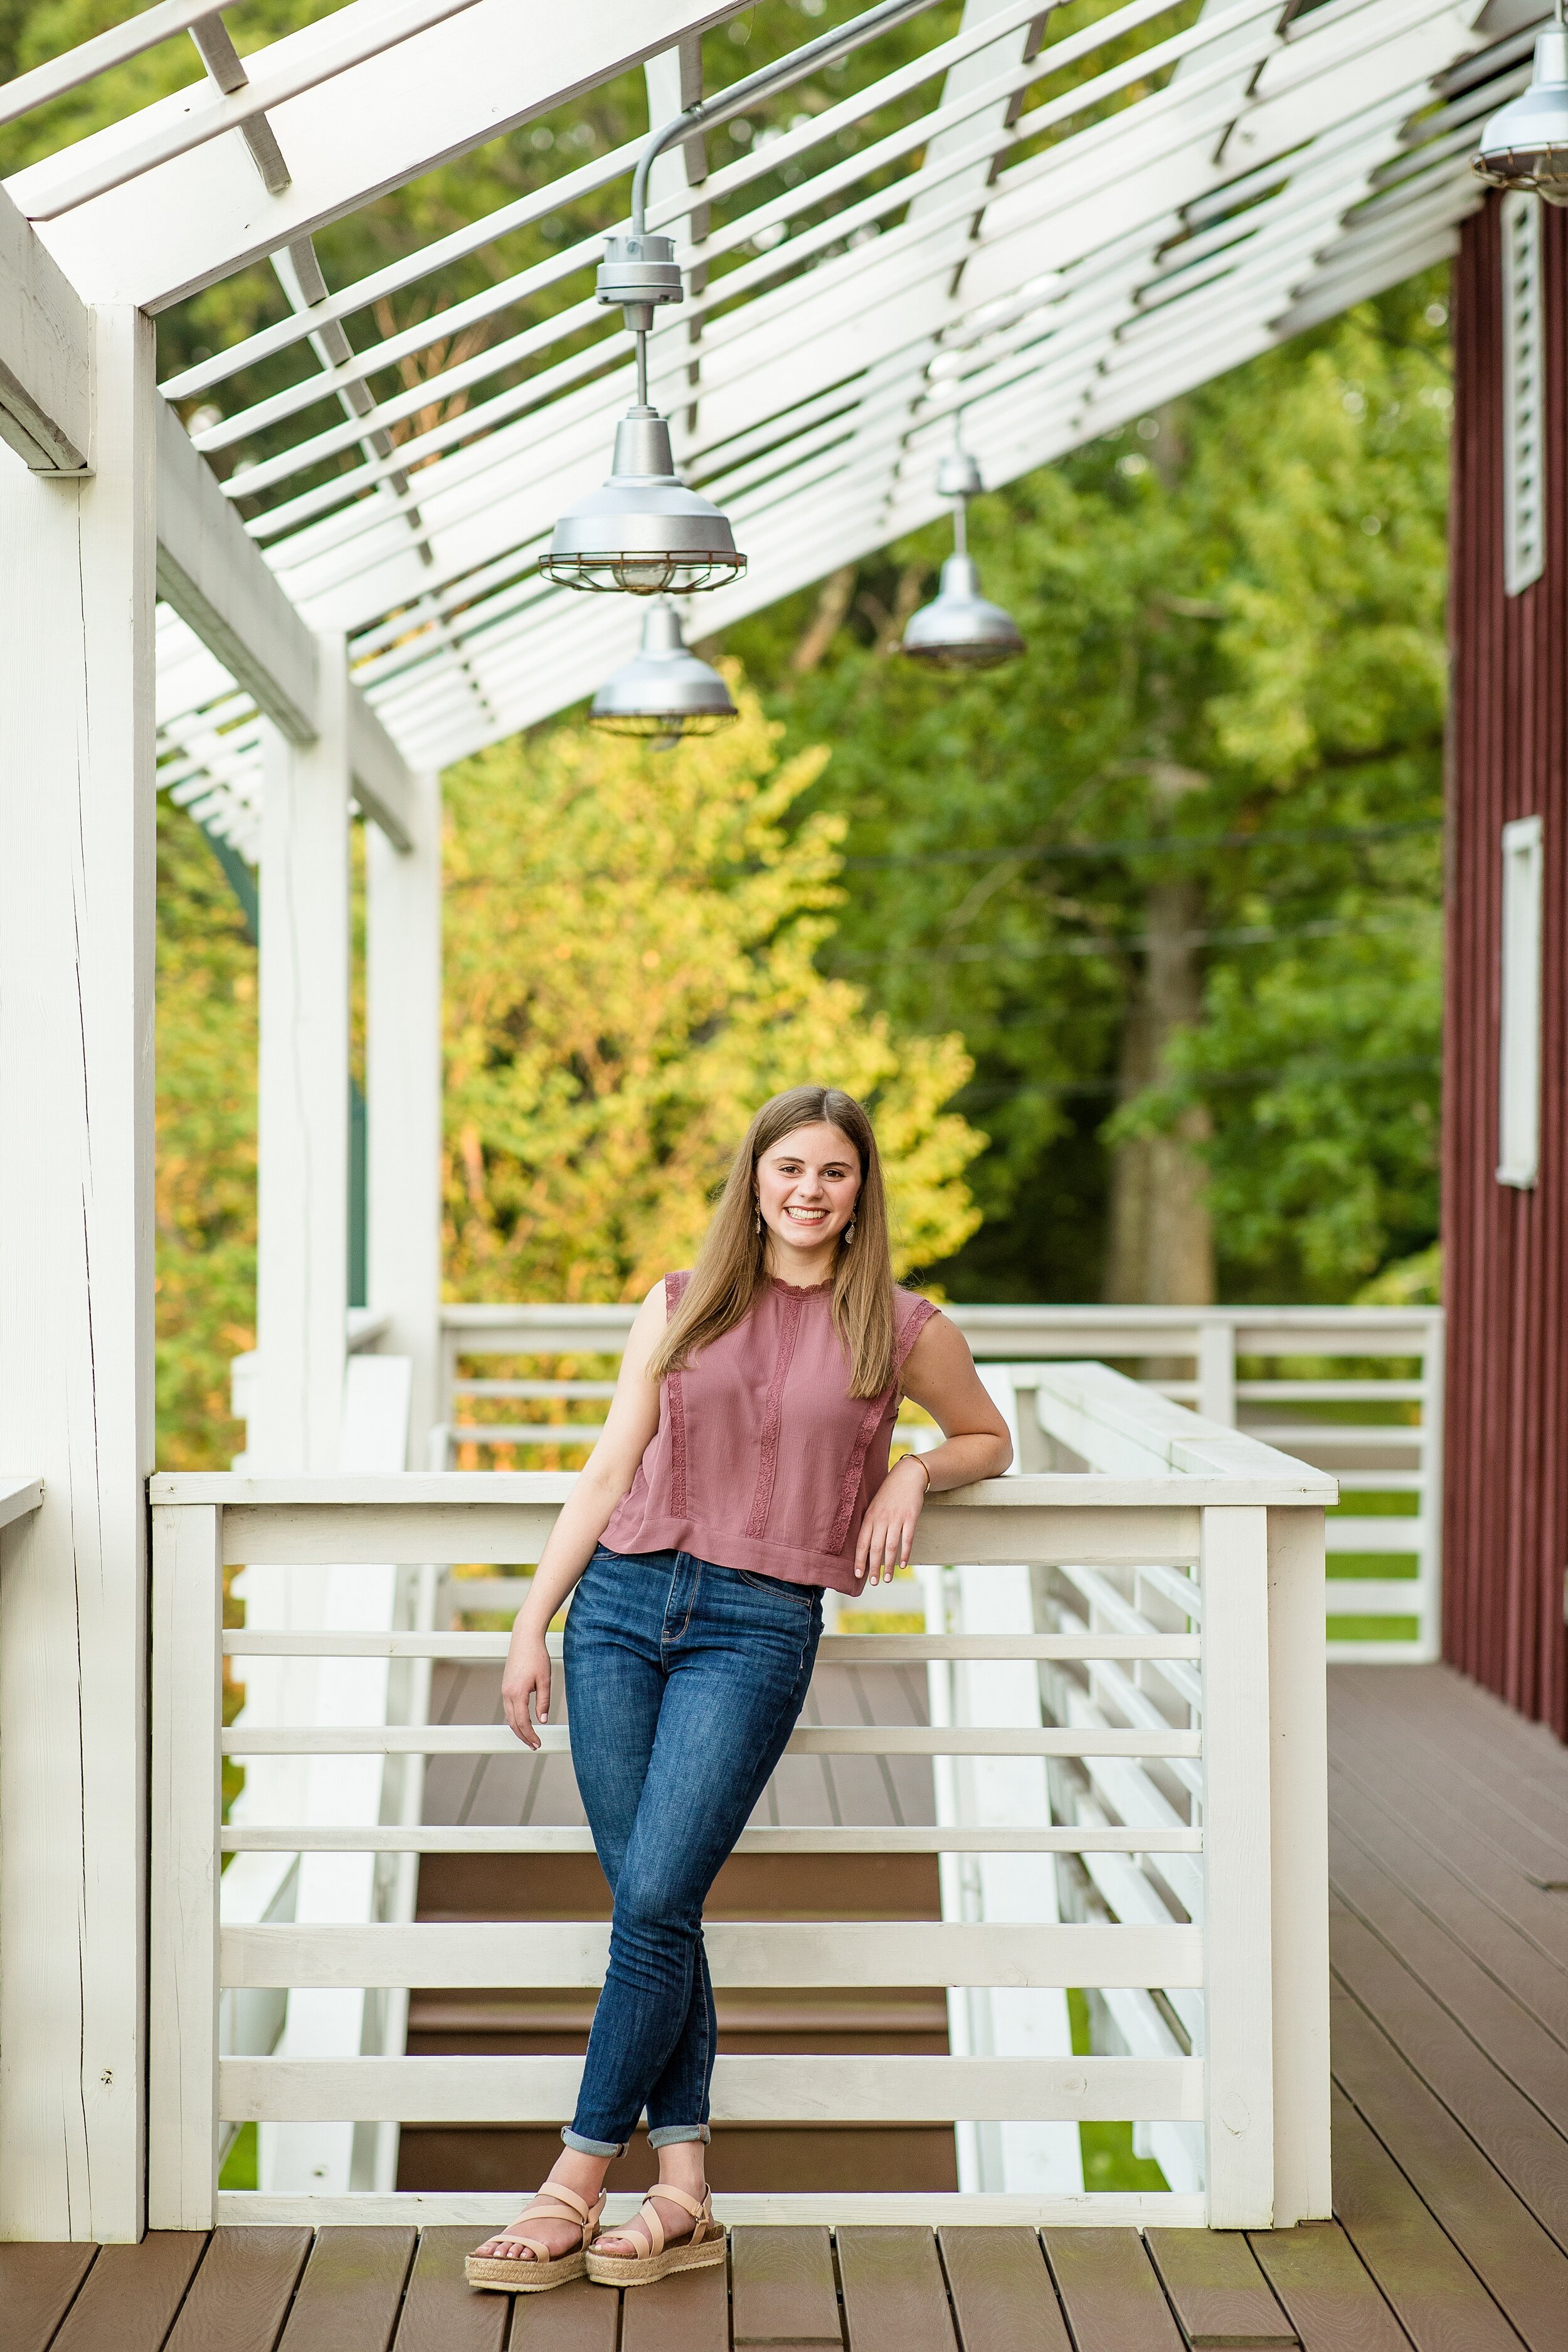
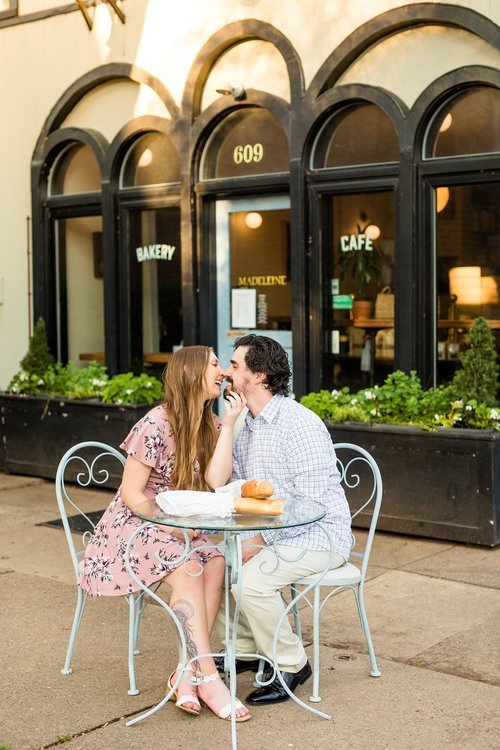
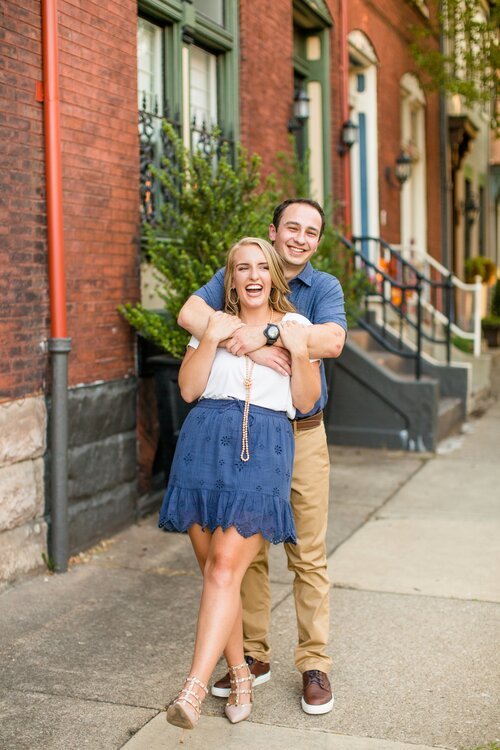
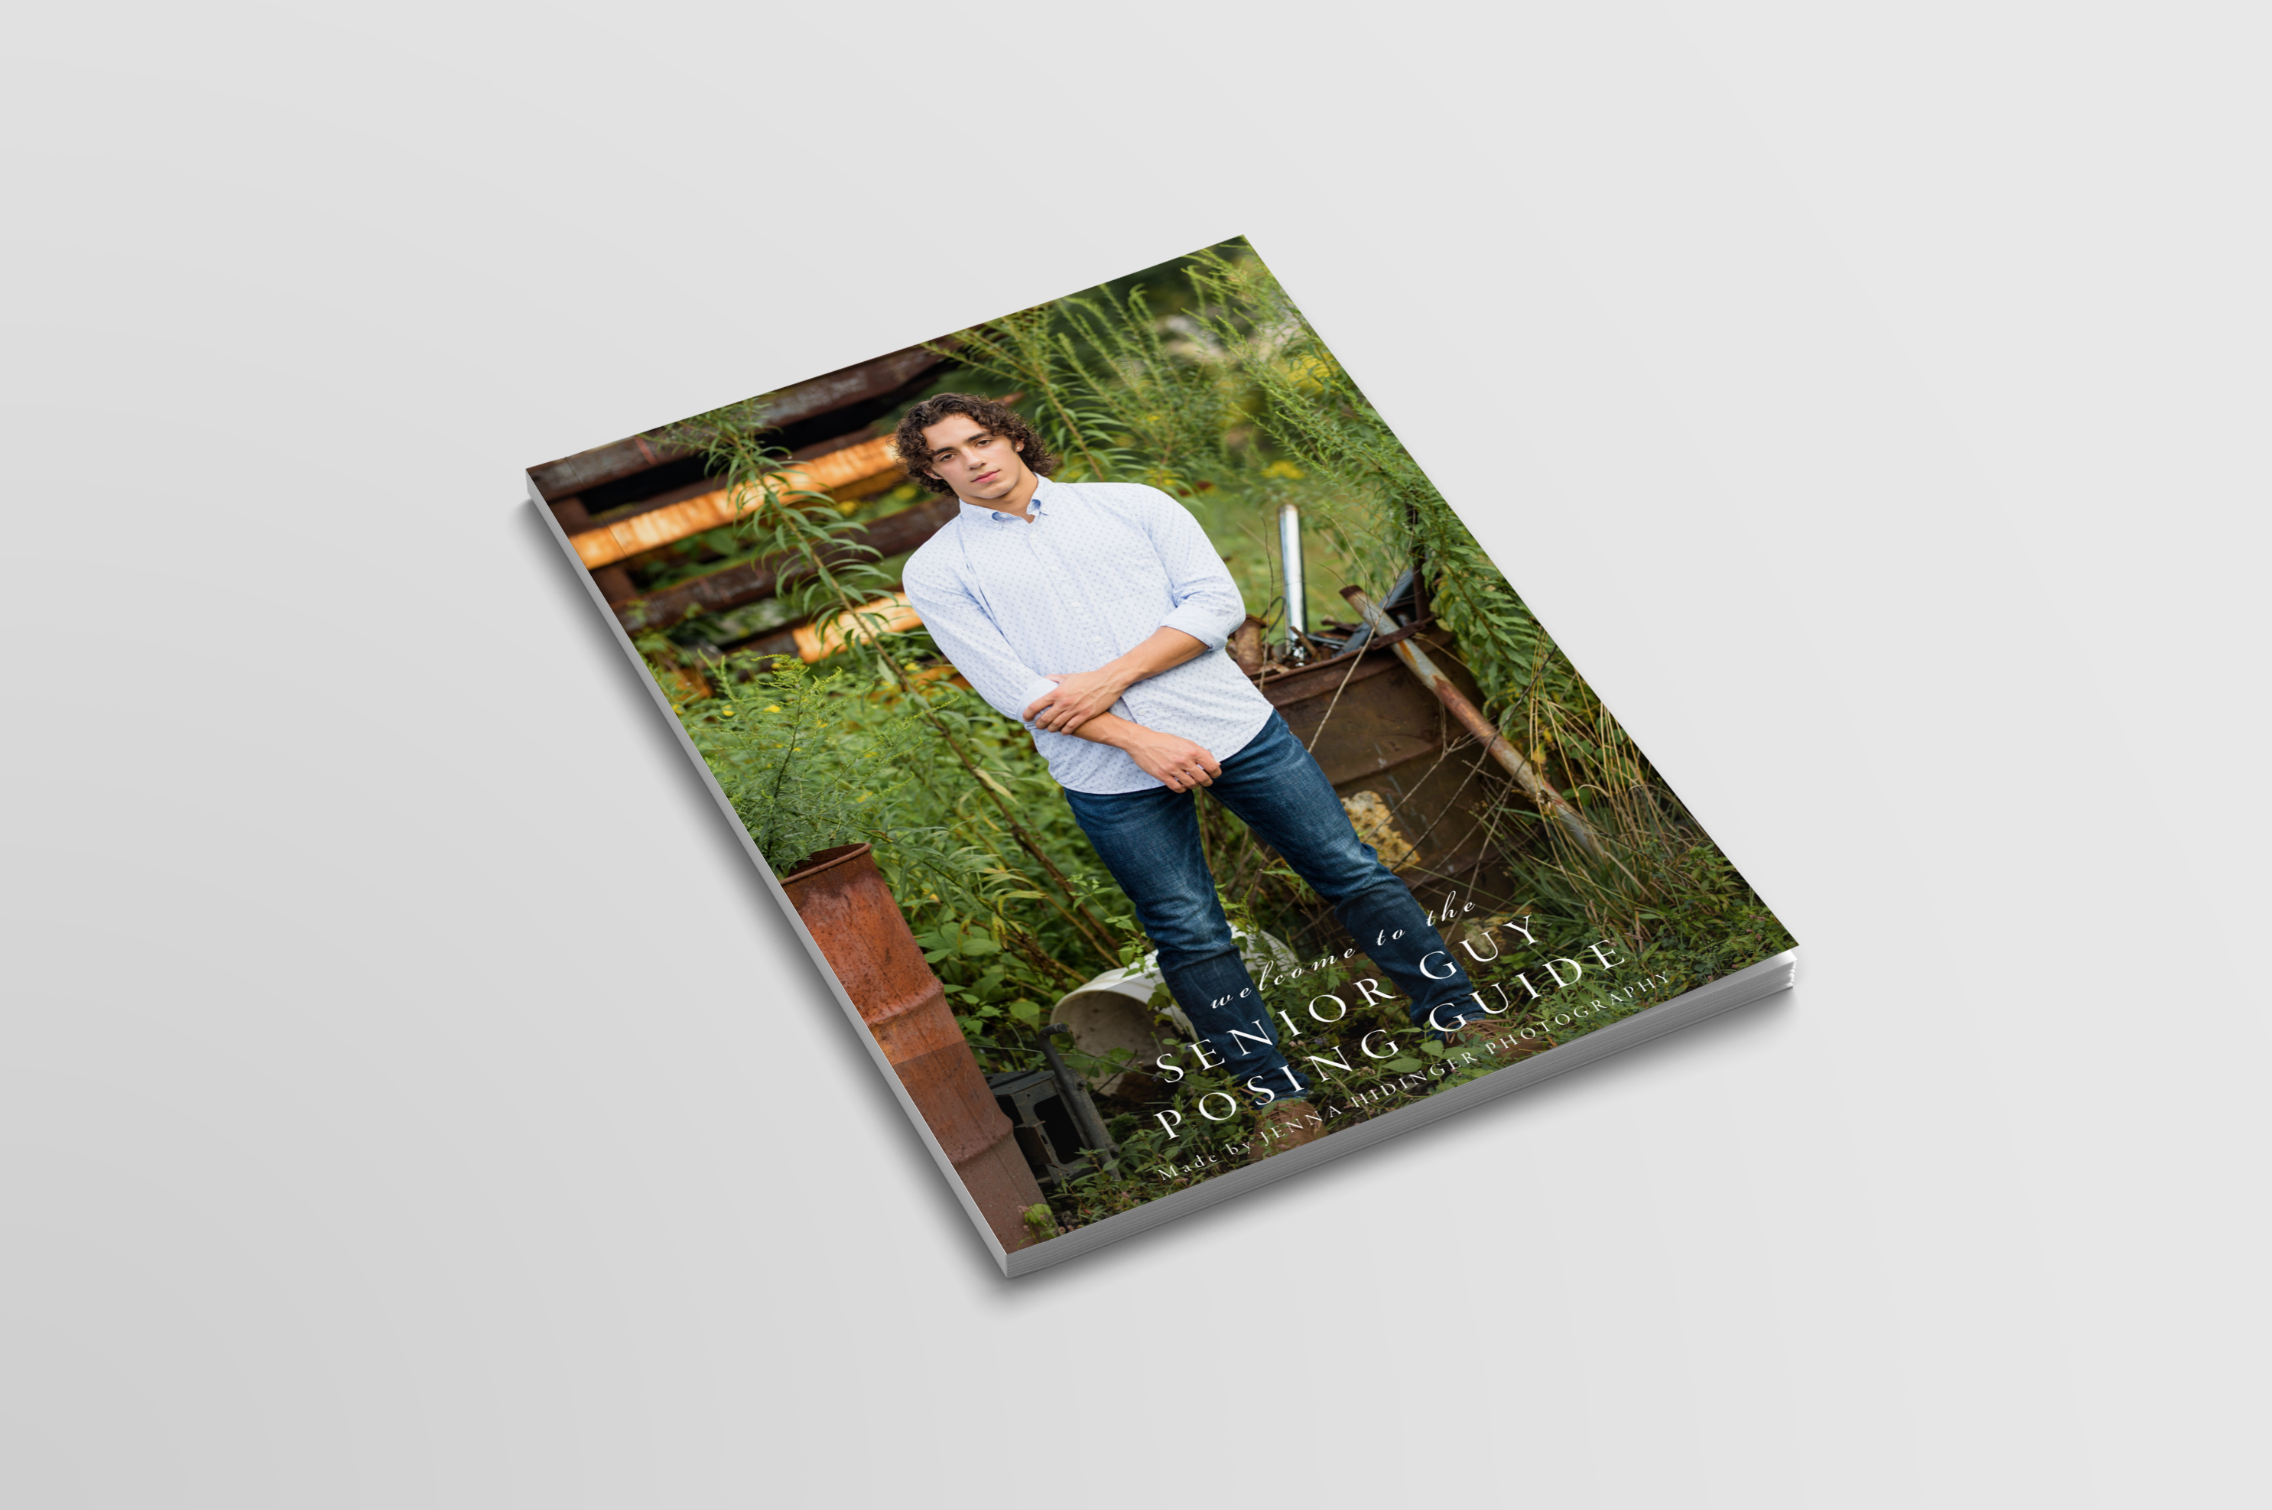
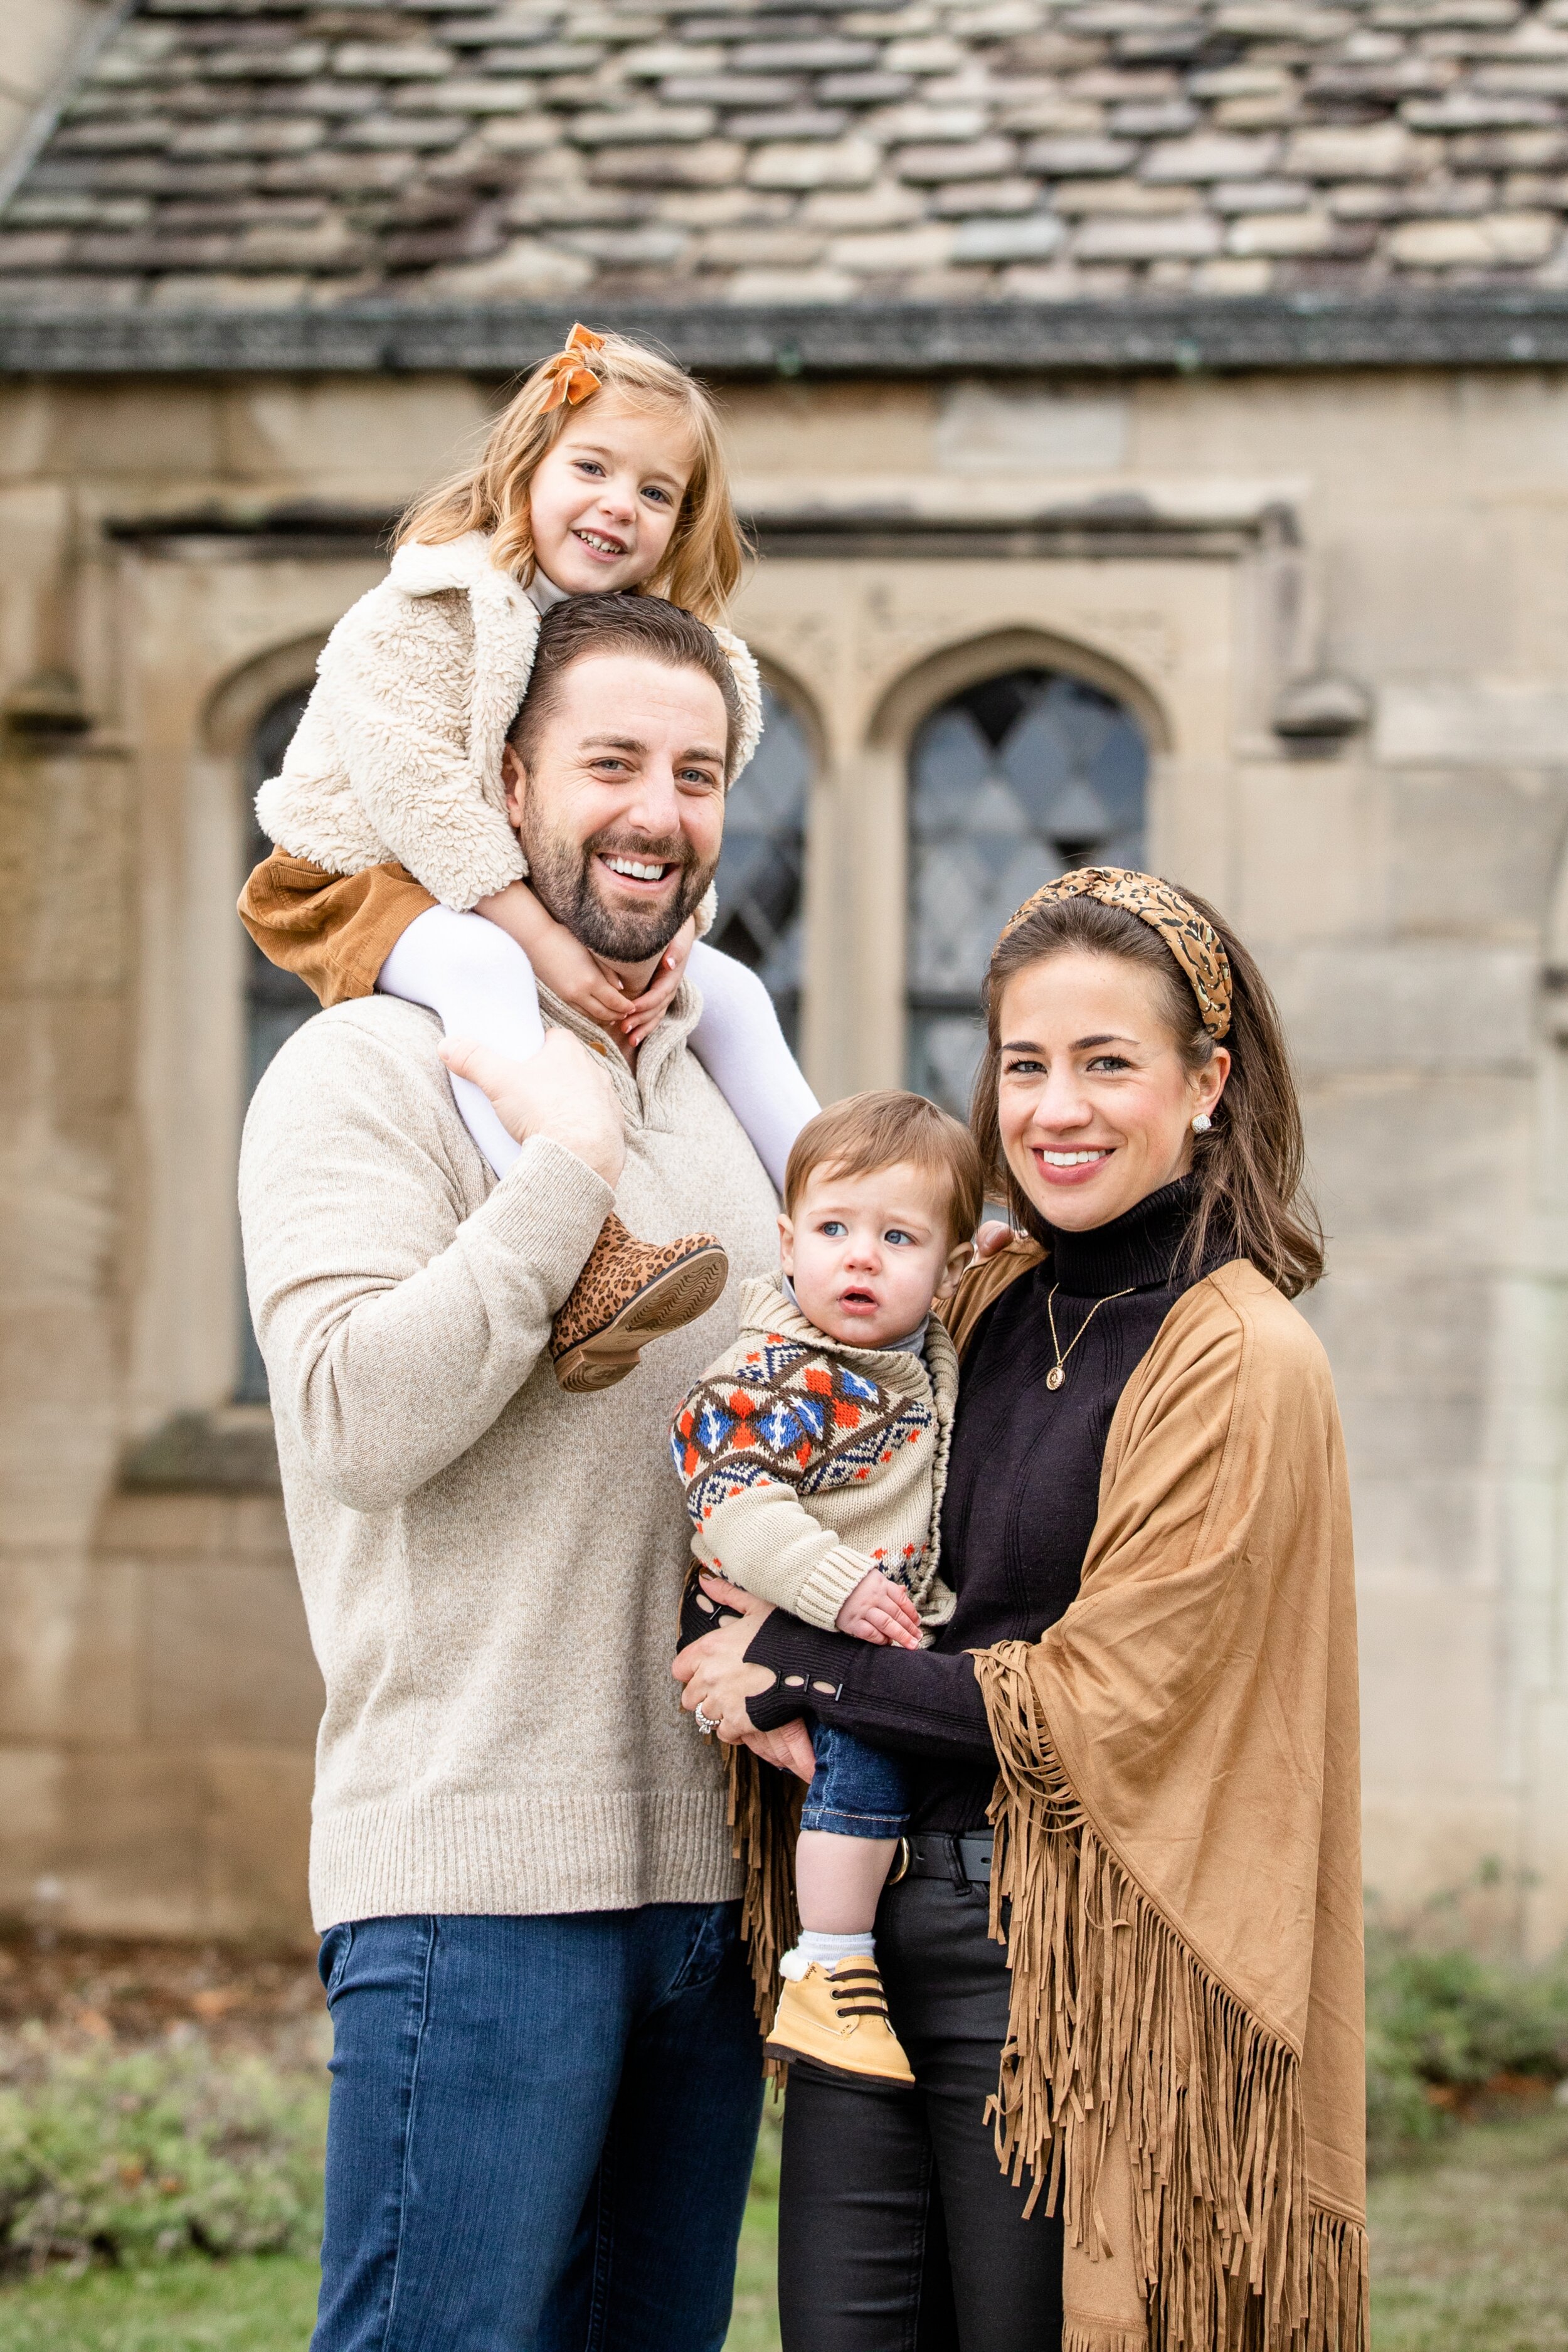
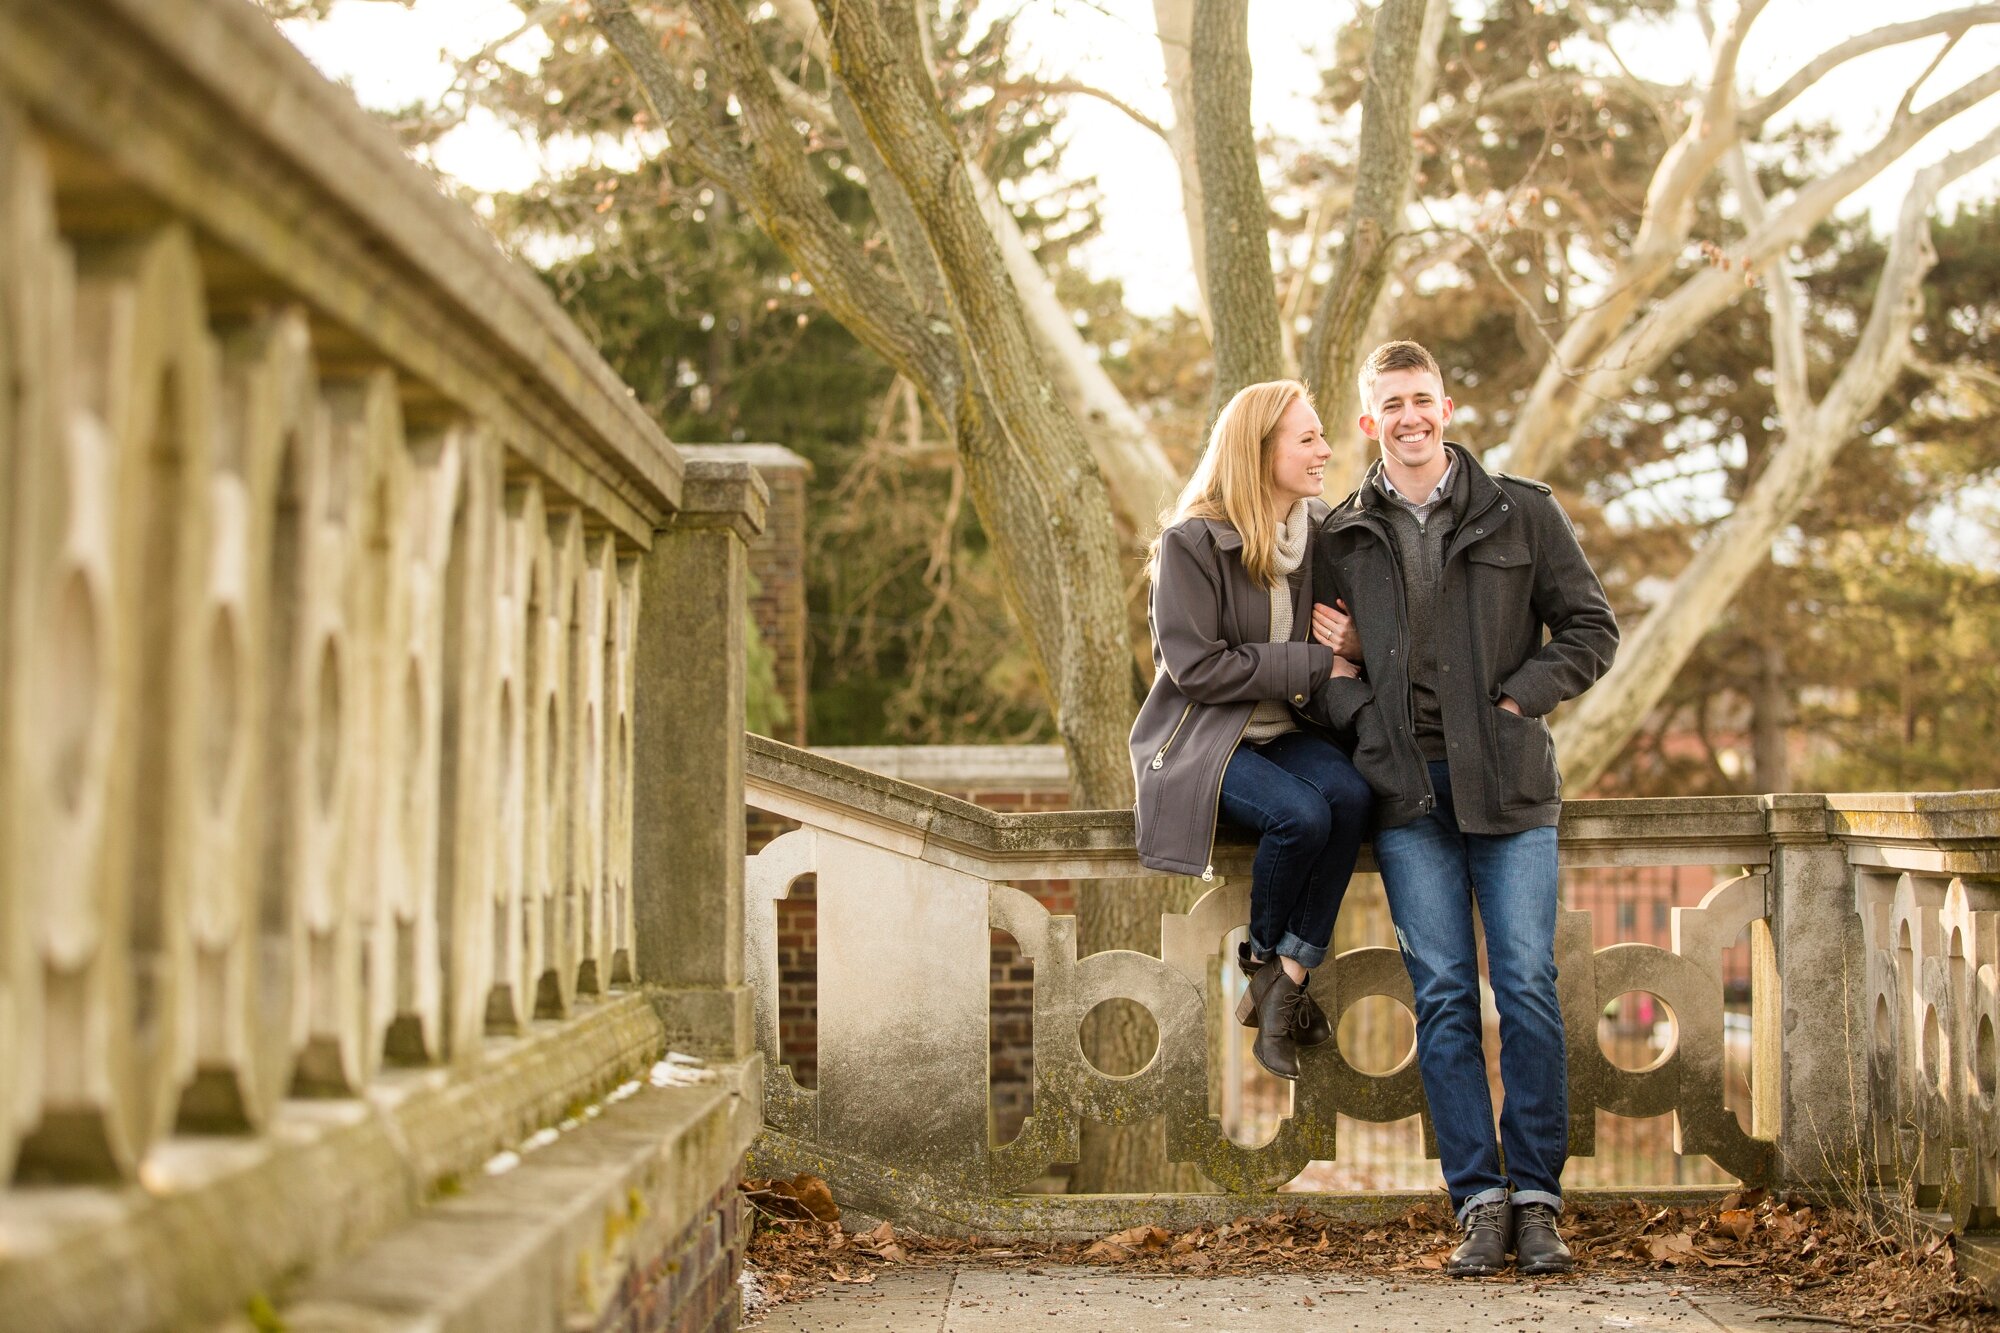
4 - Variety of “Posing Opportunities”

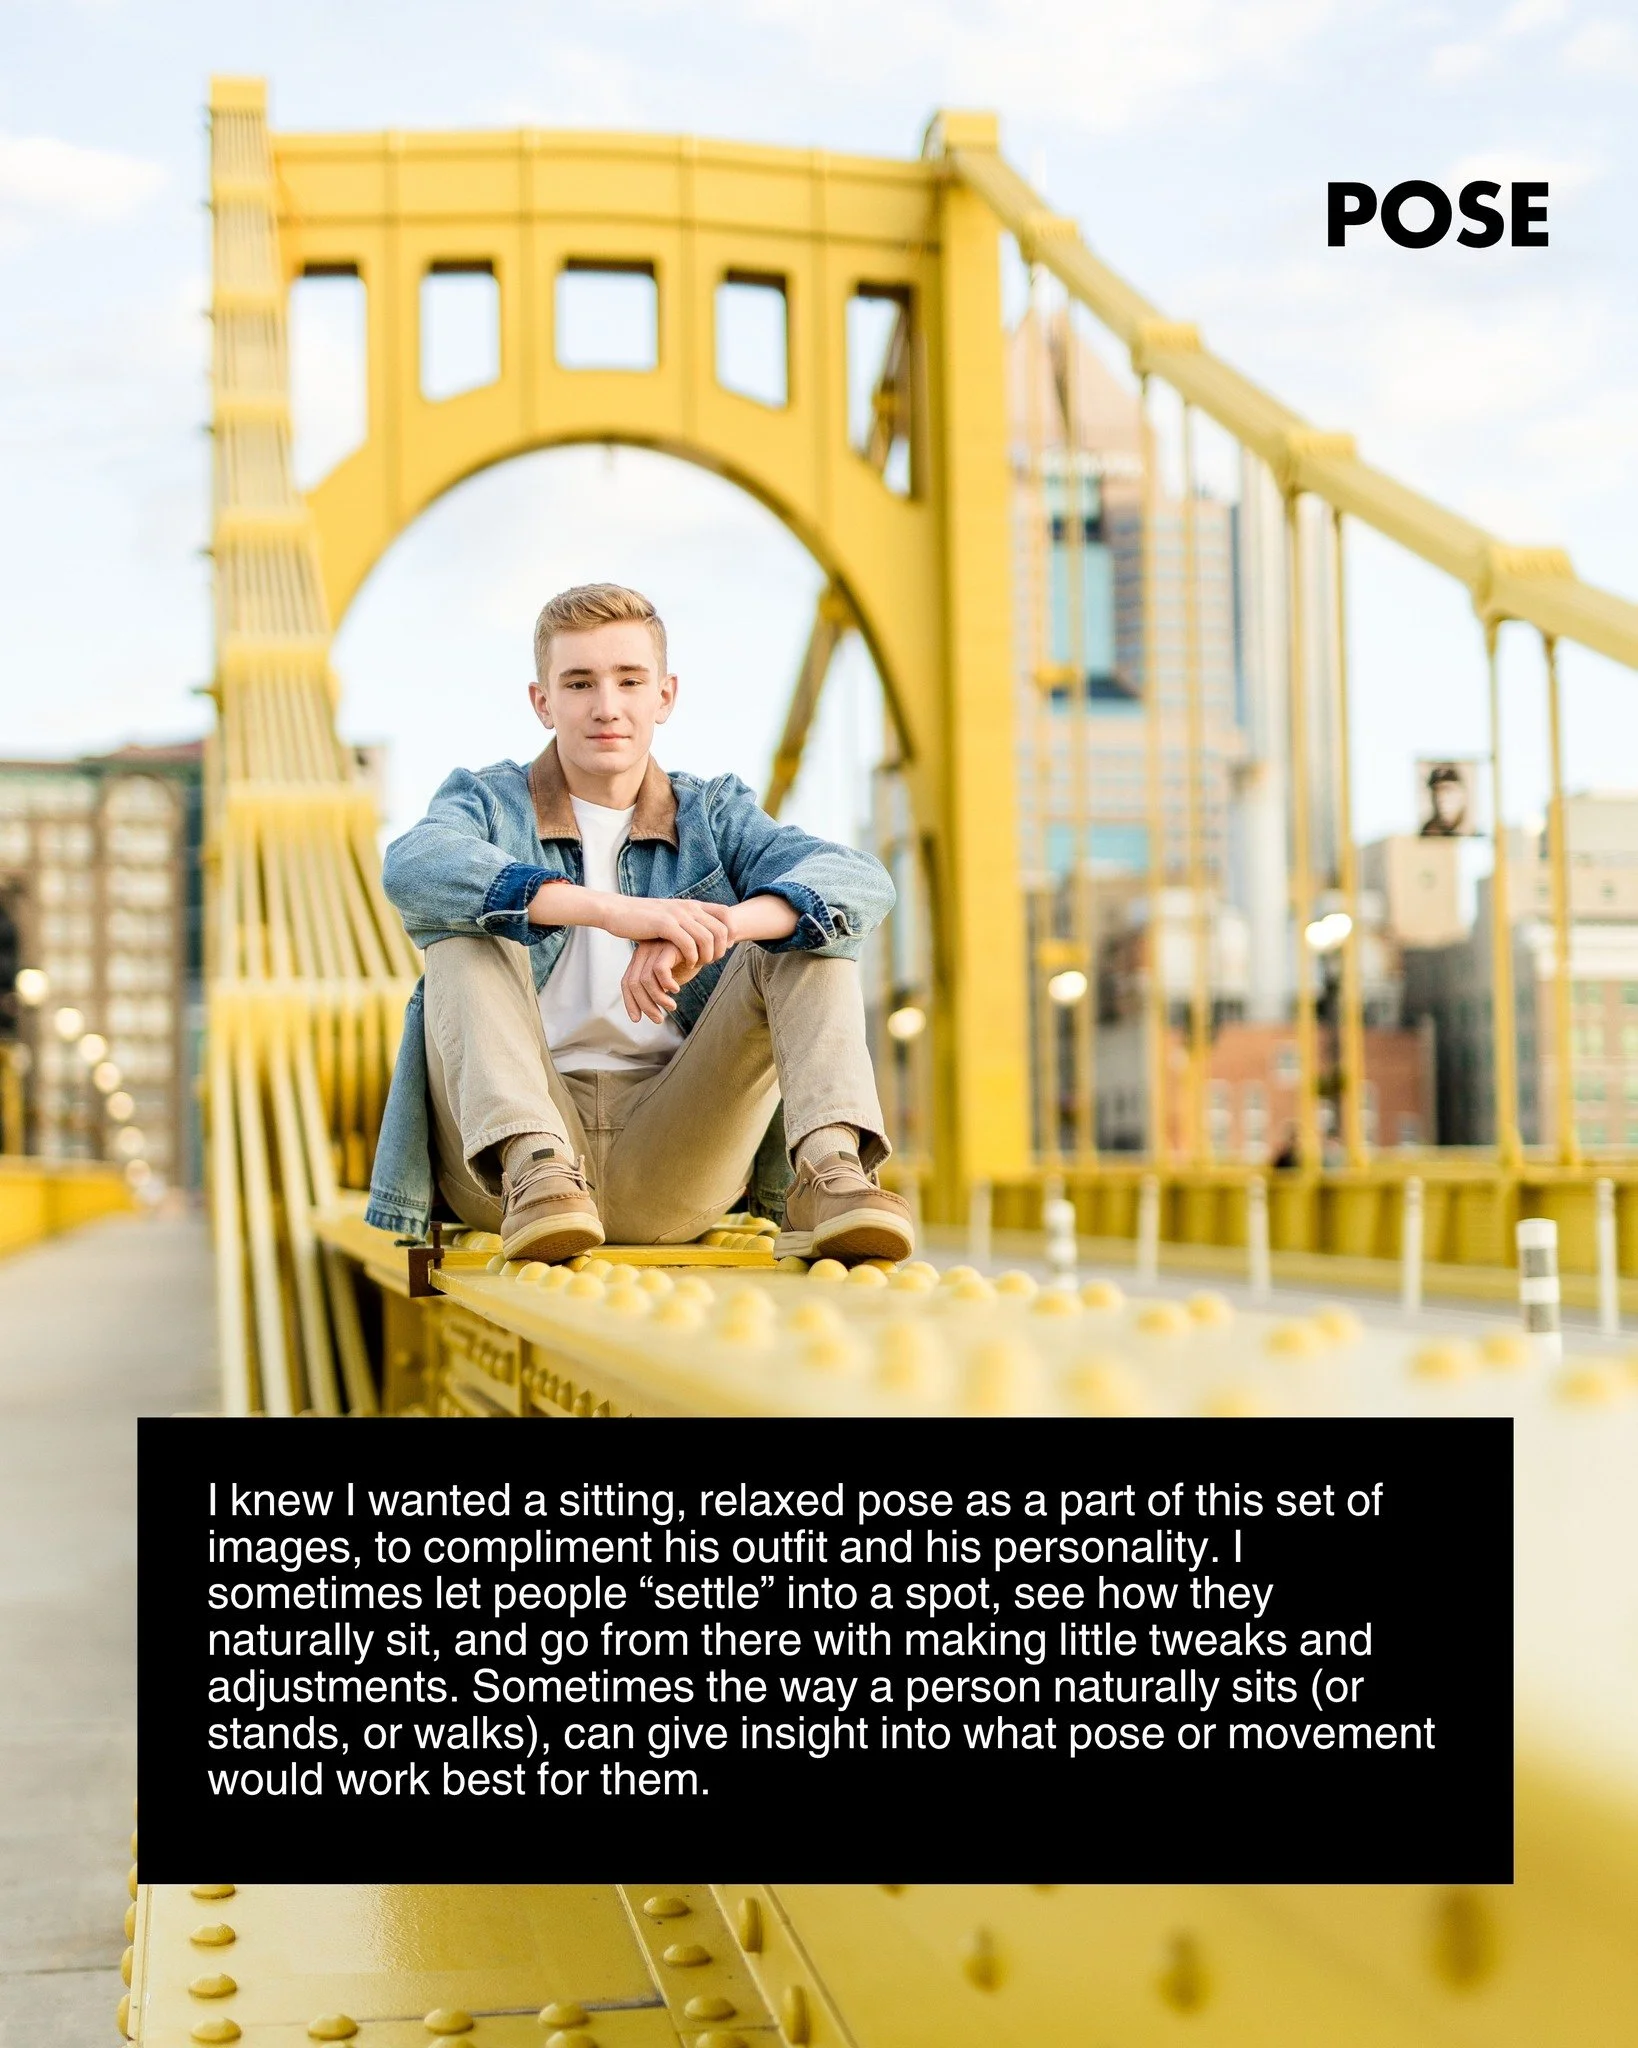
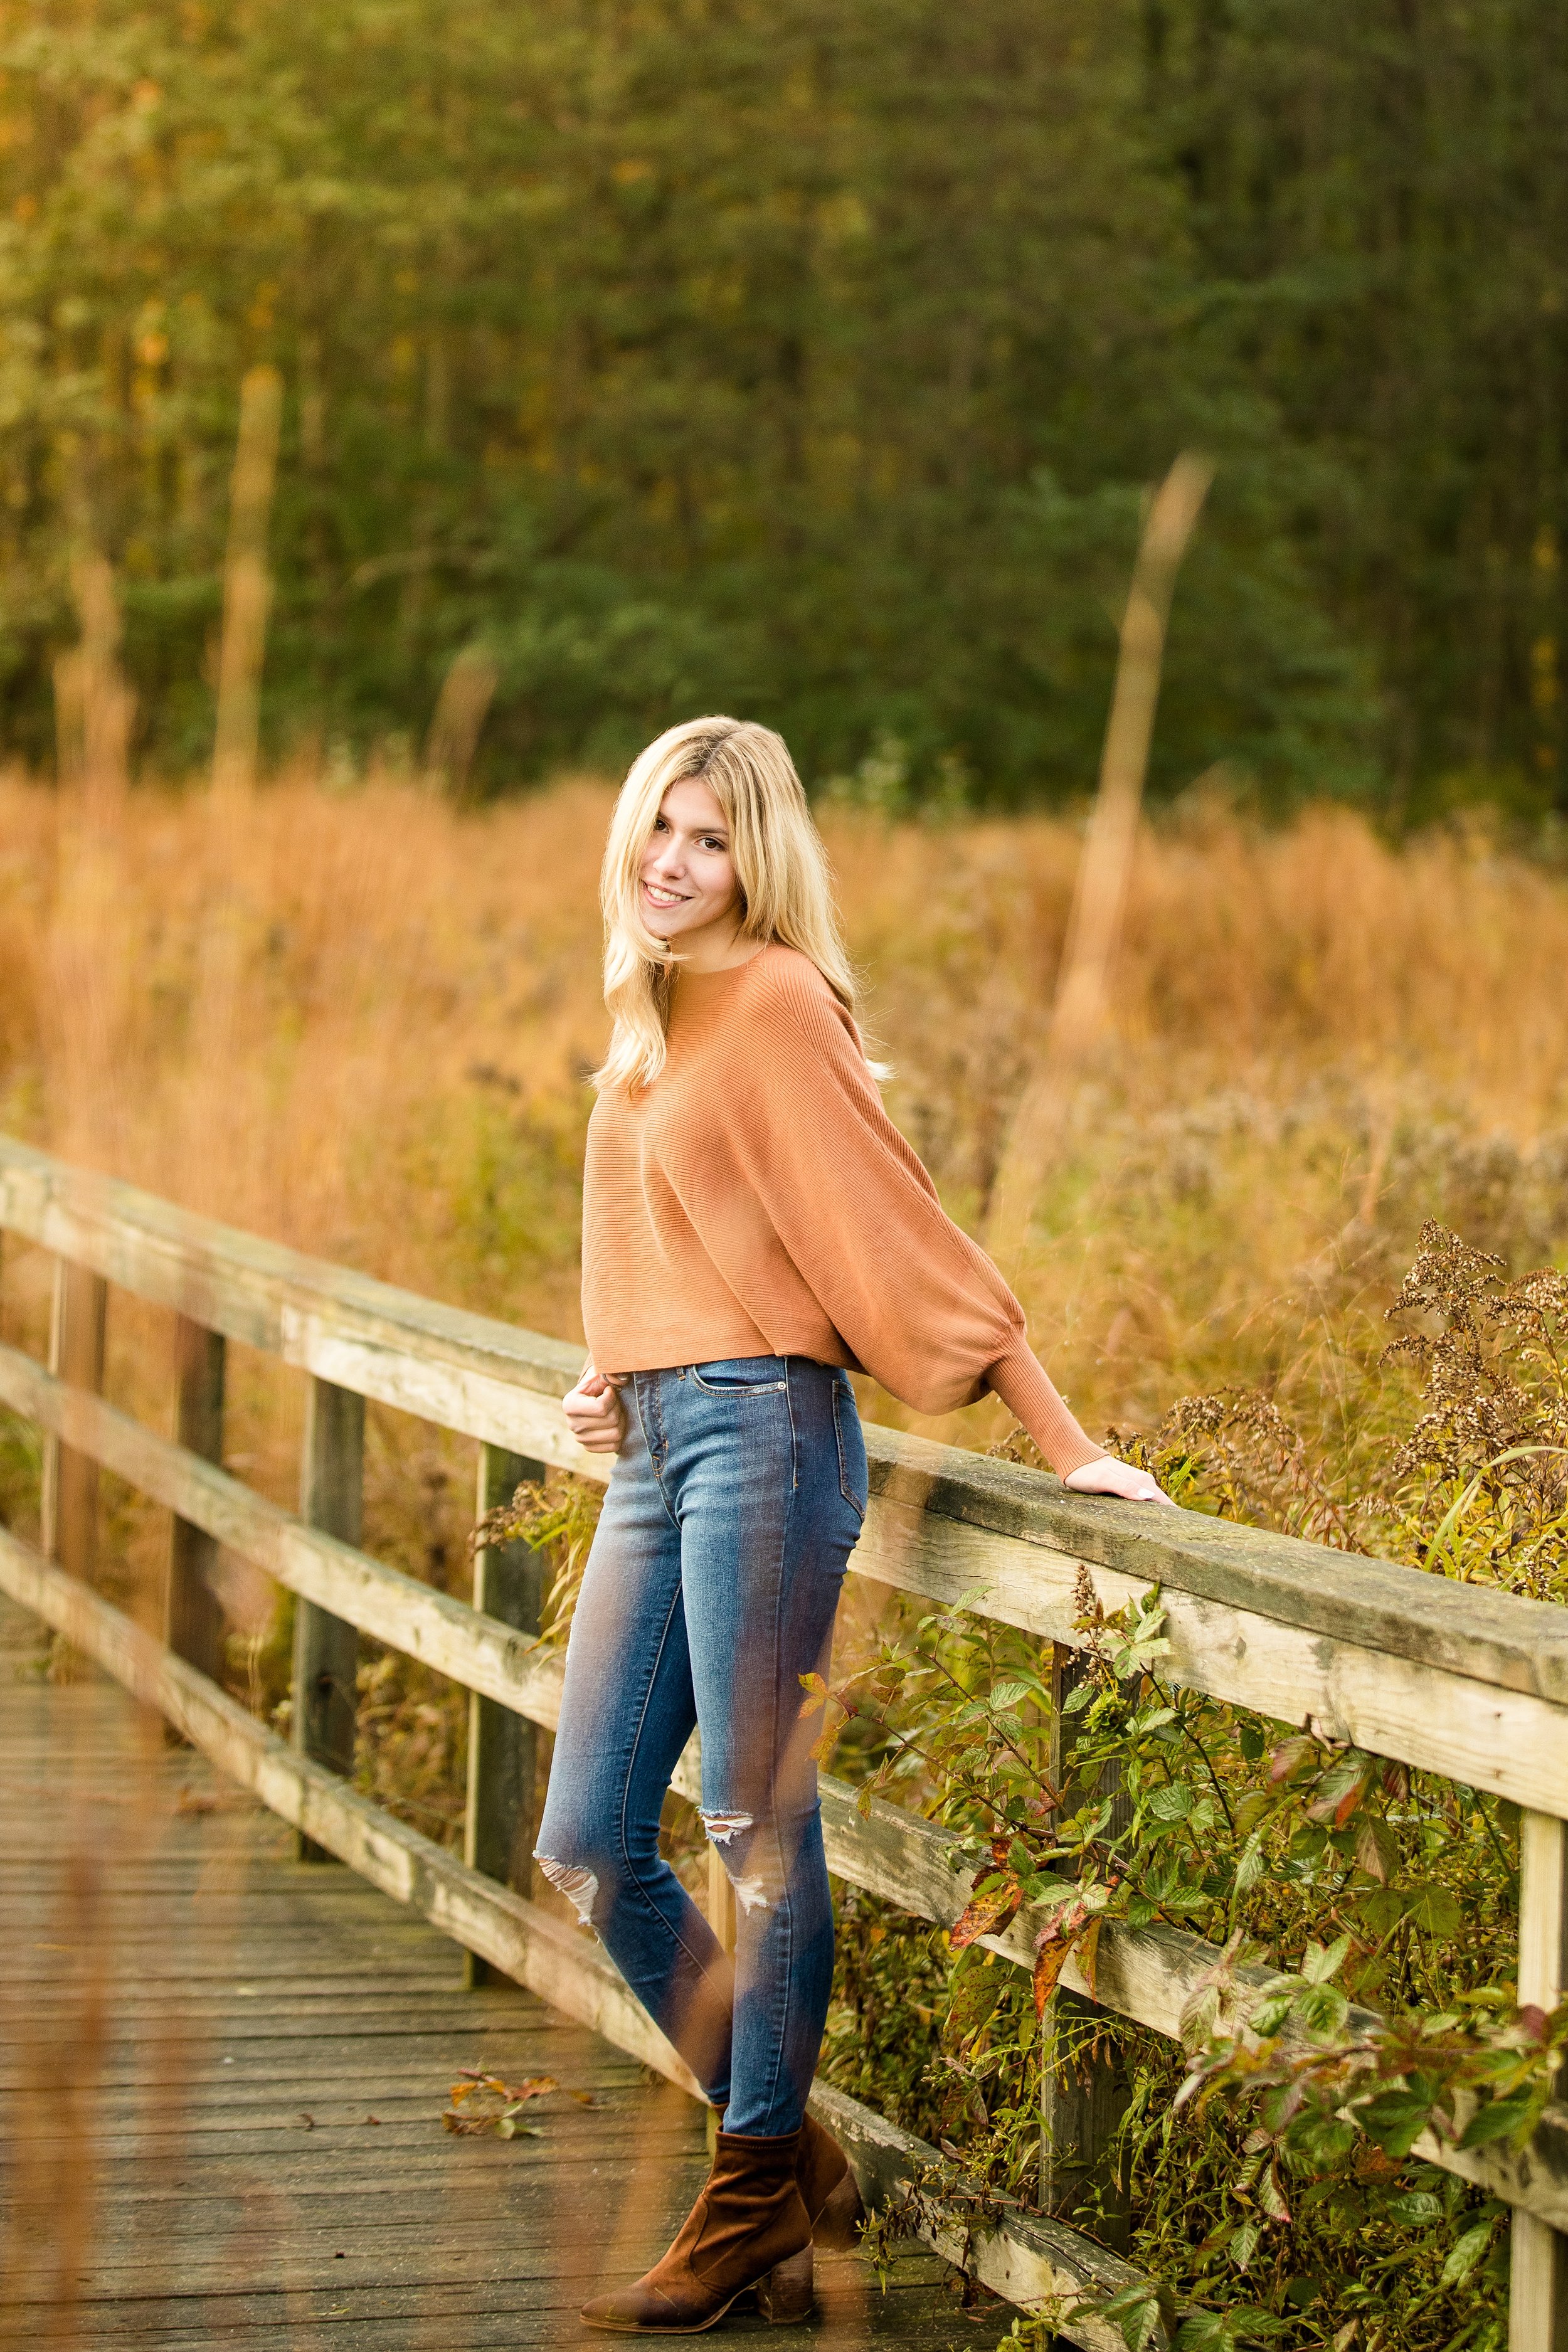
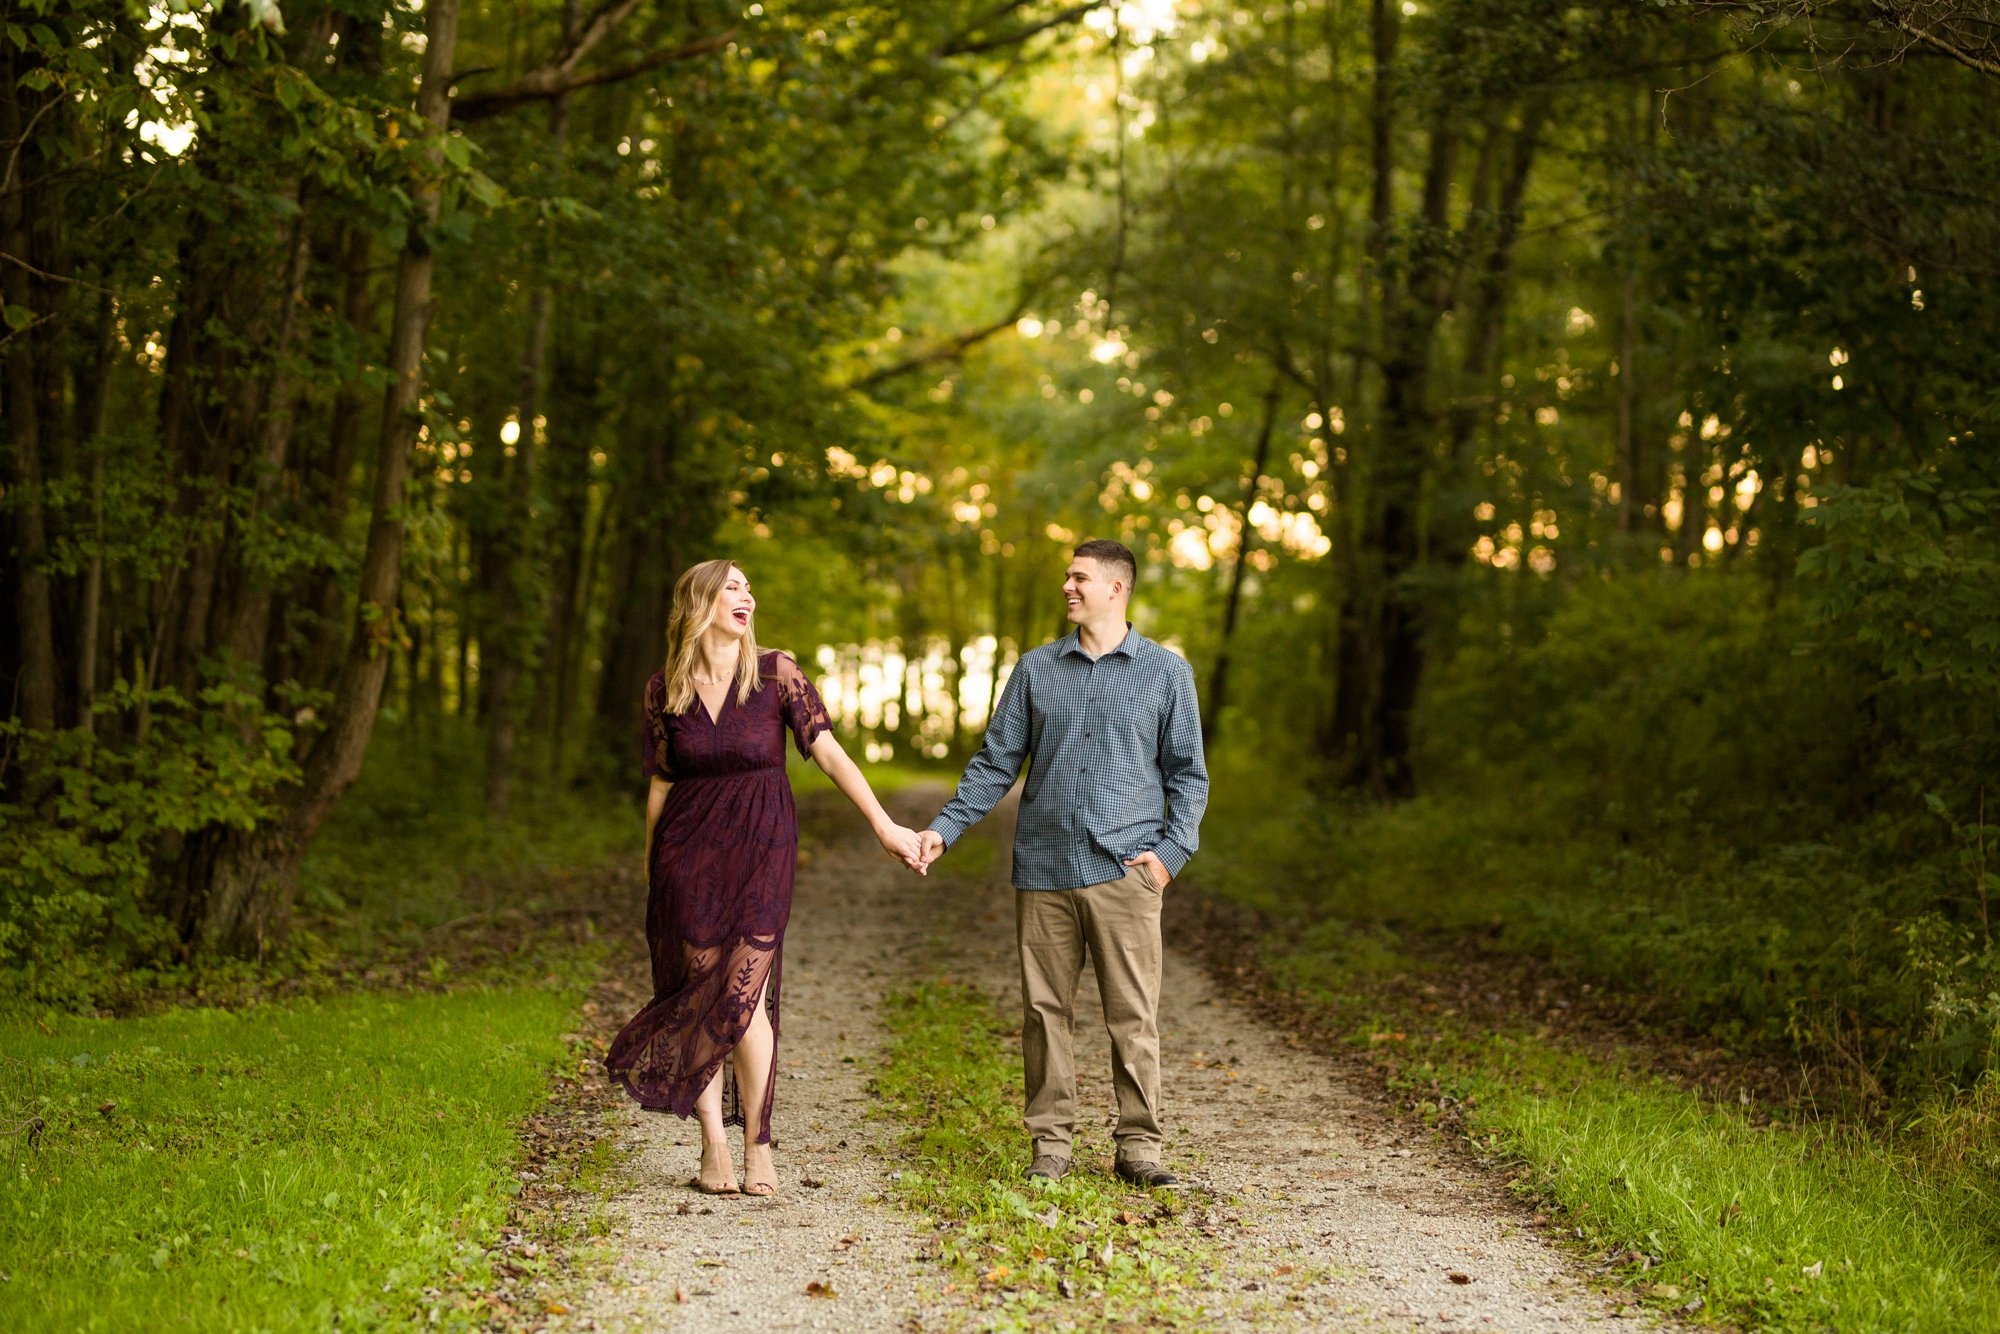
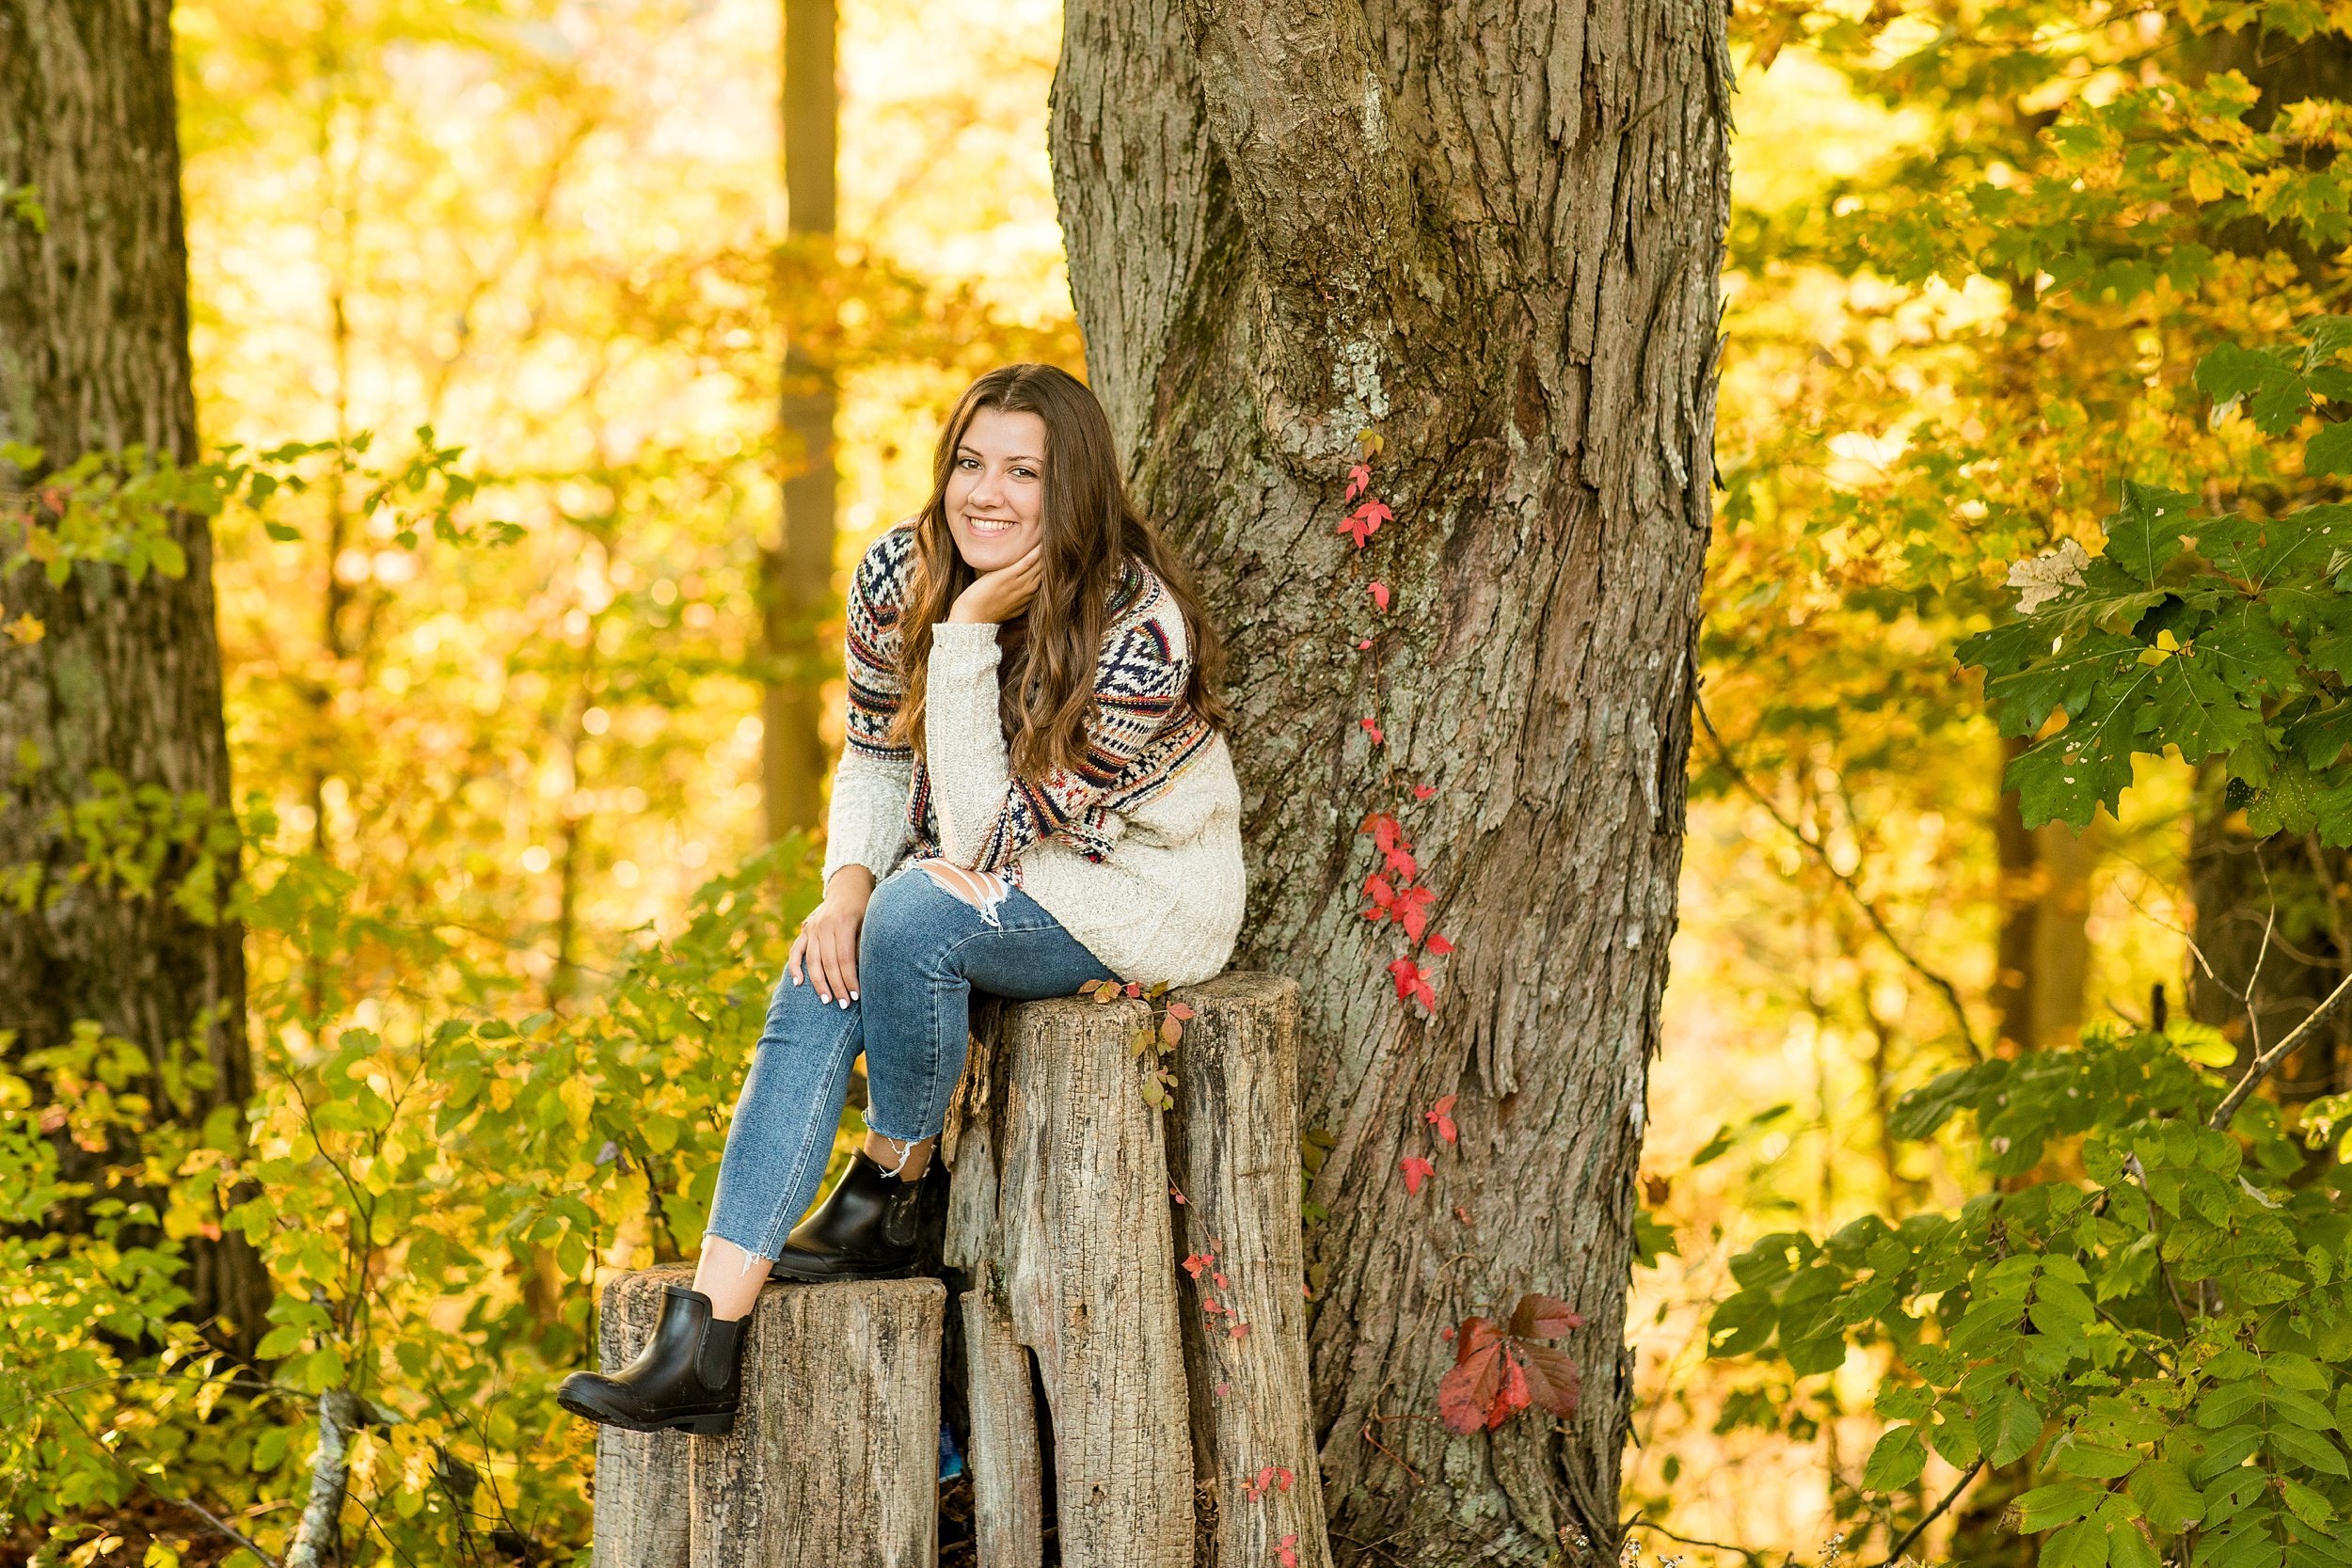
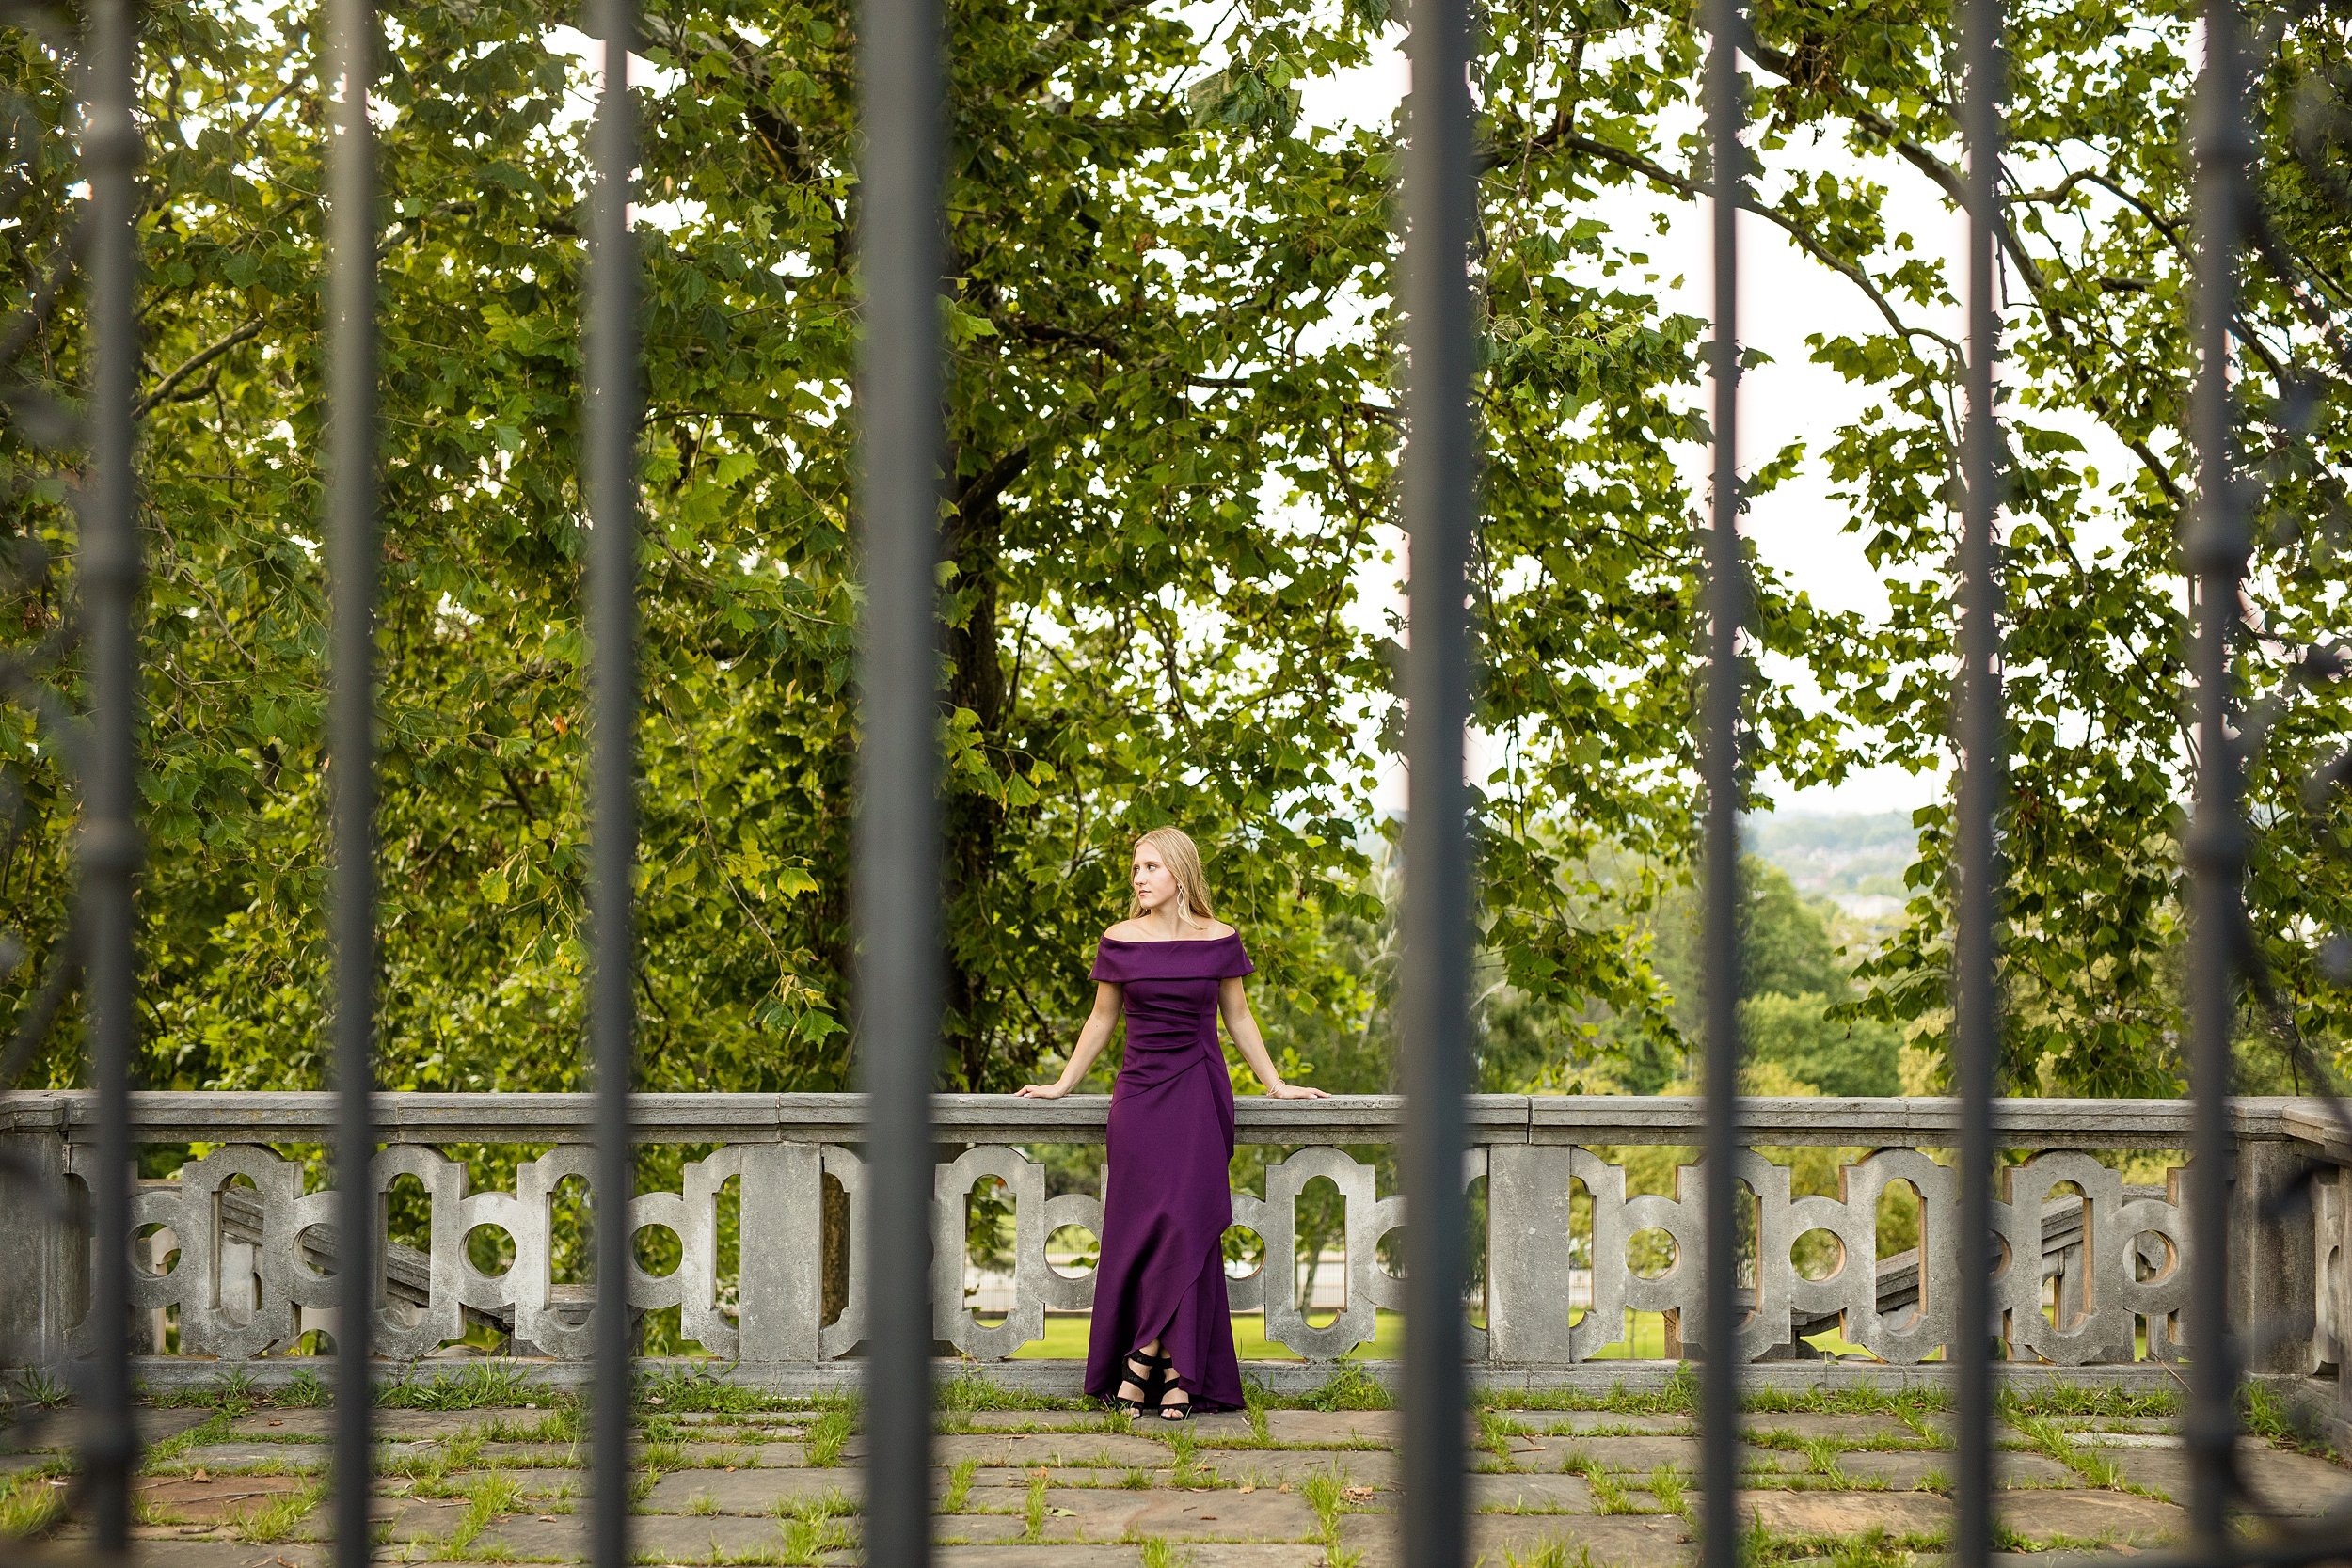
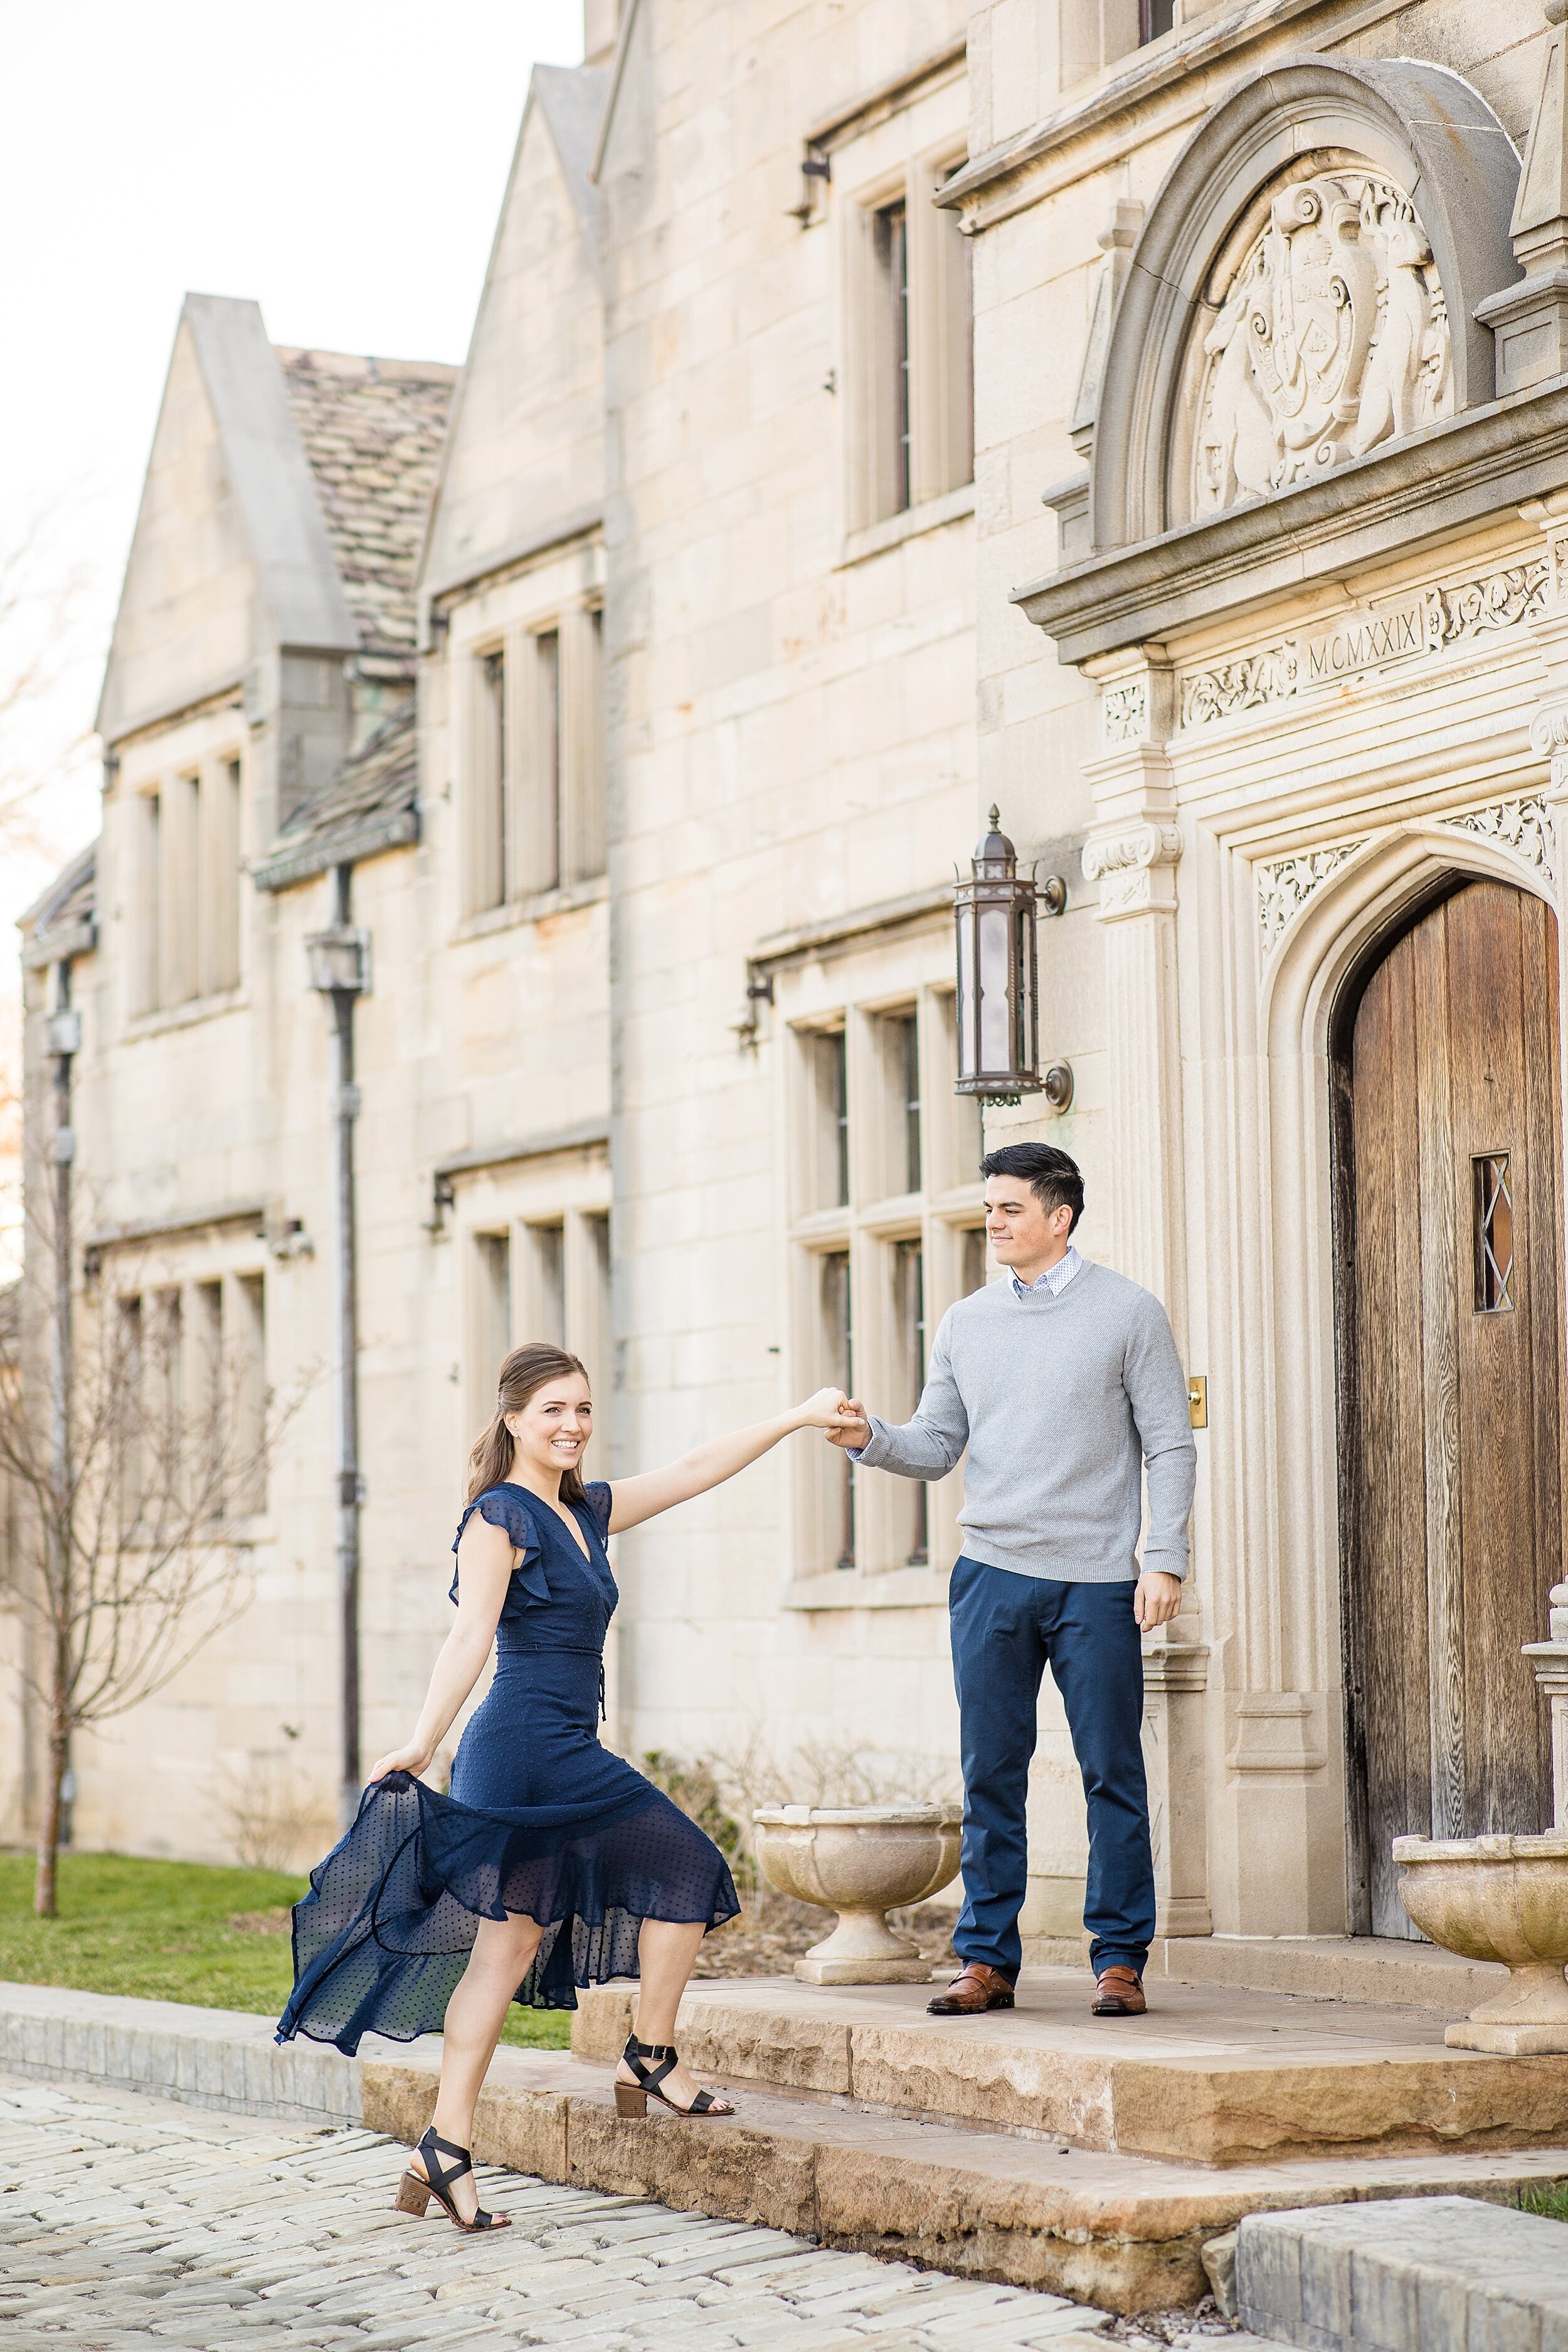
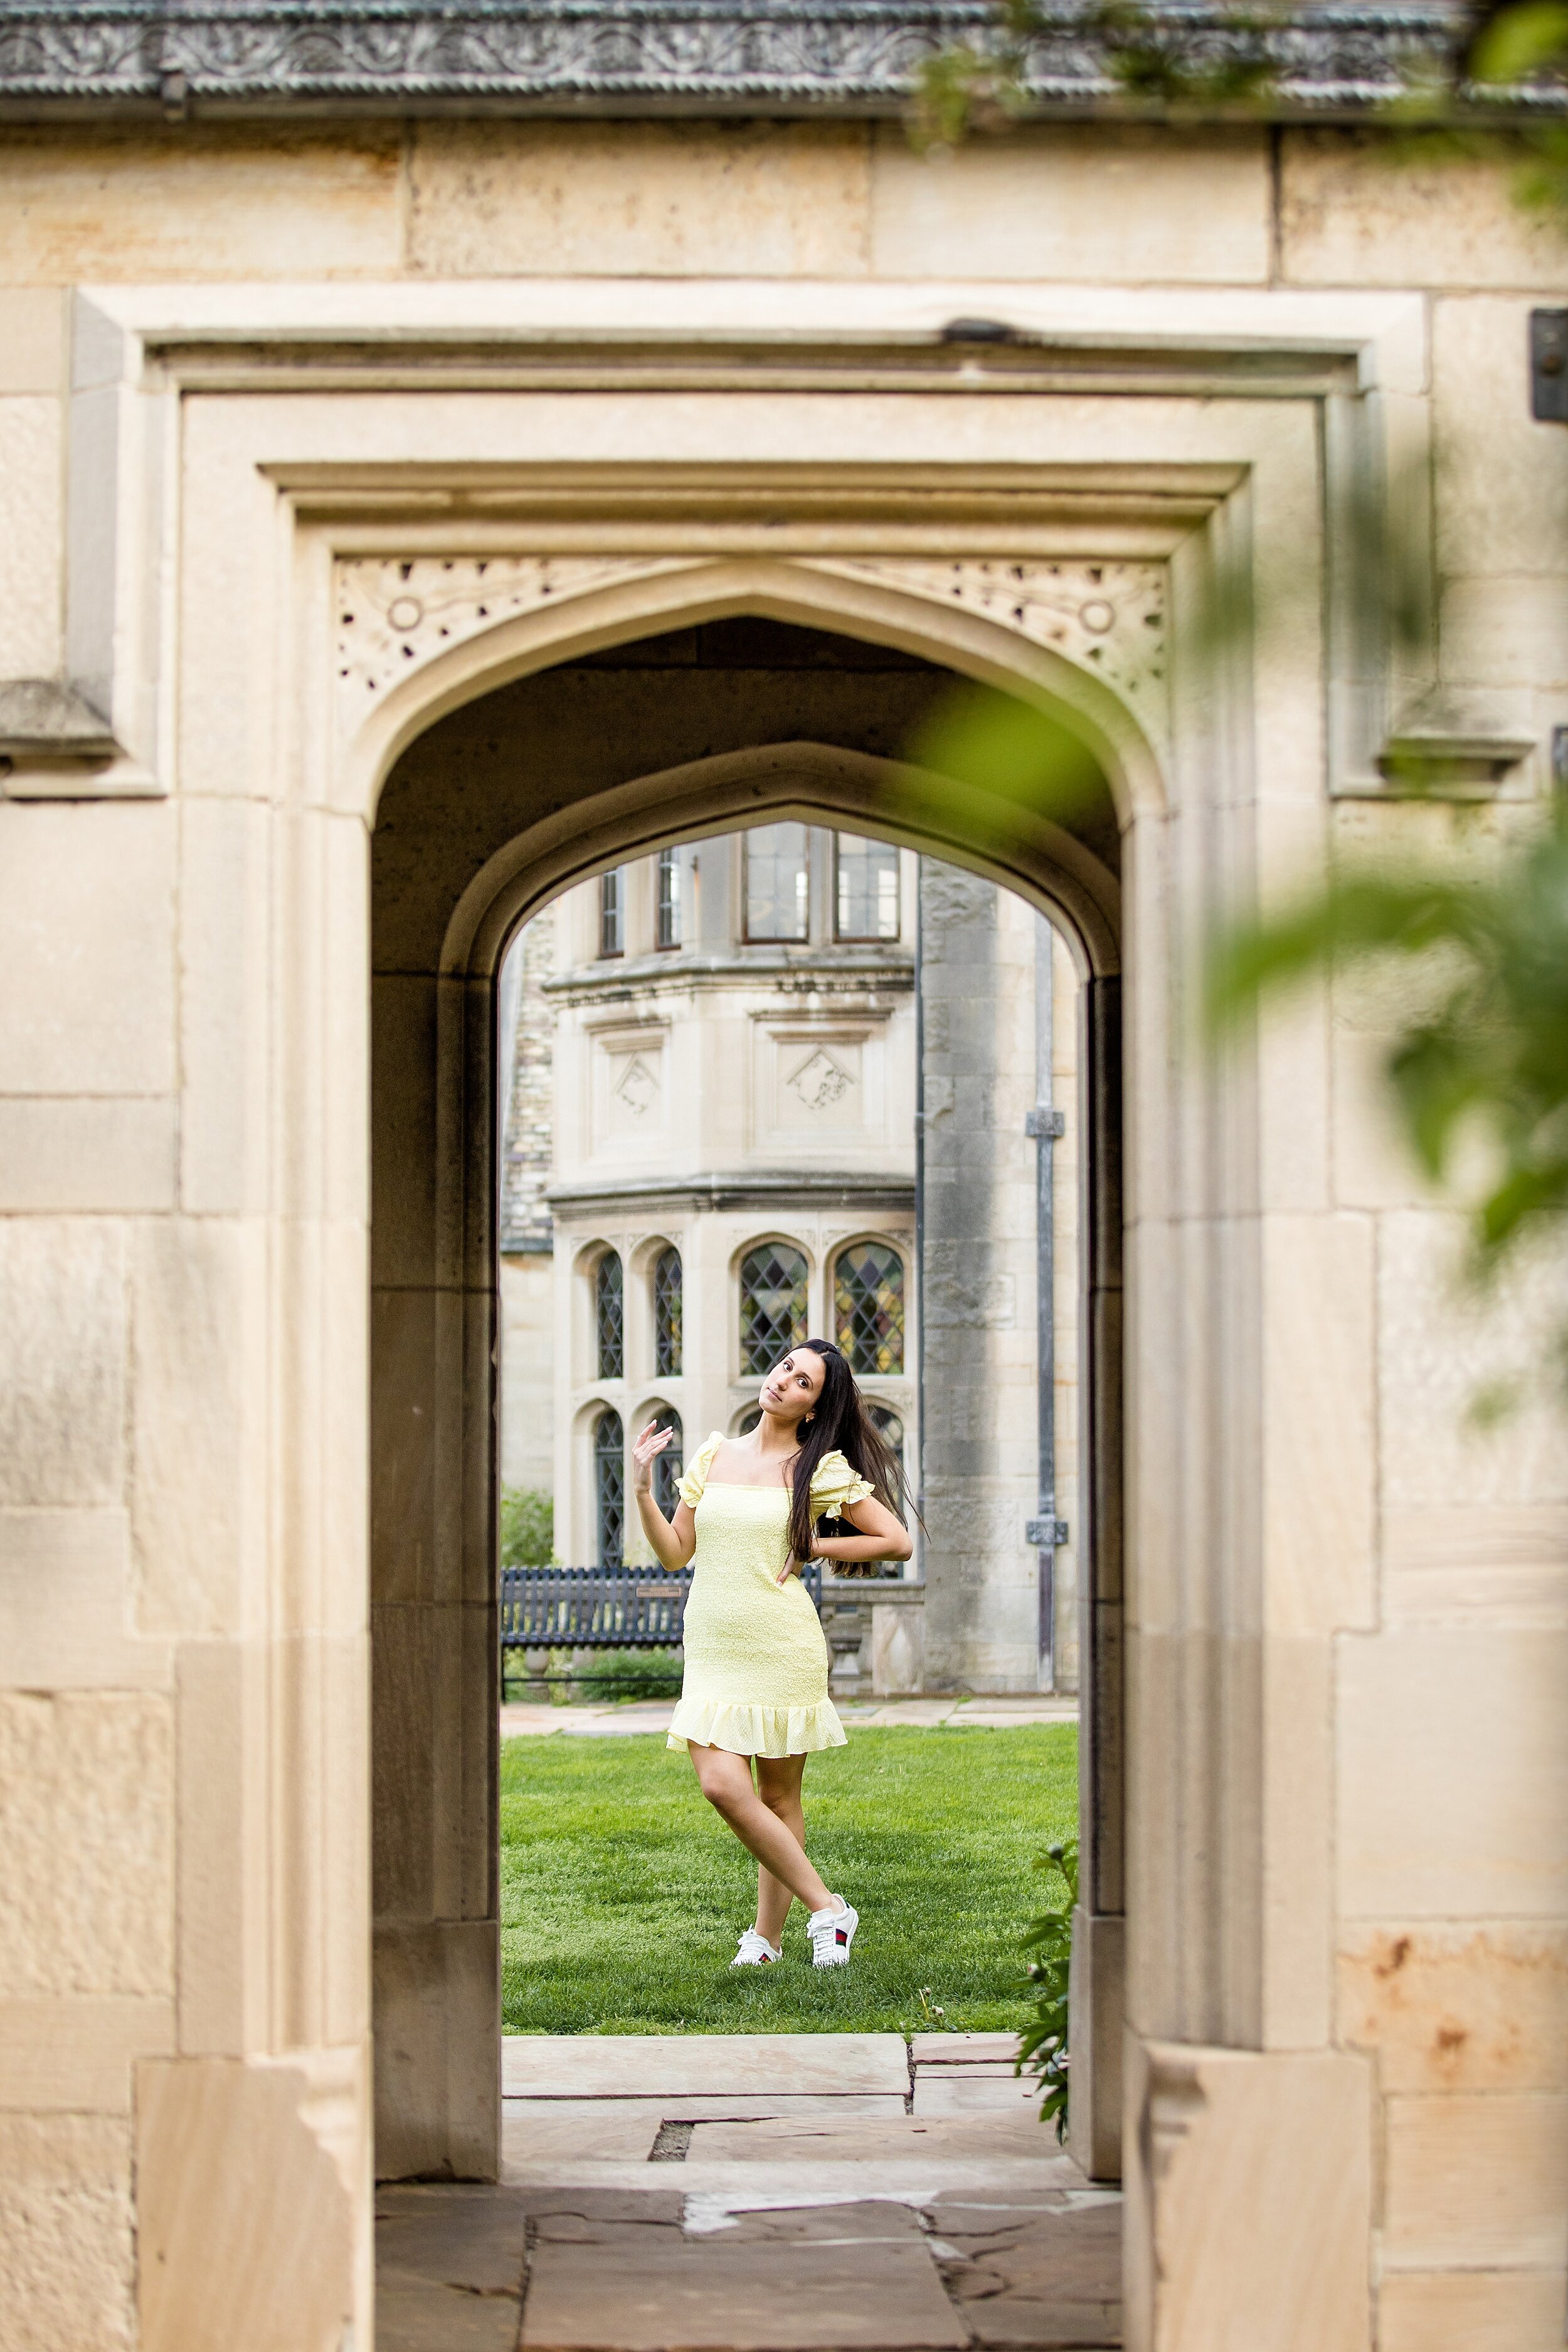
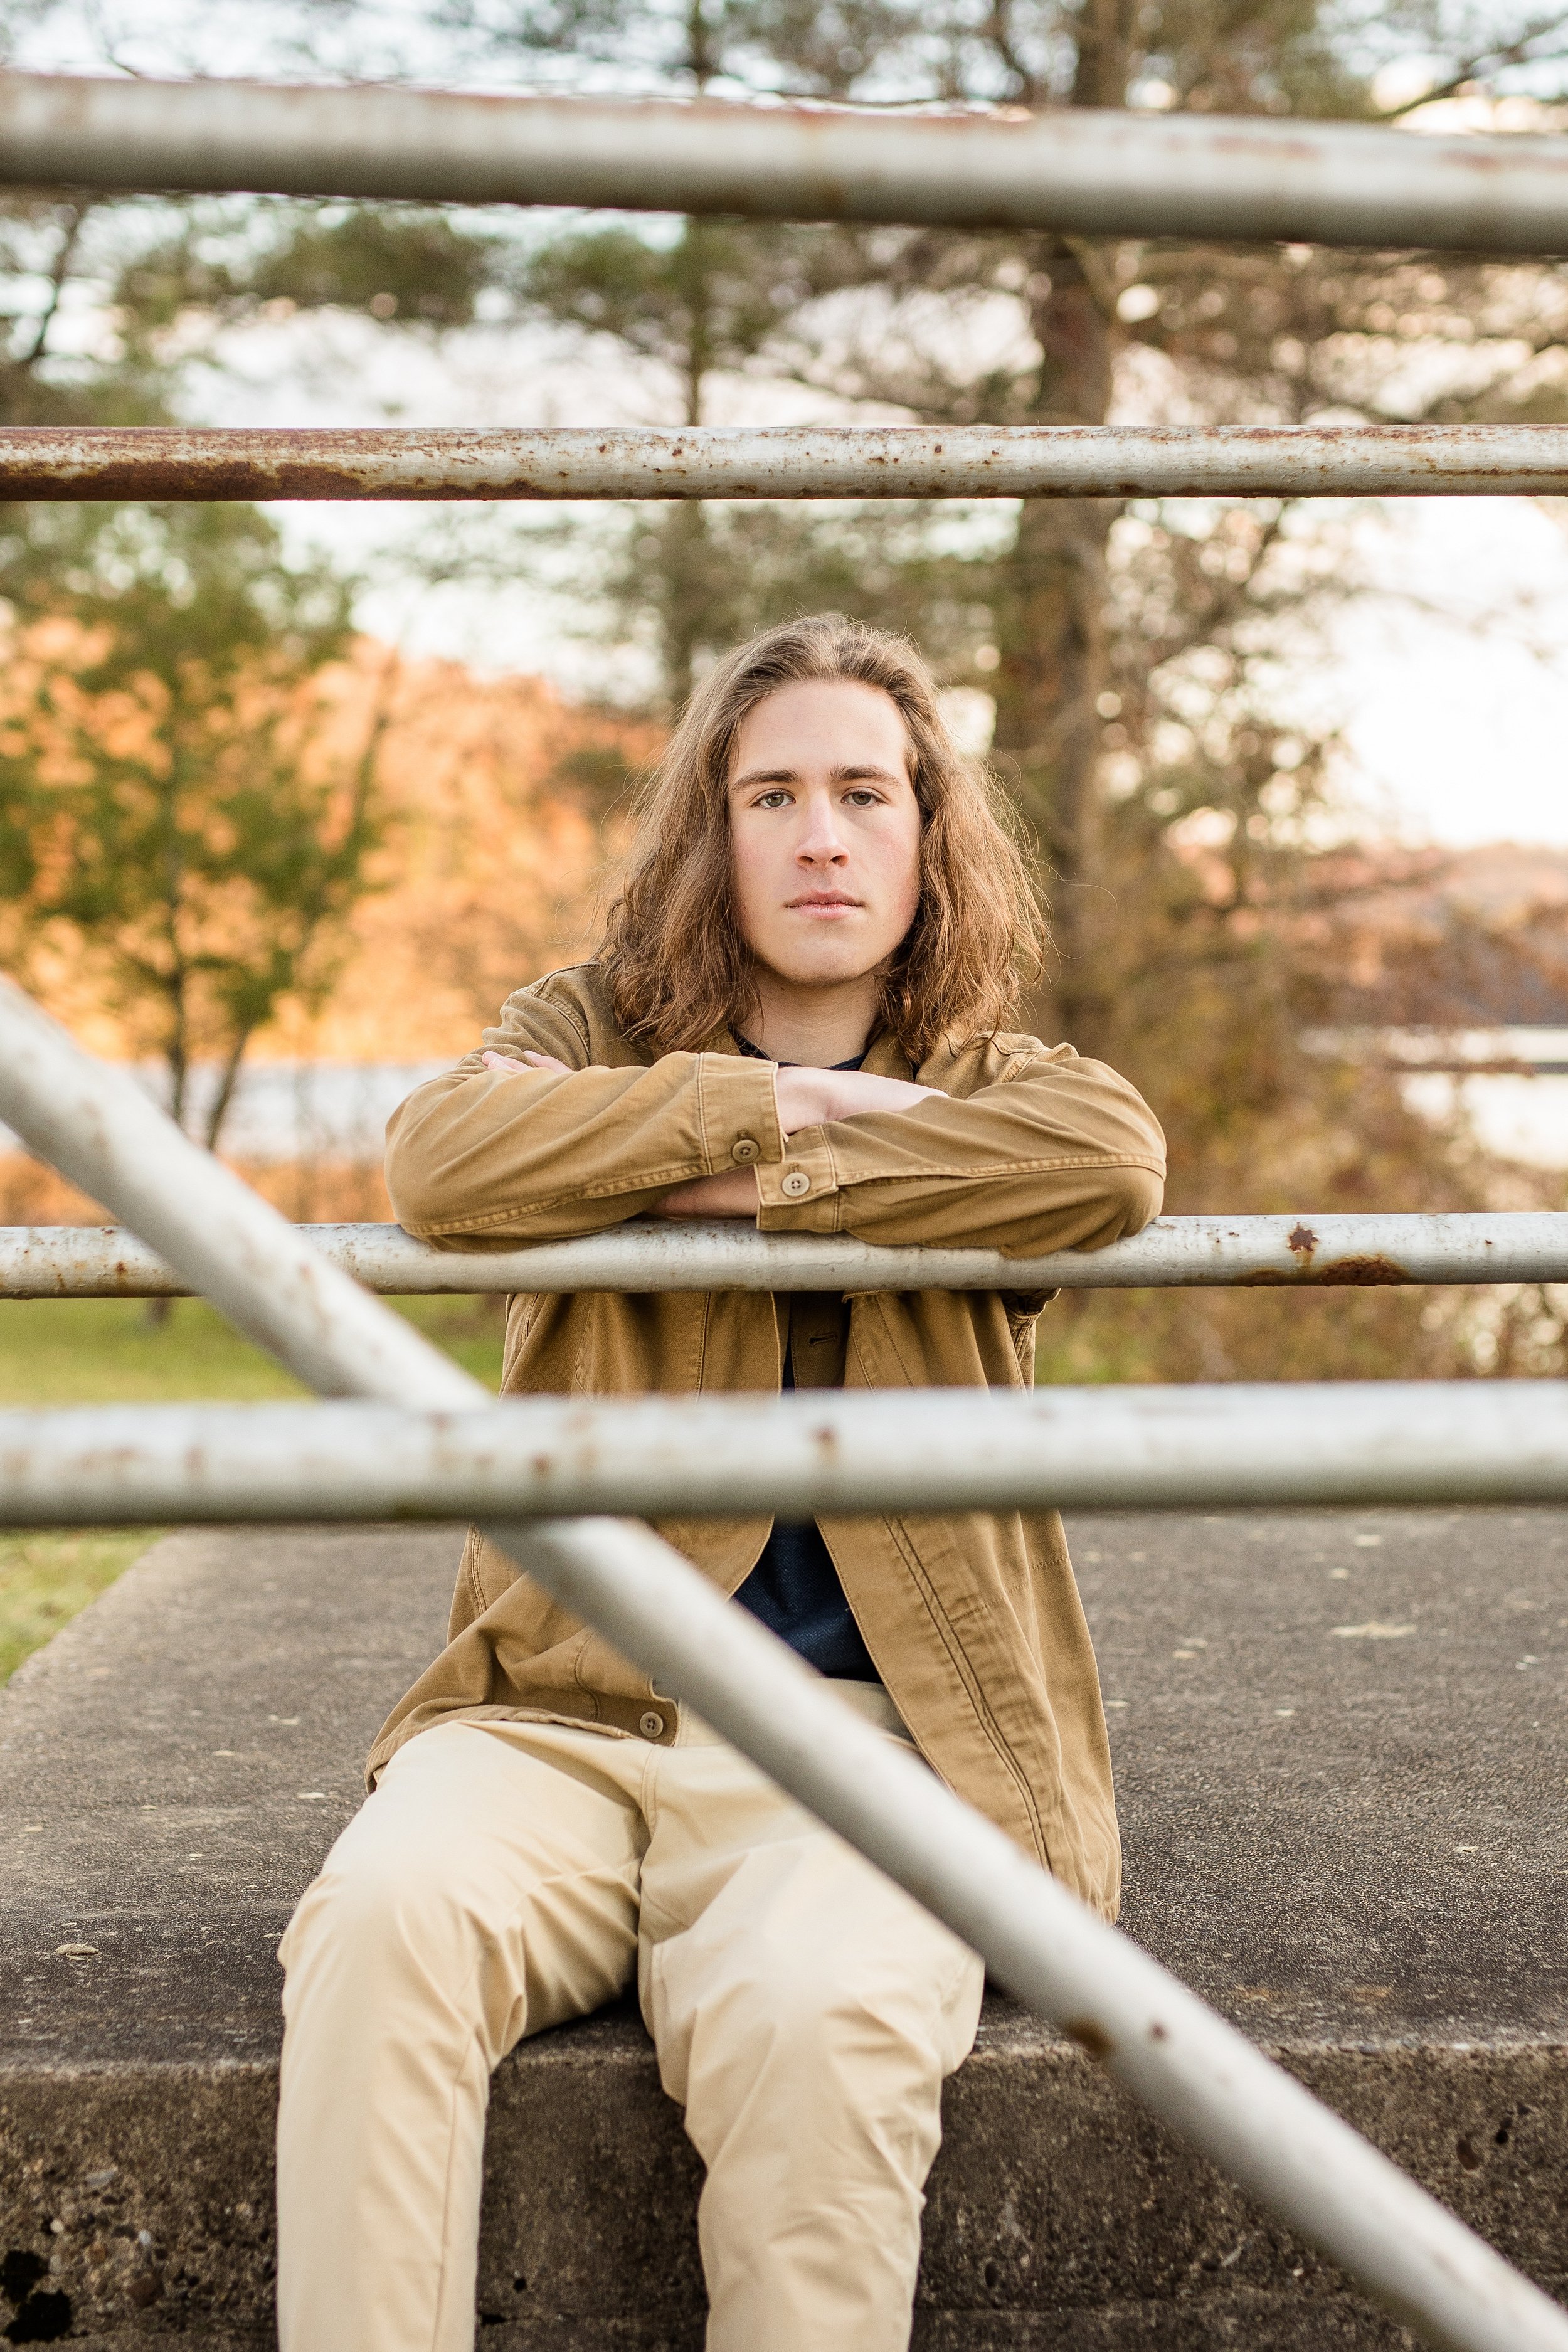
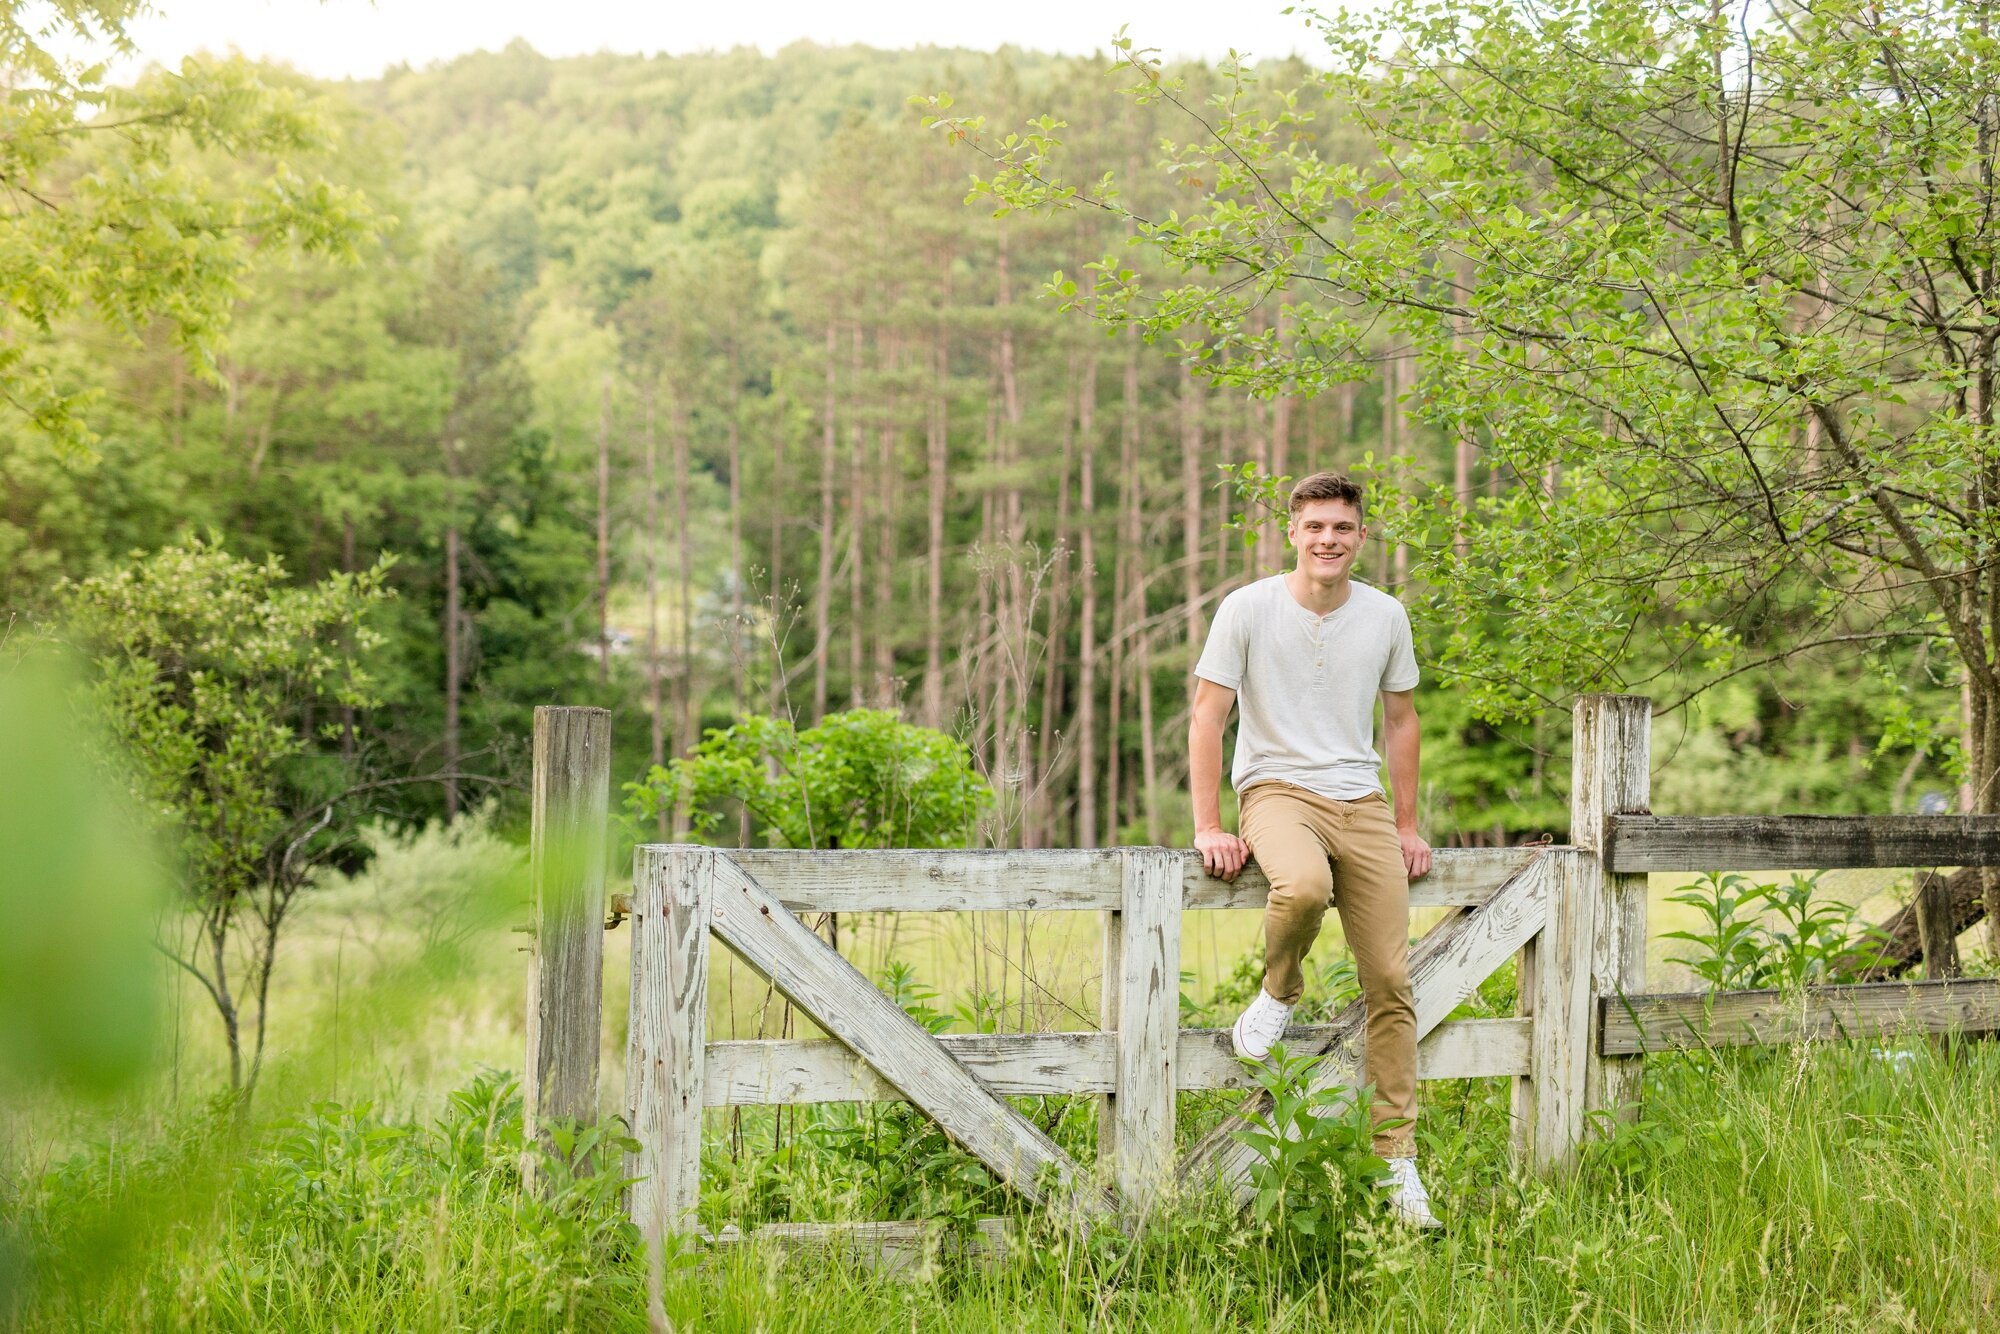
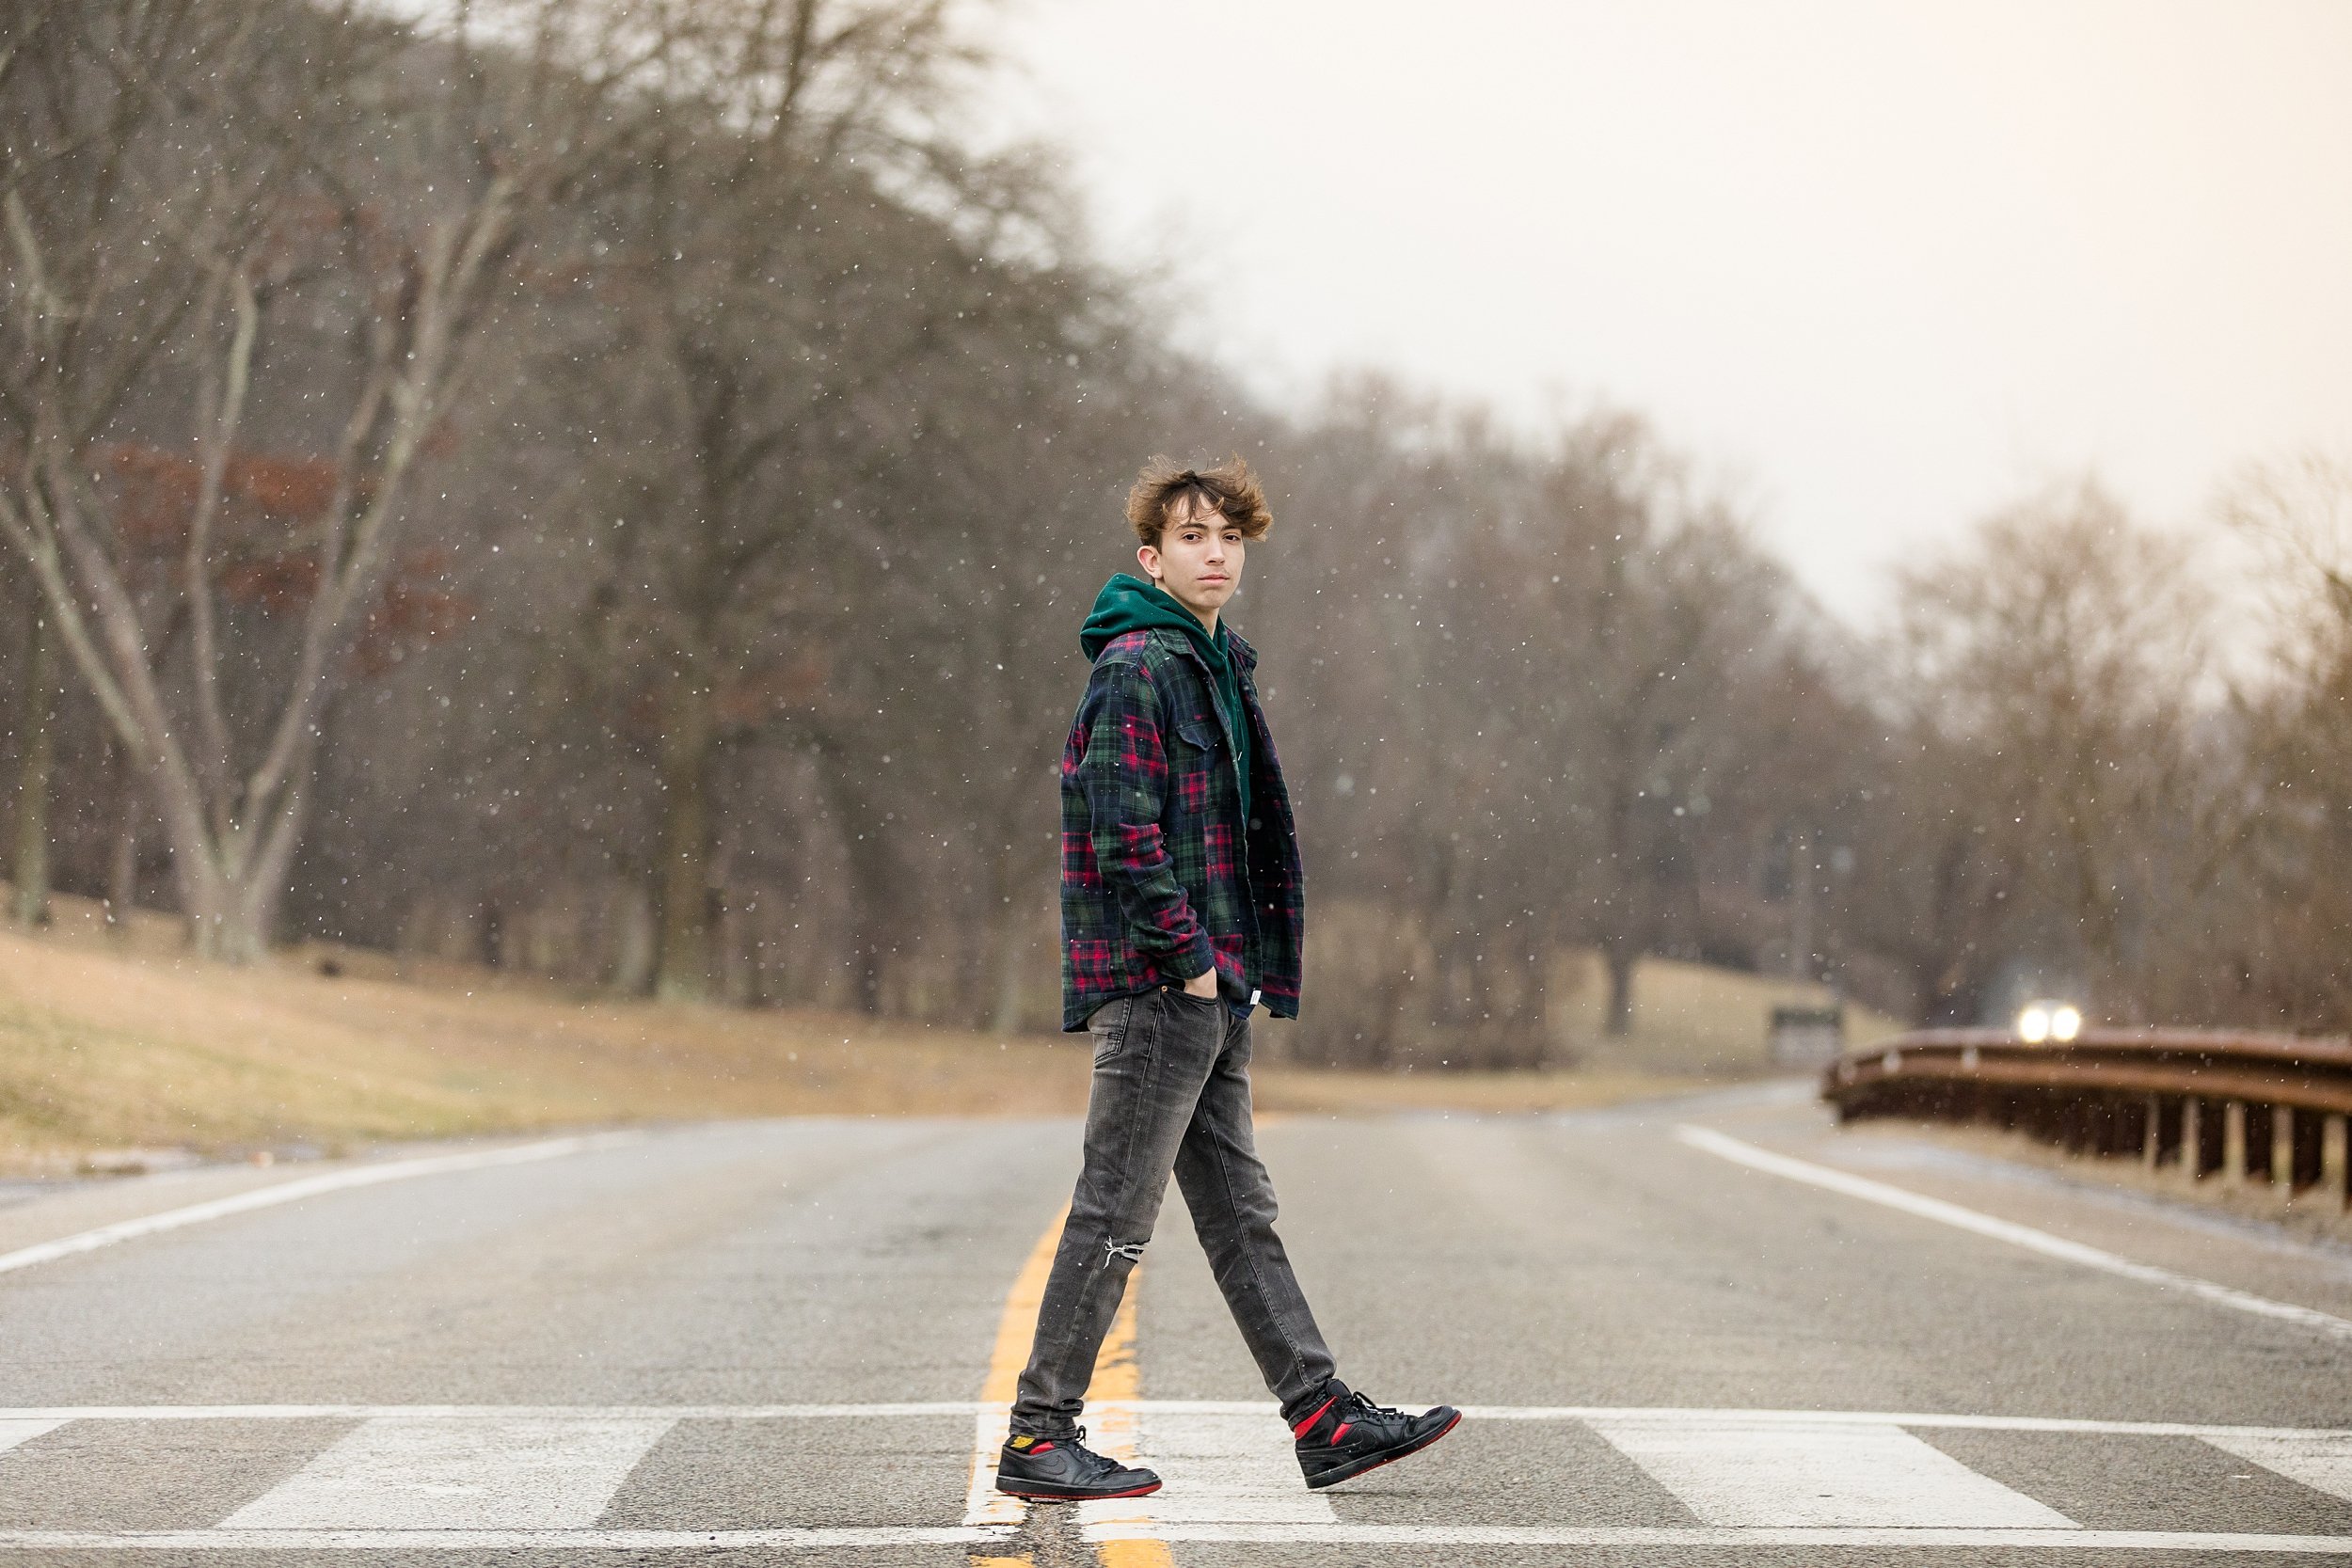
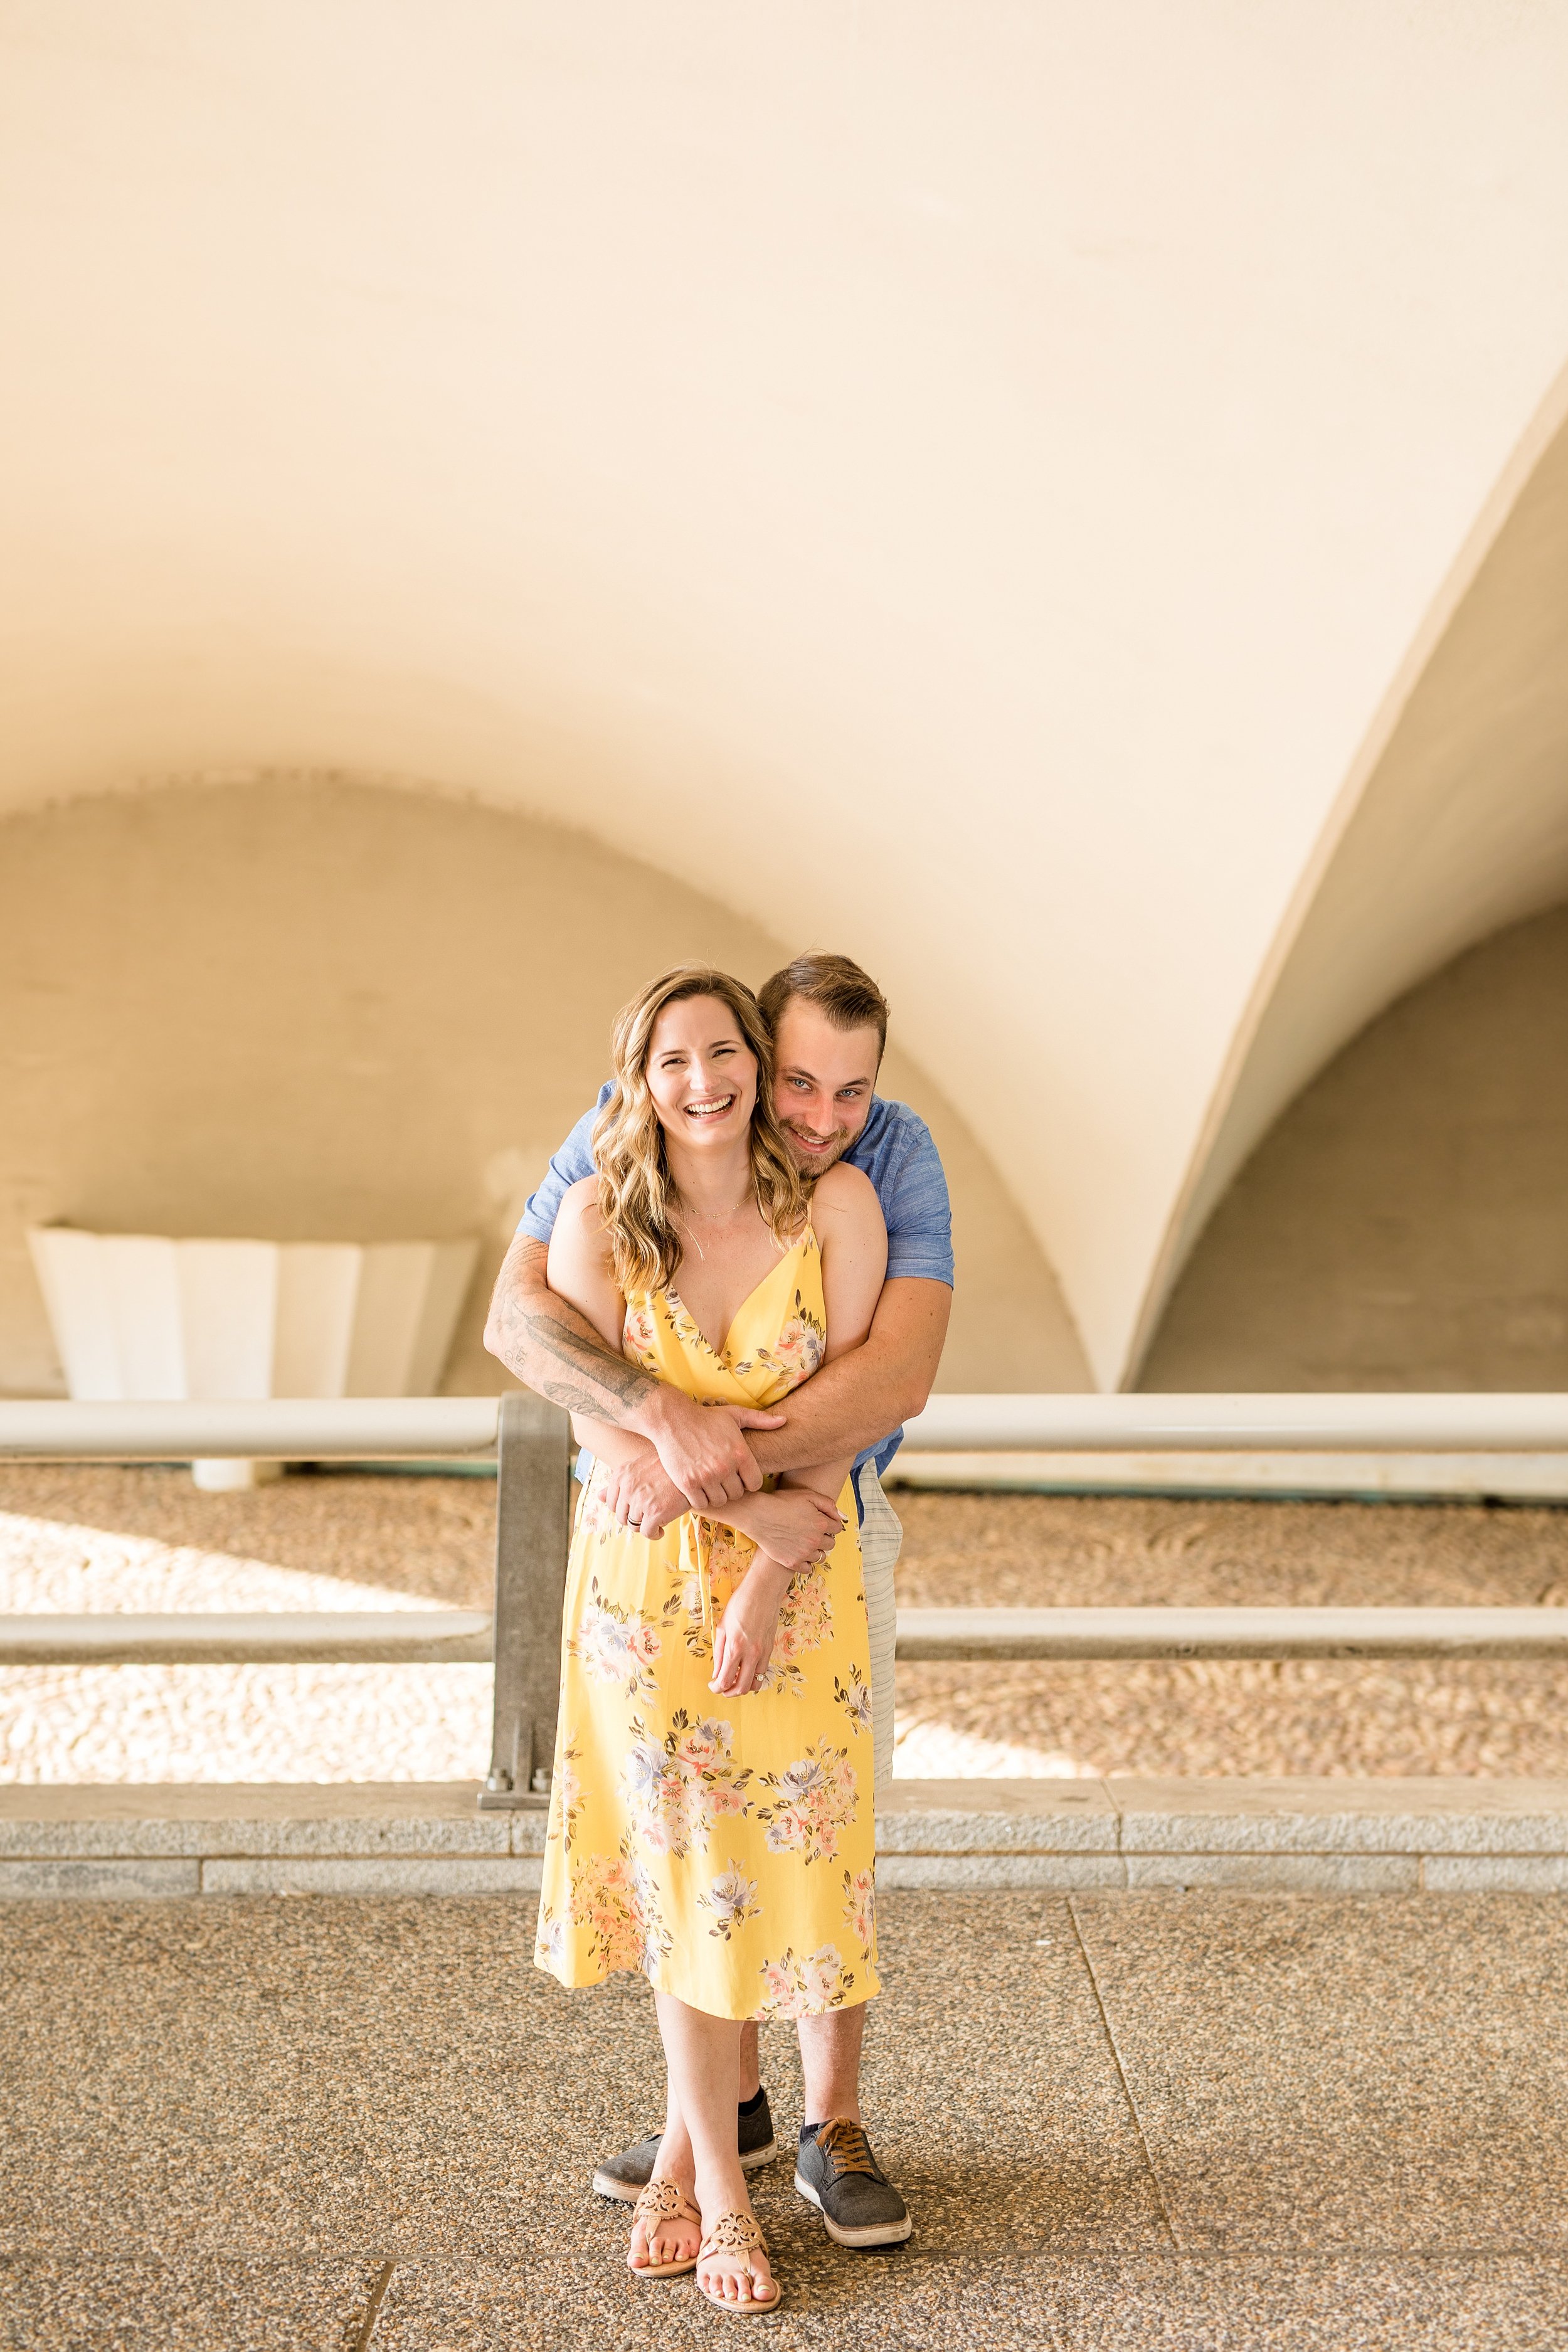
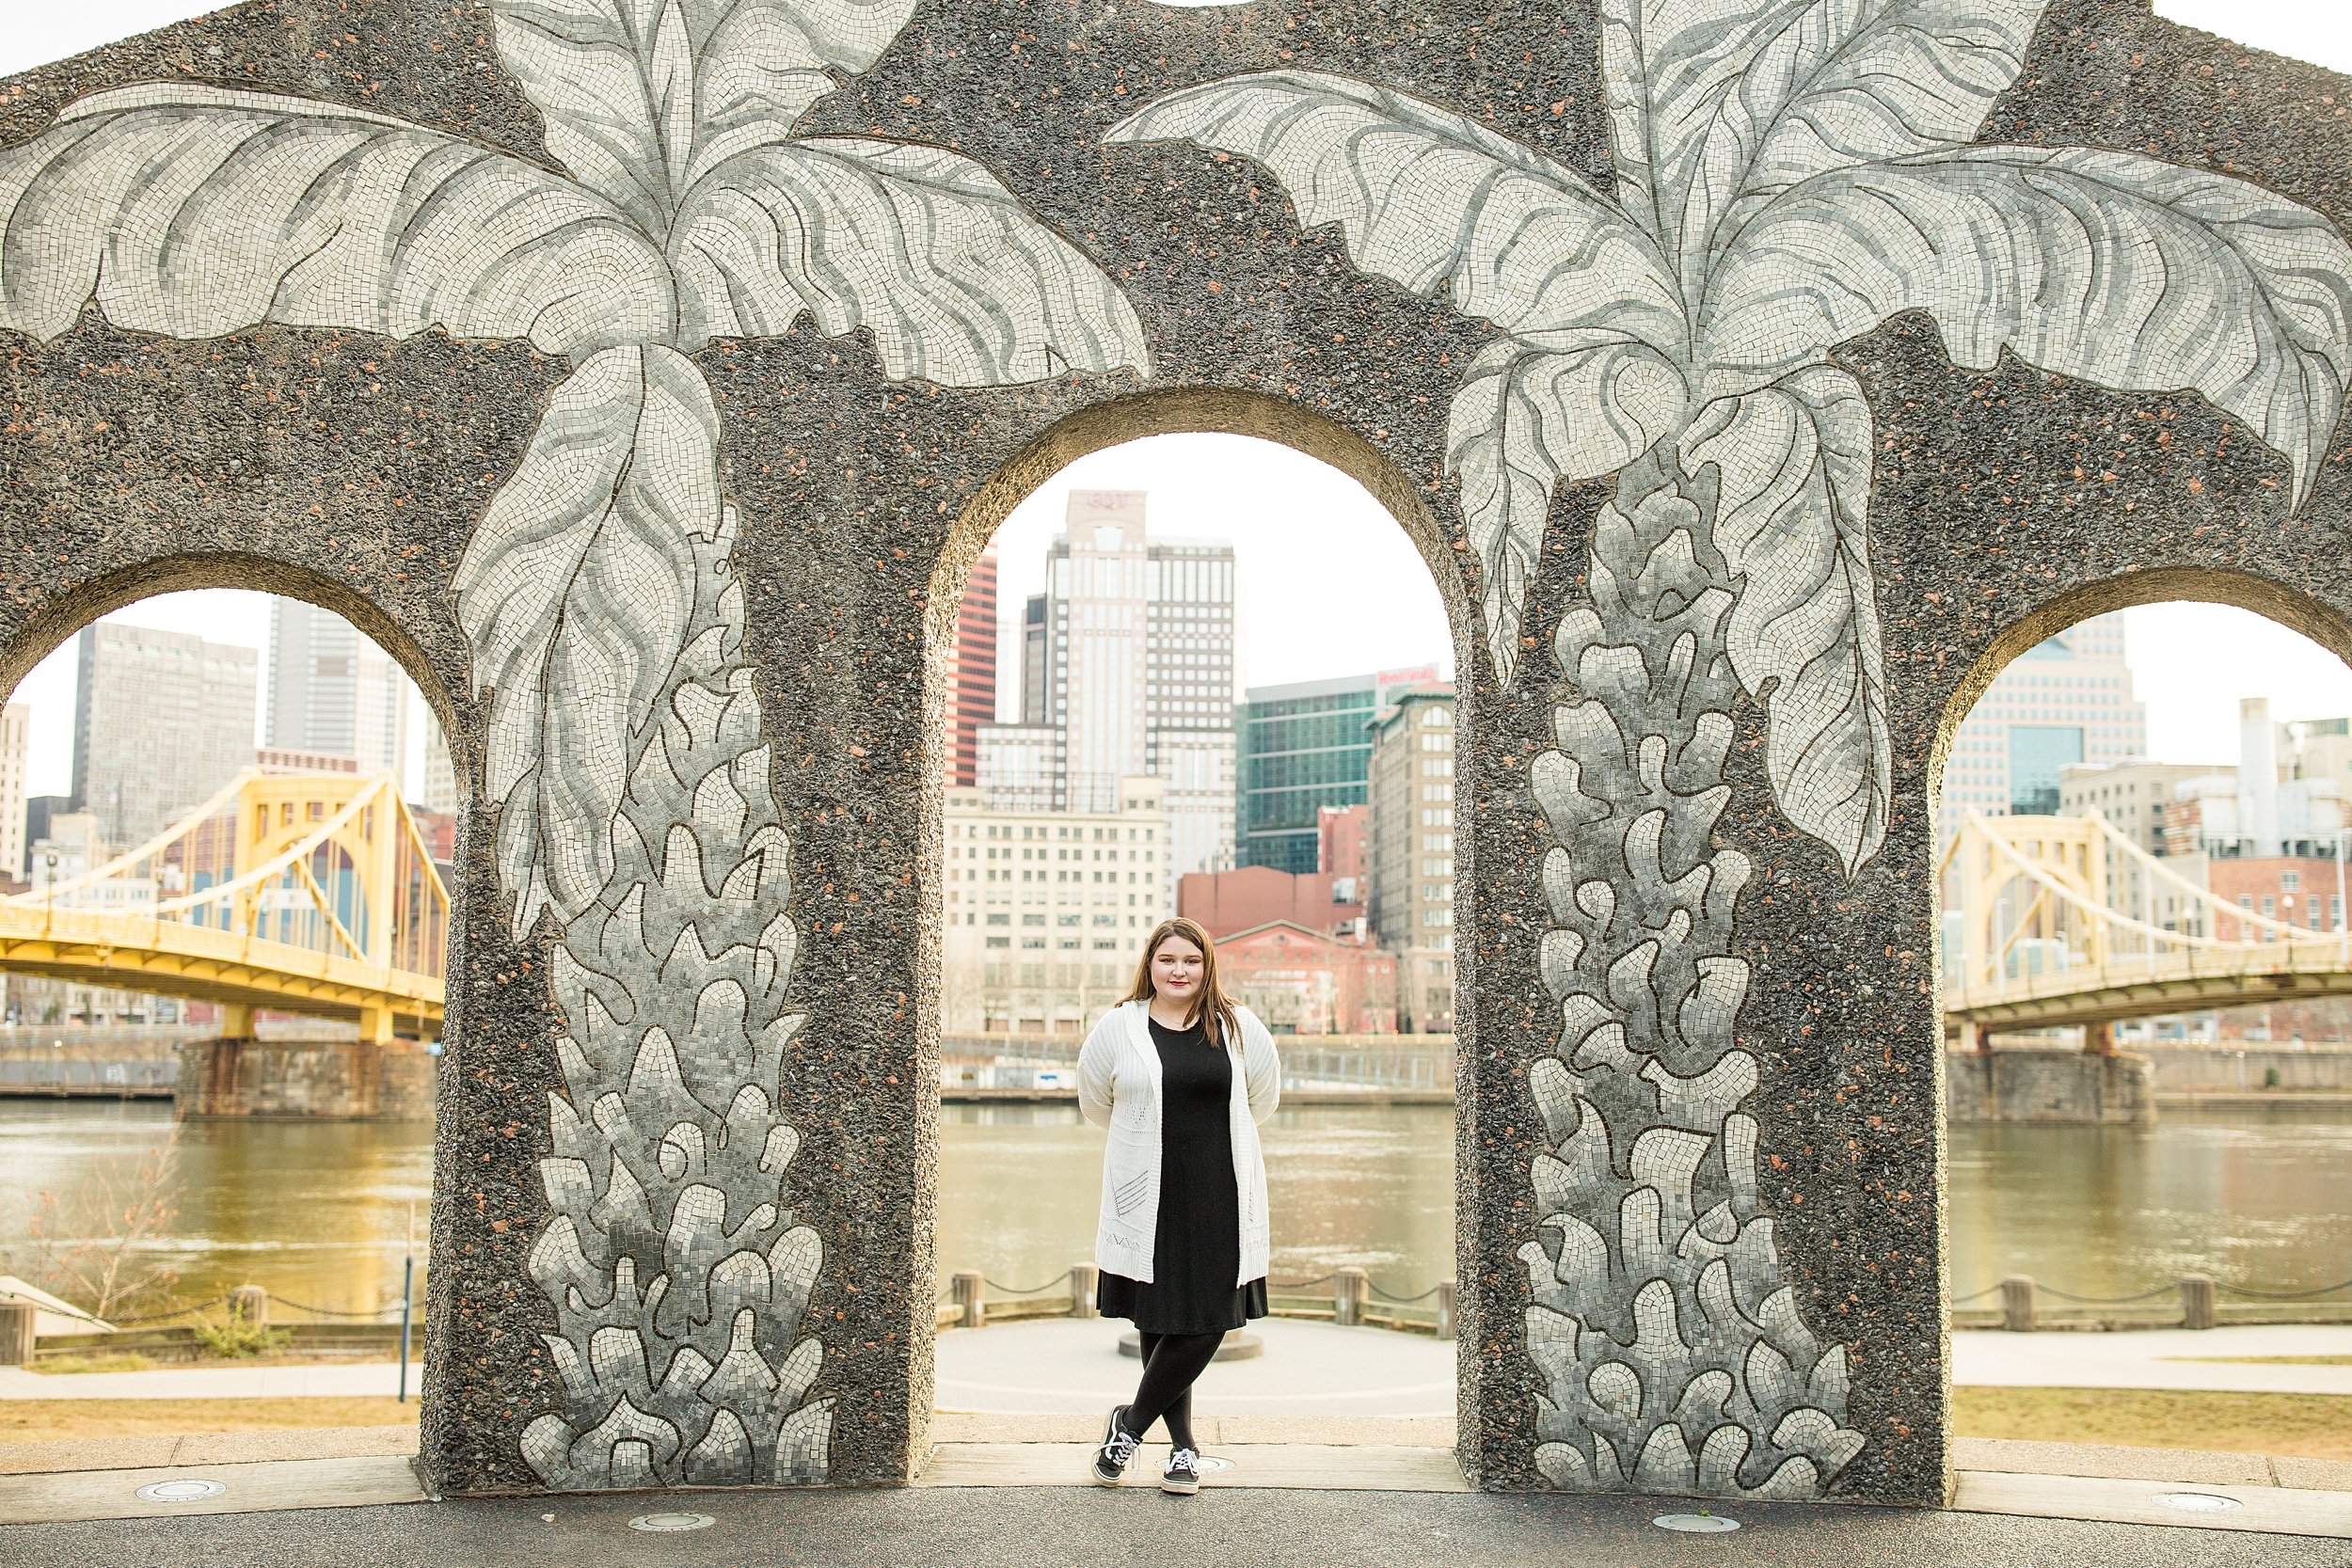
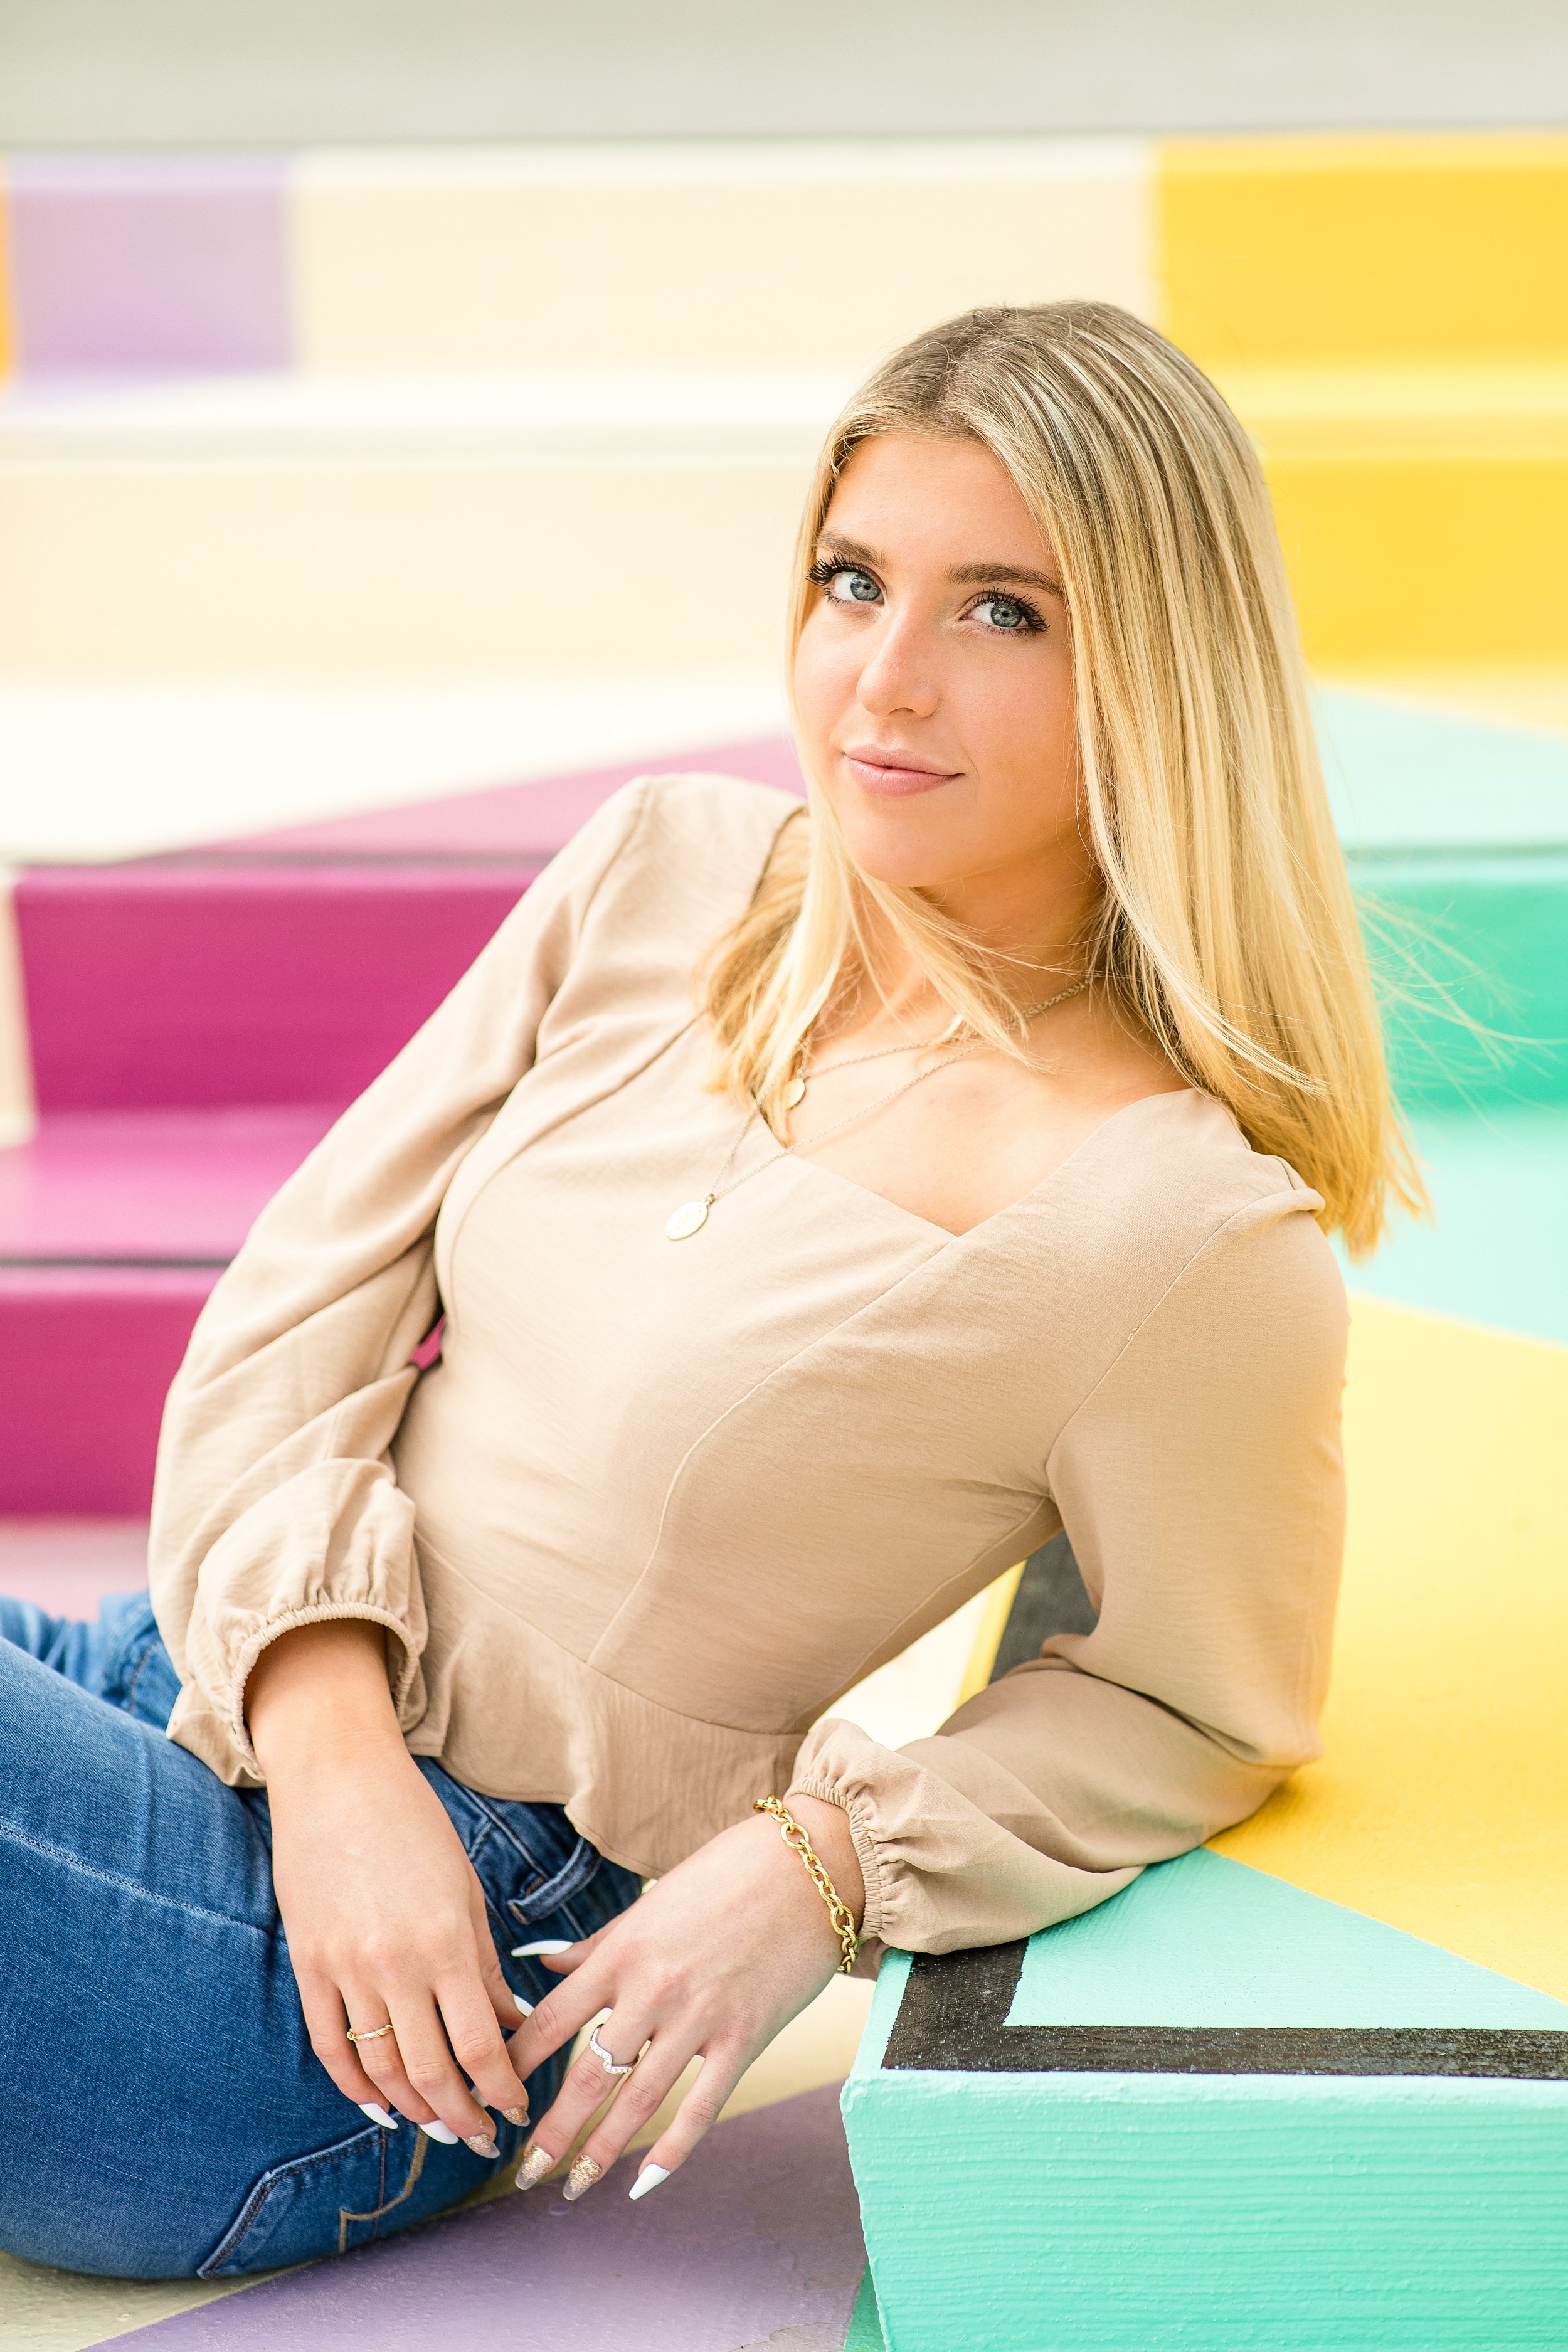
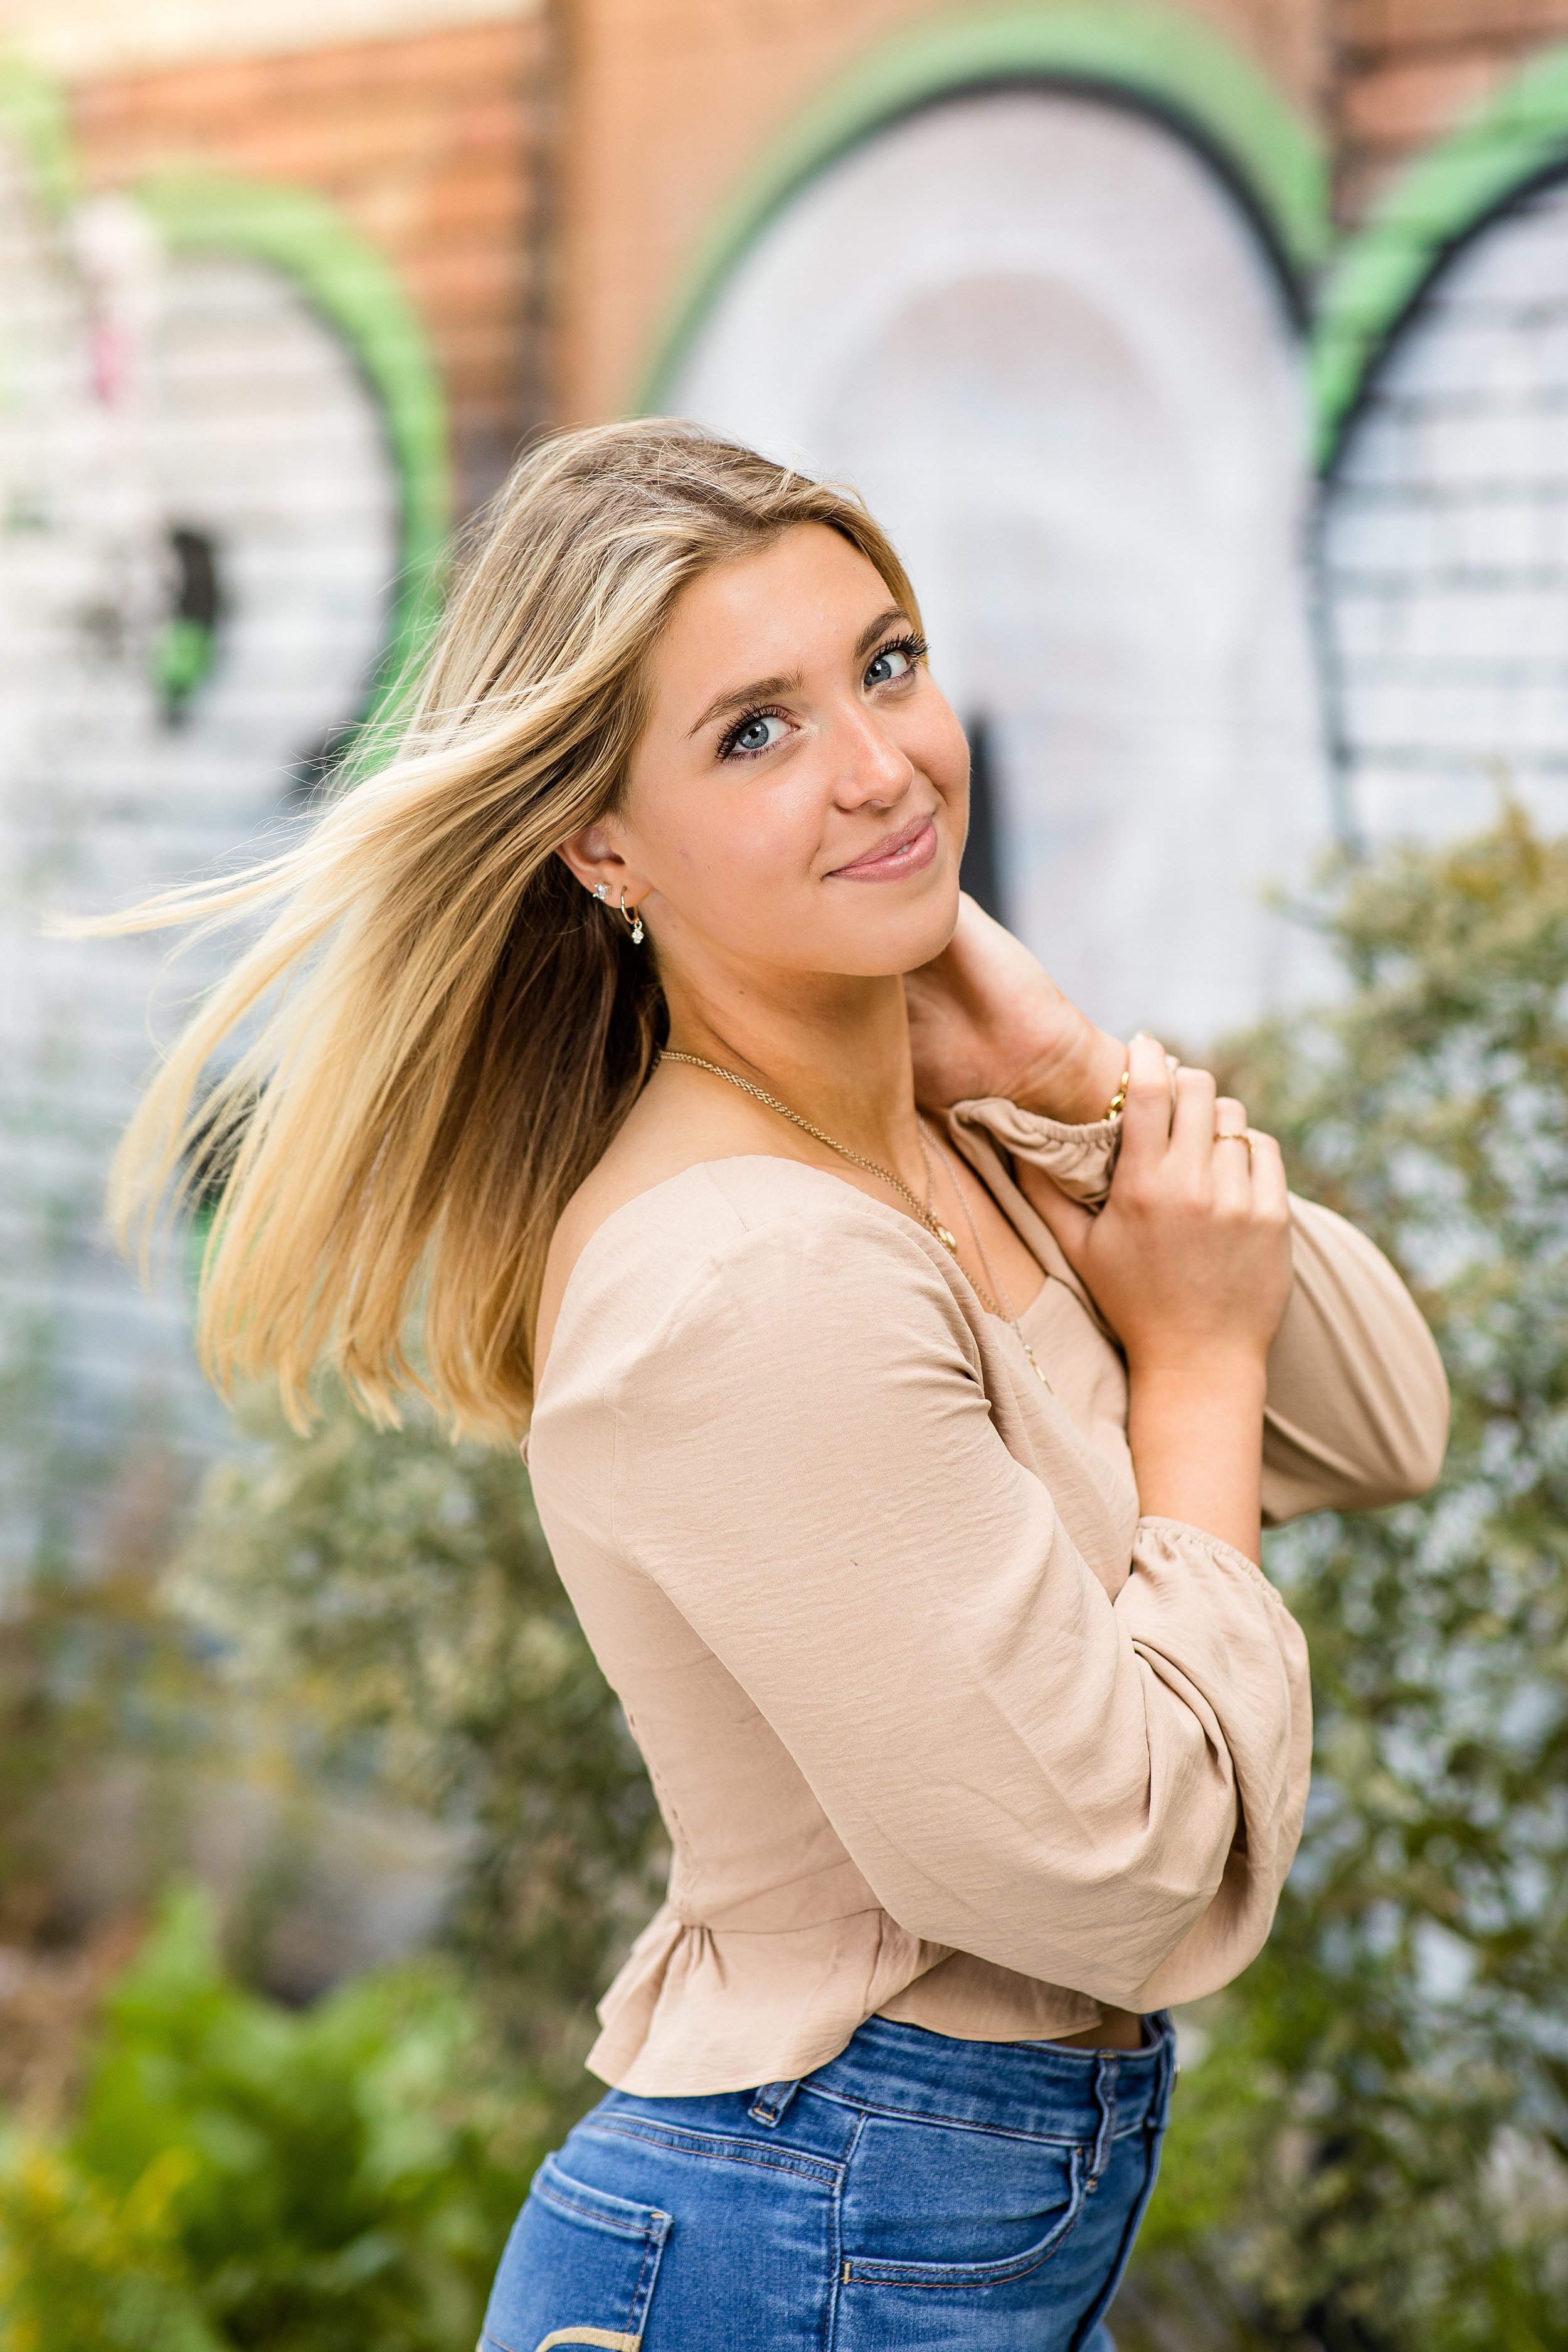
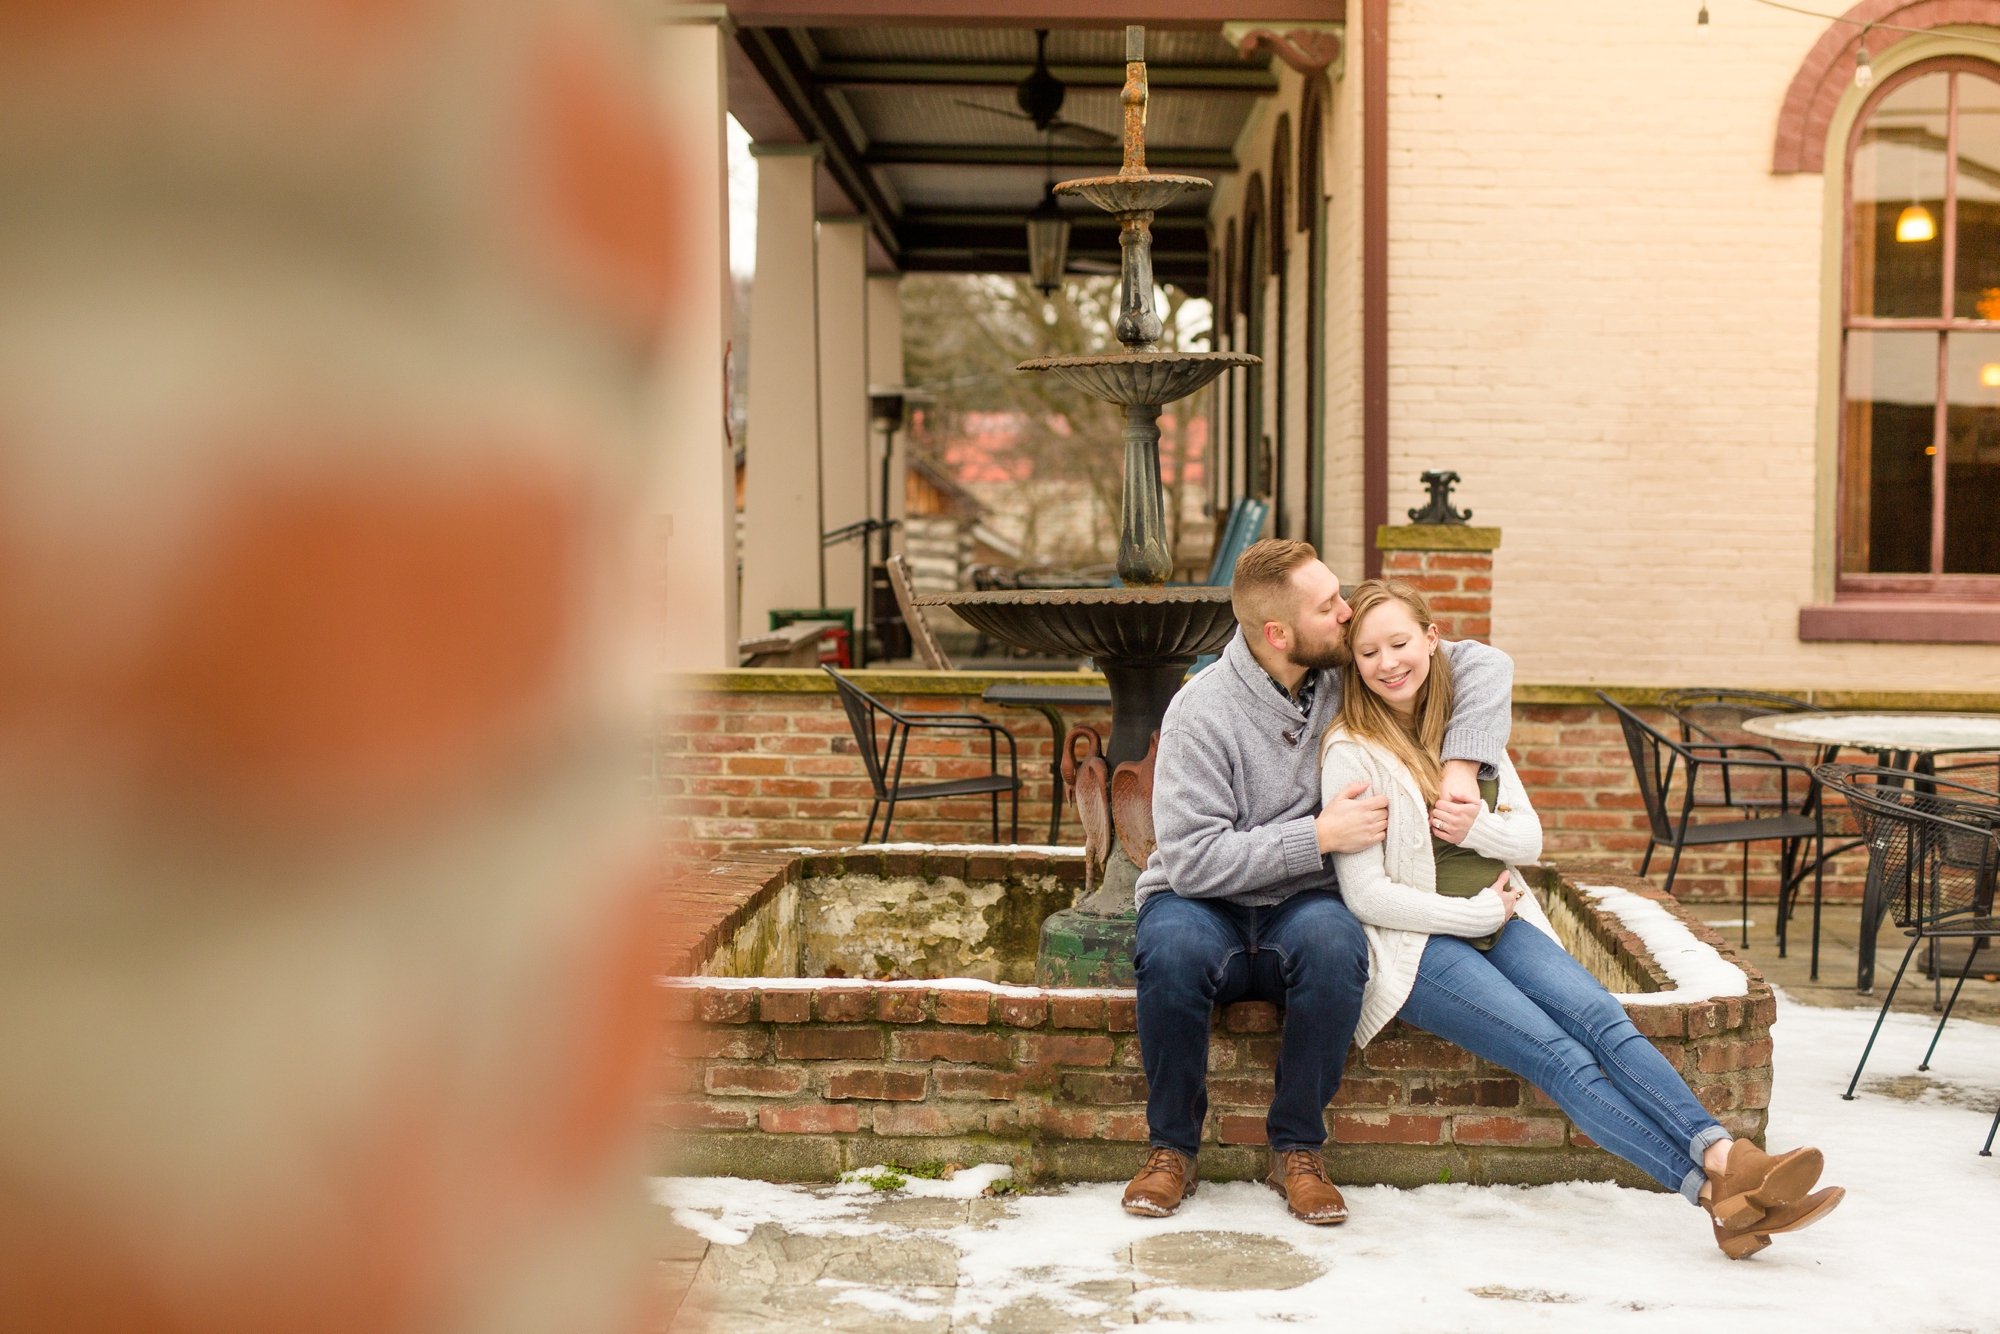
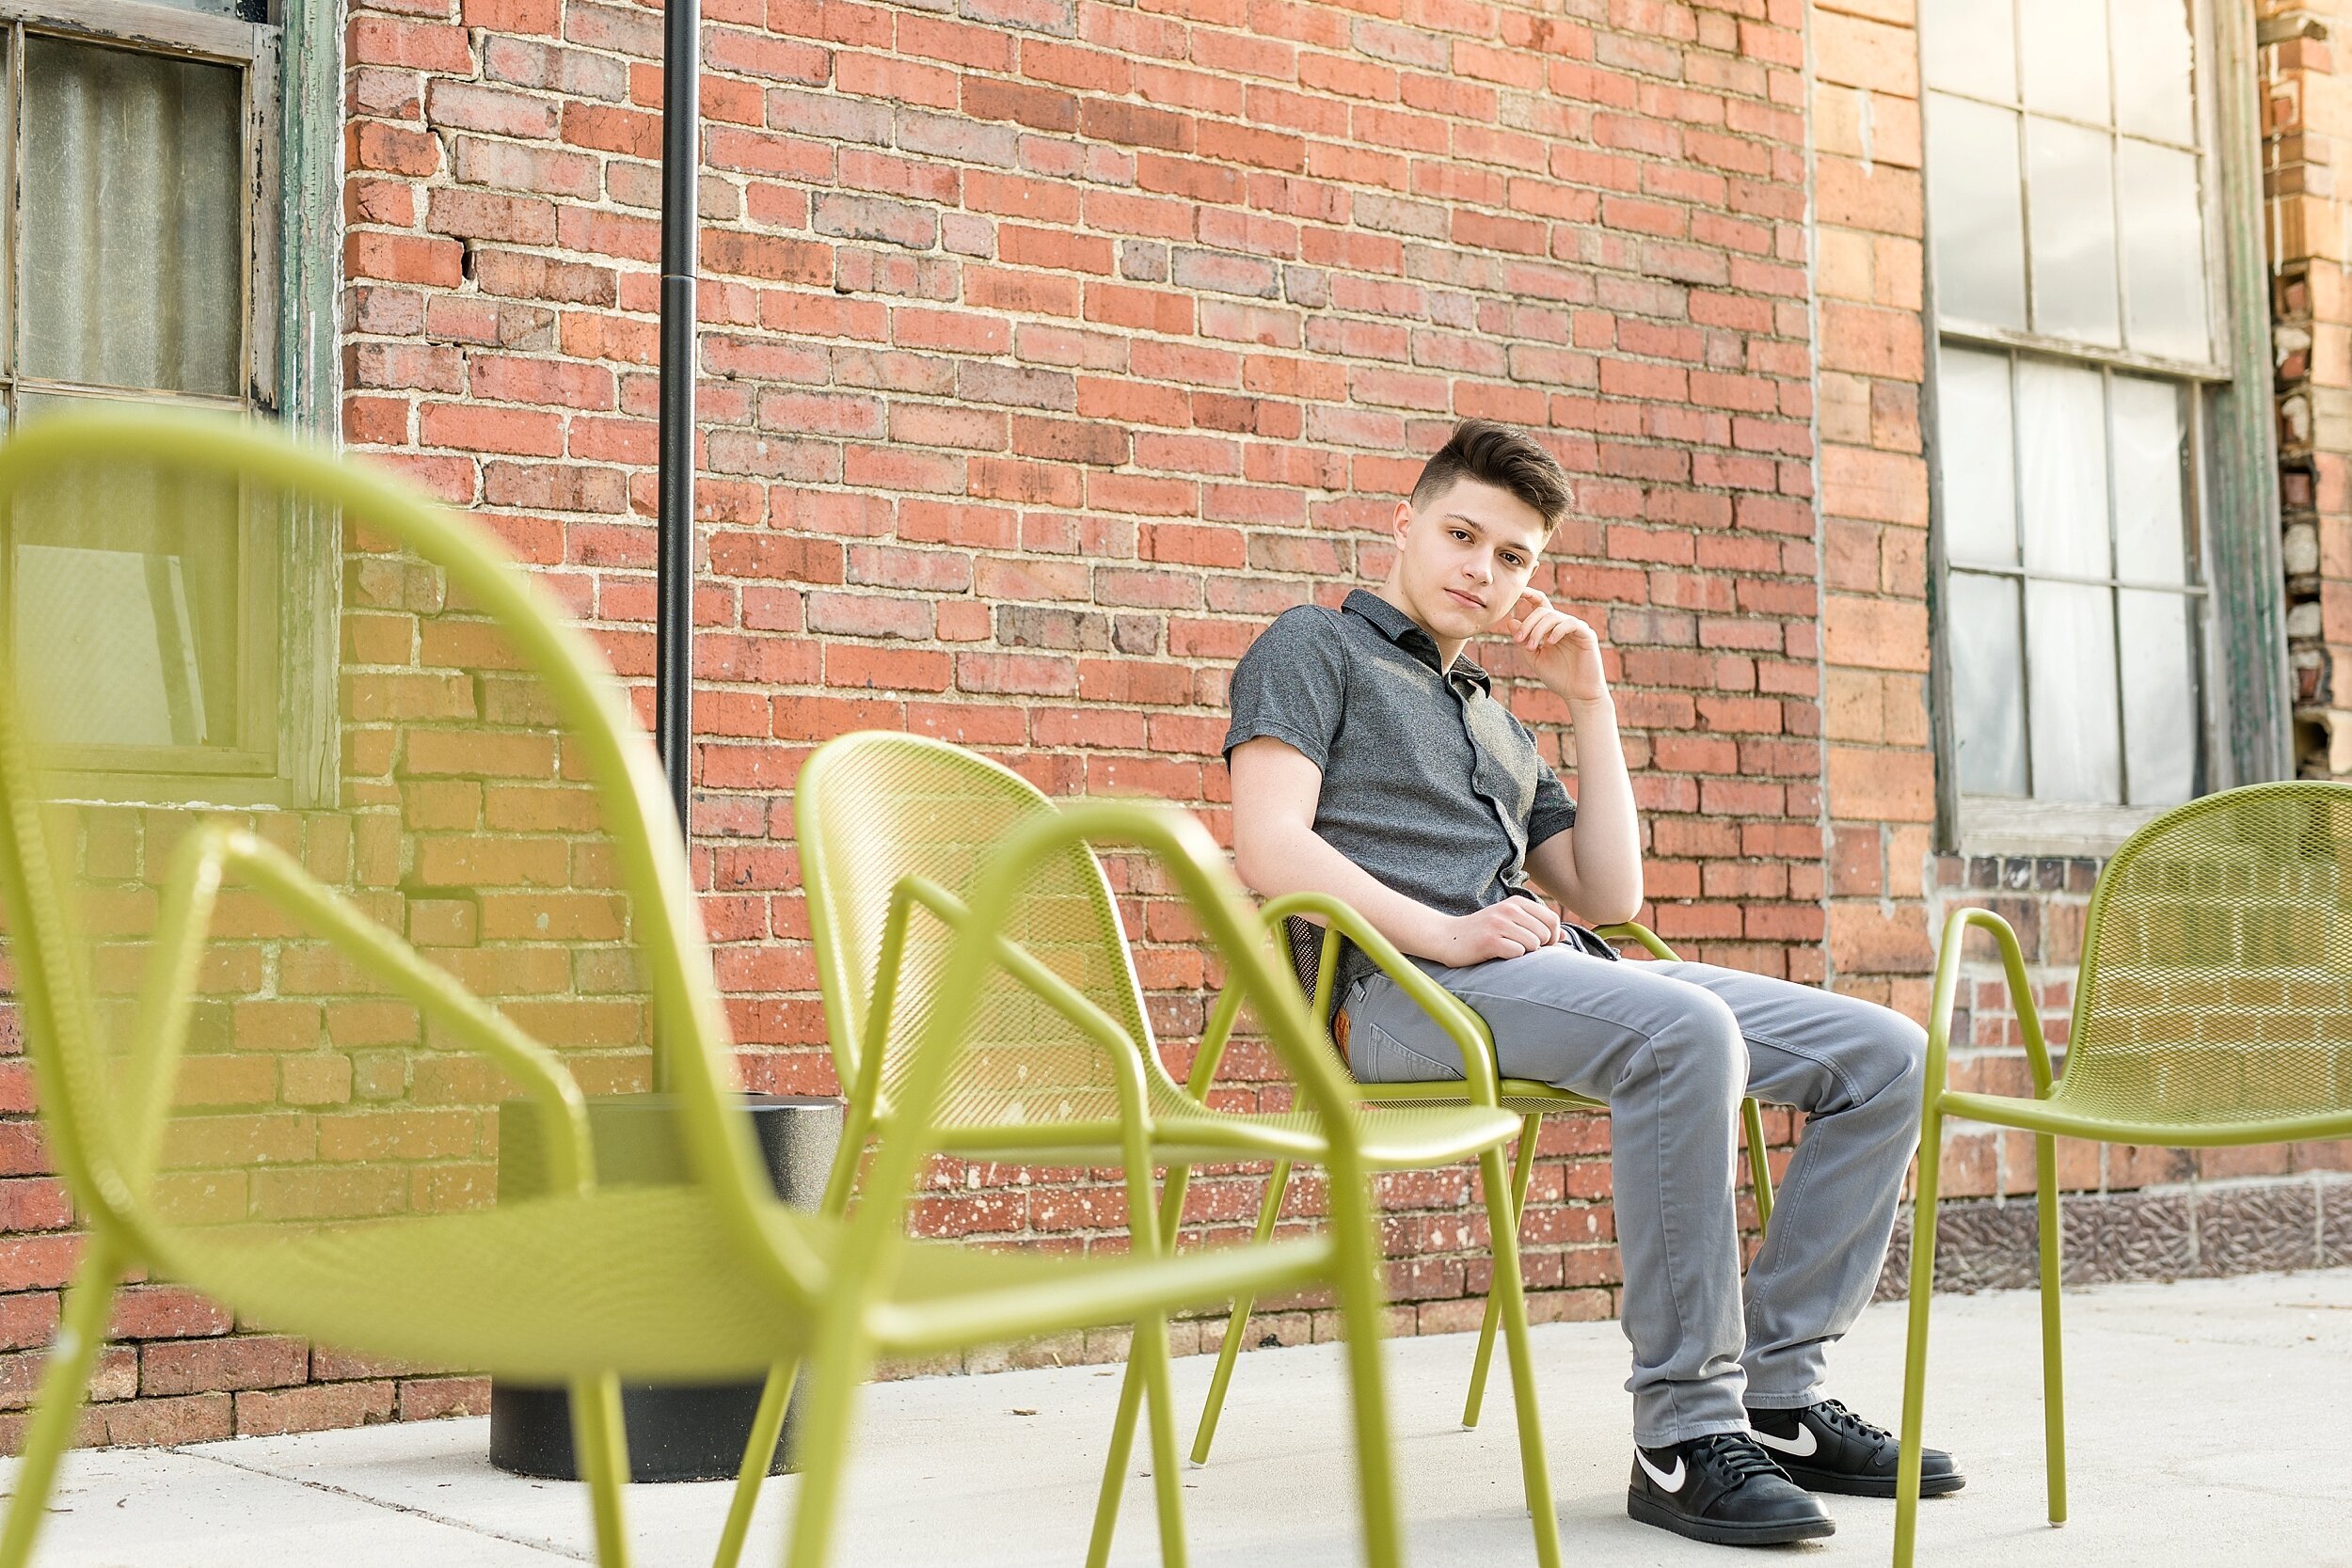
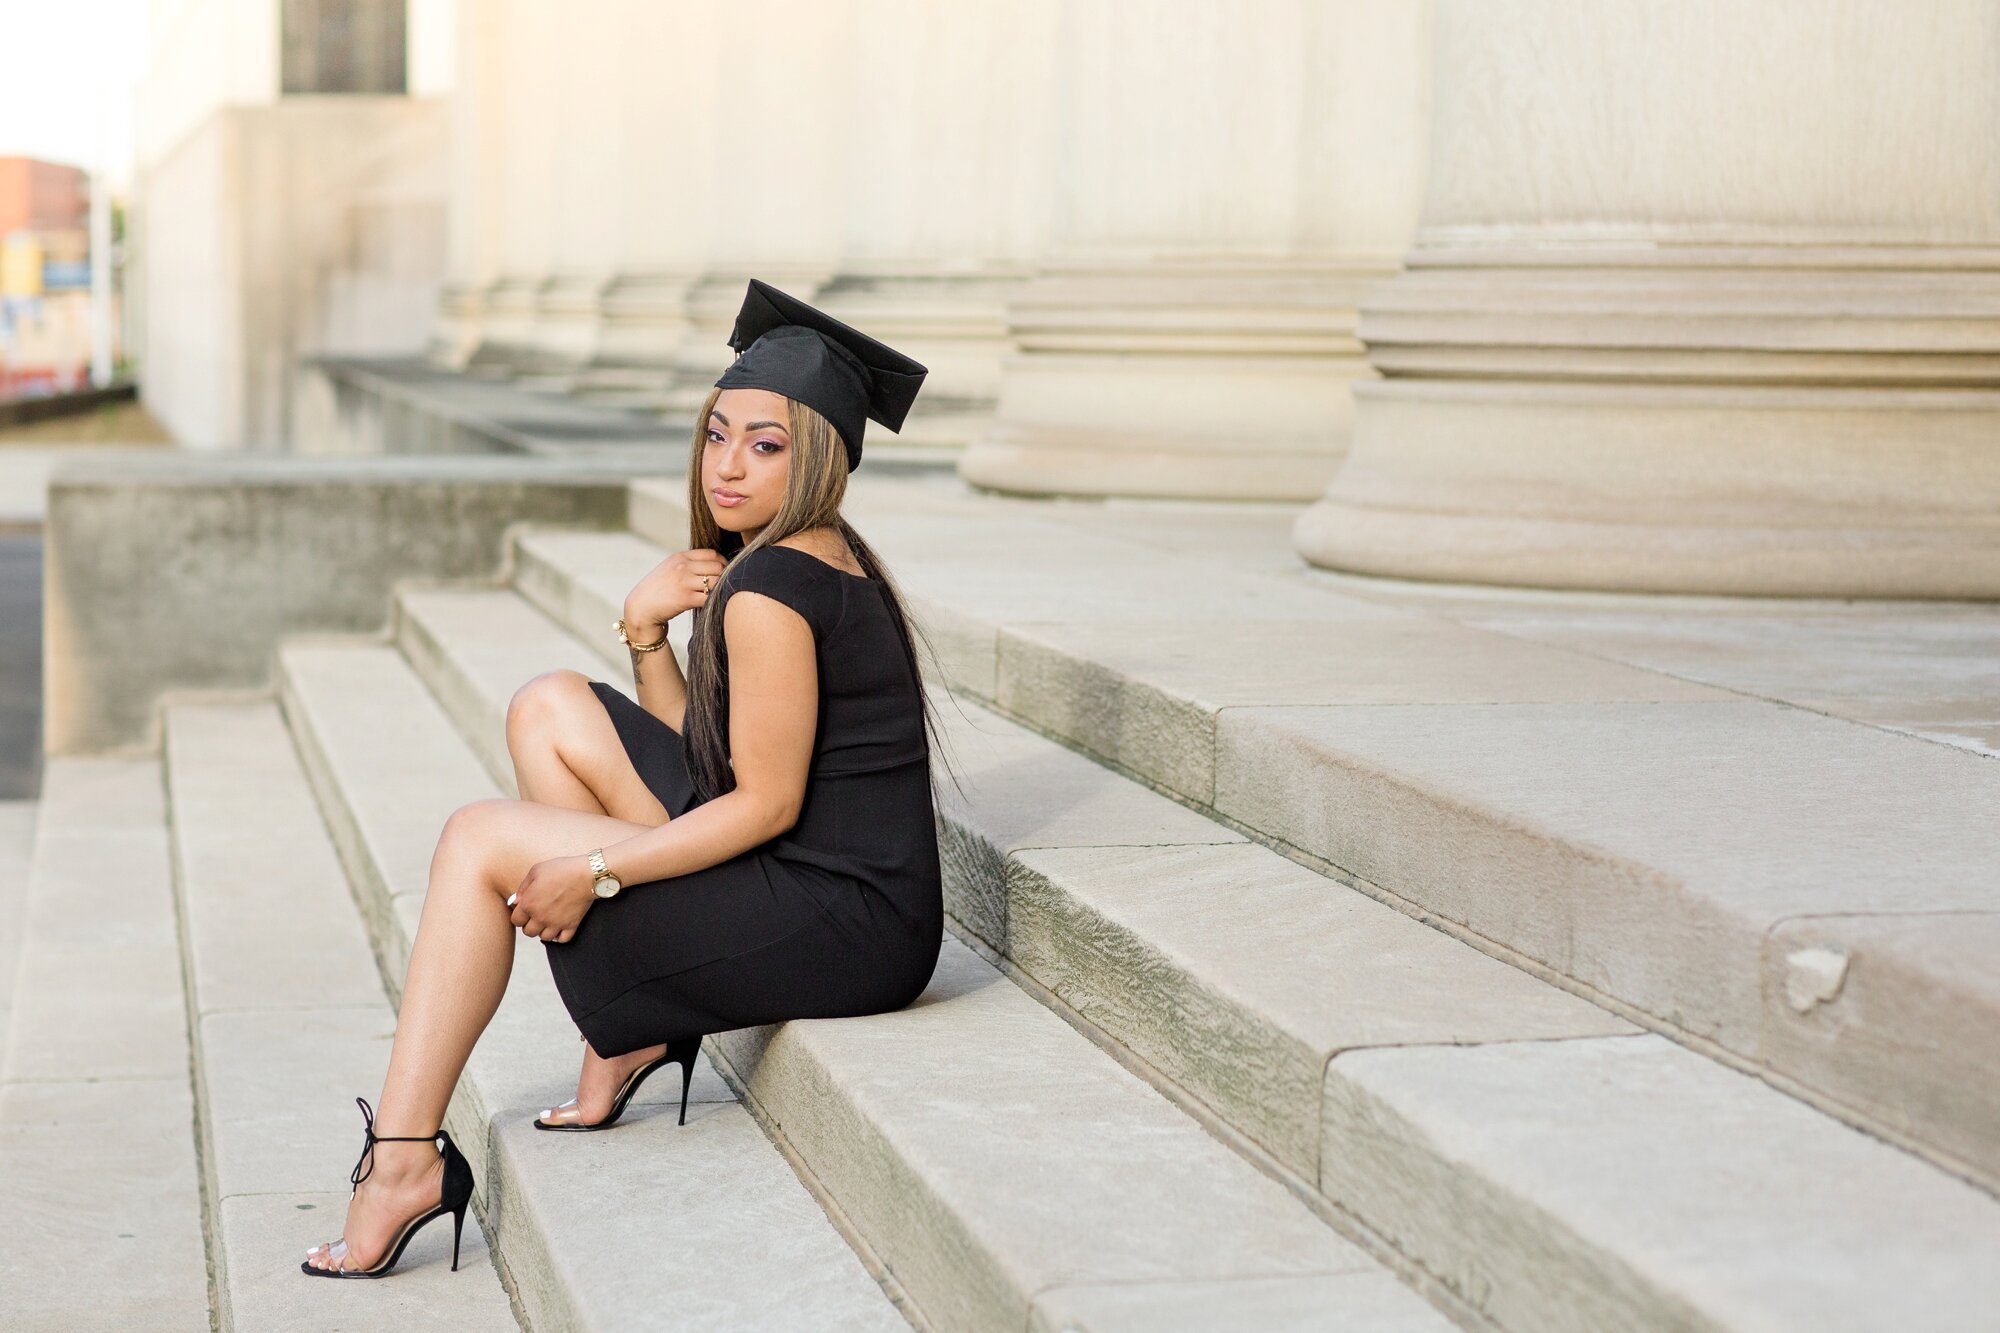
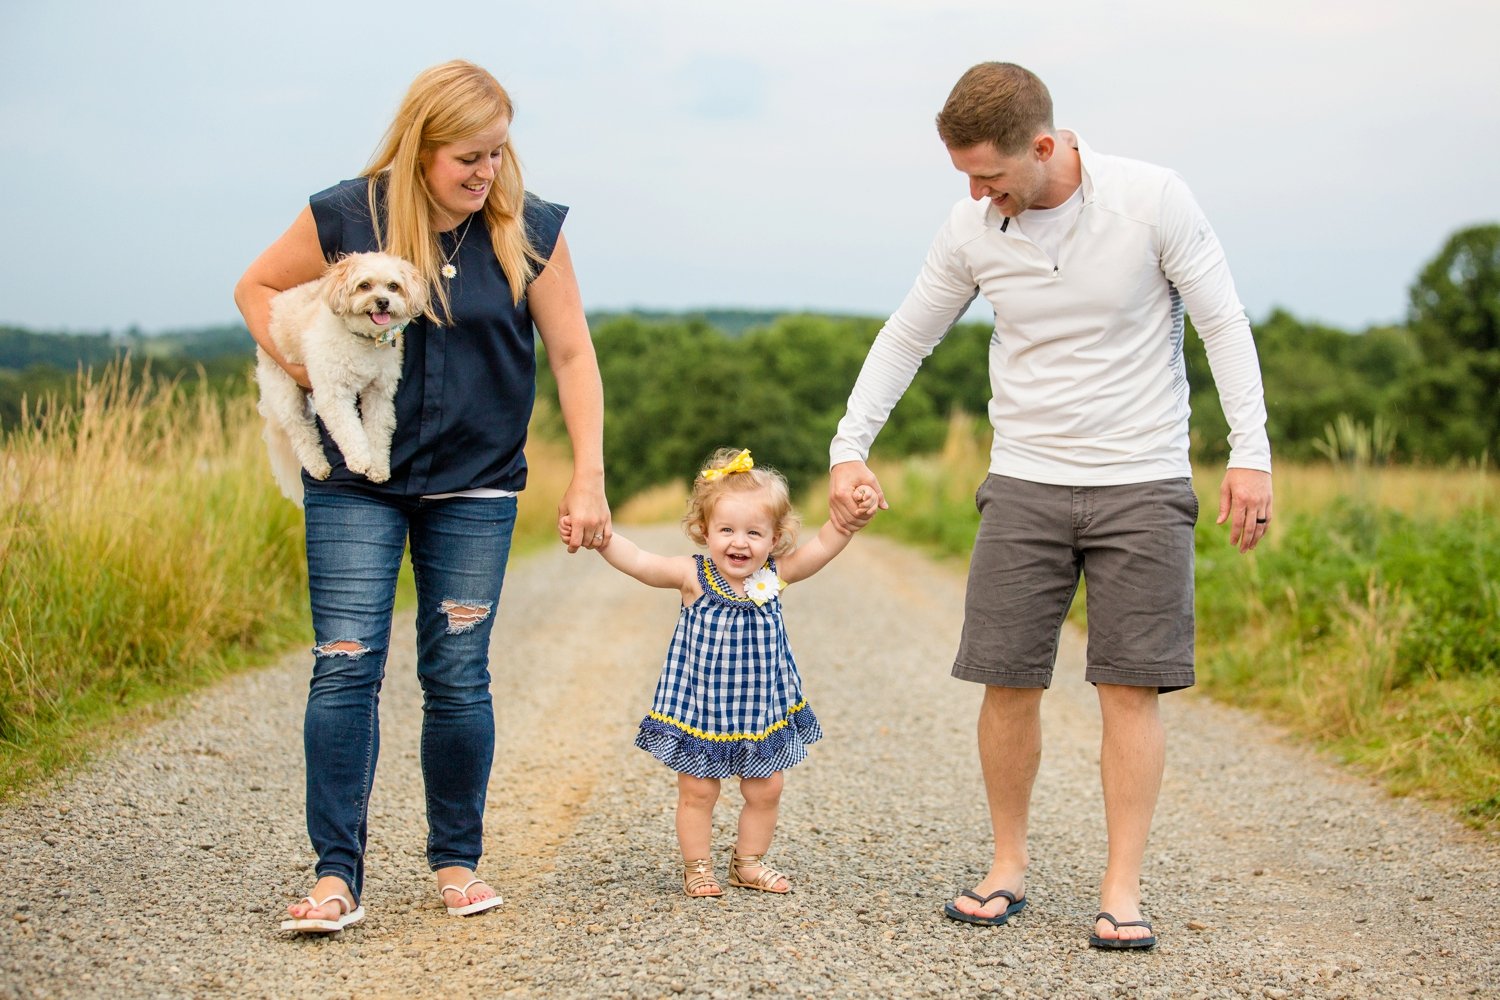
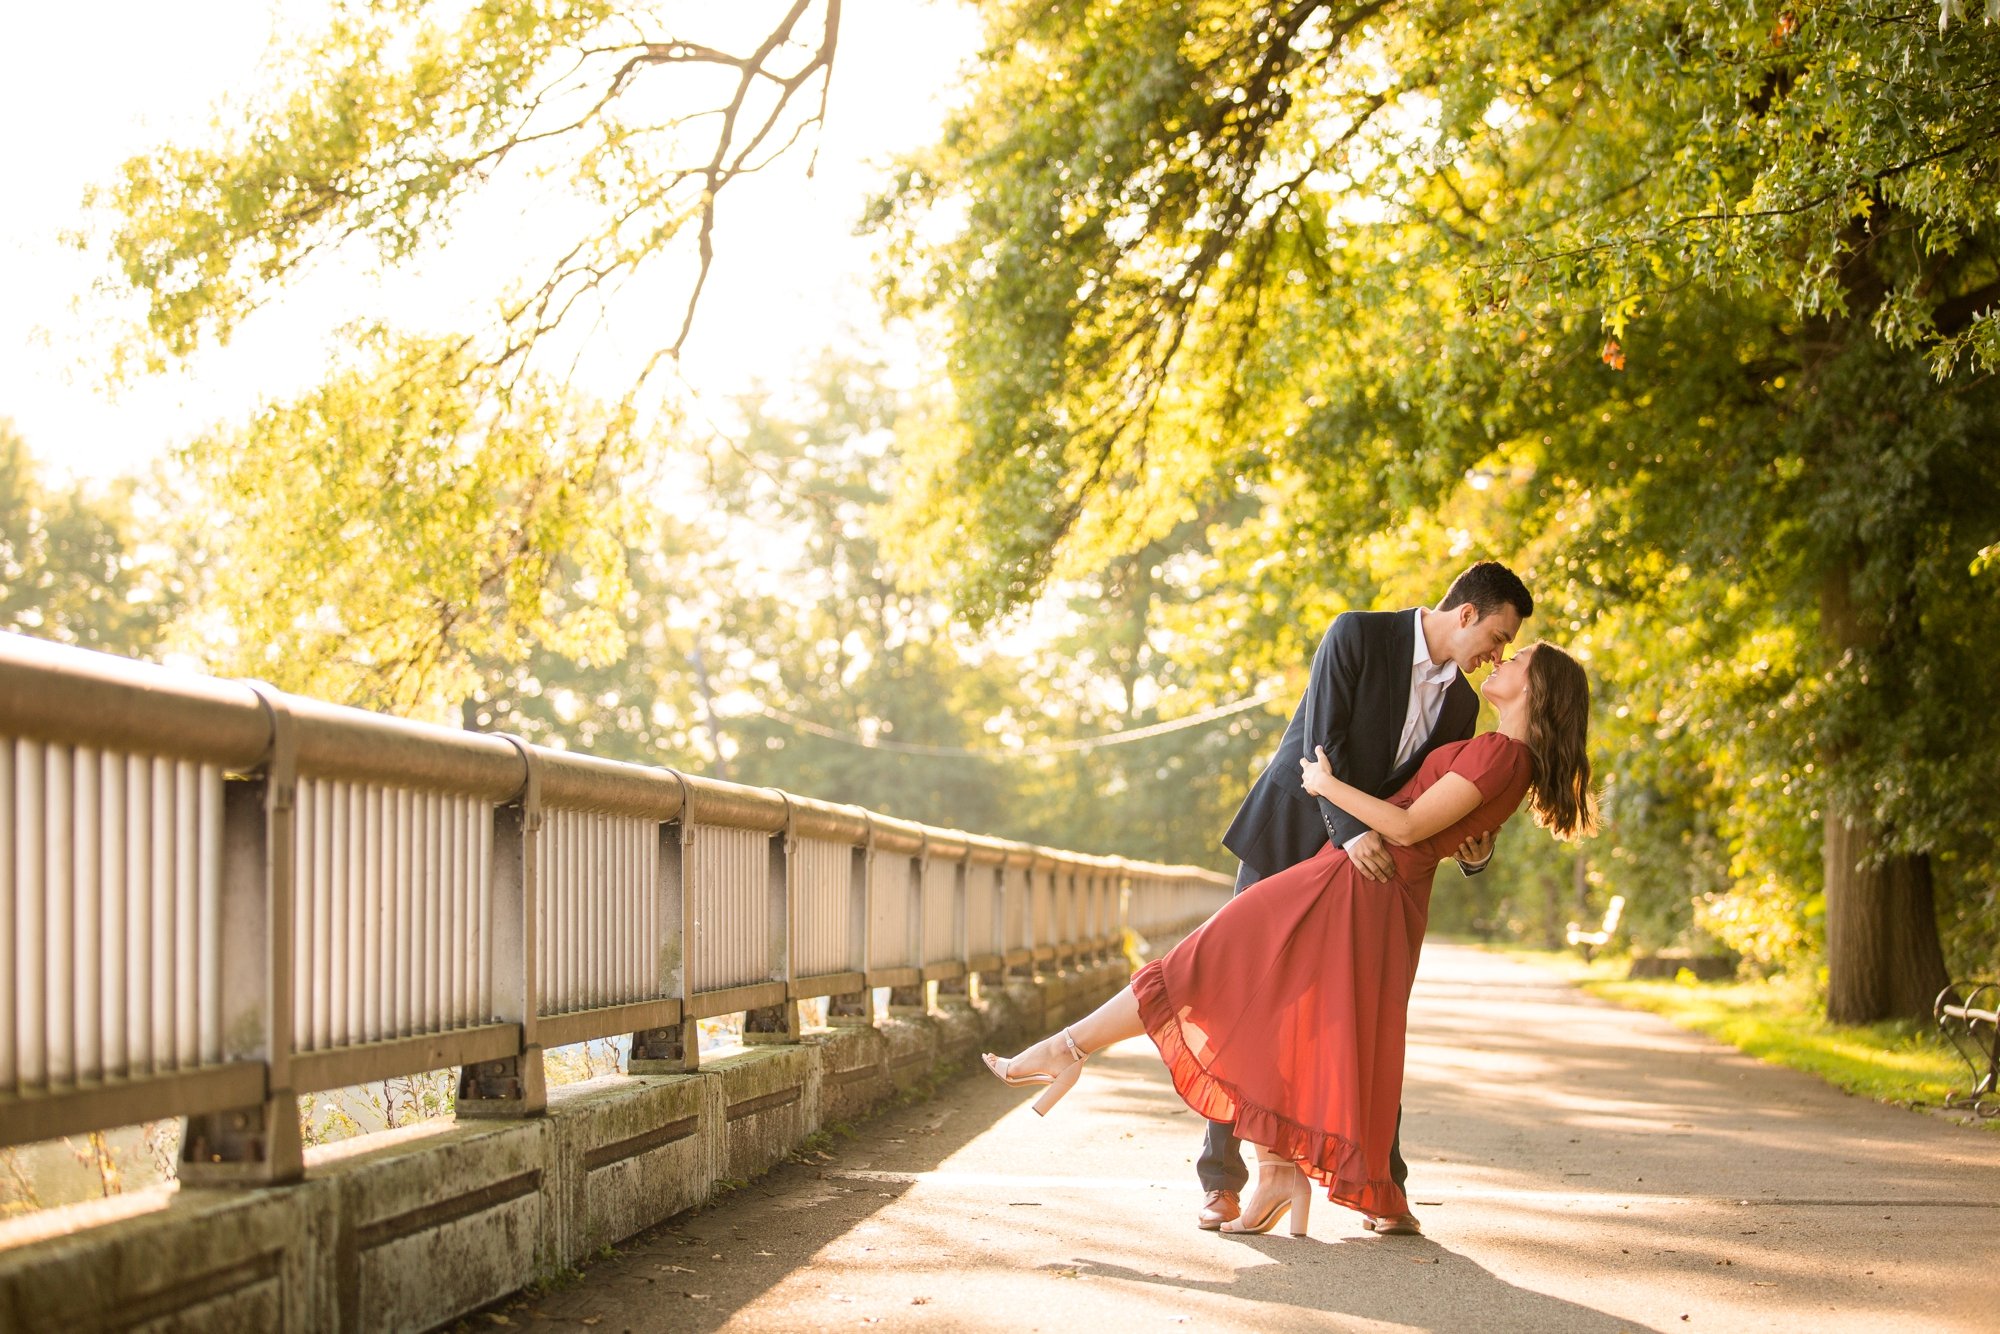
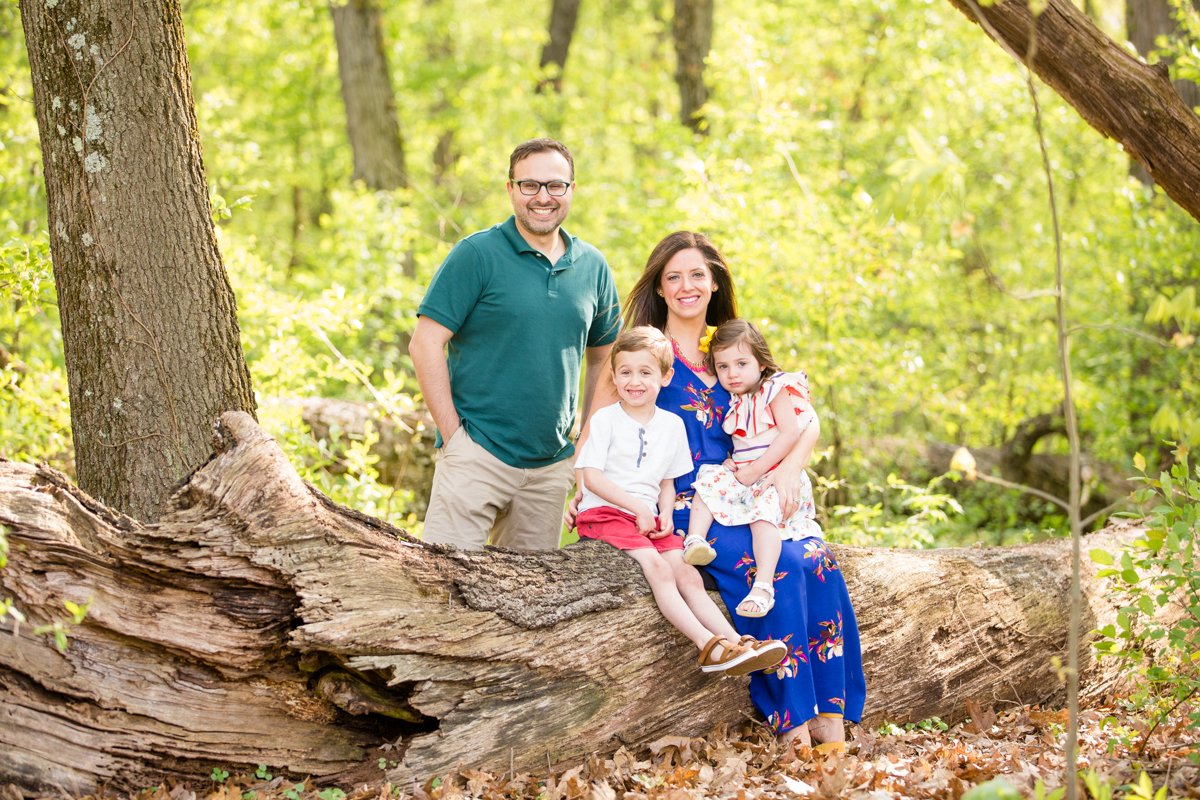
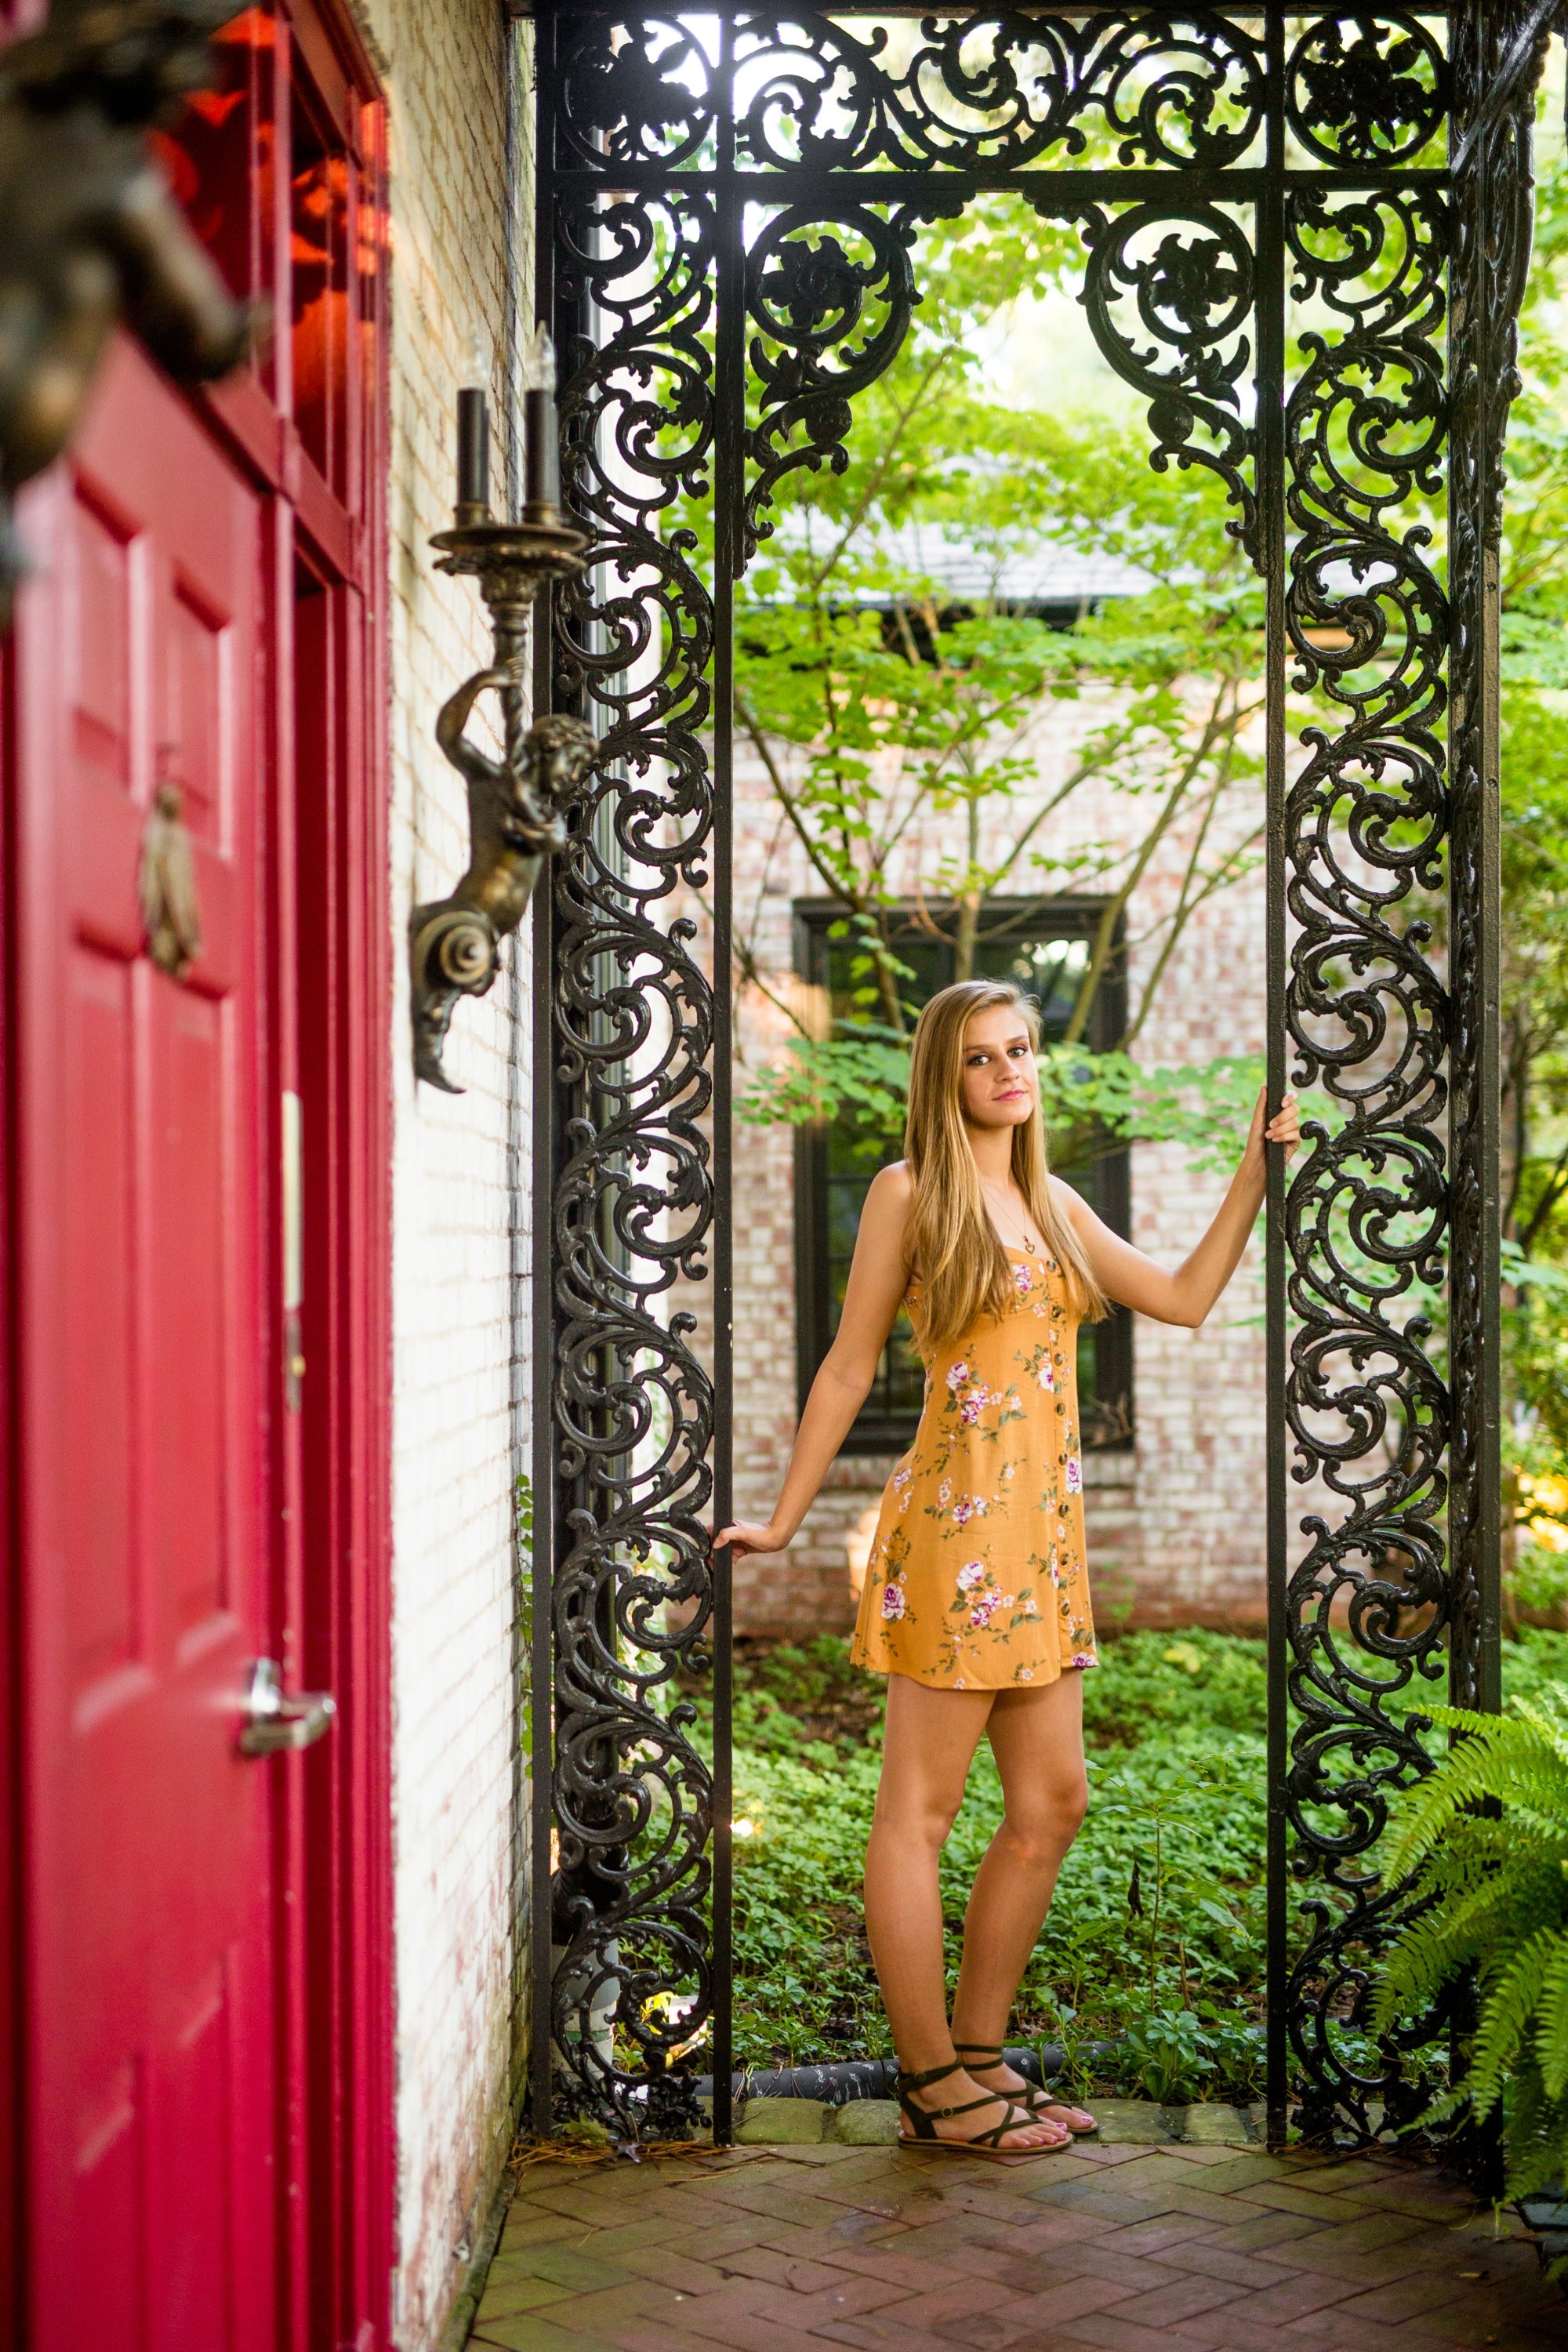
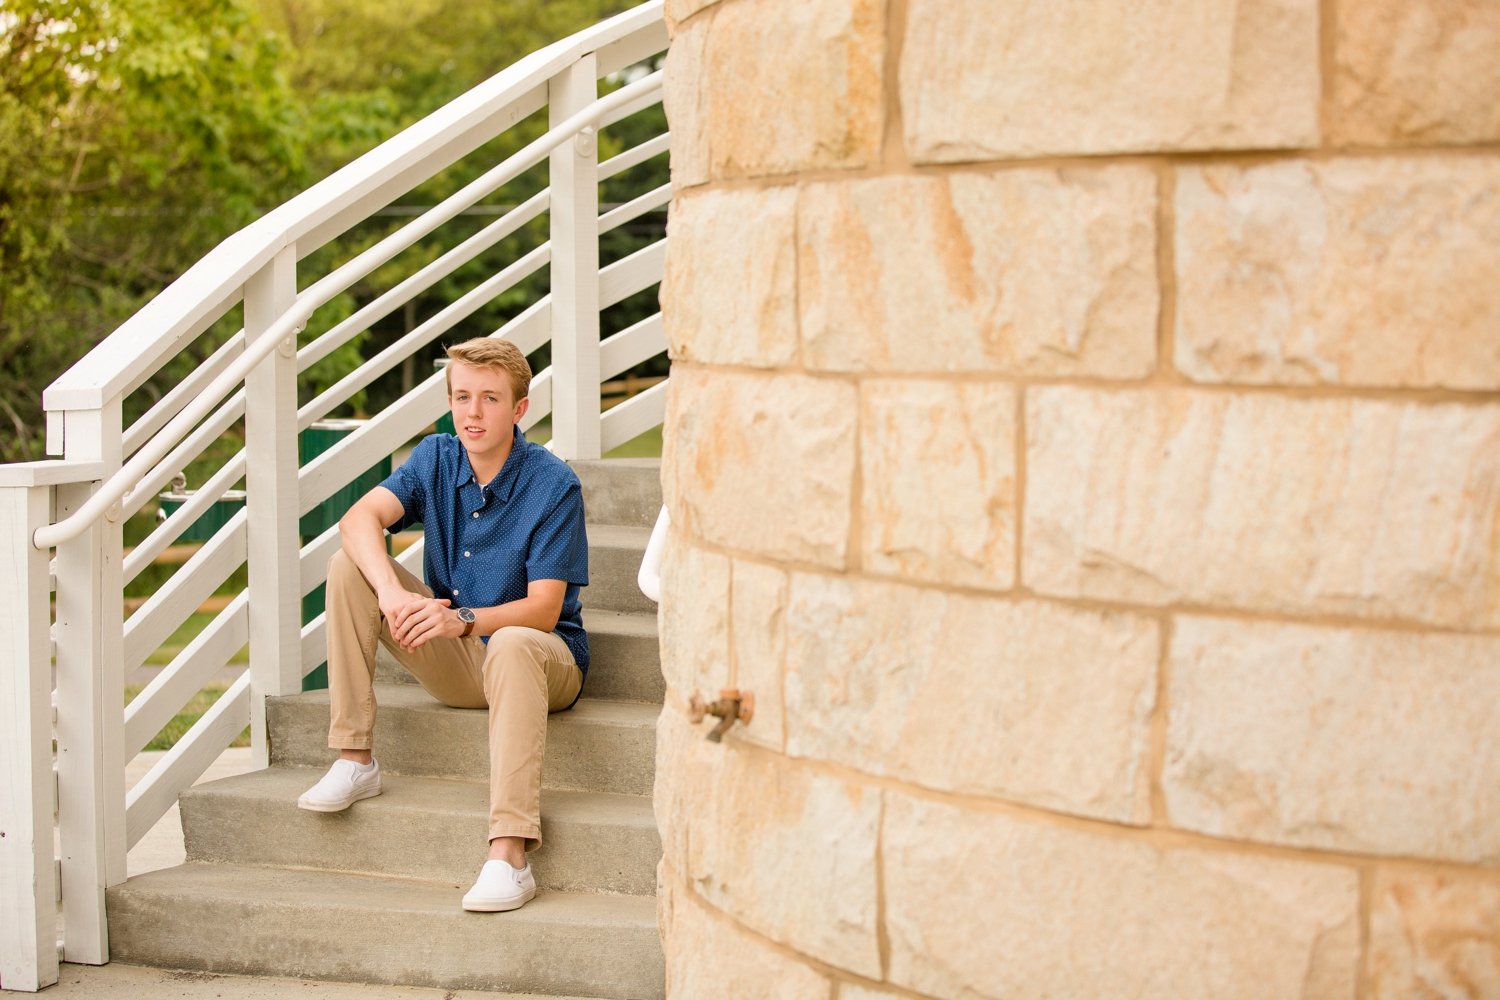
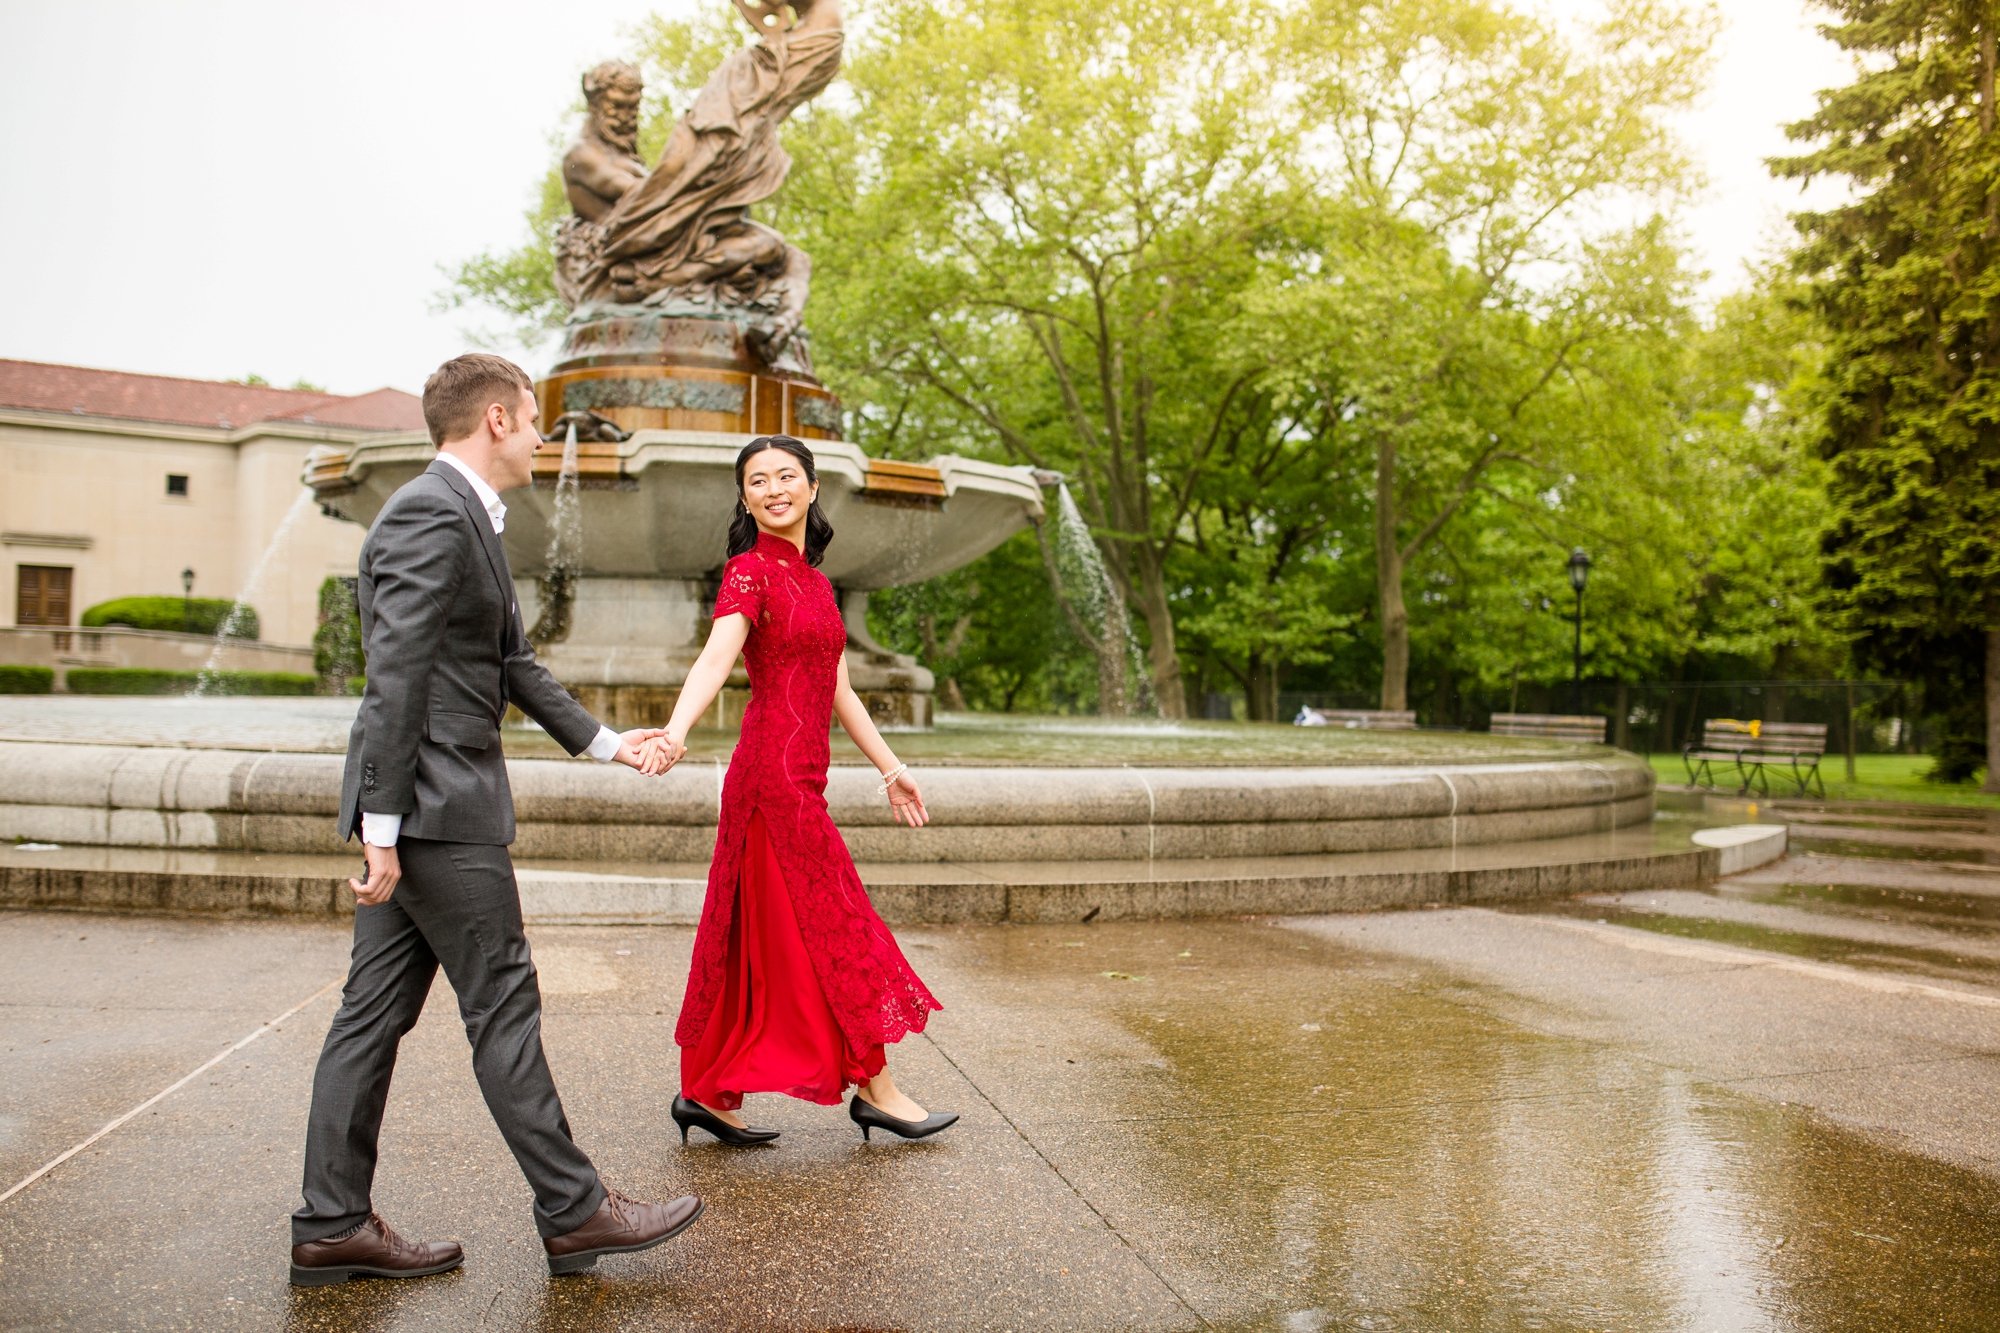
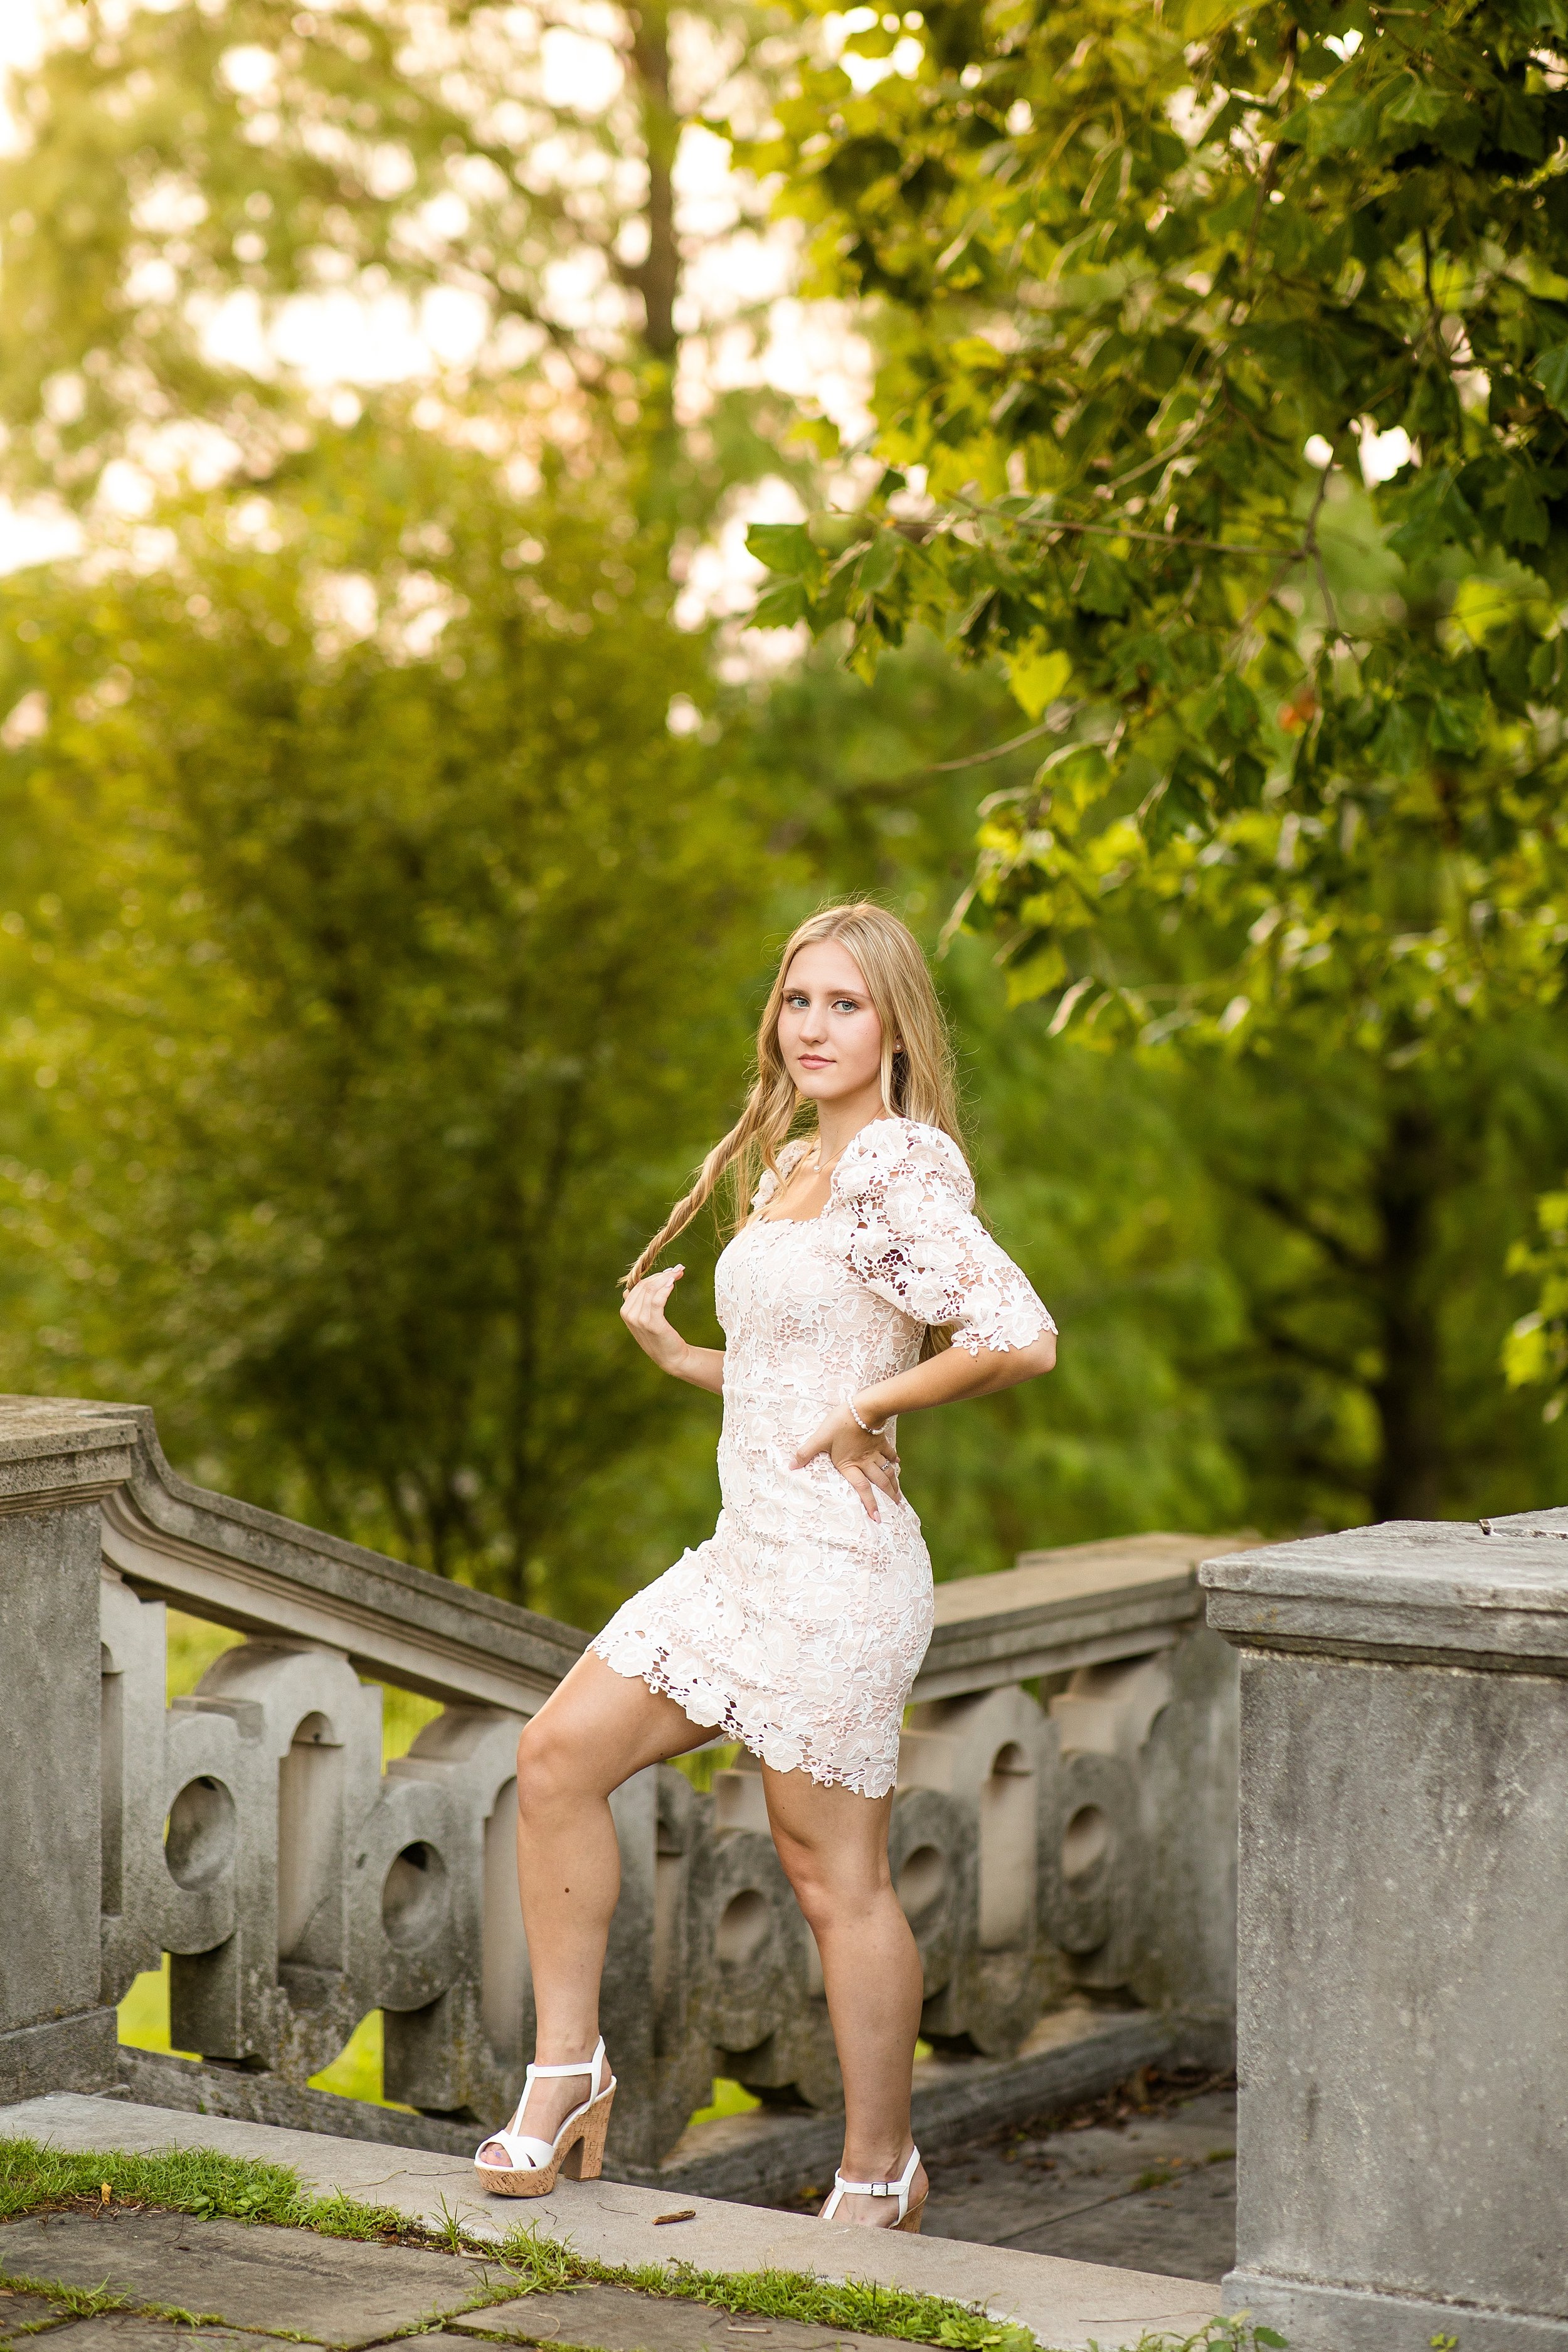
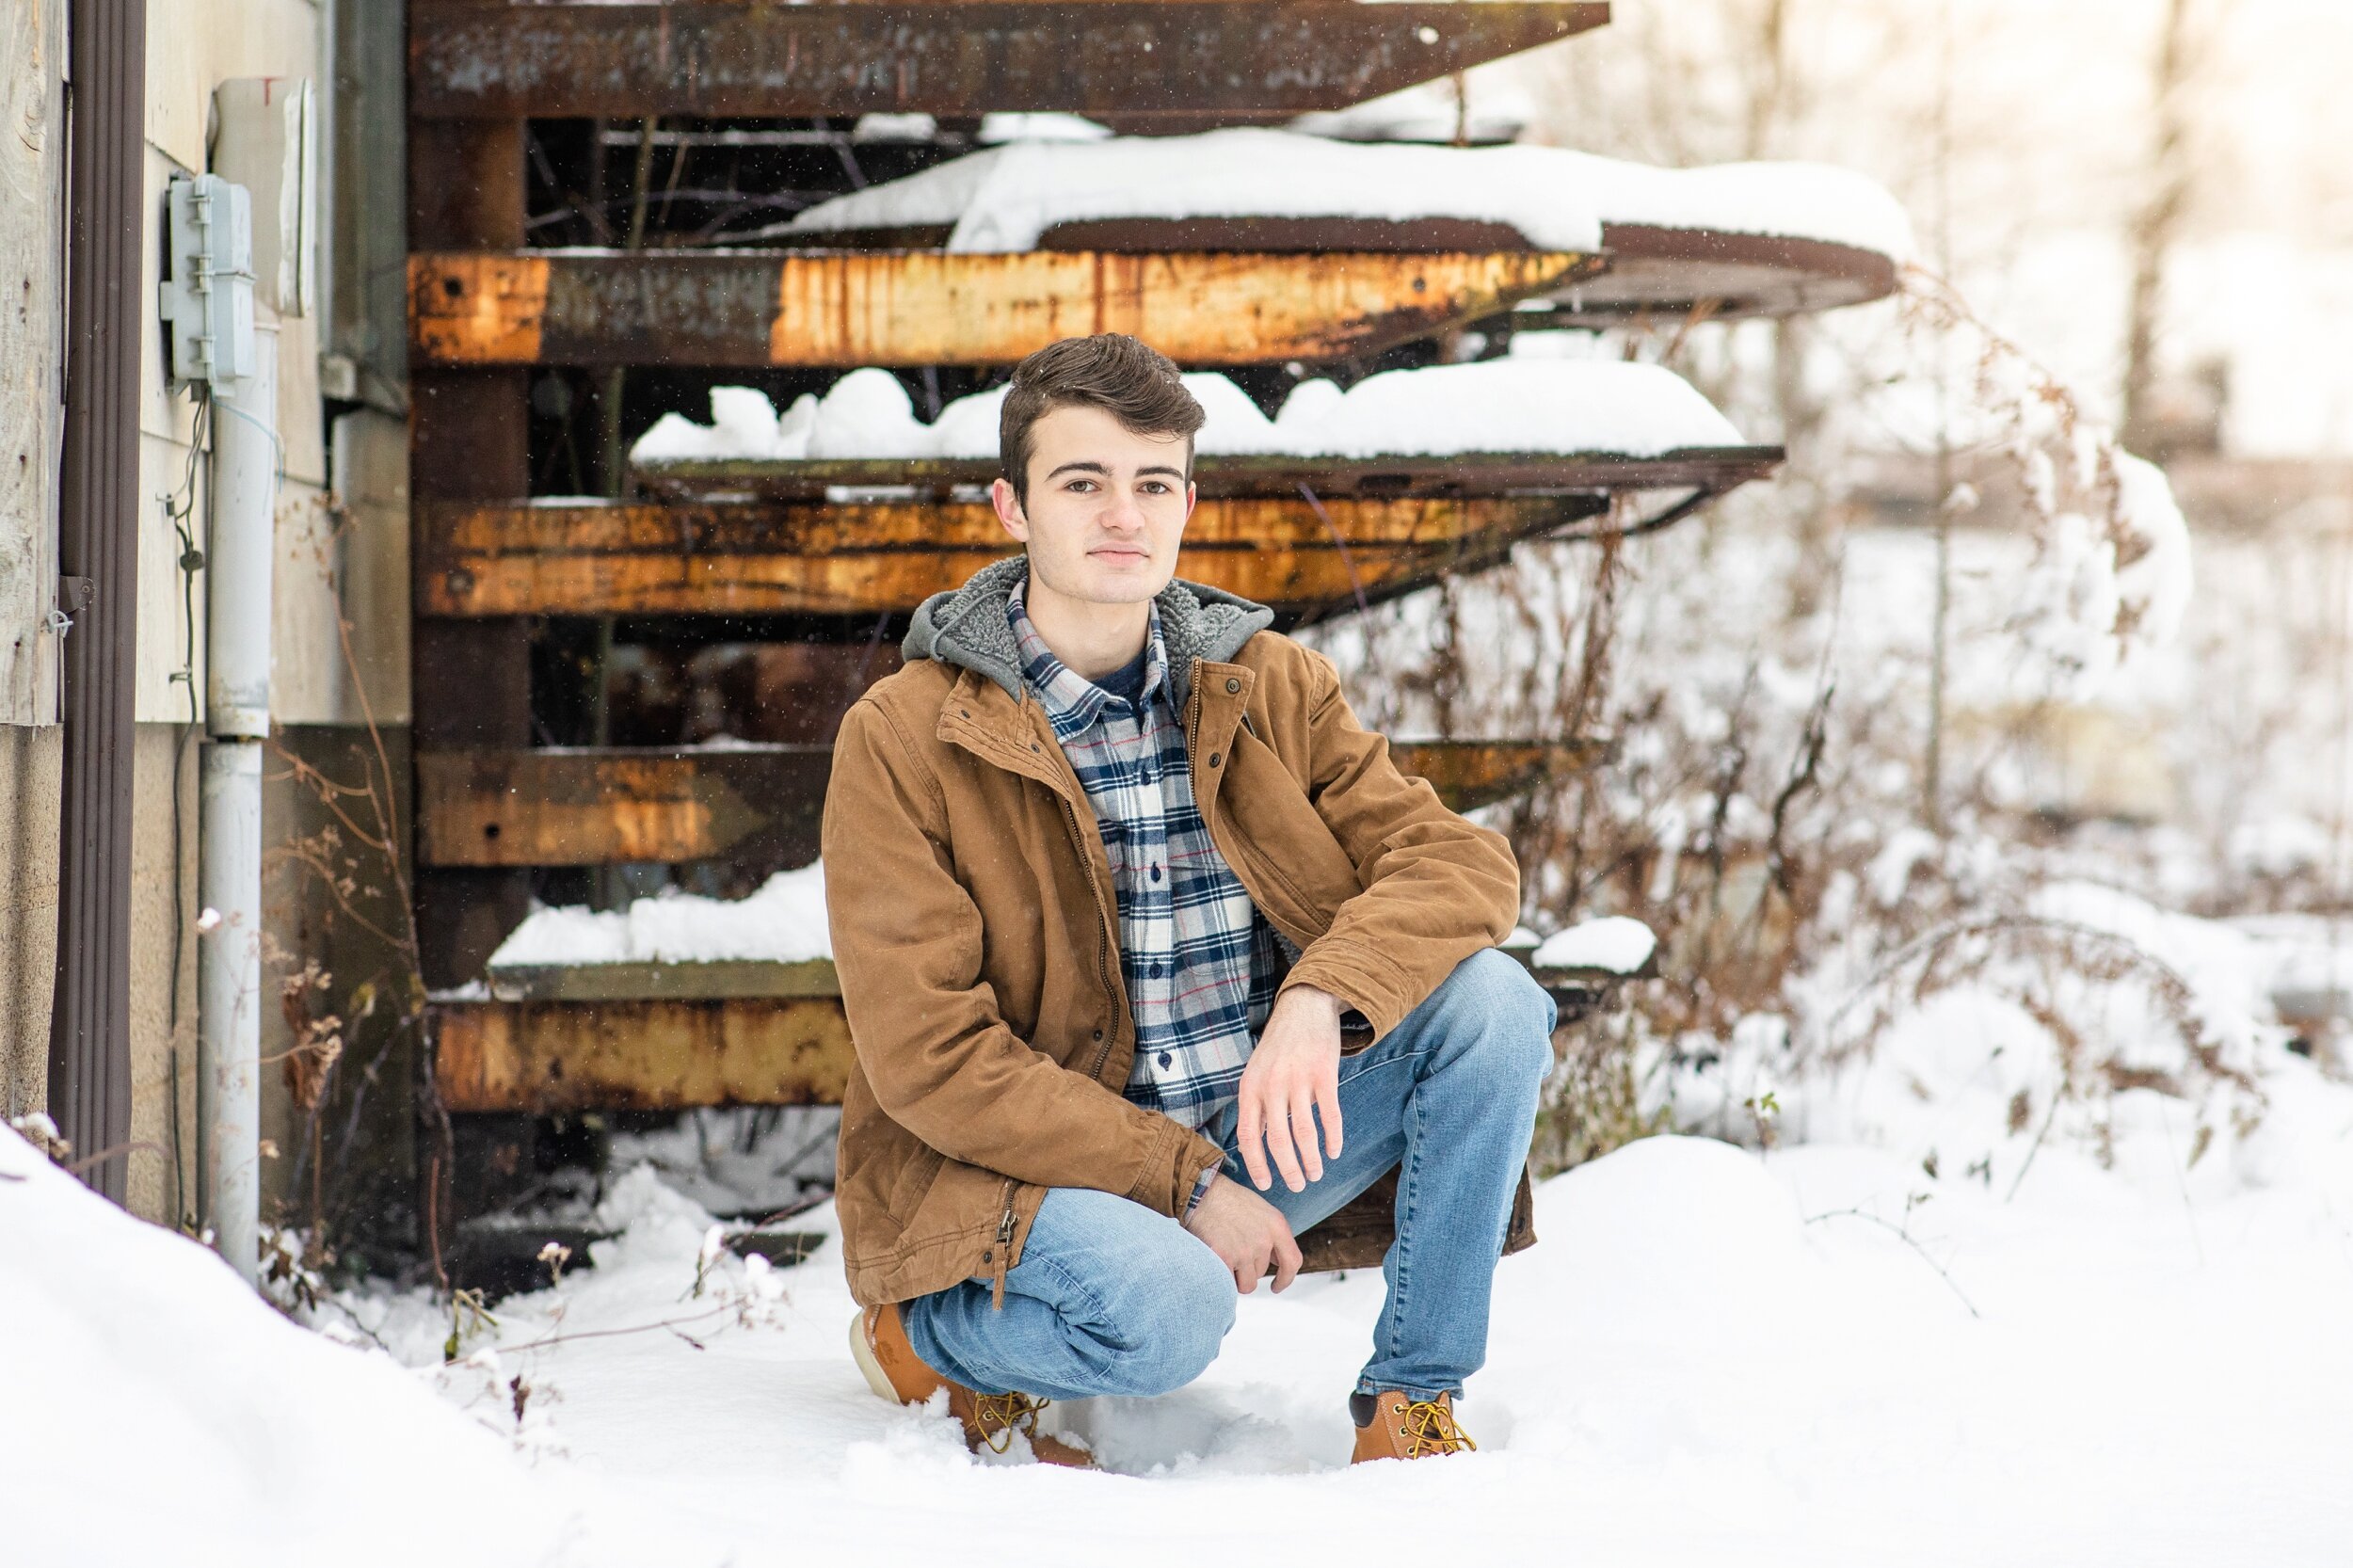
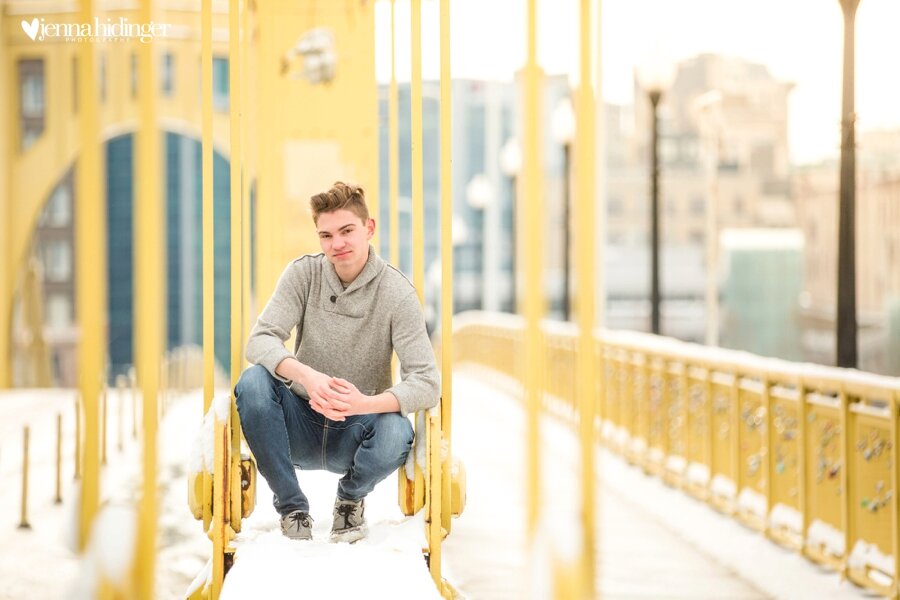
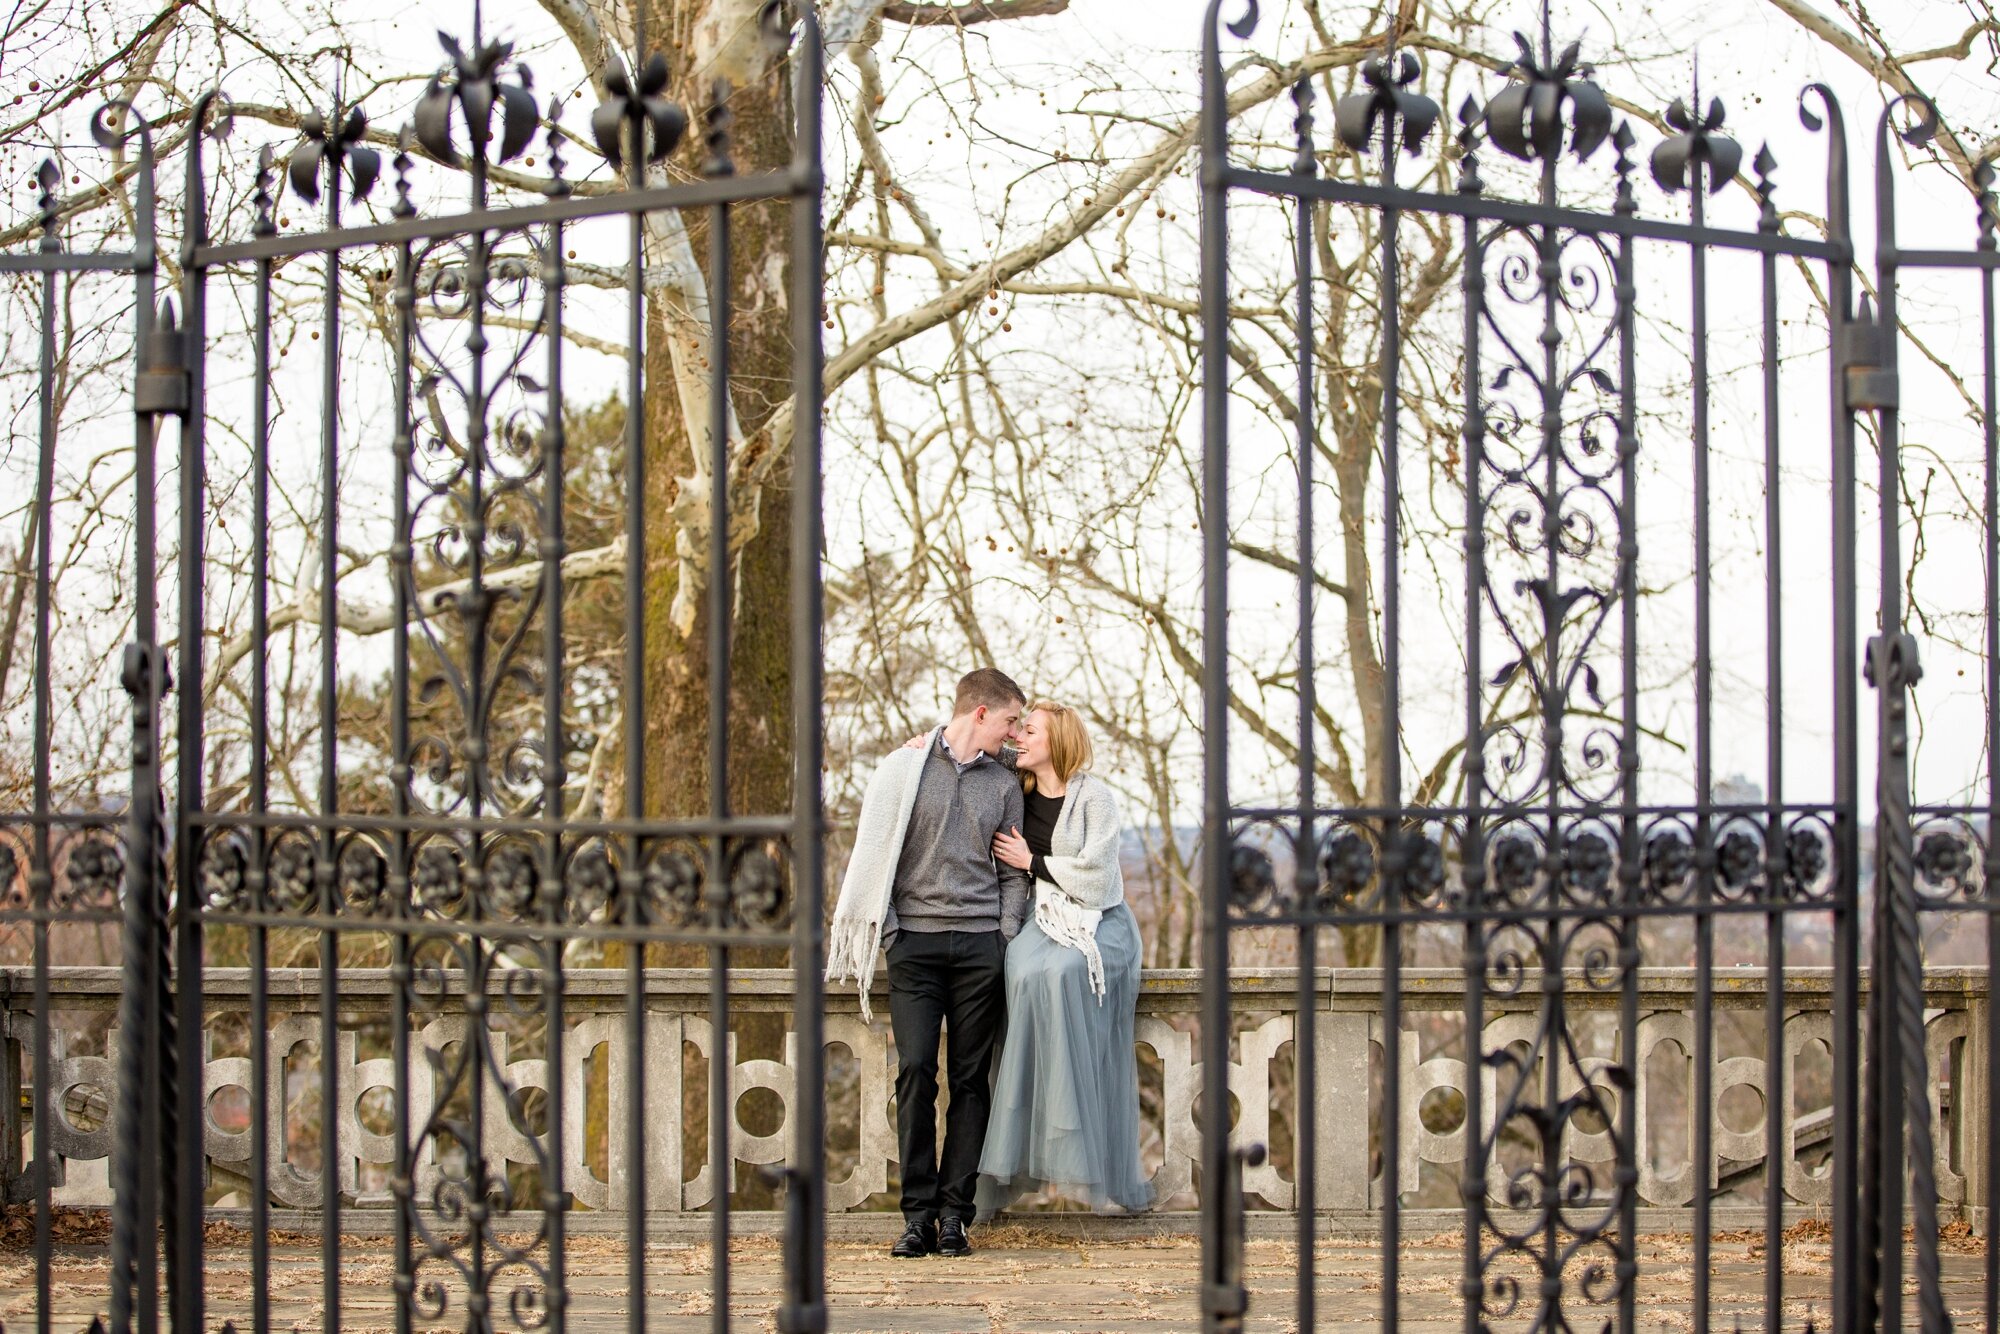
I always like to look for a variety of “posing options/opportunities” to maximize the poses I can direct my clients into when scouting a location. For example - is there somewhere they can sit? Something they can lean on? Something they can lay on? Squat in? Walk through? Peek out from behind? Or is there really only an option to stand in some grass for the majority of the session? That can get very repetitive and limits the amount of poses we’re able to accomplish.

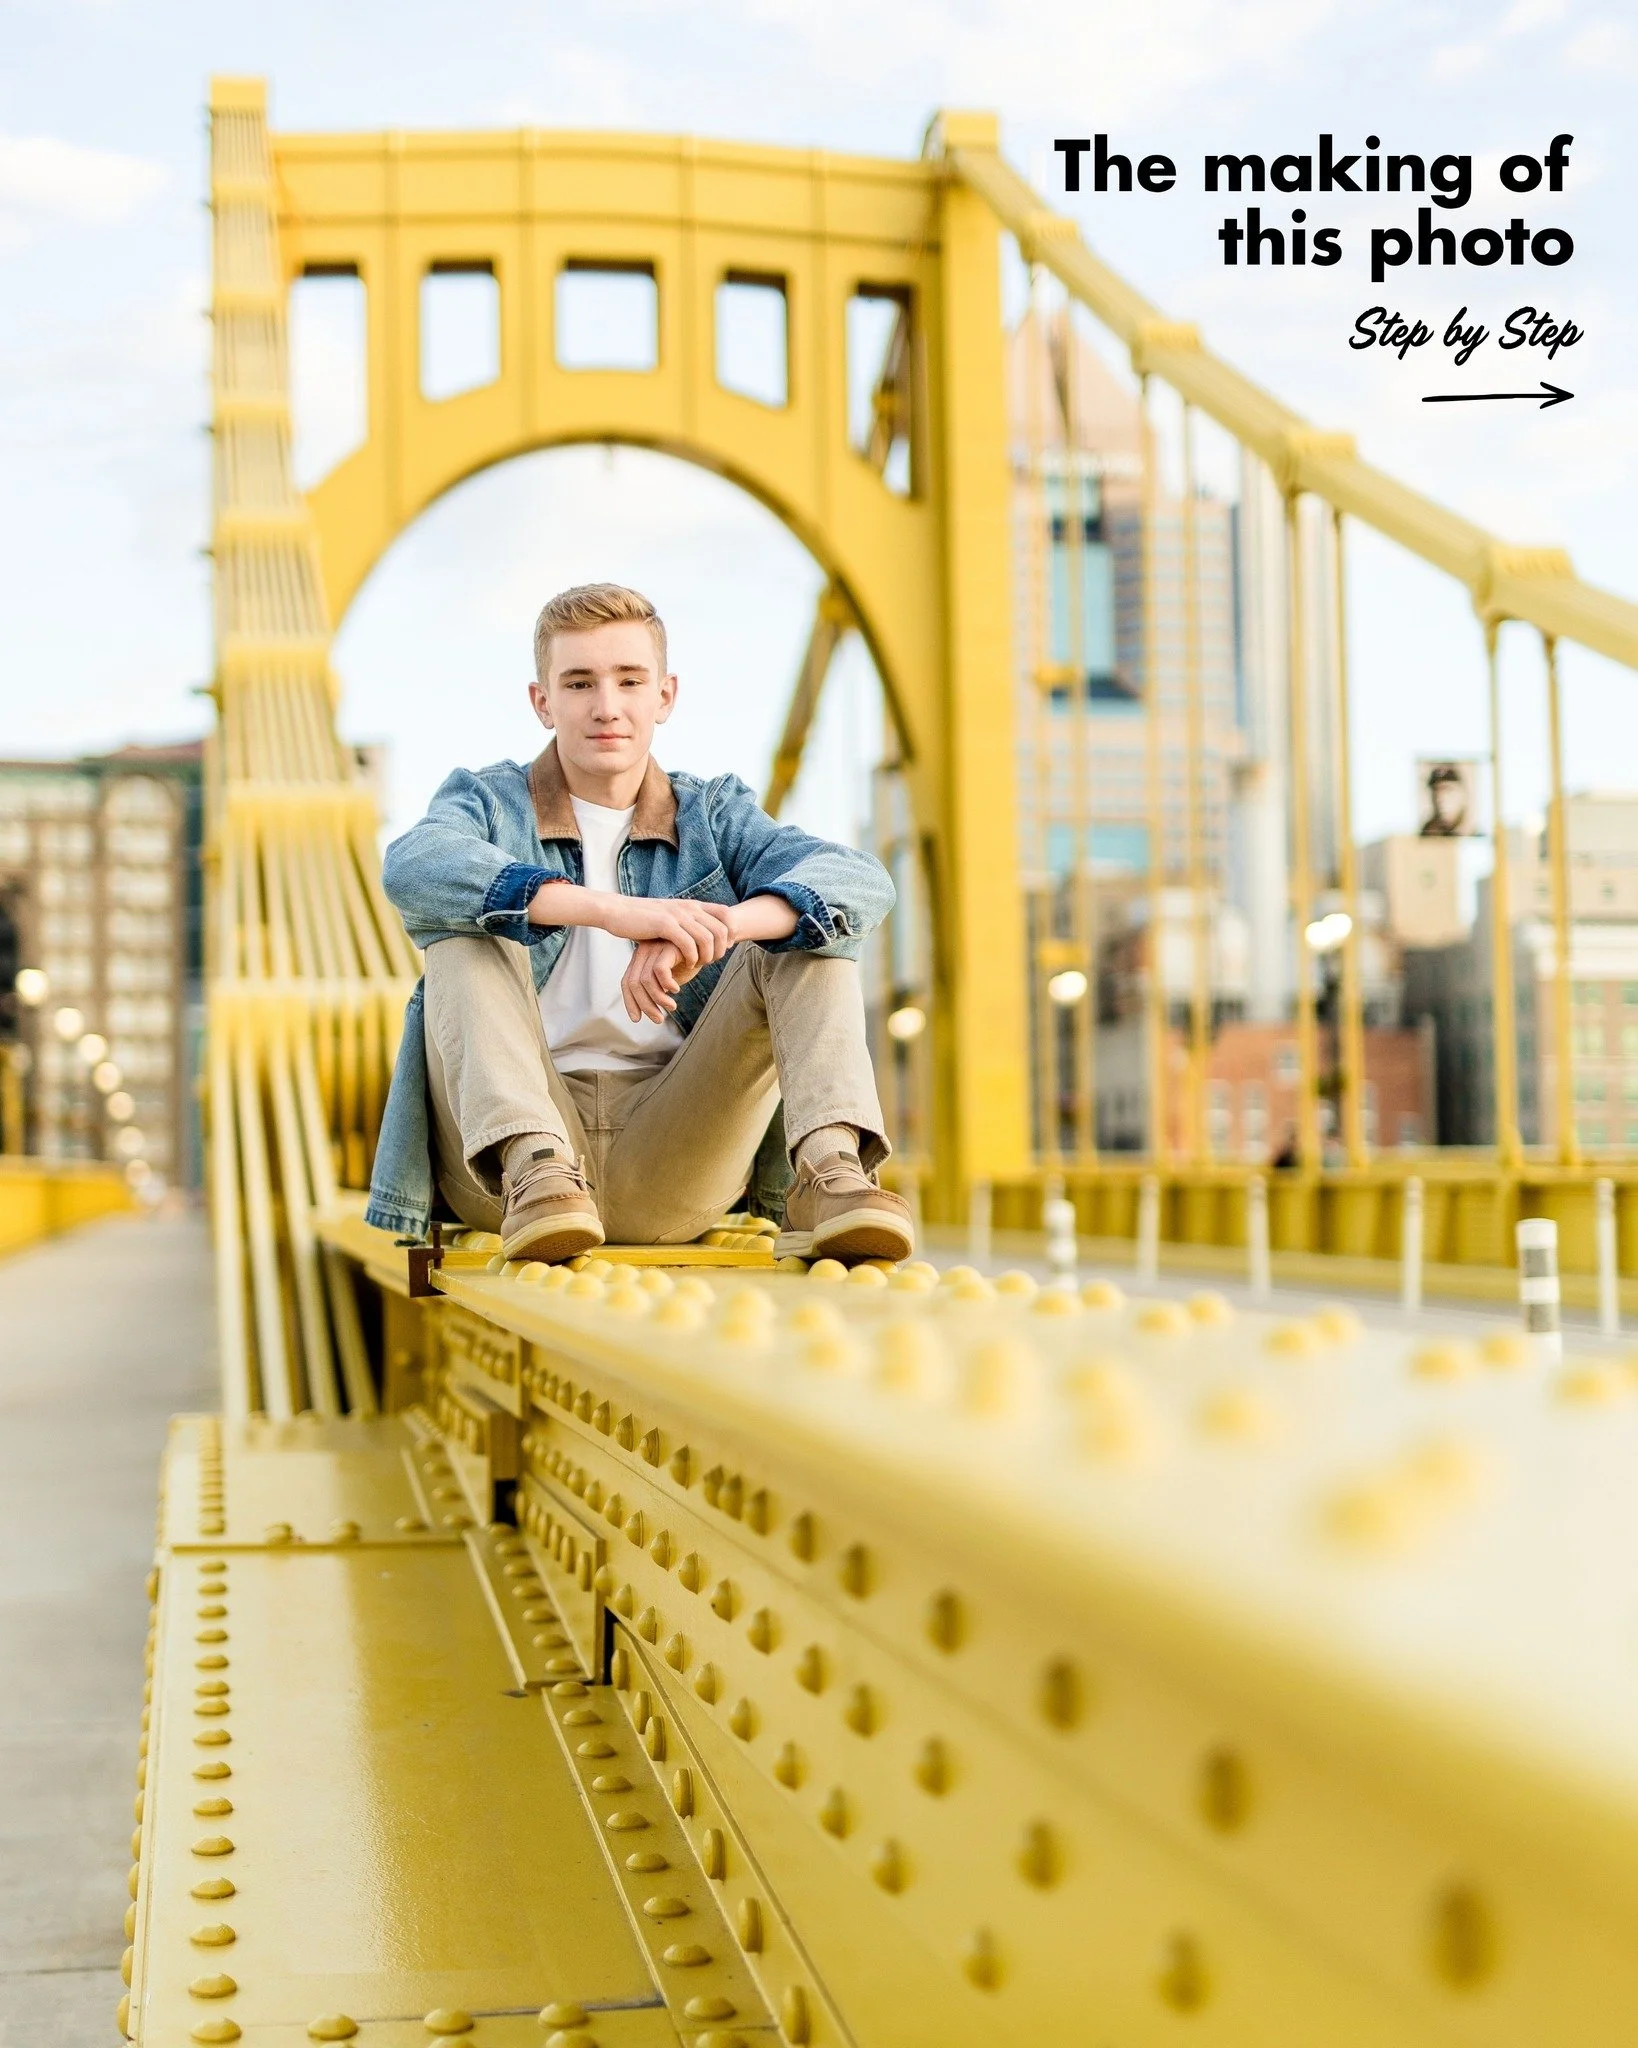
Benches, stairways, railings, doorways, steps, chairs, fences, gates, trees, archways, bridges, and the like all help add not only variety of scenery, but variety of poses that can be achieved during a given session.


I hope you enjoyed this little peek into how I location scout for sessions! I love being able to come into each and every session prepared, knowing where my best light & natural reflectors will be, as well as what backdrops and posing opportunities we have to work with.

if you enjoyed this post, you might also enjoy…

Comment

8 Tips for surviving a photo session in the hot & humid summer weather

Comment

8 Tips for surviving a photo session in the hot & humid summer weather

Summer is one of my favorite times for photos, and one of the most popular - for good reason! Everything is green and beautiful and blooming. But there are two things that can make a summer photo session very uncomfortable… the heat & humidity!

Thankfully, there are some steps you can take to better prepare for a photo session in the heat & humidity. Below are a few of my top tips!

1 - Dress for summertime weather!

This one might be the most obvious, but make sure you dress for the summer weather! Light, breezy fabrics without too many layers are the way to go. The key is to keep you as comfortable (and not sweaty!) for as along as possible.

Ladies, consider dresses and skirts, or a cute romper. Guys, consider lighter linen pants and fabrics.

Patterned shirts and dresses can also often hide sweat - and there are some fabrics that just generally hide sweat better than others, so look for those!

Also, consider lighter colors over darker ones. The sun will reflect off of your lighter colored clothing, rather than trap the heat in darker colors!

2- Stay hydrated before, during, and after!

Make sure you are drinking a lot of water leading up to your photo session so you’re not already dehydrated going into your session! Bring a water bottle with you to your session as well so you can stay hydrated during the shoot.

3 - Consider an early morning session.

This one is certainly not for everyone, but for those who really want to beat the summer heat… this can be a great way to go! Generally, mornings can be a bit cooler than evenings, so if you really want to beat the heat, consider a sunrise photo session.

4 - Consider bringing a second change of clothes.

For a summertime shoot, this can be a game changer! If it’s really hot and humid and your clothing is starting to show the affects of that (hello, pit stains!), then having a second outfit to change into can be a breath of fresh air (literally ;) ).

5 - For the ladies, consider hiring a professional makeup artist.

Those of us who might not be super proficient in the art of makeup (including myself!), having a makeup artist that can help create a sweat-proof look can be KEY!

6 - For the ladies, start with tighter curls in your hair, or choose an up-do for the second half of your photos.

Tighter curls will loosen up as you’re out in the heat and humidity, creating a more natural look throughout your session. I’ve also had girls & women choose a secondary hair style for their photos - maybe a cute updo or braid? Or, you can just have a styled updo from the start if you don’t want to worry about how your hair may fade during your photos!

7 - Don’t wear sunglasses for the week leading up to your session.

When you’re used to wearing sunglasses and then suddenly have to be outside in the bright light for an hour to an hour and a half, you will be very squinty. This is something very common that happens ALL the time. Put those sunglasses away for the week leading up to your session so your eyes are used to the brighter summer light!

8 - Bring an extra towel with you.

This might sound kind of gross - but a towel or washcloth can come in handy at a humid photo session for all of the extra sweat that might accumulate. Even if we can’t stop the sweat, we can wipe it off so it’s out of the frame for a few shots!

Comment

Favorite Photo Related Products & Accessories 2021

1 Comment

Favorite Photo Related Products & Accessories 2021

Every photographer has their favorite accessories that make their lives a little easier while they shoot! I’m excited to share a couple of my favorite photography-related pieces of gear and accessories that I’ve started using over the last year that have been game changers for me. All of the gear/accessories are linked so you can view additional details, and possibly even purchase!

(*Note that the links contained in this blog post are affiliate links, which means that I would receive a small credit if you decide to purchase any of the products listed here from the links below!)

The Spider Camera Holster

This piece of equipment (pictured in the photo below) has been the BIGGEST game changer for me in the last year. As someone who has dealt with back pain for my ENTIRE life and has two herniated discs and three bulging discs in my lower back, I will shout my love for the Spider Camera Holster from the rooftops!

Screen%2BShot%2B2020-12-01%2Bat%2B2.36.40%2BPM.jpg

This genius alternative camera strap sits on your hips (sort of like a belt), and allows you to hook your camera onto it (there’s a metal mechanism that attaches to your camera in order to make this possible!). No more neck or mid-back pain after shoots, because the weight sits on your hips and is distributed evenly for a better hands-free experience!

And, believe it or not, they also make a Dual Spider Holster, which allows you to hook TWO cameras onto your hips. This is the version that I use especially for wedding days when I like to have two cameras available for use! I love the convenience of having both of my cameras right on my hips!

If you have back pain and you are a photographer, you HAVE to check this holster out! It literally allows me to shoot 12 hour wedding days virtually PAIN FREE - a first for me in 7 years of being a wedding photographer!

Spider Holster Camera Hand Strap

If you like the idea of the Spider Holster, you may want to consider a hand strap - you know, to give you a little extra grip on your camera, since it won’t be hanging from a strap anymore!

The hand strap linked in the title above is actually made by the same company that created the Spider Holster, and while it’s one of the more expensive hand straps - I can tell you, from experience with many cheaper versions of camera hand straps, that it is WELL worth the money. This hand strap is designed to fit the shape of your hand perfectly - it doesn’t flap around like some others on the market. It stays in place, is easy to slip your hand into for quick use, and is made of a durable leather material.

Photo courtesy of Amazon.com

Photo courtesy of Amazon.com

131924184_840411370142788_1296010642893167448_n.jpg

By now, you know how obsessed I am with the Spider Holster, so of course you know I’m going to recommend some additional accessories to go with it!

The spider holster has space for additional accessories on the belt area - and the one linked above (Peak Design Field Pouch) is my favorite! (See photo to the right for how it looks on the belt!).

It is similar to a fanny pack, and is great for holding things like extra batteries, wedding day timelines, your phone, extra memory cards, etc.! It really fits a LOT of items, and is great for carrying around extra things you might need on a shoot! It is designed for use with the Spider Holster, so it has holes on the back and can easily be looped onto the Spider Holster. It uses velcro for securing the opening flap, and has zippered pockets to keep your cards safe from falling out, if it accidentally opens (mine rarely does!). This pouch is a great addition to your Spider Holster belt!

Photo courtesy of Amazon.com

Photo courtesy of Amazon.com

Praise the Lord for sturdy card holders that give peace of mind on wedding days! I am ALWAYS terrified that something will happen to my memory cards once I fill them up and put them away on a wedding day, so this past year, I upgraded to something more durable than I’ve ever used before: the Beeway CF Card Holder (it also can hold SD cards! Just save the little plastic container the SD cards come in, and place your full SD cards in there, then put them in this card holder. They fit perfectly in the slots designed for CF cards! They also have ones made specifically for SD cards).

This card holder is waterproof, dust proof, and has the ability to protect cards, even if the case is run over by a car! It can also be attached to your bag easily. I have two of these and I absolutely LOVE them! I never have to worry about losing my cards or getting caught in the rain.

FrederickEngagement2020PRINT-62-1.jpg

This is my favorite camera bag I think I’ve ever owned.

I am so picky when it comes to camera bags, because I like to carry a LOT of gear on me. This is the only bag I’ve found that is durable AND holds all of the equipment I want it to.

I can easily fit a camera body, 3 lenses, and a couple of speedlights, along with extra batteries, memory card holders, a water bottle - it really carries everything I need it to! I love that, if I have it on my shoulder at a wedding, I can easily access my gear, too.

Photo courtesy of Amazon.com

Photo courtesy of Amazon.com

My favorite piece of gear EVER will always be solid reflector. It pops light in people’s faces and eyes, giving their skin a beautiful glow on sunny days AND overcast days, simply by holding it close to their face and bouncing the available light! This one is particularly a favorite of mine, because it has two handles on either side, which makes it easier for me to use when I don’t have an assistant to help me. If you are looking for a way to up your portrait game - a reflector is a GAME changer!

Also, the bigger the reflector, the more WIDE of a span the light reflects. A smaller reflector will result in a more focused, smaller light, and a larger reflector will result in a wider “throw” of light across your subject, with softer shadows (at least, I’ve found this to be the case in my experience!). I typically will not get any reflectors smaller than 43” because of this.

For more resources for photographers, check out the product links below, or be sure to follow along on the Jenna Hidinger Photography blog!

1 Comment

Winter Photoshoot Outfit Ideas: The Do's and Don'ts

1 Comment

Winter Photoshoot Outfit Ideas: The Do's and Don'ts

When considering an outdoor photo session in the winter months, you may come across a bit of a conundrum. Of course, you want to look cute for your session, but you do not want to be too cold while standing outside for an hour or two!

Enter the answer: this blog post! I’ve compiled a list of the most pertinent “do’s” and “don’ts” pertaining to outfit choice for photo sessions that take place in winter weather.

SAY YES TO…

  • Visible Layers - Visible layers - coats, sweaters, faux fur wraps, and the like - can not only keep you warm and toasty, but add lots of great visual interest to a photo! Consider finding an adorable coat that you could wear for your entire session, and plan any other outfits around that!

  • Hidden Layers - As great as visible layers are, you might want to consider some “hidden” layers for your winter session, too! Layering extra warmth under your “visible” layers (so long as they don’t get too bulky!) can be a game changer during a winter session. You’ll want to make sure you can last in the cooler temps so that you can get your money’s worth of photos during your session! My favorite example “hidden layers” came from one of my engagement session clients, who wore a beautiful maxi skirt to her winter session. She layered multiple pairs of pants and fluffy socks underneath her skirt, and you couldn’t even tell in her final images!

  • Super Cute Coats - Like I mentioned before, consider splurging in a cute coat, and make it the visual centerpiece of your images! A cute coat “goes” quite well with a winter backdrop, too.

  • Winter Accessories - Give me ALL of the adorable winter accessories! Hats, scarves, mittens, boots, boot socks, faux fur wraps - you name it, it can be incorporated into your images, AND add warm during your session!

  • Boots or Waterproof Shoes - This is a HUGE one that I try to remember to tell my clients beforehand… if your shoot will have snow in it, make sure you wear a pair of shoes that are either 1) water proof, 2) insulated, or 3) you don’t care about getting ruined! If you schedule a session with me and there’s snow, you better believe that we will be galavanting around in it!!

  • Bright Pops of Color - I LOVE bright colors for winter sessions! With backdrops being mostly more neutral (with snow) or barren (empty tree branches), pops of color (think a bright colored coat, or a bright set of mittens, scarf, and hat!) can add lots of visual interest and “pop” to your images!

  • Winter Themed Props - Fun winter themed props can be a great way to stay warm during your session! Have a cute and cozy blanket laying around the house? Bring it and we can have you sit on it, or wrap you and your family or partner up in it! You could even bring some cute mugs and hot chocolate for something a bit more styled.

CONSIDER PASSING ON…

  • Outfits That Show Skin (if you don’t want to muscle through the cold!) - This one might seem obvious, but I’ve had quite a few people over the years show up to their winter sessions in dresses and short sleeve shirts, and I’ve felt absolutely terrible keeping them out in the cold! Of course, this is a completely personal choice. Some people don’t mind the cold, and are willing to “muscle” through for an hour when they have a specific vision of what they want their photos to look like. I love those people!!! But if you are uncomfortable and cold and having a no good very bad time… that will most likely show through in your images! Consider choosing weather appropriate clothing, unless the cold never bothered you anyways ;) Remember that you will be out in the winter weather for an extended period of time, so you’ll most likely get cold fast!

  • TOO Many Heavy Layers - While layers are usually a good thing when planning for an outdoor session, you will want to make sure that you don’t have too many layers! Too many extra layers can add on extra “weight” that isn’t there.

A FEW MORE RESOURCES:

If you’re looking for some more help preparing for your winter photo session, check out the posts below!

View some of my favorite outfits from past winter sessions below!

If you enjoyed this blog post, check out some more of our most up-to-date content below!

For more resources for photographers, seniors, and engaged couples, click any of the photos below!

1 Comment

Winter Photoshoot Location Ideas Near Pittsburgh, PA

Comment

Winter Photoshoot Location Ideas Near Pittsburgh, PA

Some might call me crazy, but one of my favorite times of the year for photo sessions is Winter! The public areas are less crowded, and there is always a chance that we might catch some snow before or after a session!

If you’re in the Pittsburgh area and are looking for a great place to have a Winter photo session – fear not! I’ve compiled a few of my favorite places in the Pittsburgh area for photo sessions that I am so excited to share with you! Most of these locations will “work” for a session without snow, but all look SO much more magical with it! First up… 

1.     A Christmas Tree Farm


What could be more wintery than a Christmas tree farm?! A Christmas tree farm is a great choice of location because it thrives year ‘round, even (and especially) in the cold, which means that, instead of seeing dead, barren branches (like you might in a park studded with seasonal trees), you’ll have a green backdrop! Christmas tree farms also look gorgeous dusted in snow, so if you can swing your session right after a snow storm… it might be worth it!

My favorite Christmas tree farm for any type of photo session is Lake Forest Gardens in Fombell, PA (about 45 minutes north of downtown Pittsburgh). They do require advance notice for photo sessions, along with a $25 payment – but it’s so worth it for access to such a gorgeous backdrop!

2.     McConnell’s Mill


A favorite spot of mine North of Pittsburgh for winter shoots is McConnell’s Mill – but mostly only if there is snow on the ground.

McConnell’s Mill has some areas that can be utilized that look great with or without snow (the wood mill, covered bridge, rows of pine trees, large rocks, the river/creek area), but there are still lots of seasonal trees that lose their leaves each winter season.

Like with any location you’ll find on this list, if you are able to schedule your session after a snow storm… you could get some gorgeous and unique images with snow  and icicles!

3.     Mellon Park


Mellon Park is one of my favorite spots for winter sessions closer to the downtown area. Mellon Park boasts some beautiful architecture (black iron fences, grey stone archways, brick walls, a large decorative fountain, steps & benches) that look stunning any time of year. But, again, add in some snow and you’ll get a different, whimsical look!

4.     Hartwood Acres Mansion


Chances are, if you research “photo session locations in Pittsburgh” long enough, Hartwood Acres Mansion is bound to pop up as a favorite… and for good reason! The mansion itself provides so many different backdrops, from doorways, to stairs, to arches, to walls – there are so many great spots for photos there! This location is my all time favorite in the winter because it truly looks beautiful – with or without snow! There are also a couple of rows of pine trees in the back and front of the building that can be used when other seasonal trees have lost their leaves!

5.     North Shore


The city with its beautiful buildings and bright yellow bridges will always look photo ready… no matter the season! The North Shore is another favorite of mine in the winter. It boasts multiple bright yellow bridges (the Roberto Clemente and Andy Warhol are my favorites to use!), along with a great city view, all along the walkway. I once had a session there in the snow, and it looked even BETTER!

6. Historic Harmony


Another all-time favorite location of mine is Historic Harmony, just about 30 minutes north of Pittsburgh! Harmony is a small, historic, German town with lots of historic brightly colored buildings. Everywhere you turn, there’s another unique spot to use for photos! This location looks beautiful with or without snow, and is another great spot that you can use regardless of if there is snow on the ground or not! There are also some nature trails nearby that can be used that look gorgeous with a light dusting!


Overall, any good winter location for a photo session will have at least one of the following three: some sort of architecture, evergreen trees, or snow! Finding backdrop elements that provide visual interest, even in the dead of winter, are oh so helpful for creating beautiful, wintery images!

Comment